Article Contents:
- Why a doorway cannot be left random
- Types of door zones: what and how is designed
- Interior door with frame and architraves
- Hidden door "into the wall"
- Doorless opening
- Wide opening in the hall
- Door to the study or dressing room
- Wooden slats around the door: principles and techniques
- Slats on the sides of the door as pilasters
- Slats on the wall with a hidden door
- Slats as a continuation of the panel from floor to ceiling
- Slats on the wall between two doors
- Slats as a transition disguise
- Stucco decor and moldings around the doorway
- Molding as a frame around the door
- Stucco decor on the walls next to the opening
- Moldings above the door
- Polyurethane decor in the color of the wall
- Wooden moldings matching the slats
- Decorative portal made of moldings and trims
- Hidden door: the most complex and the most beautiful scenario
- Why a hidden door is a separate task
- Wooden slats for a hidden door: requirements
- Moldings around a hidden door
- Baseboard near a hidden door
- Trims for a hidden opening
- Baseboard at a doorway: three key joints
- Joint of baseboard with door casing
- Transition of baseboard through an opening without a door
- Joint of the skirting board with the hidden door panel
- Wooden skirting board: when and for whom
- MDF skirting board: versatile, practical, precise
- Ceiling cornice and top of the doorway
- How the cornice passes by the door
- Wooden cornice above the door
- Thin polyurethane cornice for modern interiors
- Molding instead of a massive cornice
- Trim for the doorway: details that make all the difference
- Wooden corner for edges and corners
- Wooden block as guide and support
- Wooden molding as horizontal detail
- Trim products for interior doors: a systematic approach
- How to design the transition between rooms: from hallway to living room
- Wide opening without a door: portal as a statement
- Door with architraves: unity with the decor of adjacent walls
- Hallway: slats near the entrance to the room
- Designing an opening in different styles
- Neoclassicism: portal as an architectural manifesto
- Modern interior: minimalism, but precision
- Japandi: wood, air, minimalism
- Classic country house: wood everywhere
- Commercial space: portal as brand identity
- Ready-made doorway design schemes
- Scheme 1: Hidden door in a slatted wall
- Scheme 2: Classic opening in neoclassicism
- Scheme 3: Modern opening with slats
- Scheme 4: Country house with wooden trim
- Scheme 5: Hallway with slatted wall and door to living room
- Mistakes in doorway design: what ruins the interior
- FAQ: popular questions about door opening design
- STAVROS: system trim for door areas
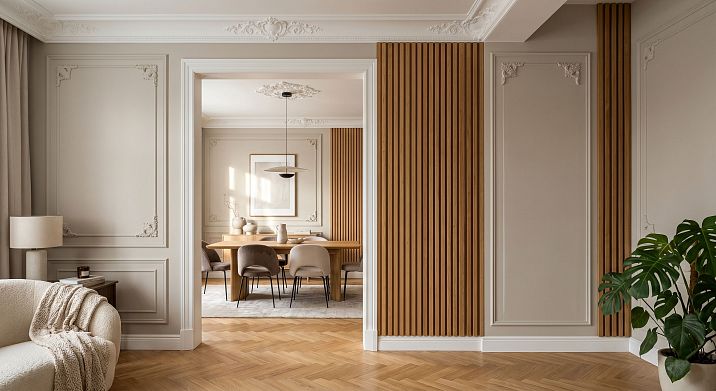
A door opening is not just a hole in the wall. It is the boundary between two spaces, and it is here that the interior either holds together as a whole or falls apart. Look at any room: if the opening is finished haphazardly — the trim separate, the baseboard breaks off, the slats end centimeters from the door frame — even the most beautiful decor on the other walls will feel unfinished. The door area is a junction, a final point, a place where everything converges: walls, floor, ceiling, moldings,Wooden planks, baseboard, and cornice.
That is why door opening design is a separate and serious topic. Not an extension of the hallway or living room theme, but its own design scenario with its own rules, tools, and solutions. Let's break it down completely.


Why a door opening cannot be left to chance
Try a mental experiment. Imagine a room with beautifully finished walls: wooden slats on the lower part, molding frames above, a ceiling cornice around the perimeter. Everything is thought out and coordinated. Now imagine that this room has a door — and the slats simply break off 10 centimeters from the door trim. The baseboard goes under the frame but does not align with it in height. The cornice runs along the wall, but above the opening — emptiness.
It is this discomfort that is felt instantly, although most people cannot immediately articulate its cause. They say 'something is off,' 'unfinished,' 'somehow awkward.' And the reason is in untreated junctions.
A door opening is a place where several decorative systems intersect.Stucco decor around the door openingSlats on walls, baseboards on the floor, cornices on the ceiling — all of them must either correctly terminate at the opening or logically transition through it into the adjacent room. There should be no random breaks.
Main principle: a doorway is not an exception to the decorative system, but a part of it. It requires design planning on par with walls and ceilings.


Types of door zones: what and how is designed
Before discussing materials, it's important to understand what kind of opening you are working with. It's not always the same thing.
Our factory also produces:


Interior door with frame and architraves
Classic option. There is a door frame with architraves on both sides. Decorative elements — slats, moldings, baseboards — must correctly meet these architraves. The main challenge here is the joint of the baseboard with the architrave at the bottom and the transition of wall decor to the architrave vertically.
Get Consultation
Hidden door "flush with the wall"
One of the most complex and interesting scenarios. A hidden door has no visible frame or architraves — it is made flush with the wall. This means thatwooden slats for a hidden doormust run continuously across the entire wall — both on the door leaf and on the adjacent wall. Baseboards, moldings, cornices — must also be joined in advance. This scenario requires design planning before door installation.
Opening Without a Door
An arched or rectangular opening without a door leaf — a passage between rooms. There is no casing, no frame, but there are internal slopes of the opening. Molding framing orwooden slats at the doorwaycreate an architectural portal.
Wide opening in the hall
Wide openings of 1.2–2 m are a common solution in halls and open-plan layouts. They can be designed as a full portal: moldings around the perimeter, slats on the sides, a cornice above the opening, a baseboard below. This is one of the most impressive scenarios.
Door to the study or dressing room
Doors to specialized rooms are often designed in a unified style with the interior of those rooms. If the study is done in wooden tones —Wooden trimthe area around the door should match that style. If the dressing room is minimalist — the same applies to the details.
Wooden slats around the door: principles and techniques
Wooden slats around the door— this is not necessarily framing the opening around the perimeter. Slats work differently: they create a vertical decorative rhythm on the wall, and the door either fits into it or becomes its accent.
Slats on the sides of the door as pilasters
Vertical slats on both sides of the doorway are one of the most effective techniques. They visually frame the door without touching the casing, creating an architectural portal feel. The slats are attached to the wall, not the door frame — this is important: when replacing the door, the decor is preserved.
For this techniqueWooden plankis chosen with a slightly larger cross-section than for regular wall finishing — from 30×50 mm. It should visually "hold" the vertical line, being sufficiently noticeable next to the door.
Slats on the wall with a hidden door
This is the best scenario for a hidden door.Rafter panelsor individual slats run across the entire wall — including the door leaf. The door becomes invisible: it "hides" in the rhythm of the slats. The door leaf must be finished with the same slats with the same width and spacing — otherwise the concealment won't work.
This requires precise planning before door installation: you need to know the position of each slat in advance so that the door joint falls between the slats, rather than cutting through one of them.
Slats as a continuation of the panel from floor to ceiling
If the wall is decorated with slats from floor to ceiling, the door is simply a break in that panel. The slats go up to the trim, stop, and continue on the other side. Important: the slats must stop at the same distance from both trims. Symmetry is key to making the door look organic in a slatted wall.
Slats on the wall between two doors
Two doorways next to each other with a wall between them is a typical layout in a hallway or foyer. The wall is an ideal place for a vertical slatted section.Wall decoration with wooden slatshere it works as an architectural accent, separating the two entrances and giving the wall meaning.
Slats as a transition disguise
Sometimes a doorway is awkwardly placed — too close to a corner, another wall, or a window. Slats help "soften" this discomfort: they create a decorative rhythm that distracts from the awkward placement of the opening.
Stucco decor and moldings around the doorway
Molding framing of a door is a classic architectural technique dating back to antiquity. Pilasters on the sides, a profiled architrave on top, a base at the bottom — this is a scheme that modern design has reinterpreted and simplified. But the principle remains the same: the opening as an architectural portal.
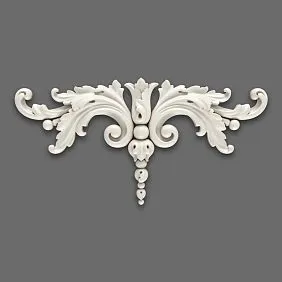
Molding as a frame around the door
The simplest and most effective option:Decorative wooden moldingsare mounted around the perimeter of the doorway — on the sides and top. They form a visible frame. This is not a casing — the frame is mounted on the wall around the casing or instead of it, if there is no casing (hidden door, opening without a door).
A molding frame can be the color of the wall — then it works as a thin relief accent. Or the color of the door, or a contrasting color — depending on the design intent.
Stucco decor on the wall sections next to the opening
The wall sections on both sides of the door are an excellent place for. Clear lines, created using modern technologies, emphasize the strict aesthetics of the room. Each decorative element harmoniously fits into the overall concept, creating a sense of order and thoughtfulness.. Molding frame panels on these wall sections create an architectural context for the door. The door is perceived not just as an "opening," but as an element of a designed wall.
Moldings above the door
Above the doorway — in the area from the top edge to the ceiling — there is often an empty plane. If the opening height is 2.1 m and the ceiling is 2.7 m, there is 60 cm of wall above the door. Here you can:
-
place a horizontal molding belt at the level of the top edge of the door;
-
add a small molding frame between the door and the ceiling;
-
run apolyurethane ceiling decorin the form of a ceiling cornice that smoothly "meets" the upper edge of the opening.
Polyurethane decor in the color of the wall
The most delicate option:Moldings made of polyurethaneare painted the same color as the wall. There is a frame around the door — but it doesn't shout. Only relief, only a light shadow. This technique creates the most expensive feeling: architecture is present but not intrusive.
Wooden moldings to match the slats
If the slats are made of dark oak, the molding around the door is made of the same dark oak. The unity of material creates a system: the slats on the wall and the molding frame of the door belong to the same "language" of decor. The door becomes part of the architectural environment, not a foreign object.
Decorative portal made of moldings and trim
For a wide opening without a door or for the main entrance to the living room — a full decorative portal. It may include:
-
vertical pilasters on the sides made ofwooden decorative moldings or made of wooden boards on the wall;
-
horizontal architrave on top made ofwooden corniceor a wide molding;
-
the base from below of a widewooden baseboard;
-
Wooden corner piecesat the connection points of the portal elements.
Such a portal turns an opening into an architectural statement.
Hidden door: the most complex and the most beautiful scenario
A hidden door is not just a technical issue. It is a design manifesto: "I don't have a door — I have a wall that knows how to open." That is why such a solution requires the most precise design of the decor.
Why a hidden door is a separate task
A hidden door has no casing. No visible frame. The door leaf is part of the wall. This means that all decorative wall finishes must continuously transition onto the door leaf: slats, moldings, baseboard. Any mismatch — slats of a slightly different width, a baseboard with a slightly different profile — instantly "gives away" the door and ruins the entire effect.
Wooden slats for a hidden door: requirements
For a wall with a hidden doorWooden planks for decorationmust be of the same cross-section and tint — both on the wall and on the door leaf. The spacing of the slats is planned so that the door joint falls between the slats, not on a slat. The slats on the door leaf are attached with special glue, the slats on the wall — with glue or fasteners. Both installation options should provide the same plane: the door leaf and the wall are on the same level.
Rafter panelswith a flexible backing are especially convenient here: they allow cutting precise sections for the wall and for the door with the same rhythm of slats.
Moldings around a hidden door
Moldings on the wall with a hidden door should also transition across the door leaf. A horizontal molding belt at a height of, for example, 1.2 m should run continuously — along the wall and along the door.Moldings made of polyurethaneare preferable to wooden ones for this: they are lightweight, easy to cut and install on the door leaf without the risk of deformation when opening.
Baseboard near a hidden door
The baseboard is one of the main "detectors" of a hidden door. If it is attached to the wall and breaks off at the invisible opening — the door is found. Solution: a baseboard attached to the bottom edge of the door leaf should be the same height and profile as the wall baseboard. When the door opens, it moves away with it — and that's normal. The main thing is that in the closed position, the bottom line is continuous.
MDF Skirting Boardfor a hidden door is preferable to wooden: MDF is lighter, more stable when the leaf moves, and better maintains the plane when installed on the door.
Trim for a hidden opening
wood trim itemsfor a hidden door are selected exclusively from the same materials as for the entire wall. Corners, bars, decorative profiles — everything must match in dimensions, tone, and material. Any difference will be visible.
Baseboard at a doorway: three key joints
Baseboard at a door — these are three technical joints, each of which needs to be solved separately.
Joint of the baseboard with the door casing
Classic method: the baseboard is brought flush to the casing and cut at 90°. The flat end of the baseboard meets the side plane of the casing. If the casing and baseboard are made of the same material, the joint is almost invisible.
If the casing is thinner than the baseboard in projection, a baseboard rosette is needed: a small square or rectangular decorative element at the joint point. This is a beautiful classic solution that hides the mismatch and adds detailing.
Transition of the baseboard through an opening without a door
In an opening without casings, the baseboard goes into the slope and meets the corresponding baseboard from the other side. Here it is important that there is no rough end in the depth of the slope — it is covered wooden corner pieceor with a molding profile along the inner corner of the slope.
Joint of the baseboard with the hidden door leaf
Described in detail above. Let's add: the joint between the wall baseboard and the door baseboard should be minimally noticeable. For this, a narrow vertical Wooden blockor a separation profile — it covers the gap between the moving panel and the stationary wall.
Wooden baseboard: when and for whom
Wooden baseboardnear the doorway — for interiors where wood is the dominant material. Wooden doors, wooden floor, wooden slats — thento buy wooden baseboardmade of the same species — the only logical solution.
For a country house, classic study, or neoclassical interior, a wide wooden baseboard — from 70 mm — creates a monumental bottom line worthy of high ceilings and massive doors.
MDF baseboard: versatile, practical, precise
— is a horizontal element that frames the room at the bottom of the walls where the wall meets the floor. Skirting boards perform several functions: they hide the technological gap between the wall and floor covering (necessary for thermal expansion), protect the lower part of the wall from mechanical damage, create visual completion, and may conceal wiring.near the doorway — for painted interiors. The ideal surface smoothness gives an even color. It can be painted to match the wall — then the bottom line disappears, and the baseboard ceases to be a "detail," becoming part of the overall plane.
White MDF Skirting Board— a versatile neutral option for light modern interiors. It works with any doors and any floor, without creating conflicts.
Ceiling cornice and top of the doorway
The transition from the vertical wall to the horizontal ceiling above the door is an area often overlooked when planning decor. And it is here that the cornice either elegantly completes the space or creates a problem.
How a cornice "passes" past a door
A ceiling cornice runs along all walls around the perimeter of the room. When it reaches a doorway, the question arises: how does the cornice go around the door? Options:
The cornice continues above the doorway. If the ceiling cornice runs along the ceiling rather than the wall, it simply passes over the doorway without interruption. This is the cleanest and most correct method.
The cornice runs along the wall and enters the reveal. In this case, the cornice must neatly enter the horizontal reveal above the door and meet a similar cornice from the other side. This joint requires a precise 45° cut.
The cornice ends before the opening. If the cornice is on the wall and the opening has no reveal, the cornice is brought flush to the edge of the opening and ends. The end is coveredwooden corner pieceor with a special end cap.
Wooden cornice above the door
wooden corniceabove the doorway as a standalone element — this technique comes from classical architecture. A horizontal profiled cornice is mounted directly above the door, like an architrave. It adds architectural completion to the doorway and creates a horizontal accent.
Wooden beamsSTAVROS — for classic, neoclassical, country houses, and interiors with high ceilings. The cornice profile should match the overall style of the door framing.
Thin polyurethane cornice for a modern interior
For a minimalist spacepolyurethane ceiling decorin the form of a thin profile — a delicate option. It marks the transition from ceiling to wall without creating heaviness. It continues without interruption above the door opening.
Molding instead of a massive cornice
Sometimes, especially with a standard ceiling height of 2.5 m, a full cornice above the door looks heavy. A thinPolyurethane moldingat the level of the top edge of the door — a light horizontal line that structures the wall without pressure.
Trim for the door opening: details that make all the difference
If moldings and slats are the visible part of the decor, thenTrimming Itemsis what holds everything together and makes every joint neat. A door opening has many joints, and each requires its own solution.
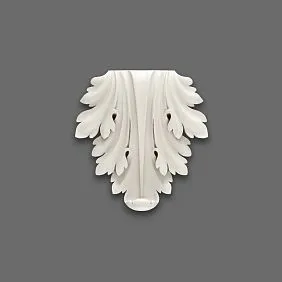
Wooden corner for ends and corners
Wooden angleis a universal element for the door area. Ends of slats at the casing? A corner. Inner corner of the slope? A corner. Joint of the baseboard with the casing without a rosette? A small corner cap. This is a small detail that, when absent, looks like carelessness, and when present, looks like professionalism.
It is chosen to match the main trim. If the slats and baseboard are oak, the corner piece is also oak. If MDF is for painting, the corner piece is also MDF, for the same paint.
Wooden block as a guide and support
Wooden blockis used in several scenarios:
-
as a vertical guide for slats next to the door;
-
as a horizontal crossbar for molding above the door;
-
as a hidden support for the portal architrave;
-
as a separation profile between the hidden door panel and the wall.
It is important to choose a block with even geometry — without twisting or bending.Wooden blockSTAVROS is milled with precise edges, which simplifies installation and ensures correct geometry.
Wooden baguette as a horizontal detail
Wooden Picture Framewith the profile it is used as a horizontal divider of zones next to the door. For example, at the level of the top edge of the doorway — as a light horizontal line that "closes" the door from above and makes it part of the architectural series.
Molding products for interior doors: a systematic approach
Molding products for interior doorsmust form a system. Baseboard, cornice, trims, corners, strips — all from the same material, in the same tint, with coordinated profiles. Only then does the door area look designed, not assembled from leftovers.
How to design the transition between rooms: from hallway to living room
The transition from the hallway to the living room is one of the most important thresholds in an apartment or house. The guest passes through it and sees the living space for the first time. This is where the decor should work especially expressively.
Wide opening without a door: a portal as a statement
A wide opening of 1.2–1.8 m from the hallway to the living room is an excellent opportunity for a decorative portal. The side walls are decorated withvertical wooden slatsor molding pilasters. Above the opening — a horizontal architrave made ofwooden corniceor a wide molding. Below is a baseboard that continuously transitions from the hallway into the living room.
Such a portal creates a sense of ceremonial transition, distilling the best of classical architecture into a modern interior.
Door with architraves: unity with the decor of adjacent walls
If the door has architraves, it is important that the architrave matches the rest of the trim. If the walls have wooden slats, the architrave should be made of the same wood. If the walls have molding frames, the architrave should have a similar profile.
Hallway: slats near the entrance to the room
In the hallway, wooden slats on one wall often end at the doorway. A neat finish of the slat section at the opening —Wooden anglealong the end, the baseboard in the same line — creates a sense of completeness.
Doorway design in different styles
Doorway design is not a universal recipe. Each style requires its own approach.
Neoclassicism: portal as an architectural manifesto
A neoclassical doorway is a full-fledged architectural portal: pilasters with a base and capital, a profiled architrave, and a ceiling cornice above it.Decorative wooden moldings for pilasters,wooden cornice for the architrave, wideWooden baseboard for the base.Polyurethane wall decor on the side walls on both sides of the door.
Modern interior: minimalism, but precision
A modern doorway is straight lines and clean surfaces. No curly profiles. Verticalwooden planks on the wall on the sides of the door. StraightMDF Skirting Board around the entire perimeter. A thin polyurethane ceiling molding. No extra volume.
The main thing in a modern interior is precision of execution. The slats must be strictly vertical, the baseboard strictly horizontal, and all joints neat.
Japandi: wood, air, minimalism
In a Japandi interior, the doorway is finished with natural wood — light oak or ash.Decorative wooden stripthin profile on the sides of the opening. ThinWooden baseboardwithout complex profile. No molding frames. Maximum air and minimum details.
A door in Japandi is part of the wall. Therefore, a hidden door with slatted finish works perfectly here.
Classic country house: wood everywhere
A classic country house requires wooden framing for everything. Door frame made of wood,Buy wooden crownwith profile for architrave, widewooden skirting board purchase— from the same species. All wooden elements in the same tint. This does not require expensive materials — it requires consistency.
Commercial space: portal as a brand style
In an office, hotel, or showroom, a door portal is an element of corporate identity. It can be strict and modern or classic and representative. But in any case, it must be technically precise: durable fasteners, protected edges,Wooden corner pieces at all junctions — doors are used frequently and intensively.
Ready-made door opening design schemes
Scheme 1: Hidden door in a slatted wall
-
Wall:Rafter panels or individual slats from floor to ceiling, including the door leaf
-
Skirting board:MDF Skirting Board in the color of the wall or slats — on the wall and on the leaf
-
Cornice: thin polyurethane profile along the ceiling, continuous
-
Joints:Wooden corner pieces at the ends of slatted sections
-
Result: the door is invisible in the closed position
Scheme 2: Classic opening in neoclassical style
-
Sides: molding pilasters made ofof wooden moldingswith base and capital
-
Top:wooden cornice as a horizontal architrave
-
Bottom: wideWooden baseboard from 80 mm
-
Walls nearby:Polyurethane wall decor — frame panels
-
Result: a classic-style architectural portal
Scheme 3: Modern opening with slats
-
Sides: verticalWooden plankson both sides of the door
-
Baseboard: straightWhite MDF Skirting Boardaround the entire perimeter
-
Cornice: thin polyurethane molding along the ceiling
-
Joints: minimal, without accent details
-
Result: a minimalist modern opening with a tactile accent from wood
Scheme 4: Country house with wooden trim
-
Framing:wooden rails for wall decoration on the sides of the opening
-
Crown molding:Buy wooden crown with a profile above the door
-
Baseboard: widewith a classic profile creates a sense of solidity, reliability. matching the door and floor
-
Molding: all oak, same stain
-
Result: a cohesive wooden portal in a country house style
Scheme 5: Hallway with slatted wall and door to living room
-
Hallway wall: vertical slats, finishedwooden corner piece at the opening
-
Opening: molding frame fromof polyurethane moldingsin the color of the wall
-
Skirting board:MDF Skirting Boardcontinuously from the hallway to the living room
-
Result: smooth transition between spaces
Mistakes in designing doorways: what ruins the interior
Slats break off at the door without a profile. The end of the slat section near the door casing must be covered with a corner piece or molding. A bare end is always carelessness.
Baseboard is not joined with the casing. The gap between the baseboard and the door casing or a sloppy corner cut is a detail that catches the eye every day. The joint needs to be planned before installation.
Cornice abruptly ends above the opening. A ceiling cornice that simply "breaks off" in front of the door without a cap or transition is a visual disaster. It is solved with a cap made of the same material or by extending the cornice above the opening.
Moldings conflict with the door frame. A molding frame that is placed over the door frame creates a conflict of planes. The molding is mounted either flush with the frame or on a separate section of the wall, without overlapping.
The ends of wooden slats are not covered. Already mentioned, but we repeat: this is one of the most common and noticeable mistakes.Wooden angle— a mandatory element at each end of the slatted section near the opening.
Different shades of wood on the door, slats, and baseboard. A dark door, light slats, and a neutral baseboard — three different wood tones in one area. This is not contrast, it's chaos. Either everything in one tone, or a clear system of contrasts.
A hidden door does not align with the decorative wall. If the slats on the door are slightly shifted relative to the slats on the wall, the hidden door effect is ruined. This is a design error that cannot be fixed after installation.
Too massive decor in a narrow opening. Wide pilasters, a heavy cornice, large moldings on an 80–90 cm opening make it visually even narrower. The scale of the decor should match the width of the opening.
FAQ: popular questions about designing door openings
Do I need to match the tone of the wooden slats with the tone of the door frame?
Yes, absolutely. If the slats next to the door are made of oak with a mocha finish, and the door frame is made of white MDF, this is a contrast that only works if it is intentional. Accidental contrast looks like a mistake. In most cases, the slats, baseboard, and door trim should be coordinated in tone.
Can polyurethane moldings be used next to a wooden door?
Yes. Polyurethane can be painted any color — including to match wood or neutral white. If polyurethane moldings are painted to match the wooden casing, they are visually indistinguishable from wooden ones. Additionally, polyurethane is lighter and easier to install on complex areas.
How to design an opening without a door between the kitchen and living room?
Vertical slats on the sides of the opening as decorative pilasters, a horizontal molding or cornice at the top, a continuous baseboard at the bottom. This is a classic technique that creates a "frame" around an open passage without a door.
How to join a baseboard with a casing if they are of different heights?
Use a baseboard rosette — a square decorative element at the junction point. It hides the height mismatch and adds detail. The traditional size of the rosette is a square whose sides equal the width of the casing.
How does a hidden door keep the decor stationary when opening?
The slats and moldings on the door leaf are firmly attached to it. When opening, they move with the door. In the closed position, they are aligned with the slats on the wall. This effect requires precise calculation even before the door is installed.
Can wooden slats be used in a bathroom or toilet opening?
Solid wood slats in rooms with high humidity are undesirable without special treatment. For a bathroom, it is better to use MDF panels with moisture-resistant impregnation or slats with several layers of moisture-resistant varnish. The joint at the bathroom door should always be carefully sealed.
Is a molding needed above every door or only above the main ones?
It depends on the style and concept. In classic and neoclassical interiors, a molding above every door is the norm. In modern ones — only above the main opening or above none. It is important to maintain unity: if there is a molding above one door, it should be above all doors in that area.
How to correctly choose the width of the baseboard for the door area?
The width of the baseboard should match the scale of the room and the ceiling height. For standard apartments — 60–80 mm. For high rooms and country houses — 80–120 mm. The baseboard at the doorway should be the same width as the baseboard around the entire perimeter of the room.
STAVROS: system trim for door zones
The doorway is not a place to skimp on quality or material consistency. This is where the interior is tested for durability: joints, ends, abutments — everything is visible, everything is perceived every day.
That is why professional designers and experienced homeowners choose trim from a single source. When slats, cornices, baseboards, corners, and bars are produced by one factory — unity of tone, profile, and surface quality is guaranteed.
STAVROS is a Russian manufacturer of solid wood and polyurethane products. A full range for designing door zones, openings, and transitions between rooms — all under one roof.
In the STAVROS catalog for working with door openings:
-
Wooden planks — for pilasters, vertical accents, and slatted walls with hidden doors
-
Wooden plank — precise geometry for complex abutments
-
Rafter panels — for walls with hidden doors, with guaranteed rhythm
-
Decorative wooden moldings — for frame framing of openings
-
Moldings made of polyurethane— for cash registers, frames and complex areas
-
Polyurethane wall decor— for decorating piers next to openings
-
polyurethane ceiling decor— for cornices above openings
-
wooden corniceandWooden beams— for architraves and ceiling profiles
-
Wooden baseboardandMDF Skirting Board— for the bottom line at doorways
-
Wooden angle— for ends of slats and junction corners
-
Wooden block— for guides and support posts
-
wood trim items— complete system for any doorway
Read about the correct installation of polyurethane moldings — with precise angles, hidden joints and proper painting — in the detailed articleinstalling polyurethane molding.
A doorway is a threshold. Literally and figuratively. And how it is designed speaks about the approach to the interior more eloquently than any decor on the far wall. Design it correctly — and every transition from room to room will be a small architectural pleasure.