Article Contents:
- First screen: what to buy for the top line of a built-in wardrobe
- Why do you even need a cornice on built-in furniture
- What the cornice for a built-in wardrobe solves
- When to choose a wooden cornice: seven tasks where wood is organic
- Solid wood furniture and veneered facades
- Classic library and sideboard
- Classic style kitchen with wooden facades
- Natural interior: wood, linen, stone
- Restoration of historical furniture
- Furniture for painting in a "living" tone
- Thematic interiors with wooden details
- When to choose a polyurethane cornice or molding: eight tasks
- Built-in wardrobe up to the ceiling in a painted interior
- Neoclassicism: the connection of furniture with stucco decor
- Dressing room and bedroom with painted furniture
- Built-in furniture in plasterboard niches
- Furniture for painting without preserving wood texture
- Wet rooms: kitchen, laundry, bathroom
- When stucco ornament is needed on the top line
- Quick installation without special tools
- How to choose the height and relief of the cornice
- Gap as a starting point
- Ceiling height and proportions
- Cornice relief and interior style
- Ratio of cornice to facades
- Detailed comparison of two materials
- On installation
- By painting
- By durability
- Ready-made scenarios for different types of furniture
- Built-in wardrobe in the bedroom: neoclassicism
- Classic library made of solid wood
- Ceiling-height kitchen: practical cornice
- Walk-in closet: thin top line
- Sideboard or display cabinet: wood + decor
- Installing a furniture cornice: how it's done
- Installing a wooden cornice
- Installing a polyurethane cornice
- How to connect a wardrobe cornice with a room ceiling cornice
- Option one: wardrobe up to the ceiling cornice
- Option two: wardrobe below the ceiling cornice
- Option three: no ceiling cornice
- What to buy together: a complete checklist
- Checklist for a wooden cornice
- Checklist for a polyurethane cornice
- Nine mistakes when buying a cornice for furniture
- Calculating a cornice for a wardrobe: practical section
- Wardrobe perimeter
- Corners
- Reserve
- Example calculation
- Frequently Asked Questions
- About the Company STAVROS
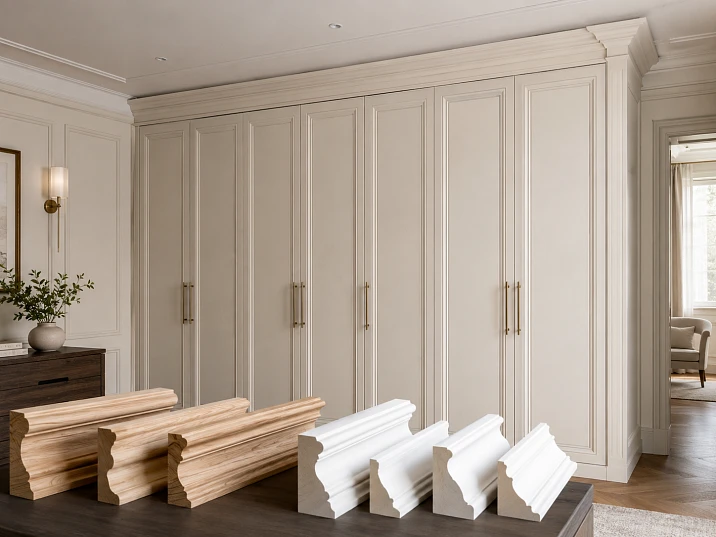
There is one detail that is often overlooked when making built-in furniture. The wardrobe is ready, the facades are painted, the handles are installed — but the top line gapes with a gap. Or vice versa: the body rests against the ceiling, but is not "built-in" — it just stands, without any connection to the space. It is the cornice that closes this gap, connects the wardrobe to the wall and ceiling, and makes the furniture part of the room's architecture.
wooden cornice or polyurethane stucco molding — two fundamentally different materials with different logic of application. The choice between them is not a question of "what is better", but a question of "what suits your task". A solid wood wardrobe in a classic library is one thing. A built-in wardrobe up to the ceiling in a modern apartment is quite another.
In this article, we will analyze both options in detail: when wood is irreplaceable, when polyurethane is more convenient, how to assemble a complete set and what not to do when choosing a cornice for furniture.


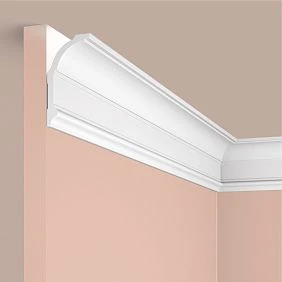


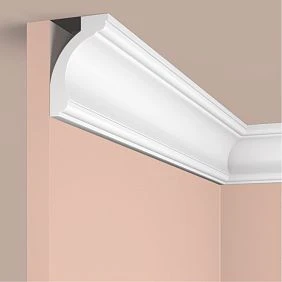
First screen: what to buy for the top line of a built-in wardrobe
Before getting into the details — a specific answer for those who already know what they need:
Wooden cornice kit:
-
wooden cornice — of the required profile and length + 15% extra.
-
Furniture Decoration from Wood — corner connectors, if the cornice goes around internal and external corners.
-
Fasteners — screws, furniture brackets, mounting brackets.
-
Wood primer.
-
Stain, varnish, or paint.
-
Sandpaper (120–180).
Polyurethane cornice kit:
-
Moldings made of polyurethane — wide cornice profile + 12% extra.
-
decorative polyurethane elements — accents on the top line if desired.
-
Decor for Molding — corner inserts.
-
Specialized glue. About choosing — what to glue polyurethane molding with.
-
Acrylic sealant.
-
Acrylic primer.
-
The paint is acrylic, matching the furniture or wall color.
A complete set is not a "cornice plus everything else as needed." It is a pre-assembled list that allows installation without additional trips to the store.




Why a cornice is needed on built-in furniture
A question that is not asked aloud, but is always there: is a cornice necessary? Maybe skip it?
The answer depends on how "built-in" the furniture is. If there is 5–15 cm of open space between the top of the cabinet and the ceiling, this gap will collect dust, look unfinished, and disrupt the visual logic of the space. The cornice covers it and makes the furniture part of the wall.
If the cabinet reaches almost to the ceiling but not flush, without a cornice, the line where the body "ends" will be visible. The cornice smooths the transition and removes the feeling of "incompleteness."
If the furniture is flush with the ceiling, a cornice is still needed as a decorative transition line: it hides ceiling irregularities, masks mounting foam or gaps, and gives the top line architectural clarity.
Our factory also produces:
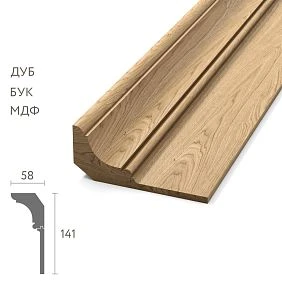
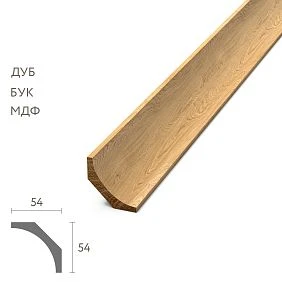


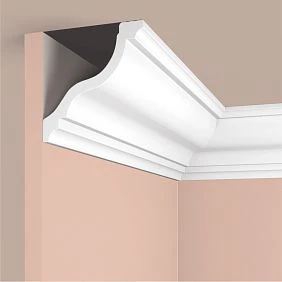

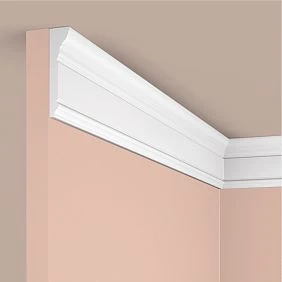

What a cornice solves for a built-in wardrobe
-
Covers the gap between the top of the body and the ceiling.
-
Hides ceiling irregularities in the adjoining area.
-
Visually "embeds" the cabinet into the space.
-
Adds architectural completeness to the top line.
-
Connects the furniture with the walls and ceiling cornice.
-
Allows you to create a classic or neoclassical top line.
-
In kitchen furniture, it closes the gap between wall cabinets and the ceiling.
Get Consultation
When to choose a wooden cornice: seven tasks where wood is organic
Solid wood furniture and veneered fronts
wooden cornice — the only organic choice when the cabinet or kitchen is made of natural wood materials. Unity of material is the foundation of a stylish result. A wooden cornice with the same tinting or varnishing as the facades creates a continuous top line.
Classic library and sideboard
Bookcase, sideboard, credenza — typical furniture with wooden top cornices. Here the cornice is not just a covering element, but a crucial architectural detail. A tall, relief wooden cornice above the sideboard — that's what makes the furniture "historic," solid.
By the way, wooden cornices here are often complemented with decorative elements for furniture — corner overlays, carved inserts, and wooden decor on the ends.
Classic-style kitchen with wooden facades
A wooden kitchen in classic style is a systematic thing. Facades, frames, cornice, legs, baseboard — everything must be made of the same material or at least coordinated in tone. The wooden kitchen cornice here is a mandatory element.
For the kitchen cornice, additionally used are Wooden trim for glazed doors and Wooden plank for decorative inserts.
Natural interior: wood, linen, stone
In interiors built around natural materials, a polyurethane cornice is a foreign element. wooden cornice in such a space is an organic choice, consistent with the concept.
Restoration of historical furniture
Wood is indispensable for furniture restoration. A new cornice made of the same material is part of preserving style and time.
Furniture for painting in a "live" tone
If furniture is hand-painted while preserving the wood texture through paint — the effect of craquelure, glazing, intentional aging — a wooden cornice is the right choice here too. Polyurethane does not allow for this processing technique.
Thematic interiors with wooden details
Rustic, country, Provence, Scandinavian loft with wood — styles where the cornice should be wooden. Polyurethane stucco will stand out from the overall concept here.
When to choose a polyurethane cornice or molding: eight tasks
Built-in wardrobe up to the ceiling in a painted interior
A built-in wardrobe painted the color of the wall should "dissolve" into the interior. The cornice in this case is not a decorative accent, but an architectural line. Moldings made of polyurethane, painted to match the wall and facades, create a single surface — the furniture literally blends into the wall.
A wooden cornice in this scenario will require perfect preparation and painting to prevent the texture from showing through. Polyurethane paints more evenly and uniformly — without the wood grain showing through.
Neoclassicism: the connection between furniture and stucco decor
If the room already has a polyurethane ceiling cornice, wall moldings — it's logical for the cabinet cornice to be made of the same material and system. Polyurethane moldings creates a unified decorative language of the space.
Dressing room and bedroom with painted furniture
In dressing rooms and bedrooms, all furniture is often one color. A white or light gray cabinet system with a matching polyurethane cornice is neat, modern, and easy to install.
Built-in furniture in plasterboard niches
A cabinet built into a plasterboard niche is an ideal environment for a polyurethane cornice. It is glued to the plasterboard, painted together with the entire niche, and creates a unified surface.
Furniture for painting without preserving wood texture
If MDF facades are painted with acrylic paint in a smooth tone, the polyurethane cornice provides a more uniform coating. Result: the top line looks like part of an architectural element, not like an applied wooden profile.
Wet rooms: kitchen, laundry room, bathroom
In areas with high humidity, a wooden cornice requires careful coating. Polyurethane is indifferent to moisture and does not deform. For a kitchen with intense steam load Polyurethane furniture decor — a more practical choice.
When a stucco ornament is needed on the top line
If the cornice must carry an ornament — leaves, volutes, geometric relief — a mass-produced wooden cornice will not offer it. Only hand carving. Polyurethane reproduces fine ornament serially, accurately, and affordably.
Quick installation without special tools
Polyurethane profile is cut with a knife or hacksaw, glued with specialized adhesive. It does not require turning, carpentry, or milling tools. Installation is quick and can be done independently.
How to choose the height and relief of the cornice
This is one of the key practical questions. The wrong size — and the result will be either unnoticeable or oppressive.
Gap as a starting point
The size of the gap between the top of the cabinet and the ceiling is the main parameter. The cornice should completely cover this gap, with a slight overlap on the cabinet body below and on the ceiling above.
Practical rule:
-
Gap up to 50 mm — cornice height 60–80 mm.
-
Gap 50–100 mm — cornice 90–120 mm.
-
Gap 100–150 mm — cornice 120–160 mm.
-
Gap over 150 mm — either a body lift or additional elements are required.
Ceiling height and proportions
Low ceiling (up to 2.6 m) — do not overload. Cornice 60–80 mm, without deep relief. High ceiling (3.0 m and above) — a more expressive profile is acceptable.
Cornice relief and interior style
| Style | Recommended relief | Material |
|---|---|---|
| Modern | Smooth or minimal profile | Wood or polyurethane |
| Scandinavian | Simple straight | Wood |
| Neoclassical | Moderate ornament | Polyurethane |
| Classic | Developed profile with ornament | Wood or polyurethane |
| Provence | Figural wooden | Wood |
| Minimalism | Without cornice or thin belt | Polyurethane |
Ratio of cornice to facades
The cornice should not be larger than the height of the upper cabinet facade. If the top section of the cabinet is 350 mm high, a 160 mm cornice takes up 45% of the visible height — too much. For such a cabinet, the optimum is 70–90 mm.
Detailed comparison of two materials
Installation
| Parameter | Wooden cornice | Polyurethane Cornice |
|---|---|---|
| Tool | Miter saw or miter box | Miter box or knife |
| Mounting | Screws, brackets, corner braces | Specialized glue |
| Corner joint | Cutting at 45°, more difficult with the grain | Easy, no chipping |
| Ceiling installation | Difficult | Simpler |
| Cabinet installation | Convenient | Convenient |
| Self-installation | Requires experience | Accessible without experience |
For painting
| Parameter | Wooden cornice | Polyurethane Cornice |
|---|---|---|
| Preparation | Sanding + wood primer | Acrylic primer |
| Result in one color | Good, texture may show through | Perfect, even tone |
| Natural texture | Possible (varnish, oil, stain) | No |
| Glazing, crackle | Possible | No |
| Paint refresh | Sanding + painting | Primer + painting |
By durability
| Parameter | Wooden cornice | Polyurethane Cornice |
|---|---|---|
| Moisture resistance | Requires coating | High |
| Resistance to temperature changes | Moderate | High |
| Tendency to deformation | Possible with humidity changes | No |
| Durability with proper care | Very High | High |
Ready-made scenarios for different types of furniture
Built-in wardrobe in the bedroom: neoclassical
Task: Sliding or hinged wardrobe up to the ceiling in the bedroom. MDF facades, painted white. Gap to the ceiling — 80 mm.
What to buy:
-
Moldings made of polyurethane — profile 90–100 mm around the perimeter of the wardrobe.
-
Decor for Molding — corner inserts for external and internal corners.
-
Glue.
-
Sealant.
-
Primer + white paint.
-
Margin 12%.
Effect: The cornice blends with the wall and wardrobe into a single white plane. The wardrobe is 'built-in'.
Classic solid wood library
Task: Bookshelf library made of wooden sections with vertical posts. Height — up to the ceiling.
What to buy:
-
wooden cornice — shaped profile with moderate relief.
-
decorative elements for furniture — corner trims for cornice joints.
-
Connecting wooden elements for internal corners.
-
Screws, brackets.
-
Wood primer + tinting oil or varnish.
Effect: The cornice completes the library sections and provides a classic profile, organic for a book space.
Kitchen up to the ceiling: practical cornice
Task: Kitchen wall cabinets at a height of 2.4–2.6 m. Painted MDF fronts. Gap to ceiling — 30–50 mm.
What to buy:
-
wooden cornice with a small profile, if the kitchen is wooden.
-
or Moldings made of polyurethane — for a painted kitchen matching the facades.
-
Silicone sealant for the joint with the ceiling (for the kitchen — silicone, not acrylic, due to moisture).
-
Fasteners or glue.
-
Coating — matching the kitchen color.
Note: In the kitchen, the cornice must account for the opening of upper fronts. If the doors are hinged — the cornice should not obstruct their opening. Check: with the door fully open, there should be a gap to the plane of the cornice.
Wardrobe: thin top line
Task: Built-in wardrobe in a niche. Sliding doors. Gap — 50 mm.
What to buy:
-
Thin Polyurethane molding 60–70 mm.
-
Glue + sealant + primer + paint matching the niche color.
-
No additional decorative elements.
Effect: The line is closed. The cornice is not visible as a separate element — it simply covers the gap and completes the niche.
Sideboard or display case: wood + decor
Task: Sideboard in the dining room or living room. Height — up to the ceiling or with a pronounced upper block.
What to buy:
-
wooden cornice with a shaped profile.
-
Wooden decoration — corner and end caps.
-
Wooden trim — for glass inserts in upper doors.
-
Fasteners.
-
Tinting varnish or oil.
Effect: A sideboard with a wooden cornice acquires a classic "furniture" look — like a piece from a joinery workshop, not case furniture.
Installing a cornice for furniture: how it's done
Installing a wooden cornice
The wooden cornice is mounted on the cabinet body mechanically — with screws from the inside or outside. For a neater installation — through furniture brackets from the inside.
Sequence:
-
Measure the perimeter of the cabinet along the top line.
-
Cut the cornice at 45° angles on a miter saw or miter box.
-
Check the trial fit without glue or fasteners.
-
Secure the fasteners — brackets from inside the body or screws through.
-
Fill gaps at corners and joints with wood putty.
-
Sanding, primer, painting.
Feature of internal corners: If the cabinet is installed in a niche and the cornice wraps around an internal corner, the 45° cut is made "mirrored." A wooden cornice requires precise sawing: an error of 1–2° on hard wood results in a noticeable gap.
Installation of polyurethane cornice
The polyurethane profile is glued with specialized adhesive. More about the technique — installing polyurethane molding.
Sequence:
-
Marking — with a pencil along the bottom edge of the cornice on the cabinet body.
-
Cutting corners — miter box or miter saw, fine cut grain.
-
Apply glue in a zigzag pattern to the back of the profile.
-
Press along the markings, secure with painter's tape until the glue sets.
-
Joints — acrylic sealant, smooth with a wet finger.
-
After drying: acrylic primer → paint.
Advantage of polyurethane on corners: The profile cuts without chipping. Small gaps at corners are sealed with sealant and become invisible after painting.
How to connect the cabinet cornice with the room's ceiling cornice
One of the most important design questions when working with a built-in cabinet up to the ceiling: the cabinet cornice and the ceiling cornice — how to coordinate them?
Option one: cabinet up to the ceiling cornice
If there is a ceiling cornice in the room, the cabinet is installed so that its top touches the bottom plane of the cornice. A cabinet cornice is not needed in this case — the ceiling cornice already fulfills this role.
Option two: cabinet below the ceiling cornice
The gap between the cabinet and the cornice is filled with a separate furniture cornice that matches the style of the ceiling cornice.
How to coordinate:
-
If the ceiling cornice is — Moldings made of polyurethane, the furniture cornice is taken from the same system, but smaller.
-
If the ceiling cornice is wooden — the furniture cornice is also wooden, with a similar or slightly simpler profile.
Option three: no ceiling cornice
The furniture cornice covers the gap on its own. With the right profile choice, it "defines" the top line of the space — performing the function that a ceiling cornice would in another interior.
What to buy together: full checklist
Checklist for a wooden cornice
-
wooden cornice — around the perimeter + 15%.
-
decor for furniture — corner overlays, decorative elements.
-
Screws — length suitable for the body thickness.
-
Furniture corners — for hidden installation.
-
Wood putty — for filling gaps.
-
Sandpaper 120–180 grit.
-
Wood primer.
-
Wood stain or paint.
-
Varnish or oil — for natural finish.
-
Cornice allowance 15%.
Checklist for polyurethane cornice
-
Moldings made of polyurethane — around the perimeter + 12%.
-
decorative polyurethane elements — decorative accents if desired.
-
Decor for Molding — corner inserts.
-
Specialized adhesive.
-
Acrylic sealant — 1–2 tubes.
-
Acrylic primer.
-
Acrylic paint — to match the furniture or wall color.
-
Masking tape — for fixing during bonding.
-
Profile reserve 12%.
Nine mistakes when buying a cornice for furniture
Mistake one: buying a cornice without measuring the gap.
Cornice purchased, gap — 60 mm, profile — 120 mm. The cornice "overlaps" the cabinet facade by 60 mm and hinders opening.
Mistake two: too large a profile for a low room.
A 150 mm cornice with a 2.5 m ceiling takes up 6% of the visible wall height. This is too much: the space feels "oppressive".
Mistake three: the cornice interferes with opening the upper doors.
Hinged doors of upper cabinets "hit" the cornice when opened if it protrudes further forward than the plane of the closed door. Always check: the gap between the front plane of the open door and the back plane of the cornice — at least 5 mm.
Mistake four: mixing a wooden cornice with white polyurethane stucco without any painting.
Natural wooden cornice + white polyurethane moldings on facades without a common logic — a style conflict.
Mistake five: not taking a spare cornice.
Each internal corner consumes an extra piece of profile. A reserve of 12–15% is mandatory.
Mistake six: forgetting fasteners for a wooden cornice or glue for a polyurethane one.
The cornice has been delivered. The installer has arrived. No fasteners. This is a real situation that is easy to avoid.
Mistake seven: not accounting for opening in a niche.
A cabinet in a niche — internal corners. The cornice wraps around them. This requires special trimming and additional linear footage. Calculate the niche separately.
Mistake eight: not coordinating the cornice profile with the ceiling molding or baseboard.
The cabinet cornice and ceiling cornice in the same room should be from the same system or at least from the same style logic.
Mistake nine: not thinking about the color before purchasing.
If the cornice will be painted — polyurethane. If it will be varnished while preserving the texture — wood. If both options seem acceptable — answer the question honestly before placing the order.
Calculating the cornice for a cabinet: practical section
Cabinet perimeter
For a cabinet placed in a niche or against a wall, the cornice is mounted only on the visible part:
-
Cabinet width 2400 mm against one wall: cornice along the front = 2400 mm.
-
If the cabinet does not touch the walls on the sides: add side parts.
Corners
Each external corner — one additional cut (two segments meet at 45°). Each internal corner in a niche — the same, but mirrored.
For each corner, additionally add: profile height × 2 (for two segments forming the corner).
Reserve
Add 12–15% to the total linear footage after calculating the corners.
Example calculation
A cabinet 2400 mm wide with two side panels of 600 mm each. Installed in a niche with two external corners.
-
Front: 2400 mm.
-
Side panels: 600 × 2 = 1200 mm.
-
Total: 3600 mm.
-
15% margin: 540 mm.
-
To order: 4140 mm = 2 strips of 2100 mm with a small margin.
Frequently asked questions
What is better for a built-in cabinet: a wooden cornice or a polyurethane one?
If the furniture is solid wood and the wood texture is important — wooden cornice. If the cabinet is painted and should blend with the wall — Moldings made of polyurethane are more convenient and give a more uniform result.
Can polyurethane molding be used on furniture?
Yes. Polyurethane moldings works well on painted furniture fronts, top lines of cabinets, decorative panels, and in classic/neoclassical interiors.
What to buy for a ceiling-height cabinet?
Cornice of the required material and height, glue or fasteners, sealant, primer, paint, and extra profile.
Which cornice to choose for a ceiling-height kitchen?
A profile that does not interfere with opening doors, with moderate relief for easy cleaning. Wooden — for a wooden kitchen. Polyurethane — for a painted one.
Can a wooden cornice and polyurethane molding be painted the same color?
Yes, but preparation differs: wood — sanding + wood primer; polyurethane — acrylic primer. The result with polyurethane is more uniform.
How to calculate how much cornice to buy?
Perimeter of the open part of the cabinet + allowance for corners + 12–15% allowance for cutting.
About the company STAVROS
STAVROS produces and supplies a full range of cornices and decorative profiles for furniture: Wooden cornices of various profiles and heights, decorative elements for furniture made of solid wood, Moldings made of polyurethane, Polyurethane furniture decor and everything needed for installation.
The STAVROS catalog features both materials — wood and polyurethane — allowing you to choose a cornice exactly for your task: style, gap height, coating type. Consultations on selection, calculation, and installation are the company's standard for every order.