Article Contents:
- Not everything installed on furniture is conveniently called hardware
- Three groups of components in a furniture project
- Technical hardware
- Frontal Hardware
- Wooden components
- Leg and mounting plate
- Handle and front
- Overlay and front
- Glide and leg
- Dimensions are consistent
- Unambiguous SKU
- Parts are compatible
- No mix-ups
- The surface and finish are repeated
- The item can be reordered
- Furniture hardware
- Hardware for legs and handles
- Materials for installation and finishing
- Wooden Handles
- Wooden legs
- Carved decoration
- Step 1. Start with the carcass and structure
- Step 2. Choose the legs
- Step 3. Select the fasteners
- Step 4. Choose the handles
- Step 5. Add decorative elements
- Step 6. Add materials for installation and finishing
- Step 7. Check the quantity
- Step 8. Assemble one sample
- Mistake 1. Writing everything on one line
- Mistake 2. Ordering legs without fasteners
- Mistake 3. Choosing handles after drilling
- Mistake 4. Forgetting the glides
- Mistake 5. Mixing up installation materials and decorative parts
- Mistake 6. Not specifying the material of the wooden component
- Mistake 7. Not checking one set before the batch
- Mistake 8. Choosing fasteners based only on a photo
- What is included in furniture hardware for furniture making?
- How does technical hardware differ from front hardware?
- Are furniture legs considered hardware?
- What wooden components are used in furniture manufacturing?
- How to choose a fastener for a wooden leg?
- When should you choose a mounting plate?
- How to account for glides in a project?
- When should you choose furniture handles?
- How to list hardware in a specification?
- Where to buy hardware and wooden components for furniture?
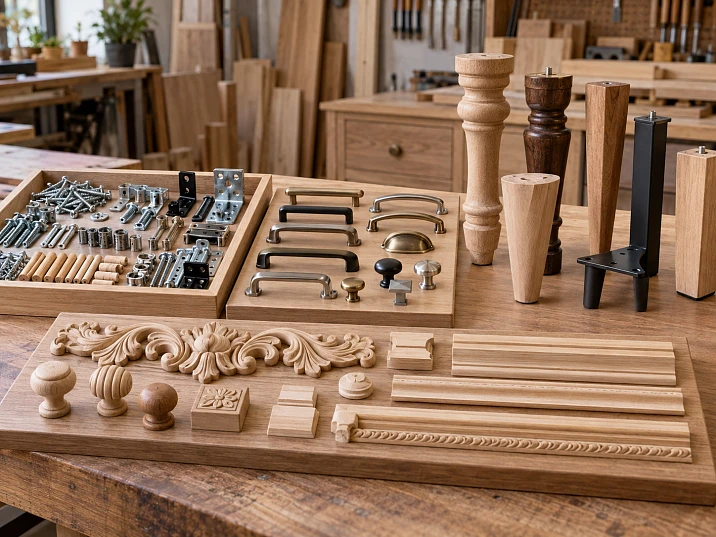
Page description: What is included in furniture-making hardware: fasteners, mounting plates, glides, wooden handles and legs. How to separate items in a specification and buy STAVROS components.
The most inconvenient entry in a furniture project looks brief: “hardware — one set.” As long as the item is assembled by the same person who designed it, the problem is barely noticeable. But once the project is handed over to another craftsman, the dresser is repeated six months later, or ten identical wardrobes are ordered, it becomes unclear what exactly is included in that “set.”
Handles? Mounting plates? Glides? Fasteners for legs? The wooden legs themselves? Carved overlays? Glue and finishing materials?
For production, it is more convenient not to put everything in one basket, but to divide items by purpose. Then it is immediately clear what is responsible for assembly, what the user uses to open the front, which parts are standalone wooden components, and what needs to be purchased separately for installation.
In this article, by furniture hardware for furniture manufacturing we will primarily mean the part of the components related to fastening, handles, legs, and wooden decorative elements. Hinges, slides, lift mechanisms, and complex drawer systems exist, but here they are not the main subject of discussion.
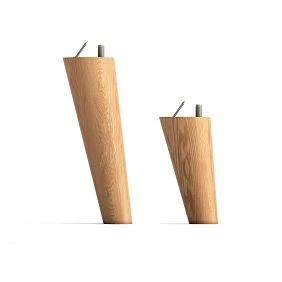
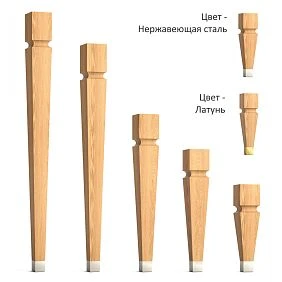
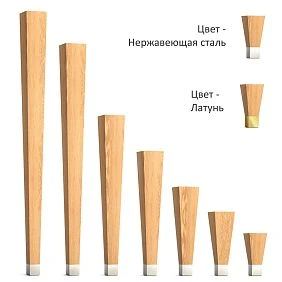
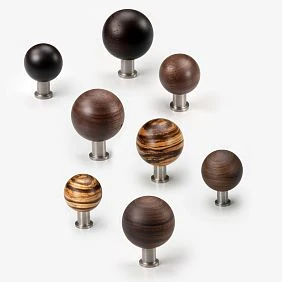
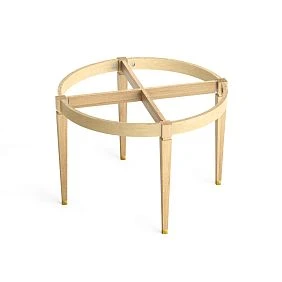
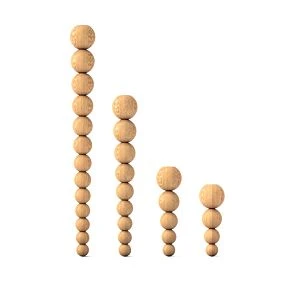

Not everything installed on furniture is conveniently called hardware alone
In everyday speech, the word "hardware" refers to almost everything that is not the carcass.
One list includes:
- hinges;
- guides;
- handles;
- legs;
- support feet;
- mounting plates;
- Moldings;
- carved overlays;
- decorative rosettes.
For the buyer, this is not always a problem.
This greatly hinders the furniture maker.
The reason is simple: these parts have different functions.
The mounting plate is needed for attachment.
The handle is needed to open the front and at the same time remains visible.
The wooden leg is itself a large part of the furniture.
A carved overlay may not perform any technical function at all — only a decorative one.
If everything is written in a single line, it is impossible to properly check compatibility, quantity, and replacement.
Therefore, in a working project it is useful to separate at least three groups:
- technical mounting parts;
- front hardware;
- wooden components and decor.




Three groups of components in a furniture project
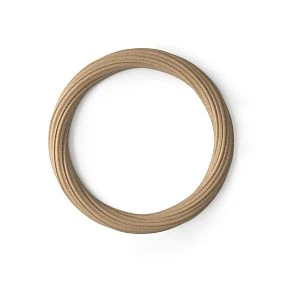
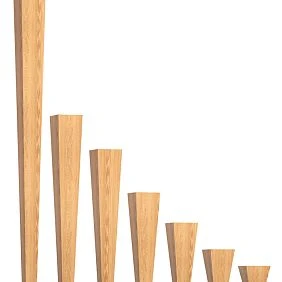
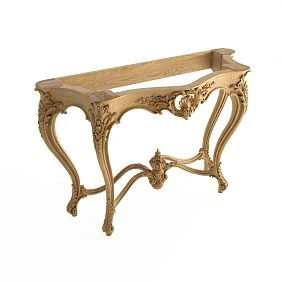
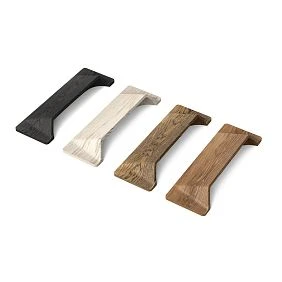
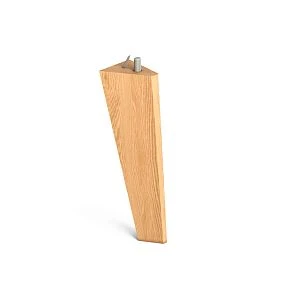
Our factory also produces:
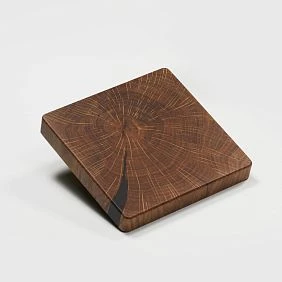
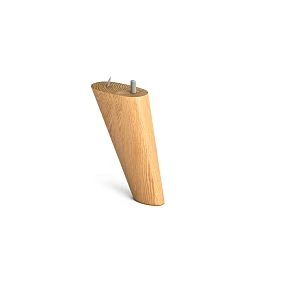
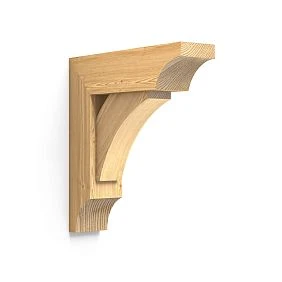
Technical hardware
These are the parts needed for fastening, installation, adjustment, and proper assembly of furniture.
This may include:
- studs;
- dowel nuts;
- self-tapping screws;
- mounting plates;
- support feet;
- leg fasteners;
- installation kits.
Some of these parts are almost invisible after assembly.
Buyers rarely choose them by appearance. The main question is different: do they fit in size and installation method.
Get Consultation
Front hardware
These are the parts that the user sees and touches every day.
First of all — furniture handles.
They can be:
- buttons;
- brackets;
- profile;
- overlay;
- inset.
Here, technique and appearance can no longer be separated. A handle must simultaneously work comfortably, be mounted correctly, and match the front.
Wooden components
Legs, pedestals, moldings, overlays, rosettes, and other carved elements are better accounted for separately.
Calling them just hardware is too crude.
A wooden leg has its own height, shape, material, and finish.
An overlay has a size, pattern, and place on the front.
These are already independent furniture components.
Why this separation matters for the specification
Let's imagine an entry:
hardware — 1 set
What can you learn from it?
Practically nothing.
Unclear:
- how many handles;
- what the product number is;
- which mounting plates;
- which legs;
- are support feet needed;
- whether there is carved decor;
- what to do if one item is out of stock.
It is much more convenient to record each group separately.
For example:
| Position | What it is | Quantity |
|---|---|---|
| Furniture leg | wooden support | 4 |
| Mounting plate | leg mounting | 4 |
| Thrust bearing | floor contact protection | 4 |
| Handle | front hardware | 6 |
| Overlay | Decorative element | 2 |
Even without specifying particular item codes, such a table is already clearer.
And if you add the product number, material, and finish, you get a proper working specification.
Furniture leg mounting — a separate purchasing unit
A leg cannot be considered separately from how it will be installed.
Two visually similar supports may have different mounting methods.
One is mounted on a stud.
Another requires plates.
The third is designed for a different mounting assembly.
Therefore, it is useful to keep two separate lines side by side in the project:
Leg
и
leg attachment.
Section hardware for legs and handles just shows that the attachment is a separate group.
It includes mounting plates, glides, and other parts that cannot be replaced by the word “fasteners in general.”
Mounting plate: why it is chosen together with the leg
The mounting plate connects the leg to the furniture body or tabletop.
Before purchasing, you need to check:
- what mounting method is provided for the leg;
- is there a threaded stud;
- what thread size does it have;
- is there a matching receiving part;
- how is the plate positioned;
- is a tilt required.
If any of these things do not match, the leg itself may be good, but the assembly will not come together.
That is exactly why fasteners cannot be bought later, “some suitable one.”
First, choose a compatible system.
FUR-017: example of angled mounting for one leg
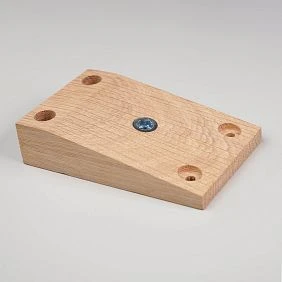
A good example is mounting plate FUR-017.
Its size is 112 × 70 × 26 mm.
The plate has a 10° angle and an M8 metal threaded insert. It is designed for installing a furniture support with an M8 stud.
The main thing here is not the product number itself.
It is important to understand the principle: the mount changes the position of the leg.
If the leg is installed at an angle, its lower point ends up farther from the body than with vertical installation.
This means the following change:
- the external dimensions of the furniture;
- the position of the support;
- side view;
- distance between the legs;
- and sometimes the stability of the entire composition.
Therefore, the angle of the mounting plate must be taken into account already in the drawing.
Not after assembly.
FUR-020: one plate for two legs at once
Mounting plate FUR-020 is designed differently.
It is intended for attaching two furniture legs.
The plate has two M8 metal threaded inserts installed, and the legs themselves are attached with M8 studs.
The tilt angle is also 10°.
There are several length options. For example, one of the sizes is 305 × 70 × 24 mm, while the distance between the mounting points is specified separately.
This example clearly shows why the line "mounting plate" without a part number and size is almost useless.
FUR-017 and FUR-020 are both mounting plates.
But they work differently.
The first one handles the mounting of a single support.
The second one connects two at once.
The glide is a small part that is easy to forget
The glide sits at the very bottom of the furniture, so it is often overlooked during the design stage.
But this small part affects the contact between the leg and the floor.
Depending on the version, the glide can:
- protect the floor surface;
- reduce direct contact between the wood and the coating;
- close the bottom end of the support;
- add a small amount of height;
- in the adjustable version, help compensate for unevenness.
If a glide is required, it must be added to the specification in advance.
Not after the furniture has already been assembled.
For example, a chest of drawers has four legs.
If each one needs a glide, then the order must include four pieces.
For a series of ten chests of drawers, that is already forty.
A small forgotten item quickly turns into a halt of the entire assembly.
Wooden furniture handles — front hardware
A handle differs from concealed fasteners in that it always remains visible.
It affects several things at once:
- grip comfort;
- the appearance of the front;
- the location of the holes;
- the protrusion above the surface;
- daily use.
Therefore Wooden furniture handles it is better to list them as a separate group.
The entry “handles — 6 pcs” is already better than “hardware — set.”
But for a working project, this is still not enough.
You need to know at least:
- the specific model;
- size;
- type of mounting;
- quantity;
- the material;
- finishing.
For brackets and other handles with two mounting points, the distance between the holes is especially important.
Why you need to choose the handle before drilling the front
Drilling the front first and then looking for a suitable handle is a bad order.
Especially if the handle is mounted at two points.
It is better to do the opposite:
- choose a specific handle;
- check its dimensions;
- check the distance between the mounting points;
- determine the position on the facade;
- make a template;
- only then drill.
This seems obvious until the craftsman encounters a facade where the holes are already made, and the new handle does not match in distance.
A single-point knob offers more freedom.
A long pull has less.
A profile or recessed handle adds its own requirements for the installation location.
Therefore, the handle must be approved before the entire batch of facades is launched.
Furniture legs are standalone wooden components
Wooden furniture legs sometimes called hardware.
In a broad sense, this is acceptable.
But in a working project, it is more useful to treat the leg as a separate furniture component.
It has:
- its own height;
- width;
- depth;
- shape;
- wood species;
- finishing;
- mounting method;
- position on the cabinet.
A leg can noticeably change the proportions of the entire piece of furniture.
A mounting plate has almost no such influence.
Therefore, they should not be mixed in the same line.
Why the leg and its fastening should be accounted for separately
Let's imagine a chest of drawers with four wooden legs.
The project includes:
4 legs
и
4 mounting plates.
Why not list this as a single set?
Because later only one part may change.
For example, the leg was replaced with another model, but the old attachment still fits.
Or vice versa: the leg stays the same, but the installation method changes.
If the two items are separated, it is easy to modify the project.
If everything is listed as a "leg set," confusion begins.
A simple way to list it:
Leg, item code specified in the project — 4 pcs.
Mounting plate, item code specified in the project — 4 pcs.
In the article and working document, this is quite sufficient. Complex foreign designations are not needed.
Decorative wooden elements — third procurement group
Carved overlays, rosettes, capitals, and brackets cannot be classified as technical fasteners.
But they are included in the furniture package.
Main section — STAVROS carved decor.
For the project, such details are better recorded separately.
For example:
Overlay, item code specified in the project — 2 pcs., oak, clear lacquer finish
Or:
Rosette, item code specified in the project — 4 pcs., beech, enamel finish
It's immediately clear that this is neither a fastener nor a handle.
This is a standalone decorative element.
Installation and finishing materials — another separate group
There are items that should not be mixed with either handles or legs.
For example:
- installation adhesive;
- oil;
- brushes;
- decorative caps;
- finishing materials.
STAVROS has a separate section for them materials for installation and finishing.
In the work specification, it's useful to create a separate group for such materials.
Otherwise, next to six handles and four legs, a can of oil or a tube of glue suddenly appears, and the list becomes hard to read.
What a furniture project specification should look like
A complex table is not necessary.
The main thing is that each item is clear.
For example:
| Position | Category | Article | Quantity |
|---|---|---|---|
| Leg | wooden support | project item code | 4 |
| Mounting plate | Mounting | FUR-017 | 4 |
| Thrust bearing | leg protector | project item code | 4 |
| Handle | front hardware | project item code | 6 |
| Overlay | Decorative element | project item code | 2 |
Then, if necessary, the following are added:
- the material;
- size;
- coating;
- installation location;
- note.
For a single chest of drawers, such a table may seem too detailed.
For a repeat order, on the contrary, it is very convenient.
How to check the compatibility of all items
Each group has its own checks.
Leg and mounting plate
Check:
- mounting method;
- thread;
- stud;
- angle;
- plate size;
- space under the cabinet.
Handle and front
Check:
- dimensions;
- distance between mounting points;
- protrusion;
- position;
- adjacent fronts;
- ease of grip.
Overlay and front panel
Check:
- width;
- height;
- thickness;
- free field;
- position relative to the handle;
- finishing.
Base plate and leg
Check:
- the shape of the lower part;
- size;
- installation method;
- change in overall height, if any.
Compatibility cannot be verified with a single phrase like "everything fits."
Each pair has its own parameters.
One approved set for a small batch
If a workshop makes a single cabinet, the set can be selected specifically for it.
If five or ten identical items are needed, it is better to first fully assemble one sample.
For example, the following are approved:
- specific leg;
- specific mounting plate;
- foot plate;
- handle;
- overlay.
After checking the first item, this set is locked in.
The next dresser does not need to be re-assembled.
This reduces the risk that different handles or other leg fasteners end up in the same batch.
It is especially useful to save:
- article numbers;
- dimensions;
- quantity per item;
- photos of assemblies;
- finishing.
What “quality hardware” means for a workshop
The word “high-quality” by itself explains almost nothing.
For production, specific characteristics matter more.
Dimensions are repeatable
If ten identical parts are ordered, they are indeed identical in the important dimensions.
The item code is unambiguous
The same item can be found again by its number.
The parts are compatible
The threaded rod fits the threaded insert.
The plate fits the selected leg.
The handle fits the prepared holes.
No mismatched items
The box contains exactly what is specified in the order.
Surface and finish are consistent
This is especially important for front-facing parts — handles and wooden decor.
The item can be reordered
For a workshop, this matters no less than the beauty of the first delivery.
A dresser can only be reproduced if its components can also be reproduced.
What matters when choosing a manufacturer of furniture hardware and components
For a furniture maker, a wide range is not the only thing that matters.
It is far more useful if the supplier provides clear information for each item.
It's good when you can check:
- article number;
- dimensions;
- the material;
- configuration options;
- mounting method;
- availability;
- the ability to reorder.
This is especially important for small batches.
A single item can be assembled even with some improvisation.
Ten identical ones — no longer.
In serial work, every ambiguity turns into a recurring problem.
What STAVROS covers in furniture components
STAVROS should not be presented as a supplier of absolutely all furniture hardware on the market.
Technical hardware is much broader: there are hinges, slides, lift mechanisms, drawer systems, and many other groups.
The interesting part here is the set of components that can be associated with wooden products and their installation.
Furniture fittings
General section:
https://www.stavros.ru/products/furnitura-dlya-mebeli/
Hardware for legs and handles
Mounting plates, glides, and other items:
https://www.stavros.ru/products/furnitura-dlya-mebeli/furnitura/
Materials for installation and finishing
https://www.stavros.ru/products/furnitura-dlya-mebeli/materialy-dlya-montazha-i-otdelki/
Wooden handles
https://www.stavros.ru/products/izdeliya-iz-massiva/ruchki_mebelnye/
Wooden legs
https://www.stavros.ru/products/izdeliya-iz-massiva/nozhki-mebelnye/
Carved decor
https://www.stavros.ru/products/reznoy-dekor/
This way, the project can be organized not around the abstract word “hardware,” but around specific groups.
How to assemble components before ordering
A convenient order looks like this.
Step 1. First, the carcass and structure
Determine the dimensions of the furniture, the position of the bottom, fronts, and main parts.
Step 2. Choose the legs
Specify the height, material, quantity, and mounting method.
Step 3. Choose the fasteners
Check the mounting plates, studs, threaded inserts, and glides.
Step 4. Choose the handles
Before drilling the fronts.
Step 5. Add decorative elements
Only after the free areas on the fronts are clear.
Step 6. Add materials for installation and finishing
Glue, oil, and other necessary items.
Step 7. Check the quantity
Not for the whole project "approximately", but for each line item.
Step 8. Assemble one sample
If the furniture is produced in a series, it is useful to first fully assemble one unit.
After that, the set is considered verified.
Example of components for one chest of drawers
Let's imagine a chest of drawers with four legs, three drawers, and two decorative overlays.
It may require:
- 4 wooden legs;
- 4 mounting plates;
- 4 foot pads;
- 3 handles;
- 2 decorative overlays.
That already makes 17 separate items by count, although at a household level all of this can easily be called “hardware.”
If you make ten identical chests of drawers:
- legs — 40;
- plates — 40;
- glides — 40;
- handles — 30;
- overlays — 20.
Now an error in one line means dozens of missing parts.
That is why a good specification becomes especially important even in a small series.
How to change one item without breaking the whole project
A good specification is needed not only for the first purchase. It is especially useful when a part is suddenly out of stock or needs to be replaced.
Let's imagine that the leg, mounting plate, glide, handle, and decorative overlay have already been approved for the cabinet. Later it turns out that the required plate is temporarily unavailable.
If all items are listed separately, the task is clear: only the fastener is being changed. The craftsman checks the new plate by thread, angle, size, and installation location. The leg, handle, and decor do not need to be touched.
But if everything is listed as a "hardware set," you first have to figure out again what that set consisted of.
The same goes for the handle.
Suppose the model has been discontinued. If the project contains its dimensions and mounting method, you can look for a replacement based on specific parameters. If it only says "wooden handle," finding a new one without rechecking the facade is almost impossible.
Therefore, when replacing, it is better to follow four steps:
- determine exactly which item is being changed;
- write down its dimensions and mounting method;
- check whether the replacement affects adjacent parts;
- only after that approve the new item code.
Parts that are already tied to drilling or the finished furniture geometry are replaced with particular care.
Replacing a glide usually affects only the lower part of the leg.
Replacing the mounting plate can change the angle and position of the support.
Replacing a handle may require new holes.
Replacing a decorative overlay affects the composition of the front.
So the word "replacement" is one thing, but the consequences are different. It is the separate specification that allows you to see this in advance.
Example: how to assemble a set for a wardrobe
Let's take a simple cabinet with two doors and four wooden legs.
It may require:
- 4 legs;
- 4 mounting plates;
- 4 foot pads;
- 2 handles;
- 2 decorative overlays;
- mounting adhesive for decorative elements, if provided by the installation method.
First, the legs and mounting are approved. Then the cabinet height and position of the supports are checked. After that, the handles are selected, and only then are the doors drilled. The overlays are placed taking into account the handles and the free area of the facade.
This order is important because the elements are interconnected.
If the overlay is chosen before the handle, later it may turn out that there is no convenient place left for the handle.
If the leg is chosen without a plate, the mounting may not fit later.
If the foot pad is remembered at the end, the actual height and contact with the floor may differ from what was intended.
As a result, a good configuration is not a long list of parts, but the right sequence of decisions.
Common mistakes when configuring furniture
Mistake 1. Writing everything in one line
Hardware — set.
Afterwards, it is impossible to check the quantity and replacements.
Mistake 2. Ordering legs without fasteners
The supports arrived, but there is nothing to install them with.
Mistake 3. Choosing handles after drilling
The holes do not match the specific model.
Mistake 4. Forgetting the glides
The furniture is assembled, but the lower part of the legs is not prepared for use.
Mistake 5. Mixing installation materials and decorative parts
The list becomes unreadable.
Mistake 6. Not specifying the material of the wooden component
When reordering, oak may be ordered instead of beech, or vice versa.
Mistake 7. Not checking one set before a series
The mistake is repeated on every item.
Mistake 8. Choosing fasteners only by photo
For an installation part, the thread, size, angle, and purpose are more important.
Where to buy furniture hardware and wooden components for furniture
If you specifically need furniture hardware to buy, it is better to start not with one long page, but with the right group.
For mounting parts — Furniture for legs and handles.
For wooden handles — wooden furniture handles.
For supports — Wooden furniture legs.
For decorative components — Carved furniture decor.
For glue, oil, and other auxiliary materials — Mounting and finishing materials.
After choosing, it is better to return to the specification again and check that each purchased item is actually tied to a specific place in the furniture.
Quick note
| What we buy | Which group to assign it to | What to Check |
|---|---|---|
| Mounting plate | technical hardware | carving, angle, size |
| Screw | Fastening | size and compatibility |
| Thrust bearing | technical hardware | shape, size, installation |
| Handle | front hardware | size, mounting, position |
| Leg | wooden component | height, material, mounting |
| Overlay | decorative component | size, material, facade field |
| Oil or glue | Installation and finishing | Compatibility with the material |
The main idea is simple: don't try to name all the parts that are installed on furniture with a single word.
The more precisely they are separated by function, the easier it is to order, assemble, check, and reproduce the product.
Frequently Asked Questions
What is included in furniture hardware?
In a broad sense, this includes fasteners, mounting parts, handles, and other elements involved in the assembly and use of furniture. For a working project, it is more convenient to account separately for technical hardware, face handles, and standalone wooden components.
How does technical hardware differ from face hardware?
Technical hardware is needed primarily for installation and the operation of a unit. Face hardware remains visible and is used by people every day. The clearest example of face hardware is a furniture handle.
Are furniture legs considered hardware?
In a broad everyday sense, they are often classified as hardware. In a production specification, it is more convenient to list legs separately because they are large standalone wooden components with their own dimensions, material, and mounting.
What wooden components are used in furniture production?
Legs, supports, bases, handles, moldings, carved overlays, rosettes, capitals, brackets, and other decorative parts.
How to choose a fastener for a wooden leg?
First check the mounting method of the leg itself: the stud, the thread, the attachment point, and the required angle. After that, choose a compatible mounting plate or another assembly.
When should you choose a mounting plate?
Before final assembly, and preferably at the same time as choosing the leg. The plate affects the mounting method and sometimes the angle of the support.
How should glides be accounted for in the project?
List them as a separate line with a quantity matching the number of corresponding legs or supports. If the glide affects the height or adjustment, this must also be taken into account in the drawing.
When should furniture handles be chosen?
Before drilling the fronts. First, the specific handle and its dimensions are approved, then the holes are marked out.
How should hardware be formatted in the specification?
Divide the items into groups and for each one specify the name, article number, and quantity. For wooden parts, it is useful to add the material and finish.
Where can you buy hardware and wooden components for furniture?
The relevant groups are collected in the STAVROS catalog: mounting hardware, installation materials, wooden handles, legs, and carved decor. It is best to select by a specific assembly rather than by the general word "hardware."