Article Contents:
- When a furniture handle truly becomes a designer piece
- Five roles of a handle on a furniture front
- Example: a 450 mm wide drawer
- Example: a tall wardrobe door
- The size on a drawing and the free space for fingers are two different things
- One shape — different usage requirements
- Where the handle shape can replace applied decor
- Plane HL-011: a long line with pronounced width
- Tetras HL-033: similar length with a different profile mass
- Button HL-036: one design in three sizes
- Module HL-049: compact geometry as a standalone accent
- What is worth taking away from the comparison
- An example of a unified system for different furniture pieces
- Coordinating the color means checking it on the material
- Which dimensions the craftsman needs before drilling
- When the handle overlaps the frame or decorative element
- What goes into the actual cost of a handle installed on furniture
- Can an accent handle be installed on a facade with a deep panel groove?
- What to do if the handle looks right but the facade is too thin for the standard mounting
- Why can two identical oak handles look different on adjacent doors?
- Should a wooden handle be matched in color with visible metal hinges?
- Can the same handle model be installed both vertically and horizontally?
- What should I do if the required handle size is no longer available when reordering?
- Can a purchased handle be sanded further if a different finish is required?
- What should be considered if the fronts are veneered and the handles are made of solid wood?
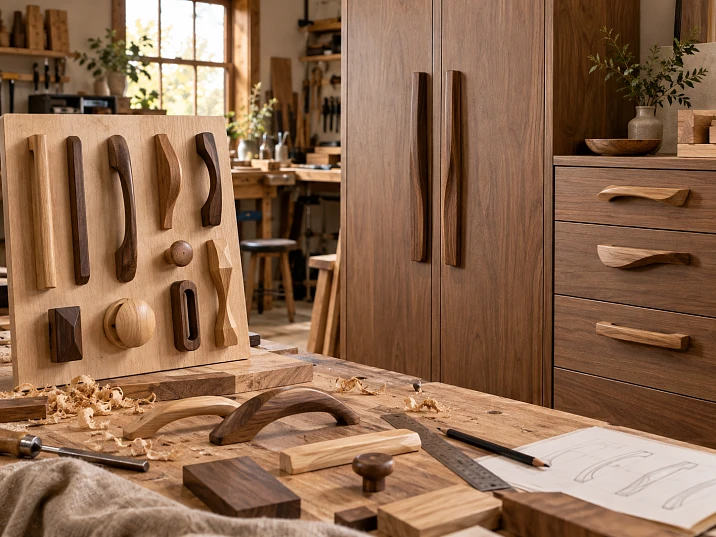
A chest of drawers has three drawers, each 450 mm wide. In the sketch, a long wooden handle looks striking, but once installed it almost covers the front from edge to edge. The craftsman chose it as a neat detail, but ended up with the main element of the composition. At the same time, opening the drawer can be quite convenient. The mistake here is not in the quality of the handle, but in the fact that its actual size was evaluated separately from the furniture.
For such a front, a handle 400 mm long occupies almost 89% of the width. If placed strictly in the center, only 25 mm will remain to the side edges. With a 180 mm model, the relative size is already 40%, and the side margins are 135 mm each. These are two different solutions even with the same handle pattern.
Designer wooden handles are chosen based on several interrelated conditions: what role they play on the front, how they relate to its size, whether they are comfortable to grasp, where the fasteners will be located, and whether the same technique can be reproduced on other items. A successful handle can replace additional decor. An unsuccessful one can force you to redo an already finished front or put up with inconvenient opening.
Therefore, the workflow begins with the furniture, not with a beautiful photograph: the purpose of the front, the composition, the handle size, the grip method, the material and finish, a test sample, the location of the holes — and only then ordering the full set.
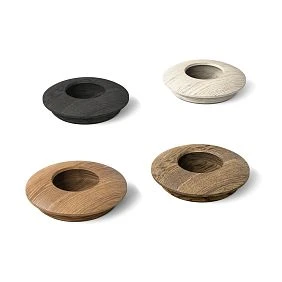
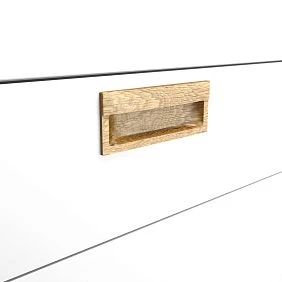
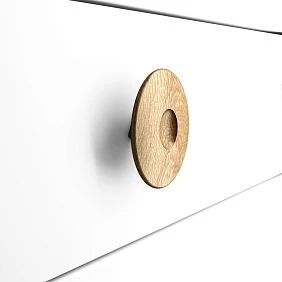
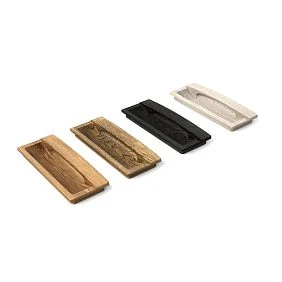
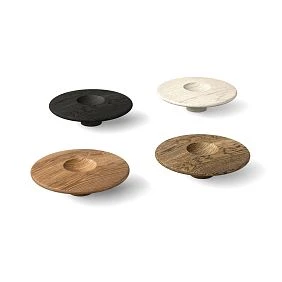
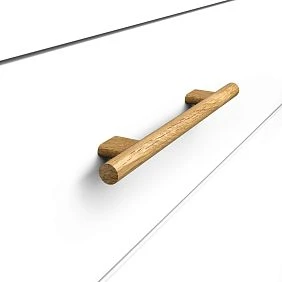
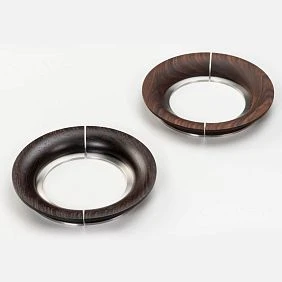
When a furniture handle truly becomes a designer piece
For expressive furniture, it is not at all necessary to look for a handle in the shape of a star, an animal, or a complex sculpture. Sometimes a completely straight wooden profile works much more powerfully if its length matches the verticals of the cabinet and is repeated across several sections. On another item, a small rounded element is enough: it stands out against a calm, smooth front precisely because of its position and material.
The difference between a random decorative handle and a deliberately chosen designer handle is tested by a simple question: why is this particular shape and this particular size installed here? If the answer is limited to the words "I liked it in the catalog," the choice is not yet complete. If the shape continues the line of the facade, softens strict geometry, highlights a single drawer, or connects several pieces of furniture, it already has a clear compositional task.
This does not mean that every handle needs a complex artistic idea. On a carved sideboard, a handle can be intentionally almost invisible. On a smooth cabinet, it can become the only visible wooden detail. Both solutions can be designer choices: what matters is that they are subordinated to the structure of a specific piece.




Five roles of a handle on a furniture facade
| Role of the handle | How it is perceived | What to check when choosing |
|---|---|---|
| Neutral | Does not distract attention from the panel, carving, or facade material | Small scale, restrained shape, ease of grip |
| Supporting | Continues the lines of the stiles, frames, or door proportions | Alignment of direction, length, edge offsets |
| Accent | Becomes a noticeable standalone element | Whether there is enough free space around, and whether there is a second competing accent |
| Graphic | Forms a long vertical or horizontal line | Straightness of installation, distance to neighboring handles, mounting |
| Figurative | The shape carries a specific motif or recognizable silhouette | Suitability for the furniture's purpose, actual grip, repeatability across a series |
The most common mistake is trying to make all details accent pieces at the same time. If the facade already has deep carving, several moldings, expressive wood grain, and complex coloring, a large handle with active relief often turns into yet another focal point. The furniture loses the coherence of its design.
And vice versa: on a flat painted door, a wooden handle can become the one element of volume that gives the surface scale. For this solution, you don't necessarily need to buy additional overlays and decorative trim.
Our factory also produces:
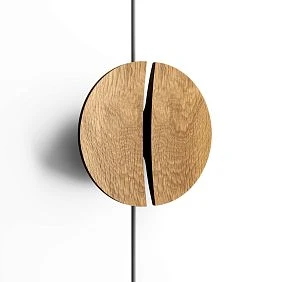
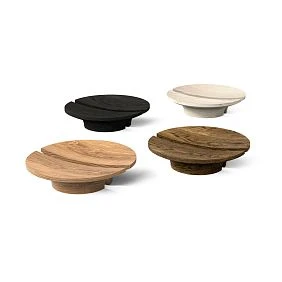
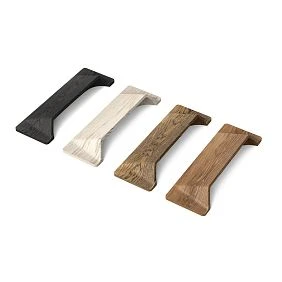
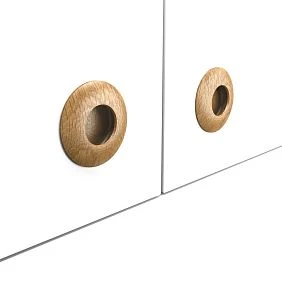
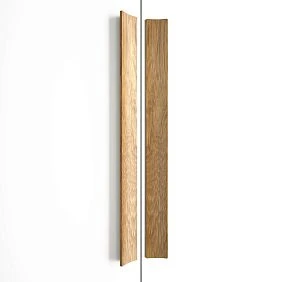
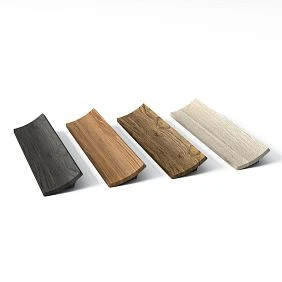
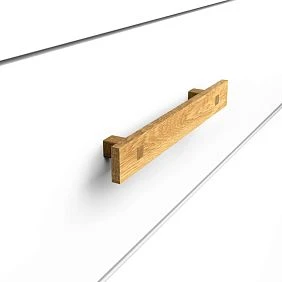
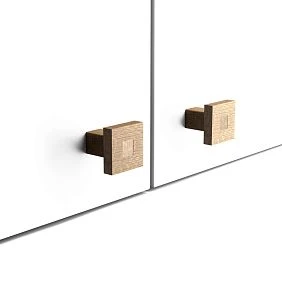
First, the facade: a wardrobe, a chest of drawers, a nightstand, and a kitchen require different solutions
In a furniture project, the shape of the handle cannot be chosen before the way the facade will be used is known. On one wardrobe, the door is tall and light; on another, it is wide and massive; a handle of the same length will look similar only in a separate product photo.
For a hinged wardrobe, a long handle can emphasize the height, especially if the doors are smooth and lie in the same plane. However, its length should be correlated not only with the height of the panel but also with the position of the hand. There is no point in turning the handle into a vertical line across the entire door if the user always grabs a small section at an awkward height or catches the neighboring door.
For a chest of drawers, the relationship between the width of the drawer and the length of the handle works more strongly, as does the overall rhythm of the rows. If the top drawers are lower than the others, equally large handles may take up a disproportionately large part of their front surface. Here it is more useful to preserve the overall motif by changing the scale or moving from an elongated shape to a compact one.
For a bedside nightstand, a large pull is rarely needed solely for convenience. A small knob handle can provide enough grip space and leave the facade material visible. But with a tight drawer and heavy contents, the compact element should be tested physically: a beautiful small knob is not always easy to grasp with several fingers.
For the kitchen, the repeatability of everyday movement is important. The handle is grabbed with a wet hand, fingers may be occupied, and the door is opened at different angles. Complex narrow edges and hard-to-reach recesses in such places require especially careful fitting. The finish must also match the operating conditions; the word “wood” by itself does not guarantee resistance to frequent contact with water and cleaning agents.
There is another special case — a furniture collection consisting of a wardrobe, a chest of drawers, and a console. Here you can use handles of different sizes, but with a common outline, direction of lines, and finish. Then the pieces look related, even if their facades differ several times over.
Get Consultation
How to calculate the scale of a handle relative to the facade
Absolute length says little about the appearance of a handle. To compare options, it is convenient to use the ratio of its visible size to the corresponding side of the facade:
Handle proportion = handle length ÷ width or height of the front × 100%.
This is not a construction standard, not a usability requirement, and not a formula for perfect design. It is a simple way to see how much of the surface the handle occupies. For a horizontal handle on a drawer, use the width of the front; for a vertical handle on a cabinet, use its height.
Example: drawer 450 mm wide
For the calculation, let's take real length options for the Plane HL-011 model from the STAVROS catalog. Assume that the handle is positioned horizontally in the center, and its length matches the designation A in the product card.
| Handle length | Share of the front width | Space on the left and right when centered | Solution character |
|---|---|---|---|
| 180 мм | 40% | 135 мм | A separate, moderate accent |
| 260 мм | 57,8% | 95 мм | A noticeable line that preserves side margins |
| 400 мм | 88,9% | 25 мм | Almost a continuous horizontal across the drawer width |
All three options fit geometrically. But for a 450 mm wide front, the third one already requires a separate check: whether the handle ends come too close to the side edges, whether the placement disrupts the adjacent gap, and whether the chosen shape is comfortable to grip.
The length ratio says nothing about the space for fingers. Two 260 mm handles can feel completely different if one is a flat profile and the other is a bow with a pronounced grip. Therefore, the scale coefficient is needed for selection by composition, not as a substitute for a trial installation.
Example: a tall cabinet door
Let's imagine a door 2400 mm high. The same Plane line has versions 700, 1200, and 1800 mm long. The relative values will be approximately 29%, 50%, and 75% of the height. In the first case, the handle reads as a local vertical element; in the second, as an independent line of considerable length; in the third, almost as an architectural division of the door.
At such a height, the installation coordinate must be determined. If a long handle is simply centered in the middle of the door, its working zone may end up above the usual hand position. A pronounced vertical and a comfortable grip point do not have to coincide; the solution is checked with the user and on the actual front or its mock-up.
On a two-door cabinet, one more circumstance is taken into account: two long handles create their own rhythm in the center of the composition. Too-close parallel lines may visually merge, and protruding elements may restrict the opening of the adjacent door. The drawing needs both doors, the gap between fronts, and the handle outlines, not one isolated door.
Handle geometry: why looking only at the length is not enough
The STAVROS wooden furniture handle catalog includes several types of products: knob handles, profile handles, bows, and other shapes. Different groups have their own dimension schemes. You cannot automatically interpret the same letter on the drawing of different products as the same technical parameter.
For the long models Plane HL-011 and Tetras HL-033, the cards show dimensions A × B × C × D. In the tables, A corresponds to the overall length; B and C describe the transverse geometry; D is an additional dimension that must be compared with the installation drawing. The compact Button HL-036 card contains only A × C × D. It would be a mistake to consider its D the same center-to-center mounting dimension as that of the long product: the function of each value must be checked on the diagram of the specific model.
| Model STAVROS | Example of the specified version | What data helps make a decision |
|---|---|---|
| Plane HL-011 | A × B × C × D = 400 × 40 × 25 × 320 mm | Length of the graphic line, wider profile geometry, mounting drawing |
| Tetras HL-033 | A × B × C × D = 400 × 25 × 19 × 320 mm | Same length with smaller cross-sectional dimensions, different perception of the shape |
| Button HL-036 | A × C × D = 37 × 22 × 15 mm | Compact shape, depth and mounting dimensions per the drawing |
| Module HL-049 | A × B × C × D = 42 × 42 × 27 × 20 mm | Geometry of a small standalone element and its mounting design |
The data refers to the named versions from the product cards, not to all possible sizes of each line. For ordering and drilling, a specific variant is always selected.
Plane and Tetras share the same selected length A = 400 mm, but differ in B and C. Therefore, even if they are placed on the same line on the facade, the width of the visible surface and the volume will be different. This is an example where the design choice is determined not by the number "400", but by the entire cross-section shape.
The dimension on the drawing and the free space for fingers are different things
The external height of the handle does not automatically equal the useful clearance for grip. Part of the overall dimension may be taken up by the wood itself, protrusions, or the mounting point. To assess comfort, you need to check the distance from the facade to the inner surface that the fingers grip, the shape of the support areas, and the possibility of gripping from the required direction.
You should not judge comfort from a side photograph, especially if the item is intended for daily use. A simple trial of a real handle tells you more here than a detailed description of its appearance.
Comfortable grip: what to check before buying the whole batch
The most expensive mistake with an expressive handle occurs after drilling: the facades are ready, the holes are made, and the user finds it inconvenient to open the furniture. Before that moment, you need to check not only the aesthetic image but also the hand movement itself.
First, determine the direction of force. A vertical cabinet door is pulled differently from a horizontal drawer. A heavy wide drawer may require a more stable grip than a small lightweight door. A handle that sits comfortably in the fingers when opening with one hand is not necessarily suitable for a different mass and trajectory of movement.
Then check the space for gripping. The user's fingers must fit between the handle and the facade in the position in which the furniture is actually opened. For a bar handle, assess the inner opening; for a profile handle, the accessible edge and the ability not to slip; for a knob, the contact area of the fingers and the protrusion relative to the front plane.
After that, inspect the edges. Crisp geometry is attractive, but a sharp angle in an area of constant contact can press into the fingertips. With a well-chosen handle, the decorative edge can remain pronounced while the working edge is comfortable. These qualities do not contradict each other.
Grip with wet hands is also important. A completely smooth short handle does not always provide confident traction, whereas a profile with a comfortable finger rest may feel more reliable. But you should choose an option not by the general rule "textured is better", but by the actual shape and finish.
One shape — different usage requirements
For a rarely opened cabinet in the living room, it is acceptable to focus more on graphics and an unusual silhouette, as long as the grip remains safe. For frequently used kitchen drawers, the priority shifts: the convenience of a repeated motion, ease of cleaning, and coating durability matter more than visual impact.
On children's furniture and in narrow passages, protruding edges are additionally assessed. The handle should not create a sharp snag for clothing or be located where it is regularly bumped. For furniture used by people with limited hand mobility, a physical grip test is especially important: a small knob may be less convenient than an elongated pull, but the specific result depends on the user.
Practical check: attach the sample to an unnecessary fragment of a facade of the same thickness and ask someone to open it several times from a normal position. Check the grip with one hand, access to the handle when the adjacent door is open, contact of nails and fingers with the edge, and the feel of the edge under force. If the motion requires finding a special spot every time, it is better to replace the beautiful model before production begins.
Knob, pull, or profile handle: which shape to choose for the furniture concept
The search query "designer furniture handles" brings together products that differ in construction. Therefore, it is better to choose the shape not by the collection name, but by the kind of contact it creates with the hand and the line it creates on the facade.
A knob handle works as a point. It is suitable for small drawers, single doors, cabinets, and furniture facades where you want to preserve a large open field. But two knobs on one wide drawer are already a different composition: their axes must be symmetrical, and using the pair must be genuinely convenient. Placing two points just for the pattern is not always reasonable; especially if the user prefers to open the drawer with one hand.
A pull handle usually creates a clearer grip zone. It is convenient to consider for drawers where confident pulling matters. The designer character of a pull can be created by the shape of the supports, the cross-section, the wood, and the proportion. Even the simplest arc can differ from neighboring models so much that accidental mixing will disrupt the integrity of the furniture.
A profile handle primarily forms a line. On a tall cabinet, it can become a vertical division; on a drawer, an extended horizontal accent. The greater the length, the more carefully two things should be checked: whether access to the work surface at the chosen height is convenient and whether it comes too close to neighboring furniture elements.
An expressive geometric knob differs from an ordinary round one in that even a small size creates a noticeable pattern. A square, faceted, or composite shape can echo the straight lines of the facade. But each additional angle complicates the assessment of finger contact, and sometimes also surface care.
A recessed handle may be preferable to a surface-mounted one when the hallway is narrow, the furniture stands flush against an adjacent item, or the protruding shape is constantly being bumped. Choosing it brings other technical constraints: the depth of the recess, the thickness of the base, the installation tool, and the location for drilling or milling. For the sake of appearance, the facade must not be weakened without calculation.
For most projects, there is no need to use all these types at once. It is enough to choose a leading shape and, if the furniture dimensions vary greatly, one compatible additional type.
Where a handle shape can replace surface-mounted decor
Let us imagine a smooth facade made of solid oak with a vertical grain direction. Instead of a separate carved overlay and a top molding, a long wooden handle with expressive geometry can be used. It will create a vertical accent while keeping the wood visible. This solution is appropriate if the handle is sufficiently comfortable and does not require overly complex fastening.
On other furniture, the task is the opposite: the facade has carved overlays and frames. Then a discreet knob handle can give a person a convenient opening point without competing with the main ornament. Here, the absence of an additional accent is also a meaningful solution.
Four real STAVROS models: what the comparison shows
Using four series as an example, one can see how completely different compositional techniques are derived from a single material. All names and the dimensions given below refer to catalog products; the availability of a specific version and the order terms should be checked immediately before purchase.
Plane HL-011: a long line with pronounced width
У Plane HL-011 a range of lengths from 180 to 1800 mm is provided. The variants have cross-sectional parameters B = 40 mm and C = 25 mm. This makes it possible to maintain a single geometric motif on a small facade, a large dresser, and a tall wardrobe by changing the length.
For example, for a wardrobe with a door height of 2200 mm, a model 1200 mm long occupies approximately 55% of the height. The same handle 260 mm long on such a panel will be perceived as a small local element. Before choosing the long variant, one must decide whether it should visually stretch the entire door or remain a familiar furniture handle.
For a joinery workshop, this model is also interesting because different lengths can be included in a single series of fronts. However, the choice is not limited to parameter A: the mounting of each version is checked against its own dimensional drawing. Short and long handles are not necessarily interchangeable in terms of hole spacing.
Tetras HL-033: similar length with a different profile weight
У Tetras HL-033 there are also short and long versions, including 70, 180, 400, 700 and 1800 mm. For these, the product page specifies B = 25 mm and C = 19 mm. Compared with Plane, this model has smaller cross-sectional dimensions. Therefore, at the same length, it is worth trying if you need a more delicate graphic accent.
Comparing two numbers does not replace comparing shape: a profile may be perceived differently because of its facets, light and shadow, and the available grip. But it helps to immediately discard the mistaken logic that “both handles are 400 mm, so they will give the same effect.”
For a project where the front is decorated with decorative frames, such a more restrained cross-section option sometimes proves compositionally more convenient. On a completely smooth door, by contrast, a craftsman may deliberately prefer a wider line. This is not a choice between a good and a bad model, but between two tasks.
Button HL-036: one design in three sizes
У Button HL-036 the product page lists versions with a main dimension A = 37, 53 and 74 mm. They are useful for furniture where the same shape needs to be repeated on several drawers of different widths.
Take a compact drawer 320 mm wide: the 37 mm size will be approximately 11.6% of its width. For a 600 mm wide front, a 74 mm handle will take up 12.3%. The proportions turn out to be close, although the physical dimensions differ by a factor of two. This is one way to maintain a coherent composition without mechanically repeating the same sizes on all fronts.
When choosing a button, the grip is especially important. An external increase from 37 to 74 mm does not yet mean that it will be twice as comfortable for the fingers: the shape of the grip area and the projection are checked on a sample. For a large, heavy pull-out section, a bow handle or profile may be more suitable, even if the button looks neater.
Module HL-049: compact geometry as a standalone accent
У Module HL-049 dimensions are given as A × B × C × D = 42 × 42 × 27 × 20 mm. In its scale, this is a separate small element capable of acting as a noticeable geometric point on a calm facade.
Such a handle is suitable for evaluating a different approach: not forming a long line, but repeating a compact module in several identical places. For example, on three drawers, a single vertical installation axis can be maintained. If the drawers have different widths, the handle coordinates are tied to the common axis of the furniture, not to the nearest end.
But here, too, geometry is not the only deciding factor. You need to check how the fingers grip the chosen shape, whether there is free space around it, and how much the actual volume protrudes above the facade surface.
What is useful to take away from the comparison
For the long Plane and Tetras, scale works primarily through an extended line. For Button, it works through the coordination of three dimensions of a compact shape. For Module, it works through the repetition of a small volumetric element. These are different design tools, not four interchangeable product names.
All four cards present options in beech and oak. But the material and finish should be selected at the level of the specific version. Information about one finish option cannot be automatically transferred to all models and sizes.
How to combine handles into a single furniture collection
Let's imagine a set: a tall hinged wardrobe, a chest of drawers with four drawers, and two bedside tables. If handles are chosen separately for each item, the result may be several successful pieces that are not perceived as one collection. The connection can be built through shape, material, color, and installation direction.
The first path is one geometric motif, different sizes. For a large wardrobe, an extended handle is used; for the chest of drawers, a shorter version of the same model. When the length changes, the overall character of the line is preserved. This is easiest where the manufacturer actually produces several sizes of one article, as with Plane or Tetras.
The second path is two types of handles with a single finish. For example, a long profile remains on the wardrobe, while a small knob is used on the bedside table. Their shapes may differ, but both are made of wood of the same selected species and receive a compatible shade of finish. At the same time, the same color does not fully compensate for contradictory geometry: before approval, it is worth laying the samples side by side.
The third path is a unified installation rhythm. On several items, the grip points are at comparable heights, the long handles share the same direction, and the buttons are centered relative to the fronts according to a single logic. A person reads this system even without deliberately comparing product codes.
The weakest solution is to unite forms with only the word “designer.” Five unusual handles from different series do not by themselves create a style. Sometimes one long and one compact form are enough for an entire collection.
An example of a unified system for different furniture items
| Item | Handle logic | What we keep consistent | What we change for the front |
|---|---|---|---|
| Tall cabinet | Elongated vertical handle | Wood species, finish, geometric motif | Length and installation height |
| Low chest of drawers | Horizontal handles from the same family | Section, material, matte finish | Length to match drawer width |
| Bedside tables | Small handles or knobs | Color, wood tone, arrangement principle | Grip type and scale |
| Narrow console | One local accent | Common language of lines | Number of handles and position relative to the axis |
This is an example of a design scheme, not a ready-made manufacturer's set. Before ordering, check whether the selected sizes and finishes are available in the assortment, whether their actual shades match, and whether the mounting methods are suitable.
Beech and oak: the handle material should support the overall finish
A pronounced handle shape works together with the wood. On beech and oak, the same profile can be perceived differently even before finishing: the fiber structure, surface pattern, and shade of the solid wood affect the appearance of a long piece and a small knob.
Beech is worth considering when a workshop needs a solid wood handle for subsequent opaque painting or for a finish with a calm grain pattern. But the name of the species alone does not mean the surface is ready for any enamel without primer, intermediate sanding, and a technological test. The choice of preparation option and coating must correspond to the technology adopted in the workshop.
Oak is often chosen when you want to preserve a noticeable wood texture. On a profile handle, the grain runs along the long part, while on a compact handle it is perceived differently. With a transparent or semi-transparent finish, the difference in tone and pattern between individual pieces can become noticeable on adjacent fronts.
If all the furniture is painted in a single opaque color, it is necessary to determine whether an open wood texture is needed at all. Sometimes a wooden handle with carefully matched paint is sufficient; in other cases, the task is solved by a different type of material. You should not choose oak just because it is considered more expensive or expressive.
When purchasing uncoated solid wood handles it is important to coordinate the species, surface condition, and intended finishing method. If a wardrobe is made of one material, a chest of drawers of another, and the handles must look completely identical, samples are tested on each combination rather than assuming that one stain color will produce an identical result.
Coordinating color means testing it on the material
The screen shows a representative image. On finished furniture, the color of the handle depends on light, species, surface preparation, and degree of gloss. Under matte enamel, the shape is perceived as softer; under clear lacquer, the wood shows through; and on tinted oak, the grain pattern can become a standalone accent.
For uncoated handles, it is better to separate three checks: whether the shape is suitable, whether the required painting system can be implemented, and whether the result matches the front. First approve the geometry and mounting, then perform a trial finish on one piece. If the surface or shade is unsatisfactory, it is the specific technological parameter that needs to be changed, not the entire furniture composition.
Uncoated or pre-finished handle: which is more rational for the project
A workshop has two options. Buy unfinished products, apply your own finish together with the fronts, and achieve a uniform result. Or choose wooden handles with a ready-made finish and reduce the number of operations in your own production.
The first option is convenient when the furniture color is non-standard, when the shade of legs, decorative parts, and handles must be precisely matched, or when a custom tinting system is used. But the purchase cost is increased by priming or other preparation, painting, drying, protection of mounting points, and sometimes a repeat cycle after defects. If the workshop does not have suitable equipment, in-house finishing can make a small batch more complicated and more expensive.
The second option is suitable when the available color and appearance of the ready-made finish match the furniture. At the same time, one should not assume that any model and any wood species are available in any shade. On the STAVROS website, certain versions with a finish are presented as separate products; for example, next to the unpainted Plane HL-011 there is a Plane HL-011M version. Compatibility of length, species, and color must be checked in the selected product page.
For a clear finish there is another nuance: two handles supplied in the same order may have natural differences in the wood grain pattern. In most solid wood products, this is a property of the material, not automatically a quality defect. However, in custom furniture with strongly pronounced symmetry, it is better to select the handles for adjacent doors and evaluate them side by side before installation.
| Production situation | What is worth checking first |
|---|---|
| Enamel is needed exactly to match the facade color | Unpainted version and the possibility of finishing using the workshop's technology |
| A ready-made color from the catalog is suitable | Finished version, lead time, and conformity to the sample |
| Oak should remain visible | Wood grain, tint, sheen, and compatibility with the facade |
| Need to quickly assemble several items without a painting area | Cost and availability of ready-coated handles |
| The series will be repeated in a few months | Ability to reorder the same SKU, finish, and coating |
The decision is made based on the total cost and repeatability of the result. An unfinished handle may cost less as a product, but that does not mean it is cheaper once it is ready for installation. And a ready-made coating does not always eliminate the need for a trial fit: geometry and grip do not automatically become suitable after painting.
Mounting: the drawing is needed before drilling the facade
A designer handle may look like a standalone wooden block or a neat button, but for a furniture maker it is primarily important how it is mounted. Two visually similar shapes can have a different number of mounting points, hole layout patterns, and facade thickness requirements.
The product pages for Plane HL-011 and Tetras HL-033 include an additional parameter D, which changes with the handle length. For example, for both models in finish A = 400 mm, D = 320 mm is specified, and in finish A = 500 mm, D = 384 mm. These values are consistent with differences in mounting geometry, but hole markings must be transferred only from the drawing of the specific finish, not from an assumption about the meaning of the letter.
This is especially important for a craftsman who is buying a new designer handle to replace an old one. If the existing front panel already has two holes, first measure the distance between their centers and compare it with the new layout. For example, conventional old centers with a spacing of 96 mm do not match new centers at 128 mm: the difference is 32 mm. The fact that the handle lengths match does not fix anything here by itself.
If the front panel has not yet been manufactured, do the opposite: approve the item number and installation layout, then assign the drilling coordinates in the working drawing. This avoids the situation where a finished expensive door requires new holes, and the old ones have to be covered with repair inserts.
What dimensions a craftsman needs before drilling
- Overall dimensions of the product. It shows how far the handle extends toward the edge of the front panel, the adjacent door, or the decorative frame.
- Position and number of fastening points. These are taken from the installation drawing of the selected model and size, not from the external length.
- Front panel thickness. It determines which fastening is permissible and what length of fastening elements is required.
- Access point for the fastener from the back side. The hole must not fall into a hidden crossbar, reinforcement, milled groove, or internal filling element.
- Working projection and grip area. After installation, the hand should not rest against the adjacent edge or catch on another decorative element.
- Position relative to hinges and mechanisms. The handle must not prevent the door from opening fully, and when the drawer is open, it must not catch on adjacent parts.
In the descriptions of the reviewed unpainted models Plane, Tetras, and Button, the manufacturer states that a fastening kit is included. Even so, the specific contents and compatibility with your front panel should be checked when ordering. The presence of screws does not mean that their length is suitable for a front panel of any thickness or a non-standard base.
When the handle intersects with the frame or decorative trim
On a paneled door, the mounting often has to be placed not on a free flat surface, but next to the frame molding. In that case, measuring the central axis of the door is not enough. You need to determine whether the support part of the handle will fit on the flat surface, whether the relief will overlap it, and whether access to the mounting holes will remain.
If the overlay or molding already protrudes forward, a large profiled handle may end up too close to them. Even without direct intersection, the parts interfere with fingers. When designing such furniture, it is sometimes wiser to shift the handle, choose a different size, or abandon the expressive shape in favor of a compact element.
If you need to select wooden furniture hardware entirely by mounting and purpose, a separate overview of handles for a wardrobe, chest of drawers, and kitchen. The design choice question is broader: in addition to hole dimensions, you need to achieve a complete visual pattern of the piece.
Placement of handles on doors and drawers: an example composition
On a chest of drawers with six identical drawers, the handles can be arranged on a single vertical axis, as two symmetrical knobs, or as one long horizontal handle. These are three different patterns, and the mounting method for each also differs.
Let's imagine a chest of drawers 1200 mm wide with two columns of drawers. The width of each front panel, excluding structural gaps, is conventionally 596 mm. If you choose one Plane handle 400 mm long for each drawer and center it, the margins relative to the front panel will be 98 mm each: (596 − 400) ÷ 2 = 98 mm. The handles will create six parallel lines of equal length.
Now suppose the top drawers need two knob handles positioned symmetrically. Here you cannot simply keep “98 mm margins.” You need to assign the coordinates of the knob centers separately relative to the vertical axis of the front, check the size of each knob and the actual grip. For such a composition, two points may look appropriate, but the number of mounting holes and operations increases.
A long handle has another compositional advantage: it can itself create a horizontal line that ties a row of fronts together. However, when the drawer is short, a large profile starts to take up a significant portion of its surface. In that case, it is more useful to reduce the length or choose a more compact type.
On a two-door wardrobe, check both handles at the same time. If the model has a noticeable protrusion, there must be sufficient working clearance between its outline and the opposite door. If the handles are located close to the central joint, it is worth checking the movement of both doors when opening at different angles. Only after such a test fit can the placement be considered approved.
Purchase calculation: how much real options cost and where additional expenses arise
It is useful to conduct a commercial comparison using specific configurations. In the card
If instead of Plane for four doors you take Tetras HL-033 in beech of the same length, the cost of this group will be 4 × 980 = 3,920 RUB — 560 RUB less. But this difference cannot lead to the conclusion that one model is more advantageous than the other for any interior. They differ in transverse geometry, and therefore in visual effect and in the feel of the grip.
To the base purchase cost, the workshop must add finishing, possible consumables, labor, delivery, and a reserve for replacing damaged parts. If the preliminary sample has already passed inspection and will be included in the main set, it is counted in the total quantity: there is no need to buy an eleventh handle just because the first one was initially used as a test piece.
When choosing ready-made coated options, repeat the comparison using their actual prices and availability. Do not compare an unpainted Plane of one size with a coated Tetras of another and attribute the difference only to material or design.
What is included in the actual cost of a handle installed on furniture
For custom finishing: product price + delivery + surface preparation + coating material + labor + fastening and installation + losses due to defects.
For a ready-made coating: price of the coated product + delivery + verification of conformity to the sample + fastening and installation + possible replacement if the finish does not match.
A workshop does not necessarily need a detailed financial model for a single bedside table. But when producing a series of twenty cabinets, even a small difference in the finishing operation and the defect rate begins to affect the overall cost. That is why the item code and finishing method are best approved before purchasing the entire batch.
One sample before the series: what actually needs to be tested
For custom furniture, one photograph and a size chart are not enough. A handle sample is needed not for formal purchase confirmation, but for consistently checking several different risks.
First, place the item against the facade where it is meant to work. Assess the scale from a normal viewing distance: a small knob can get lost on a large door, while a long profile can overpower a small drawer. Then check the actual finger grip, including the position of the hand near the side edge.
Next, make a test mounting base of the same thickness as the future facade. Attach the handle according to the drawing and open and close it several times. If an elongated profile is planned, it is advisable to check not only the center but also the areas near the ends, as well as possible wobbling under asymmetrical force. The behavior of the assembly is determined by all its parts, not just the handle.
After that, carry out a finishing test. For an unpainted item, use the preparation and coating system planned for the finished furniture. Check not only the shade, but also how the surface feels to the fingers after drying, the quality of edge treatment, and the appearance near the fasteners.
And only when the shape, grip, mounting, and finish are agreed upon does the handle become an approved item. For a small furniture series, it is enough to keep the sample itself, its photograph on the facade, the dimensions, and the exact mounting diagram. A few months later, this information will be more useful than an approximate memory of "we used long oak handles."
How to record a designer handle in a furniture specification
In production documentation, it is better to use a separate line for each size and finish. One item code with several length options cannot be recorded as a single undefined position: the warehouse and the assembler must know exactly which model to install on a specific door.
| Specification field | Example entry | Why it's needed |
|---|---|---|
| Model | Plane HL-011 | Eliminate substitution with a similar shape |
| Finish | Length A = 400 mm, beech | Distinguish from other sizes and wood species |
| Full product address | Link to the specific product page | Quickly open the drawing and current options |
| Dimensional diagram | A/B/C/D according to the approved drawing | Verify mounting holes and dimensions |
| Finishing | Approved paint system code | Match color and gloss |
| Installation location | Cabinet door, model Sh-02 | Do not confuse with a drawer or another door |
| Mounting coordinates | From the base edges of the front | Repeat the placement without marking "by eye" |
| Quantity | Four pieces per set | Place an order without a shortage |
| Sample | Photo and approval date | Check the repeat order |
Here it is important to distinguish between the product size and the design coordinate. Size D, A, or C comes from the manufacturer's drawing; the installation point relative to the edge of the front is specified by the workshop. One value does not replace the other.
For two different handles in one set, create two lines, even if they are the same color. For coated versions, specify the exact modification, not just the base model without clarification. For a repeat order, it is useful to also save the date the card was checked and the specific agreed version.
If a workshop produces a small batch, the first step is to approve one door or one drawer in full. After that, the coordinates are transferred to the remaining parts using a production template or drilling jig. This is more reliable than placing the handle on each door and finding the center by hand.
When a distinctive wooden handle is better not to choose
Not every furniture project needs a solid wood accent. Sometimes a wooden handle will complicate the piece without any visible benefit, and this should be determined before purchase.
Narrow passage and protruding parts. If people constantly pass near the furniture or an open door leaf is close to a wall, a large surface-mounted handle can get in the way. Here it makes sense to compare a short handle with a flatter option or a recessed design. Reducing the length is not enough if the problem is the protrusion from the front.
Very active carving or a strongly pronounced front. When the door already has a large wooden overlay and a deep molded frame, another complex geometric element can disrupt the composition. For such furniture, it is more sensible to choose a calm shape and preserve a comfortable grip rather than create an additional visual focal point.
Technologically inconvenient mounting. It happens that a handle that looks suitable requires holes in the area of a frame joint, a hidden edge, or another important front assembly. The holes cannot be moved arbitrarily: otherwise the chosen item will either no longer mount properly or the furniture structure will be compromised. In such a situation, the model is changed rather than trying to adapt a finished door to a preferred SKU.
Excessive maintenance demands. Dirt can accumulate in complex relief, and the coating in a constantly gripped area experiences repeated mechanical stress. For furniture in a room with frequent cleaning or high humidity, the material, coating, and ease of cleaning need to be checked separately. An unfinished solid wood handle without a suitable finish does not automatically become ready for such conditions.
Lack of repeatability in a series. If a manufacturer plans to produce the same furniture in small batches, they need to understand whether the selected handles can be obtained again in the same sizes and finishes. A complex one-off shape may be wonderful for a single custom piece, but inconvenient as a permanent item in a series specification.
There are also cases when a handle is not needed at all: the design provides for reliable opening by a prepared edge, a hidden profile, or a specially selected mechanism without protruding hardware. Such an intention should not be disrupted just to install a wooden decorative element.
Where to buy designer wooden handles and how to place an order without mistakes
In the STAVROS catalog you can buy wooden handles for furniture, choosing between compact, elongated, and profile pieces. For a custom cabinet, it is convenient to first compare the Plane and Tetras models; for a chest of drawers and a nightstand, additionally consider Button and Module. Different models suit different tasks, so a commercial search should start with the shape and size of the front, not with sorting by price alone.
If you need a maximally independent finish, unpainted wooden handles are suitable for preliminary selection. When the chosen factory finish is satisfactory, compare the options in the category of coated handles. For a long graphic line, you can separately view wooden profile handles, and for a compact point on the front — handle-buttons. The final choice is always made based on a specific product card.
For custom furniture production, it is more correct to send the supplier not a general request like “we need designer wooden handles,” but a list of agreed items: model, length, wood species, type of finish, quantity, card address, and, if necessary, clarification on the mounting kit. The terms of working with furniture workshops can be checked in the section for manufacturers, and the procedure for receiving the goods — on the page payment and delivery.
It is also useful to look in advance at STAVROS product quality requirements, especially if the project involves further painting and strict requirements for the surface. When ordering several dozen items, agreements on timing, material, and execution should be confirmed before the fronts go into production.
The sequence for a practical order looks like this:
- Choose the leading shape based on the furniture composition and the opening method.
- Match several real sizes against the front; don't limit yourself to one long option.
- Check the parameters and mounting against the card of the selected version.
- Order and install a sample, evaluate the grip, placement, and finish.
- Record the SKU, dimensions, material, finish, and hole coordinates in the specification.
- Count the quantity for all doors and drawers; include the already-tested sample if it will go into the product.
- Compare the full cost of ready-made handles and unfinished products, taking your own operations into account.
- After approving the first front, place the main order and repeat installation using a single template.
With this sequence, a designer handle remains part of thoughtfully designed furniture rather than turning into an unexpected problem at the final assembly stage.
Frequently asked questions when choosing designer wooden handles
Can an accent handle be installed on a facade with a deep panel?
Yes, if the chosen model has a suitable flat area for mounting and enough space for a full grip. A decorative frame or deep panel sometimes leaves too narrow a smooth strip. Do not try to compensate for this by arbitrarily moving the mounting holes onto the bevel: first check the contact of the handle's support parts with the facade and the position of the fasteners according to the drawing. If there is not enough flat surface, it is worth choosing a more compact model or reconsidering the handle's placement.
What should I do if the handle looks right but the facade is too thin for standard mounting?
First, study the installation diagram and the base requirements for the specific product. The possibility of using different fasteners or reinforcement is determined by the design of the facade and the handle, not by wood thickness alone. For a thin frame or a complex composite facade, you cannot simply replace the screw with the first one that fits in length: the fastening must work reliably under repeated stress. If the design does not allow such a connection, choose a different handle or change the project before manufacturing the part.
Why can two identical oak handles look different on adjacent doors?
Solid wood has natural variations in grain and shade. On long handles, the direction of the grain is more noticeable, especially under clear or tinted finish. Adjacent doors may also be lit at different angles, which changes color perception. Before installation, lay out the received handles next to each other on the facades, choose the most matching pieces for a symmetrical pair, and compare them after a test coating if the finishing is done in the workshop.
Should a wooden handle be matched in color with visible metal hinges?
An exact material match is usually not required. A wooden handle can support the facade wood, while visible metal hardware forms a separate small accent. But several contrasting elements in one area can clash with each other. Evaluate the assembled furniture as a whole: the color of the handle, the shade of the hinges and other metal parts, the position of the elements, and the number of repeats. If the hardware is concealed, there is no point at all in matching the handle color to invisible hinges.
Can one handle model be installed both vertically and horizontally?
For some geometric shapes, this solution is possible and visually logical. However, changing the direction must not contradict the installation diagram or make the grip inconvenient. Test the sample in both positions, especially if the profile has a pronounced working edge or unequal side shapes. In the series, fix the orientation for each type of facade: the same article number on a drawing without specifying the installation direction does not guarantee the same result.
What should you do if the required handle size is no longer available when reordering?
Do not automatically replace it with the nearest length. First, compare the new dimension with the hole positions, adjacent gaps, and the overall composition. If the drilling pattern cannot be changed, look for a compatible version or arrange to modify specific fronts. For serial furniture, it is useful to find out the supplier's reorder terms before the first production run and keep a complete list of approved sizes. This is especially important when handles become a noticeable part of the collection's signature design.
Can a purchased handle be sanded further if a different finish is required?
An unfinished part may allow additional surface preparation, but sanding must not uncontrollably alter edges, radii, and mounting areas. Repeatability is especially easy to disrupt on a small geometric knob. If the product already has a coating, removing it or repainting requires a separate check of material compatibility. For an expensive furniture collection, it is better to select the required version in advance and run a test on one sample than to try to rework all items after delivery.
What should be considered if the fronts are veneered and the handles are solid wood?
You should compare not only the species name but also the color, grain direction, coating character, and proportions. On a veneered front, the grain may be carefully matched or symmetrically mirrored, while a solid wood handle has its own structure. Sometimes it is better to make the handle in the color of the front and remove the competition between grains. Sometimes, on the contrary, a pronounced oak handle becomes a planned wooden accent against a calm background. The final decision is checked on real materials side by side.
A successful designer wooden handle is a detail whose shape, scale, ease of opening, finish, and installation are coordinated before the front is manufactured. Then it truly reinforces the author's intent and retains its character when repeated across an entire furniture collection.