Article Contents:
- Confirmed specifications of MLD-006 and MLD-011
- MLD-006 or MLD-011: comparison of same width and different depth
- Why same width does not mean same result
- Why MLD-011 cannot be considered a reduced copy of MLD-006
- MLD-006 35 × 23 × 2400 mm: when depth works for the project
- MLD-011 35 × 20 × 2400 mm: when a calm depth is needed
- What three millimeters of depth change
- How depth affects light and shadow
- How to check the profile with a cardboard template
- How to check both profiles by DWG
- Selection for a large furniture facade
- Selection for a small furniture door
- MLD-006 for a cabinet and bookcase
- MLD-011 for a kitchen group
- MLD-006 for a sideboard
- MLD-011 for a chest of drawers and nightstand
- Molding frame on an interior door
- MLD-006 on a tall classic door
- MLD-011 on a small door
- Molding near the door handle
- How to account for the lock and hinges
- Wall panels and boiserie
- MLD-006 for an accent wall
- MLD-011 for a small room
- Frame around a painting or mirror
- Single or double frame
- How to combine two profiles in one room
- How to combine molding with trim
- How to connect molding with the cornice
- Beech for enamel
- Oak for tinting
- What does "Prestige" sanding mean
- How to get the same color for molding and door
- How to avoid flooding the relief with enamel
- Paint before or after installation
- How to calculate the perimeter of one frame
- How many 2400 mm slats are needed for the facade
- How to calculate molding for four doors
- Cutting map for wooden molding
- Allowance for corner joints
- Cutting wooden molding at 45 degrees
- How to check the actual angle of the frame
- How to position joints
- Can leftovers be used
- Installation on MDF
- Installation on solid wood
- Installation on painted wall
- How to choose glue
- Is mechanical fixation needed
- How to press a long strip
- How to remove excess glue
- How to care for the finished frame
- MLD-006 in the living room
- MLD-011 in the bedroom
- MLD-011 in the hallway
- MLD-006 in the study
- Moldings in the dressing room
- Moldings in commercial interiors
- How to check the profile in full size
- How to check the cumulative effect of a series
- How to choose a molding for furniture restoration
- How to replace an old molding without new traces
- How to choose a profile for custom-made new furniture
- How to choose a profile for ready-made furniture
- How to check the distance to the edge of the facade
- How to check the distance between two frames
- How to match a frame to a baseboard
- How to match a frame to a ceiling cornice
- How not to confuse a molding with a casing
- How not to confuse a molding with a cornice
- How not to confuse a wooden molding with a random batten
- Mistake: choosing only based on a frontal photo
- Mistake: always assuming 3 mmMistake: not considering adjacent doors
- Mistake: not considering adjacent doors
- Error: do not account for loops
- Error: calculate only the net perimeter
- Error: assign universal stock
- Error: use molding as a load-bearing frame
- Error: choose different material in one frame
- Error: mix enamel preparation and tinting
- Error: do not check corner quality before painting
- Error: mount on weak coating
- Error: use one glue for all surfaces
- Error: do not mark cut pieces after cutting
- Error: do not consider the oak pattern
- Error: make an intermediate joint on the visible side
- Error: paint parts from different batches separately
- Who is MLD-006 suitable for
- Who MLD-006 may not suit
- Who is MLD-011 suitable for
- Who MLD-011 may not suit
- When it is better to choose MLD-001
- How not to confuse molding with trim and cornice
- How to buy MLD-006 or MLD-011 on STAVROS
- What to check before payment
- What not to do from scratch
- How to accept an order before finishing
- How to store planks 2400 mm long
- How to check the finished frame
- How to check MLD-006 under side lighting
- How to check MLD-011 in a series of facades
- How to choose a model for a white kitchen
- How to choose a model for an oak library
- How to choose a model for a double-door cabinet
- How to choose a model for one accent door
- How to choose a model for the lower part of the wainscoting
- How to choose a model for the upper part of the wall
- How to match the profile with a handle bracket
- How to match the profile with a button
- How to match the profile with a panel
- How to match the profile with carved overlays
- How to prepare a specification
- How to save data for reordering
- Check question before ordering
- What to buy together with MLD-006 or MLD-011
- How to check the profile on a facade sample
- How to match depth with door thickness
- How to account for light direction in a cabinet group
- How to account for cleaning and daily contact
- How to check compatibility with carved decor
- How to calculate an order for multiple rooms
- How to avoid confusion during installation
- Why it's better to decide before making the facade
- Final check before ordering
- FAQ: questions about MLD-006 and MLD-011
- How is MLD-006 different from MLD-011?
- Why does the result differ with the same width?
- How much does MLD-006 protrude more?
- Which molding is better suited for a large facade?
- Which model should I choose for a small door?
- Which molding interferes less with the furniture handle?
- Can MLD-006 be used on a wall?
- Will MLD-011 fit an interior door?
- Are the profile shapes the same?
- Do I need to compare DWG files?
- Which molding should I choose for white enamel?
- When is the best time to order oak?
- How to calculate the number of planks 2400 mm long?
- How much extra should I add for corners?
- Can I combine both models in one room?
- Can I combine them in one frame?
- How to glue molding to MDF?
- Is mechanical fixation necessary?
- Can I use molding as a mirror frame?
- Where to buy MLD-006?
- Where to order MLD-011?
- What to buy together with the molding?
- How to check the difference before purchase?
- What should I check before ordering?
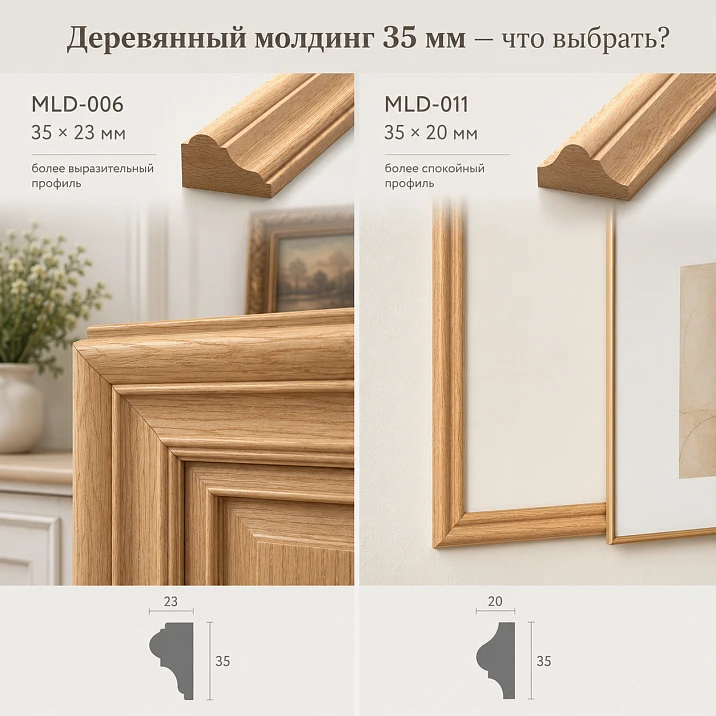
A wooden molding 35 mm wide can be purchased for a furniture frame, door, cabinet, boiserie, and wall panel, but the same width does not mean the same result. MLD-006 has dimensions 35 × 23 × 2400 mm, MLD-011 — 35 × 20 × 2400 mm. The depth difference is only 3 mm, yet MLD-006 protrudes above the surface by 15% more relative to MLD-011. On one small door this seems like a nuance, but on a series of facades it changes the light and shadow, visual mass, and distance to handles, hinges, and adjacent frames.
Buy molding MLD-006 is suitable for a large cabinet, library, sideboard, tall door, or accent wall panel, where the profile should be readable from a distance. Buy molding MLD-011 is better for a small door, a repeating kitchen group, and a frame next to a handle, when a width of 35 mm is needed but a 23 mm protrusion seems excessive.
Both models have a length of 2400 mm, are made of beech or oak, and are offered with "Prestige" sanding and preparation for enamel or tinting. Due to the same width, they are easy to place side by side on a paper diagram, but MLD-011 should not be considered a reduced copy of MLD-006. The profiles may differ in the shape of the central relief, radii, and side platforms, so before producing frames, both drawings need to be compared.
The main question of the article sounds practical: if the frame must remain 35 mm wide, which depth is better — 23 or 20 mm? The answer depends on the scale of the facade, distance to hardware, number of repeats, lighting, material, and finish. The choice begins not with the model name, but with a cardboard template of the actual cross-section on the specific furniture or wall.
Short answer. MLD-006 35 × 23 × 2400 mm is chosen for a deeper frame with a pronounced side shadow. It is especially suitable for large facades, wall panels, libraries, and tall classic doors.
MLD-011 35 × 20 × 2400 mm retains the same width of 35 mm but protrudes less. It is more convenient next to furniture handles, on small doors, kitchen fronts, and in a series of repeating frames. Before ordering, attach two cross-section templates to the surface and check the opening of all adjacent elements.
Buy MLD-006 Buy MLD-011 View all wooden moldings Choose a molding for a door Order a frame calculation
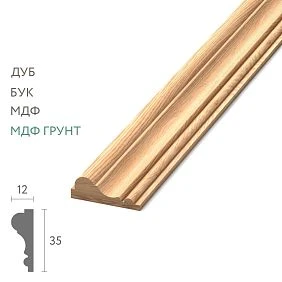
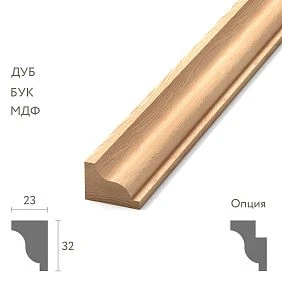
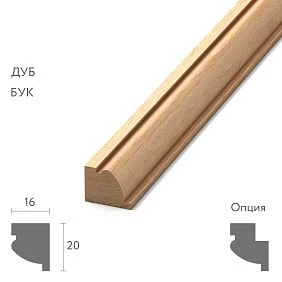
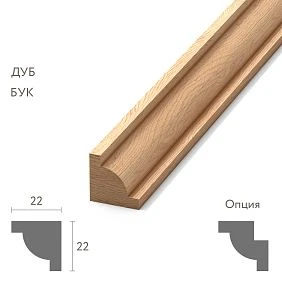
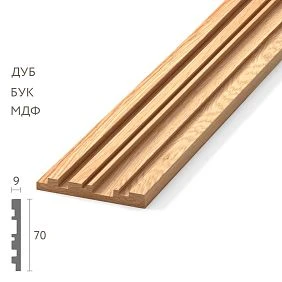
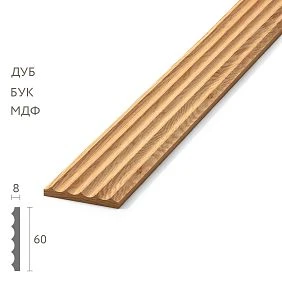
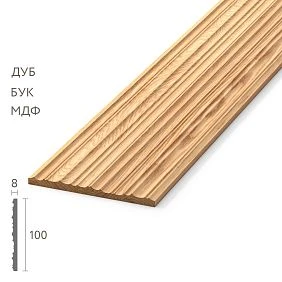
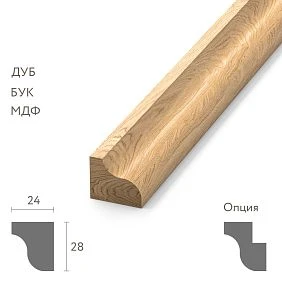
Confirmed specifications of MLD-006 and MLD-011
| Parameter | MLD-006 | MLD-011 |
|---|---|---|
| Size A × C × L | 35 × 23 × 2400 mm | 35 × 20 × 2400 mm |
| Width A | 35 мм | 35 мм |
| Depth C | 23 мм | 20 мм |
| Length L | 2400 мм | 2400 мм |
| Material | Beech or oak | Beech or oak |
| Sanding quality | «Prestige» | «Prestige» |
| Preparation | For enamel or tinting | For enamel or tinting |
| Main Feature | Deeper projection at 35 mm width | More compact projection at the same width |
| Typical Scale | Large facade, door, library, wall panel | Cabinet door, kitchen, frame series, small door |
| Compatibility | Checked against DWG and installation location | Checked against DWG and installation location |




MLD-006 or MLD-011: comparison of same width and different depth
| Criterion | MLD-006 35 × 23 mm | MLD-011 35 × 20 mm | Practical conclusion |
|---|---|---|---|
| Depth | 23 мм | 20 мм | MLD-006 protrudes 3 mm more |
| Relative difference | 15% deeper relative to 20 mm | Approximately 13% less relative to 23 mm | Percentages are calculated from the selected comparison base |
| Chiaroscuro | More pronounced | Calmer | Side light enhances the difference |
| Large facade | Reads more confidently | Looks lighter | The choice depends on the overall furniture architecture |
| Small door | May appear massive | Usually easier to place | Need a cross-section template |
| Near the handle | Requires increased clearance | Less risk of visual conflict | Check the working grip |
| Series of frames | Creates a rich repeat | Provides a more versatile rhythm | Cumulative effect is more important than a single frame |
| Interchangeability | Not confirmed | Not confirmed | Need to compare DWG, radii, and platforms |
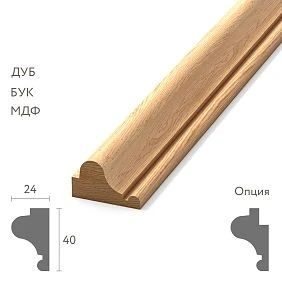
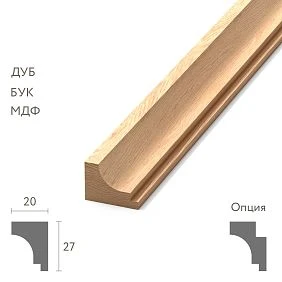
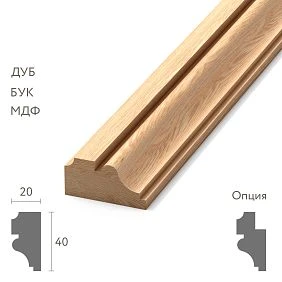
Our factory also produces:





Why same width does not mean same result
Width of 35 mm determines the visible frame field on the facade, but depth is responsible for the protrusion, shadow, and contact with the hand. The 23 mm profile stands out more from the surface and changes the side silhouette of the door more significantly.
MLD-011 protrudes by 20 mm and retains the full width of the frame. Therefore, it can look equally wide from the front, but lighter from the side and under side lighting.
On one part, a difference of 3 mm is small. On four sides of the frame and several adjacent facades, it creates a stable visual character for the entire piece of furniture.
Get Consultation
Why MLD-011 cannot be considered a reduced copy of MLD-006
Matching width and length do not prove an identical cross-sectional shape. The central apex, radii, slope of side sections, and transition to the plane may differ.
If one model is replaced with another within an already calculated frame, the ends and corners may look different. This is especially noticeable on 45-degree miter cuts.
Before producing facades, both drawings are opened and not only the numbers A, C, and L are compared, but also the full profile contour.
MLD-006 35 × 23 × 2400 mm: when depth works for the project
A deep profile suits large surfaces where the decorative line should be visible from a distance. On a library, sideboard, or tall door, it forms a richer frame.
The 23 mm protrusion enhances the side shadow and visually separates the central panel from the body. This effect is especially noticeable under directional lighting.
For this task, you can buy deep profile 35 × 23 mm and test it with a cardboard template on an actual facade.
MLD-011 35 × 20 × 2400 mm: when a calm depth is needed
The compact profile maintains a width of 35 mm but protrudes less. It suits small doors, kitchen facades, and repeating frames.
The 20 mm depth makes placement near handles easier and reduces the risk of collision with adjacent doors. This does not eliminate the need to check opening, but expands layout flexibility.
If a restrained protrusion is needed, you can buy compact profile 35 × 20 mm and compare it with MLD-006 in full size.
What three millimeters of depth change
Three millimeters affect the shadow size, distance to the handle, end silhouette, and height of the corner joint.
On a light facade, the difference is noticeable in the softness of the shadow; on a dark one, in the highlight and side contour. Under enamel, the profile is read by shape; under tinting, wood texture is added.
The practical choice is made not by the number 3 mm, but by how the entire perimeter of the frame interacts with the surface.
How depth affects light and shadow
The farther the profile peak is from the surface, the longer and more contrasting the side shadow is under directed light.
MLD-006 may look more architectural on a large wall or door. MLD-011 creates a calm line that does not compete with handles and other details.
A test piece is examined during the day, in the evening, and with the backlight on. One frontal photo does not show the actual volume.
How to check the profile with a cardboard template
A section of 35 × 23 mm and 35 × 20 mm is cut from thick cardboard. The template is applied perpendicular to the surface in the area of the future frame.
This way you can see how much the molding protrudes next to the handle, hinge, trim, and adjacent door. To evaluate light, the template is made three-dimensional or a short wooden sample is used.
The check takes a few minutes and helps to avoid an unsuitable depth before ordering the full footage.
How to check both profiles by DWG
The drawing shows not only the maximum width and depth, but also the actual profile curve. This data is important for the miter cut and joint with other products.
Compare the position of the apex, side platforms, and transition to the base. Even the same maximum of 35 mm can be distributed differently.
The installer and furniture maker must work with the same version of the drawing, not with an approximate sketch from the catalog.
Selection for a large furniture facade
On a tall cabinet door or wide panel, MLD-006 often looks more convincing. The 23 mm depth helps the frame not get lost on a large surface.
MLD-011 is also suitable for a large facade if the furniture should be lighter and calmer. It is especially appropriate on a series of doors where one deep profile would be repeated too actively.
For the final selection, lay out the full rectangle, rather than comparing two short segments.
Selection for a small furniture door
A small facade requires free space between the frame, edges, and handle. MLD-011 is usually easier to fit due to its 20 mm depth.
MLD-006 may take up too much volume, although its width formally fits. The side protrusion can make a small door heavy.
Minimum clearances are not assigned universally: they depend on the handle, hinge, door thickness, and profile shape.
MLD-006 for cabinet and bookcase
A deep molding suits tall classical furniture, where the frame should continue the cornice and pilaster architecture.
On a bookcase, it can frame glass sections or central panels, but is not a load-bearing frame for the glass.
The 2400 mm length allows for long verticals without an intermediate joint on most furniture fronts after calculation.
MLD-011 for kitchen group
In the kitchen, frames are repeated on many doors and drawers. A calmer protrusion helps maintain integrity without excessive relief.
MLD-011 is easier to combine with furniture handles, built-in appliances, and adjacent fronts. Checking the work area is still mandatory.
Birch under enamel allows the profile to be linked with a painted kitchen, oak under stain — with natural fronts and countertop.
MLD-006 for buffet
Buffet and display case allow for more expressive relief, especially on wide doors and central sections.
Depth of 23 mm supports the cornice and massive base, creating a cohesive vertical architecture.
On small drawers of the same furniture, a different profile can be used only after deliberate separation, otherwise the fronts will look inconsistent.
MLD-011 for dresser and nightstand
On a dresser, handles and frequent use of drawers are important. A 20 mm protrusion usually interferes less with grip and maintains a calm scale.
Width of 35 mm remains noticeable, so the profile does not look like a thin strip. It forms a full frame even on a medium-sized front.
Before installation, check that the lower part of the molding does not touch the adjacent drawer when opening.
Molding frame on interior door
On a smooth panel, a wooden profile creates a paneled pattern without completely replacing the door. MLD-006 provides a deeper classic relief, MLD-011 provides a more restrained frame.
The decor should not interfere with the handle, lock, casing, or opening. The depth is checked when the door is fully swung open.
Ready interior door decor ideas help choose the placement, but the specific frame size is calculated separately.
MLD-006 on a tall classic door
The tall door leaf and large panel allow using a 23 mm profile without feeling overloaded.
The pronounced shadow supports the cornice, wide casing, and other classic elements.
If the door is located in a narrow hallway, the side protrusion is checked especially carefully to ensure the frame does not hit the wall or furniture.
MLD-011 on a small door
A depth of 20 mm suits a compact door leaf and several repeating frames.
The profile maintains a width of 35 mm, so the pattern remains noticeable but protrudes less into the passage.
On a double door, check the gap between the moldings of both leaves when opening simultaneously.
Molding near the door handle
The hand working area must remain clear. Measure not only the distance on the plane, but also the handle protrusion relative to the profile.
MLD-011 reduces the risk of conflict, but 20 mm can also interfere on a narrow door. MLD-006 requires a wider field.
The paper template of the handle and molding is installed simultaneously before marking the holes.
How to account for the lock and hinges
The molding must not cover hidden fastening areas or interfere with lock maintenance.
On the inner side of the frame, check the distance to recessed elements, especially if the door is thin or the profile is installed close to the edge.
Hinges are evaluated when fully open. The decorative frame must not touch the casing or adjacent surface.
Wall panels and boiserie
On the wall, the difference in depth is more pronounced due to side lighting and a large number of frames.
MLD-006 is suitable for an accent wall and large panels, MLD-011 for a series of frames in a small room and the lower part of the wall.
In the section ideas for decorating walls with wooden moldings you can assess the scale of the finished panels and choose the direction of the project.
MLD-006 for an accent wall
The deep profile creates a pronounced architectural grid and reads well next to the cornice and baseboard.
It is better to use it on a sufficiently large wall where shadows do not fragment the space.
The distance between frames is calculated based on the overall composition, not on the width of the profile individually.
MLD-011 for a small room
The compact protrusion helps maintain a decorative width of 35 mm without excessive volume.
On a narrow wall or in a hallway, the profile protrudes less into the passage and creates a calm light-and-shadow effect.
The number of frames is limited so that the wall does not appear broken into too many small sections.
Frame around a painting or mirror
Molding can form a wall frame around an object but should not serve a load-bearing function for glass or mirror.
MLD-006 creates a more pronounced outer contour, MLD-011 provides a neat framing next to a thin frame.
The mounting of the painting and mirror is designed separately from the decorative profile.
Single or double frame
A single frame looks calmer and suits small facades. A double frame creates more complex architecture and requires more free space.
For a double composition, MLD-011 is often more convenient as the main profile, with a thinner molding as the inner contour.
You can view thin wooden molding and compare it as an additional frame, without mixing sections without a layout.
How to combine two profiles in one room
MLD-006 and MLD-011 can be used in different zones if each has a permanent role. For example, a deep profile on the main wall, a compact one on furniture.
On a series of identical facades, mixing often looks like a mistake. The difference in depth is noticeable by the shadow and corners.
The material, color, and finish quality should tie both models into one system.
How to combine molding with trim
The wide trim and frame should have a consistent scale and depth.
Before ordering, you can choose a wide wooden trim and check it next to MLD-006 or MLD-011.
You cannot assume automatic profile matching: compare drawings, width, projection, and joint line.
How to connect molding to cornice
The top line of furniture or a wall can support the same material and finish as the frames.
You can match a wooden cornice to the molding and assemble a complete composition.
Deep MLD-006 is more often paired with a massive top line, MLD-011 with a more restrained one, but the decision is tested on the full facade.
Beech under enamel
Beech is chosen for opaque finishes and painted furniture. A uniform surface helps achieve an even color across the entire frame.
Under enamel, the difference between 20 and 23 mm is especially noticeable by the shadow, because the wood texture does not distract from the shape.
Profiles, trims, and cornices are painted in one batch of materials to maintain a consistent shade and gloss.
Oak under tinting
Oak is suitable for projects with visible wood texture. On a wide 35 mm profile, the pattern is clearly visible.
MLD-006 emphasizes volume and texture, MLD-011 looks calmer but retains a natural character.
Tinting is tested on a trial section because end cuts and longitudinal surfaces may absorb the compound differently.
What does "Prestige" sanding mean?
"Prestige" quality involves detailed surface preparation for finishing.
This is not a ready-made enamel, stain, or varnish. The profile still goes through the agreed painting cycle.
Before cutting, inspect the face side and set aside sections with the most suitable grain for visible sides of the frame.
How to achieve the same color for molding and door
The profile and facade are finished with the same system, or an accurate test coat is made next to the finished surface.
The color name does not guarantee a match between different materials. This is especially important when tinting oak and repairing old furniture.
The sample is evaluated under daylight and artificial lighting before ordering the full length.
How to avoid flooding the relief with enamel
A thick layer of primer and paint smooths the profile and reduces the difference between models.
The compound is applied evenly, controlling the top, valleys, and side transitions.
After each layer, the molding is examined under side lighting, and sags in the corners are not allowed.
Paint before or after installation
Pre-painting is convenient for side edges and long profiles. Installation after finishing requires careful work with joints.
Painting an assembled frame helps unify seams, but access to inner sides becomes more difficult.
Often the main cycle is done before installation, and local touch-ups are made after installation.
How to calculate the perimeter of one frame
For a rectangle, add two heights and two widths along the cut line. Dimensions are taken from the approved frame geometry, not from the overall facade dimension.
Then consider corner cuts and technological allowance. The exact allowance depends on the number of frames, the craftsman's experience, and pattern matching requirements.
The formula helps determine the net footage, but a cutting map is needed to convert the result into 2400 mm strips.
How many 2400 mm strips are needed for the facade
The net perimeter is not mechanically divided by 2400 mm, but distributed across individual sides. Each segment must fit into a whole strip, accounting for the cut.
A long vertical can take up almost the entire strip and leave a remainder for the short side. It is more advantageous to calculate several facades with one map.
Before ordering, check whether the remnants can be used on small doors without a visible intermediate joint.
How to calculate molding for four doors
First, record the dimensions of each frame, then group identical sides by length.
From a 2400 mm strip, combinations of segments are selected with minimal waste, not forgetting the cut width and corner processing.
The calculation is performed separately for MLD-006 and MLD-011 if the models are used in different zones.
Cutting map for wooden molding
The map shows which sides are cut from each plank. It prevents accidental waste of long elements on short parts.
The diagram marks the facade number, the direction of the oak grain, and the visible side.
For serial furniture, the map reduces differences in shade and helps pair sides from similar wood areas.
Allowance for corner joints
Allowance is needed for the width of the cut, test corners, fixing chips, and matching the pattern.
A universal percentage cannot be assigned without dimensions and the master's experience. A large number of small frames require a different allowance than one large one.
Before ordering, the master approves the cutting map and specifies additional footage.
Cutting wooden molding at 45 degrees
The nominal 45-degree angle only works with a rectangular frame and precise facade geometry.
First, check the actual angle, then perform a test joint on short samples.
MLD-006 and MLD-011 may show a small gap differently due to varying depth and profile shape.
How to check the actual frame angle
A square and diagonals help determine if the base is rectangular.
On an old door or wall, the angle may differ from 90 degrees, so two identical cuts will not create a tight joint.
A slight deviation is adjusted on site, without filling a large gap with a thick layer of material.
How to position joints
On a furniture facade, it is better to use solid sides without intermediate joints.
If the wall length exceeds 2400 mm, the joint is placed in a less visible area and the wood grain is matched.
Two models cannot be joined together as a continuation of one line without a special project: the depth difference will be noticeable.
Can leftovers be used
Short leftovers are suitable for small facades, trim samples, and test corners if the length is sufficient.
Before use, check for damage, color match, and pattern direction.
The remainder should not create an extra joint just to save one long side.
Installation on MDF
The facade must have a durable, even coating and sufficient contact area.
Choose adhesive based on the base material and finish. A thick layer should not be used to level out unevenness.
Mechanical fastening, if needed, is determined by the installer; universal installation using only adhesive cannot be guaranteed.
Installation on solid wood
On solid wood, consider the grain direction, surface condition, and wood changes due to humidity.
The molding and base can be finished together or separately according to an agreed-upon technology.
Fasteners must not split the profile or protrude to the visible side.
Installation on a painted wall
The strength of the connection depends on the adhesion of the paint to the wall. If the coating peels off, the molding will come off with it.
The base is cleaned and the compatibility of the mounting compound is checked.
For long frames, temporary support and additional fixation may be required according to the project.
How to choose glue
The compound is selected based on the base, wood species, coating, and profile position.
In the category you can buy glue and materials for installing wooden molding after checking the instructions.
The exact consumption is not specified without the contact area and surface condition. A test connection is performed before the main work.
Is mechanical fixation needed
The solution depends on the length, frame weight, base, and operating conditions.
On the facade, thin fasteners can be supplemented with glue, but their position must not damage the relief.
On a wall or ceiling, the layout is calculated separately. There is no universal method for all projects.
How to press a long strip
Pressure is distributed evenly along the entire length without deforming the profile.
Use soft pads and temporary stops compatible with the finish.
Excessive local pressure can leave a dent or shift the frame relative to the markings.
How to remove excess glue
Remove the compound according to the instructions, without smearing it on the wood and enamel.
On oak under tinting, glue can alter the absorption of the finish, so the front surface is protected.
Angles are checked under side light after setting.
How to care for the finished frame
Dust is removed with a soft cloth or brush, without flooding the joints with water.
Care products are chosen based on the finish coating, not just the wood species.
Loosening of the profile requires checking the fastening and base, not cosmetic masking of the seam.
MLD-006 in the living room
A deep profile is suitable for an accent wall, library, TV area, and large door.
It forms a noticeable architectural line that connects furniture and wall panels.
In a small living room, the number of frames is limited so that shadows do not fragment the space.
MLD-011 in the bedroom
Compact depth suits cabinets, doors, the wall behind the headboard, and the vanity table.
The 35 mm wide profile remains noticeable but does not create excessive bulk next to soft textiles.
The shade is matched to the furniture, door, and baseboard using a single test swatch.
MLD-011 in the hallway
Narrow passages are especially sensitive to protruding details. A depth of 20 mm is usually more convenient near doors and cabinets.
The frame is checked from the side and with all doors fully open.
If an accent wall panel is needed, MLD-006 is only considered when there is sufficient free space.
MLD-006 in the study
The library and study wall panels can accommodate a deeper profile.
Oak under tinting emphasizes the natural character, beech under enamel supports the painted architecture.
The fixtures are directed so that the profile creates a controlled shadow, not random sharp stripes.
Moldings in the dressing room
On tall doors, you can combine MLD-006 for central sections and MLD-011 for small drawers, if the difference is pre-planned in the project.
On identical facades, it is better to keep one model.
Vertical frames are checked near handles and when opening adjacent doors.
Moldings in commercial interiors
In a hotel, salon, restaurant, or showroom, frames are often repeated over a large area.
MLD-006 creates a more solemn architecture, MLD-011 creates a calm serial grid.
Before mass ordering, assemble one control section with real lighting, finish, and mounting.
How to check the profile in full size
A short sample shows the shape but not the full scale of the frame. Therefore, all four sides are laid out on the facade using cardboard or temporary strips.
Compare MLD-006 and MLD-011 at the same height and under identical lighting.
The result is photographed from the front and side so that all project participants can approve the solution.
How to check the cumulative effect of a series
One frame may look calm, but twenty identical frames will create a dense grid.
MLD-006 enhances repetition more due to its 23 mm depth. MLD-011 produces a lighter result.
In the kitchen and cabinet group, mock up not just one door but at least three adjacent facades.
How to choose molding for furniture restoration
First, measure the old profile, attachment marks, and the free field of the facade.
The new model does not have to overlap the previous frame. A difference in depth may reveal unpainted or faded areas.
Cover repair and new markings are planned before purchasing the full footage.
How to replace old molding without new marks
Not only the width of 35 mm must match, but also the position of the outer and inner edges.
MLD-006 and MLD-011 may cover the old contour differently due to the cross-section shape.
A test piece is applied to the cleaned facade and marks are evaluated from all sides.
How to choose a profile for new custom furniture
Molding is included in the drawing before door manufacturing. The cabinetmaker sets margins, handles, hinges, and cut lines in advance.
This allows using MLD-006 on large facades without risk of collision and MLD-011 on compact sections.
The article and finish are fixed in the specification along with the cutting map.
How to choose a profile for ready-made furniture
On a finished facade, the space is already limited. Therefore, template and handle checking become mandatory.
MLD-011 is often easier to add without changing the hardware, but this is not a universal rule.
MLD-006 is chosen only where a depth of 23 mm truly improves the scale and does not interfere with operation.
How to check the distance to the edge of the facade
The offset is measured from the visible border of the frame, not from the top of the profile.
Too small a field makes the frame cramped and increases the risk of edge damage during installation.
On paired doors, internal offsets must account for the central gap.
How to check the distance between two frames
Two adjacent frames must have sufficient quiet field, otherwise shadows merge.
For MLD-006, the distance often needs to be larger due to the strong protrusion.
MLD-011 allows a denser rhythm, but the solution is checked on a series, not on a single fragment.
How to choose a frame for a baseboard
The lower part of the wall frame must account for the height and projection of the baseboard.
MLD-006 can create a more noticeable transition, MLD-011 a softer one.
Profiles should not accidentally collide; the joint is drawn in cross-section.
How to choose a frame for a ceiling cornice
The scale of the cornice sets the upper architecture of the wall.
A deep molding is appropriate next to a massive cornice, a compact one with a calmer upper line.
Material and finish tie both elements together, but geometry is checked separately.
How not to confuse molding with casing
The platband frames the opening, the molding creates a decorative frame on the surface.
MLD-007.1 can be combined with MLD-006 or MLD-011, but does not automatically replace them.
The order specifies the purpose of each strip and a separate article number.
How not to confuse molding with cornice
The cornice completes the top of furniture or a wall and usually has a different orientation and geometry.
MLD-006 and MLD-011 work as frame profiles.
Mixing functions without a drawing leads to awkward joints and incorrect scale.
How not to confuse wooden molding with a random batten
A batten has a simple cross-section and does not create the same relief and chiaroscuro.
The finished molding provides a repeatable profile along the entire length of 2400 mm and is prepared for finishing.
A random plank may differ in geometry, moisture content, and surface quality.
Error: select only by frontal photo
From the front, both models have a width of 35 mm and may appear almost identical.
The difference is shown by the side view, cross-section, and light. Without a template, it's easy to underestimate the 23 mm protrusion.
Before purchasing, open the drawings and examine the profile on a specific surface.
Error: always assume 3 mmError: do not consider adjacent doors
The frames of two doors may collide or create too narrow a gap.
The problem is especially noticeable in a corner kitchen and a double-door cabinet.
Opening is checked before final fixation.
Error: do not account for loops
The fastener and hinge cup occupy the inner area of the facade.
The molding should not block access to adjustment and weaken the material near the holes.
Marking is coordinated with the furniture maker before manufacturing the door.
Error: calculate only the net perimeter
The net length does not account for plank cutting, cut width, and test angles.
The result may be less than the actual need, even if the total meters seem sufficient.
The cutting map is compiled before ordering.
Error: assign a universal allowance
One large frame and twenty small ones have different waste structures.
The selection of the oak pattern also affects consumption.
The stock is determined by the master for a specific map.
Error: using molding as a load-bearing frame
MLD-006 and MLD-011 are decorative profiles.
They should not independently hold a mirror, glass, or heavy panel without a separate structure.
The load-bearing system is designed independently of the decor.
Error: choosing different material in the same frame
Beech and oak look different and accept transparent finishes.
Even under enamel, it is better to assemble elements from one consistent batch.
The material is fixed in the specification before cutting.
Error: mixing undercoat preparation and tinting
These are different wood preparation options.
If one side of the frame is prepared differently, the color and surface may differ.
All slats of one facade are ordered in the same finish.
Error: not checking the quality of corners before painting
After applying the topcoat, a large gap will not disappear and may become more noticeable.
A test corner is assembled dry and examined under side lighting.
Only after approval is the cut repeated on the main parts.
Error: mounting on weak coating
The glue holds the profile together with the top layer of the base.
If the paint or veneer is peeling, the frame will come off with them.
The base is repaired before installation.
Mistake: using one glue for all surfaces
Painted MDF, solid wood, and the wall differ in adhesion.
The composition is chosen according to the instructions and a test joint is made.
Successful installation on one facade does not prove suitability for another base.
Mistake: not marking the pieces after cutting
Similar sides can easily be confused between facades.
Each piece is marked with the frame number, side, and orientation.
The marking is preserved until final assembly.
Error: do not consider the oak pattern
On transparent finishes, adjacent sides may differ significantly in tone and grain direction.
The cutting plan is made so that visible areas look consistent.
Remnants are used only after visual comparison.
Error: make an intermediate joint on the visible side
The joint disrupts the continuity of the profile and may differ in shadow.
For a facade length up to 2400 mm, it is better to cut the side as a single piece.
On the wall, the joint is moved to a less noticeable area.
Error: paint parts from different batches separately
The shade, gloss, and layer density may differ.
It is better to finish all the slats of one room or furniture group at the same time.
The test paint sample is kept as a reference.
Who is MLD-006 suitable for
MLD-006 is suitable for large facades, libraries, sideboards, tall doors, and accent walls.
It is chosen when the frame should provide a pronounced shadow and support a massive cornice or casing.
The profile requires sufficient free space and checking of handles, hinges, and adjacent doors.
Who MLD-006 may not suit
On a small drawer, narrow door, or tight passage, a depth of 23 mm may be excessive.
In a series of numerous frames, deep relief can overload the surface.
In such cases, compare MLD-011 or thinner profiles.
Who is MLD-011 suitable for
MLD-011 is suitable for kitchen fronts, small doors, chests of drawers, cabinets, and wall frame series.
It maintains a width of 35 mm but protrudes less and is easier to match with fittings.
The model is especially convenient when the profile should support the composition rather than dominate.
Who MLD-011 may not suit
On a large wall or massive cabinet, a depth of 20 mm may look too subdued.
If the project requires a strong architectural shadow, it is better to check MLD-006.
The final decision is made based on a full-size mockup.
When it is better to choose MLD-001
A thin profile is needed for a small inner frame or delicate furniture where a width of 35 mm is too large.
You can view compact profile for additional frame and compare it with your own card.
MLD-001 is not a direct replacement for MLD-006 or MLD-011: width, depth, and overall scale will change.
How not to confuse molding with trim and cornice
Molding forms a frame and decorative line, trim frames an opening, cornice finishes the top of furniture or a wall.
These products can be combined, but do not replace each other in function.
In the catalog you can view all profiles from oak and beech and choose a category by task.
How to buy MLD-006 or MLD-011 at STAVROS
First, determine the frame width of 35 mm, then select a depth of 23 or 20 mm and check the profile against DWG.
After that, calculate the 2400 mm strips, choose beech or oak, preparation for enamel or tinting, and create a cutting map.
For a complex facade, you can order a layout of moldings on the facade or wall.
What to check before payment
The order must include the exact article number, size 35 × 23 × 2400 or 35 × 20 × 2400 mm, material, finish, and quantity of strips.
The cutting map, mounting compound, trim, cornice, and additional profiles are recorded separately.
Current payment and delivery terms for 2400 mm strips are checked before ordering.
What not to do from scratch
The buyer does not need to independently mill a long profile of the same cross-section and sand every meter.
Ready-made MLD-006 and MLD-011 allow you to focus on choosing the depth, cutting, finishing, and installation.
Additional Options for using moldings on furniture and walls Help to assemble the complete project.
How to accept an order before finishing
The strips are sorted by article and checked for size, material, length, and surface.
MLD-006 and MLD-011 are not mixed in one stack because the same width makes quick visual sorting difficult.
All issues are resolved before cutting and painting.
How to store strips 2400 mm long
Moldings are placed horizontally with even support along the length.
They are protected from moisture, impacts, and point loads that can change the geometry.
Packaging and labeling are kept until installation.
How to check the finished frame
After installation, measure the diagonals, inspect the corners, and check the uniformity of gaps.
Doors and drawers are opened in working combinations, and the wall frame is viewed from the main points of the room.
The light and shadow should be uniform on symmetrical sides.
How to check MLD-006 under side lighting
The sample is positioned so that light falls along the facade, not directly from the front.
The shadow from a depth of 23 mm shows how active the frame will be in a real room.
If the contrast is too strong, compare MLD-011 or change the distance between frames.
How to check MLD-011 in a series of facades
One sample may seem too calm, but repetition on several doors enhances the overall pattern.
At least three adjacent facades are mocked up, preserving real gaps and handles.
This makes it clear whether a depth of 20 mm is sufficient for the entire furniture group.
How to choose a model for a white kitchen
White enamel enhances the role of shadow, so depth becomes the main decorative parameter.
MLD-006 creates a more classic volume, MLD-011 creates a calmer and more modern frame.
Handles and lighting are tested together with the painted sample.
How to choose a model for an oak library
On oak, relief and texture work simultaneously.
MLD-006 emphasizes massiveness and deep architecture, MLD-011 preserves the natural character without excessive protrusion.
A test piece is tinted together with the facade and cornice.
How to choose a model for a double-door wardrobe
On two doors, the frames must match in height, width, and offsets from the central gap.
MLD-006 requires more free space between the doors, MLD-011 is easier to place in a tight composition.
Both doors open simultaneously until final fixation.
How to choose a model for a single accent door
If one door should stand out among calm facades, MLD-006 creates a stronger frame.
If the distinction is based on color or material, MLD-011 may be sufficient and not compete with other accents.
The decision is checked against the overall appearance of the furniture.
How to choose a model for the lower part of a boiserie
The lower frames are closer to the furniture and passage, so the protrusion has practical significance.
MLD-011 is often more convenient in tight spaces, MLD-006 suits a spacious wall and massive baseboard.
The profile should not interfere with cleaning and placing furniture flush.
How to choose a model for the upper part of the wall
At height, a deep profile reads more subtly, so MLD-006 may be justified for a large panel.
MLD-011 suits frequent repetition and a small room where strong shadows near the ceiling fragment the space.
The cornice and frames are considered in the same section.
How to match the profile with a handle bracket
A long bracket creates its own horizontal or vertical line.
MLD-006 requires sufficient distance so the hand does not hit the frame. MLD-011 is easier to fit nearby.
The handle template is installed in the working position, not just drawn on the plan.
How to align the profile with the button
The compact button takes up less space in length, but fingers still reach the facade surface.
A deep molding may restrict grip if the frame is positioned close.
MLD-011 is often more convenient, but the distance is checked physically.
How to align the profile with the panel
The molding can frame an existing panel or create its visual equivalent on a smooth door.
The outer and inner boundaries of the frame must have sufficient margins.
MLD-006 emphasizes the transition more, MLD-011 makes the transition softer.
How to align the profile with carved overlays
The carved decor and molding must have comparable depth and material.
A profile that is too deep may conflict with a small overlay, while one that is too compact may get lost next to a large center.
All elements are laid out together before ordering.
How to prepare a specification
The document specifies the article number, size A × C × L, material, preparation, number of slats, and installation location.
A cutting map, DWG, color, and installation method are attached to the specification.
This way, the cabinetmaker, painter, and installer use one version of the project.
How to save data for reordering
The model card, drawing, finishing recipe, and remaining profile with signature are saved.
A photo of the finished frame helps compare a new order with existing furniture.
The current parameters of the card are still checked before reordering.
Check question before ordering
If it is impossible to show in the cross-section why the project needs exactly 23 or 20 mm, the selection is not yet complete.
First, check the light, handles, hinges, corners, and the full perimeter.
After that, specify the exact article number and quantity of planks.
What to buy together with MLD-006 or MLD-011
The molding becomes part of a complete system only after selecting adjacent elements, finishes, and installation materials. The frame may require a casing, cornice, thin internal profile, and design layout. All links below lead to confirmed STAVROS pages, but compatibility of sizes and cross-sections is checked separately.
| What to add | Why | For which scenario | What to Check | Link |
|---|---|---|---|---|
| MLD-006 | Create a deep frame | Cabinet, door, wall | 23 mm protrusion and free gaps | molding 35 × 23 mm from solid wood |
| MLD-011 | Keep the width with less depth | Kitchen, chest of drawers, series of frames | 20 mm protrusion and profile per DWG | 35 × 20 mm solid wood molding |
| MLD-001 | Add thin inner contour | Double frame | Depth alignment | Compact profile for additional frame |
| MLD-007.1 | Frame the doorway | Door and portal | Scale and joint | Combine molding with door framing |
| KZ-001 | Assemble the top line | Cabinet and wall panel | Material, protrusion, finish | Assemble the top line of furniture |
| Boiserie | View the scale of wall frames | Living room, study, hallway | Distances and number of frames | Frames for wall panels |
| Doors | Select frame placement | Interior door leaf | Handle, lock, hinges | Molding frames on the panel |
| Materials | Secure and finish the profile | MDF, solid wood, wall | Base and coating | Buy installation materials |
| Quality | Choose material and preparation | Enamel or tinting | Same batch | choose beech or oak |
| Tips | Check cutting and installation | Independent work | Do not replace the project with advice | Recommendations for cutting and installing moldings |
How to check the profile on a facade sample
A small fragment of the facade material with two short pieces shows the actual joint, color, and protrusion.
On such a sample, it is convenient to compare MLD-006 and MLD-011 next to the handle, check the primer, and make a test corner.
The control fragment is kept as a reference until installation is complete.
How to match the depth with the door thickness
The depth of the molding should not be evaluated separately from the thickness of the facade.
On a thin door, MLD-006 may look particularly massive from the side, while MLD-011 is more proportional.
On a thick, massive facade, both profiles appear calmer, but the choice is still checked in cross-section.
How to account for light direction in a cabinet group
Light from a window or built-in lighting falls on adjacent frames at different angles.
MLD-006 creates a more noticeable alternating shadow, MLD-011 a soft repeat.
A layout of several doors is placed in the real direction relative to the window.
How to account for cleaning and daily contact
The deeper the profile, the more noticeable the side surfaces and corners where dust can accumulate.
MLD-011 is easier to perceive in a frequently used kitchen, but maintenance depends primarily on the finish coating.
The frame is not placed in an area of constant impacts and touches.
How to check compatibility with carved decor
If the frame is supplemented with overlays or rosettes, their maximum depth must be coordinated with the profile.
MLD-006 can support a large carved centerpiece, MLD-011 — a more compact composition.
The combination is checked on a full layout, not on individual cards.
How to calculate an order for multiple rooms
For each room, a separate list of dimensions and profiles is compiled.
MLD-006 and MLD-011 are counted separately, even if the material and finish are the same.
The total order is combined only after checking the cutting maps and the number of whole planks.
How to avoid confusion during installation
Packages are labeled by model, room, and frame number.
After cutting, the sections are marked on the reverse side without damaging the future finish.
Thus, the uniform width of 35 mm does not lead to accidental replacement of the 23 mm profile with a 20 mm one.
Why it is better to make a decision before manufacturing the facade
At the drawing stage, you can freely change the margins, handles, and hinge placement.
After the door is manufactured, the choice of depth is limited by the prepared gaps and holes.
An early layout reduces the risk of rework and helps order the exact footage.
Final check before ordering
The buyer should see the facade, frame, handles, hinges, corner joints, and the selected profile on one diagram. If at least one component remains conditional, first clarify the drawing and only then fix MLD-006 or MLD-011 in the order.
Such control is especially important for a series of identical doors: one incorrect depth or wrong article will be repeated on all furniture.
After approval, the specification is signed by the designer, cabinetmaker, and installer so that all participants use one article, one depth, and one cutting map.
Check completed early.
FAQ: questions about MLD-006 and MLD-011
How is MLD-006 different from MLD-011?
Both models have a width of 35 mm and a length of 2400 mm. MLD-006 has a depth of 23 mm, MLD-011 has 20 mm, and the full profile should be compared using DWG.
Why do results differ with the same width?
The width determines the frame field from the front, the depth determines the protrusion and light-shadow. Therefore, the facade looks different from the side and under directional lighting.
How much does MLD-006 protrude more?
Depth of 23 mm is 3 mm and 15% greater relative to the 20 mm depth of MLD-011.
Which molding is better for a large facade?
More often MLD-006, if a pronounced frame is needed. MLD-011 is chosen for lighter architecture.
Which model to choose for a small door?
Usually MLD-011 with a depth of 20 mm is more convenient, but the final choice is made according to the template.
Which molding interferes less with the furniture handle?
MLD-011 protrudes less, but the working clearance needs to be checked with the specific handle.
Can MLD-006 be used on a wall?
Yes, for a wall panel and accent frame after calculating the base, cutting, and fastening.
Will MLD-011 fit an interior door?
Yes, if the frame does not interfere with the handle, lock, hinges, and the opening of the door leaf.
Are the profiles the same shape?
This cannot be determined by width alone. You need to compare both drawings, radii, and side platforms.
Do I need to compare DWG?
Yes. The drawing shows the full outline and helps to correctly perform the miter cut.
Which molding should I choose for white enamel?
Beech prepared for enamel. Both profiles are offered in this finish.
When is it better to order oak?
When you need to preserve the visible texture and use translucent tinting.
How to calculate the number of planks 2400 mm long?
First calculate the sides of all frames, then create a cutting map considering the cut, corners, and remnants.
How much allowance should be added for corners?
There is no universal percentage. The allowance depends on the number of frames, the craftsman's experience, and pattern matching requirements.
Is it possible to combine both models in one room?
Yes, if each is assigned a separate role, for example MLD-006 on the wall, MLD-011 on furniture.
Can they be combined in one frame?
Not recommended without a special project: different depth and profile shape will be noticeable.
How to glue molding to MDF?
Choose a compatible compound, prepare a strong base, and perform a test joint. Universal glue is not assigned.
Is mechanical fixation required?
This depends on the base, length, weight, and position of the frame. The decision is made by the master.
Can molding be used as a frame for a mirror?
Only as decorative framing. The mirror's support system is calculated separately.
Where to buy MLD-006?
In the MLD-006 card on the STAVROS website after selecting beech or oak and the preparation option.
Where to order MLD-011?
In the MLD-011 card after checking the depth, material, and required number of slats.
What to buy together with the molding?
Mounting materials, suitable casing, cornice, thin profile, or design layout services — depending on the project task.
How to check the difference before purchasing?
Make two cardboard templates of sections 35 × 23 and 35 × 20 mm and apply them to the actual facade.
What should be checked before ordering?
Article number, drawing, size, material, finish, cutting map, handles, hinges, corners, and fastening method.
Result: MLD-006 or MLD-011
MLD-006 35 × 23 × 2400 mm is chosen for large facades, libraries, sideboards, tall doors, and accent wall panels. The 23 mm depth creates a stronger chiaroscuro effect and is more readable from a distance.
MLD-011 35 × 20 × 2400 mm retains the 35 mm frame width but protrudes less from the surface. It is more convenient for kitchens, dressers, small doors, repeating cabinet groups, and areas near furniture handles.
Both models are made of beech or oak, have a "Prestige" sanding finish, and options for preparation under enamel or tinting. The profiles cannot be considered fully interchangeable: before cutting, you need to compare both DWG files and check the corner joint.
On the STAVROS website, you can open both product cards, view the wooden molding category, select trim, cornice, and installation materials. A conscious choice of depth helps maintain the required 35 mm width, avoid conflicts with hardware, and achieve a properly scaled frame.