Article Contents:
- The logic of a two-layer solution: why a block if there is molding
- Where a wooden block is needed: seven real tasks
- Base for a false panel
- Leveling a protrusion and creating volume
- Frame of a decorative portal
- Reinforcing the area under a shelf or hanging element
- Creating volume on a flat wall
- Niche design
- Preparing the base for linear elements
- Where polyurethane decor works best
- Final frame around the panel perimeter
- Decorative Overlays and Corner Elements
- Cornice line along the top edge of the panel
- Portal framing
- Light relief for painting
- Three key materials: block, batten, corner
- Wooden block: the base for volume
- Wooden batten: lines, backings, decorative geometry
- Wooden corner: a neat solution for corners and joints
- Summary table: what is for what
- Five scenarios: how the wood + polyurethane combination works
- Scenario 1: decorative accent wall
- Scenario 2: decorative false portal
- Scenario 3: decorative niche
- Scenario 4: wall box
- Scenario 5: built-in furniture with decorative facade
- Detailed breakdown: how to choose the right block for the task
- Block cross-section depending on the task
- Attaching the block to the wall
- Treating the block before use
- How to properly join wood and polyurethane into a single finished surface
- Sealant in joints: a mandatory step
- Priming: different compounds for different materials
- Installing molding on a wooden surface
- What to buy together: a complete list for each scenario
- For a decorative accent wall (option with backing)
- For a false portal
- For a niche with decorative framing
- For an engineering box
- For a built-in wardrobe with a decorative facade
- Mistakes that make you do the work twice
- Buying molding without understanding the base
- Attaching heavy elements only with decorative glue
- Not accounting for the thickness of the batten when calculating the projection
- Choosing a slat that is too thin for a volumetric panel
- Not checking the wood and polyurethane joint before painting
- Forgetting about corner junctions
- Not Buying Extra Profile
- Making the relief too deep in a small room
- Additional keys: related queries that lead to these products
- Practical calculation: example for a false panel 2.4×1.2 m
- FAQ: popular questions
- Can you combine wooden blocks and polyurethane moldings?
- What to buy for a decorative false panel?
- When is a wooden corner needed?
- Can you paint wood and polyurethane the same color?
- What is better for finishing decor: wooden slats or polyurethane moldings?
- Is primer needed before painting polyurethane?
- How to calculate the amount of molding for frames?
- STAVROS: everything for decorative walls, portals, and niches
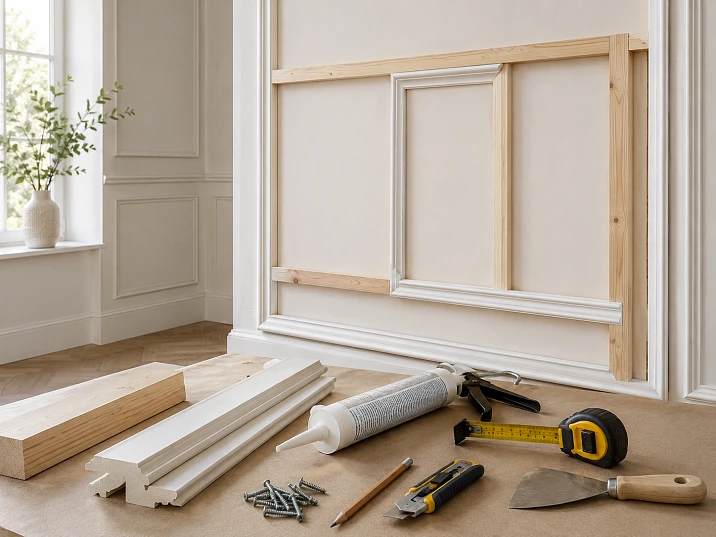
There are two types of people who come for materials for a decorative wall. The first only take moldings — and then find that they hold poorly on loose plaster, and a heavy element simply falls off. The second only take blocks and slats — and get a geometrically precise structure that lacks finishing decorative depth. The correct answer is a combination: Wooden block as a base and Polyurethane moldings as a finishing decorative layer. This article is precisely about how these two materials work together — for a false panel, portal, niche, ledge, or accent wall.



The logic of a two-layer solution: why use a block if there is molding
That's a reasonable question. Moldings made of polyurethane they are easy to glue, take paint well, and provide expressive relief. Why add a wooden base?
The answer lies in physics and geometry. Polyurethane molding is a decorative profile. It creates relief, but it does not create volume. When you need to extend a decorative element from the wall by 20, 30, 50 mm — to create a ledge, imitate a pilaster, assemble a false portal or box — molding alone does not solve this task. It needs a structural substrate that provides shape, depth, and load-bearing capacity.
Wooden block — is precisely this structural element. It is mounted on the wall, creates the required volume, geometry, and frame — and on top of it, moldings, slats, and overlays are glued or attached. The two materials complement each other: one is engineering, the other is beauty.
This is not theory. This is the practice of any professional decor installer and any designer who understands the difference between "gluing onto a wall" and "assembling a decorative structure."




Where a wooden block is needed: seven real-world tasks
Before going to the catalog, it's worth understanding in which specific situations a wooden block becomes a necessary element of a decorative solution.
Our factory also produces:
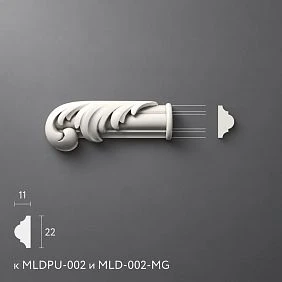
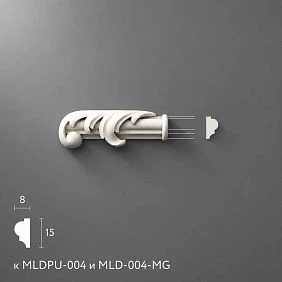
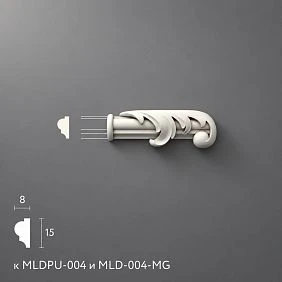

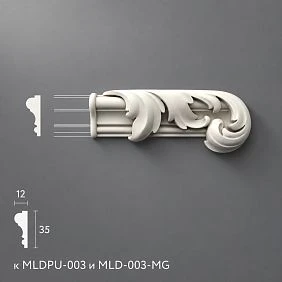
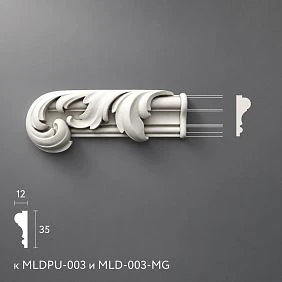
Base for a false panel
A false panel is a decorative surface that protrudes from the wall, creating a sense of depth and volume. A substrate (MDF, plywood, gypsum board) is mounted on a timber frame, and then onto it — Moldings made of polyurethane and decorative plates.
Without a wooden frame, the false panel has no support. A timber with a cross-section of 40×40 or 50×50 mm forms a lathing that evenly distributes the load and allows precise alignment of the front plane.
Get Consultation
Leveling the protrusion and creating volume
If the wall has a protrusion — an engineering box, ventilation duct, beam — it must either be hidden or beautifully designed. Wooden block allows bringing the geometry of the protrusion to right angles and flat planes. After cladding, moldings and Polyurethane wall decor.
Frame of a decorative portal
A decorative false portal is one of the most complex scenarios. It is an imitation of an architectural opening or fireplace, assembled entirely from decorative materials. The wooden frame here is the load-bearing base that holds the shape and allows mounting heavy polyurethane cornice profiles, pilasters, archivolt.
Reinforcing the area under a shelf or hanging element
If a shelf, light fixture, or hanging element is planned to be installed on the decorative panel, the load must be taken by a wooden timber, not the molding. In the required place of the frame, a reinforced timber or crossbar is installed, to which the load-bearing element is attached.
Creating volume on a flat wall
Sometimes a wall is completely flat, without features — and that's exactly what hinders the decor. wooden plank or a small-section bar is mounted on the wall and creates that minimal offset (10–20 mm) that makes the decor 'work': a molding installed with a gap from the wall gives shadow and visual depth, which a molding glued directly onto plaster lacks.
Niche design
A niche in the wall is a space where the geometry of corners is often imprecise. A wooden bar allows you to align the edges of the niche, make the corners straight, and set the desired depth. Then moldings are mounted along the perimeter of the niche from polyurethane decor and decorative plates.
Preparing the base for trim
Polyurethane trim and wooden trim require a level base. On an uneven wall, before installing a cornice or baseboard, a wooden batten is installed, which levels the plane and provides a reliable base for fastening.
Where polyurethane decor works best
Now — the flip side. Polyurethane moldings does not replace a wooden bar where a structure is needed. But where finishing decor is needed — relief, frame, ornament, completion — polyurethane is indispensable.
Final frame around the perimeter of the panel
After the false panel is assembled on a wooden frame and sheathed with a backing, they are mounted along its perimeter Moldings made of polyurethaneThey form a decorative frame that hides joints, adds relief, and completes the structure visually.
Decorative overlays and corner elements
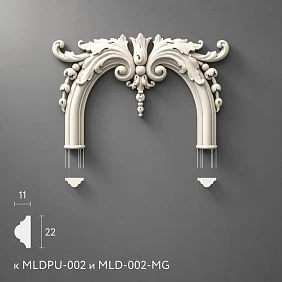
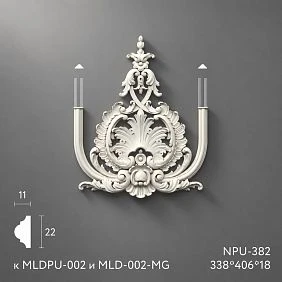
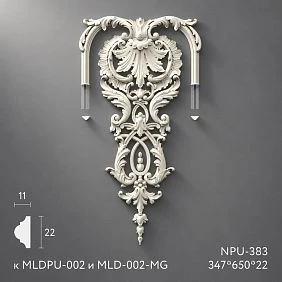
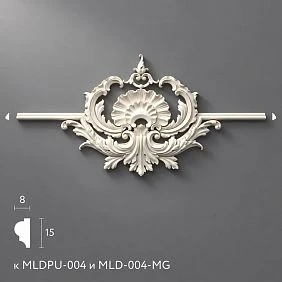
decorative polyurethane elements — overlays, rosettes, corner "ears" — are mounted at key points: in the corners of frames, on the upper lintel of the portal, in the center of the panel. They provide decorative richness without the need to alter the structure.
Cornice line along the top edge of the panel
Cornice made of polyurethane molding is mounted along the top edge of the false panel or along the top line of the wall. It creates a visual "canopy" that unites the structure with the wall and gives it a finished look.
Portal framing
Polyurethane profiles are used for framing architectural forms: arches, portals, door and window openings. Flexible moldings or a set of straight profiles form a frame that, when painted in the wall color, looks like built-in architecture.
Light relief for painting
When the goal is not to create a complex structure, but simply an architectural relief on the wall — Moldings made of polyurethane are mounted directly onto the wall without a wooden base. This is the simplest scenario, which nevertheless requires a flat surface.
Three key materials: block, batten, angle
Before moving on to scenarios, let's break down the differences between three wooden elements used in decorative structures.
Wooden block: the foundation for volume
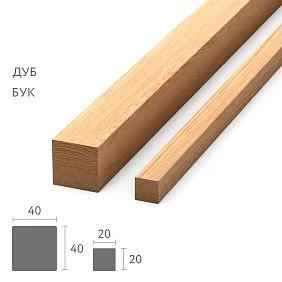
Wooden block — this is a rectangular-section lumber used as a load-bearing element of the frame. Typical sections for decorative structures: 40×40, 50×50, 40×60, 50×70 mm. The higher the load (e.g., if a shelf is planned) and the greater the depth of projection from the wall, the larger the block needed.
The block is mounted to the wall using dowels, anchors, or self-tapping screws depending on the base type. A substrate is attached to it, followed by the decorative layer. This is the foundation for everything else.
Wooden batten: lines, substrates, decorative geometry
wooden plank — a thinner linear element with a rectangular cross-section. It is used where the depth of a block is not needed, but a straight line or thin substrate is required. The batten is used to create vertical and horizontal stripes on the wall, for decorative geometry in the "slat wall" style, and for leveling the surface before installing molding.
Read more about using battens in finishing — in the article Wooden slats on a wall: finishing options, installation, decor.
Wooden corner: a neat solution for corners and joints
Wooden angle — a profile with an L-shaped cross-section. Its purpose is to finish the external or internal corner of a structure: the junction of two planes, the transition from a false panel to the wall, the edge of a box, the edge of a decorative niche. The corner hides joints, protects edges, and provides a clean transition that can be primed and painted.
Paired with polyurethane molding, the wooden corner solves the "abutment" problem: where the molding cannot fit tightly into the corner, the corner closes the gap and creates a clean line.
Summary table: what for what
| Material | Purpose | Section | Application |
|---|---|---|---|
| Wooden block | Frame, offset, volume | 40×40 — 50×70 mm | False panel, portal, box |
| Wooden strip | Lines, substrates, geometry | 10×30 — 20×40 mm | Slat wall, alignment |
| Wooden corner | Corners, joints, transitions | 20×20 — 40×40 mm | Edges, abutments |
| Polyurethane molding | Decorative relief | Various | Frames, cornices, framing |
| PU overlays | Accent elements | Various | Corners, centers, portals |
Five scenarios: how the 'wood + polyurethane' combination works
Now — specifics. Five typical tasks solved by combining wooden structure and polyurethane decor.
Scenario 1: decorative accent wall
The most popular request. One wall in the living room or bedroom should become an architectural accent: frame panels, relief, decor.
Option A: only polyurethane, without wooden base
Moldings are glued directly to the wall. Works on flat surfaces made of plaster, drywall, concrete. Relief is minimal — only the molding profile above the wall plane.
Option B: wooden batten as a base + polyurethane moldings
wooden plank mounted horizontally in strips along the wall, creating a level base and a slight offset. The moldings are attached to the batten. An additional level of relief appears — a shadow under the molding and a shadow from the base.
Option C: full timber frame + sheathing + moldings
Timber lathing, MDF sheathing, moldings along the perimeter of the panels. Maximum volume and greatest strength. The panel protrudes 30–50 mm from the wall. The difference in perception is colossal: the wall comes to life.
What to buy: Wooden block, RK-001 can be ordered directly on the website, Moldings made of polyurethane, Decor for Molding, fasteners, glue, sealant, primer, paint.
Scenario 2: decorative false portal
A false portal is an imitation of an architectural opening that leads nowhere but creates a sense of depth and grandeur. A classic solution for a living room with a TV area, for a headboard, for framing a fireplace.
False portal construction: a wooden frame made of timber, sheathed with MDF. The frame defines the shape of the pilasters and the lintel. On top of the sheathing — Moldings made of polyurethane on the pilasters and along the perimeter of the opening. The top lintel is a cornice made of polyurethane molding. The pilaster capitals — decorative polyurethane elements.
The angles between wooden planes are closed wooden corner piece before applying the finishing coat.
What to buy: 50×50 mm timber (for frame posts and crossbar), MDF for sheathing, moldings for pilasters, cornice profile for crossbar, capitals (PU overlays), wooden corner for external corners, polyurethane glue (more details in the article what to glue polyurethane molding with), sealant, primer, paint, 10% spare.
Scenario 3: decorative niche
A niche in the wall is a space with uneven angles and unpredictable geometry. A wooden timber here solves two tasks: it levels the niche angles and creates a platform for mounting decor.
Timbers are mounted along the niche perimeter — on vertical and horizontal edges. Sheathing is fixed over the timber, which levels the walls. Wooden angle frames the outer edges of the niche — where the niche transitions into the wall plane. Along the perimeter of the niche's outer framing — Moldings made of polyurethane and if necessary Decor for polyurethane moldings in the corners.
What to buy: timber matching the niche geometry, Wooden angle for edges, framing moldings, decorative overlays for accent, glue, sealant, primer, paint.
Scenario 4: wall box
An engineering box hiding pipes, cables, or ventilation ducts can be not a dull structure but a decorative architectural element.
A wooden frame made of timber sets the shape of the box — three or four planes. The sheathing levels the surface. Wooden angle protects all external corners and creates clean straight lines. Along the top and bottom edges of the box — polyurethane moldings that visually integrate the structure into the overall decorative system of the wall.
If the box is vertical and wide enough — it can be turned into a decorative column: moldings along the entire height, capital and base from PU overlays.
Scenario 5: built-in furniture with decorative facade
This is a complex scenario where the wooden structure is the base of the furniture, and the polyurethane decor is the final facade layer.
A built-in wardrobe, library, or closet made of MDF or plywood is sheathed on the front side with a decorative layer: moldings along the perimeters of the facades, Decorative wooden decor on door panels, corner overlays made of polyurethane. When painted all in one color, the built-in furniture reads as an architectural element — part of the wall, not a piece of furniture.
Detailed analysis: how to choose the right block for the task
A wooden block is a product with important parameters: wood species, cross-section, straightness, moisture content. For decorative structures that will be painted, it is important to choose a dry block without warping or cracks.
Block cross-section depending on the task
-
20×30 mm — thin backing, surface leveling, support for molding
-
40×40 mm — frame for a lightweight false panel, backing for cladding
-
50×50 mm — frame for a portal, box, false wall, load-bearing posts
-
40×60 — 50×70 mm — reinforced posts, shelf support, load-bearing structures
Attaching the block to the wall
On concrete and brick walls: dowel nail or anchor bolt with a fastening step of 40–50 cm.
On drywall: self-tapping screws for metal to guide profiles.
For wooden base: self-tapping screws 3.5×45 or 3.5×55 mm.
Before installing the bar, the wall must be dry, clean, and free of peeling plaster. If the wall is loose, a deep penetration primer is mandatory.
Treatment of the bar before use
For decorative structures that will be painted, it is recommended to treat the wooden bar with an antiseptic primer. This prevents mold in closed cavities of the structure and protects the wood from moisture deformation.
The surface of the bar that will be visible after installation (if used as a decorative element) is sanded with 120-grit sandpaper, then primed and painted.
How to properly join wood and polyurethane into a single finished surface
This is one of the key technical issues. Wood and polyurethane are different materials with different behavior under temperature and humidity changes. A direct joint without preparation is a potential crack after the first heating season.
Sealant in joints: a mandatory step
At the joint of a wooden surface and a polyurethane molding, an acrylic sealant is applied before painting. It fills the gap, remains elastic after drying, and does not crack with minor material movements. After curing, the sealant is sanded and painted together with the surface.
More about proper adhesive and sealing compounds in the article what to glue polyurethane molding with.
Priming: different compounds for different materials
Wood is primed with acrylic wood primer or universal water-dispersion primer. Polyurethane is primed with a special adhesion primer for polyurethane — without it, the paint will roll off.
After applying primer to both surfaces, one finish coat of paint can be applied to the entire surface.
Installing molding on a wooden surface
Moldings made of polyurethane They are glued to a wooden substrate with polyurethane mounting adhesive. Additionally, in hidden places, finish nails can be used — they press the profile until the adhesive fully sets. For details on installation technique, see the article installing polyurethane molding.
What to buy together: a complete list for each scenario
For a decorative accent wall (option with substrate)
-
wooden plank — for horizontal substrates
-
Moldings made of polyurethane — for frame panels
-
Decor for polyurethane moldings — corner elements
-
Screws and dowels for the batten
-
Mounting adhesive for moldings
-
Acrylic sealant
-
Primer for wood and primer for polyurethane
-
Finish paint
-
Spare slats and moldings — 10%
For false portal
-
Wooden block 50×50 mm — for frame posts and crossbars
-
MDF 16 mm — for sheathing
-
Wooden angle — for external corners of pylons
-
Moldings made of polyurethane — for pylon finishing
-
Polyurethane trim — cornice for crossbar
-
decorative polyurethane elements — pilaster capitals
-
Fasteners, glue, sealant, primer, paint, 10–15% reserve
For a niche with decorative framing
-
Wooden block 40×40 mm — for leveling the edges of the niche
-
Wooden angle — for the transition edges niche/wall
-
Moldings made of polyurethane — for framing around the perimeter of the niche
-
Polyurethane wall decor — if necessary, on the walls of the niche
-
Glue, sealant, primer, paint, 8% reserve
For a utility box
-
Wooden block 40×40 or 50×50 mm — for the frame
-
MDF or gypsum board — for sheathing
-
Wooden angle — on all external edges
-
Moldings made of polyurethane — along the top and bottom edges
-
Fasteners, glue, sealant, primer, paint
For a built-in wardrobe with a decorative facade
-
Wooden decor and solid wood overlays — for wooden facades
-
Moldings made of polyurethane — around the perimeter of the facades
-
decorative polyurethane elements — at the corners and centers of the panels
-
Construction adhesive, sealant, primer, paint
Mistakes that make you do the work twice
Buying molding without understanding the base
The first and main mistake. If the base is loose, damp, or uneven, the glue will not provide the necessary adhesion. A polyurethane molding glued to loose plaster will eventually come off. First, level and strengthen the base, then glue.
Attach heavy elements only with decorative glue
A 3 m long cornice profile or a wide frieze weighs significantly more than a thin molding. On horizontal surfaces (cornice, horizontal portal lintel), glue alone often cannot handle the weight, especially while it is curing. Additional fastening points with finishing nails or self-tapping screws through a wooden base are mandatory.
Not accounting for the batten thickness when calculating the projection
If a false panel projection from the wall of 30 mm is planned, a 40×40 mm batten will give a projection of 40 mm plus the thickness of the sheathing. As a result, the actual projection will be 56–58 mm. When designing, you need to sum the batten + sheathing + molding, and only then will the figure be correct.
Choosing too thin a batten for a volumetric panel
wooden plank A 10×20 mm cross-section will not withstand the load of a heavy backing and moldings over large areas. The batten used as a backing must be at least 20×30 mm, and with a fastening step of more than 50 cm, 25×40 or 30×40 mm.
Not checking the wood and polyurethane joint before painting
If a gap remains in the joint and it is not sealed with sealant, the crack will appear clearly after the first coat of paint. Applying a second coat on top will not help. The joint must be checked, sealed, sanded, and only then painted.
Forgetting about corner junctions
The joint of the molding with a wooden surface at an external corner is a vulnerable spot. Here either a Wooden angle, or the molding is cut at 45° and the joint is carefully sealed. An unfinished corner is always unsightly and short-lived.
Do not take a profile reserve
When cutting molding for corners, part of the length is lost. Each joint "eats" 2–5 cm of the profile. For a structure with dozens of joints, a shortage of one or two meters of profile is a standard situation when buying "flush". A margin of 10–15% of the calculated footage is a professional norm.
Making too deep a relief in a small room
A false panel with a projection of 60–80 mm in a room 3 meters wide takes up a significant part of the space. In small rooms, the projection should be minimal — 20–30 mm. Deep structures are appropriate in spacious halls, living rooms, and studies with high ceilings.
Additional keys: related queries that lead to these products
A buyer looking for materials for a decorative wall or portal is also interested in several related topics.
Wooden linear products made of solid wood — planks, slats, corners, baseboards from natural wood — the entire range is presented in the catalog.
Wooden decor for furniture — overlays, profile elements, rosettes from solid wood for finishing facades — in the section wooden decorative overlays.
Polyurethane linear products — profiles, baseboards, cornices, fillets from polyurethane — in the section polyurethane molding.
Decor for moldings — corner pieces, rosettes, end caps — in the section polyurethane molding decor.
Polyurethane wall decor — pilasters, horizontal rods, wall panels — in the section . Clear lines, created using modern technologies, emphasize the strict aesthetics of the room. Each decorative element harmoniously fits into the overall concept, creating a sense of order and thoughtfulness..
Practical calculation: example for a false panel 2.4×1.2 m
Task: false panel on an accent wall, two frames around the perimeter, wooden batten as a backing, molding around the perimeter of each frame.
Wooden batten (horizontal strips):
Panel width 2.4 m, batten spacing 40 cm — 3 strips needed. Each length 2.4 m. Total: 7.2 m + 10% margin = 8 m of batten.
Molding for two frames:
Frame 1: 90×50 cm, perimeter 280 cm. Frame 2: similar. Total: 560 cm = 5.6 m of molding + 15% margin = 6.5 m.
Corner pieces: 2 frames × 4 corners = 8 corner pieces.
Glue: 1 tube 300 ml for ~3–4 linear meters of molding. For 6.5 m — 2 tubes.
Sealant: 1 tube of acrylic sealant.
Primer: 0.5 L for the batten and moldings on the surface of this area.
Paint: 1–1.5 L of finish paint for two coats.
FAQ: Popular Questions
Can you combine a wooden block and polyurethane molding?
Yes, this is a professional standard for any volumetric decorative structures. Wooden block creates a structural base — volume, geometry, load-bearing capacity. Polyurethane moldings — the final decorative layer. Both materials, with proper preparation and painting, give a unified surface.
What to buy for a decorative false panel?
Wooden block or RK-001 can be ordered directly on the website for the base, MDF for sheathing, Moldings made of polyurethane for the decorative frame, Decor for Molding for corner accents, fasteners, polyurethane glue, acrylic sealant, primer, paint, and 10% material reserve.
When is a wooden corner needed?
Wooden angle it is needed on all external corners of wooden structures — edges of false panels, ribs of boxes, transitions niche/wall. It protects the edge from chips, hides ends, and creates a neat straight line that is easy to paint.
Can wood and polyurethane be painted the same color?
Yes. But the preparation technology is different: wood is sanded and primed with acrylic wood primer. Polyurethane is degreased and primed with adhesion primer for polyurethane. After priming, both surfaces are painted with the same color finish paint — and the boundary between materials disappears.
What is better for finishing decor: a wooden slat or a polyurethane molding?
It depends on the task. wooden plank provides a geometric line and light relief — for a slatted wall or minimalist geometry. Polyurethane molding provides an expressive decorative profile — for frames, cornices, stucco framing. Often both are used together: the slat is the base, the molding is the finish.
Is primer needed before painting polyurethane?
Absolutely. Without adhesion primer, paint on polyurethane holds poorly and peels off over time. Polyurethane primer is applied in one coat, dries for 30–60 minutes, after which the surface is ready for painting. Details — in the article installing polyurethane molding.
How to calculate the amount of molding for frames?
Calculate the perimeter of each frame and add up all the results. Add 12–15% for trimming and reserve. Count corner elements by the number of corners: 4 elements for each rectangular frame.
STAVROS: everything for decorative walls, portals, and niches
STAVROS manufacturing company is one of the key suppliers of wooden moldings and polyurethane decor in Russia. The STAVROS catalog includes all the elements described in this article: wooden slats and solid wood corners, a full range of polyurethane moldings, decorative polyurethane elements, Polyurethane trim и Wall Decor.
STAVROS production is located in Saint Petersburg. Wooden products are made from solid beech and oak on professional equipment with manual finishing. Polyurethane products are manufactured using precision casting, preserving all relief details. Delivery is available throughout Russia and CIS countries. Pickup is available from showrooms in Moscow and Saint Petersburg.
If you need help selecting materials for a specific task — a decorative wall, false portal, niche, or built-in furniture — STAVROS specialists will help calculate the quantity, select profiles, and assemble a kit where each element works precisely in its place.