Article Contents:
- Why you shouldn't buy molding 'only by the piece'
- Basic kit: what to buy together with molding
- Glue for decorative molding: what's important to check
- Compatibility with polyurethane
- Initial fixation and adjustment time
- Working on walls and ceilings
- Interior or facade
- Sealant for joints: why it's needed and how to use it
- Why sealant is needed when installing moldings
- Which sealant to choose
- Primer and paint: finishing without mistakes
- Why prime polyurethane moldings
- When you can paint without preparation
- Which paints are suitable for polyurethane moldings
- Why the color should be determined before installation
- How much extra to allow for moldings
- Moldings for frames and panels
- Ceiling Cornices
- Decorative overlays and sockets
- Facade decoration
- General rule
- What to buy with polyurethane moldings
- Straight molding strips
- Corner pieces and decorative inserts
- Reserve
- Glue, sealant, primer, paint
- Marking tools
- What to buy with ceiling moldings
- Ceiling Cornice
- Ceiling rosette
- Molding frames on the ceiling (optional)
- Painter's tape
- What to buy for polyurethane wall decor
- Additional items often forgotten
- Decorative skirting board
- Brackets and Consoles
- Molding for hidden areas
- Spare strips
- Practical breakdown: kit for a specific task
- Scenario 1: Cornice around the perimeter of an 18 sq. m room
- Scenario 2: Three frames of moldings on the wall
- Scenario 3: Ceiling rosette for a chandelier
- Common mistakes when buying stucco and consumables
- Ready checklist before ordering
- Where to buy stucco and everything needed for installation
- FAQ: Answers to Popular Questions
- What glue is needed for polyurethane moldings?
- Is sealant needed for decorative moldings?
- How much extra length should be allowed for moldings?
- What should be purchased together with a ceiling rosette?
- Can I buy the moldings first and the consumables later?
- Do I need to paint the moldings after installation?
- What is most often forgotten to buy together with moldings?
- Do I need to buy corner pieces for the moldings?
- About the Company STAVROS
Here is a typical story that happens more often than it seems. A person chooses molding, carefully selects the molding profile, calculates the length, places an order — and on the day of installation discovers that there is no glue. Or there is glue, but it's the wrong kind — solvents in the composition damage the polyurethane. Or the glue is suitable, but there is no sealant for the joints, and after installation all the gaps are visible as if on the palm of your hand. Or everything is purchased, but no extra length of molding was allowed, and one plank is missing for the final corner cut.
This is not inattention. It is a systemic problem: when buying stucco decor, most people think about the decor, not about what ensures quality installation and proper finishing. That is why this article is not about types of moldings or interior styles. It is about what you need to put in your cart alongside moldings, rosettes, and cornices so that installation proceeds without interruptions and the result looks professional.
Why you cannot buy stucco moldings "only by the piece"
Polyurethane stucco decor is a system. One molding on the wall does nothing. It is always a combination of elements: linear moldings, corner blocks, overlays, rosettes, cornices — plus consumables without which installation and finishing are physically impossible.
When a person buys "only moldings," they buy a blank, not a finished result. Between the blank and the result are glue, sealant, primer, paint, material allowance, and a whole range of small items, each of which turns out to be critically important in practice.
Why is this especially relevant for polyurethane? Because polyurethane stucco has its own installation features that differ from working with plaster, polystyrene foam, or wood:
-
Polyurethane does not absorb moisture, so not every glue provides the necessary adhesion
-
The surface of polyurethane is smooth and dense — before painting, it requires priming for an even result
-
Joints between planks are visible without sealant, especially after painting
-
Allowance for cutting is not an option but a necessity, since each corner "eats" part of the plank
All of this needs to be purchased simultaneously with the decor. Not after. Not "when the time comes." Immediately. Otherwise, installation will stop exactly at the moment when the halt is most painful.




Basic kit: what to buy together with stucco molding
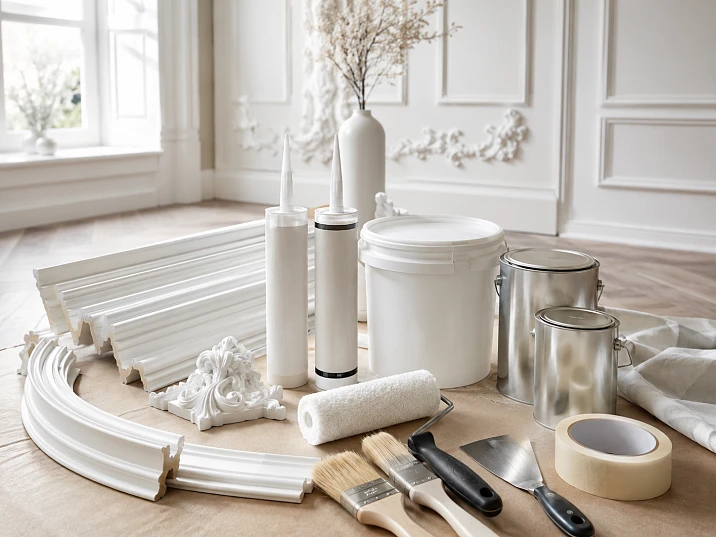
Before moving on to a detailed analysis of each item, it is useful to have the structure of the complete kit in mind. Here is what is included in the basic purchase for any project with polyurethane stucco decor:
Main decorative elements:
-
The decor itself: Polyurethane moldings — moldings, cornices, rosettes, overlays, depending on the task
-
Corner elements and decorative inserts for frames — if a system of panels or molding frames is planned
-
Reserve of 10–15% above the calculated footage
Consumables and auxiliary materials:
-
Assembly adhesive compatible with polyurethane
-
Acrylic sealant for joints and abutments
-
Primer for preparing polyurethane surface for painting
-
Paint for finishing decorative elements
-
Masking tape for protecting adjacent surfaces
-
Spatula or rubber spatula for leveling sealant
-
Rag for removing excess glue before it sets
This list is not redundant. Each item plays its role at a specific installation stage. Excluding any of them means either a technical failure in the process or a visual defect in the result.
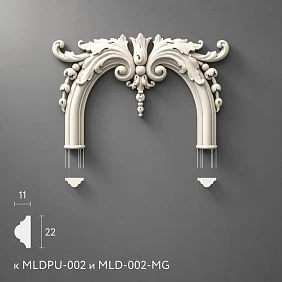
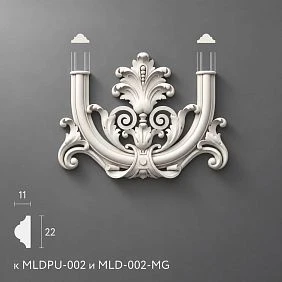
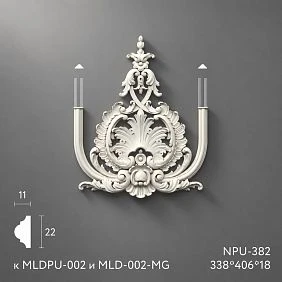
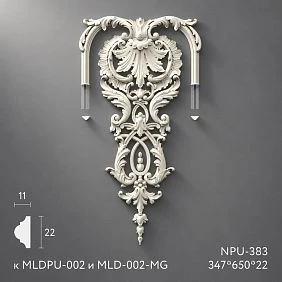
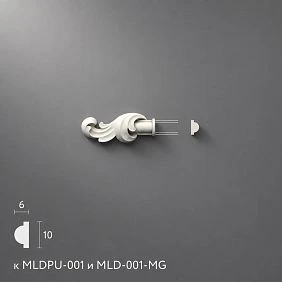
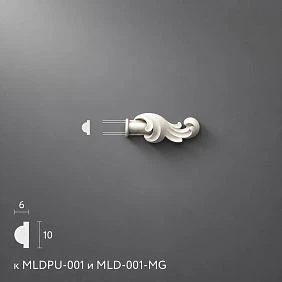
Our factory also produces:

Glue for stucco decor: what is important to check
Glue is perhaps the most underestimated item when purchasing stucco decor. It seems: glue is glue, the main thing is that it holds. In practice, choosing glue for polyurethane moldings requires attention to several parameters.
Get Consultation
Compatibility with polyurethane
The first and most important requirement. A number of glues and mounting compounds contain aggressive solvents (acetone, toluene, some esters) that literally corrode the polyurethane surface: it softens, deforms, loses its relief. This is not a theoretical risk — it is a specific damage to the decor that cannot be fixed without replacing the element.
Before buying glue, always check: whether compatibility with polyurethane or plastic is indicated in the instructions or on the label. If not explicitly stated, check with the seller or test on a small offcut.
for installing polyurethane molding Water-based or polyurethane-based compounds without aggressive solvents have proven themselves well.
Initial fixation and adjustment time
Glue for decorative molding should:
-
Provide initial fixation quickly enough so you don't have to hold the element by hand for 20–30 minutes
-
At the same time, leave time for position adjustment — 3–5 minutes is enough for leveling
Instant-grab glue is convenient for horizontal surfaces, but on a ceiling or vertical wall with a heavy cornice, initial fixation is crucial to prevent the element from sliding in the first seconds after pressing.
Working on walls and ceilings
Ceiling installation is a special case. The glue must hold the element immediately after application, without sagging. For polyurethane ceiling cornices and rosettes, a compound with sufficient initial viscosity is needed, one that does not run and holds the part in the desired position.
Interior or facade
For interior and facade installation, different compounds are used. Facade adhesive must be resistant to moisture, temperature fluctuations, and atmospheric loads. Interior adhesive can be simpler in composition, but it must still provide a reliable bond with polyurethane and the base material — concrete, drywall, or plastered surface.
The question "Can you glue moldings with liquid nails?" arises often. The answer: it depends on the specific composition of the liquid nails. Some compositions are compatible with polyurethane and provide good adhesion — but always check compatibility, and don't buy "the first ones you see" for the sake of saving money.
Sealant for joints: why it is needed and how to use it
"Why sealant if the glue itself fills gaps?" — the logic is understandable, but incorrect. Glue is a fixative, not a finishing material. Sealant performs a fundamentally different task.
Why sealant is needed when installing moldings
Joints between molding strips. Even with perfectly precise cutting, a microscopic gap remains between the ends of the strips. After painting, this gap becomes noticeable — especially under side lighting. Sealant applied to the seam and smoothed with a finger or spatula fills the joint and makes it visually invisible.
The junction of the cornice to the wall and ceiling. Wall and ceiling surfaces are almost never perfectly flat. A cornice, even if correctly installed, may not fit tightly to the surface at certain points. Sealant closes these gaps — otherwise, after painting, they will be visible as dark lines.
The joint of the ceiling rosette with the ceiling. A polyurethane rosette is a round or polygonal element that is glued to the ceiling. Small gaps are inevitable around the perimeter, especially if the ceiling has even the slightest unevenness. Sealant along the contour is a mandatory step.
Small gaps and defects. After installing the entire system, point gaps, small cracks, or places where the glue did not completely fill the gap are almost always found. Sealant solves these problems before painting — and they disappear.
Which sealant to choose
For polyurethane stucco decor, use exclusively acrylic sealant. Not silicone. Silicone cannot be painted: even after applying paint, the silicone seam will remain visible as a strip of different texture. Acrylic sealant can be painted, sanded, and after painting becomes part of the surface.
Acrylic sealant is applied in a thin strip along the joint, smoothed with a wet finger or a small rubber spatula, and excess is removed with a rag. Drying time is 1–4 hours depending on the composition and temperature. After drying, priming and painting follow.
Primer and paint: flawless finishing
Painting is the final step that either makes the stucco decor part of the interior or reveals it as a "glued-on element." The difference between correctly and incorrectly executed painting is the difference between a professional result and a makeshift one.
Why prime polyurethane stucco
The surface of polyurethane is smooth and almost non-porous. Paint on such a surface without primer may apply unevenly, run, form spots, or peel off after a few months. Primer creates a micro-roughness on the surface, ensuring paint adhesion to polyurethane.
Good news: no specialized primer is needed for polyurethane. A standard acrylic deep-penetration primer is suitable, applied in a thin layer and allowed to dry before painting. One coat of primer, and the surface is ready for painting.
Important nuance: it is better to prime already installed decor rather than strips before installation. This allows priming both the joints with sealant and the surface of the elements themselves in a single operation.
When you can paint without preparation
If the decor will be painted the same color as the wall or ceiling, and the wall surface is already well-primed, sometimes you can skip separate priming of the stucco. But this is an exception, not the rule. In most cases, one coat of primer is 15 minutes of work that guarantees a quality finish for years.
Which paints are suitable for polyurethane molding
For painting polyurethane decorative molding, the following are suitable:
-
Water-based acrylic paints — the most common option, good coverage, quick drying, no odor
-
Latex paints — elastic coating, withstands micro-bends and vibrations well
-
Alkyd enamels — more durable coating, but take longer to dry and have an odor
It is not recommended to use paints with aggressive solvents: they can damage the polyurethane surface or react with the adhesive.
Painting is done after the sealant and primer have completely dried. Usually two coats of paint with intermediate drying are sufficient — and the decor becomes a monolithic part of the painted surface. No visible seams, no "glued-on" details — only architectural volume integrated into the interior.
Why the color should be determined before installation
This is a practical note that saves nerves. If you plan to paint the molding in a color different from the walls — decide on the color before installation, because in some cases painting the elements before installation (with subsequent touch-up of joints) gives a cleaner result than painting after. This is especially relevant for complex relief profiles where it is difficult to reach the depth of the ornament with a brush.
How much spare to take for molding
The question of stock is one of the most frequent and painful. Buying "just enough" almost guarantees running out at the final stage. Buying too much means spending extra.
Here is a practical system for calculating stock for different types of elements:
Moldings for frames and panels
A 10% stock is the minimum for straight-line frames on flat walls without complex layouts. If there are many frames, walls have non-standard proportions, or the frame layout involves non-standard cuts, allocate 12–15%.
Why is 10% insufficient for complex cases? Because each corner of a frame involves two end cuts at 45°. With 12 frames, that's 48 cuts. Each cut requires precision: the slightest mistake and the strip becomes scrap. This is where stock is consumed fastest.
Ceiling Cornices
A 10–15% stock is mandatory. Cornices are installed around the room perimeter, and each internal corner requires a 45° cut. Even in a square room, four corners mean eight end cuts. If the room has a niche, bay window, or complex configuration, add more.
Decorative overlays and rosettes
For piece items, stock in linear meters is not needed. But there is another nuance: if there are multiple sockets or overlays are used in pairs, ensure the quantity covers symmetry. Three sockets instead of four in a symmetrical system is a visual error that cannot be hidden.
Facade Decoration
For facade decor, a 15% stock is a reasonable minimum. Outdoor work is always more complex: cutting at height, fitting to the facade texture, non-standard window opening sizes. Reordering a single cornice for a facade is time-consuming and inconvenient.
General rule
It is better to have a leftover of 2–3 strips than to halt installation for a reorder. Leftover stock is insurance for replacing a damaged element, minor adjustments, or layout changes.
What to buy together with polyurethane moldings
Moldings are the basic element of most decorative systems. But "buying moldings" means much more than just linear pieces. Let's consider the complete set.
Straight molding strips
This is the main linear material used to assemble frames, panels, and linear runs. Moldings made of polyurethane The STAVROS catalog offers various profiles: from simple straight ones to multi-tiered with ornamental relief. Choose a profile that matches the scale of your ceiling height and interior style.
Corner pieces and decorative inserts
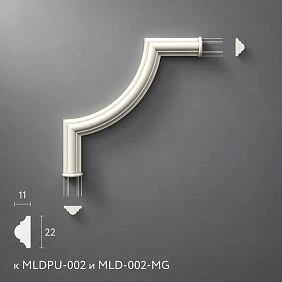
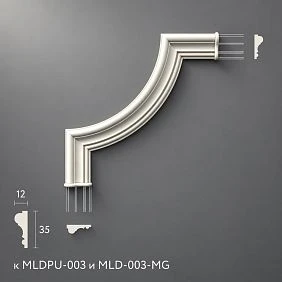
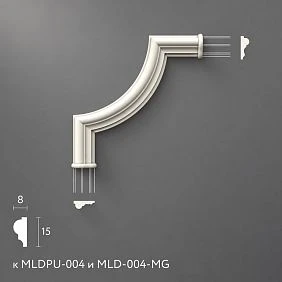
If frames are made from moldings, corners can be cut at 45° yourself (requires a precise miter box or jigsaw) or use ready-made corner blocks. Ready-made corner elements made from decoration for moldings significantly speed up installation and guarantee a neat corner without the risk of cutting errors.
At the intersection of moldings in the center of the frame, you can install a decorative insert — a rosette or small overlay. This is an optional element, but it enriches the system and makes the frame more decorative.
Reserve
For moldings — 10% minimum. If there are many frames and complex layouts — 12–15%.
Adhesive, sealant, primer, paint
All of this is needed on the same day as the moldings. No 'I'll buy it later.'
Marking tool
Level, tape measure, pencil, plumb line for vertical lines. Without precise marking, the frames will turn out crooked — no adhesive can fix that.
What to buy with ceiling stucco molding
The ceiling is the most technically challenging installation area. Working overhead, precision of joints, the need to hold the element until the adhesive sets — all of this requires full preparation.
Ceiling cornice
Ceiling molding — this is primarily a cornice that is mounted around the perimeter of the room. The cornice is calculated in linear meters with a 15% margin. For a ceiling cornice, adhesive with good initial grip is especially important, because on the ceiling there is no gravity to help — only the adhesive holds the element until it is completely dry.
Ceiling rosette
Polyurethane ceiling rosettes are mounted in the center of the ceiling under the chandelier. The rosette requires adhesive, sealant along the contour, primer, and paint. Additionally — painter's tape to protect the wire and chandelier socket during painting.
Molding frames on the ceiling (optional)
If the ceiling is decorated not only with a cornice but also with molding frames above the sofa or dining area — add the entire molding kit: linear elements, corner pieces, adhesive, sealant, spare parts.
Painter's tape
Painter's tape on the ceiling is not a minor accessory but a fundamental necessity. It protects walls from accidental paint splatters when painting the cornice, limits the area for applying sealant, and helps create clean lines in two-color designs.
What to buy for polyurethane wall decor
The wall is the most versatile area for applying stucco decor. Molded frames, decorative panels, overlays, cornices, and baseboards can all be used here in various combinations. A complete set for wall decor looks like this:
Main elements:
-
Moldings — linear elements for frames and runs
-
Polyurethane decorative appliques — to enrich frames with ornamental accents
-
Corner blocks and inserts for frames
-
Decorative baseboard (optional) — for the lower boundary of the system
-
Decorative cornice (optional) — for the upper boundary of the system
Consumables:
-
Adhesive compatible with polyurethane
-
Acrylic sealant
-
Primer
-
Paint
-
Painter's tape
-
Spatula, rags, level, tape measure
For complex accent walls with multi-level decor, it is recommended to draw a layout diagram before purchasing. Polyurethane wall decor in the STAVROS catalog includes several collections with different relief styles — from strict classics to modern geometric systems.
Additional elements that are often forgotten
Main decor and key consumables are clear. But there are a number of items that seem insignificant until installation reaches the point where they suddenly become necessary.
Decorative baseboard
If the molding frames on the wall start from the floor baseboard level, a baseboard coordinated in profile with the molding is needed. Not always, but often. Plan ahead.
Brackets and Consoles
If above the fireplace, door portal, or in a niche it is planned Polyurethane brackets — they are added to the kit separately. The bracket is a piece item with a separate cost.
Linear elements for hidden areas
If the stucco molding is installed in a niche or behind furniture, where part of the profile is not visible, a simpler one can be used Polyurethane trim instead of a decorative molding. This is reasonable savings without loss in the visible result.
Spare planks
After installation, there are always leftovers. But spare full planks are different. If after a year one element gets mechanical damage (corner chip, dent during furniture moving), finding the exact same article may be difficult. One or two spare planks of the same profile are a reasonable insurance for the future.
Practical breakdown: kit for a specific task
Let's consider three specific scenarios and compile a complete purchase list for each.
Scenario 1: Cornice around the perimeter of an 18 sq. m room
Room perimeter 4 × 4.5 m = 17 m. 15% reserve = 19.6 m. Round up to 20 linear meters.
Set:
-
Ceiling cornice — 20 linear m (with 2 m planks = 10 planks)
-
Construction adhesive — 3–4 tubes (based on 1 tube per 5 m)
-
Acrylic sealant — 2 tubes
-
Primer — small volume for application around the perimeter
-
Paint — 0.5–1 liter for painting the cornice
-
Masking tape — 2 rolls
Scenario 2: Three frames made of moldings on the wall
Wall 3.6 × 2.7 m, three frames 1.0 × 1.2 m each. Length: 13.2 m + 15% = 15.2 m. Round up to 16 linear meters
Set:
-
Molding — 16 linear meters (with 2 m planks = 8 planks + 1 spare)
-
Corner blocks — 12 pieces (4 corners × 3 frames)
-
Central decorative inserts for frames — 3 pieces (optional)
-
Glue — 2 tubes
-
Sealant — 1 tube
-
Primer, paint, painter's tape
Scenario 3: Ceiling rosette for chandelier
Set:
-
Socket — 1 piece of the required diameter
-
Glue — 1 tube
-
Sealant — 0.5 tube (enough for the outline)
-
Primer — minimal amount
-
Paint — 0.2–0.3 liters
-
Painter's tape to protect the wire and area around the socket
Common mistakes when buying moldings and consumables
Mistakes when buying stucco decor are a separate topic worth discussing honestly. Because they repeat from project to project, and each one has specific consequences.
Buying moldings without a reserve. It seems like saving money — but results in reordering and installation delays. With reordering, there's a risk that the needed item is temporarily out of stock or has changed in a new batch.
Forgetting about glue. Yes, it happens. Moldings are ordered, but the glue is "I'll buy it tomorrow." In the end, tomorrow turns into "next week," and installation gets postponed.
Not buying sealant. "The glue will fill it in" — is a wrong decision. After painting, the joints become visible precisely because acrylic sealant was not used.
Not checking glue compatibility with polyurethane. An aggressive composition damages the element's surface. Replacing the decor costs several times more than the right glue.
Not accounting for painting. Polyurethane stucco comes white or paintable. If the interior color is not white — paint is needed. This is obvious, but paint is forgotten in 30% of cases.
Not buying corner elements for frames. The corners are cut imprecisely — the frame looks unprofessional. Ready-made corner blocks from decoration for moldings solve this problem completely.
Mixing profiles from different collections. One molding with a rounded profile and a cornice with an angular profile in the same space — this is a visual conflict. Systematic selection of elements from one collection gives a consistent result.
Choosing a rosette without considering the chandelier's diameter. A rosette smaller than the chandelier's diameter is completely covered by the light fixture — it loses its purpose. A rosette significantly larger than the chandelier's diameter looks unbalanced.
Ordering decor without a layout diagram. Without a diagram, it's impossible to accurately calculate the number of elements. Some will be extra, some will be missing.
Buy glue and sealant later. Buying consumables at retail is always more expensive than within a single order. Plus time loss.
More details on technical installation aspects — in the article installing polyurethane molding, where all practical nuances of working with joints, corners, and painting are covered.
Ready checklist before ordering
| What we buy | Why it's needed |
|---|---|
| Polyurethane stucco molding | Main decorative element: moldings, cornices, rosettes, overlays |
| Mounting adhesive (compatible with PU) | Fixing elements on the wall or ceiling |
| Acrylic sealant | Neat joints, junctions, small gaps |
| Primer | Surface preparation of polyurethane for painting |
| Paint | Finish color and visual integration of decor |
| Reserve 10–15% | Trimming, corners, installation errors |
| Corner elements (molding decor) | Clean frame corners without manual trimming |
| Painter's tape | Surface protection when applying glue and paint |
| Rubber spatula | Leveling sealant in joints |
| Rag | Immediate removal of excess glue before hardening |
| Level and tape measure | Precise marking before installation |
Where to buy moldings and everything needed for installation
If you are selecting decor for walls, ceiling, facade, or furniture, it is most reasonable to immediately gather a complete set: decorative elements, consumables, and spare items. This avoids repeat orders, installation delays, and unexpected costs for urgent additional purchases.
You can buy ready-made stucco matching the Baroque style. Calculate the quantity: linear meters of cornices and moldings, number of rosettes, pilasters, consoles, corner elements. Add a ten to fifteen percent allowance for trimming. with a full selection of categories can be found in the STAVROS catalog. Here are collected all types of elements for systematic decor: Moldings made of polyurethanecornices, Polyurethane ceiling rosettes, Decorative Inserts, Decor for Molding, Wall Decor и Ceiling molding — everything in one place, with clear dimensions and photographs.
FAQ: Answers to popular questions
What glue is needed for polyurethane moldings?
You need glue compatible with polyurethane — without aggressive solvents (acetone, toluene). These are mounting adhesives on a water or polyurethane base, specifically designed for working with polymer materials. For facade installation, the glue must be weather-resistant.
Is sealant needed for decorative moldings?
Yes, acrylic sealant is mandatory. It fills joints between strips, junctions with the wall and ceiling, and small gaps after installation. Without sealant, joints will be visible after painting. Silicone sealant is not suitable — it cannot be painted.
How much spare should I take for moldings?
For straight sections — at least 10%. For complex layouts with many corners, frames, and non-standard cuts — 12–15%. Ordering extra later leads to delays and risk of batch differences.
What should I buy together with a ceiling rosette?
Construction adhesive, acrylic sealant (for the rosette perimeter), primer, paint, and masking tape to protect the wire. First determine the rosette diameter: it should match the chandelier scale and ceiling area.
Can I buy the molding first and the consumables later?
Theoretically — yes. Practically — inconvenient and expensive. Buying glue, sealant, and paint separately means extra trips, wasted time, and often overpaying. It's better to calculate the full set and order everything at once.
Do I need to paint the molding after installation?
In most cases — yes. Painting hides joints, evens out the molding color with the wall or ceiling surface, and makes the decor visually blend with the interior. Without painting, white polyurethane on a colored wall looks like an insert.
What is most often forgotten to buy together with the molding?
Most often — glue, sealant, corner elements, and spare moldings. Primer and paint also often remain 'off the radar' during the initial order. Use the checklist above to not miss any item.
Do I need to buy corner pieces for moldings?
Not necessarily, if the corners will be cut manually at 45°. But ready-made corner blocks significantly simplify installation, guarantee a neat corner, and speed up the work. For those doing the installation themselves, it is recommended.
About the company STAVROS
Installation of decorative molding begins with the right choice and the right purchase. Decorative elements, consumables, a material reserve — all of this should be in the kit before the first touch to the wall.
STAVROS — a catalog of decorative stucco, moldings, rosettes, cornices, overlays, and architectural polyurethane decor for interior and facade applications. The catalog features all categories of elements: from simple linear moldings to complex architectural systems with brackets, pilasters, and capitals.
If you are assembling a kit for installation, start with the catalog polyurethane products STAVROS: clear dimensions, photos in interiors, a full range of categories, and consistency of elements within each system. Select the decor, calculate the quantity, add a reserve and consumables — and the installation will go without a single stop.