Article Contents:
- Why an open edge of a slatted panel is always a problem
- Where the edge problem most often occurs
- Side edge of the accent zone
- External corner
- End of a niche
- Edge of the TV zone
- Junction with a doorway
- Transition to a painted wall
- Bottom joint at the floor
- Top edge at the ceiling
- First solution: wooden corner
- Where is the wooden corner used
- How to choose a wooden corner
- Installation of a wooden corner
- Second solution: wooden molding
- When molding is better than a corner
- Technical features of molding
- Color schemes with molding
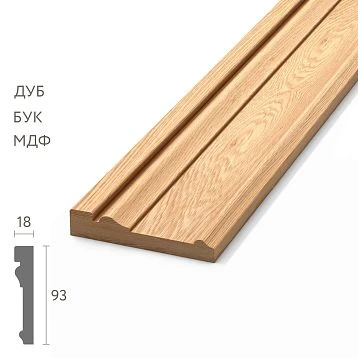
- Third solution: MDF baseboard or wooden baseboard
- Why baseboard is mandatory
- When to choose MDF baseboard
- When to choose wooden baseboard
- Baseboard height: proportion matters
- Solution four: additional wooden strip
- Where the strip works as an additional element
- Parameters of the additional strip
- How to choose the right option for the situation
- Details by zones: how to design the edge in a specific room
- TV area in the living room
- Hallway and corridor
- Bedroom — headboard area
- Niche
- Mistakes when designing the edge
- What to buy together with slat panels for a complete set
- FAQ: Answers to Popular Questions
- About the Company STAVROS
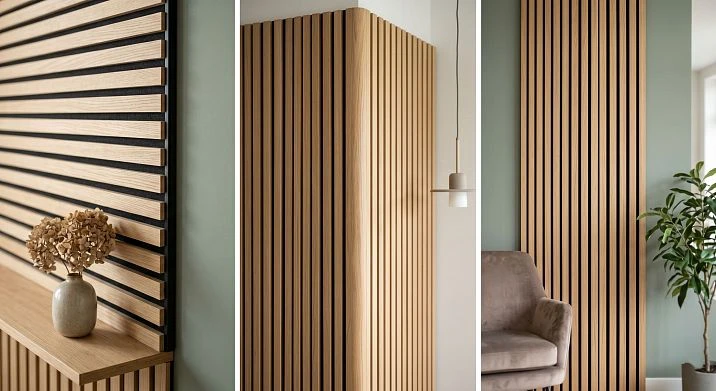
There is a moment in any renovation when the work is almost finished, the wall is already sheathed, the slats are standing straight, the shade is chosen — and then your gaze hits the side end of the panel. An open cut. Raw MDF or wood, a difference with the main wall, a dark gap near the floor, or an awkward transition to a doorway. And the question arises with unexpected sharpness: how to close the edge of the slat panel so that the wall looks finished, not abandoned halfway?
This is not a trifle. This is exactly the detail that separates professional installation from amateur work. slatted panels for walls — a material with character, with a vertical rhythm, with depth. They require completion. An open end is not just an aesthetic flaw: it is a vulnerable spot that over time begins to crumble, absorb moisture, and deteriorate. Therefore, the question "how to close the edge" is about both beauty and durability.
In this article — everything you need to know about solutions for finishing the edge of a slat panel. Specifically, by situation, with commercial logic: what to buy, why, and in what order.
Why an open edge of a slat panel is always a problem
Let's be honest. Many people think: "Well, the end is at the back, in the corner, no one will see it." But a slat panel is arranged differently than, say, tiles: it has relief, depth, vertical rows. And any open end of this panel is visible — from any angle, with side lighting, especially in the evening with working lights.
Look at the panel from the side. What is there? A cut of the base, ends of the slats, possibly glue or fasteners. This is a technical picture that no guest in your apartment should see. And also — an open end has no protection from:
-
mechanical impact (accidental hit, bumped corner when rearranging furniture);
-
moisture (especially relevant in the hallway and corridor);
-
destruction of the outer rail, which is held only by the base and is not secured from the side.
When Slatted wall panel it is installed as part of a well-thought-out system with additional elements — it works differently. The edges are closed, the corners are protected, the bottom joint is covered by a baseboard. The wall functions as a single architectural object, not as a set of parts glued next to each other.
And another argument — purely visual. A closed end makes the panel 'heavier' in a good sense: it gains completeness, volume, architectural weight. An open end is always lightness in a bad sense: a feeling of temporariness, incompleteness, 'just for now.'




Where the edge problem most often occurs
Before choosing a solution, you need to understand which specific edge is being discussed. The situations are different — and the right solution for each is unique.
Our factory also produces:




Side edge of the accent zone
The most common case. decorative slatted panels they cover the central part of the wall — behind the TV, behind the sofa, in the headboard area. On the left and right, the panel ends, and there is an open side edge. It is clearly visible when viewed from the side, especially if the accent zone is located a few centimeters from an adjacent wall or furniture.
Get Consultation
External corner
When the slatted panel wraps around an external corner — continues on two adjacent walls — where the walls meet at a right angle from the outside, a corner profile is needed. Without it, the joint line of two ends, each exposed, will be visible on the corner protrusion.
End of the niche
A niche is a special case. Inside the niche, the slatted panel runs along the back wall and possibly along the side walls. At the intersection of the back and side surfaces, there is a corner. A profile is needed there to create a neat internal or external corner transition.
Edge of the TV zone
The TV zone is likely the most viewed spot in the living room. A person sits on the sofa opposite, and their gaze inevitably takes in not only the screen but everything around it. An open side edge of the panel next to the TV will be constantly visible. This requires not just a technical solution but a beautiful decorative frame.
Connection to the doorway
Where the slatted panel ends at the doorway, a joint with the door frame or casing occurs. This spot requires a precise solution: a gap, profile, or trim piece that transitions from the slats to the casing without a visible break.
Transition to a painted wall
If the panel covers part of the wall and the rest is painted, the boundary between the slatted area and the painted surface must be finished. Simply cutting off the panel results in a step, shadow, and differences in height and color.
Bottom joint at the floor
The bottom of the slatted panel always requires a baseboard. Not because it's customary, but because the expansion gap between the panel and the floor (5–10 mm) must be covered. Without a baseboard, there is a dark gap, dust, and moisture.
Top edge at the ceiling
If the panel does not reach the ceiling, the top horizontal edge also needs a profile: either a molding or a special cornice element. If the panel goes up to the ceiling, the transition to the ceiling baseboard must be clear.
Solution one: wooden corner
This is the most straightforward and technically clean way to close an open end. Wooden corner bracket — a profile with two flanges that overlap the panel end and are fixed on two planes: on the panel base and on the adjacent wall or adjacent plane.
Where the wooden corner is used
External wall corner. Classic. The slatted panel runs along two adjacent walls forming an external corner. On the corner edge — Wooden corner bracket: its flanges overlap the ends of both panels, protect the corner, and create a clear vertical line along the edge.
Open side end. The panel ends on a visible plane — not in a corner, but in the middle of the wall. In this case, the corner is attached to the side end of the panel and to the wall. Visually, it is a clean vertical profile that covers the cut and creates an even transition line.
Edge of a niche. A niche with slatted panels inside requires corner profiles at all plane intersections. Both internal — where the back wall meets the side walls — and external, where the niche side walls transition into the main wall.
Slope. A vertical slope next to a window or door is another plane that is often paneled together with the main wall. At the intersection of the slope and the wall — a corner.
Transition to furniture. If the slatted panel ends at a built-in wardrobe, shelf, or other piece of furniture — the end needs to be closed. In this case, the corner covers the cut and creates a neat transition from the wall finish to the furniture body.
How to choose a wooden corner
The main parameter is the shelf. It should be no less than the thickness of the panel + base. For MDF slatted panels standard thickness of 12–16 mm, the optimal corner shelf is from 15 to 25 mm. If the shelf is smaller, the corner will not completely cover the end, leaving a visible cut.
The second parameter is height. The corner is attached along the entire height of the slatted zone: if the panel goes from floor to ceiling, the corner is of the required length. Calculate based on installation height + 5 cm allowance.
The third parameter is color. A corner matching the panel color is a monochrome solution, the corner is invisible and works as a technical closing element. A corner in white or a contrasting color is a decorative accent, a vertical line that reads as a designer touch.
Installation of a wooden corner
It is attached with finishing nails or liquid nails. During installation, it is important:
-
to align the corner vertically — any deviation will be very noticeable;
-
to apply glue in a continuous line — the corner must fit the surface without gaps;
-
after installation, hold the load until the glue fully sets.
Second solution: wooden molding
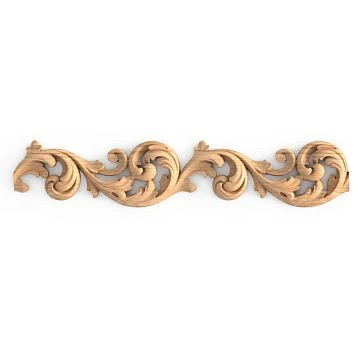
Where not just technical edge protection is needed, but decorative design — that's where wooden molding. Molding is a profile with a relief cross-section that creates a horizontal or vertical decorative line. It doesn't just cover the edge — it turns it into a design element.
When molding is better than corner trim
Corner trim is a functional detail. Molding is decorative. The boundary between them is not absolute, but there are scenarios where molding works better:
Transition to a painted wall. Where the slatted area ends and a smooth surface begins, Decorative wooden moldings they create a clear decorative boundary. This is not just a technical "closer" — it's a line that says: "this is an intentional transition between two zones."
Frame around a slatted insert. If the slatted panel is an accent zone bounded on four sides, molding around the perimeter creates a full frame. Left and right vertical moldings + top horizontal molding = three sides of the frame. Below — a baseboard or bottom molding. Result: the panel turns into a "picture" on the wall.
TV zone with an architectural accent. Molding around the perimeter of the TV panel is one of the best design techniques for a living room. The screen inside the molding frame, slats as a background — this creates a complete visual center of the room. Not just a "wall with a TV," but a well-thought-out architectural composition.
Headboard zone in the bedroom. On the sides of the slatted panel behind the bed — two vertical moldings, at the top — a horizontal one. The frame holds the headboard zone and prevents it from "dissolving" into the room's space. This is a soft, delicate technique without rigid corner profiles.
Living room with a sofa. The slatted wall behind the sofa with a molding frame is a complete design solution. The sofa 'leans' against the frame, creating the feeling of an architectural recess.
Technical features of the molding
Buy wooden molding — this is the first step. The second is proper installation, and there are nuances here.
Molding on horizontal sections is attached with a 90° cut — along the length. Molding in corners — at 45°, using a miter box with an angle lock. An error of 1–2 degrees in the corner cut will be very noticeable on the assembled frame.
The width of the molding should be proportionate to the width of the slats. A thin molding (15–20 mm) next to wide slats (30–40 mm) is a mismatch. The molding should read as a confident frame, not get lost next to large slats.
molding MLD-019 — a specific option with a good profile for wall frames: the width allows for creating an expressive horizontal or vertical line without excessive bulkiness.
Color schemes with molding
Three working schemes for slatted panels:
Wood panel + white molding. Classic. Warm wood tone inside, white frame outside. The molding highlights the slatted area and creates contrast. Works in Scandinavian style, modern classic, neoclassical.
Monochrome. Panel, molding, and baseboard in the same color. The frame is 'present' but not conspicuous: it is visible as a relief transition, creating volume without contrast. For minimalist spaces, minimalism, and modern interiors.
Dark panel + molding in matching tone. For studies, bedrooms, interiors in a "masculine" or "library" style. Dark background, slats with shadows between them, dark frame — everything creates a rich, deep wall with character.
Solution three: MDF baseboard or wooden baseboard
The bottom edge of the slatted panel is a special case. No corner profile or frame is needed here. What is needed is a horizontal element that covers the gap between the panel and the floor and creates the bottom horizon of the entire wall system. This is the job of the baseboard.
Why a baseboard is mandatory
The slatted panel is not installed flush with the floor. A technological gap of 5–10 mm is necessary to compensate for deformations due to changes in humidity and temperature. This gap needs to be covered. Without a baseboard — a dark gap near the floor, dust that accumulates there, and visual incompleteness of the lower part of the wall.
But the function of the baseboard is not limited to "covering the gap." The baseboard is the bottom horizontal line of the entire wall. It holds the entire system from below, just as the molding holds it from above and on the sides. Without this line, the wall "floats": the slats seem to start from nowhere.
When to choose an MDF baseboard
MDF Skirting Board — the right choice in several situations:
Everything is painted in a single color. If the panels, baseboard, and molding are coated with the same enamel — MDF baseboard provides a perfectly smooth surface for painting. No need to level wood fibers, prime wood pores, or fight uneven paint absorption. MDF paints evenly, without traces.
Clear geometry is needed. MDF is a material with constant density without natural wood defects. The baseboard profile comes out with a precise cross-section: straight edges, sharp corners. This is important for modern, minimalist interiors.
The budget is limited. MDF baseboard is more affordable than solid wood. For large areas, this means significant savings without losing visual appeal.
buy MDF skirting board and paint it the same color as slatted panel for painting — this is an ideal monochrome system with clean lines and a unified surface.
When to choose a wooden baseboard
solid wood baseboard — for interiors where the texture of natural wood is important:
Classic and neoclassical interior. The profile of a wooden baseboard is expressive, with a shaped cross-section. It fits naturally where wooden moldings, cornices, and slatted panels with an oak imitation create a "wooden" system.
Natural texture. Under varnish or matte impregnation, a wooden baseboard reveals the material's texture. This is not just a finishing detail—it is an honest accent on natural origin.
Consistency with the floor. If the floor is parquet or engineered wood, a wooden baseboard creates a unified lower horizon in a matching tone. This is especially important in classic living rooms and bedrooms.
Baseboard height: proportionality matters
This is a detail often overlooked. A baseboard 40 mm high next to a slatted panel with large slats spaced 30–40 mm apart is disproportionate: the baseboard gets "lost." The rule: the baseboard height should be comparable to the slat spacing or exceed it.
Height guidelines:
-
Ceiling 240–260 cm: baseboard 70–100 mm.
-
Ceiling 260–300 cm: baseboard 100–130 mm.
-
Ceiling 300 cm and above: baseboard 130–150 mm.
-
Hallway with high traffic: baseboard from 100 mm — for protection.
Solution four: additional wooden batten
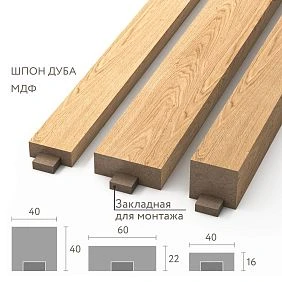
This is the most underestimated additional element. RK-001 can be ordered directly on the website it is considered as part of a slatted wall — but not as an independent additional profile for edging. And that's a shame.
Where the batten works as an additional element
Horizontal dividing belt. If the slatted panel occupies the lower part of the wall (up to 100–120 cm) and the top remains smooth — a horizontal dividing element is needed at the transition between them. A horizontal batten is a more concise option than a profiled molding. It is simply a thin, even horizontal line that clearly divides the wall into two zones.
Symmetric side filler. If the width of the slat zone is not a multiple of the panel width, the last slat on the right may be narrower or wider than the others. This disrupts the rhythm. Decorative wooden slat of the required section "fills" symmetry on both sides of the zone — the rhythm is preserved, the wall looks correct.
Closing a narrow gap. During installation near a doorway or furniture, a narrow vertical gap may remain between the last slat and the frame or cabinet body. A filler slat of the required size closes this gap — neatly, without rework.
Continuation of the slat rhythm. In non-standard places — niches, around windows, on slopes — you can buy a wooden batten and continue the rhythm of the slat wall where the finished panel does not fit in size. This is important for visual integrity: the slats go "further" than the main panel and create a sense of continuity.
Transition between panel and furniture. A slat at the end of the panel next to furniture is an elegant way to finish the slat zone near a cabinet body or bookshelf. It does not "interrupt" with a molding accent, but continues the language of the slat wall to the final point.
Filler slat parameters
When choosing of wooden strips three parameters are important for the filler:
-
Cross-section: the width of the slat should be close to the width of the panel slats.
-
Height (profile): the slat should "look" like part of the overall system.
-
Covering: same tone as the main slats — or paintable to match the color.
How to choose the right option for the situation
All four solutions are good — but each for its own task. Here is a clear summary table.
| Situation | Recommended solution |
|---|---|
| Open side edge | Wooden angle |
| External wall corner | Wooden corner bracket |
| Transition to the painted wall | wooden molding |
| Frame around accent area | molding MLD-019 |
| Bottom joint at the floor | MDF Skirting Board or Wooden baseboard |
| Niche or slope | Corner + slat |
| TV zone | Molding around the perimeter + baseboard |
| Hallway | Corner + high baseboard |
| Bedroom (headboard) | Molding on sides and top + baseboard |
| Transition to door | Trimming Items + extension strip |
| Narrow gap near furniture | Wooden extension strip |
| Asymmetric rhythm of slats | Wooden plank as an extension |
Details by zones: how to finish the edge in a specific room
TV zone in the living room
This is the most critical spot regarding the panel edge. The TV area is the center of the living room, always in sight. An exposed end is especially unacceptable here.
Classic scenario: slatted panels for walls on the main plane + Wooden decorative moldings MLD-019 on three sides (top + two sides) + Wooden baseboard from below. If the panel extends to a corner — Wooden corner bracket on the corner edge.
Color: wood panel + white molding + white baseboard — unbeatable. Or monochrome for painting for a strict modern interior.
Hallway and corridor
The hallway is an area of maximum load on the finish. Everything here must be not just beautiful, but also durable. An open end in the hallway is not an aesthetic, but already a practical problem: it will be bumped during the first major rearrangement.
Scheme for the hallway: Slatted panels for interior finishing on the lower part of the wall + Wooden corner bracket on all external corner transitions + wooden molding along the top edge + Skirting 100–120 mm high from below.
Additional Items: wood trim items for joints at door frames. In the hallway there are usually 2–4 doors, and each needs a neat transition.
Bedroom — headboard area
In the bedroom, the requirements are different: what matters is not durability, but delicacy of design. Sharp angular profiles, harsh contrasts — that's not what you need near the bed.
Scheme for the headboard: Decorative slatted panel PAN-001 the width of the bed + side vertical moldings + top horizontal molding + Wooden baseboard matching the floor color at the bottom.
The molding creates a frame that holds the slatted area and prevents it from "spreading" across the wall. At the same time, the frame is not a rigid angular profile, but a smooth relief transition, proportionate to the bedroom space.
Niche
The niche has the largest number of points requiring finishing. The back wall meets two side walls, and the side walls meet the main wall on the outside. That's four corners: two internal and two external.
Internal corners of the niche — corner profile or Wooden plank in the form of an internal corner. External corners at the niche exit — Wooden angle Standard. Bottom edge — Skirting or horizontal molding. Top edge — horizontal molding or cornice profile.
Edge finishing mistakes
This section is for those who want to do it right the first time. Typical mistakes — each has a specific consequence.
Leaving the panel cut visible. The most common mistake. "No big deal" — they think during installation. But then the cut starts to darken, the edges of the slats peel off, dust gets into the hollow cuts. A wooden corner or molding covers the end in 15 minutes of installation — and this problem is completely eliminated.
Covering the edge with a profile that is too thin. A corner with a 10 mm shelf for a 16 mm thick panel — the profile does not cover the end. A visible gap or protruding cut remains. The profile shelf must be larger than the panel thickness: at least 3–5 mm more.
Installing a baseboard of a different style. Slat panel in a modern minimalist interior + baseboard with a classic figured profile — this is a style break. All system elements must belong to the same design language.
Not accounting for the panel thickness when choosing a corner. A panel with slats has a total thickness greater than just the base: the slats protrude by 15–25 mm. The corner must cover not only the base but also the protruding slats — or be attached so that the slats do not press against its shelf.
Mixing different wood shades. Oak Slat Panel one tone + molding with a different wood tone + baseboard of a third shade — this is chaos. Either everything under a single enamel paint, or a single stain for all wooden elements.
Forget about the external corner. When ordering, they count panels, baseboards, sometimes moldings — and forget about corner pieces. They discover this during installation. Reorder = waiting = installation downtime.
Don't calculate additional elements in advance. wood trim items for joints at doors, additional strips for non-standard places, transition profiles — all this needs to be calculated before ordering. Rule: add 15–20% reserve to the main calculation.
Don't treat the end before installation. The MDF cut needs to be primed before closing with a corner piece or molding — especially if painting will be done later. Otherwise, even under the corner piece, the end may start to absorb moisture and deteriorate from the inside.
What to buy together with slatted panels for a complete set
Final checklist for those ready to order.
slatted panels for walls — in three versions: with decorative coating (PAN-001), primed for painting (PAN-002), under oak wood (PAN-003).
Wooden corner piece UG-001 — for all external corner transitions and open side ends. Count: one corner piece for each open edge or external corner.
Wooden molding MLD-019 — for frames, transitions to painted walls, and decorative belts. Perimeter of the slatted zone + 15% allowance for cuts.
MDF Skirting Board — for monochrome systems for painting. Length of the lower edge of the slatted zone + 10% allowance.
solid wood baseboard — for natural interiors. Same calculation logic.
Wooden slat RK-001 — for additional areas, dividing belts, and continuing the rhythm of slats in non-standard zones.
Decorative wooden slat — for self-installation of slatted accents on non-standard surfaces.
wood trim items — for all technical joints: near door frames, sockets, furniture bodies.
More about installing slatted panels and about that, How to attach slat panels to the wall — in the corresponding materials.
FAQ: Answers to popular questions
How to cover the edge of a slatted panel on the wall?
Depends on the situation. Side open end — Wooden angle. Transition to painted wall — wooden molding. Bottom joint at the floor — Skirting. Narrow gap or extension piece — Wooden plank.
Can the end of a slatted panel be covered with a wooden corner piece?
Yes. Wooden corner bracket — is the standard and most reliable way to finish an open end or external corner. The corner shelf must cover the full thickness of the panel.
Is molding needed for slatted panels?
Molding is needed where a frame or decorative transition is required. If the panel runs from corner to corner — molding is not necessary. If the panel covers part of the wall and transitions to a painted surface — molding is needed.
How to finish the bottom of a slatted panel at the floor?
With baseboard. MDF Skirting Board for painting or Wooden baseboard — depending on the style. Height — from 70 mm and above.
Which baseboard to choose for slat panels?
Based on two criteria: style (a laconic profile for modern interiors, shaped for classic ones) and coating (MDF for painting or wood for varnish/stain). Height — according to the ceiling height.
How to cover the joint between a slatted panel and a wall?
wooden molding — if a decorative transition is needed. wooden batten — if a laconic vertical divider is needed. a corner piece — if transitioning to another plane. Read more about how how to join slatted panels.
Can a regular wooden batten be used as an extension?
Yes. Wooden plank — a universal extension element for narrow spaces, non-standard transitions, continuing the slatted rhythm in areas where a finished panel does not fit.
How to design slatted panels near a doorway?
Trimming Items — for the joint between the panel end and the door casing. If there is a gap between the panel and the frame, it is covered with With an extension strip the required cross-section.
About the company STAVROS
The question "what to use to cover the edge of a slat panel" becomes simpler when everything you need is in one catalog from one manufacturer.
STAVROS produces a full range of elements for wall finishing: slatted panels for walls in three versions, Wooden corner pieces, Wooden moldings, Wooden baseboard и MDF Skirting Board, rails и wood trim items.
STAVROS — it's when every edge is covered, every corner is protected, and every transition looks exactly as intended.