Article Contents:
- First screen: what to buy for an acoustic TV wall
- How an acoustic TV wall differs from a regular one
- A regular TV zone is just a beautiful wall
- An acoustic wall solves several tasks at once
- Why wood and polyurethane are the best pair for this task
- Wooden slats on a TV wall: everything you need to know
- Slat RK-001: universal profile for a TV zone
- Slat spacing and acoustic effect
- Substrate for slats: sound absorption
- Wooden overlays and furniture decor: integration with the cabinet
- Polyurethane decor for TV wall: frame, cornice, and baseboard
- Moldings: architectural frame for the slat field
- Cornice on the TV wall: upper boundary of the system
- Polyurethane trim: baseboard and horizontal accents
- Wall decor: frames for sconces and lighting
- Decor for moldings: corner inserts for frames
- Decorative stucco: point accents
- Ready-made sets for different interiors and budgets
- Minimum set: slats plus frame
- Classic living room: slats in polyurethane architecture
- Home theater: acoustics and system
- Kitchen-living room: unity of TV wall and the rest of the space
- Study or media room: dark texture and leather sofa
- How to correctly choose proportions and arrangement of elements
- Height of the slatted field
- Width of the slat field
- TV height from the floor
- Molding and scale of the slat field
- Lighting: where to hide it
- Complete shopping checklist: what to order at once
- Mistakes when buying and installing: a no-holds-barred analysis
- Buying slats without a TV placement diagram
- Forgetting space for wires
- Placing active molding next to speakers
- Not connecting the bottom line with the baseboard
- Mixing too many textures
- Forgetting the top line
- Buying moldings without extra for cutting
- Not accounting for lighting and shadows
- Interior styles and corresponding solutions for a TV wall
- Modern classicism
- Minimalism and Scandinavian style
- Art Deco and Neoclassicism
- Dark interior: anthracite and graphite
- Installation of a slatted field and polyurethane system
- Wall preparation
- Mounting planks
- Installation of a polyurethane frame and cornice
- Material calculation: quick formula
- Planks
- Moldings for a frame
- Cornice
- Skirting
- STAVROS: one supplier — complete system
- Frequently Asked Questions
Be honest with yourself: how many times have you seen a living room where a huge TV hangs on a completely empty white wall? Sometimes — on wallpaper with a floral pattern. Sometimes — on drywall with wet putty. The TV is expensive, the picture is excellent. But the wall behind it is emptiness. A technical rectangle in the middle of a living space.
This is not aesthetics. This is an unfinished renovation.
A TV wall with acoustic wood panels, wooden slats, polyurethane moldings, the right cornice, and baseboard — a completely different story. This is a zone that works on several levels at once: visual, functional, and acoustic. This is exactly the kind of wall we will break down here — from the first slat to the final coat of paint.



First screen: what to buy for an acoustic TV wall
Let's start with the main thing. Not with theory about styles — with a practical shopping list. Because a person looking for "what to buy for the wall behind the TV" is already in the middle of renovation and wants specifics.
Complete set for an acoustic TV wall:
-
Wooden planks — the main element of the textured wall field, create vertical rhythm and acoustic effect;
-
Acoustic wooden panels — blocks of slats on a backing, convenient for installation as a single field;
-
Pogonazh iz massiva — horizontal planks framing the slat area, zone dividers;
-
Moldings made of polyurethane — decorative frame around the acoustic field, framing of side zones;
-
a polyurethane cornice — top line, wall-to-ceiling joint in the TV area;
-
Polyurethane trim — baseboard, horizontal accent profiles, bottom border;
-
Decorative stucco — accent elements on side walls;
-
Polyurethane wall decor — frames for sconces, backlight zones, accent overlays;
-
Decor for Molding — corner inserts, frame locking elements;
-
Adhesive for polyurethane profiles — installation-grade, compatible with polyurethane;
-
Fasteners for wooden parts — clamps, liquid nails, self-tapping screws;
-
Acrylic sealant — joints, corners, abutments;
-
Primer — for surface preparation before painting;
-
Paint — uniform color for the frame system, polyurethane profiles;
-
Cable channel or niche for wires — mandatory part of any TV zone;
-
5–10% spare — for trimming and defects.
Main idea: an acoustic wall behind the TV is not just a beautiful wall. It is a zone where sound, image, cables, backlighting, and interior completeness are simultaneously addressed. Wood provides texture and acoustics. Polyurethane provides the architectural frame and decorative completeness.




How an acoustic TV wall differs from a regular one
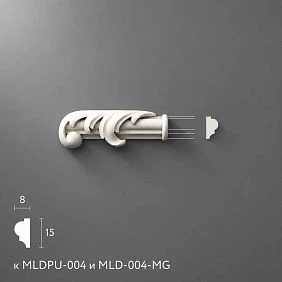
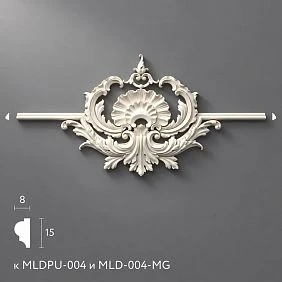
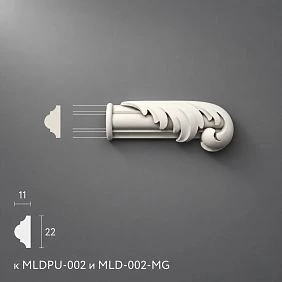
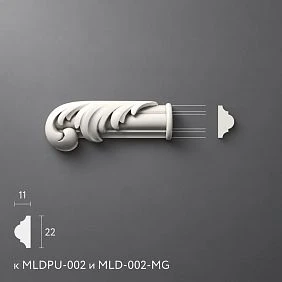
Our factory also produces:
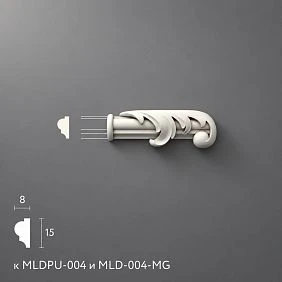
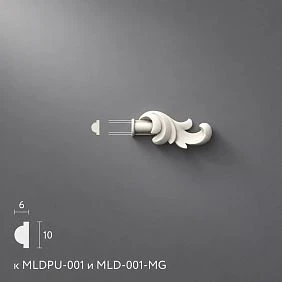

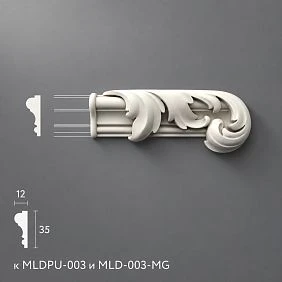
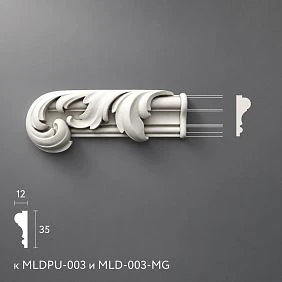
A regular TV zone is just a beautiful wall
A regular TV zone solves one task: make the wall behind the TV visually appealing. Painted, wallpapered, paneled — and that's it. The TV hangs, it's nice to look at, but sound reflects off bare surfaces and 'wanders' around the room. Wires stick out. The backlight is hastily attached. No system.
Get Consultation
An acoustic wall solves several tasks simultaneously
An acoustic TV wall is a multi-level system. It includes:
-
TV — precise height chosen, viewing angle from the sofa considered;
-
Speakers — niches, brackets, or gaps between slats provided;
-
Wooden slats or panels — create an acoustic sound diffusion effect and visual depth;
-
Sound-absorbing backing — under the slats, inside the panels;
-
Cable zone — groove in the wall, cable channel, hidden niche;
-
Backlight — a niche for LED strip behind or above the slats, sockets;
-
Decorative frame — moldings, cornice, baseboard frame the entire field;
-
Junction with ceiling and floor — cornice and baseboard complete the system.
It is this kind of wall that looks expensive — not because of expensive materials, but because it is architecturally thought out.
Why wood and polyurethane are the best pair for this task
Wooden slats behind the TV are, first and foremost, about texture. Wood is warm, alive, with depth. With backlighting from below or behind, the slats create a play of shadows — the wall literally 'comes alive'. Additionally, wood diffuses sound: vertical slats with gaps between them work as a diffuser — sound from speakers is not reflected flatly but is scattered into the volume.
But slats alone are not enough. Without an architectural frame, the field of slats looks like unfinished installation — as if the carpenter left and never returned. This is where Polyurethane moldingscomes in: moldings frame the slat field along the perimeter, the cornice completes the top line, the baseboard covers the bottom. Polyurethane is lightweight, precise, paints well, and does not deform. It does not compete with wood — it creates a frame for it.
Wooden slats on the TV wall: everything you need to know
Slat RK-001: universal profile for the TV zone
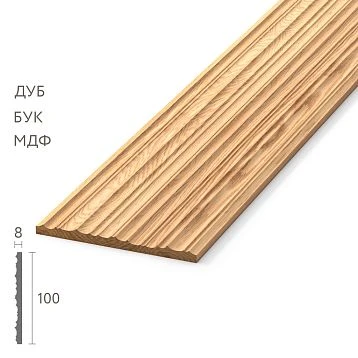
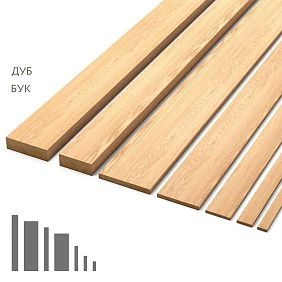
Wooden Rail RK-001 Made of oak or beech — one of the most sought-after profiles for creating slatted walls. Width 80 mm, a clean straight profile without complex relief. This is exactly what you need for a TV zone: the slat is wide enough to create a noticeable rhythm and simple enough not to overload the space.
Oak is harder, with expressive texture, dark shade under oil or stain. Beech is denser to the touch, lighter, better suited for enamel. Both options are good for a TV wall: oak — if the interior is warm, with wood and natural materials; beech — if a single color paint finish is planned.
The slats are installed vertically with a gap of 10–20 mm between them. This gap is not a weakness of the structure, but its strength: it is in the gaps that the acoustic effect "lives" and the LED backlight is hidden.
Slat spacing and acoustic effect
The installation spacing of the slats — the distance between centers — determines the visual rhythm and acoustic density. Frequent spacing (15–20 mm gap) creates a dense field, close to a solid panel. Rare spacing (30–40 mm gap) creates a more "airy" field, more space for play of shadows and backlighting.
For a home theater with good acoustics, a spacing with a gap of 20–25 mm is recommended: open enough for sound to diffuse, and dense enough for the wall to look solid.
Backing under the slats: sound absorption
A sound-absorbing backing — acoustic felt, mineral board, or specialized panel — is installed under the wooden slats. The backing absorbs reflected sound, prevents slat vibration when low-frequency acoustics are operating, and levels the wall.
Without backing, the slats work only as a diffuser — sound is scattered but not absorbed. With backing, the system works fully: part of the sound is scattered by the slats, part is absorbed by the backing. This is especially important for rooms with hard floors (laminate, tile) and high ceilings.
Wooden overlays and furniture decor: integration with the cabinet
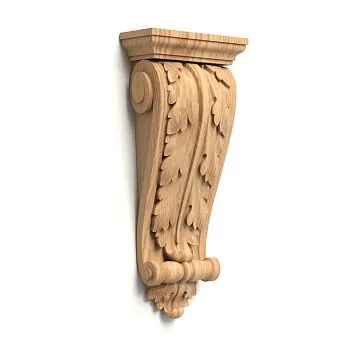
Wooden decoration and wooden overlays are used to integrate the TV cabinet with the slatted wall. When the cabinet fronts are faced with the same slats or replicate their texture, the wall and furniture are perceived as a single structure. This is one of the most powerful design techniques: the furniture "dissolves" into the wall.
Solid wood overlays on the fronts, horizontal slats on solid wood trim the side panels of the cabinet — all of this creates a connection between the wall plane and the functional zone below.
Polyurethane decor for the TV wall: frame, cornice, and baseboard
Moldings: an architectural frame for the slatted field
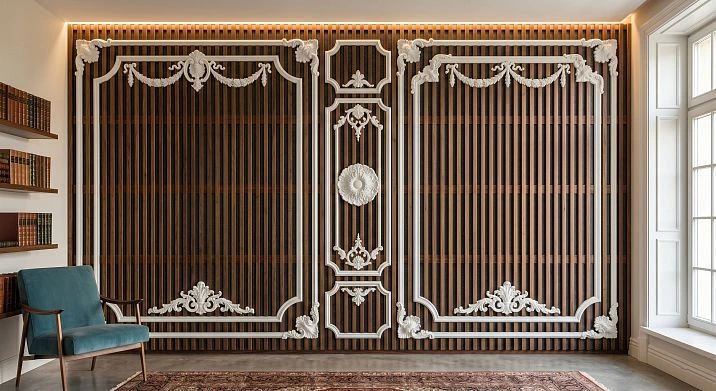
Wooden slats occupy the central field of the TV wall. Moldings made of polyurethane form a clear decorative frame around this field. This is not decoration for decoration's sake — it is an architectural boundary that says: "the slatted zone starts here and ends here." Without a frame, the slatted field looks like an unfinished installation. With a frame, it looks like a deliberate design decision.
Moldings are installed around the perimeter of the slatted field: at the top, bottom, and sides. The width of the molding is chosen proportionally to the width of the slats and the height of the wall. For a slatted field 2.5 meters high and 3 meters wide, a molding of 40–60 mm with a clear relief works well. Thinner profiles will get lost, wider ones will create a heavy frame.
Cornice on the TV wall: the upper boundary of the system
a polyurethane cornice on the TV wall is installed in two variants. The first is around the perimeter of the entire room, and then it is part of the overall finishing system, not just the TV zone. The second is only above the slatted field, as a completion of the upper line of the accent wall. The second variant is more expressive: the cornice emphasizes that the TV wall is an architectural accent, not just a finished surface.
In areas with backlighting, the cornice can act as a niche: if installed with a small gap from the ceiling, an LED strip is hidden behind the cornice, providing soft contour lighting along the upper edge of the slatted field.
Polyurethane linear elements: baseboard and horizontal accents
Polyurethane trim — these are linear profiles that serve as a baseboard at the bottom of the TV wall, as well as horizontal dividing strips between zones. A polyurethane baseboard is installed faster than a wooden one, is not afraid of moisture, and has precise geometry — which is especially important in an area where everything must be perfectly level.
The bottom line of the TV wall is the boundary between the slatted field and the cabinet or floor. The baseboard here performs a dual function: it covers the joint and visually "grounds" the slatted structure.
Wall decor: frames for sconces and lighting
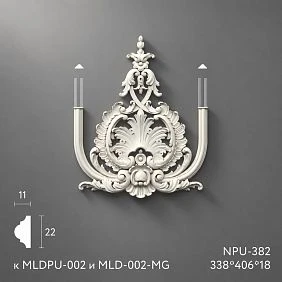
On the sides of the slatted field are side walls that also require finishing. Polyurethane wall decor in the form of molding frames around sconces, niches, or decorative elements creates symmetry relative to the central slatted field. Two sconces on the sides in molding frames, with a slatted field in the middle — this is a classic trick that always works.
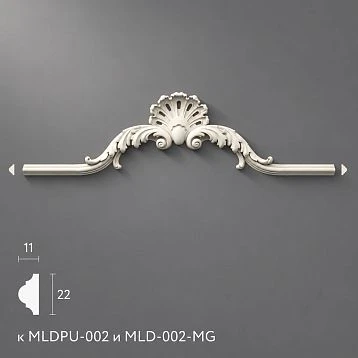
Decor for moldings: corner frame inserts
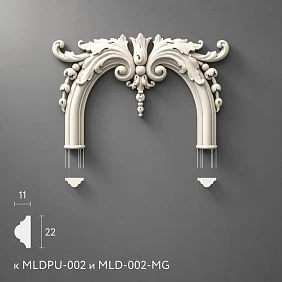
Decor for Molding — corner rosettes and lock elements give the frame around the slatted field a finished look. Instead of a 45° joint, a decorative insert appears in the corners of the frame: a square rosette, a lock element, a medallion. This instantly raises the level of detail and creates the feel of expensive handcrafted decor.
Decorative stucco: point accents
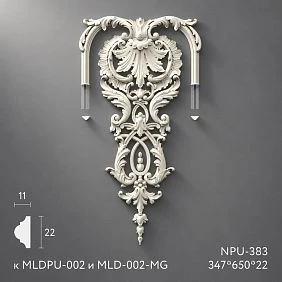
Decorative stucco In the form of applied medallions or cartouches, it is appropriate on the side walls, not on the slatted field itself. One medallion above the sconce, a symmetrical pair of applied elements on the walls next to the TV zone — these are point accents that create a sense of architectural refinement without overload.
An important rule: stucco is not installed on the slats themselves or inside the slatted field. It competes with the wood texture and disrupts the purity of the rhythm. Stucco — only on the perimeter and along the sides.
Ready-made kits for different interiors and budgets
Minimum kit: slats plus frame
The most affordable and at the same time very effective option. Slatted field made of wooden strips across the entire width of the wall, moldings around the perimeter as a frame, baseboard at the bottom. No cornice, no side frames. Minimal — maximally expressive.
This kit works in Scandinavian, modern, and minimalist interiors, where the main focus is on the purity of forms and the texture of materials.
Kit: wooden slats + moldings around the perimeter of the field + Polyurethane trim (baseboard) + glue + fasteners + 10% spare.
Classic living room: slats in polyurethane architecture
A classic interior requires more. The slatted field behind the TV is framed by a molding frame with corner decorative inserts. On the sides, there are moldings on the piers. A cornice runs the entire length of the wall. A baseboard of appropriate scale. Decorative stucco On the side piers, it is symmetrical and restrained.
In a classic interior, the slats can be made of oak for tinting in a warm walnut shade. The moldings and cornice are white. The contrast of dark wood and white polyurethane is classic.
Set: oak slats + Moldings made of polyurethane with frame + corner inserts + cornice + baseboard + Decorative stucco + white paint + oil or stain for slats.
Home theater: acoustics and system
A home theater is serious business. This is not just a beautiful wall, but an engineering system. Wooden slats with acoustic backing, gaps for sound diffusion, a niche for speakers, hidden cables, LED backlighting behind the slats. Moldings around the perimeter of the slatted field form an architectural "screen" frame. The cornice creates the feel of a cinema hall.
In a home theater, slats are often chosen in dark colors — for black or anthracite painting or dark veneer. The moldings and cornice can also be dark: anthracite, graphite, matte black. A dark TV wall + dark ceiling + hidden lighting = cinema atmosphere.
Set: wooden slats + sound-absorbing backing + moldings with dark paint + cornice + baseboard + cable channel or niche + LED strip behind slats + fasteners + glue + primer + paint.
Kitchen-living room: unity of the TV wall and the rest of the space
In an open-plan kitchen-living room, the TV wall should not contradict the kitchen front. The slatted field behind the TV — in a color or texture that echoes the kitchen facades. Pogonazh iz massiva on the horizontal dividers of the TV zone — matching the countertop or facade profiles.
Moldings on adjacent walls repeat the frame motif of the TV wall — so the space 'flows' from zone to zone without breaks. A cornice around the entire ceiling perimeter unites the zoned space into a single room.
Set: wooden slats + solid wood trim as horizontal dividers + Moldings made of polyurethane on adjacent walls + cornice + baseboard + glue + fasteners + uniform paint for moldings.
Study or media room: dark texture and leather sofa
A study with a TV or media room — a space where the interior intensity can be higher than in a living room. Dark wooden panels with vertical slats, Wooden decoration on the side surfaces, thin moldings in a dark color, natural veneer. Here you can afford richness.
Moldings in the study are chosen with minimal relief — strict, geometric, without baroque curves. The cornice is restrained. Stucco — only if the room's style supports it (neoclassicism, art deco).
Set: dark slats or veneered panels + Wooden decoration on the side surfaces + thin moldings + a small cornice + baseboard + oil or tinting varnish for wood + dark paint for moldings.
How to choose the proportions and arrangement of elements correctly
Height of the slatted field
The slatted field behind the TV can be of three sizes. The first option is from floor to ceiling: maximum, theatrical, creates a sense of monumentality. Works well in tall rooms with ceilings from 2.8 meters. The second option is from floor to about 2/3 of the wall height: moderate, neat, leaves space for a cornice or horizontal decor on top. The third option is an accent zone: slats only in the area behind the TV, matching the width and height of the TV zone, with a molding frame around the perimeter. The most compact option.
For most apartments with ceilings of 2.5–2.7 meters, the second option is optimal: a slatted field from floor to a height of 2.2–2.3 meters, then a horizontal strip with molding or cornice.
Width of the slatted field
The slatted field should be wider than the TV. The minimum margin is 30 cm on each side. This creates the feeling that the TV is "recessed" into the wall, not screwed to it. The optimal option is slats across the entire width of the wall: from corner to corner. Then the entire wall becomes a single accent plane.
Height of the TV from the floor
The center of the TV screen should be at the eye level of a seated person — approximately 100–115 cm from the floor. For a large screen (65–75 inches), the bottom edge of the screen will be at a height of about 70–80 cm. This is important when designing the slatted field: the TV stand, cables, outlets, niche for speakers — everything must be calculated before installing the first slat.
Molding and scale of the slatted field
The proportion of the molding to the slatted field is a key visual parameter. A too thin molding (20 mm) on a large slatted field (3×2.5 meters) will be barely noticeable. A too wide one (100 mm) will create the feeling of a heavy frame that presses down on the slats.
Working proportion: molding width = 2–4% of the slatted field width. For a field 3 meters wide — molding 60–120 mm. For a field 1.5 meters wide — 30–60 mm.
Lighting: where to hide it
Lighting in a slatted wall is not mandatory, but a very effective element. Three working options: LED strip behind the slats (angled lighting from below or above — the slats cast shadows, the wall 'comes alive'); LED strip in a niche under the cornice (soft contour lighting from above); LED strip in a niche above the baseboard (from below, creating a floating wall effect).
For any of these options, you need to plan space for the strip and power supply before starting the slat installation — it's harder to do later.
Complete shopping checklist: what to order at once
This list is compiled so that after one order, you don't have to go back to the store.
Wooden elements:
-
wooden slats RK-001 — based on the area of the slatted field with an installation factor and 10% reserve;
-
Pogonazh iz massiva — horizontal dividers, framing strips;
-
Wooden decor and overlays — for cabinet fronts, side accents.
Polyurethane elements: -
Moldings made of polyurethane — along the perimeter of the slatted field + side frames + 10% margin;
-
a polyurethane cornice — along the wall width or room perimeter + 10%;
-
Polyurethane trim — baseboard + horizontal profiles + 10%;
-
Decorative stucco — by the number of accent points on side walls;
-
Polyurethane wall decor — frames for sconces, accent zones;
-
Decor for Molding — corner inserts: 4 pieces per frame.
Installation and finishing materials: -
Adhesive for polyurethane profiles — selection details in the article what to glue polyurethane molding with;
-
Fasteners for wooden slats — clamps or liquid nails + countersunk screws;
-
Acrylic sealant — joints of moldings, wall junctions;
-
Primer — for polyurethane profiles before painting;
-
Paint — for moldings, cornice, baseboard;
-
Oil, varnish or tinting compound — for wooden slats.
Engineering solutions: -
Cable channel or groove for wires — before installing slats;
-
Hidden outlets — behind the slat field, for TV and speakers;
-
LED strip — if lighting is planned;
-
Mounting profile — horizontal guide for attaching slats.
Mistakes when buying and installing: analysis without condescension
Buying slats without a TV layout diagram
The slats are bought and delivered. Installation has begun. And then it turns out that the TV bracket cannot be hung where planned — there is no load-bearing surface behind the slats. Or that the socket will end up exactly in the middle of the slat field and will be visible through the gap.
Rule: before buying slats, you need a diagram with the exact location of the TV, bracket, sockets, and cables. All of this must be resolved on paper before the first nail is driven.
Forgetting space for wires
Wires behind the TV — an eternal problem. HDMI cable, power, antenna, audio cables — all of this needs to be hidden before the slats are put in place. After installation, it is extremely difficult to retrieve them without dismantling.
Solutions: a groove in the wall with a cable channel, a hidden niche at the base of the slat field, a cable channel behind a vertical strip on the side of the slat field.
Placing active molding near speakers
Overlay elements decorative molding — medallions, cartouches — create a vibration point. At high volume, low frequencies from the speakers can transmit through the wall to the molding. If the molding is poorly glued, it will start to rattle. Rule: near speakers, use only profiles that are securely glued along their entire length, without point overlay elements.
Not connecting the bottom line with the baseboard
The slat field ends at the floor, but the baseboard is not provided or does not match the molding system. The result is a gap between the slats and the floor, an untidy joint. The baseboard must be planned from the start: it covers the bottom joint of the slat field and creates an even bottom line for the system.
Mixing too many textures
Oak slats, polyurethane moldings imitating marble, metal-look baseboard, glossy cabinet. Four different textures in one zone is visual chaos. The rule of three textures: no more than three different material solutions are allowed in the TV zone. Better to have two: wood and painted polyurethane.
Forgetting the top line
The slat panel is in place, the moldings on the sides are installed, the baseboard is set. But at the top — nothing. The joint between the slat panel and the ceiling is simply cut off. This is not 'minimalism' — it's incompleteness. A top line is always needed: either a molding 'cap' for the frame, a cornice, or at least a straight horizontal profile.
Buying moldings without extra for trimming
This is especially critical for the frame around the slat panel. Frame corners require 45° cuts, which leads to profile waste. In a room with non-standard angles (and almost every real room is like this), the angle won't be exactly 90°, requiring additional adjustment. Without a 10–15% reserve, you'll run out at the final moment.
Not accounting for lighting and shadows
Wooden slats with backlighting are beautiful. But only if the lighting is designed correctly. An LED strip mounted too close to the slats creates harsh striped shadows. A strip placed at the correct distance (15–20 cm from the slat panel) gives a soft diffused glow. The angle of the strip, color temperature (2700–3000K for warm wood), brightness — all of this needs to be thought out before installation.
Interior styles and corresponding solutions for the TV wall
Modern classic
Oak slats with oil or stain (walnut, dark oak), white polyurethane moldings with a frame and corner decorative inserts, medium-height cornice, white baseboard. Dark wood and white polyurethane — a contrasting pair with high visual impact.
Minimalism and Scandinavian style
Beech or light oak slats, no stucco, thin molding as a frame or without a frame at all, baseboard made of polyurethane molding minimal profile. Slats with natural oil finish, moldings white or gray. Strictness, purity, texture — three words describing this style.
Art Deco and Neoclassicism
Dark lacquered slats, polyurethane moldings with geometric relief, Decor for Molding with geometric corner inserts, cornice with stepped profile. Everything strict, symmetrical. Decorative stucco — only on the side walls, as a couple of accents.
Dark interior: anthracite and graphite
Slats in dark finish (anthracite, charcoal, matte black), moldings in the same color or slightly lighter, dark ceiling, warm lighting. polyurethane decor in dark interiors should be chosen with a simple profile — rich relief in dark color is lost.
Installation of slatted field and polyurethane system
Wall preparation
Before installing wooden slats, the wall must be level, dry, and strong. If a sound-absorbing underlayment is planned, it is installed first. Then a horizontal mounting profile (metal or wood) is installed, to which the slats are attached. This ensures a uniform level and a flat plane for the slat field.
Electrical work (cables, sockets, cable channels) is laid before installing the mounting profile. After the profile is installed, they are no longer accessible.
Installing the rails
Slats are attached to the mounting profile using clips (hidden fasteners) or liquid nails with temporary fixation using painter's tape. Clips are preferable: they allow individual slats to be replaced without dismantling the entire field. The gap between slats is maintained using a template or spacers.
After installing the entire field, the slats are sanded (if necessary) and coated with oil, varnish, or a tinting compound.
Installation of polyurethane frame and cornice
Installation technology of polyurethane moldings described in the material installing polyurethane molding. Moldings are installed with adhesive after the slat field is in place — they must fit precisely against the edges of the slat structure. This requires careful marking and precise cutting of corners.
After installing the moldings and cornice — sealant on all joints, sanding, primer, paint. Only then — the final treatment of the wooden slats.
Material calculation: quick formula
Planks
The area of the slat field (width × height) is divided by the slat width plus the gap. The result is the number of slats. Add 10% reserve to this.
Example: field 3 × 2.5 meters = 7.5 sq. m. Slat 80 mm + gap 20 mm = 100 mm = 0.1 meters. 3 meters / 0.1 = 30 slats. Each slat is 2.5 meters long. 30 slats + 3 spare = 33 slats.
Moldings for the frame
Perimeter of the slat field + 10% reserve. For a field 3 × 2.5 meters: perimeter = (3 + 2.5) × 2 = 11 meters. With reserve — 12.1 meters. Plus decor for moldings: 4 corner inserts.
Cornice
Width of the TV wall or room perimeter + 10% reserve.
Baseboard
Width of the slat field + 10% reserve.
STAVROS: one supplier — complete system
TV wall with wooden slats and with polyurethane moldings — this is not two separate orders. It is a single system that requires compatibility in scale, color, and form. That is why it is important that both the wood and polyurethane come from the same manufacturer.
STAVROS is a Russian manufacturing company with a history since 2002. Starting with carved wooden products for the restoration of palaces (Konstantinovsky Palace, Hermitage, Alexander Palace), STAVROS today offers a full range of decorative materials for interiors: from wooden strips и solid wood trim to molding, crown moldings и Decorative polyurethane moldings.
All STAVROS products are designed with an understanding of architectural proportions and are compatible in scale and form. This means: by ordering wooden slats and polyurethane moldings from STAVROS, you get a system — not a random set of profiles from different sources.
STAVROS supplies products throughout Russia from one piece. Production — Saint Petersburg, showrooms in Saint Petersburg and Moscow. Average production time for custom orders is 5–10 business days. Products in stock are shipped within 3 business days.
Frequently asked questions
Can you combine wooden acoustic panels and polyurethane stucco molding?
Yes, and this is the optimal combination for a TV wall. Wood — slats, acoustic panels, cabinet — provides texture and sound. polyurethane decor — moldings, cornice, baseboard, frames — creates an architectural frame. The two materials work in different zones and do not compete.
What to buy for an acoustic wall behind the TV?
Wooden planks, sound-absorbing underlayment, Moldings made of polyurethane for the frame, Cornice, baseboard, Decor for Molding, glue, fasteners, sealant, primer, paint for polyurethane, and oil or varnish for wood. Reserve — 10%.
How not to overload the TV wall with decor?
Rule of three focal points: main element — slats; secondary — molding frame; tertiary — spot stucco on side walls. No more than three levels of decor at once. decorative molding — only outside the slat field.
Are polyurethane moldings suitable for a home theater?
Yes. Polyurethane moldings hold their shape well when the acoustics are working, do not vibrate when properly installed with glue along the entire length, can be painted any color, and create an architectural frame for the "screen."
How to connect the TV wall with the rest of the room?
Repeat the moldings or baseboard on adjacent walls. Run a cornice along the entire perimeter of the ceiling. Use the same paint shades for moldings throughout the room. This creates a feeling of a cohesive interior, not a separate "TV niche."
What type of wood should be chosen for the TV wall slats?
Oak — if oil or stain is planned, a warm natural tone. Beech — if the slats will be painted with enamel in the same color as the moldings. Both options are available for slats RK-001 from Stavros.
Is a sound-absorbing backing needed under the slats?
In a standard living room — desirable, but not necessary. In a home theater with a serious acoustic system — mandatory. Without a backing, the slats only diffuse sound (diffusion); with a backing, they also absorb it (absorption).
How to properly paint polyurethane moldings on a TV wall?
Primer is mandatory for even coverage. Two thin coats of paint with intermediate drying. Matte or semi-matte acrylic paint. Do not paint in one thick coat — there will be drips. Details in the installation material: installing polyurethane molding.
Can the slats be installed independently without special tools?
Yes. Wooden rails They are cut with a regular saw or miter saw, mounted on liquid nails or through clamps. The main thing is even marking and maintaining the spacing. Polyurethane profiles are cut with a miter box and glued with assembly adhesive.