Article Contents:
- When a ceiling made of slat panels is the right choice
- Which panels to choose: wood, MDF or for painting
- Wooden Slat Panels
- MDF panels with wood finish
- Paint-ready panels
- How ceiling slat panels differ from wall panels
- Price of a slat panel ceiling: what makes up the cost
- Panel material
- Ceiling area and layout complexity
- Frame or adhesive
- Trim elements
- Lighting and ventilation
- Ceiling cornice or perimeter profile
- Delivery and Installation
- How to calculate the number of slatted panels for a ceiling
- How to choose the direction of slats on the ceiling
- How to combine a slatted ceiling with walls and interior
- With slatted panels on the wall
- With a wooden baseboard
- With solid wood trim
- With moldings and cornices
- With molding
- With Furniture
- Ceiling and wall joint: how to handle it properly
- Open edge
- Wooden ceiling cornice
- Polyurethane molding
- Laconic profile
- Wooden profile from millwork
- Where to use slatted panels on the ceiling
- Kitchen-living room
- Hallway and corridor
- Living Room
- Bedroom
- Office
- Commercial interior
- Mistakes when buying slatted panels for the ceiling
- What to buy together with slatted panels for the ceiling
- How to buy slatted panels for the ceiling without mistakes: the final algorithm
- About the Company STAVROS
- FAQ: answers to popular questions about slatted panels for the ceiling
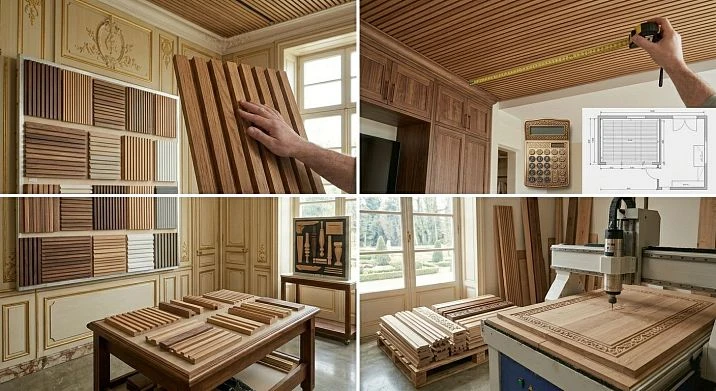
The ceiling is the fifth wall. The one that everyone sees, but finishes last. A white suspended ceiling in an apartment with wooden furniture, slats on the wall, and natural materials everywhere is a disconnect that is felt, even if it is hard to explain. This is where slatted panels for the ceiling come into play: they add rhythm, warmth, depth, and tie the ceiling plane into a single concept with the rest of the interior.
If you want to buy slatted panels for the ceiling and do it right — without overpaying, without calculation errors, and without disappointment after installation — this guide is written specifically for you. There will be no general talk about "beautiful design" here. Here — specifics: materials, sizes, price of a slatted panel ceiling, calculation, installation, joints, and combination with walls.

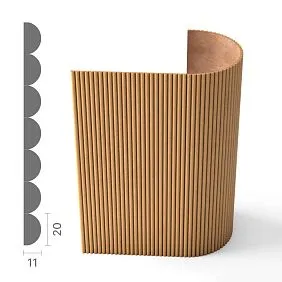
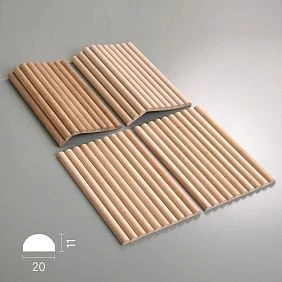
When a slatted panel ceiling is the right choice
Before moving on to selection — a few words about why you would choose a slatted ceiling at all. It is not a universal solution, and that is precisely why it works where it is used deliberately.
A slatted ceiling is needed if:
-
you need to add rhythm and structure to the interior — slats create a repeating linear pattern that organizes the space better than any wall decor;
-
you want to visually elongate the room — slats along the long wall visually increase the depth of the room;
-
you need to introduce a warm wood texture where there is no room for wooden walls or furniture;
-
the ceiling is uneven or requires hiding utilities — a slatted structure on a frame covers everything that is better left unseen;
-
the interior is built around wooden details, and the ceiling should support them;
-
you need to zone an open kitchen-living room space without partitions;
-
you want to make the hallway or corridor expressive without resorting to complex solutions.
And most importantly, wooden slatted ceiling panels should look like part of the interior, not like technical cladding. This is what distinguishes a successful slatted ceiling from an unsuccessful one: in the first case, the slats work together with the walls, furniture, baseboards, and cornices; in the second, they simply hang overhead.




Which panels to choose: wood, MDF, or for painting
Choosing the material is the first and most fundamental decision. The appearance, price, and installation possibilities all depend on it.
Our factory also produces:
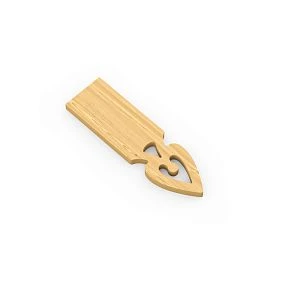
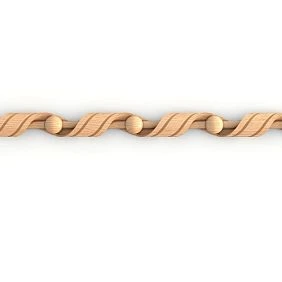

Wooden slat panels
wooden slatted panels for the ceiling — this is a natural material with a living texture, unique fiber pattern, and warm character. Each solid wood panel is unique — and that is precisely its value.
Wooden panels are suitable for:
-
a country house — here wood is organic, logical, and appropriate;
-
a study — a wooden ceiling adds status and creates an atmosphere of concentration;
-
a living room in classic, neoclassical, or Scandinavian style — wood supports the style and connects the space;
-
an entrance hall with high ceilings — a wooden slatted ceiling makes the entry scenographically expressive;
-
a stair hall — a vertically elongated space with wooden slats on the ceiling looks architecturally convincing.
Wooden panels require proper storage and acclimatization before installation: at least 48 hours in the room where installation will take place. The humidity in the room must be stable — wood reacts to sudden changes.
Get Consultation
MDF panels with wood finish
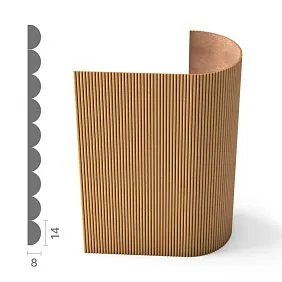
MDF slatted panel — this is a structurally stable, geometrically precise material with a film coating imitating wood or for painting. Unlike solid wood, MDF does not react to humidity, does not warp, does not dry out, and does not crack.
MDF panels with wood finish are chosen for:
-
apartments — stability is important where there is no ability to control the microclimate;
-
kitchen-living rooms — near the cooking area, a material resistant to steam is needed;
-
commercial interiors — restaurant, showroom, meeting room, reception;
-
bedrooms — where even geometry and a neat appearance without excessive texture are needed;
-
projects with budget constraints — MDF is usually more affordable than natural solid wood with a similar visual effect.
Panels for painting
Slat panels for painting are an architectural technique. The slats create rhythm and relief on the ceiling but do not carry color load. Such a ceiling looks monochrome, strict, professional. It does not compete with bright walls, furniture, or decor — it simply adds structure to the plane.
Panels for painting work well in modern interiors, neoclassicism, minimalism, and loft with wooden accents.
How do ceiling slat panels differ from wall panels?
This question is more important than it seems. People often buy Rafter panels for walls and automatically apply the same solution to the ceiling. Sometimes this works. But there are nuances that need to be understood in advance.
Joints are more visible on the ceiling. On a vertical surface, small irregularities and gaps are less noticeable — the eye glides past. On a horizontal surface directly overhead, any crooked joint or uneven row immediately catches the eye.
The weight of the structure matters. On the wall, panels are held by glue, clips, or screws in a horizontal plane. On the ceiling, the same system works against gravity. It is necessary to calculate the load on the fasteners and the base.
A neat perimeter is required. Wall slats go under the baseboard at the bottom and under the molding or cornice at the top. Ceiling slats abut the wall around the perimeter — and this joint needs to be planned in advance, otherwise it will look unfinished.
Lighting requires planning. If recessed lights are needed in a slat ceiling, their positions must be determined before installation — cutouts in the panels are made in advance.
The spacing between slats sets the rhythm. On the wall, frequent spacing looks dynamic. On the ceiling, the same frequent spacing can create visual pressure. For the ceiling, it is better to choose wider slats or a larger gap between them.
Price of a slat panel ceiling: what makes up the cost
The price of slatted panel ceilings is one of the most popular queries, and the answer cannot be straightforward. The final cost always consists of several components.
Panel material
Solid oak or beech wood panels are the most expensive option. MDF with a wood finish is cheaper. Paintable panels are even more affordable. The difference in cost per square meter can be significant, so the material is the first variable in budget calculation.
Ceiling area and layout complexity
A simple rectangular room means minimal trimming waste. A room with niches, sloped corners, bay windows, beams, or columns results in significantly more trimming, more waste, and more installation time.
Frame or adhesive
Slatted panels are installed in two ways: on a wooden or metal frame, or directly onto a prepared base using adhesive. A frame is more expensive in terms of materials and labor but allows hiding utilities and leveling an uneven ceiling. Adhesive is faster and cheaper but requires a flat and clean base.
Fitting elements
The price of slatted panels for the ceiling is often quoted without considering additional elements: corner profiles, transition strips, perimeter moldings, or cornices. These additional elements can account for 15–20% of the final cost.
Lighting and ventilation
Each hole for a light fixture involves marking, cutting, and an installation frame. Several rows of recessed lights can significantly increase the labor intensity of installation.
Ceiling cornice or perimeter profile
Wooden moldings or Moldings made of polyurethane Around the ceiling perimeter — it's not just aesthetics, but also covering the technological joint between the slats and the wall. They need to be included in the estimate as a separate item.
Delivery and installation
Slat panels are a long-length material. Delivery requires appropriate transport or cutting to length, which also affects the cost.
How to calculate the number of slat panels for the ceiling
Calculation is 30 minutes of work that saves money on excess or nerves in case of shortage.
Step 1. Measure the ceiling. Length and width of the room — measure in several places because walls are rarely parallel. Take the maximum values.
Step 2. Calculate the area. Length × Width = area in m². If the room is not rectangular — break it into rectangular fragments.
Step 3. Choose the direction of the slats. Along the long wall or across — this determines which side the working size of the panel goes by, and which side the slat width goes by.
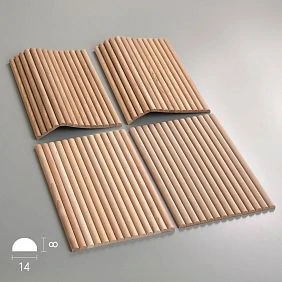
Step 4. Specify the panel size. Standard slat — 2400, 2700, or 3000 mm in length, width — from 60 to 150 mm. The narrower the slat, the more rows and more joints.
Step 5. Calculate the number of rows. Room width ÷ slat width = number of rows (taking into account the gap between slats, if provided by the layout).
Step 6. Calculate the length. Number of rows × length of one row = total linear length of the rail. Divide by the length of one panel to get the number of pieces.
Step 7. Add a margin of 10–15%. For trimming edge rows, installation errors, defects.
Step 8. Calculate the perimeter separately. The perimeter of the room is for the molding, cornice, or profile along the ceiling perimeter.
If lights are planned in the ceiling, mark their positions on the diagram in advance and check if they fall on the panel joints.
How to choose the direction of the rails on the ceiling
Direction is a strategic decision that affects the perception of the room more strongly than color or material.
Rails along the long wall visually elongate the room in depth, creating perspective. The best choice for corridors, hallways, and elongated kitchen-living rooms. The eye "travels" along the rail and perceives the room as longer.
Rails across expand a narrow room. If the room is narrow and elongated, the transverse rhythm of the rails visually adds width.
Rails from the window is a classic technique: the rails run perpendicular to the wall with the window. Light falls along the rail and emphasizes the relief. Works well in a bedroom and study.
Zoning in a kitchen-living room: the direction of the rails can be changed in different zones. Above the kitchen — across, above the living room — along. Or vice versa. Changing direction is an architectural boundary without a partition.
Small room — avoid dark, frequent slats. A dark rhythm with a pitch of 80 mm on the ceiling of a small bedroom creates a feeling of pressure. Here, light wide slats with a large pitch or no gap at all — a solid layout — are better.
How to combine a slatted ceiling with walls and interior
This is where most design mistakes happen. Buying wooden panels for the ceiling and installing them is only half the task. The other half is connecting them with the rest of the space.
With slatted panels on the wall
If the room already has Rafter panels on the walls — the ceiling slats should be either the same direction or perpendicular. Matching the direction of wall and ceiling slats can create a "tunnel" effect. A perpendicular layout is a more interesting architectural solution.
With a wooden baseboard
Wooden baseboard of the same tone as the ceiling slats completes the vertical route of wood in the interior: from floor to ceiling. This creates a feeling of a designed space, not a set of separate elements.
With solid wood trim
Pogonazh iz massiva — door casings, window frames, wooden profiles — should be in the same tone as the ceiling slats. If the slats are light oak and the casings are dark walnut, the conflict is obvious. A single wood tone across all details — that is the system.
With moldings and cornices
Wooden moldings around the perimeter of the ceiling — this is both a joint closure and an additional architectural element. For a modern interior — a laconic profile. For classic style — a cornice with a more complex cross-section.
With plasterwork
Polyurethane Items — rosettes, medallions, cornices — can be combined with a slatted ceiling in a neoclassical or classic interior. The principle: stucco is concentrated in the area of the light fixture or along the perimeter, while the slats are on the main plane. This creates a hierarchy: the slats are the background, the stucco is the accent.
With furniture
If the interior has wooden furniture legs, handles, overlays, or frames — a slatted ceiling will support and enhance them. Wood on the ceiling "activates" wood on the floor and furniture into a single system. Without this connection, the slatted ceiling will look like a foreign element.
Ceiling and wall joint: how to handle it properly
The junction of the slatted ceiling and the wall is the most technically and aesthetically vulnerable point of the entire structure. It is here that gaps, unevenness, and a sense of "incompleteness" most often appear.
Open edge
Only works with perfect geometry of walls and ceiling and with precise installation of the outermost slat flush against the wall. In practice — a rare case. In most apartments, the walls do not provide an ideal angle, and the open joint will look sloppy.
Wooden ceiling cornice
This is a classic solution. Wooden moldings and cornices are installed around the perimeter of the ceiling and cover the joint between the slats and the wall. A wooden cornice, matched in tone to the slats, creates a unified material language. For a country house, study, or classic style — this is the best option.
Polyurethane molding
Moldings made of polyurethane — lightweight, geometrically precise, ready for painting. If the ceiling slats are to be painted, the polyurethane molding matches the same color scheme. For modern interiors and neoclassicism, this is one of the best options. More about installation in the article on Molding Installation.
Laconic profile
For a minimalist interior, a narrow wooden or aluminum profile that covers only the edge of the slat and the joint with the wall will work. No ornamentation, maximum strictness.
Wooden profile from millwork
Pogonazh iz massiva allows you to choose the desired profile for any angle: straight, beveled, cove. Wooden millwork matching the slats is a cohesive, well-thought-out solution.
Where to use slatted panels on the ceiling
Kitchen-living room
Open kitchen-living room spaces are an ideal environment for a slatted ceiling. Slats help visually divide zones without partitions: above the dining table — one pattern, above the sofa area — the same rhythm but in a different direction. Or a continuous covering uniting both spaces. MDF panels with a wood finish are preferable here to solid wood — there is always moisture and odors near the cooking area.
Hallway and corridor
The hallway is the first thing a guest sees. And the last thing the owner notices before leaving. A slatted ceiling in the hallway creates an instant effect: the space becomes structured, 'designed'. Slats along the corridor elongate it, making a narrow passage feel less cramped. The joint with the wall — a wooden molding or ceiling cornice matching the slats.
Living Room
In the living room, a slatted ceiling is most often used as an accent zone — above the TV area or above the dining table. A continuous covering of slatted panels across the entire living room ceiling is a bolder solution that requires balance with the rest of the decor. If there is wood on the walls, furniture with wooden details, or solid wood baseboards, the ceiling slats will fit organically.
Bedroom
The bedroom requires a calm rhythm. Light wide slats, soft texture, small spacing — or, conversely, wide panels with minimal gaps. Dark wood in the bedroom works only with good daylight and sufficient area. In a small bedroom, a dark slatted ceiling creates excessive enclosure.
Office
A wooden slatted ceiling in a study is an architectural statement about the status of the space. It is especially convincing when combined with wooden panels on the walls, bookcases with wooden handles, and solid wood moldings. A study with a slatted ceiling made of dark oak looks like a well-thought-out interior, not just "put a table and a cabinet."
Commercial interior
Showroom, restaurant, meeting room, reception — a slatted ceiling in a commercial interior signals quality and attention to detail. MDF panels with a wood finish are optimal here: geometrically precise, stable, provide a neat layout, and allow for hidden installation of lights.
Mistakes when buying slatted panels for the ceiling
This list is the result of years of practice and observations of how good ideas turn into costly rework.
Buying panels without calculating the area. "By eye" means a shortage of 20% or overpaying for 30% extra material. Always calculate according to the layout.
Not considering the weight of the structure. A slatted ceiling on a frame is a load on the floor. Heavy wooden panels require an appropriate fastening system.
Choosing dark panels for a low ceiling. Dark wood on a 2.5 m ceiling creates a "box" feeling. For low rooms, use light, wide, calm slats.
Not planning the lights. If you remember about the lights after installation, that means rework. The positions and types of lights must be determined at the layout planning stage.
Forgetting about ventilation and hatches. Ventilation grilles, inspection hatches — all of this must be included in the layout before work begins.
Not accounting for a cutting allowance. Without a reserve, installation becomes a gamble: one crookedly cut element — and you are short a whole strip.
Not planning the joint with the wall. An open edge without molding or cornice is a common mistake. The joint must always be closed, and the type of closure should be chosen in advance, not after the fact.
Choosing panels only by photo. A photo does not convey the real texture, tone, and scale of the slat. If possible, view samples in person or ask for a photo next to something of a known size.
Not matching the ceiling with the rest of the interior. A slatted ceiling by itself is not yet an interior. It needs a connection with the baseboard, trim, furniture, and moldings. Without this connection, the ceiling will be "on its own."
Using plastic solutions "for the bathroom" on residential ceilings. Plastic slats are a different product, a different class, a different result. For a residential interior, use wooden or MDF panels.
What to buy together with slatted panels for the ceiling
A complete set for a slatted ceiling includes not only the panels themselves. Here is what else will be needed:
-
Rafter panels — main category, wooden and MDF;
-
wooden lath panels — for a natural interior made of solid wood;
-
MDF slatted panel — for even geometry and stability;
-
Wooden moldings and cornices — for closing the joint and decorating the perimeter;
-
Moldings made of polyurethane — lightweight, geometrically precise, for painting;
-
Wooden baseboard — for connecting the ceiling to the floor line;
-
Pogonazh iz massiva — trims, profiles, transition elements;
-
Solid Wood Items — complete catalog of wooden interior parts;
-
Polyurethane Items — decorative elements for joints, cornices, and accents.
How to buy slatted ceiling panels without mistakes: the final algorithm
-
Determine the room: kitchen, living room, hallway, bedroom, study, commercial space — each has its own requirements.
-
Measure the ceiling: length, width, presence of niches, slopes, beams.
-
Choose the material: natural wood, wood-look MDF, panels for painting.
-
Decide the direction of the slats: lengthwise, crosswise, zonal.
-
Calculate the number of panels using the algorithm with a 10–15% margin.
-
Plan the lighting: types, positions, installation method.
-
Choose the joint covering method: wooden cornice, polyurethane molding, profile.
-
Select additional elements: baseboard, architraves, linear moldings in a single tone.
-
Go to catalog of slatted panels and place the order.
About the company STAVROS
STAVROS is a Russian manufacturer of wooden decor, linear moldings, and finishing materials from solid wood. The company's catalog includes slatted panels for walls and ceilings, wooden moldings, baseboards, architraves, linear moldings, furniture legs, handles, carved overlays, and polyurethane products for interiors and facades. Full-cycle production: from blank to finished product. STAVROS works with private clients, designers, and construction organizations, accepts custom orders by parameters, and provides Contact us to confirm shipping to your destination.
FAQ: answers to popular questions about slatted ceiling panels
Which slatted panels are best to buy for the ceiling?
For a residential interior — wooden panels made of solid wood or MDF with a wood finish, with even geometry and a suitable slat width. Plastic on a residential ceiling looks cheap and is not durable. Wooden and MDF panels provide a neat result and pair well with other wooden interior details.
How much does a slatted panel ceiling cost?
The cost depends on the material, area, width and length of the panels, complexity of the layout, lighting fixtures, installation method, and joint finishing. Wooden panels are more expensive than MDF. Add a cornice or molding around the perimeter, installation materials, and delivery to the cost of the panels — and you'll get the real budget.
Can wall slat panels be used on the ceiling?
Sometimes yes, but you need to consider the weight, fastening method, and permissible load. Not every wall panel is designed for installation against gravity. Check with the manufacturer.
What should I use to cover the joint between the slat ceiling and the wall?
A wooden molding or cornice matching the slats — for wooden and country interiors. A polyurethane molding for painting — for modern and neoclassical styles. A minimalist profile — for minimalism.
Where do slat panels look best on the ceiling?
In the hallway, kitchen-living room, study, bedroom, country house, and commercial interiors. Anywhere you need to add the warm texture of wood, create rhythm, and connect the ceiling with the rest of the interior.
How to calculate the number of panels?
Ceiling area ÷ area of one panel = approximate quantity. Add 10–15% for trimming and reserve. Calculate the perimeter separately for molding or cornice.
Do wooden panels need to be acclimatized before installation?
Yes. Wooden panels need to be kept in the room for at least 48 hours at stable temperature and humidity. This prevents deformation after installation.