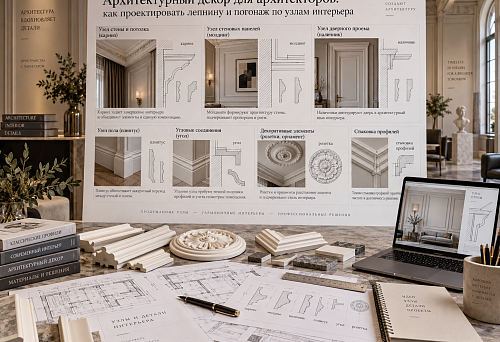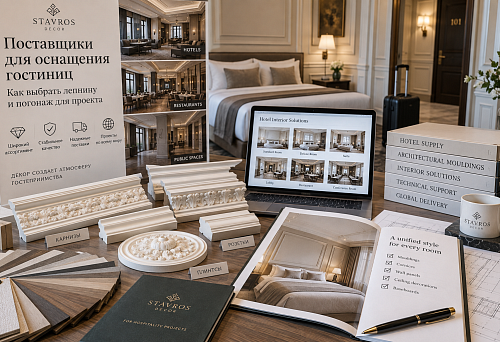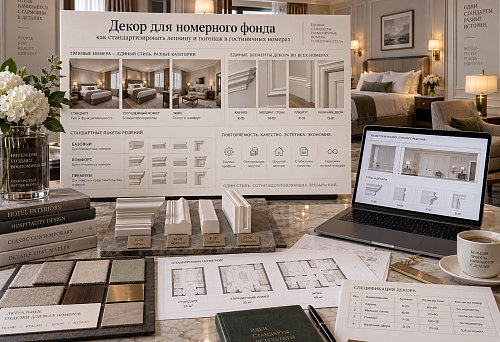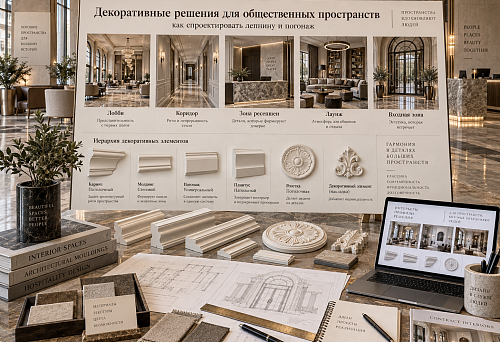









































































Article Contents:
- What Polyurethane Architectural Decor Is — and What It Is Not
- Why Designers Use Polyurethane Moldings
- The Main Product Families: Build a System, Not a Collection of Random Pieces
- 1. Linear moldings
- 2. Ornamental trim and frieze-like profiles
- 3. Wall appliques, onlays, and relief ornaments
- 4. Ceiling medallions and ceiling rosettes
- 5. Corbels and brackets
- 6. Coordinated wall decor sets
- How to size a ceiling medallion
- Coordinate the medallion with electrical planning
- Start with the furniture plan
- Choose the frame proportion
- Use the right profile scale
- Neoclassical
- French and Versailles-inspired interiors
- Art Deco
- Transitional
- Contemporary and minimalist
- Single large frames
- Stacked panels
- Repeated narrow bays
- Wall frames with ornamental centers
- 1. Prepare the surface
- 2. Establish reference lines
- 3. Dry-fit important compositions
- 4. Cut carefully
- 5. Use the correct adhesive
- 6. Finish joints as part of the system
- Monochrome wall and molding
- White molding on a colored wall
- Color-drenched interiors
- Metallic accents and selective gilding
- Patina and layered finishes
- Living rooms
- Dining rooms
- Bedrooms
- Entries and foyers
- Home offices and libraries
- Hospitality and commercial interiors
- Using too many different profiles
- Choosing ornament before proportions
- Ignoring furniture
- Using a medallion that is too small
- Assuming every white molding is polyurethane
- Calling decorative corbels structural
- Ordering exact quantities with no cutting margin
- Installing before checking the complete composition
- Is polyurethane molding only for traditional interiors?
- What is the difference between molding and trim?
- What is the difference between a ceiling rosette and a ceiling medallion?
- Can polyurethane molding be painted?
- Can I paint the molding the same color as the wall?
- Can polyurethane decor be used in bathrooms?
- Can I use polyurethane corbels to support a shelf?
- How do I choose molding width?
- How should I choose panel proportions?
- How much extra molding should I order?
- Should the ceiling medallion be larger than the chandelier?
- Can a ceiling medallion be used without a chandelier?
- Are all STAVROS wall decor sets made entirely of polyurethane?
- Where should I start if I am designing a whole room?

A well-designed room is rarely defined by one expensive object. More often, it is defined by proportion: where a wall begins and ends, how the ceiling meets the vertical plane, how a doorway is framed, how a chandelier relates to the ceiling around it, and whether the decorative details feel like part of the architecture rather than accessories added at the end. That is precisely where polyurethane architectural decor becomes useful. It can introduce shadow lines, frames, relief, rhythm, and ornament without forcing the room into a single historical style.
For U.S. designers, builders, remodelers, cabinetmakers, and homeowners, the category is broader than the phrase “stucco.” It includes linear profiles, ornamental trim, decorative appliques, ceiling centers, wall compositions, corbels, brackets, rosettes, and coordinated molding systems. The most useful way to think about the material is not as a substitute for something else, but as a design toolkit: a family of elements that can be specified by scale, profile, projection, ornament, finish, and relationship to the surrounding architecture.
The STAVROS assortment includes polyurethane moldings, ornamental trim, wall compositions, ceiling decor, decorative overlays, and related architectural elements. In American search behavior, the wording varies: people look for urethane molding, trim molding, ceiling medallions, corbels, wall decor, and architectural molding. These phrases describe different design tasks, so the best result comes from selecting the element according to the surface, room scale, installation conditions, and visual role rather than simply choosing the most ornate profile.


What Polyurethane Architectural Decor Is — and What It Is Not
Polyurethane architectural decor is a group of molded decorative products made to create relief and architectural articulation on walls, ceilings, furniture fronts, doors, panels, and selected facade applications. The term covers both simple linear elements and highly sculptural pieces. Some profiles are only a fraction of an inch deep and are intended to create a crisp frame around a wall panel. Others are dimensional ornaments designed to become the focal point of a ceiling or a formal wall composition.
That distinction matters. A thin linear molding works by drawing a line. A rosette works by creating a center. A corbel works by introducing an apparent point of support or a decorative stop. An applique works as a localized accent. A complete wall set works as a composition in which multiple elements are already proportioned to one another. Treating all of these pieces as interchangeable “decoration” usually leads to a room that feels busy. Treating them as architectural components produces a more coherent result.
Polyurethane also should not be confused with every white paintable trim material on the market. A category page may contain polyurethane, MDF, or polystyrene products, and each material has its own behavior, strengths, and suitable applications. STAVROS lists polyurethane pieces as specific products and collections, while some other sections include different materials. For a project in which material consistency matters, confirm the material at SKU level rather than assuming that every molding or cornice in a broad category is polyurethane.
For this reason, the term polyurethane decorative elements is most useful when it refers to pieces that are explicitly identified as polyurethane. On a large project, that simple verification step helps prevent errors in finishing, detailing, installation planning, and procurement.




Why Designers Use Polyurethane Moldings
The appeal of polyurethane is not that it creates a particular style automatically. Its advantage is that it can reproduce a controlled, repeatable relief while remaining practical to handle. That makes it useful for both restrained contemporary trim schemes and more elaborate classical compositions. In a minimalist room, a narrow profile may be used to create one or two oversized wall frames painted exactly the same color as the wall. In a neoclassical living room, the same material family can support layered panel molding, corner ornaments, a ceiling center, and small relief accents.
One reason urethane trim works especially well in interior design is visual precision. A successful molding layout depends on straight lines, consistent spacing, repeatable projection, and clean transitions. Even when the ornament itself is decorative, the composition around it must be disciplined. The eye notices irregular spacing much faster than it notices the complexity of the pattern. Good polyurethane trim therefore succeeds when it is treated as part of the room’s geometry.
The material is also practical for projects in which the decorative surface will be painted. A monochromatic finish can make an ornate element feel calm and architectural, while a contrasting or metallic finish can make the same relief more expressive. The freedom to treat the surface as part of the room’s color scheme is one of the reasons polyurethane decor can move between classical, transitional, Art Deco, eclectic, and contemporary interiors.
Another benefit is the range of scale. STAVROS lists compact linear polyurethane profiles such as MLDPU moldings as well as large modular ceiling compositions and sculptural wall ornaments. That range allows the designer to keep the language consistent from small details to larger focal points instead of mixing unrelated decorative systems.
Наша фабрика также производит:


Смотреть весь Каталог продукции
The Main Product Families: Build a System, Not a Collection of Random Pieces
The easiest way to specify architectural decor is to organize it by function. Start with the planes of the room — walls and ceiling — and then identify transitions, centers, frames, and accent points. This creates a hierarchy before any ornament is selected.
Получить консультацию
1. Linear moldings
Linear moldings establish boundaries. They can frame painted wall panels, divide a tall wall into zones, outline a door composition, create a border around an inset field, or introduce a narrow relief line on furniture. STAVROS lists polyurethane MLDPU profiles in multiple widths and projections. Because the effect of a linear profile depends heavily on scale, compare the actual width and projection with the dimensions of the wall rather than judging from a close-up product image.
For American interiors, a narrow profile is particularly effective when the goal is subtle panel molding rather than traditional heavy trim. A 10–20 mm profile reads very differently from a broad architectural band. The narrow version creates a graphic line; the larger version creates a stronger shadow and starts to behave more like a structural frame.
2. Ornamental trim and frieze-like profiles
Ornamental trim introduces pattern into a linear system. This is where polyurethane trim molding becomes more decorative than a plain wall frame. Repeating motifs can be used horizontally as a frieze, vertically as a narrow accent, or inside a larger panel composition. The design challenge is repetition: the pattern must start, stop, and meet adjacent elements in a way that looks intentional.
Before ordering, examine the repeat, the length of the piece, the ornament direction, and whether the pattern has a natural center. A profile that looks beautiful in isolation can become awkward if the wall length forces a visible partial repeat at the end. On symmetrical walls, begin the layout from the center and work outward so that cuts occur in balanced locations.
3. Wall appliques, onlays, and relief ornaments
Wall appliques are localized decorative elements rather than continuous profiles. They can occupy the center of a panel, reinforce the corners of a frame, sit above a doorway, decorate a furniture front, or create a focal point on an otherwise simple wall. Their power comes from concentration: one well-scaled relief can be more effective than several unrelated details.
The polyurethane architectural moldings and relief pieces in the STAVROS catalog include floral, scroll, shell, geometric, and other motifs. When working with elaborate ornament, keep the surrounding geometry quieter. When the molding layout itself is complex, select a simpler center ornament. The two layers should support one another rather than compete.
4. Ceiling medallions and ceiling rosettes
A ceiling medallion gives the ceiling a center. In American terminology, “ceiling medallion” is generally the strongest and clearest term for a decorative ceiling piece used around a chandelier or pendant. STAVROS offers polyurethane ceiling medallions in both complete and modular compositions. Some are designed around a lighting center; others can also function as stand-alone ceiling decoration.
The medallion should be chosen as part of the lighting composition, not after the chandelier has already been installed. The canopy diameter, mounting plate, wiring exit, suspension method, chandelier scale, and ceiling height all affect the correct selection. A good medallion visually connects the fixture to the architecture. An oversized one can flatten the chandelier; an undersized one can look like a decorative washer rather than a deliberate ceiling feature.
5. Corbels and brackets
Decorative corbels create the visual impression of support and introduce a strong three-dimensional accent. They work beneath shelves, at the sides of openings, below projecting architectural details, in fireplace compositions, under decorative ledges, and as terminal elements in classical interiors. STAVROS offers polyurethane corbels and bracket-shaped decorative elements.
It is important to distinguish decorative appearance from structural capacity. Unless a product is explicitly engineered and rated to carry a load, treat it as decorative. A shelf, mantel, or other weight-bearing element should be supported by the actual construction behind it. The polyurethane piece can then conceal, frame, or visually enrich that structural solution.
6. Coordinated wall decor sets
For clients who want a composed result without designing every proportion from scratch, wall decor sets can be useful. STAVROS wall collections include neoclassical, Versailles-inspired, botanical, Japandi, and other decorative directions. Some sets combine polyurethane ornaments with MDF linear components, so material should be checked in the individual set specification. The advantage of a coordinated set is proportional logic: the frame, ornaments, and overall panel dimensions are conceived as one composition.
The broader polyurethane wall decor section is therefore best approached as a design library. Instead of asking, “Which piece is the prettiest?” ask, “Which composition fits this wall width, ceiling height, furniture placement, and style?” That shift in question is what separates decoration from architectural design.
Polyurethane Ceiling Medallions: The Highest-Demand Specialized Category
Among polyurethane architectural decor terms, the ceiling-medallion cluster deserves special attention because it describes a very specific need: a homeowner or designer already has a ceiling center, chandelier, pendant, or formal room in mind and is looking for the element that completes it. A polyurethane ceiling medallion is not simply a decorative circle. It is a transition between the flat plane of the ceiling and the suspended volume of the light fixture.
That transition solves several visual problems at once. First, it gives the eye a reason for the chandelier to occupy the center of the room. Second, it creates a zone of shadow and relief around the canopy. Third, it can conceal minor irregularities around the electrical outlet or mounting area, provided the installation is properly designed. Fourth, it connects the central light fixture to the rest of the architectural language — wall frames, ceiling borders, cornices, or decorative panels.
The most sophisticated ceilings are usually organized in layers. The outermost layer may be the wall-to-ceiling transition. Inside that comes a perimeter frame or molding. The central field remains relatively calm. At the center, the medallion establishes a focal point. The hierarchy matters: if every layer uses the same visual intensity, the ceiling becomes crowded. If the center is expressive and the perimeter is restrained, or vice versa, the eye can understand the composition.
How to size a ceiling medallion
There is no universal diameter formula that works for every room. Instead, evaluate four relationships: medallion to chandelier, medallion to room width, medallion to ceiling height, and medallion to any surrounding ceiling frame. A wide room with a tall ceiling can carry a large medallion even when the chandelier canopy itself is modest. A smaller room with a low ceiling usually benefits from a lower-relief design with enough diameter to register visually but not enough depth to make the ceiling feel crowded.
If the chandelier is highly ornamental, the medallion can be simpler. If the chandelier has a minimal geometric form, an elaborate classical medallion will create deliberate contrast — but that contrast must be part of the design concept, not an accident. In transitional interiors, one of the safest approaches is a medallion with controlled relief: enough detail to create shadow, but not so much ornament that it dictates the entire style of the room.
Coordinate the medallion with electrical planning
Before installation, verify the chandelier mounting system and the medallion’s center. Large modular designs may be composed from multiple pieces, which means the layout should be dry-fitted and marked before adhesive is applied. Confirm that the canopy or mounting plate will not interfere with the relief. If the decorative element needs a center opening, the opening should be coordinated with the wiring and mounting hardware before final finishing.
In high-end residential work, this coordination should happen on the drawing set, not on installation day. The reflected ceiling plan should show the fixture center, medallion outline, perimeter molding, vents, sprinklers, smoke detectors, and any recessed lighting. This prevents a common failure: beautiful ornament that has to be cut unexpectedly because another building component occupies the same space.
Wall Molding: Use Proportion Before Ornament
Wall molding is one of the simplest ways to change the character of a room because it modifies the proportions of the wall without changing the wall itself. A flat painted surface becomes a structured elevation. The technique can be classical or contemporary depending on the profile and layout.
The exact-search phrase polyurethane wall molding describes a narrower part of the market than the broader molding terms, but the design intent is highly commercial: the user is looking for a material and a specific application. For that reason, wall molding should be treated as a full system of planning decisions rather than a decorative afterthought.
Start with the furniture plan
Do not draw wall frames before you know where the major furniture will sit. A sofa that overlaps a molding rectangle by three inches can make a carefully measured elevation feel wrong. A headboard centered on one frame and a pair of nightstands centered on adjacent frames can make the same room feel resolved. For dining rooms, align panels with the table axis or with the bay divisions of the wall. For hallways, create rhythm based on doors, openings, and lighting rather than using identical rectangles regardless of architecture.
Choose the frame proportion
Tall narrow frames emphasize verticality. Wide low frames make a wall feel broader. Square or near-square panels feel more static and formal. A series of narrow frames creates rhythm; a single oversized frame creates calm. In contemporary interiors, fewer larger panels usually look more sophisticated than many small panels.
The distance from molding to adjacent corners, baseboards, ceilings, doors, and other panels is as important as the profile itself. Consistent negative space is what makes the system look deliberate. If the room contains multiple door heights or irregular openings, establish a governing datum — for example, a common top line — and allow the panel widths to vary rather than forcing every rectangle to be identical.
Use the right profile scale
A thin profile can disappear on a very large wall; a heavy profile can dominate a small bedroom. Evaluate samples at full scale. Tape the outline of the proposed frame directly on the wall, then hold a molding sample in position and view it from the opposite side of the room. Architecture is experienced from a distance. Product photography is not a substitute for scale testing.
Ornamental Trim: How to Use Pattern Without Making the Room Feel Busy
Ornamental trim can carry tremendous visual information in a narrow band. A repeating leaf, bead, geometric pattern, or classical motif produces texture and shadow even when painted in a single color. The danger is repetition without hierarchy. When an ornamental profile is used everywhere — every wall frame, every door, every ceiling edge — the eye has nowhere to rest.
A better approach is to reserve ornament for locations that deserve emphasis. Use plain linear molding for the main panel geometry, then use an ornamental profile inside a central panel, around a mirror, above a doorway, or on one feature wall. Another approach is to use the ornamental trim as a narrow frieze while keeping the rest of the room’s trim simple.
The confirmed U.S. term polyurethane trim molding captures this functional overlap between trim and molding. The best specification is one in which the profile’s role is clear: frame, divider, accent, border, or ornament. When the role is unclear, too many profiles are often used together.
Corbels and Brackets: Decorative Support as an Architectural Motif
Corbels have a strong visual identity because they imply load. Historically, a corbel projects from a wall to support a beam, balcony, cornice, or shelf. In decorative polyurethane work, the form can be used without becoming the actual structural support. That distinction allows designers to use the language of classical architecture in lighter interior assemblies.
Use polyurethane bracket forms at transitions where a vertical surface appears to carry something above it: beneath a decorative ledge, beside a portal, under a mantel-like shelf, or as part of a large wall composition. When used in pairs, their spacing should relate to the element they appear to support. When used singly, they can terminate a decorative band or mark an axis.
For a traditional interior, scrolls, acanthus leaves, and classical profiles can reinforce the period language. For transitional interiors, choose a cleaner silhouette and paint the bracket the same color as the wall or millwork so that the shape reads through shadow rather than contrast. For commercial spaces, repeated corbels can establish rhythm across a bar, reception desk, wall display, or decorative canopy — again, provided the actual structural support is handled independently.
Decorative Appliques and Onlays: Small Pieces with High Visual Impact
A decorative applique is one of the most efficient ways to add complexity to a flat surface. Because it is localized, it can be used selectively: one central ornament on a panel, a pair above a door, a small motif on a cabinet, or a larger relief in a niche. The surrounding surface provides the quiet background that allows the relief to work.
When the applique is painted the same color as the substrate, the result is architectural. Light reveals the shape through shadow. When it is finished in a contrasting tone, gilded selectively, or patinated, the result becomes more decorative. Neither approach is inherently better; the correct choice depends on whether the room needs structure or ornament.
For furniture, door, and millwork applications, scale is even more important. A decorative element that looks restrained on a six-foot wall panel may overwhelm a 24-inch cabinet door. Always compare the actual dimensions with the usable flat area of the substrate. Leave enough margin around the relief for the eye to perceive the shape as an intentional object rather than something squeezed into the available space.
Style: From Neoclassical Restraint to Art Deco and Contemporary Rooms
Polyurethane does not have a style by itself. Style comes from profile geometry, ornament, proportion, spacing, finish, and context. That makes the material unusually flexible from a design standpoint.
Neoclassical
Neoclassical interiors rely on balance and controlled ornament. Use wall frames with generous negative space, centered reliefs, and a limited family of motifs. Avoid making every panel different. Repetition is part of the elegance. A ceiling medallion can be more expressive than the wall trim, but both should share a similar degree of refinement.
French and Versailles-inspired interiors
Here the decorative system can become richer: curved ornaments, floral details, double frames, corner pieces, and layered panels. The challenge is not whether to use ornament, but how to control it. Keep the large-scale geometry symmetrical. Allow the relief to be expressive inside that order. If both the geometry and the ornament are irregular, the room loses the disciplined grandeur associated with this style.
Art Deco
Art Deco benefits from geometry, stepped profiles, repeated lines, circles, and deliberate contrast. Instead of floral appliques, consider more abstract shapes or clean linear trim. Wall frames may become tall, narrow, and repetitive. Metallic finish can be used as an accent, but a monochrome application can also feel distinctly Deco if the proportions are strong.
Transitional
Transitional interiors are often the best context for architectural molding because the room can borrow proportion from traditional interiors without reproducing historical ornament literally. Use simple profiles, large panel fields, low-relief decorative pieces, and a unified paint color. The result feels finished and architectural but not period-specific.
Contemporary and minimalist
In contemporary rooms, restraint is everything. One oversized wall frame, a precise vertical rhythm of narrow moldings, or a low-profile ceiling medallion can create depth without introducing visual clutter. Paint the decor the same color as the wall and let the changing daylight reveal the relief. This approach is especially effective in neutral interiors where texture and shadow replace color contrast.
How to Choose the Right Polyurethane Molding Profile
Choosing molding by photograph alone is one of the fastest ways to make a specification mistake. A product image isolates the profile from the room, often enlarges the relief, and removes the visual information that actually matters: scale. The same profile may look delicate in a catalog and surprisingly assertive on a small wall. Conversely, a molding that appears substantial on a product page may disappear when installed twenty feet away in a double-height room.
Start with three dimensions: visible width, projection from the surface, and length. Width determines how much of the wall the molding occupies. Projection determines the depth of the shadow. Length affects joint planning and waste. Then consider the cross-section. A rounded profile produces a softer highlight and shadow. A stepped or angular profile produces a crisper graphic effect. A highly ornamented profile introduces pattern that will remain visible even under monochrome paint.
For wall frames, the profile should be large enough to read from the normal viewing distance. For furniture fronts, a compact profile is usually more appropriate. For a ceiling border, a deeper projection can help the molding hold its own against the scale of the ceiling plane. There is no single “correct” width; the correct width is the one that supports the composition.
When comparing PU molding options, print the cross-section at full scale or order a physical sample if available. Place the sample against the actual wall finish. Look at it in daylight and artificial light. Relief is fundamentally about shadow, and shadow changes with lighting direction.
Material Logic: Polyurethane, MDF, Wood, and Polystyrene Should Not Be Treated as Identical
Architectural interiors often combine materials, and that can be a strength when each material is used deliberately. Polyurethane is well suited to molded relief, curved ornament, complex decorative forms, and profiles that benefit from repeatable detail. MDF is commonly used for long, straight, paint-grade linear components. Wood contributes natural grain, machining possibilities, and a distinctly material presence. Polystyrene is another lightweight trim material with its own product ranges and specifications.
The important point is not to declare one material universally superior. The important point is to avoid accidental substitution. If the design brief calls for polyurethane because of a particular product form, do not assume that a visually similar profile made from another material is equivalent in installation or finish behavior. If a coordinated wall set combines polyurethane ornaments with MDF moldings, specify it as a mixed-material system rather than describing every piece as polyurethane.
This distinction is especially important on procurement documents. A contractor reading “paintable molding” may source a different material unless the specification includes manufacturer, product code, dimensions, and material. For a private renovation, the same principle applies on a smaller scale: always check the product card before adding items to the cart.
Planning Wall Panels: A Practical Design Method
A successful wall-molding project can be planned with a simple sequence. First, measure the wall. Second, mark every fixed element: doors, windows, switches, outlets, sconces, thermostats, built-ins, radiators, and vents. Third, place the major furniture on the elevation. Only then should you design the molding frames.
Establish the outside margins first. If the first frame begins too close to the corner while the last frame has generous space, the imbalance will be visible even if the internal rectangles are perfectly square. Next, decide whether the composition should be symmetrical around the room, around a wall centerline, around a fireplace, or around the furniture. In many real rooms these axes are not identical, so one must take priority.
For a formal living room, symmetry around the architectural center is often appropriate. For a bedroom, symmetry around the bed may be visually stronger. For a dining room with an off-center doorway, the dining table or chandelier axis may matter more than the geometric center of the wall. Design is the act of choosing which relationship deserves emphasis.
Single large frames
One large rectangular frame per wall bay creates calm, especially when the profile is narrow and painted with the wall. This works well in contemporary, transitional, and restrained neoclassical rooms. The large field inside the frame can remain empty, hold artwork, or become the background for a console or headboard.
Stacked panels
A lower and upper panel can create a more traditional elevation. The dividing line may correspond to chair-rail height, furniture height, or another architectural datum. Avoid arbitrary halfway divisions. The lower zone should feel grounded; the upper zone should have enough height to breathe.
Repeated narrow bays
A series of narrow panels introduces rhythm and can visually stretch a corridor or organize a long wall. This approach requires exceptional consistency in spacing. Even a small cumulative error becomes obvious across a long run, so layout should be calculated before any pieces are cut.
Wall frames with ornamental centers
When an applique or rosette sits inside the frame, give it sufficient negative space. The ornament should not touch the molding visually. A useful test is to step back until the entire wall fits in your field of vision. If the relief reads as one clear center within a larger field, the scale is probably working. If the ornament and frame merge into one busy shape, simplify or enlarge the field.
Ceiling Decor Beyond the Medallion
Ceiling design does not have to mean a fully ornamented classical ceiling. The most effective modern applications often use only two or three devices: a perimeter line, a central feature, and perhaps one secondary frame. Polyurethane can help create those layers without turning the entire ceiling into a decorative surface.
The STAVROS ceiling decor section includes coordinated compositions intended for ceiling applications. When working with a complete ceiling system, begin with the room plan. Locate the chandelier or pendant, then map recessed lights, HVAC diffusers, sprinklers, smoke detectors, speakers, access panels, beams, and curtain pockets. Decorative geometry should acknowledge these functional components rather than collide with them.
A perimeter molding can visually lower or frame a tall ceiling, while a secondary inner frame can make a large ceiling feel more composed. In a long rectangular room, an elongated central field may be more appropriate than forcing a circular arrangement. In a square room, a central medallion inside a square or rectangular frame creates a clear hierarchy. In open-plan spaces, ceiling molding can subtly define dining and living zones without building partitions.
Ceiling Medallion Selection for U.S. Homes
The phrase “ceiling medallion” is familiar to American buyers because the product has a clear purpose. But choosing one still requires more than matching a decorative style. The physical relationship among chandelier, ceiling height, room dimensions, and surrounding trim determines whether the medallion looks integral or added on.
For a small bedroom or entry, a shallow medallion can create a finished lighting center without dominating the ceiling. For a dining room, the medallion can reinforce the axis of the table and chandelier. In a large living room or foyer, a broader composition can help a chandelier feel appropriately scaled to the architecture. In hospitality interiors, repeated medallions can establish rhythm across a sequence of fixtures.
The term urethane ceiling medallion also appears in U.S. search behavior and refers to the same functional category. Regardless of wording, the specification should identify the exact product, size, composition, and installation requirements. Search terminology brings the buyer to the category; product data completes the decision.
How to Measure Before Ordering
Accurate measurement is less glamorous than selecting ornament, but it has more influence on whether the installation goes smoothly. Before ordering linear molding, create a wall-by-wall takeoff. Record each straight run, each inside and outside corner, each interruption, and each point where the profile must terminate.
Do not simply calculate total room perimeter if the molding is being used for frames. A panel-molding project requires the perimeter of every frame, not the perimeter of the room. If the layout contains repeated panels, calculate one complete panel, multiply by quantity, then add special conditions separately. This makes the takeoff easier to check.
For ceiling medallions and large ornaments, measure the available field, not only the room. A ceiling may be twelve feet wide, but recessed lights, a beam, or an HVAC diffuser may reduce the usable decorative zone significantly. For wall appliques, measure the clear flat area between moldings and other elements.
Allow a reasonable cutting and fitting margin for linear profiles. The exact waste allowance depends on the complexity of the layout, the number of corners, the standard product length, installer experience, and whether pattern matching is required. A simple rectangular room with plain molding uses material more efficiently than a project with many short pieces, miters, and ornamental repeats.
Ordering: Think in Systems and Product Codes
A professional order should be easy to audit. For each item, record the product code, description, material, dimensions, quantity, intended location, finish, and any related pieces. If an ornament has left and right versions, note both explicitly. If a wall composition uses a center piece and matching corner elements, list the complete set rather than expecting the installer to infer the relationship later.
When working from the STAVROS catalog, use the exact product page as the procurement reference. The site includes specific polyurethane molding, trim, relief, medallion, and bracket pages with dimensions and product information. For designers and architects, the samples and catalogs section can also help with presentation and specification workflow.
On multi-room projects, create a room code. For example: LR for living room, DR for dining room, MB for primary bedroom. Add the location to each line item: “LR west wall, upper panels” or “DR ceiling center.” This sounds administrative, but it prevents the same molding from being delivered to the wrong installer or finished in the wrong color.
Installation Strategy: The Quality Is in the Layout
Polyurethane decor is generally easier to handle than heavy mineral ornament, but easy handling does not remove the need for accurate installation. The visible quality of molding work comes primarily from layout, alignment, cuts, joints, substrate preparation, and finishing.
1. Prepare the surface
The substrate should be clean, dry, stable, and suitable for the adhesive and finish system being used. Loose paint, dust, grease, unstable filler, or significant surface irregularities can compromise adhesion or make the installed molding appear wavy. Repair visible defects before layout. On existing painted walls, verify compatibility between the coating and the selected adhesive.
2. Establish reference lines
Use a level or laser to establish the primary horizontal and vertical datums. Do not rely on the floor or ceiling being perfectly level, especially in older buildings. A molding frame that follows an uneven floor may look crooked when viewed against a door or window that is actually plumb. Decide which line should visually govern the composition.
3. Dry-fit important compositions
Before applying adhesive to a large medallion, ornate wall composition, or multi-piece corner assembly, place the components in position and confirm alignment. Mark centerlines and reference points. For mirrored left/right ornaments, verify orientation. For modular ceiling decor, confirm that the entire composition fits before the first piece is fixed permanently.
4. Cut carefully
Use a cutting method appropriate for the product and profile. A clean, controlled cut makes joints easier to finish. For miters, test the angle on scrap or a small offcut before cutting finished pieces. Real walls are not always exactly ninety degrees, so a theoretical 45-degree miter may require adjustment.
5. Use the correct adhesive
Adhesive selection depends on the polyurethane product, substrate, product size, and manufacturer recommendations. STAVROS lists installation adhesives among its finishing materials, but installers should still verify compatibility with the exact product and surface. Large or unusual elements may require a different fixing strategy than small trim.
6. Finish joints as part of the system
The installation is not complete when the molding is attached. Joints, minor gaps, transitions, and fastener points must be finished so that the composition reads as one architectural assembly. Under monochrome paint, a poorly finished joint can be more visible than expected because grazing light emphasizes the defect.
Painting Polyurethane Decor: Make the Relief Work with Light
Paint can make the same molding look traditional, contemporary, subtle, or theatrical. The first decision is whether the decor should merge with the architecture or contrast with it.
Monochrome wall and molding
Painting the wall and molding the same color is one of the most versatile approaches. The relief appears through light and shadow rather than color difference. This works especially well with narrow wall frames, contemporary rooms, muted palettes, and spaces where furniture or artwork should remain the primary focal point.
White molding on a colored wall
This creates a more graphic, traditional appearance. It works when the room already contains white casing, baseboards, crown, or other millwork. The key is consistency: if every trim element is white, the molding becomes part of that architectural family. If only one small molding is white while all surrounding trim is another color, it may look disconnected.
Color-drenched interiors
Color drenching — walls, trim, doors, and sometimes ceiling in one color family — is particularly effective with relief because it removes visual fragmentation. The architecture becomes sculptural. Deep colors intensify shadows; pale colors make the relief softer. Gloss level also matters: higher sheen highlights every contour and every surface defect, while matte or low-sheen finishes produce a quieter effect.
Metallic accents and selective gilding
Gold, bronze, silver, or other metallic finishes can be used selectively on raised details. This is most convincing when the metallic treatment has a clear hierarchy: perhaps only the center ornament, the high points of a relief, or one perimeter line. Covering every decorative surface with metallic finish can reduce the sense of depth because the eye reads the finish before the form.
Patina and layered finishes
Layered finishing can emphasize recesses and make ornament appear more dimensional. Use test samples first. Relief that looks subtle when raw may become much stronger after a darker glaze settles into recesses. A sample allows the designer to judge whether the effect supports the room or makes it feel artificially aged.
Wall and Ceiling Lighting: Relief Needs Shadows
Architectural decor does not exist independently of lighting. A molding profile is a small three-dimensional object; its visibility depends on the direction and softness of light. Flat frontal lighting reduces relief. Grazing light reveals it. Before finalizing the decorative layout, consider where daylight enters and how artificial light will strike the wall or ceiling.
Sconces can exaggerate vertical panel molding, especially when placed close to the wall. Picture lights can create strong shadow beneath ornamental details. Cove lighting can make a ceiling perimeter appear lighter and more layered. A chandelier casts changing light across a medallion and makes its relief more visible in the evening.
This is one reason renderings can be misleading. A rendering may use idealized lighting that makes every profile look perfect. In reality, a north-facing room, a windowless corridor, and a brightly lit retail interior will reveal the same molding differently. Evaluate important profiles under lighting conditions similar to those in the finished project.
Polyurethane Decor for Doors, Portals, and Openings
Doorways are natural locations for architectural emphasis because they already represent a transition. Molding can widen the visual frame, align the opening with wall panels, or create a more formal portal. An applique centered above the opening can establish a classical axis; paired ornaments can extend the composition horizontally.
For a restrained design, continue the same wall-molding profile around the doorway or align panel edges with the casing. For a richer design, create a layered frame: casing closest to the opening, a wider decorative field, then an outer molding. The layers should step outward logically rather than stacking random profiles.
If the opening has no door, architectural trim becomes even more important because there is no door slab to provide visual weight. A well-proportioned frame can make the opening feel intentional and can connect two rooms with different wall treatments.
Polyurethane Decor for Furniture and Built-Ins
Polyurethane relief is not limited to walls and ceilings. Selected decorative overlays and moldings can be used on furniture fronts, built-ins, doors, panels, and other decorative substrates when the product and installation method are suitable. The design principle remains the same: the decor should respect the scale of the surface.
On a cabinet door, a narrow frame can make a flat front feel more architectural. A small central applique can create a classical or romantic accent. On a larger wardrobe, repeated elements can establish rhythm. On a reception desk or custom display, relief can be integrated into a broader millwork composition.
Avoid treating a furniture front as a miniature wall. Cabinet doors have smaller margins, handles, hinges, rails, and stiles that compete for space. Place decorative elements where they will not interfere with hardware, finger clearance, door swing, or panel joints. Always mock up the layout at full scale before bonding the pieces.
Rooms Where Polyurethane Decor Works Especially Well
Living rooms
Living rooms usually offer the largest uninterrupted wall surfaces, which makes them ideal for panel molding. Use the furniture arrangement to determine the hierarchy. A central frame behind the sofa, balanced side frames, and a ceiling medallion aligned with the chandelier can create a coherent room without requiring dense ornament.
Dining rooms
Dining rooms benefit from strong symmetry because the table itself creates an axis. Wall panels, a central ceiling medallion, and a pendant or chandelier can all align. If a sideboard occupies one wall, design the panel behind it as a complete composition rather than allowing the furniture to cut randomly across molding lines.
Bedrooms
The wall behind the bed is the natural focus. Large, calm frames tend to work better than many small panels. The headboard should sit comfortably inside the composition with enough space above it. In smaller rooms, low-relief molding painted with the wall can add architectural depth without making the space feel formal.
Entries and foyers
Because a foyer is experienced immediately, it can support a stronger decorative gesture than a room where people spend hours. A chandelier and medallion, an ornate console wall, paired corbels, or a more detailed door surround can establish the character of the home in a small area.
Home offices and libraries
Molding can organize shelving, art, and built-ins. Dark monochrome paint combined with wall frames creates depth without adding multiple materials. Classical ornament can be concentrated above doors or within one focal panel rather than repeated across every surface.
Hospitality and commercial interiors
Restaurants, hotels, showrooms, salons, and reception spaces often need a strong visual identity. Repetition is useful here: a series of framed wall bays, repeated decorative brackets, or multiple ceiling centers can establish rhythm across a large space. At the same time, maintenance, fire-safety requirements, substrate conditions, accessibility, and local code requirements should be reviewed by the project team for the specific application.
Professional Specification: What Designers and Architects Should Record
A beautiful elevation is not enough. A successful decorative package should be buildable and orderable. For each polyurethane element, document the manufacturer, SKU, material, dimensions, quantity, orientation, location, finish, and installation notes. If the project uses a collection or set, identify whether the set contains multiple materials.
Dimension molding layouts from stable architectural references: finished corners, door centerlines, ceiling centerlines, or other fixed geometry. Avoid chains of dimensions that can accumulate error. For repeated panels, provide one typical panel dimension and a clear spacing rule, then identify exceptions separately.
In elevations, show the molding profile width at the scale of the drawing. In details, show the cross-section and relationship to adjacent surfaces. For ceiling medallions, coordinate with the lighting schedule and reflected ceiling plan. For decorative brackets, state clearly whether they are nonstructural.
For larger projects, a physical sample board can be more valuable than another rendering. Mount a section of molding, one representative ornament, and the proposed paint finish on a panel. Review it under project lighting. The sample resolves scale, finish, shadow, and color in one decision.
Common Design Mistakes — and How to Avoid Them
Using too many different profiles
A room rarely needs five unrelated molding profiles. One primary linear molding, one secondary trim, and one family of ornaments is often enough. Repetition creates unity. Variety should be reserved for changes in hierarchy, not used simply because many products are available.
Choosing ornament before proportions
The shape of the wall frame matters more than the ornament inside it. Establish the large geometry first. If the panel is badly proportioned, no decorative applique will rescue it.
Ignoring furniture
A panel that looks perfect on an empty elevation can fail once a sofa, bed, or console is installed. Design the architecture and furniture together.
Using a medallion that is too small
A tiny ceiling center beneath a large chandelier often looks accidental. Evaluate the entire ceiling field. The medallion needs enough visual scale to relate to the fixture and the room.
Assuming every white molding is polyurethane
Verify material at product level. STAVROS carries different materials across its decor categories. This matters for specifications, installation, and finish expectations.
Calling decorative corbels structural
Decorative polyurethane brackets should not be assumed to carry structural loads. Support shelves, mantels, and projections with appropriate construction unless the product documentation explicitly states otherwise.
Ordering exact quantities with no cutting margin
Linear molding projects involve cuts, miters, joints, and occasionally damaged pieces. Plan quantities based on the actual layout and include a practical margin appropriate to the complexity of the work.
Installing before checking the complete composition
A single misplaced first piece can shift every subsequent element. Mark the full panel, medallion, or repeated sequence before committing to adhesive.
A Practical Selection Checklist
- Define the role. Is the element a frame, border, center, corner, accent, transition, or repeated motif?
- Confirm the material. Verify that the selected SKU is polyurethane if polyurethane is required.
- Check actual dimensions. Width, height, projection, length, and overall composition size matter more than the thumbnail image.
- Review room scale. Compare the piece with wall width, ceiling height, furniture, and viewing distance.
- Coordinate other systems. Lighting, electrical boxes, vents, sprinklers, switches, outlets, door casing, and cabinetry can affect placement.
- Choose the hierarchy. Decide which element should be noticed first and keep secondary details quieter.
- Plan the finish. Same-color paint, contrast, metallic accent, or patina should be decided before final installation.
- Order by product code. Record SKU, quantity, location, and orientation.
- Dry-fit important elements. Large ceiling pieces and multi-part wall compositions should be checked before bonding.
- Keep structural and decorative functions separate. Decorative pieces should not be assigned loads without explicit product documentation.
How Polyurethane Decor Can Make a Room Feel More Expensive Without Making It More Ornate
Luxury in interiors is often confused with quantity. More ornament, more materials, more contrast, more decorative objects. Architectural luxury usually works in the opposite direction: fewer moves, executed with greater precision. A perfectly proportioned wall frame painted the same color as the wall can feel more sophisticated than a heavily ornamented surface. A well-scaled ceiling medallion can make a simple chandelier feel intentional. A single relief panel can give a plain corridor a sense of architecture.
The reason is depth. Flat construction is visually inexpensive when every surface terminates abruptly. Molding creates intermediate layers. It gives light something to reveal. Even a profile projecting less than an inch can create a line of shadow that changes through the day. That small change introduces visual complexity without requiring another material, pattern, or color.
This is where decorative polyurethane molding can be particularly effective. Used selectively, it adds detail exactly where the architecture needs emphasis. The goal is not to show how much decoration was purchased. The goal is to make the room appear as though its proportions were always meant to be that way.
Working with Collections: Consistency Is a Design Advantage
One of the hardest parts of decorative specification is matching pieces that were not designed to work together. Two floral ornaments may both be beautiful but use different line weights, leaf shapes, relief depths, and stylistic periods. When placed in the same room, those differences become obvious.
Coordinated collections reduce that risk. A collection provides a shared ornamental vocabulary. The designer can still control the amount of decoration, but the selected pieces already speak the same visual language. STAVROS wall-decor collections include interpretations of neoclassical, Versailles, botanical, Japandi, and other styles, with complete wall compositions and product groupings.
Collections are especially helpful for multi-room projects where continuity matters. The living room may use the richest composition, the dining room a simplified version, and the hallway only the linear molding, yet all three spaces can feel related. Consistency does not require identical rooms; it requires recurring proportions, motifs, or profile families.
Maintenance and Long-Term Care
Architectural decor is usually low-contact, which simplifies maintenance. The main issue is dust accumulation on horizontal ledges and in deep relief. Regular gentle dusting is generally preferable to aggressive cleaning. Use methods compatible with the finish paint and avoid abrasive tools that can scratch the coating or soften crisp edges.
If the decor is painted together with the wall, future room repainting can refresh the entire composition. Before repainting, inspect joints and edges. Small gaps or finish cracks should be repaired so they do not telegraph through the new coating. Detailed relief should be painted carefully to avoid filling fine recesses with excessive paint.
In bathrooms, kitchens, commercial spaces, or other demanding environments, maintenance requirements depend not only on the polyurethane element but also on the substrate, adhesive, primer, paint, humidity, cleaning methods, and ventilation. Treat the assembly as a system. A moisture-resistant decorative element cannot compensate for an unsuitable wall coating or poor substrate preparation.
Frequently Asked Questions About Polyurethane Moldings and Decor
Is polyurethane molding only for traditional interiors?
No. Traditional ornament is only one application. Simple polyurethane profiles can create large monochrome wall frames, restrained geometric grids, modern door surrounds, or minimalist ceiling details. Style comes from the profile, layout, finish, and surrounding design.
What is the difference between molding and trim?
In U.S. usage, the terms overlap. “Molding” often refers to shaped architectural profiles, while “trim” is a broader term for finishing pieces around edges, openings, walls, ceilings, and other transitions. Search behavior reflects that overlap, which is why both “urethane molding” and “urethane trim” are used. For specification, the exact product code and function are more important than the generic label.
What is the difference between a ceiling rosette and a ceiling medallion?
They are often used for the same general decorative category. In American English, “ceiling medallion” is usually the clearer shopping and design term for an ornamental ceiling center around a chandelier or pendant. “Rosette” may describe a ceiling center or a smaller decorative ornament depending on context. STAVROS lists dedicated ceiling rosette/medallion products as well as smaller decorative rosette forms.
Can polyurethane molding be painted?
Many polyurethane architectural products are intended to be integrated into painted interior schemes. The correct primer, paint, and preparation depend on the product surface and project conditions. Check the specific product recommendations and test the finish when appearance is critical.
Can I paint the molding the same color as the wall?
Yes, and it is one of the most effective contemporary approaches. Same-color finishing emphasizes relief through shadow instead of contrast. It is particularly useful when the design should feel architectural but understated.
Can polyurethane decor be used in bathrooms?
Polyurethane is commonly selected for applications where resistance to ordinary interior moisture is desirable, but the success of a bathroom installation depends on the complete system: substrate, adhesive, joints, primer, paint, ventilation, and exact product. Verify the intended application of the selected SKU and finish system before installation.
Can I use polyurethane corbels to support a shelf?
Do not assume decorative polyurethane corbels are structural. Unless a product has a documented load rating for that purpose, provide independent structural support for the shelf and use the corbel as the visible decorative element.
How do I choose molding width?
Choose by scale and viewing distance, not by a universal rule. Narrow profiles work well for subtle frames and furniture. Wider or deeper profiles create stronger shadow and are easier to read on large walls and high ceilings. Test a full-size sample in the room whenever possible.
How should I choose panel proportions?
Begin with the room and furniture. Tall panels emphasize height; wide panels emphasize width. Large panels tend to feel calmer and more contemporary, while smaller repeated panels create more rhythm and traditional detail. Keep margins and spacing consistent.
How much extra molding should I order?
Order from a measured layout rather than a rough room perimeter. Include additional material appropriate to the number of miters, short pieces, pattern repeats, and installer experience. Complex layouts require more cutting allowance than simple long runs.
Should the ceiling medallion be larger than the chandelier?
Not necessarily by a fixed ratio. The medallion must relate to the chandelier, room, ceiling height, and surrounding ceiling composition. Evaluate the visible diameter of the fixture and the architectural field around it. A drawing or full-scale paper template is more reliable than a universal formula.
Can a ceiling medallion be used without a chandelier?
Yes, if the design supports it. Some decorative ceiling compositions can function as stand-alone centers, inside coffers or framed ceiling fields. Confirm the specific product configuration and how its center is designed before specifying it without a light fixture.
Are all STAVROS wall decor sets made entirely of polyurethane?
No. Some coordinated wall sets combine polyurethane decorative elements with MDF linear moldings. Check the composition of the specific set. This mixed-material approach can be intentional, but it should be described accurately in the specification.
Where should I start if I am designing a whole room?
Start with the room geometry, furniture, openings, and lighting. Then define the decorative hierarchy: wall frames, ceiling perimeter, central medallion, and accent ornaments. Choose products only after those relationships are established.
Designing a Complete Polyurethane Decor Scheme: A Step-by-Step Example
Imagine a rectangular living room with a centered fireplace on one short wall, a sofa on the opposite wall, two windows on one long wall, and a chandelier centered in the room. The goal is a refined transitional interior — architectural but not overtly historical.
Step one: establish axes. The fireplace and chandelier create the primary room axis. The sofa aligns with that axis. The wall panel behind the sofa should therefore reinforce it rather than follow only the mathematical center of the wall if those centers differ slightly.
Step two: design wall frames. Use one large central frame behind the sofa and narrower side frames. Repeat the same top and bottom margins on the fireplace wall. Around the windows, simplify the treatment so the room does not become over-framed.
Step three: select the profile. Choose a restrained linear profile with enough projection to cast a visible shadow. Use one profile throughout the major wall frames. Avoid adding a second ornamental molding unless it has a clear role.
Step four: choose one relief accent. Add a decorative applique above the fireplace or inside the central sofa panel — not both. That single accent becomes the wall’s decorative high point.
Step five: coordinate the ceiling. Add a ceiling medallion centered on the chandelier. If the room needs additional ceiling definition, introduce a simple perimeter molding that echoes the wall profile without copying it exactly.
Step six: unify the finish. Paint walls and moldings one warm neutral color. The relief will appear through light. Use a slightly different sheen only if the project needs subtle emphasis.
Step seven: review at distance. Look at the full room, not individual products. If the eye jumps from ornament to ornament, remove one. If the room feels flat, increase hierarchy — perhaps through a larger center frame or a more expressive ceiling medallion rather than adding more small pieces.
This method can be adapted to bedrooms, dining rooms, foyers, hotels, restaurants, and retail spaces. The product list changes; the design logic does not.
Why Search Volume Should Guide Content — but Not Design
People search with practical language. They may type “polyurethane molding,” “urethane trim,” “ceiling medallion,” “wall molding,” or “corbel” because they already know the object they need. Those terms are useful for organizing a product catalog and for helping customers find the right section. But once the customer reaches the page, the content has to do more than repeat the phrase. It should help them choose correctly.
That is why this guide treats the strongest search phrases as doors into specific design problems. Polyurethane moldings lead to profile selection and wall geometry. Polyurethane ceiling medallions lead to lighting and ceiling composition. Polyurethane corbel products lead to decorative support motifs. Polyurethane wall decor leads to complete wall systems and collections. The keyword gets the user to the correct family; design information helps them make the purchase intelligently.
Choosing STAVROS Polyurethane Decor for a Project
Start from the application, not the catalog thumbnail. If you need straight frame lines, begin with linear molding. If you need a patterned band, review ornamental trim. If you need a focal wall detail, review polyurethane molded ornaments and appliques. If you need a ceiling center, start with ceiling medallions. If you need a three-dimensional terminal or support motif, review decorative corbels and brackets.
Then narrow the selection by size. Compare actual inches or millimeters with the wall, ceiling, or furniture elevation. Check the product material. Review the shape and ornament. Confirm whether the piece is straight, corner-specific, left/right, modular, or part of a coordinated set. Finally, plan the finish and installation before ordering.
The main STAVROS relief-decoration category brings these families together, while dedicated subcategories make it possible to shop by function. This is particularly useful for complex projects because one room may require several families: plain linear molding, ornamental trim, a ceiling medallion, and a small relief accent.
Conclusion: Architectural Detail Works Best When It Has a Reason
Polyurethane molding is most convincing when it does more than decorate a surface. It should clarify a proportion, establish a center, frame an opening, organize a wall, connect a chandelier to a ceiling, or give a transition enough visual weight. When every element has a reason, even a richly ornamented room can feel controlled. When the elements are chosen independently, even a minimal room can feel cluttered.
For U.S. projects, the most useful vocabulary is practical: molding, trim, wall molding, ceiling medallion, corbel, bracket, applique, rosette, and wall decor. The design process, however, remains architectural. Measure first. Establish hierarchy. Choose scale before ornament. Verify material and product data. Coordinate with furniture, lighting, and construction. Dry-fit important compositions. Finish the joints carefully. Paint with intention.
Whether the project calls for quiet urethane moldings around large monochrome wall panels, a sculptural polyurethane ceiling medallion above a chandelier, refined urethane trim inside a formal room, or decorative relief elements that become the focal points of the composition, the strongest result comes from the same principle: let the architecture lead and let the ornament support it.