


Article Contents:
- House facade: grandeur begins at the threshold
- Architectural elements for exterior walls
- Advantages of polyurethane for exteriors
- Styling of facade design
- Color solutions for the facade
- Practical aspects of facade installation
- Interior walls: continuation of the architectural theme
- Functions of wall decor
- Wall molding elements
- Compositional techniques
- Styling of interior moldings
- Color and texture
- Ceiling: the fifth wall of the house
- Elements of ceiling moldings
- Compositional ceiling schemes
- Light and moldings
- Unity of image: connection between facade and interior
- Repetition of ornaments and forms
- Color coordination
- Proportions and scale
- Mirroring of the entrance area
- Installation practice: from project to implementation
- Stage one: design
- Stage two: surface preparation
- Stage 3: Marking
- Stage four: cutting elements
- Stage five: gluing
- Stage six: joint sealing
- Stage seven: painting
- Timelines and cost of work
- Mistakes to avoid
- First mistake: scale mismatch
- Second mistake: stylistic chaos
- Third mistake: excessiveness
- Mistake four: inconsistency between facade and interior
- Mistake five: poor installation
- Mistake six: incorrect adhesive selection
- Mistake seven: painting with low-quality paints
- Mistake eight: ignoring climate
- Care and operation: beauty for decades
- Regular Cleaning
- Stain Removal
- Recoating
- Repair of damage
- Protection from Mechanical Damage
- Economics of the matter: investment in long-term beauty
- Material Costs
- Approximate calculation for a house
- Return on investment
- Economical options
- Questions and answers: FAQ on polyurethane molding
- Is polyurethane molding suitable for an old house?
- How many years does polyurethane molding last?
- Can it be used on a wooden house?
- Does molding affect thermal insulation?
- Is polyurethane flammable?
- How does molding behave in heat of +40°C and cold of -40°C?

Have you ever noticed how a house becomes a true work of art when every detail—from the entrance group to the ceiling cornice in the bedroom—harmonizes in unison? When the facade is not just beautiful in itself but resonates with the interior, when the walls inside continue the architectural thought started outside, and the ceilings complete the symphony of volume and light? In 2026, such a holistic approach to residential space design becomes not just a trend but a philosophy of home creation. And at the center of this philosophy is the solutionPolyurethane moldings buythat opens up universal possibilities for decorating all surfaces in a unified style and material.
Why polyurethane? Because it is the only material that feels equally comfortable under the scorching sun on the facade, in the high humidity of a bathroom, and in a formal living room with its aesthetic demands. When you decidepolyurethane moldings buyyou get not a set of disparate decorative elements but a system—thoughtful, technological, capable of unifying the architectural image of the entire building. Let's dive into this world where every centimeter of space works to create harmony.


House facade: grandeur begins at the threshold
The first thing a person sees when approaching your house is the facade. It forms an impression even before the guest crosses the threshold. Architectural decor here plays the role of a language through which the building tells about itself, the status of the owners, taste, and style. And if in the past beautiful facade finishing was available only to owners of historical mansions or those with a substantial budget for stone carving, todaybuy facade moldingmade of polyurethane means obtaining aristocratic elegance for reasonable money and with minimal installation effort.


Architectural elements for exterior walls
Facade molding is a whole universe of forms and solutions. Let's start with cornices. The crowning cornice under the roof visually completes the building's volume, making the transition from wall to roof smooth and noble. Without such an element, even an expensive house looks unfinished, as if its top were cut off. The cornice creates shadow, emphasizes horizontality, and visually expands the building. In classical architecture, such cornices were made of stone—heavy, expensive, requiring reinforced foundations. A polyurethane cornice weighs dozens of times less, is attached with facade adhesive, and serves for decades without losing shape.
Interfloor belts and moldings divide the facade horizontally, create rhythm, and emphasize levels. If you have a two-story cottage, a relief belt between floors visually structures the volume, making it more noble. Vertical elements—pilasters, half-columns, lesenes—work to create classical proportions. They frame the entrance group, highlight bay windows, and emphasize the building's corners. Even a simple rectangular house with such elements gains character and becomes recognizable.
Window trims—architraves, pediments, window sill cornices—are decorations that turn standard plastic windows into architectural value. An arched pediment with a keystone above a window creates an accent, a triangular pediment—classicism, a simple architrave—neatness and completeness. Rusticated stones on corners and around openings imitate stone masonry, adding massiveness and solidity to the building.
The entrance group deserves special attention. A portal with columns, a pediment, and decorative consoles turns a simple door into a grand entrance. Even a modest-sized house with an impressive entrance zone makes an impression of respectability. And this is just a few polyurethane elements installed in a day's work.
Our factory also produces:


Advantages of polyurethane for exterior
Why has polyurethane become the material of choice for facade decor? First, resistance to atmospheric influences. Modern polyurethane compounds withstand temperature ranges from minus fifty to plus eighty degrees. Siberian frosts, southern heat, humidity of coastal cities—the material retains its shape and properties in any conditions. It does not crack from temperature fluctuations, crumble, or delaminate.
Second, moisture resistance. Polyurethane does not absorb water, swell, or rot. Rain, snow, fog—all of this runs off the surface without causing harm. Unlike gypsum, which quickly deteriorates from moisture on the facade, or polystyrene foam, which absorbs water over time and loses shape, polyurethane remains stable for decades.
Third, low weight. This is critical for facade decor. Heavy stone or concrete elements create a load on walls and foundations, requiring complex reinforcement-based fastening. Polyurethane weighs dozens of times less for the same dimensions. A linear meter of a wide cornice can weigh only two to three kilograms. This allows decor to be mounted even on lightweight frame walls without worrying about load-bearing capacity.
Fourth, ease of installation. No anchors, metal structures, or complex fastening systems are needed. Special polymer adhesive for exterior work reliably fixes elements to any base—brick, concrete, aerated block, plaster. Additionally, dowels can be used for reinforcement in high-load areas. Installing the facade of an average-sized cottage takes three to five days, including fitting and painting.
Fifth, durability. High-quality polyurethane molding lasts thirty to fifty years without losing its aesthetic properties. It does not fade in the sun (if painted with resistant paints), does not yellow, and does not change geometry. This is a long-term investment in the appearance of the house.
Get Consultation
Stylistics of Facade Design
When you decidebuy stucco for home, the first question is—in what style? Polyurethane is universal; it can be adapted to any architectural direction.
Classicism and Neoclassicism require strict symmetry, clear proportions, and moderate decor. Porticos with columns, triangular pediments, rusticated corners, and simple cornices without excessive ornamentation are appropriate here. The color palette is white, cream, light gray against pastel walls. This is nobility and restraint, tested by centuries.
Baroque and Rococo—for those who are not afraid of opulence. Abundant molding, curvilinear forms, plant ornaments, volutes, cartouches, mascaron. Windows are framed with complex architraves with broken pediments, corners are decorated with pilasters with capitals, cornices abound with decorative elements. This is theatricality, luxury, a display of prosperity.
Empire—monumentality and military strictness. Concise forms but large scale. Massive porticos, smooth columns, wreaths, laurel garlands, military attributes in decor. Colors—white with gold on dark blue or emerald backgrounds.
Modern (Art Nouveau)—smooth, flowing lines, asymmetry, plant motifs. Windows with curving architraves, cornices with wavy profiles, decorative panels with irises and lilies. This is poetry, romance, closeness to nature.
Modern Eclecticism allows mixing elements of different styles, creating a unique appearance. Classical pilasters on a minimalist facade, a Baroque entrance group in the context of concise walls, Art Deco rosettes on modern panels. The main thing is a sense of proportion and professional execution.
Mediterranean Style—this is arcades, rusticated columns, terracotta shades, abundant use of cornices and moldings. The decor is generous but not overloaded, creating a sense of warmth and sun.
Minimalism and High-Tech may seem incompatible with molding, but that is not the case. Here, concise geometric profiles without ornamentation are used—straight bands, angular frames, simple cornices. Painted to match the wall color or in contrasting colors (black, graphite), they create relief and structure without violating minimalist aesthetics.
Color Solutions for the Facade
Traditionally, facade molding is painted white or in light tones that contrast with the wall color. This is a classic solution, tested by centuries. White molding on beige, peach, light yellow walls creates airiness and elegance. On dark walls (gray, blue, green), white decor looks graphic and expressive.
But modern trends allow for other options. Molding in the same tone as the walls creates a bas-relief effect—the decor does not stand out but reveals itself through the play of light and shadow. This is a refined, unobtrusive technique for those who value restraint.
Contrasting dark shades—graphite, anthracite, brown—give the facade modernity and strictness. This solution is especially effective on light walls.
Metallic effects—gilding, patina, bronze, silvering—turn decor into jewelry. Gilded column capitals, patinated rosettes, bronze cornices create luxury and uniqueness. It is important not to overdo it—an excess of metallic looks vulgar. Accentuate individual elements, leaving the main mass of decor in neutral tones.
Bright colors—terracotta, ochre, olive—are suitable for Mediterranean and ethnic styles. They create a warm, sunny atmosphere.
Practical Aspects of Facade Installation
Installation of facade molding begins with preparing the base. Walls must be plastered, leveled, and primed. Perfect smoothness is not required, but serious defects must be eliminated. Marking is a critically important stage. Use a laser level to apply center lines, height marks, and element boundaries. A millimeter error on the facade turns into centimeters of visual displacement at a distance.
Choose specialized adhesive for polyurethane and exterior work. Compositions based on MS polymers or polyurethane adhesives provide reliable adhesion to any bases, are elastic, and withstand thermal deformations. Adhesive is applied in a zigzag or dotted pattern over the entire back surface of the element. The element is pressed against the wall and fixed until setting (usually 5-10 minutes). For large elements, dowels are additionally used—they are installed after the adhesive sets, and the holes are then filled with putty.
Cutting elements is done with a miter saw or a hacksaw with fine teeth. For precise corner fitting, use a miter box. Joints between elements are sealed with acrylic sealant for exterior work. The sealant is applied, smoothed with a wet spatula or finger, and after drying forms an invisible seam.
Painting—the final touch. Use facade paints—acrylic, silicone, silicate. They are weather-resistant, vapor-permeable, and do not fade. Paint is applied in two coats with a brush or roller after the adhesive and sealant have completely dried (usually after a day). The first coat is primer, the second is finish. For complex effects (patina, gilding), involve a professional decorator.
Walls Inside the House: Continuation of the Architectural Theme
Crossing the threshold of the house, a guest should feel continuity—the uninterruptedness of style. If the facade speaks the language of classicism, the interior cannot be high-tech, and vice versa. Wall molding is a tool that connects the external and internal into a single whole. When you see the same ornaments, proportions, and rhythm in the interior as on the facade, the house gains integrity, becomes an architectural organism, not a set of disparate rooms.
Functions of Wall Decor
Molding on walls solves several tasks simultaneously. The first is aesthetic. Decorative elements adorn the surface, add volume, and create visual interest. A bare wall, even painted a beautiful color, looks flat. Relief molding turns it into a sculptural composition, where light plays on convexities and depressions, creating a living, changing picture.
The second task is zoning. Moldings divide the wall into sections, creating panels. This visually structures the space. In a large room, panels help avoid a sense of emptiness; in a small one, they create an illusion of architectural complexity. Vertical elements raise the ceiling, horizontal ones expand the room.
The third task is framing and accenting. Molding highlights functional zones: fireplace, television, headboard, mirror, paintings. A framed element gains visual significance, becoming a focal point of the interior.
The fourth—concealment. Molding hides wall defects, irregularities, joints of different materials. It can cover electrical wiring, cables, smart home sensors.
Elements of wall molding
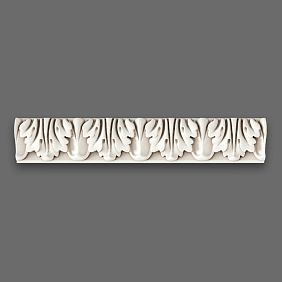
Moldings are straight relief strips of varying widths and profiles. They create frames on walls, frame doors and windows, and divide surfaces into panels. Thin moldings (2-5 cm) are used for delicate decor, wide ones (10-15 cm) for powerful accents. The profile can be simple (smooth, with one or two protrusions) or complex (with ornament, fluting, plant motifs).
Decorative panels and overlays are independent artistic elements with three-dimensional relief. These can be plant compositions (acanthus leaves, grapevines, floral garlands), geometric patterns, antique motifs (meander, palmettes), Baroque volutes and cartouches. Overlays are placed symmetrically on both sides of the fireplace, above the door, on wall sections between windows, on the frieze under the ceiling. They turn the wall into an artistic panel.
Corner elements complete the intersections of moldings, adding professionalism to the composition. Instead of simply joining strips at an angle, use special corner overlays with rosettes, flowers, geometric shapes. These are the details that distinguish a master's work from an amateur's.
Pilasters and half-columns are vertical elements imitating architectural structures. A pilaster is flat, slightly protruding from the wall, with a base (foundation), shaft (body), and capital (crowning part). A half-column is volumetric, protruding by half or one-third of its diameter. These elements create a sense of classical architecture in the interior, divide walls vertically, and visually raise the ceiling. Especially effective in high rooms (from 3.5 meters), in halls, living rooms, dining rooms.
Decorative cornices and friezes are placed under the ceiling, creating a transition from the vertical plane to the horizontal. They can be laconic or richly decorated with ornament. A cornice visually raises the ceiling, especially if LED lighting is hidden behind it.
Door and arch framings turn openings into architectural elements. Casings with capitals, portals with columns, arched framings with keystones — all this creates solemnity and structure in the interior.
Compositional techniques
How to arrange molding on walls so the result is harmonious? There are several proven schemes.
Panel division is a classic technique. The wall is divided by moldings into rectangular or square sections. Inside the panels, you can place wallpaper, contrasting paint, decorative plaster, fabric. Framed by moldings, these inserts look like paintings. Panel proportions are important: they should relate by the golden ratio or in ratios of 2:3, 3:5. Avoid panels that are too small or too large — the former create visual clutter, the latter look empty.
Symmetrical framing — highlighting the center of the wall. For example, a large overlay with plant ornament is placed above the fireplace, with symmetrical vertical moldings on the sides, creating a portal. Or a bed's headboard is framed by a rectangular frame of moldings with corner overlays. Symmetry calms, creates a sense of order and classical beauty.
Rhythmic repetition — several identical elements at equal distances. For example, along a long corridor wall, vertical overlays or pilasters are placed every one and a half meters. Or identical panels between windows in a living room. Rhythm creates dynamics, guides the gaze, structures the space.
Accent wall — one wall in the room is richly decorated with molding, the others remain neutral. This is a modern technique that avoids overload but creates a bright focal point. The accent wall is usually the one with the main functional element: fireplace, TV, bed headboard, dining area.
Framing functional elements — TV, mirror, paintings are surrounded by molding, like a frame. This highlights the object, giving it significance. The framing should be proportional to the object — too narrow gets lost, too wide overwhelms.
Stylistics of interior molding
As on the facade, interior molding should match the overall style.
Classical interior requires symmetry, clear proportions, moderate decor. Straight moldings create panels, pilasters frame the fireplace, a ceiling cornice with simple ornament crowns the walls. Colors — white, cream, gold on pastel walls.
Baroque in the interior is abundance. Abundant gilding, complex curvilinear forms, rich plant ornament. Overlays with cherubs, volutes, cartouches, garlands cover walls and ceilings. This is luxury, a display of wealth, theatricality.
Neoclassicism is a modern interpretation of classicism. Forms are simplified, decor becomes more restrained, but proportions and symmetry are preserved. Thin moldings, laconic overlays, calm colors. This is elegance without pomp.
Art Deco — geometry and luxury of the 1920s. Zigzag moldings, sunburst rosettes, fan overlays, strict verticals. Contrasting colors: black with gold, emerald with silver, blue with bronze.
Provence and country — plant motifs, grapevines, floral garlands. Molding is painted in warm creamy, milky tones, sometimes artificially aged with patina. This is cozy rustic elegance.
Minimalism with accents — simple straight profiles without ornament, painted the color of the walls. They create relief without overloading the space. This is for those who want structure but are not ready for abundant decor.
Loft — industrial aesthetics with classical notes. Against a backdrop of brick and concrete, white or graphite molding creates a contrast of eras. Wide cornices and laconic moldings add historicity to the space.
Color and Texture
Traditionally, interior molding is white or light shades. But in 2026, other solutions are also popular.
Tone-on-tone — molding is painted the color of the walls. It reveals itself through the play of light and shadow, creating a bas-relief effect. This is refined, unobtrusive, visually does not reduce space.
Contrast — white molding on dark walls or dark on light. A classic solution that emphasizes each decorative element.
Pastel — delicate shades of pink, blue, mint, lavender create a romantic atmosphere. Suitable for bedrooms, children's rooms, boudoirs.
Metallic — gilding, silvering, patina turn molding into jewelry. Moderation is important: gild the capitals of pilasters or individual overlays, leaving the main mass of decor neutral.
Wood and stone — imitation of natural materials through painting and patination. Molding can look like carved wood or stone carving.
Ceiling: the fifth wall of the house
The ceiling is often called the fifth wall, and rightly so. It occupies the entire area of the room, but most people leave it white and flat. Yet ceiling molding can radically change the perception of space, add volume, create a visual center, and tie the interior together. When you use cornices and rosettes on the facade of a house, it's logical to continue this theme inside, creating architectural unity.
Elements of ceiling molding
Ceiling cornices and baseboards create a transition from the wall to the ceiling. They come in different widths (from 5 to 30 cm) and profile complexities. A narrow cornice is a delicate touch, a wide one is a powerful architectural accent. A cornice visually raises the ceiling, especially if painted the same color as the walls or if lighting is hidden behind it. An LED strip behind the cornice creates a floating ceiling effect—a modern technique combining classic decor with innovative technologies.
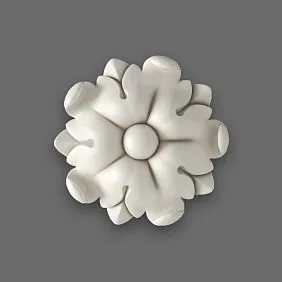
Ceiling rosettes are round or polygonal decorative elements framing a chandelier. The diameter of the rosette is chosen proportionally to the size of the light fixture and the room. For a room of 15-20 sq.m with a ceiling of 2.7-3 m, a rosette with a diameter of 40-60 cm is suitable. In more spacious and high rooms, elements up to 80-120 cm can be used. A rosette not only decorates the chandelier mounting point but also visually enlarges the light fixture, making it more significant. If the chandelier is modest, a rich rosette compensates for this, creating an impression of luxury.
Coffered ceilings are a complex system of intersecting beams and moldings creating recessed sections. Coffers are a classic of architecture dating back to antiquity. In the resulting sections, you can place spot lighting, contrasting paint, or decorative painting. Coffers visually raise the ceiling, add volume, and create a palatial feel. Installing coffers is more complex than a simple cornice, but the result is impressive.
Domes and vaults are for rooms with very high ceilings (from 4 meters). A polyurethane dome is mounted in the center of the ceiling, creating a volumetric accent. A chandelier may hang from under the dome. This solution is for grand halls, lobbies, and stairwells.
Decorative beams imitate load-bearing structures, adding massiveness and historicity to the interior. Especially popular in country, chalet, and loft styles. Polyurethane beams are hollow inside, lightweight, but externally indistinguishable from wooden ones.
Corner overlays and medallions complement cornices, placed in the corners of the room. They complete the composition, adding detail. In the center of the ceiling, besides the rosette for the chandelier, additional medallions can be placed, creating a multi-center composition.
Compositional ceiling schemes
Perimeter framing is the most common solution. A cornice is mounted along the entire perimeter of the ceiling, with a rosette for the chandelier in the center. This is a basic scheme suitable for any style and room size.
Coffering—the ceiling is divided into sections by beams or moldings. The scheme can be regular (identical squares or rectangles) or complex (a large central section, smaller side ones). Each section has its own lighting or decor.
Radial composition—decorative strips radiate from the central rosette to the corners of the room, creating a radiant structure. This adds dynamism and visually expands the space.
Multi-level composition—a combination of elements of different heights and sizes. For example, a wide cornice around the perimeter, slightly below it—a second tier of thin moldings, in the center—a large rosette, and from it to the corners—medallion inserts. Such complexity creates an effect of luxury and architectural depth.
Minimalist accent—only one element on the ceiling. For example, a large rosette in the center without a perimeter cornice. Or only a wide cornice without a central accent. This is for those who prefer restraint.
Light and molding
Molding on the ceiling comes to life with proper lighting. Hidden lighting behind the cornice creates soft diffused glow, visually separating the ceiling from the walls. Spotlights in coffers or around the perimeter of the rosette emphasize the relief, creating a play of shadows. A chandelier framed by a rich rosette becomes the crown of the interior, drawing all eyes.
LED technologies allow changing the color and intensity of lighting, creating various lighting scenarios. In the morning—bright cool light, in the evening—warm subdued light, for celebrations—colorful dynamic lighting. Molding becomes not just decor but a functional element of the lighting system.
Unity of image: connection between facade and interior
The main value of polyurethane molding is the ability to create a unified architectural image for the entire house. When facade elements echo interior ones, when the same motifs are repeated outside and inside, the house gains integrity. It is not a set of disparate rooms in a box but a thoughtful organism where every detail is in its place.
Repetition of ornaments and forms
If you used a cornice with a floral ornament on the facade, repeat this motif in the ceiling cornice or wall overlays inside. Facade pilasters with Corinthian order capitals will be reflected in interior half-columns of the same style. Window casings outside may be duplicated by door frames inside.
This does not mean literal copying. The scale changes—facade elements are larger, interior ones are more delicate. But the style, proportions, and rhythm are preserved. A guest who saw your house from the outside, upon entering, will immediately feel: yes, this is the same house, the same language of architecture.
Color coordination
If the facade is done in a beige-white palette, it's logical to continue it in the interior. White molding on beige walls will create continuity. If a contrasting scheme is used outside (dark walls, white decor), the interior can play with reverse contrast (light walls, dark accents) or continue the same logic.
Metallic accents (gilding, patina) can also link the exterior and interior. Gilded column capitals at the entrance will find an echo in gilded elements in the living room.
Proportions and Scale
The golden ratio, which works on the facade, is also applicable in the interior. If the height of the facade cornice is 1/10 of the wall height, the interior ceiling cornice should have a similar ratio. The width of moldings, the spacing between elements, the size of overlays—all this follows unified proportional laws.
Mirroring of the entrance area
The grand entrance is the transition point from external to internal. Here, the connection between facade and interior should be especially evident. If the entrance outside is decorated with a portico with columns, it's logical to use pilasters of the same order in the lobby. A facade rosette above the entrance may be duplicated by a ceiling rosette in the hallway. This creates a smooth transition, avoiding a sharp stylistic break.
Installation practice: from project to implementation
Theory is beautiful, but how to bring the idea to life? Installing polyurethane molding does not require professional construction skills but requires care, precision, and understanding of the process.
Stage one: design
BeforePolyurethane moldings buyCreate a sketch. Draw a plan of the facade, each room with dimensions. Mark where molding elements will be located. Calculate the required linear meters of moldings, the number of overlays, rosettes, corner elements. Add 10-15% for cutting and reserve.
Use specialized 3D visualization software or simply draw by hand. It's important to see the overall picture before starting work. Mistakes are easy to fix on paper, but expensive and difficult on the wall.
Stage two: surface preparation
Walls and ceilings must be plastered, puttied, and sanded. Perfect smoothness is not required, but serious defects should be eliminated. Surfaces must be dry — installation on a damp base is not allowed. Prime the surfaces with a deep penetration primer to improve adhesion.
Third stage: marking
Using a laser level, tape measure, ruler, and pencil, mark the placement lines of elements on the walls and ceiling. For ceiling cornices — a perimeter line at the required distance from the ceiling. For wall moldings — panel outlines. For a ceiling medallion — the center of the room (usually coincides with the chandelier mounting point). Symmetry is critical — check dimensions from both sides.
Stage four: cutting elements
Polyurethane cuts easily. For straight cuts, use a hacksaw for metal, a jigsaw, or a miter saw. For angled connections of moldings (inside and outside corners), use a miter box — a tool for cutting at precise angles (usually 45 degrees). A professional miter saw with a rotating table ensures perfect cuts.
After cutting, treat the edges with fine sandpaper to remove burrs.
Stage five: gluing
Choose glue designed for polyurethane. Universal construction adhesive or 'liquid nails' will also work, but specialized compounds (based on MS polymers) provide better adhesion. For the facade, use exterior-grade adhesive that is resistant to moisture and temperature.
Apply glue to the back of the element in a zigzag pattern or in dots. If the element is wide (cornice, beam), apply glue over the entire area. Press the element against the surface, align it with the markings, and hold for 30-60 seconds. Most adhesives set quickly but reach full strength after 24 hours.
For heavy or large elements on the facade, additionally use dowels. Drill holes through the element into the wall, insert dowels, and screw in self-tapping screws. Sink the screw heads and cover with putty.
Stage six: sealing joints
Joints between elements are sealed with acrylic sealant (for interiors) or polyurethane sealant (for facades). Apply sealant from a tube using a gun and smooth it with a wet spatula or finger. Remove excess immediately with a damp cloth. After drying, the seam becomes invisible.
If there are gaps between the element and the surface (due to wall unevenness), fill them with the same sealant or acrylic putty.
Stage seven: painting
After the glue and sealant have completely dried (usually after one to two days), you can paint. Use water-based paints — acrylic, latex, water-emulsion. For the facade — specialized facade paints resistant to UV and precipitation.
Apply paint with a brush, roller, or spray gun in two coats. The first coat is a primer, the second is a finish coat. Drying time between coats is specified by the paint manufacturer (usually 2-4 hours).
For complex effects (patination, gilding, imitation of stone or wood), use specialized decorative paints and techniques. If you lack experience, invite a professional decorator.
Timelines and cost of work
Installing facade molding on an average cottage (150-200 sq.m of facade) takes 3-5 days of work for a team of two people. The interior of the same house (4-5 rooms) — another 3-4 days. Painting adds 1-2 days. Total full cycle — about two weeks.
The cost of professional work is approximately equal to the cost of materials. If materials cost 200 thousand rubles, labor will cost 150-250 thousand. DIY installation saves this amount but requires time and care.
First mistake - unstructured mixing. A classic chair, loft table, Scandinavian chest, and minimalist cabinet in one room is not eclecticism, but visual chaos. Each item draws attention to itself, not creating cohesion. A system, logic, unifying idea is needed. Choose one dominant style, add a second as an addition, and possibly a third as an accent. But no more than three, and all should have something in common - color, material, era, or functionality.
Even quality materials won't save a project from failure if conceptual or technical errors are made.
First mistake: scale mismatch
Miniature molding in a huge space gets lost and looks stunted. Massive elements in a small room feel oppressive and visually shrink the space. Always correlate the size of the decor with the room's dimensions. For a 15 sq.m room with a 2.7 m ceiling, a cornice 8-12 cm wide and a medallion 40-50 cm in diameter are suitable. For a 40 sq.m hall with a 3.5 m ceiling — a cornice 15-20 cm, medallion 80-100 cm.
Mistake two: stylistic chaos
Baroque medallions in a minimalist loft, antique pilasters in rustic country style, mixing incompatible patterns create a sense of bad taste. Choose a single stylistic direction and follow it throughout the house. Variations within the style are acceptable (more romantic decor in the bedroom, stricter in the study), but the main line should be unified.
Mistake three: excessiveness
The desire to decorate every centimeter leads to overload. Space needs pauses, clean surfaces for the eyes to rest. Molding is an accent, not a background. If walls are completely covered with decor, it stops being readable and turns into visual noise.
Mistake four: inconsistency between facade and interior
A classic facade with columns and molding, but inside — bare minimalism. Or vice versa — a modern, laconic exterior and baroque opulence in the interior. Such dissonance destroys the integrity of the house. The degree of decorativeness can vary (facade stricter, interior richer or vice versa), but the stylistic line should be traceable.
Mistake five: poor-quality installation
Crooked joints, gaps, uneven lines ruin the impression even of expensive molding. If you are not confident in your skills and tools, it's better to entrust the work to professionals. Saving on installation can lead to the need for rework.
Mistake six: incorrect adhesive selection
Using adhesive not intended for polyurethane or operating conditions leads to element detachment. For facades, exterior-grade adhesive is mandatory. For wet areas—moisture-resistant. Saving on adhesive is unacceptable.
Mistake seven: painting with low-quality paints
Cheap paint yellows, peels, fails to convey texture. Sloppy application creates drips and runs. Painting is the final touch, requiring as meticulous an approach as installation.
Mistake eight: ignoring climate
In regions with extreme climates (severe frost, heat, hurricane winds) facade molding requires additional protection. Use quality paints with UV filters, additional mechanical fastening with dowels, anti-vandal coatings.
Care and operation: beauty for decades
Polyurethane molding is low-maintenance, but basic care extends its flawless appearance.
Regular cleaning
Interior molding: dust is removed with a dry soft cloth, slightly damp sponge, or vacuum with brush attachment once every month or two. For relief elements, a soft brush is convenient.
Facade molding: once a year (spring after winter or autumn) wash the facade with water from a hose or pressure washer (on moderate power). This removes dust, dirt, cobwebs, bird droppings. Stubborn stains wipe with a sponge and mild soap solution.
Stain removal
Most stains are removed with a damp cloth and neutral detergent. Greasy stains (in kitchen)—dishwashing liquid. Marker/pen marks—alcohol or solvent (test first on inconspicuous area). Aggressive chemicals, abrasives, stiff brushes are prohibited.
Recoating
After 10-15 years paint may fade, especially on facades. Molding can be repainted. Surface is lightly sanded with fine sandpaper for better adhesion, dusted, primed, and coated with new paint layer. This completely refreshes the appearance.
Repair of damage
Accidentally detached element is re-glued with the same adhesive. Minor chips (rare for flexible polyurethane) are filled with acrylic putty, sanded when dry, and touched up. Serious damage (e.g., from impact) requires element replacement—another advantage of modular system.
Protection from mechanical damage
In high-risk areas (hallway corners, door zones) install elements with additional mechanical fastening. In homes with children/pets choose more resilient profiles capable of withstanding accidental impacts.
Economic aspect: investment in long-term beauty&
How much does it cost to transform a house into an architectural masterpiece using polyurethane molding?
Cost of materials
Prices vary depending on product complexity, size, manufacturer. Approximate ranges:
-
Simple moldings and cornices: 300-800 RUB/linear meter
-
Ornate cornices with patterns: 800-2500 RUB/linear meter
-
Small overlays: 500-2000 RUB/piece
-
Large decorative panels: 3000-15000 RUB/piece
-
Ceiling rosettes: 1500-20000 RUB/piece (depending on diameter and complexity)
-
Pilasters and half-columns: 5000-30000 RUB/piece
-
Corner elements: 300-1500 RUB/piece
Sample calculation for a house
Cottage 150 sq.m, two floors, 6 rooms.
Facade:
-
Crowning cornice (60 linear meters × 1500 RUB) = 90,000 RUB
-
Interfloor belt (50 linear meters × 800 RUB) = 40,000 RUB
-
Window trims 12 pcs (12 × 5000 RUB) = 60,000 RUB
-
Entrance group (pilasters, pediment) = 50,000 RUB
-
Corner elements, rustication = 30,000 RUB
Total facade: 270,000 RUB
Interior:
-
Ceiling cornices for all rooms (120 linear meters × 600 RUB) = 72,000 RUB
-
Rosettes 6 pcs (6 × 4,000 RUB) = 24,000 RUB
-
Wall moldings (200 linear meters × 400 RUB) = 80,000 RUB
-
Overlays, corner elements = 40,000 RUB
-
Door trims = 30,000 RUB
Total interior: 246,000 RUB
Consumables:
-
Adhesive, sealant, fasteners = 20,000 RUB
-
Paint, primer = 30,000 RUB
Total material cost: approximately 566,000 rubles
Professional labor: 250-350 thousand rubles (if not doing it yourself)
Total turnkey: 800,000 — 900,000 rubles
This may seem like a significant amount, but compare it to alternatives. Plaster stucco would cost 2-3 times more. Stone carving — 5-10 times more. And most importantly — polyurethane decor lasts 30-50 years without requiring renewal. Calculated per year of use, this is 20-30 thousand — the price of a couple of good chandeliers.
Return on investment
A house with quality architectural finishing costs 15-25% more on the market compared to a similar one without decor. If your cottage is valued at 15 million, an 800 thousand investment in stucco increases its value to 17-18 million. The investment pays off completely upon sale, and during your lifetime it provides aesthetic pleasure.
Economical options
If the budget is limited, prioritize. Start with the facade and formal areas (living room, hall) — they create the first impression. Use simple profiles without complex ornamentation — they are cheaper but create architectural structure. Do the installation yourself to save on labor. Phased implementation is also possible: first the facade, then the interior a year later.
Questions and answers: FAQ on polyurethane stucco
Is polyurethane stucco suitable for an old house?
Absolutely. Moreover, it's an ideal way to refresh the appearance without major reconstruction. Polyurethane reinforces the facade, covering minor cracks. Its light weight doesn't put stress on old walls. Inside, stucco conceals surface defects, giving rooms a fresh look.
How many years does polyurethane stucco last?
With proper installation and painting using quality materials — 30-50 years without loss of properties. On the facade under extreme conditions — at least 25 years. This is comparable to plaster, but at significantly lower cost and complexity.
Can it be used on a wooden house?
Yes, and it's even preferable to plaster. Wood "breathes," slightly changing dimensions due to humidity and temperature. Flexible polyurethane compensates for these micro-movements. Leave a small ventilation gap between the wooden wall and the stucco for air circulation.
Does stucco affect thermal insulation?
Positively. Decor, especially wide cornices and moldings, partially covers cold bridges (window and door slopes, material joints). Polyurethane has low thermal conductivity, providing additional surface insulation. The difference is small but noticeable.
Does polyurethane burn?
Modern polyurethane compositions contain flame retardants — additives that reduce flammability. The material belongs to class G2-G3 (moderately flammable), does not sustain combustion on its own. In case of fire, it doesn't release more toxic gases than ordinary furniture or finishes. To increase fire safety, use fire-retardant paints.
How does stucco behave in heat +40°C and cold -40°C?
Polyurethane retains its properties within a temperature range of -50 to +80°C. It does not melt in heat or crack in cold. It is important to use quality paints and adhesives also designed for extreme temperatures.


