Article Contents:
- The role of backlighting in modern architecture: from function to emotion
- Light as an architectural tool
- Psychology of hidden lighting
- Energy efficiency and eco-friendliness
- Types of baseboards for backlighting: variety of solutions
- Ceiling profiles: classic of light design
- Wall profiles: vertical accents
- Shadow profiles: floating effect
- Corner profiles: complex configurations
- Installation of LED strips: technology and nuances
- Choosing LED strip
- Electrical scheme and components
- Profile installation
- Laying LED strip
- Advantages of duro-polymer baseboards for lighting
- Rigidity and geometric stability
- Smooth surface and reflection quality
- Durability and Service Life
- Ecological Safety
- Combining backlighting with stretch ceilings and decorative moldings
- Backlighting of stretch ceilings
- Combination with decorative moldings
- Zoning space with light
- Frequently Asked Questions
- How much does it cost to organize hidden backlighting?
- Is it possible to install lighting in an already finished interior?
- What brightness of backlighting is needed for reading?
- Can brightness and color be adjusted?
- How often should an LED strip be replaced?
- Does backlighting heat up and is it safe?
- Is backlighting suitable for a bathroom?
- Can backlighting be connected to a regular switch?
- Which is better — polystyrene or duro-polymer for backlighting?
- Conclusion: light as architecture
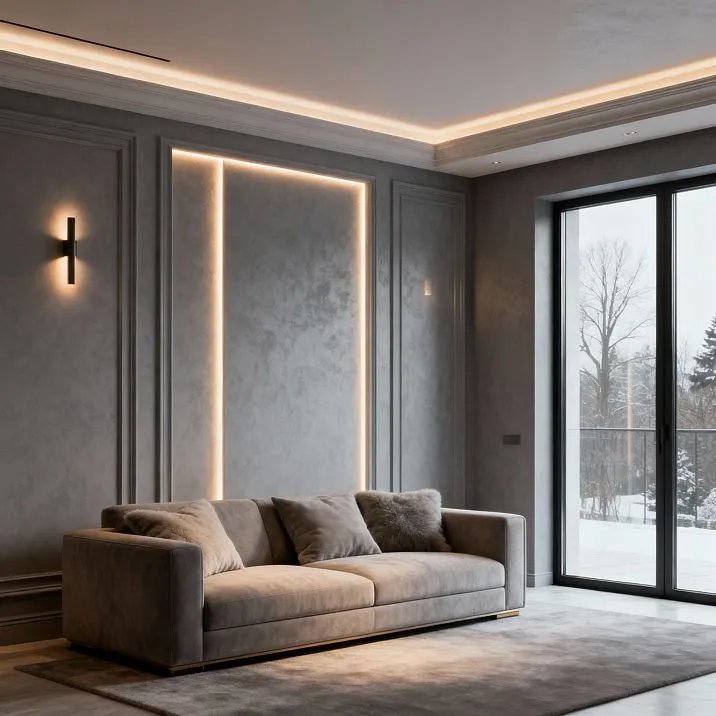
Dark room. The switch clicks — and the central chandelier bursts into bright light, flooding the room. Functional, but banal. Now imagine: the switch clicks, and a soft light line glows around the room’s perimeter. The ceiling seems to float in the air, walls dissolve into half-light, space gains depth and volume. No visible fixtures — only the magic of light emerging from nowhere.
Hidden lighting has overturned perceptions of light’s role in architecture. It is not merely a way to illuminate a space — it is a tool for shaping space, directing attention, and creating atmosphere. Light lines along ceilings and walls transform an ordinary room into a volumetric composition, where architecture and light merge into one.
The key element of this technology iswall trim for backlighting and ceilings. Special profiles with a construction designed for mounting LED strips, with geometry directing the light beam appropriately, and dimensions creating the intended effect. These are not ordinary decorative baseboards with an added bulb — these are thoughtfully designed lighting systems where every millimeter matters.


The role of backlighting in modern architecture: from function to emotion
The evolution of lighting has taken a long path. Initially, light was purely functional — a means to see in the dark. Torches, candles, kerosene lamps, electric bulbs — all of this solved one task: to make darkness bright. Design was limited to the shape of the fixture, but the light itself remained utilitarian.


Light as an architectural tool
Modern architecture considers light as a building material on par with concrete and glass.
ceiling trim for backlighting allows forming volumes that physically do not exist. A ceiling illuminated along its perimeter appears higher than it actually is. A wall with a light line at the floor visually separates from the surface, creating a floating effect.
Light zoning divides space without physical barriers. In studios and open-plan apartments, different lighting scenarios define functional zones — living room, dining area, workspace. During the day, boundaries are blurred, but in the evening, light reveals them.
Dynamic lighting changes the perception of space throughout the day. In the morning — bright, cool light, invigorating and activating. During the day — neutral, comfortable for work. In the evening — warm, dimmed, relaxing and setting the mood for rest. One room, multiple states.
Our factory also produces:


Psychology of hidden lighting
The human brain perceives hidden light sources differently than visible ones. A bulb in a chandelier is a specific object that attracts attention. A light line without a visible source creates a sense of naturalness, as if the light emanates from the architecture itself.
Soft, diffused illumination does not create sharp shadows, which is psychologically more comfortable than harsh directional lighting. In a room with hidden backlighting, a person relaxes and does not experience visual strain. This is especially important in bedrooms, relaxation zones, and meditative spaces.
Control of intensity gives power over mood. Bright backlighting activates and creates a festive atmosphere. Dimmed lighting calms and sets an intimate mood. Colored RGB backlighting adds an emotional hue — blue cools and focuses, red excites and warms, green soothes.
Get Consultation
Energy efficiency and eco-friendliness
LED technology has made hidden lighting not only aesthetically pleasing but also economically justified. LED strips consume 8-10 times less energy than incandescent bulbs for comparable light output.
ceiling trim for LED strip with a strip of 10 W/m along the perimeter of a 20-meter room consumes 200 W — as much as two ordinary bulbs.
The lifespan of LEDs reaches 50,000 hours — that is 15-20 years with daily use of 8 hours. Over this time, ordinary bulbs would need to be replaced dozens of times. Maintenance savings are enormous, especially in rooms with high ceilings, where bulb replacement is a costly endeavor.
Low voltage of 12-24V makes the system absolutely safe. Even in case of accidental insulation damage, the risk of electric shock is absent. In humid rooms, you can use sealed strips with IP65 protection without fear of short circuits.
Types of trim for backlighting: variety of solutions
Hidden backlighting is not limited to one type of profile. There are many options for different tasks, effects, and installation locations.
Ceiling profiles: classic of light design
ceiling trim for hidden backlighting — the most common type. Installed along the perimeter of the room at the junction of the wall and ceiling, with a 7-12 cm offset from the ceiling plane. The LED strip is laid on a special shelf within the profile, light is directed upward, reflected off the ceiling, and diffused into the space.
Structurally, these profiles have an L-shaped cross-section. The vertical part adheres to the wall, the horizontal shelf serves as the base for the LED strip. The shelf width varies from 20 to 50 mm depending on the planned backlighting power. The profile height — from 50 to 150 mm — determines the visual expressiveness of the cornice.
The profile’s front surface may be smooth or textured. Smooth profiles suit modern minimalist interiors, emphasizing clean lines. Textured profiles imitate classical moldings, fit historical styles, but require more careful dust cleaning.
The floating ceiling effect — the main advantage of ceiling backlighting. The light strip along the perimeter visually separates the ceiling from the walls, creating a sense of lightness. Especially impressive with stretch ceilings — the glossy surface reflects light, doubling the brightness and depth of the effect.
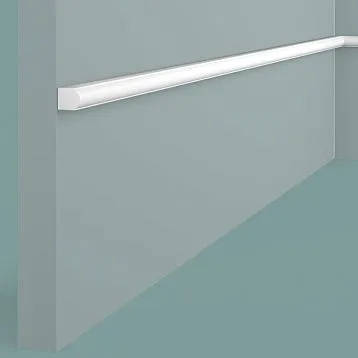
Wall profiles: vertical accents
wall trim for backlighting installed vertically or horizontally on walls to create light accents. These profiles are more compact than ceiling ones — height 30-70 mm, shelf for strips 15-30 mm. The task is not general illumination, but accentuating interior details.
Versatile applications: framing niches and shelves, illuminating pictures and mirrors, highlighting architectural elements, creating light panels on walls. Light can be directed upward, downward, or sideways depending on the desired effect.
Wall profiles are often used with colored RGB strips. Colored wall lighting creates decorative effects without claiming primary illumination. Color can be changed depending on mood, occasion, or time of day.
Double-sided profiles emit light in both directions simultaneously. Mounted vertically at the center of a wall, they create symmetrical light beams that visually divide the surface. Used for zoning and creating rhythm in monotonous spaces.
Shadow profiles: floating effect
Shadow baseboard for lighting — a special type of construction. The profile is mounted with a gap from the ceiling or floor, where the LED strip is placed. Light passes through the slit, creating a glowing line. The ceiling or wall appears visually separated, floating in the air.
The width of the shadow gap is critical for the effect. A narrow gap of 10–15 mm produces a thin, bright, graphic, and contrasting light line. A wide gap of 30–50 mm creates a soft, diffused light band. The optimal width of 20–25 mm offers a balance between brightness and softness.
Floor shadow profiles are installed along the floor with a gap from the wall. The light line at floor level creates a floating wall effect. In long corridors, this visually expands the space and adds dynamism. In bedrooms, it serves as night lighting — sufficient light to avoid tripping, but not so bright as to wake you up.
Ceiling shadow profiles are mounted on the wall below the ceiling, leaving a gap above. The floating ceiling effect is more pronounced than with standard offset profiles. The light line is sharp, graphic, and emphasizes the room’s geometry.
Corner profiles: complex configurations
Corner profiles are designed for lighting interior and exterior corners, transitions between planes. The cross-section of such profiles is adapted for a 90-degree angle — often triangular or trapezoidal with a ledge for LED strips inside.
Used for lighting multi-level ceilings, stairs, and complex-shaped niches. The light line emphasizes architecture and makes transitions between levels more pronounced. At night, corner lighting serves as orientation lighting, marking height differences.
Flexible corner profiles made of polyurethane allow decorating curved transitions — arches, domes, wavy surfaces. Rigid profiles made of polystyrene or aluminum are suitable only for straight angles.
Installing LED strips: technology and nuances
Installing a hidden lighting system requires sequence and attention to detail. Errors at any stage will ruin the result.
Choosing LED strip
The first parameter is power. For decorative lighting, 4–7 W per meter is sufficient. For functional lighting, 10–14 W/m for light ceilings, 14–18 W/m for dark ceilings. Powerful strips heat up and require good heat dissipation — aluminum profile or duroplastic baseboard with a wide ledge.
LED density affects light uniformity. A strip with 60 LEDs per meter provides even illumination without dark gaps. A strip with 30 LEDs is more economical, but individual points are visible up close. For hidden lighting, where the strip is not directly visible, 60 LEDs/m is sufficient.
Color temperature determines the tone of light. Warm white 2700–3000K creates a cozy atmosphere, suitable for bedrooms and living rooms. Neutral 4000–4500K is comfortable for work and versatile. Cool 6000–6500K energizes and visually expands space, used in bathrooms and kitchens.
RGB strips with multi-color LEDs allow changing the lighting color. This adds flexibility but costs more and requires an RGB controller for operation. For most tasks, a single-color strip with dimming capability is sufficient.
Electrical scheme and components
LED strips operate on constant voltage of 12V or 24V. A power supply converting 220V mains is required. Power of the power supply is calculated by the formula: strip length × power per meter × 1.2 (20% reserve). For an 18-meter strip at 10 W/m, a 216 W power supply is needed, with the nearest standard being 250 W.
A dimmer regulates the brightness of the lighting. It is installed between the power supply and the strip. Dimmers can be rotary, button, touch, or remote-controlled. For RGB strips, an RGB controller is used, allowing not only brightness but also color adjustment.
Wires connect system components. From 220V mains to the power supply — standard 2×0.75 mm² cable. From the power supply to the strip — wire cross-section of 1.5–2.5 mm² depending on power and length. For 24V strips, thinner wire can be used due to lower current.
Connectors and terminals simplify installation. LED strips can be soldered or connected with connectors. Soldering is more reliable but requires skill. Connectors are easier but contact may weaken over time. For critical installations, soldering is preferable.
Installing the profile
Marking determines the result. The installation line must be strictly horizontal — even a slight incline is noticeable when the lighting is on. Use a laser level for precise marking around the entire perimeter. Installation height from the ceiling is usually 7–12 cm, depending on strip power.
Adhesive for polystyrene profiles — only water-based. Polymer adhesives, acrylic sealants, and special formulations for expanded polystyrene. Organic solvents will damage the material. For duroplastic, liquid nails and polyurethane adhesives are suitable, but water-based formulations are more convenient.
Cutting profiles requires precision. Angles are cut at 45 degrees for joining. Use a miter saw for polystyrene, a flush-cut saw for duroplastic. Joints must be tight, without gaps — gaps will be illuminated and become very noticeable.
Profile mounting begins with applying adhesive to the back. Press the profile onto the wall along the marked line and hold for 30–60 seconds. Lightweight polystyrene profiles hold with adhesive. Heavy duroplastic profiles require additional fixation with screws every 40–50 cm.
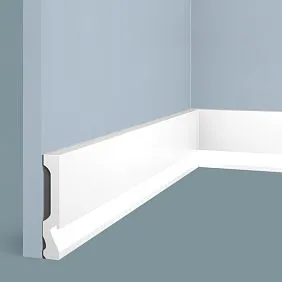
Laying the LED strip
Skirting board for LED lighting The strip has a mounting ledge for LED strips. The strip has an adhesive layer on the back, but factory adhesive is often weak. For reliability, additionally apply transparent silicone sealant in dots every 20-30 cm.
Lay the strip carefully, without bends or tension. Cutting is only allowed at designated locations — where scissors are drawn, typically every 5-10 cm. Connect segments using soldering or connectors, observing polarity — positive to positive, negative to negative.
For long sections over 5 meters, use parallel wiring. Divide the strip into two or three sections, and connect each separately with wires to the power supply. Series wiring causes brightness drop at the end of the strip due to conductor resistance.
Testing before final fixation is mandatory. Connect the system and ensure all sections light evenly. Check for dark spots, flickering, or unevenness. If issues exist, locate and fix them before final finishing.
Advantages of duro-polymer baseboards for lighting
For concealed lighting, profiles made from different materials — polystyrene, duro-polymer, polyurethane, aluminum — can be used. However, duro-polymer has several advantages making it the optimal choice for many projects.
Rigidity and geometric stability
Duro-polymer is 8-10 times denser than polystyrene, providing high rigidity. Profiles do not sag over long spans, do not deform under their own weight, and maintain ideal geometry. This is critical for wide cornices 100-150 mm, which sag in waves when made from polystyrene.
Duro-polymer has higher temperature stability. Its linear expansion coefficient is lower, so the material changes size less with temperature fluctuations. In rooms with large windows, where sunlight heats surfaces, duro-polymer profiles do not deform, and joints do not separate.
Prolonged exposure to LED heat does not affect duro-polymer. Powerful LED strips (14-18 W/m) heat up to 50-60°C. Polystyrene may soften and sag under prolonged heating. Duro-polymer retains its shape up to 90-110°C.
Smooth surface and reflection quality
Duro-polymer has a dense, smooth surface without visible pores. After painting, it becomes nearly glossy and reflects light more effectively than porous polystyrene. This improves light distribution — more light is reflected into the room, less is absorbed by the material.
Surface cleanliness simplifies maintenance. Dust on duro-polymer does not get trapped in pores and can be easily wiped off with dry or damp cloth. Polystyrene profiles, with their micro-relief, collect dust in grooves, requiring more thorough cleaning.
Resistance to yellowing — an important property for white profiles. Polystyrene may yellow over time due to UV exposure, especially near large windows. Duro-polymer is more stable and retains whiteness for decades.
Durability and service life
Duro-polymer profiles last 25-30 years or more without loss of properties. The material does not chemically age, does not lose strength, and does not develop micro-cracks. After twenty years, the profile looks as new with minimal maintenance.
Duro-polymer’s impact resistance protects against accidental damage during installation and operation. Polystyrene profiles are easily damaged during furniture installation, ladder movement, or careless handling. Duro-polymer withstands such incidents without consequences.
Economic efficiency is evident in the long term. Duro-polymer costs 2-3 times more than polystyrene at purchase. But its service life is 3-4 times longer. On an annual cost basis, duro-polymer is more cost-effective, especially considering no replacement costs.
Oak skirting boards are an indispensable element of classic interior styles. In the English style, oak skirting boards with rich carving emphasize the aristocracy and solidity of the space. Dark wood tones harmonize beautifully with traditional materials — natural stone, leather, bronze.
Both materials are safe under normal conditions, do not emit harmful substances, and have compliance certificates. However, duro-polymer is more stable when heated — it does not soften, deform, or emit volatile compounds until temperatures reach 90-110°C.
In case of fire, duro-polymer produces less smoke than polystyrene. Fire rating is typically G2-G3 versus G3-G4 for polystyrene. Self-extinguishing after removing the heat source occurs faster. Although both materials are flammable, duro-polymer is safer.
Combining lighting with stretch ceilings and decorative moldings
Concealed lighting does not exist in isolation — it is part of the overall interior concept. How to integrate it with other elements?
Stretch ceiling lighting
Stretch ceilings and concealed lighting — an ideal pair. The smooth fabric evenly reflects light, creating soft, even illumination without spots or dips. Glossy ceilings double the effect due to mirror-like reflection. Matte ceilings provide a more subdued, diffused glow.
ceiling trim for hidden backlighting Installed before stretching the fabric. Mount the profile to the wall at the desired height, lay the LED strip on the ledge. Then stretch the ceiling, leaving a gap between the fabric and the top edge of the profile.
The gap size determines the lighting character. A narrow gap of 3-5 cm provides bright, directional lighting. A wide gap of 10-15 cm creates soft, diffused lighting. An optimal gap of 7-10 cm provides a balance of brightness and uniformity.
The color of the fabric affects lighting efficiency. White reflects 80-90% of light, providing maximum brightness. Beige and pastel tones reflect 60-70%, creating a warm atmosphere. Dark ceilings absorb most of the light, making the lighting more of a contour than illumination.
Combination with decorative moldings
Concealed lighting can be combined with traditional decor. A ceiling cornice with lighting complements wall moldings, creating vertical divisions. Light lines emphasize the decor’s geometry and add depth.
The layering principle works effectively. The lower layer — wall moldings without lighting — creates relief and shadows. The middle layer — ceiling cornice with primary lighting. The upper layer — additional decorative elements on the ceiling. Each layer is read separately, together creating rich, layered depth.
Color unity unifies elements. All profiles are painted in one color — usually white or matching the wall color. Light reveals form but does not disrupt visual unity. Contrasting colors are used sparingly — they may fragment the space.
Zoning space with light
In large rooms, backlighting acts as a zoning tool. Different ceiling areas are illuminated with varying intensity or color. Living room zone — warm bright light. Dining zone — neutral medium brightness. Relaxation zone — dimmed warm light.
Independent control of zones provides flexibility. Each zone is connected to a separate switch or controller. You can turn on everything at once for general lighting or selectively to create an intimate atmosphere in part of the room.
Dynamic scenes are programmed through smart controllers. Morning scene — gradual brightness increase, simulating dawn. Evening scene — smooth dimming, preparing for sleep. Festive scene — colorful dynamic backlighting. One system, endless possibilities.
Frequently asked questions
How much does it cost to install hidden backlighting?
The cost depends on the room's perimeter and selected components. For a 20 m² room (perimeter 18 m), you will need: profiles ~5000-8000 rub, LED strip ~3000-5000 rub, power supply ~1500-2500 rub, dimmer ~1000-2000 rub. Total material cost: 10000-17500 rub. Installation by yourself or +50-100% for professional labor.
Can lighting be installed in an already finished interior?
Yes, but partial renovation is required. Old ceiling moldings must be removed if present, new profiles with a mounting ledge for the strip must be installed, and wiring must be run to the power supply. Walls and ceiling will not be damaged with careful work. Dust will be minimal.
What brightness level is needed for reading?
Reading requires illumination of 300-500 lux. Hidden backlighting provides 50-150 lux — this is insufficient. It functions as ambient lighting and is supplemented by local fixtures — wall sconces, floor lamps, and desk lamps for work areas.
Can brightness and color be adjusted?
Simple models with a rotary knob cost 500-1000 rubles. Advanced models with a remote or smartphone control cost 2000-5000 rubles. They are connected between the power supply and the strip.
How often should an LED strip be replaced?
Quality LED strips last 30-50 thousand hours — that is 10-20 years with daily use of 4-8 hours. Brightness degradation begins after 70% of the lifespan — after 7-15 years, the strip will be 20-30% dimmer. Replacement is simple — peel off the old one and stick on the new one.
Does the lighting heat up and is it safe?
LED strips heat up moderately. Low-power strips (5-7 W/m) heat up to 30-40°C, imperceptible for the room. High-power strips (14-18 W/m) heat up to 50-60°C, warm to the touch but not hot. There is no fire hazard, and they can be installed on any surface, including wood.
Is lighting suitable for a bathroom?
Yes, use waterproof strips with IP65 protection. They have a silicone coating and are not afraid of direct water exposure. Install the power supply outside the wet zone or use a moisture-resistant one with the appropriate IP rating. 12-24V voltage is safe even in accidental contact.
Can lighting be connected to a regular switch?
Yes, the power supply connects to the network through a regular switch. For brightness adjustment, you need a dimmer; for color change, an RGB controller. Smart systems integrate with voice assistants and can be controlled by commands or schedules.
Which is better — polystyrene or duroplastic for lighting?
For standard rooms with profiles 70-90 mm, polystyrene is sufficient — it is 2-3 times cheaper. For wide cornices 100-150 mm, rooms with large windows, or commercial spaces, duroplastic is better — it is sturdier, longer-lasting, and more stable.
Conclusion: Light as Architecture
Hidden lighting has long moved from the category of luxury to a standard feature of modern interiors.
Skirting board for LED lighting Transforms light from a utilitarian function into an architectural tool that shapes space, controls perception, and creates emotions.
The technology is accessible and easy to understand. A special profile with a shelf for LED strips, an LED strip of the required power, a power supply of the corresponding power, optionally a dimmer or controller for management. Installation is accessible for a homeowner with basic skills. The result — a professional lighting system that operates for decades.
The choice of profile material depends on the task. Polystyrene is economical and sufficient for most projects. Duroplastic is long-lasting and optimal for premium interiors, wide profiles, and commercial spaces. Aluminum is professional and universal for complex technical installations.
Integration with stretch ceilings and decorative moldings expands possibilities. Light lines highlight architecture, reveal volumes, and create depth. Multi-level lighting with independent control of contours provides flexibility in scenarios from work to relaxation.
STAVROS offers a full range of profiles for hidden lighting.
ceiling trim for backlighting Made of polystyrene and duroplastic, wall moldings, shadow profiles, corner elements — everything necessary to implement lighting design of any complexity.
Professional consultants will help design a system tailored to your needs. Power calculation for lighting, selection of optimal profile sizes, choice of LED strips and electrical components — receive expert support at every stage.
Quality guarantee, certified products, competitive prices, delivery across Russia — STAVROS makes professional lighting design accessible to everyone.
Shadow baseboard for lighting or a classic cornice with a shelf — choose a solution that fits your concept.
Transform your interior with the power of light. Create a space that surprises, inspires, and changes with your mood. Hidden lighting is not just a technology — it is an art of light control. Andceiling trim for LED strip — the key tool of this art.