Article Contents:
- What you need to buy for installing MDF skirting board: a short answer
- What methods of attaching MDF skirting board exist
- Using adhesive
- Using clips
- On a mounting strip
- On self-tapping screws / combined fasteners
- Glue for MDF skirting board: how to choose correctly
- Which glue is suitable for MDF skirting board
- What is important to consider when choosing glue
- Clips for MDF skirting board: what you need to know
- How clips work
- Compatibility of clips and profile
- Clip installation step
- Mounting plate for MDF baseboard: when it is justified
- Principle of operation of the mounting plate
- When the mounting plate is especially useful
- Connectors, corners and ends: what to consider before purchasing
- Connector for MDF baseboard
- Corner Elements
- Joining with architraves
- MDF baseboard with cable channel: a solution for concealed wiring
- When it's really needed
- What to check before purchase
- Which installation method to choose: a table by situation
- MDF baseboard on uneven walls: a special case
- Installing MDF baseboard step by step: a practical sequence
- Mistakes when buying fasteners for MDF baseboard
- What to buy together with MDF baseboard: a systematic approach
- Solid wood baseboard as an alternative
- Wooden casings
- Wooden cornice and MDF cornice
- Wooden moldings
- Wooden strips
- Solid wood moldings
- Final checklist: what to buy before installing MDF baseboard
- About the company
- FAQ: Answers to Popular Questions
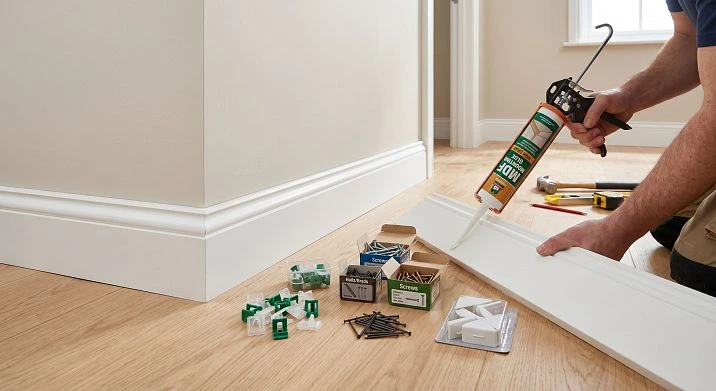
Before going to the store for fasteners, you need to answer one question: how exactly will your MDF Skirting Board? Because everything depends on it: what to buy, how much, and in what order. Glue, clips, mounting rail, fasteners, connectors, corner pieces — each of these items is needed in a specific scenario. And if you go to the store without understanding the scenario, there's a high risk of buying the wrong thing, in the wrong quantity, and for the wrong task.
This article provides a complete breakdown: methods for attaching MDF baseboards, which glue, which clips, and when a mounting rail is needed, what to consider before purchasing, and how to properly assemble everything for installation on the first try.
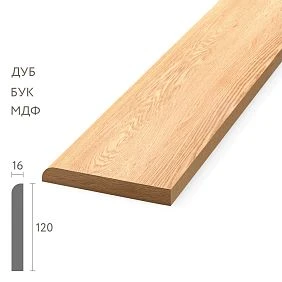
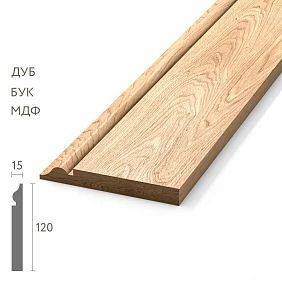
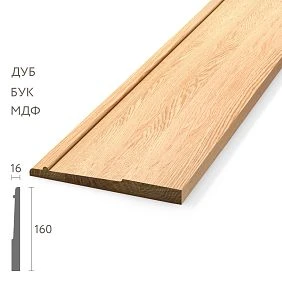
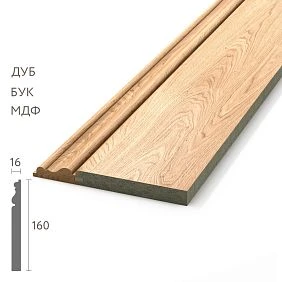
What you need to buy for installing MDF baseboards: a short answer
If you're short on time, here's the gist. To install MDF baseboards, you need to determine in advance:
-
Attachment method: glue, clips, mounting rail, screws, or a combination
-
Number of connectors: for straight joints between baseboard planks
-
Corner pieces: for internal and external corners
-
End caps: for closing off ends at doorways
-
Cutting allowance: +10–15% of the calculated length
If the walls are even, adhesive mounting will work. If removability is needed or the walls are uneven, clips or a mounting rail are better. If cables run along the wall, consider MDF baseboard with cable channel.
buy MDF skirting board with a profile suitable for your installation method — the first step. The second is to properly assemble the fasteners before starting work.




What methods of attaching MDF baseboards exist
Four fundamentally different approaches — each with its own logic, advantages, and situations where it works best.
Our factory also produces:
For adhesive
Installation with glue is a clean result without visible attachment points. No screw heads, no holes. Apply, press, secure. From an aesthetic standpoint, it's one of the best options for smooth, prepared surfaces.
When it works: walls are plastered, puttied, the surface does not crumble, there are no obvious waves or dips. MDF baseboard glue is applied to the back side of the profile — in dots or a zigzag pattern — and the plank is pressed firmly against the wall.
Limitations: if the wall is uneven, the glue will not fill the gaps, and the baseboard will not fit tightly — this is especially noticeable in corners. Additionally, a glued baseboard is almost impossible to remove without damage: when replacement is needed, you will have to tear it off with force, damaging the wall surface as well.
Get Consultation
For clips
Clips for MDF baseboards are mounting hardware that attaches to the wall or floor, and the baseboard snaps onto them. This is a solution where the profile can be removed at any time without damaging the finish — just carefully pry it off and unclip.
When it works: if periodic access to the baseboard space is planned (e.g., for cable routing), if the walls are not perfectly level and more flexible adjustment is needed, or if the ability to replace individual sections is important.
Limitations: clips require compatibility with a specific profile. Not every MDF baseboard for floor Designed for clip mounting — you need to check the profile design before purchasing fasteners.
On the mounting strip
The mounting strip for MDF baseboard is a metal or plastic strip that is attached to the wall along the entire length of the installation line, and the baseboard is then fixed onto it. This is a more technological method than point fastening.
When it works: when a perfectly straight installation line is needed, when the wall has slight deviations in flatness and the strip helps compensate for them, when installation is carried out in long corridors or rooms with a large perimeter — the strip simplifies and speeds up installation.
Limitations: the strip itself needs to be precisely leveled when attaching to the wall. If the strip is installed crookedly, the baseboard will follow that curve.
On self-tapping screws / combined fasteners
The most reliable and most common option for 'wet' or uneven surfaces: aerated concrete, foam block, brick, old plaster. A self-tapping screw with a dowel is a fastener that holds under any conditions. The downside is visible attachment points. Solution: countersink the head and cover with an MDF plug or fill with putty followed by painting.
Combined installation is glue on the main surface + self-tapping screws in corners or in problem areas where the wall does not provide a tight fit. This is the most practical approach for real installation in apartments with imperfect walls.
Glue for MDF baseboard: how to choose correctly
It would seem that glue is a small detail. In practice, it is one of the most common sources of problems during installation.
Which glue is suitable for MDF baseboard
Liquid nails are a classic option. Polyurethane or acrylic liquid nails work well on concrete, plaster, and drywall. They are applied with a gun and hold MDF well on flat surfaces.
Acrylic mounting glue is less aggressive but quite reliable. It is suitable if you need the possibility of dismantling without damaging the surface after some time.
Polyurethane glue offers maximum adhesion but also maximum difficulty in dismantling. It is only suitable when the baseboard is installed 'forever'.
Silicone sealant is not the best option as the main glue for MDF baseboard: it takes longer to set and is less shear-resistant. However, as additional fixation around the perimeter in corners or near the floor, it is quite acceptable.
What is important to consider when choosing glue
Wall material. Concrete and plaster are good bases for most mounting glues. Painted wall depends on the type of paint: greasy or oil-based paint gives weak adhesion. Drywall requires careful spot application to avoid deforming the sheet when pressing.
Room conditions. A bathroom or kitchen requires moisture-resistant glue. In standard living spaces, most mounting glues work without restrictions.
Profile weight. The taller and heavier the baseboard, the more glue application points are needed. For a wide baseboard of 100–120 mm, glue is applied not in spots but in a strip with small intervals.
Open time. Different glues have different times until firm setting. Make sure you have enough time to adjust the plank before fixing.
MDF baseboard clips: what you need to know
Clip mounting is a technology, not just "convenient." It requires understanding the profile design and choosing compatible fasteners.
How clips work
A clip is a small metal or plastic element that is fixed to the wall or floor through a hole. The baseboard has a special groove or profile shape that allows it to "snap" onto the clip. If necessary, the baseboard can be removed by simply prying it with a screwdriver or spatula — without damage.
Compatibility of clips and profile
This is a key point. There are no "universal" clips for all MDF baseboards. Each manufacturer uses its own profile geometry. Before buying clips, you need to know exactly which baseboard they are intended for. Either buy clips from the same manufacturer as the MDF Skirting Board.
Clip installation step
Clips are placed along the wall at a certain step — typically 30–50 cm. In corners — a clip must be near the corner element. At each doorway — a clip at the end. This ensures even fit of the baseboard and eliminates sagging between fixation points.
Mounting strip for MDF baseboard: when it is justified
A strip for MDF baseboard is a solution for those who want a result "like in a catalog," not "as it turned out." It provides a technological basis for installation and is especially valuable in two situations: for large volumes of work and for imperfect walls.
Operating principle of the mounting strip
A metal or plastic guide is fixed to the wall horizontally at the installation point of the baseboard — strictly level. The baseboard is then hung or snapped onto it. Result: the baseboard stands perfectly level regardless of minor waves and deviations on the wall.
When the mounting strip is especially useful
Long rooms and corridors. A corridor of 8–10 meters is a serious test for installation evenness. The mounting strip for MDF baseboard allows maintaining horizontality without deviations along the entire length.
Walls with minor waves. If the wall deviation from the plane does not exceed 3–5 mm, the mounting strip compensates for it by pressing the baseboard against the straight guide.
Accelerated installation for large volumes. When you need to install baseboard around the entire perimeter of a large apartment — the mounting strip significantly speeds up the process: first, all guides are set and secured, then the baseboard itself is quickly installed.
Connectors, corners, and ends: what to consider before purchasing
This is the part of the kit that is most often forgotten. You bought the baseboard — you bought it. But connectors, corner elements, and end caps — you didn't count them. As a result, an extra trip to the store or improvised joints that look sloppy.
Connector for MDF baseboard
The connector for MDF baseboard is an overlay element that covers the straight joint between two planks in one line. It is needed when the wall length exceeds the length of one plank (standard length is 2.5 m or 2.7 m).
The connector must match the baseboard profile: width, height, color. A properly installed connector makes the joint almost invisible. An incorrect or missing one creates an unsightly step or gap.
Tip: plan joints in inconspicuous places — behind furniture, in dark corners, away from central viewpoints.
Corner elements
Internal corner. It is formed where two walls meet inward — as in most rooms. The neatest option is a corner piece that fits over the joint and hides the cut. An alternative is a miter box with a 45° cut, but this requires precise corner geometry (which is often absent in real apartments).
External corner. It is less common — this is a protruding corner, like on a column or niche. Here, the corner piece is even more important: open ends of the baseboard on an external corner look unfinished and are quickly damaged.
End caps. They close the end of the baseboard where it ends at a doorway, at the edge of the flooring, or at any other transition. Without a cap, the end looks messy and is open to mechanical damage.
Joining with architraves
The baseboard and Wooden casings must join correctly. There are two options: the baseboard goes under the architrave (if the architrave is installed first), or the baseboard comes flush to the architrave with a cap. The second option is more often used during final installation — it is simpler to execute and does not require precise cutting.
MDF baseboard with cable channel: a solution for concealed wiring
MDF baseboard with cable channel is a special profile that has an internal cavity for running cables along the wall. It solves a specific task: hiding wires from view without chasing walls.
When it is really needed
-
You need to run internet cable, TV cable, wires from outlets to appliances
-
The walls are already ready for finishing and cannot or should not be chased
-
It is important to preserve the ability to replace or add cables in the future
What to check before purchase
Internal channel size. The cable channel in the baseboard is not for "any wires". It has a limited internal volume. You need to calculate in advance how many cables and of what diameter you plan to place inside, and ensure the selected profile can accommodate them.
Profile height. A baseboard with a cable channel is usually taller than a standard one — the internal cavity takes up space. For rooms with low ceilings or in niches, you need to check that the increased profile will not look disproportionate.
Access to cables after installation. Profiles with a cable channel usually have a removable front cover or a design that allows removing the baseboard without dismantling the base. Make sure the design allows access to the wires when needed.
Compatibility with corner elements. Corner elements for a baseboard with a cable channel must ensure the cable passes through the corner — this is a separate item in the kit that is often overlooked.
Which installation method to choose: table by situation
| Situation | Optimal option |
|---|---|
| Smooth plastered walls, continuous baseboard | Adhesive (construction adhesive or liquid nails) |
| Walls with minor deviations | Mounting strip or combined installation |
| Uneven walls, brick, aerated concrete | Self-tapping screws with dowels + cap covers |
| Removability required (access to space under baseboard) | Clips or mounting system |
| Need to hide cables | MDF baseboard with cable channel |
| Quick installation of large volume | Mounting strip + clips |
| Gypsum board | Spot glue + clips, no heavy dowels |
| Apartment for rent — replacement possible | Clips or neat glue mounting |
MDF baseboard on uneven walls: a special case
This is one of the most common problems in real renovations. The walls in most apartments are not perfectly level. And here glue often fails: it doesn't fill the gap, and the baseboard doesn't fit tightly, especially in corners.
What to do?
Option 1: mounting strip + adjustment. The strip is set strictly level, small gaps between the strip and the wall are compensated during fixing. The baseboard is installed on the strip and visually looks straight.
Option 2: combined installation. The main surface — on glue (where the wall is level), corners and problem areas — additionally fixed with screws. The heads are countersunk and masked.
Option 3: choosing a flexible profile. Some MDF profiles have a special backside design with grooves, which allows a slight tolerance when fitting against an uneven wall. Check with the manufacturer.
Option 4: acrylic filler. After installation, gaps between the wall and the baseboard are filled with acrylic sealant, which is then painted together with the baseboard. This is not a mounting solution but a finishing touch — however, it significantly improves the final appearance.
Installing MDF baseboards step by step: a practical sequence
The right sequence is half the success. Let's break down how it's done in practice.
Step 1. Measure the perimeter. Measure the length of all walls, subtract the width of doorways, add a 10–15% margin.
Step 2. Determine the mounting method. Assess the condition of the walls, decide on removability, choose the method.
Step 3. Marking. Draw a horizontal line along the entire installation perimeter — this is a guide for even installation.
Step 4. Prepare corners. Decide how corners will be finished: with corner pieces or by cutting at 45°. Prepare corner elements in advance.
Step 5. Attach the mounting strip or clips (if used). Align them with a level and secure.
Step 6. Install the baseboard. Start from a corner and work in one direction. Place each plank without gaps.
Step 7. Installing connectors and corner pieces. Secure them as you go, not at the end — it's easier and neater.
Step 8. Installing end caps. At every doorway and every transition.
Step 9. Final finishing. Acrylic sealant in gaps, painting if necessary, check all joints.
Mistakes when buying fasteners for MDF baseboards
Let's list them honestly — and without generalities.
They buy adhesive without considering the wall material. Liquid nails on oil paint is a disaster: the glue sticks to the paint, but the paint doesn't stick. First determine the base, then choose the compound.
They buy clips without checking compatibility with the profile. Clips from one manufacturer don't fit another's profile. If you buy incompatible ones, the baseboard simply won't snap on. Either you'll end up buying the wrong baseboard for the clips you already have.
They don't count connectors and corner pieces. Typical story: bought 20 meters of baseboard, but connectors and corners 'we'll get later.' Later it turns out the needed color is out of stock, or the profile has been discontinued.
They don't leave a reserve of baseboard for cutting. Every corner, every niche, every non-standard section involves cutting that goes to waste. In a room with two niches and one bay window, a 10% reserve is the minimum.
They buy a tall baseboard without checking the wall's evenness. The taller the baseboard, the more noticeable any deviation from the wall. For uneven walls, either choose a lower profile or plan for a mounting strip right away.
They choose a skirting board with a cable channel without checking the cable size. The cables don't fit — and the skirting board is already nailed on. First measure the number and diameter of cables, then choose the profile.
First they buy the fasteners, then they select the profile. The correct sequence is exactly the opposite: first choose the profile, then select compatible fasteners for it. Not the other way around.
What to buy together with an MDF skirting board: a systematic approach
A skirting board is not a separate element. It is part of a finishing system that works together with doors, architraves, moldings, and flooring.
Solid wood skirting board as an alternative
If your interior is designed for decades and you want a material that can be sanded and repainted multiple times — consider Skirting made of solid wood. An oak or beech skirting board painted white is durability and status that MDF, with all its advantages, does not provide.
For wide formats and high ceilings — Wide Wooden Skirting Board made of solid wood creates an expressive architectural horizontal line, especially striking in classic and neoclassical interiors.
are used to decorate door and window openings, giving them a finished and aesthetically pleasing appearance. They protect openings from mechanical damage and emphasize the architectural style of the room.
The baseboard and Wooden casings — this is a single "framing system" of the room. Inconsistency in color or style between these two elements destroys the integrity of the interior. Choose them as a set — from the same material, the same manufacturer, the same style.
Wooden cornice and MDF cornice
wooden cornice at the ceiling — this is the upper mirror of the baseboard. When the bottom and top of the room are framed with coordinated elements, the interior gets a complete architectural frame. For MDF solutions — MDF Crown in the same style.
Wooden moldings
Wooden moldings on the walls — horizontal or vertical — create decorative panels that turn an ordinary room into a space with character. In white, moldings, baseboards, and cornices form a unified 'white architecture'.
Wooden slats
For interiors with slatted finishes — Wooden planks or Decorative wooden lamination create a vertical rhythm on the walls that works well paired with a smooth white baseboard at the floor.
Solid Wood Molding
All Pogonazh iz massiva — baseboards, architraves, cornices, moldings, slats — are presented in a single catalog. Sourcing from one place guarantees consistency of wood species, color, and proportions.
Final checklist: what to buy before installing MDF baseboard
Before starting installation — go through this list.
-
✅ MDF Skirting Board of the required profile and height — length along the perimeter + 10–15% spare
-
✅ Selected mounting method: glue / clips / mounting strip / screws
-
✅ Connectors — according to the number of straight joints (each wall longer than 2.5 m — at least one joint)
-
✅ Corner elements — according to the number of internal and external corners
-
✅ End caps — according to the number of doorways and transitions
-
✅ Fasteners are compatible with the baseboard profile (verified before purchase)
-
✅ All system elements are coordinated in color and style: Wooden casings, wooden cornice, Moldings
About the Company
STAVROS is a Russian manufacturer of decorative molding products made from natural solid wood and MDF. The range includes: floor and ceiling baseboards, cornices, moldings, architraves, decorative slats, and a full range wood trim for residential and commercial interiors.
STAVROS production operates on modern technological equipment. Products undergo geometry and surface quality control — which is especially important when installing baseboards: deviations from straightness or unstable cross-section make installation significantly more difficult. Custom profiles and products for painting can be made to order. Contact us to confirm shipping to your destination.
FAQ: Answers to popular questions
What is the best way to attach MDF baseboard — with glue or clips?
If the walls are even and the baseboard doesn't need to be removed — use adhesive: a clean result without visible fasteners. If removability is needed or the profile supports clip mounting — clips are more convenient. For uneven walls — combined mounting or a mounting strip.
What adhesive is needed for MDF baseboard?
Construction adhesive (liquid nails) polyurethane or acrylic — for most surfaces. On oil paint or problematic surfaces, adhesive works poorly. Always check the compatibility of the adhesive with the wall material.
Can MDF baseboard be mounted on an uneven wall?
Yes, but adhesive is unreliable here — better to use a mounting strip or combined fastening. Final gaps are sealed with acrylic sealant for painting.
What is a mounting strip for MDF baseboard?
This is a guide that attaches to the wall and serves as a base for the baseboard. It ensures a level horizontal line regardless of minor wall deviations. Especially convenient for large installation volumes.
When is an MDF baseboard with a cable channel needed?
When you need to neatly hide cables along the wall without chiseling. Before purchasing, be sure to check the internal volume of the channel and the compatibility of corner elements with cable routing.
How many connectors should you buy?
One for each joint — that is, for every 2.5 m of baseboard on the long walls. Plus corner pieces for the number of corners and end caps for the number of doorways.
Can I install an MDF baseboard myself?
Yes, with the right choice of fastening method and careful approach to cutting corners, this is quite a task for DIY installation. The main thing is to first prepare a complete set, including connectors, corners, and caps, rather than buying them as you go.