Article Contents:
- When one rosette is not enough: scenarios where a set is needed
- Same or different: the main choice when buying a set
- Identical rosettes: when it is correct
- Different in diameter, same in style
- Different in relief, same in shape
- What definitely works
- Paired rosettes for a kitchen-living room: zoning with the ceiling
- How ceiling rosettes zone the space
- How to choose rosettes for a kitchen-living room
- Practical example: kitchen-living room 35 m²
- Paired outlets for a long room: how to set the rhythm
- The principle of rhythm
- Choosing the diameter for a long room
- Molding frames in a long room
- The furniture axis is the outlet axis
- Paired outlets for a hall: symmetry as an architectural language
- When two outlets are needed in a hall
- How not to overload a hall
- Cornice and outlets in a hall: a unified system
- Paired sockets for the bedroom: when delicacy matters most
- Size for the bedroom
- A flush socket in the bedroom is often the best choice
- How to avoid chaos on the ceiling: rules for a set
- Rule one: one stylistic 'family'
- Rule two: uniform painting
- Rule three: each socket is 'calmer' than if it were alone
- Rule four: placement axis — strict geometry
- Rule five: connection with the cornice
- Rule six: check the total 'decorative weight'
- Diameter of sockets in the set: scenario table
- Shape of sockets in the set: round, oval, square
- Round shape — universal
- Oval shape — for longitudinal axes
- Square shape — for strict interiors
- Set with moldings and cornice: how to assemble a complete ceiling system
- Frame contour around each socket
- Perimeter cornice as a unifying element
- Decorative overlays as corner accents
- What to buy together with paired sockets: complete set
- Required minimum for two sockets
- Extended kit for a full ceiling system
- Installing paired sockets: what to consider with two points
- Marking — before installation, not during
- Install sequentially, not simultaneously
- Joint treatment — simultaneously for both
- Five real scenarios: paired sockets in specific interiors
- Frequently Asked Questions
- About the Company STAVROS
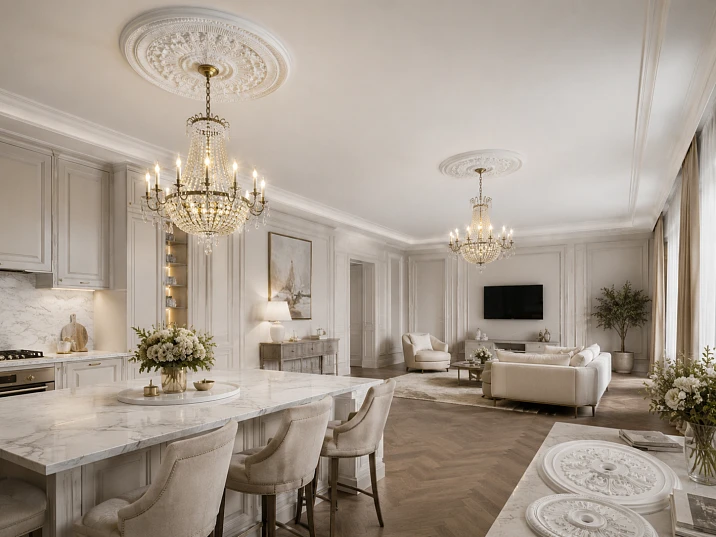
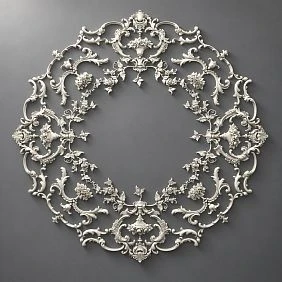
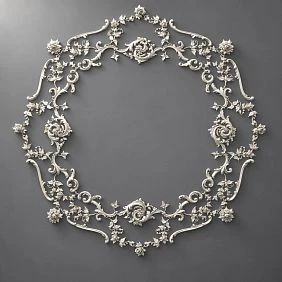
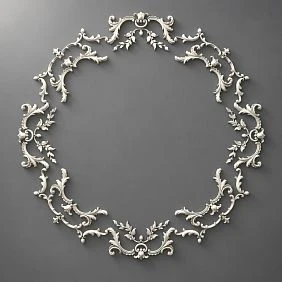
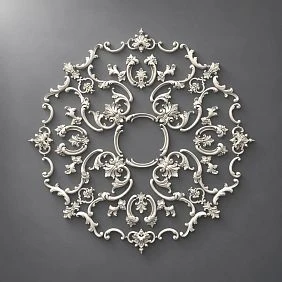
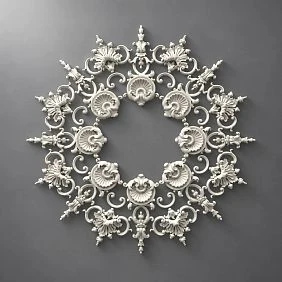
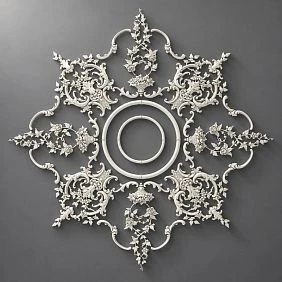
One ceiling socket frames a light fixture. Two — frame the space. This is a fundamental difference that changes the entire selection logic. Paired polyurethane ceiling sockets help frame not just one light point, but the entire ceiling composition: two identical or stylistically similar sockets connect chandeliers, a kitchen-living room, a long room, or a hallway into a single architectural scenario. But if you pick them randomly — one by one, without a system — the ceiling turns into a chaotic collection of overlays. Let's break down how to avoid this mistake and choose a kit that works.
When one socket is not enough: scenarios that require a kit
First of all — an honest answer to the question: do you even need paired sockets? Two sockets are not always better than one. But there are scenarios where a second socket is not a luxury, but an architectural necessity.
Two chandeliers in one room. A long living room, a large hall, an open space. If the ceiling supports two light fixtures, each requires its own framing. Without rosettes, each chandelier will look like a randomly driven hook.
Kitchen-living room with multiple lighting zones. One chandelier above the dining table. Another in the sofa area. Possibly pendants above the kitchen island. These are three potential points for ceiling decor.
Hall with multiple light fixtures. A grand hall with two pendants along the entrance axis is a space where symmetry is created precisely by paired rosettes.
Long corridor with repeating light fixtures. The rhythmic alternation of light points requires rhythmic decor. Rosettes set this rhythm on the ceiling.
Bedroom with two bedside pendants. If the pendants are symmetrically placed above the bed, small identical rosettes neatly frame both points.
Dining room with two pendants above a long table. This is a classic scenario: a long dining table, two or three pendants along the axis, and each pendant needs a ceiling frame.
In all these cases Polyurethane ceiling rosettes they are purchased as a set — with a pre-planned system, not as individual items.




Same or different: the main choice when buying a set
The first question to decide: will the rosettes in the set be identical — or different in diameter, relief, shape?
This is not a matter of taste. It's a matter of spatial logic.
Our factory also produces:
Identical outlets: when it's right
Two absolutely identical outlets are the most foolproof solution. Same shape, same diameter, same relief, same paint. No 'mismatch', no questions of 'why are they different'.
When to choose identical:
-
Two identical fixtures in one room.
-
A long room with symmetrical placement of chandeliers along the axis.
-
A hall with mirror symmetry of the entrance area.
-
A corridor with repeating pendants.
-
A bedroom with symmetrical bedside lamps.
-
A dining room with two identical pendants above the table.
In these scenarios, they are identical Polyurethane ceiling rosettes create rhythm, order, architectural completeness.
Get Consultation
Different in diameter, identical in style
This is a more complex but often more precise option — especially for a kitchen-living room. The two zones have different 'weight': one is primary (dining area, sofa area, formal zone), the other is secondary (kitchen area, passage zone). The rosettes should reflect this.
The rosette in the primary zone is larger, possibly with richer relief. In the secondary zone, it is smaller and calmer. But stylistically, they belong to the same 'family': both are round, ornament of the same type (both laurel, or both geometric), painted in one color.
Rule: different diameter — acceptable. Different style — risky.
Different in relief, identical in shape
This option requires caution. If two rosettes have the same diameter, but one is smooth and the other is textured — the ceiling starts 'asking questions'. Why are they different? Is it intentional — or just happened that way?
If intentional — and it's part of a design plan with clear justification — it's acceptable. If 'just happened' — better not to risk it.
What definitely works
| Scenario | Recommendation |
|---|---|
| Two identical chandeliers | Two completely identical sockets |
| Main + secondary zones | Large + small sockets of the same style |
| Kitchen-living room | Same pattern, different diameter |
| Long room | Identical along the room axis |
| Hall with symmetry | Exactly identical |
| Corridor | Identical compact models |
Paired sockets for kitchen-living room: ceiling zoning
A kitchen-living room is a space that simultaneously serves as several rooms. And the ceiling in this space should acknowledge that.
How ceiling rosettes zone the space
When rosettes appear above light points in an open kitchen-living room space, they do something important: they visually "anchor" each zone. A zone with a chandelier and rosette becomes a "place" — not just an area with a light bulb under the ceiling.
This is an architectural principle: a decorative accent on the ceiling creates a "roof" for the zone below. A dining table under a rosette and chandelier is a dining zone. A sofa under a rosette and light fixture is a living room zone. A kitchen island under a rosette and pendants is a working kitchen zone.
How to choose rosettes for a kitchen-living room
Determine the hierarchy of zones. Which zone is the main one? Most often — the dining or living room. The rosette here should be more expressive.
Do not overload the kitchen zone. Above the island or work surface, rosettes should be compact — the kitchen is already saturated with functional details.
Choose a single style. All polyurethane rosettes in one space — one ornamental language. You cannot mix baroque acanthus in the living room and geometric art deco in the kitchen.
Painting — uniform for all. The same color for all rosettes in the set. Otherwise, the space "falls apart."
Practical example: kitchen-living room 35 m²
Living room area: chandelier, rosette 400 mm in diameter, laurel relief. Dining table area: chandelier, rosette 360 mm in diameter, same laurel relief. Kitchen island area: two pendants, two compact rosettes 220 mm in diameter, smooth with a profile ring. All rosettes are white to match the ceiling. Cornice around the perimeter from the section Ceiling molding — single profile, without ornament.
Result: the open space is zoned, each zone is "marked" by a ceiling accent, the entire ceiling reads as a single system.
Paired rosettes for a long room: how to set the rhythm
A long room is a challenge. One chandelier in the center of the long axis looks either shifted to one end or unconvincing in the empty center. Two chandeliers along the long axis with two rosettes is the right solution.
The principle of rhythm
Two rosettes in a long room create rhythm — repetition of a decorative accent at equal intervals. This is an architectural principle known since antiquity: columns, windows, arches — all work on the rhythm of repetition. Ceiling rosettes in a long room follow the same principle.
Key condition: the distance between the rosettes must be symmetrical relative to the center of the room. And the same from each rosette to the nearest wall.
Choosing the diameter for a long room
In a long room, both sockets are "read" immediately. This means that the size disproportion will be noticeable right away. For a long room — strictly identical diameter.
Guideline based on room width:
-
Width up to 3.5 m — socket diameter 280–360 mm.
-
Width 3.5–4.5 m — diameter 360–450 mm.
-
Width over 4.5 m — diameter from 450 mm.
Molding frames in a long room
If Moldings made of polyurethane are used to create frame contours around sockets — both frames must be identical in size and shape. Two square frames along the long axis with sockets in the center is a classic "French ceiling" that makes a long room elegant.
The furniture axis is the socket axis
In a long room, furniture is usually arranged according to the logic of the space: a lounge area at one end, a dining area at the other. The sockets should align with the centers of these zones — not with the geometric center of the ceiling space, but with the functional center of each zone.
This means: first arrange the furniture, determine the centers of the zones, then choose the socket placement.
Paired rosettes for the hall: symmetry as an architectural language
The hall is a special space. It is the first room guests see. First-glance architectural impressions matter here. And if there are two lights in the hall, the rosettes must create perfect symmetry.
When two rosettes are needed in the hall
-
A hall with two pendants aligned with the entrance door axis.
-
A large hall with two lighting zones.
-
A stair hall where one light is on the lower level and another is higher up.
-
A square hall with four lighting points — four identical compact rosettes.
How not to overload the hall
The hall is usually small. Large relief rosettes in a small space feel oppressive. For the hall, it is better to choose:
-
Diameter no more than 320–360 mm for most halls.
-
Moderate or low relief.
-
Paint strictly in the color of the ceiling.
-
No metallic accents — unless the fixtures set a gold or bronze tone.
Cornice and rosettes in the hall: a unified system
If a perimeter cornice is planned in the hall, its ornament must be coordinated with the ornament of the rosettes. This is especially important in the hall because here the ceiling is visible 'as a whole' — from the threshold, immediately. Any mismatch will be noticeable right away.
Cornice from the assortment ceiling moldings + paired rosettes of the same style = a ceiling system that makes an impression.
Paired rosettes for the bedroom: when delicacy matters most
The bedroom is an intimate space. Monumental solutions are not needed here. But if the bedroom has two bedside lights — pendants, sconce-pendants, or small shades — two compact identical rosettes neatly 'cover' the mounting points and add completeness.
Size for the bedroom
A bedroom of 14–18 m² with a ceiling height of 2.7 m — rosettes with a diameter of 220–300 mm. No larger. A large rosette in the bedroom creates "pressure" — a feeling that the ceiling is approaching.
A smooth rosette in the bedroom is often the best choice
In the bedroom, a relief ornament is not necessary. A smooth round rosette with a profile ring is a subtle, elegant, weightless accent. It is present — but does not demand attention.
If the lights in the bedroom are crystal or with gold fittings — delicate gilding of the profile ring of the rosette creates the right connection. If the lights are matte and modern — only white, without metallic accents.
How to avoid chaos on the ceiling: rules for a set
Two decorative elements on the ceiling is twice the responsibility. One unsuccessful rosette remains a private mistake. Two uncoordinated rosettes create systemic chaos that is immediately visible.
Rule one: one stylistic "family"
All rosettes in the set must belong to the same ornamental family. Acanthus and acanthus. Laurel and laurel. Geometric and geometric. Mixing organic and geometric ornaments in one ceiling space is a risk that requires a design justification.
Rule two: uniform painting
One color for all rosettes in the set. One paint composition, one layer — so there are no discrepancies in shade. If one rosette is white and another is slightly cream — the ceiling "asks questions".
Rule three: each socket is "calmer" than if it were alone
When there is one socket on the ceiling, it can afford to be more decoratively active. When there are two sockets, each should be a bit more restrained because their total "decorative volume" doubles. Two active relief sockets + crystal chandeliers = ceiling noise.
Rule four: placement axis — strict geometry
Two objects on the ceiling must be placed along a clear geometric axis — longitudinal, transverse, or symmetrical. Random placement "where the hook is" and "where the wire reaches" creates a sense of disorder that cannot be fixed with decor.
Rule five: connection with the cornice
If there is a cornice in the room, the two elements on the ceiling work as part of the "cornice — sockets" system. The distance from each socket to the cornice should be visually "breathable" — at least 50–70 cm with a socket diameter of 350–400 mm.
Rule six: check the total "decorative weight"
Add the diameters of the two sockets and compare with the ceiling area. Approximate guideline: the total area of the sockets should not exceed 8–10% of the ceiling area. For a room of 25 m², this is an allowable diameter of two sockets of 450–480 mm each. For a room of 15 m², no more than 360–380 mm each.
Socket diameter in the set: scenario table
| Scenario | Main socket | Secondary outlet |
|---|---|---|
| Two identical chandeliers, living room 25 m² | 400–440 mm | 400–440 mm |
| Kitchen-living room, zoning | 380–420 mm | 300–340 mm |
| Long room, two chandeliers along the axis | 360–420 mm | 360–420 mm (identical) |
| Hall with two pendants | 300–340 mm | 300–340 mm (identical) |
| Bedroom, two bedside lamps | 240–300 mm | 240–300 mm (identical) |
| Corridor, repeating points | 200–260 mm | 200–260 mm (identical) |
Shape of included sockets: round, oval, square
The shape in the set is always the same. You cannot mix round and square sockets in one room without a design concept.
Round shape — universal
Two round polyurethane rosettes — the right choice for most scenarios. The circle is neutral, does not set a direction, works well with any chandeliers and in any room geometry.
Oval shape — for longitudinal axes
If two fixtures are placed along the long axis of the room, and the room is elongated — oval sockets emphasize this longitudinal logic. Two ovals along the axis — an architecturally convincing solution.
Square shape — for strict interiors
Paired square rosettes work well in interiors with clear geometry — classicism, Empire style, strict neoclassicism. Two squares on an axis create rhythm, order, and discipline.
Kit with moldings and cornice: how to assemble a complete ceiling system
Paired rosettes are already a system. But it can become even more complete if you include Moldings, a cornice, and decorative stucco.
Frame contour around each rosette
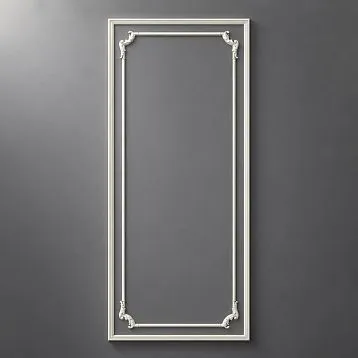
Molding frames around each rosette — a classic "French ceiling." Two rosettes, each in its own frame. Frames of the same size. The molding pattern matches the rosette pattern. Unified paint finish.
This solution transforms the ceiling from a "ceiling with lights" into ceiling architecture.
Perimeter cornice as a unifying element
Cornice around the perimeter from the section Ceiling molding unites the entire system — sockets, moldings, chandeliers — into a single whole. The ceiling acquires a "frame" within which the sockets exist as part of a well-thought-out composition.
Decorative Inserts as corner accents
Corner decorative overlays at the intersection points of molding frames — an additional level of detail. They add precision and completeness, turning frames from simple strips into architectural objects.
What to buy together with paired rosettes: a complete set
Required minimum for two rosettes
-
2 polyurethane ceiling rosettes — buy polyurethane ceiling rosettes in the STAVROS catalog.
-
Adhesive for polyurethane stucco — in double the volume compared to one rosette.
-
Acrylic sealant — for sealing perimeter seams of both rosettes.
-
Primer — acrylic.
-
Paint — water-based or acrylic in the color of the ceiling. One batch for both rosettes — to avoid differences in shade.
Extended kit for a complete ceiling system
-
Moldings made of polyurethane — for frame contours around each socket.
-
Perimeter cornice from the assortment ceiling moldings.
-
Decorative Inserts for corner elements of frames.
-
Paint reserve — for large ceiling areas.
| Task | What to buy |
|---|---|
| Arrange two identical chandeliers | 2 identical sockets + glue + paint |
| Zone the kitchen-living room | Sockets of different diameters in the same style + cornice |
| Create rhythm in a long room | 2 identical rosettes along the axis + molding frames |
| Design a grand entrance hall | 2 rosettes + cornice + uniform painting |
| Assemble a complete ceiling system | Rosettes + moldings + cornice + stucco |
| Buy without mistakes | Rosettes of the same style + unified mounting kit |
Installing paired rosettes: what to consider with two points
Installing two rosettes means twice the responsibility for precision. The slightest misalignment in one rosette, an axis shift — and the two points start to 'argue' instead of creating a system.
Marking — before installation, not during
Before applying glue, mark both installation points on the ceiling. Use a level and tape measure. Ensure both points are at the same distance from the walls, the room axis, and the cornice. Check symmetry in multiple projections.
Mount sequentially, not simultaneously
Mount the first socket, let the adhesive set for 3–5 minutes, secure it — and only then move on to the second. Mounting two sockets simultaneously creates a risk of both shifting under the adhesive load.
Joint treatment — simultaneously for both
After mounting both sockets, treat the joints with acrylic sealant. Use the same batch of sealant — so the color is identical. Paint both sockets in one session — with one batch of paint.
Full installation process algorithm — in the guide for installing polyurethane molding.
Five real scenarios: paired sockets in specific interiors
Scenario one: long living room 32 m², two identical chandeliers along the axis, ceiling 2.9 m.
Two round sockets with a diameter of 420 mm, laurel relief. Molding frames 120 × 120 cm around each. Perimeter cornice. Everything — white, single paint job. Result: "French ceiling" with two equal decorative centers. Chandeliers look like part of the architecture.
Scenario two: kitchen-living room 38 m², sofa area + dining table.
Living room area: round socket 400 mm, moderate acanthus relief. Dining area: round socket 360 mm, same acanthus relief. Perimeter cornice without ornament — profiled, unifying. White, single paint job. Result: open space zoned, each zone marked, ceiling reads as a system.
Scenario three: formal hall 4 × 6 m, two pendants along the entrance axis, ceiling 3.0 m.
Two round rosettes with a diameter of 340 mm, a delicate laurel wreath. No molding frames. A wide perimeter cornice with a floral ornament. White. Result: a strict, symmetrical formal hall with a ceiling rhythm.
Scenario four: bedroom 20 m², two bedside pendants, ceiling 2.7 m.
Two round smooth rosettes with a diameter of 260 mm with a profile ring. White, without ornament. No frames or cornice — the ceiling is clean. Result: a light, delicate, weightless accent. The pendants look "intentional" — not accidental.
Scenario five: dining room 16 m², three pendants above a long table, ceiling 2.8 m.
Three compact round rosettes with a diameter of 240 mm, identical geometric profile. Along one axis, at equal distance. White. Result: a precise rhythmic ceiling accent that makes the table area "its own" space.
Frequently asked questions
Can I buy two identical polyurethane ceiling rosettes as a set?
Yes. In the STAVROS catalog you can buy polyurethane ceiling rosettes in any quantity — identical or matched by style.
Do I need to buy rosettes of the same article number if there are two of them?
Preferably — for complete identity of the relief, size, and color of the blank. Even with the same diameter, different SKUs may have different relief depths and ornament details.
How to choose the diameter for two rosettes in a kitchen-living room?
Determine the hierarchy of zones: the main zone gets a larger diameter rosette, the secondary one gets a smaller one. A diameter difference of 40–60 mm is sufficient to indicate the difference in the "weight" of the zones without creating an imbalance.
Can I use three or four rosettes in one room?
Yes. For long rooms, halls with multiple lighting points, dining rooms with a row of pendants. The same requirement: a unified style, a unified paint finish, a clear geometric axis.
What if the light fixtures are not the same style — can I still choose the same rosettes?
You can — and it will even help. The same rosettes will create a "common language" for different light fixtures, uniting them into one ceiling system.
Is a cornice needed if there are two rosettes?
With two rosettes, a cornice becomes especially appropriate — it "frames" the system, uniting two centers into a single whole. Full range ceiling moldings — in the STAVROS catalog.
How to properly paint two rosettes so that the color is the same?
Paint in one session, with one batch of paint, at the same time. If you paint on different days with different cans, a noticeable shade difference may occur.
What should I buy together with paired rosettes?
Glue, sealant, primer, paint. For a complete system — Moldings made of polyurethane, cornice, Decorative Inserts. The entire range polyurethane products — in the STAVROS catalog.
About the company STAVROS
STAVROS — professional manufacturer and supplier polyurethane products for residential and commercial interiors. The catalog includes — Polyurethane ceiling rosettes of all shapes, diameters, and reliefs, ready for installation in paired and multiple sets. Also — Moldings and cornices, Ceiling molding, Decorative Inserts — everything for creating complete ceiling systems. STAVROS works with private customers and professional teams across Russia: delivery, consultations, assistance in selecting sets. When you need not just "two items" but a ceiling system that works — STAVROS knows how to do it.