


Article Contents:
- Preparation Stage: Foundation for Quality Installation
- Wall Diagnosis: What Lies Beneath the Surface
- Marking: Precision Multiplied by Patience
- Material Preparation: Acclimatization and Calibration
- Installation Technologies: From Simple to Complex
- Method 1: Adhesive Mounting — Fast and Clean
- Method 2: Hidden Mounting with Dowels — Professional Aesthetics
- Method 3: Mounting on Lathing — Universal Solution
- Method 4: Ready-Made Panel Systems — Speed and Factory Quality
- Method 5: Combined Mounting — Double the Reliability
- Installation Features in Different Zones
- Accent Wall: Focused Composition
- Partitions and Zoning: Seamless Transparency
- Ceiling Structures: Gravity as a Challenge
- Wet Areas: Protection Above All
- Design Solutions: From Classic to Provocation
- Vertical: Aspiration Upwards
- Horizontal: Expanding Space
- Diagonal: Dynamism and Boldness
- Combined Layout: Geometric Complexity
- Variable Spacing: Controlled Chaos
- Lighting Integration: Light Through Gaps
- Material Combination: Textural Contrast
- Practical Nuances: Secrets of Mastery
- Compensatory Gaps: Breath of Wood
- Corner Treatment: Joints Without Compromise
- Integration of outlets and switches
- End Treatment: Completed Appearance
- Maintenance and Operation: Extending Lifespan
- Regular Maintenance: Simplicity and Systematic Approach
- Damage Protection: Prevention is Better than Repair
- Repair of Local Damage: Targeted Solutions
- Cost and Calculation: From Budget to Implementation
- Material Calculation: Accuracy Saves Money
- Pricing Guidelines: From Economy to Premium
- Savings without loss of quality
- Conclusion: Lines That Transform Space

When a flat wall becomes an architectural object, when light begins to play in artificial shadow grooves, when space acquires rhythm and breath — it means that here, planks have been installed.wall finishing with lathsThis is not just a fashionable design solution. It is a fundamental rethinking of how a wall can function in a modern interior. It ceases to be a passive surface dividing rooms and becomes an active participant in composition, zoning, decorating, improving acoustics, concealing utilities — all at once.
Parallel lines possess a special magic. They create visual movement, guide the gaze, structure chaos. Vertical planks elongate space upward, making ceilings appear higher. Horizontal planks expand the room, adding width to narrow spaces. Diagonal planks introduce dynamism, breaking the static of right angles.Installation of Planks on the WallRequires precision, understanding of materials, knowledge of technology — but the result pays off all efforts, creating an interior that is impossible to forget.


Preparation Stage: Foundation of Quality Installation


Wall Diagnosis: What Lies Beneath the Surface
Before the first plank touches the wall, you must understand what you are dealing with. A wall is not just a vertical plane. It is a structure with its own history, strength, geometry. Start by checking for flatness. Use a long straightedge or laser level against the wall at several points — vertically, horizontally, diagonally. Deviations up to 5-7 mm per linear meter are acceptable; larger deviations require correction.
Tap the wall with a wooden hammer or knuckles. A dull sound indicates a strong monolithic structure. A hollow, ringing sound indicates voids or loose plaster. Such areas require repair: old plaster is removed, the surface is re-plastered or spackled. Planks fastened to an unreliable base will inevitably detach along with a piece of plaster.
Humidity is a treacherous enemy of wooden planks. If the wall is exterior, cold, and freezes in winter — condensation may form on it. If there was a leak in the room, signs of mold or dark moisture stains — the problem must be resolved before installation. Treat the surface with deep-penetrating antiseptic agents, ensure ventilation. Wood covered on a damp wall inevitably develops mold.
Determine the wall material. Concrete and brick are strong foundations that hold any fastener. Gypsum board requires special butterfly anchors or mounting into a metal frame. Gas concrete, aerated concrete — porous materials requiring long anchors or chemical anchors. Wooden walls — ideal base for planks, screws can be driven directly without anchors.
Our factory also produces:


Marking: Precision Multiplied by Patience
Marking is half the success. Here, an error of one millimeter, multiplied by the wall length, becomes centimeters of misalignment. Start by defining the base line. For vertical planks, this is a vertical line drawn with a plumb bob or laser level. For horizontal planks — a horizontal line set with a spirit or laser level.
Do not trust room corners, floors, or ceilings — they are rarely perfectly horizontal or vertical. Set the base line with an instrument, not "by eye." A laser level greatly simplifies the task, projecting a perfectly straight line across the entire wall. If you don't have a laser level, use a long construction level (at least 150-200 cm) or stretch a string between two independently checked points.
Measure distances from the base line to the next planks. If multiple parallel rows are planned, calculate the layout in advance. Consider the width of the planks themselves and the gaps between them. Standard formula: total wall width minus total width of all planks, divided by the number of gaps. The resulting number is the width of each gap for even distribution.
Mark not only the position of the planks but also the points for mounting the subframe. If installing vertical planks on a subframe, place horizontal beams at 40-60 cm intervals. The first beam — 10-15 cm from the floor, the last — 10-15 cm from the ceiling, intermediate beams evenly spaced between them.
Get Consultation
Material Preparation: Acclimatization and Calibration
Wood is a living material that reacts to temperature and humidity. Planks brought from a cold warehouse or transport must acclimatize in the room for at least 48-72 hours. Unpack them, lay them horizontally with spacers between layers for ventilation. During this time, the wood will absorb the room's humidity and temperature, minimizing subsequent deformation.
Inspect each plank. Sort by quality: defect-free, minor defects (small knots, slight irregularities), major defects (cracks, loose knots, severe warping). First-grade planks are for visible areas, second-grade for less noticeable areas, third-grade either reject or trim, cutting out the defective section.
Check geometry. Place the plank on a flat surface — it should lie flat with no gaps. Warped planks (screw, arc, saber shape) will cause problems during installation. Minor warping can be compensated by fastening, but severe warping cannot.
If painting is planned, do it before installation. Planks are laid on supports, painted in two to three coats with full drying between each. Painting installed planks is more difficult: paint seeps into gaps, creates runs, increases material usage. Ends must be painted — they absorb moisture especially actively.
Installation Technologies: From Simple to Complex
Method 1: Adhesive Mounting — Fast and Clean
Adhesive mounting is the simplest method, requiring no drilling or complex tools. Suitable for light planks (pine, spruce, thin MDF) on flat, strong walls. Uses construction adhesives such as "liquid nails," high-strength polyurethane or acrylic adhesives.
Technology:
The wall is cleaned, dusted, and primed to improve adhesion. On the back of the rail, adhesive is applied in a zigzag pattern or dots spaced 10-15 cm apart. Do not apply adhesive in a solid layer — when pressed, it will squeeze out and dirty everything around.
The rail is placed against the wall exactly according to the marking and firmly pressed by hand along its entire length. Some adhesives require a 'double touch' technique: press the rail, immediately lift it off, wait 2-3 minutes (adhesive slightly dries), then press it firmly again. This enhances bonding.
Secure the rail with painter's tape or supports until the adhesive is fully dry (usually 24 hours). Install the next rail with the required spacing, using calibration shims of equal thickness — pieces of plywood, plastic wedges, or special spacers.
Advantages: speed, absence of visible fasteners, clean front surface, minimal tools required.
Disadvantages: suitable only for light rails and flat walls, impossible to remove without damaging the rail, risk of delamination if adhesive is insufficiently strong or surface preparation is inadequate.
Method 2: hidden fastening with dowels — professional aesthetics
Dowels (wooden rods with a diameter of 6-10 mm) allow creating hidden fastening invisible from the front. The method requires precision, but the result is flawless.
Technology:
Marking points for fastening on the wall at intervals of 40-50 cm along the length of each rail. Holes are drilled to a depth of 30-40 mm for plastic anchors. Screws are screwed into the anchors but not all the way — they should protrude 15-20 mm. Pieces of dowels 20-25 mm long, previously coated with adhesive, are placed over the protruding parts.
Holes are drilled on the back of the rails exactly where the dowels protrude from the wall. The hole depth is 20-25 mm, and the diameter is 0.5 mm larger than the dowel diameter for a loose fit. The holes are coated with adhesive from the inside.
The rail is placed over the dowels and pressed firmly against the wall with light hammer blows through a wooden shim until it fits tightly. Any excess adhesive around the holes is immediately wiped away with a damp cloth. The rail is held simultaneously by adhesive and mechanical fastening — maximum reliability.
Advantages: high strength, hidden fastening, possibility of installing heavy rails, flawless aesthetics.
Disadvantages: labor-intensive, need for precise hole alignment, difficulty in dismantling.
Method 3: mounting on a furring channel — universal solution
Furring channel — a frame made of wooden beams or metal profiles, creating a flat surface for mounting rails regardless of wall condition. This is the most reliable and universal method, suitable for any walls and heavy rails.
Technology:
The direction of the rails is determined. For vertical rails, the furring channel is mounted horizontally; for horizontal rails — vertically. Dry beams 30x40 or 40x50 mm, or metal UD/CD profiles for drywall, are used.
Beams are fastened to the wall with 6x40 or 8x60 mm anchors (for concrete or brick) at intervals of 50-60 cm along each beam. The first and last beams from the wall edge — at a distance of 10-15 cm; intermediate beams — with even spacing of 40-60 cm.
Key point — aligning the furring channel into a single plane. A control string is stretched between the end beams. Intermediate beams are adjusted to the string using wooden wedges, plywood pieces, or plastic shims. Each beam is checked with a long level — it must lie strictly horizontally (for horizontal furring) or vertically (for vertical furring).
Rails are fastened to the furring channel with screws or nails. The fastening point is exactly at the center of the rail's width to prevent splitting. Screws 3.5x35 or 4x40 mm are driven into the wood 2-3 mm, then the recesses are filled with putty and painted, or covered with decorative caps.
Advantages: suitable for any walls, compensates for unevenness, creates an air gap (important for damp walls), maximum strength, possibility of placing insulation or acoustic underlayment behind the rails.
Disadvantages: labor-intensive, material cost for furring, reduction in room area by the thickness of the furring.
Method 4: ready-made panel systems — speed and factory quality
Ready-made rail panels are rails already mounted on a backing (MDF, plywood, felt) in factory conditions with an ideal, even spacing. Panels have standard sizes, most commonly 600x2400 or 600x2700 mm.
Technology:
The panel is placed against the wall and aligned strictly vertically or horizontally (depending on rail orientation). Fastening is done either with mounting adhesive (for light panels on flat walls) or with screws through the backing into the wall (for heavy panels or uneven walls).
Screws are screwed into the panel perimeter at intervals of 30-40 cm and at the center (if panel width exceeds 60 cm). Screw heads are driven flush and covered with decorative caps or left visible (depending on design).
The next panel is mounted flush or with a small 2-3 mm gap (expansion joint for thermal expansion). The joint can be covered with decorative trim, painted to match the rails or contrasting colors.
Advantages: highest installation speed (room in 3-4 hours), factory quality (ideal rail spacing), built-in acoustic underlayment in acoustic models, minimal tools required.
Disadvantages: less design flexibility (standard sizes, fixed spacing), difficulties in fitting corners and non-standard areas, higher cost per square meter.
Method 5: combined fastening — double reliability
For maximum strength, especially when installing heavy long rails from hardwood, a combination of adhesive and mechanical fastening is used.
Technology:
Mounting adhesive is applied to the back of the rail. The rail is placed against the wall (or furring channel) exactly according to the marking. Finishing nails or thin screws are driven through the front surface at a 45-60 degree angle. The fastener penetrates the rail wood, passes through, and enters the wall or furring channel.
Corner mounting is less noticeable than perpendicular mounting. The screw heads are recessed, and the mounting points are touched up with a retouch marker or wax pencil to match the wood color. The adhesive ensures flat contact, while mechanical fastening provides secure fixation until the adhesive dries and additional strength afterward.
Advantages: maximum reliability, suitable for heavy beams and ceiling structures (where detachment is especially dangerous).
Disadvantages: visible mounting marks (though minimally noticeable), labor-intensive.
Mounting features in different zones
Accent wall: focal composition
When beams cover only one accent wall and not the entire room, clear boundaries are essential.Wall decoration with beamsCreates a focal point that draws the eye. The boundary of the beam zone must be perfectly straight.
If beams occupy the central part of the wall, framed by smooth painted sections, first mark a rectangle of the required size on the wall. Around the rectangle, install decorative trim or molding to form a frame. Mount the beams inside the frame.
Alternative — beams are mounted from edge to edge of a specific wall (e.g., behind a sofa or bed headboard). In this case, the outer beams must be positioned symmetrically relative to the center of the wall or the furniture object.
The wall behind the beams can be painted in a contrasting color. If the beams are light (white, beige), the background is dark (graphite, black, dark blue). If the beams are dark (walnut, wenge, black), the background is light. Contrast enhances the graphic effect and emphasizes each beam.
Partitions and zoning: full transparency
A beam partition that divides space without creating a solid barrier is mounted from floor to ceiling as a standalone structure. A strong frame is required: vertical posts from floor to ceiling, anchored into the floor and ceiling, and horizontal beams between them.
The frame is made from 50x50 or 40x60 mm timber, or metal profile. Posts are spaced 60-80 cm apart. Horizontal beams are installed between them at 40-60 cm intervals. Beams are attached to this frame — vertically, horizontally, or diagonally.
Important nuance: the partition can be single-sided (beams on only one side of the frame, the other side is smooth plywood or drywall) or double-sided (beams on both sides). Double-sided construction is more aesthetically pleasing but twice as expensive in materials.
A transparent partition (beams only, no solid base, maximum light transmission) requires exceptionally precise installation. Each beam must be mounted vertically to the horizontal frame beams with equal spacing. Any misalignment is immediately noticeable from all sides.
Ceiling structures: gravity as a challenge
Beam panel installationInstallation on the ceiling is technically more complex than on walls due to gravity. Adhesive mounting is excluded; reliable mechanical fastening is required.
A ceiling grid is installed perpendicular to the beam direction. Boards or metal profiles are anchored to the ceiling with anchors or reinforced screws. If the ceiling is wooden, use screws directly. The grid spacing for ceilings is smaller than for walls — 30-40 cm for reliability.
Beams are screwed into the grid with screws driven through. Use concealed-head screws that are recessed into the wood. Mounting points are spackled, touched up, or covered with decorative plugs matching the wood color.
Lighting is often integrated between ceiling beams: LED strips, linear LED fixtures. Wiring is run before installing beams, and fixtures are mounted on the grid between beams. This creates an effective backlighting effect where light shines through gaps.
Wet areas: protection is paramount
Installing beams in bathrooms, toilets, or saunas requires special measures. Only moisture-resistant materials are used: larch (natural moisture resistance), thermowood (treated at high temperature, does not rot), teak (exotic wood with oily grain), or high-moisture-resistant laminated MDF.
All beams are treated with hydrophobic compounds: moisture-resistant varnishes, oils, waxes. Special attention is given to ends, which actively absorb moisture. Ends are stained in two to three coats.
The grid is installed with a 2-3 cm gap from the wall for ventilation. Air must circulate between the wall and beams; otherwise, condensation will accumulate, promoting mold. The wall behind the grid is treated with antiseptic and primed.
Beams are not installed in areas of direct water contact: inside shower stalls, above bathtubs, above sinks. Beams may be used on other bathroom walls and on ceilings (if there is adequate ventilation).
Design solutions: from classic to provocative
Vertical: upward aspiration
Vertical beams are the most common solution. They visually elongate the room, making ceilings appear higher. Especially effective in rooms with low ceilings (2.4–2.5 m), where the illusion of height is needed.
Vertical rails create a sense of slenderness, rhythm, and order. Even spacing has a calming effect, creating predictability and harmony.Installation of Planks on the WallVertical orientation suits almost any style: from Scandinavian minimalism to modern classic.
The width of vertical rails affects perception. Thin rails (20-30 mm) create a dense graphic structure, numerous lines, visual complexity. Wide rails (50-60 mm) make the rhythm more sparse, calm, and monumental.
Horizontal: expansion of space
Horizontal rails visually expand the room, making it appear wider. Suitable for narrow, elongated rooms and corridors where the illusion of greater width is needed. They create a sense of stability, groundedness, and calm.
Horizontal orientation evokes traditional wooden paneling, cladding of wooden houses. This is a reference to nature, to wood as a construction material.Wall decoration with beamsHorizontal orientation is often chosen for eco-style, Scandinavian style, and country interiors.
Horizontal rails on the wall behind the TV or sofa create an expressive background that highlights the furniture. Lines guide the eye along the wall, creating dynamics in the horizontal plane.
Diagonal: dynamism and boldness
Diagonal rails — a bold solution for those who are not afraid of experimentation. They break the conventional coordinate system, create movement, dynamics, and visual provocation. Diagonal is energetic; it destroys the static of right angles.
Installing diagonal rails is more complex: each rail is cut at an angle on both ends, requiring precise calculation. The framing is placed perpendicular to the diagonal — also at an angle. But the result is impressive: the wall transforms into a dynamic object, constantly changing depending on the viewing angle.
Diagonal can be single (all rails at one angle, e.g., 45°) or opposing (rails run toward each other, forming a chevron or zigzag). Opposing diagonal creates a complex geometric pattern requiring maximum installation precision.
Combined layout: geometric complexity
Combining vertical and horizontal rails, intersections, grids, geometric patterns — for those who want uniqueness. Rails form squares, rectangles, rhombuses, complex ornaments.
Such compositions require detailed planning. First, the entire layout is drawn on paper or in computer software to scale. Each rail and each intersection is calculated. Wall marking is done especially carefully, with verification of all dimensions.
Installation is layered: first, the lower layer of rails (e.g., vertical) is mounted, then the upper layer (horizontal), overlaid on top. At intersections, rails are joined butt-to-butt at 45°, or one overlaps the other — depending on the design intent.
Variable spacing: controlled chaos
Instead of uniform rhythm — irregularity. Rails are placed with variable spacing: narrow gaps alternate with wide ones, creating an effect of randomness and organic flow. This mimics natural structures where strict geometry does not exist.
Variable spacing is especially organic in eco-style and Scandinavian interiors. It creates a living, breathing space devoid of mechanical regularity.wall finishing with lathsWith variable spacing, it appears less formal and more relaxed.
Important: chaos must be controlled. Complete randomness appears careless. It’s better to pre-calculate the layout, creating the illusion of randomness through a thoughtfully designed alternating system.
Integration of lighting: light through gaps
LED strips can be integrated between rails, creating an impressive glow. The strip is mounted on the wall between rails (or on the framing). Light passes through gaps, creating alternating glowing stripes and shadowed recesses.
Lighting can be white (for functional lighting), warm (for coziness), cool (for modern interiors), or colored RGB with color-changing capability. Control via standard switch, dimmer (brightness adjustment), or smart system (color change, scenes, phone control).
Lighting behind the headboard of a bed is especially effective: soft diffused glow creates a relaxing atmosphere. In the living room, a lit rail wall becomes a standalone art object. In the hallway, lighting serves as night lighting.
Combination of materials: textural contrast
Rails combine beautifully with other materials, creating a richness of textures. Rails + smooth painted wall — classic combination. Rails + decorative plaster: rough textured surface contrasts with the rhythmic geometry of wood.
Rails + mirror: mirror inserts between rails visually multiply space, creating optical illusions. Mirror is cut into strips matching the width of gaps between rails, inserted into gaps. Resulting alternating pattern of wood and mirror — an effective trick for small spaces.
Rails + stone: natural or artificial stone at the lower part of the wall, wooden rails at the upper part. Combination of natural materials creates organic harmony. Suitable for eco-style, modern classic, loft.
Rails + living greenery: plants — moss, succulents, ferns — are planted in special cassette inserts between rails. Resulting living, breathing wall that unites architecture and nature. Requires irrigation, lighting, and maintenance systems.
Practical nuances: secrets of the trade
Compensatory gaps: the breath of wood
Wood is a living material that reacts to changes in humidity and temperature. In summer, during humid weather, wood absorbs moisture, swells, and expands. In winter, with heating on, it dries out and contracts. This temperature-humidity expansion must be compensated for.
When installing planks from floor to ceiling, leave a compensatory gap of 5-10 mm. Planks must not touch the ceiling or floor — this creates stress and may lead to warping. The gap is covered by baseboard (at the floor) or ceiling molding, cornice.
Between individual planks in long structures (over 3 meters) compensatory joints of 2-3 mm are also provided. If long planks are installed butt-to-butt without gaps, in summer they will press against each other, and in winter gaps will appear between them.
Corner processing: joints without compromise
Corners are always problematic areas. Planks converging at a corner can be joined in several ways. A 90° joint — planks from one wall meet planks from another wall at a right angle. The ends must be perfectly cut, otherwise gaps will remain.
A 45° joint — planks from both walls are cut at a 45° angle and joined at the corner "on the edge." This is a classic carpentry technique, creating a neat, inconspicuous joint. Requires precise cutting with a miter saw with an angle guide.
Corner overlay — a vertical corner trim is installed at the corner, to which planks from both walls are attached. The trim conceals the joint, creating a clear corner element. Suitable for classic and neoclassical interiors.
Open corner — planks from one wall are installed up to the corner, planks from the second wall start 5-10 cm away from the corner. The corner remains open and painted in the background color. A modern, minimalist solution.
Integration of outlets and switches
Outlets on a plank wall require thoughtful planning. You can cut a hole in one plank for the outlet — the plank is trimmed and installed around the outlet box. The decorative outlet frame covers the cut edge.
Alternative — planks are installed around the outlet zone, leaving a smooth wall section of 15x15 cm. The outlet is installed on this section. Visually, the outlet appears in a rectangular frame between the planks.
Switches are better placed on smooth wall sections, not covered by planks. If the entire wall is plank, the switch is installed at the edge of the plank zone, at the boundary with the smooth wall.
End processing: completion of the look
Ends of planks, especially visible ones (at the ends of plank zones), must be neatly processed. Ends are sanded with fine sandpaper, and chamfers (rounded edges) are removed. This prevents snagging, splinters, and creates a finished look.
Ends are painted or coated with varnish to match the front surface. Unprocessed ends actively absorb moisture, darken unevenly, and create a messy appearance.
At the ends of plank zones, you can install an end trim — a thin strip covering the ends of all planks simultaneously. The trim creates a clear boundary, frame, completing the composition.
Care and maintenance: extending lifespan
Regular care: simplicity and consistency
Plank structures do not require complex care. Dust is the main enemy. It accumulates in gaps between planks, on horizontal surfaces (if planks are vertical with protrusions). Remove dust once a week with a dry soft cloth, brush, or vacuum cleaner with a furniture attachment.
Narrow gaps are cleaned with a narrow vacuum attachment — a slot nozzle. For especially narrow gaps, use special brushes or a homemade device: wrap soft fabric around a long ruler and run it between the planks.
Wet cleaning is done with a well-wrung cloth without excess water. For painted and laminated planks, use mild cleaning agents diluted in water. For solid wood and veneer — simply a slightly damp cloth or special wooden furniture care products.
Oil finish requires periodic renewal — every 1-3 years depending on usage intensity. The surface is lightly sanded with fine sandpaper (grit 220-320), dusted, and coated with fresh oil. Oil is rubbed in with a soft cloth, excess is wiped off. After drying, the surface looks new.
Protection against damage: prevention is better than repair
Wooden planks are susceptible to mechanical damage. Furniture leaning against a plank wall should have soft pads protecting the wood from scratches. Heavy items (paintings, mirrors, shelves) should be hung through the planks into the wall or stud frame, not directly on the planks.
Moisture — enemy of wood. Do not allow prolonged contact of planks with water. If liquid is spilled, immediately wipe it up. In humid rooms, ensure good ventilation — use forced exhaust or air circulation.
Direct sunlight causes fading. Use curtains, blinds, or window tinting on south-facing windows. If planks fade unevenly, you can repaint them or renew the oil finish with a tinting pigment added.
Repair of local damage: targeted solutions
Scratches on an oil finish are easy to remove: sand the damaged area with fine sandpaper, then apply oil. After drying, the scratch disappears. On lacquered finishes, scratches are more difficult: the damaged area is sanded, lacquered, and then polished after drying.
Dents on softwoods (pine, spruce) can be lifted with steam: moisten the area with water, press with a hot iron through a damp cloth. Fibers will swell, and the dent will level out. This method works only on unprocessed or oiled surfaces.
A broken or cracked rail is replaced. With hidden mounting, the damaged rail is carefully removed (disassembly of adjacent rails may be required), and a new one is installed in its place. With adhesive mounting, the rail is cut out, the area is cleaned, and a new one is glued in.
Cost and calculation: from budget to implementation
Material calculation: accuracy saves money
Before purchasing materials, calculate the required amount. For a wall area of S m² with rails of width W mm and spacing G mm:
Number of rails = (wall width) / (W + G), round to the nearest whole number. Length of one rail = wall height minus 10-20 mm for expansion gaps. Total length of all rails = number of rails × length of one rail.
Rails are sold by the linear meter or in standard lengths (usually 2.0, 2.4, 2.7, 3.0 m). Choose the optimal length to minimize waste. If wall height is 2.5 m and rails are 3.0 m, waste is 0.5 m per rail — 17%. If wall height is 2.5 m and rails are 2.7 m, waste is 0.2 m — 7.4%.
Add 10-15% allowance for defects, cutting errors, and replacement of damaged elements during use. Rafters: linear meters = (wall height / rafter spacing) × wall width. Fasteners: 3-5 self-tapping screws per rail (one per rafter piece).
Price ranges: from budget to premium
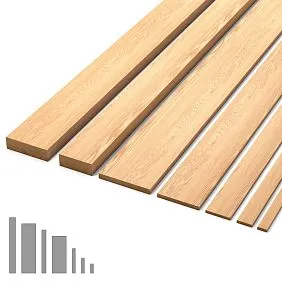
PriceInstallation of lath panelsVaries within wide limits.
Materials (rails):
Spruce, pine (solid, untreated) — 150-300 rub/m
Spruce, pine (painted, varnished) — 300-500 rub/m
Oak, beech (solid, untreated) — 600-1200 rub/m
Oak, beech (treated) — 1000-1800 rub/m
MDF veneered — 250-600 rub/m
Ready-made panels with rails — 2500-8000 rub/m²
Rafters, fasteners:
40x40 mm timber — 40-70 rub/m
Self-tapping screws, anchors — 300-500 rub per room
Adhesive — 200-400 rub/tube (enough for 3-5 m²)
Work (if hiring professionals):
Installation of rails on existing rafters — 800-1500 rub/m²
Installation with rafter installation — 1500-2500 rub/m²
Installation of ready-made panels — 600-1000 rub/m²
Painting rails — 300-500 rub/m²
Savings without loss of quality
DIY installation saves 40-60% of cost.Installation of Planks on the WallAccessible to anyone with basic skills and minimal tools.
Choosing an economical species: spruce instead of oak saves 3-5 times while maintaining functionality. Spruce can be painted any color, masking its budget nature.
On-site staining: buying untreated planks for self-staining is 30-40% cheaper than ready-to-install stained planks. MDF veneer instead of solid oak: half the cost for visually identical result.
Conclusion: lines that transform space
wall finishing with lathsThis is not just following fashion. It is a conscious choice in favor of architectural expressiveness, functionality, natural aesthetics. Planks transform space without overloading it, create volume without losing area, zone without solid barriers.
Installation of Planks on the WallThis requires precision, understanding of materials, mastery of technologies. But the result pays off the effort: the interior acquires character, individuality, memorability. Parallel lines create rhythm, guide the gaze, structure the chaos of modern life.
Wall decoration with beamsThis gives creative freedom. You choose orientation, spacing, material, color, creating a unique composition. Vertical or horizontal, uniformity or chaos, natural or color — the decision is yours.
Beam panel installationThis is accessible even to non-professionals. Ready-made systems are installed in one day, individual approach offers more flexibility. Choose the option that suits your skills, time, and budget.
Company STAVROS offers a full range ofPlanks for wallsFrom various species: oak, beech, walnut, pine, spruce. Solid wood with preserved natural texture, veneered MDF, stained planks in any RAL palette color — choice for any project and budget.
Each plank undergoes strict control: calibration to the millimeter, sorting by color and texture, humidity check (8-12%). Professional consultations will help select the optimal solution, calculate material quantity, and choose the installation technology.
Fast delivery, competitive prices for premium quality, full support from design to installation — STAVROS makes implementing design ideas simple and pleasant. We work with private clients, designers, and construction companies.
Trust STAVROS professionals to create your ideal interior.Wooden wall claddingandRelief finishFrom STAVROS — quality inspired by nature, time-tested technologies, design that creates space for comfortable living.
Plank structures — an eternal architectural truth: beauty arises from rhythm, order, light and shadow. Parallel lines create a visual melody that never tires. Your home will gain depth, character, soul. Space will speak the language of wood, light, and geometry.


