Article Contents:
- First, determine the tabletop parameters
- The load on a leg includes forces in different directions
- Four legs or another base
- Leg height is calculated based on the actual assembly
- The top cross-section is chosen for the joint
- The apron connects the legs into a frame
- A table without an apron requires its own rigidity solution
- Mounting is chosen based on the material and the joint design
- Solid wood tabletops allow for movement
- Layout is set by the axes and dimensions of the supports
- Legroom is checked with chairs
- The shape of the support is chosen after checking the cross-sections
- Beech and oak are matched to the construction and finish
- The finish is chosen with assembly in mind
- What is checked on a single support and on the assembled table
- What can be checked on a single part
- What is checked on the assembled base
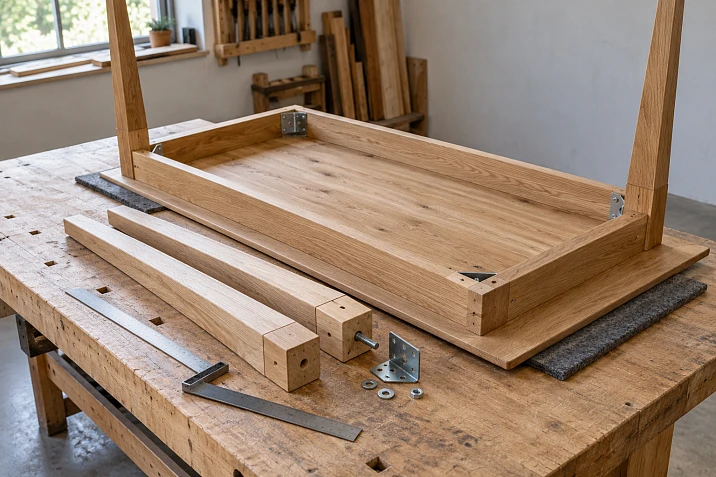
Four wooden legs of suitable height do not yet form a complete table base. A narrow top section may not accommodate the connection to the apron, a deep apron may interfere with the knees, and a large tabletop overhang may reduce stability under load on the edge. These issues are resolved before drilling and purchasing the full set.
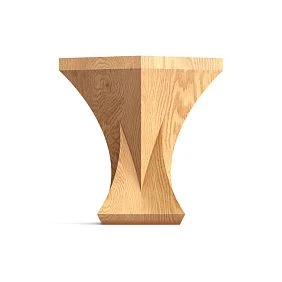
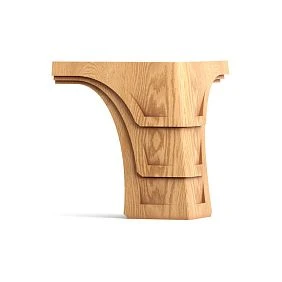
Wooden table legs are selected to match the tabletop and base design. You need to know the dimensions and material of the top, the purpose of the furniture, the placement of seating positions, and the method of load transfer. After that, determine the height, arrangement, top cross-section, and mounting of the legs. Turned, carved, or geometric shapes are chosen from the parts that suit this assembly.
First, determine the tabletop parameters
Record the length, width, thickness, material, and weight of the tabletop. If the top is composite, has an insert, extension leaves, or heavy cladding, this must also be reflected in the design. Identical external dimensions do not mean identical requirements for the base.
For a dining table, seating from several sides is important. For a desk, work equipment and possible drawers under the tabletop are added. For an extending table, the base must be checked in both the closed and open states: the load distribution and distances to the edges change.
The material also determines the connection method. In a solid wood tabletop, wood movement is taken into account. For a panel material, check the suitability of the selected fasteners for its structure and thickness. A stone or glass top requires the support and fastening specified for it; a scheme for a wooden panel cannot be transferred to it automatically.
For selection wooden table legs it is more useful to prepare this information than to look for a leg based only on the overall height of the furniture. A catalog part must fit an already clear structural task.




The load on a support includes forces in different directions
In the catalog, the words "leg" and "support" may refer to the same part. What matters in a project is how it works: how force passes from the tabletop through the joint and base to the floor. A decorative profile shows only part of this system.
Vertical load arises from the weight of the top itself and the objects on it. Lateral forces appear from bumps, leaning on the table, and moving the furniture. They load the upper joint differently than evenly distributed objects. Therefore, a massive leg with an unsuitable fastening can turn out to be a weak solution.
Distinguish strength, stiffness, and stability. Strength relates to the integrity of parts and joints. Stiffness relates to how much the base deforms and rocks. Stability relates to resistance to tipping over. A good result on one characteristic does not replace checking the others.
You cannot simply divide the estimated load by four and obtain a sufficient requirement for each support. With a load at the edge, uneven contact with the floor, and lateral impact, forces are distributed differently. The permissible load is confirmed for a specific design and conditions of use.
Our factory also produces:
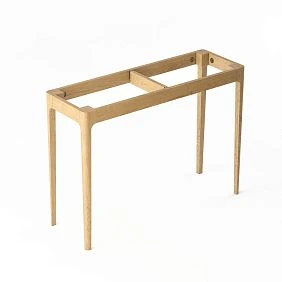
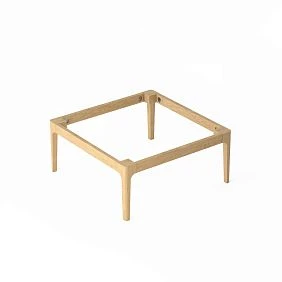

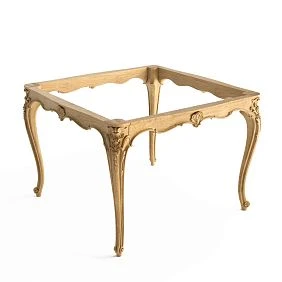
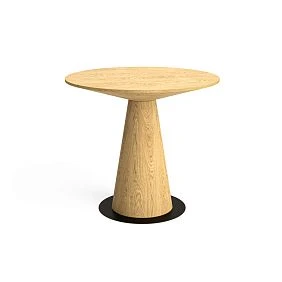
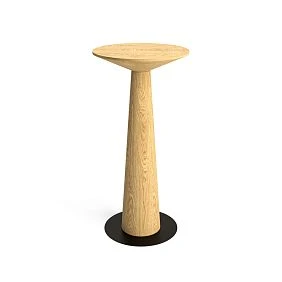
Four legs or another base
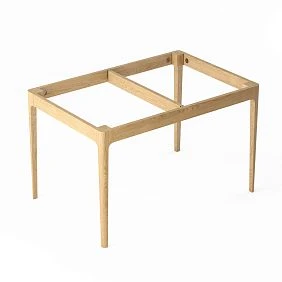
Four corner supports are convenient for a rectangular table with an apron frame. But this is not a mandatory scheme for any tabletop. A long length, complex fit, or special mechanism may require other solutions.
| Scheme | What it brings to the project | What to Check |
|---|---|---|
| Four supports at the corners | Ability to connect the legs with longitudinal and transverse aprons | Fastenings, overhangs, and access to seating places at the table |
| Four supports inset inward | A different position of the base under the tabletop | Reduced support footprint and load on the overhang |
| Two connected support nodes | A different organization of the space under the long top | The connection between the nodes, deflection and placement of seated people's legs |
| Ready-made table base | The option to select the base as a set | Compatibility with the tabletop in terms of dimensions, weight and mounting |
By moving the legs inward, you can free up part of the area at the end, but at the same time bring the cross rail closer to the knees. By adding an intermediate support, you can change how the long span performs, but it takes up a seating place. Each solution is evaluated together with the user and the top.
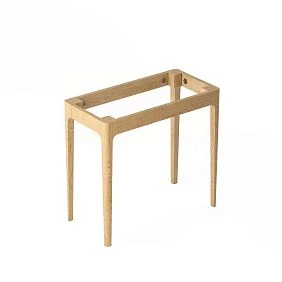
If individual parts are difficult to combine into a suitable base, consider ready-made table bases and furniture frames. Their purpose and parameters are also checked against the specific model. The availability of a ready-made frame does not make it compatible with any tabletop.
Get Consultation
The support height is calculated based on the actual assembly
The required table height is set based on the purpose and seating. Then the tabletop thickness and the height of the parts that are actually located between the top of the support and the underside of the tabletop are subtracted from it.
Installed support height = table height − tabletop thickness − height of the intermediate assembly.
For example, the design height is 750 mm, the tabletop thickness is 30 mm, and the mounting plate adds 5 mm between the leg and the tabletop. This leaves 715 mm for the installed support. If the plate is fully recessed and does not increase the height of the assembly, these 5 mm do not need to be subtracted.
The calculation applies to the selected mounting plane. The threaded part that goes into the tabletop or frame does not increase the table height by its full length. If the wooden part of the support goes into the mounting seat, its overall dimensions and installed height also differ.
The apron is not subtracted from the leg height just because it is located under the tabletop. The apron often adjoins the upper part of the leg from the side. In that case, it affects the clearance under the table but is not an additional layer between the leg and the top.
The top section is selected for the joint
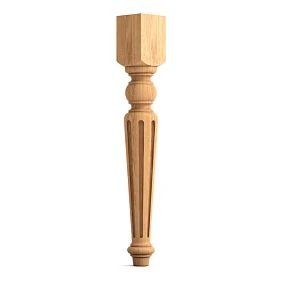
A support may have a wide decorative middle and a relatively small top platform. For installation, what matters is the area where the joints are actually placed. The maximum width of the entire leg does not describe this area.
You need to know the width and depth of the upper part, its height up to the start of the relief, the flatness and the location of the provided holes. When connecting to two aprons, both directions are evaluated. There must be enough wood left inside the part for the chosen joint; the groove, threaded insert and adjacent hole must not accidentally intersect.
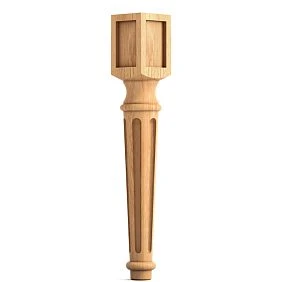
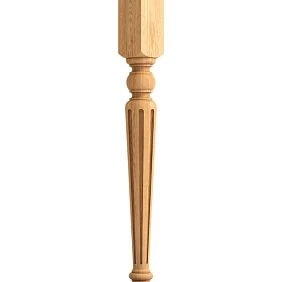
For a turned leg, it is important where the upper mounting block ends and the diameter reduction begins. For a carved one, where the protrusions and recesses are located. For a geometric one, whether the part narrows specifically in the fastener installation area.
There is no universal upper section for all dining tables. It is chosen together with the type of joint, the height of the base and the loads. Even two supports of the same external size may require different processing. If the mounting data is not specified in the product card, it is clarified before the working drawing is issued.
The apron connects the supports into a frame
The apron is a horizontal part between the legs under the tabletop. In a properly designed frame, it participates in transferring forces and resisting wobbling. What matters is not only the strip itself, but also the connection of its ends to the supports.
For a table with aprons, the leg is chosen together with the corner joint. The height of the abutment, the location of the grooves or fasteners, access for tightening and the possibility of assembling two adjacent sides are checked. If disassembly may be needed, the appropriate joint is provided in advance.
Reducing the height of the apron to free up space for knees changes the behavior of the frame and the joints. You cannot simply remove part of its height without re-checking the structure. If a visually light lower zone is needed, this condition is best included in the base design from the start.
For a long table, other connections between the supports are also considered if required by the structural calculation. Their location must preserve space for feet and seating. A decorative crossbar and a structural connection may look similar, but the purpose of each part should be determined in advance.
A table without an apron requires its own solution for rigidity
When the legs are attached directly to the tabletop, the upper joint of each support takes the loads without the usual connection of adjacent legs by aprons. Externally, such a design may look simpler, but the requirements for the joint do not disappear because of this.
Check which mounting plate distributes the load across the tabletop, how the support is prevented from rotating and tilting, and where the lateral load is transferred. A small plate suitable for lightweight furniture does not become adequate for a large dining table merely because the thread matches.
If the design includes a concealed frame or mounting battens, include them in the overall height and in checking the space under the table. The absence of a visible apron does not necessarily mean there are no braces inside the base.
The choice between a table with an apron and one without is made before buying the legs. The upper section of a support that is convenient for one connection may not suit another. For a large or heavy top, the applicability of the scheme is confirmed across the entire structure, including the tabletop itself.
The fastening is chosen according to the material and the design of the joint
A threaded rod, a threaded insert, a mounting plate and an apron connection perform different functions. One fastening method cannot be assigned to all wooden supports simply because it is convenient during assembly.
When selecting, furniture hardware for attaching supports check compatibility with the specific leg and base. Thread parameters, engagement length, hole pattern, material thickness and permissible application conditions are required. The leg and fastening assembly are specified separately.
The fastener must not come through to the face surface of the tabletop, but an overly short connection cannot be considered sufficient either. The drilling depth is set according to the working drawing and the actual parts. Before finishing the tabletop, it is useful to assemble a test joint on material of the appropriate thickness.
A detachable connection is also assessed by tool access. If the screw is covered by a second apron or a decorative element, a specific assembly order is required. It must be clear before finishing and packing the parts.
A solid wood tabletop is given room to move
Wood changes dimensions when humidity changes; on a wide tabletop, movement across the grain is especially important. The method of attachment to the base must hold the top while also accommodating this change.
For this task, appropriate tabletop fasteners that allow the intended movement are used. For example, brackets engaging a slot in the apron may behave differently from screws tightened rigidly in fixed round holes. The geometry and placement of the fasteners are determined according to the instructions for the selected system and the construction of the top.
Rigidly fixing solid wood across the grain at several distant points can create stresses during seasonal dimensional changes. Additional screws do not always improve the joint. The direction of movement must be considered at the drawing stage, especially if wide mounting components are installed under the tabletop.
This task should not be solved by arbitrarily loosening the fasteners. The connection must remain reliable; the necessary mobility is provided by its design. For other tabletop materials, the requirements are checked separately.
The layout is defined by the axes and overall dimensions of the supports
On the top view, mark the tabletop outline, the leg axes, their upper overall dimensions, and the aprons. For each offset, specify what it is measured to: the axis, the outer face, or the edge of the mounting plate. These values differ.
Let us take a conventional rectangular tabletop of 1600 × 800 mm and straight supports with an upper cross-section of 80 × 80 mm. Let the axes be 150 mm from the ends and 100 mm from the long side edges.
| Parameter | Along the tabletop | Across the tabletop |
|---|---|---|
| Top overall dimensions | 1600 мм | 800 мм |
| The offset of each axis from the corresponding edge | 150 мм | 100 мм |
| Distance between axes | 1300 мм | 600 мм |
| The clearance between the inner faces of the upper parts of the supports | 1220 мм | 520 мм |
The clearance is calculated without additional protruding parts. Aprons, corner brackets and reliefs may reduce the available space. The numbers themselves show a marking method, not recommended offsets for any table.
Separately mark the points where the supports contact the floor. With a curved or slanted leg, they may be offset relative to the upper attachment. Stability depends on the actual base on the floor, so checking it only against the upper rectangle is not enough.
When increasing the overhang, assess the load at the edge. A table may look proportional, but a narrow base under a wide top requires a separate check of tipping resistance.
Legroom is checked with chairs
Not only the seats but also the person's movements when sitting down must fit between the legs. At the end, a cross apron may get in the way; along the long side, a massive upper part of the leg or a corner bracket may. Armrests add another height that must be matched against the lower zone of the table.
Clear height is measured to the lowest part above the knees. For example, with a table height of 750 mm and a 30 mm tabletop, its lower surface is at 720 mm. If an apron drops 90 mm from this surface, 630 mm remains beneath it from the floor. With a 40 mm tabletop and the same overall height and apron layout, 620 mm remains.
This is an example of how dimensions relate. The comfort of a specific seating position is checked with the chosen chair and the intended users. A correct overall table height does not guarantee sufficient space under the apron.
On a mock-up or trial assembly, check all the designated positions, including the end ones. Assess the ability to move closer, place your feet and get up from the table. If the seating position is uncomfortable, adjust the position of the supports and the frame design, then re-check how it works.
The shape of the support is chosen after checking the cross-sections
A larger tabletop may require a different base, but the external bulkiness of the legs does not replace calculation. A tall thin support, a square leg, and a part with a variable diameter differ in geometry and in how the joints work. The entire profile is checked, including narrow sections.
| Shape | What it adds to the appearance | What to look at in the construction |
|---|---|---|
| Turned support | Smooth profile with a change in diameter | The upper block, thin sections, and the point where turning begins |
| Carved support | A pronounced decorative accent | The mounting area, the depth of the recesses, and protruding parts |
| Geometric support | Straight lines and a minimalist silhouette | Actual cross-section, inclination and mounting position |
In each group, a model of the required purpose and height is selected. One shape type does not mean the same load-bearing capacity for all products. If a support has a direction or a rotated decorative side, this position is also marked in the four-corner diagram.
Beech and oak are matched to the construction and finish
Beech supports can be considered for enamel and opaque paint, oak ones — when the pronounced wood grain matters under tinting, oil or clear lacquer. These are guidelines for appearance, not a prohibition on using another finish on either species.
The permissible load cannot be assigned based on the material name alone. The quality of the blank, shape, cross-section and joint all matter. Replacing beech with oak will not fix a weak fastening or an inconvenient arrangement of supports.
For visible wood, the selection of the blank and its preparation are specified. In the description quality of solid wood products STAVROS distinguishes laminated wood for enamel and for tinting. The difference is significant when the grain and shades of adjacent areas remain visible after finishing.
The four supports are compared together with the tabletop. Complete matching of natural texture should not be expected; it is important to agree on the overall character of the surface and the permissible differences before painting the set.
The finish is chosen taking assembly into account
Unfinished wooden supports are convenient if the workshop independently selects the shade and finishes the base together with the aprons. In this case, preparation, a test coat, and application of the finish become part of the production process.
A support with a ready-made finish can reduce the number of operations if its color, gloss, and conditions of use suit the project. But further milling or changing the fastening can affect the finished surface. Therefore, the readiness of the finish is assessed together with the readiness of the mounting assembly.
Before finishing, clarify which surfaces must remain suitable for gluing or precise fitting. An unintended layer in a joint can change the assembly. When choosing Mounting and finishing materials, check compatibility with the actual material and finish of the parts.
The color is approved on a completed sample, not on a wet surface or a photo of the can. For carved and turned shapes, it is useful to see the finish on different areas of the relief.
What is checked on one support and on the assembled table
What can be checked on one part
Measure the height, top section, and mounting area of the selected model. Place it against the project corner, assemble a test fastening, and check the fit of the aprons. Such a sample allows you to detect a mismatch before finishing the final parts.
If you only need to preselect a material or finish, the following can help Product samples. To check a specific leg, you need the actual model in the required size: a wood fragment does not show its geometry or mounting.
After the fit is approved, a trial finish is applied. The result is recorded with the article number, size, material and installation method. Approval of a similar model does not automatically carry over to another support.
What is checked on the assembled base
A single leg does not reveal the wobble of four supports, the behavior of long aprons, or stability with the tabletop installed. For this, the base is assembled as a whole and tested under the intended conditions. A routine trial fitting does not replace the necessary strength and stability testing of the finished product.
If the table wobbles, first distinguish the causes: incomplete contact with the floor, play in a joint, or frame deformation. A glide can help with floor contact but does not fix a weak corner joint. Randomly trimming the legs before identifying the cause can add a new problem.
At the same time, check the fit from all sides and access to the fasteners. For a series, keep a reference assembly, drawings and an approved finish sample so that subsequent sets are assembled from the same data.
The specification must describe the support together with its installation
The entry "wooden legs, four pieces" leaves too much uncertainty. For a repeatable result, the schedule includes not only the purchased model but also its relationship to the other table parts.
| Parameter | What to fix |
|---|---|
| SKU and finish | The exact model, size and material variant |
| Quantity | Per table, per series, separately for samples and reserve |
| Height | Overall dimensions and installed height relative to the accepted plane |
| Top cross-section | Width, depth and available height of the installation area |
| Layout | Axis offsets and orientation of each support |
| Aprons | Dimensions, position and jointing scheme |
| Mounting | Connection composition, required holes and mounting parts |
| Tabletop | Material, thickness and method of attachment to the base |
| Finishing | Delivery condition and approved paint finish |
| Check | Result of fitting the assembly and checking the assembled table |
For three tables with four identical supports, twelve parts are required. If the previously purchased trial support is included in this set and is fully suitable for installation, eleven need to be purchased. If it remains a reference sample in the workshop, the production requirement remains: twelve new supports, excluding a separate reserve.
Before series drilling, the resulting versions are checked against the specification. Do not mix up visually similar models: the top platform, height or position of the decorative profile may differ.
Errors are identified before the finish countertop is processed
Choosing from a photo often leaves the upper mounting area unnoticed. Before buying, you need a drawing or measurements of a sample. If the countertop thickness was forgotten in the calculation, checking the overall height during a trial assembly will reveal the discrepancy before painting.
It is possible to forget the stretcher even with a correct calculation of the leg height: the table will be the right size but uncomfortable for the person sitting. That is why the section must show the lower mark of the stretcher and other parts above the knees.
An overly large overhang cannot be justified by appearance alone. It requires checking the base and the load at the edge. Similarly, increasing the leg cross-section does not eliminate the need to check the fastener and the material it is installed into.
Drilling the top according to an assumed scheme, painting a batch without a test coat and changing the article number after approval create different problems, but they share a common solution: first a verified assembly and a fixed version, then repeating the operations on the set.
Where to buy wooden table legs
At STAVROS you can select wooden furniture legs by purpose, shape and available dimensions. To buy wooden table legs, prepare data on the countertop, required height, upper assembly and intended layout. This will allow you to compare models by the parameters that actually affect assembly.
The selected version is confirmed by material, surface condition and fastener kit. For a new assembly, it is reasonable to start with a trial part and place the full set order after verification. Availability and lead times are confirmed for the specific size and material.
Workshops can review conditions for manufacturers and prepare a specification for a single table or a series. It must include the supports and all specified connection parts.
Wooden table supports suit a project when four things align: the specified height, the mounting method, the layout on the floor, and seating comfort. Once these are agreed, the shape and finish can be chosen within the design that is already defined in the drawing and verified in assembly.