Article Contents:
- What you need for furniture decor: a set, not individual parts
- Where polyurethane furniture decor looks appropriate: application areas
- Which elements to choose: typology of furniture decor
- Polyurethane moldings for furniture
- Corner moldings and corner elements
- Decorative Furniture Appliqués
- Decor for moldings: inserts and accents
- Cornice profile for the top line of furniture
- Polyurethane brackets for furniture
- How to choose the size of decor for a specific facade
- Margin rule
- Overlay rule relative to the frame
- Repetition rule
- Handle rule
- Hinge rule
- Decor for different types of furniture: specific recommendations
- Decor for a wardrobe
- Decor for a chest of drawers
- Decor for kitchen facades
- Decor for built-in furniture
- Decor for sideboards and display cases
- What to buy for a specific task: scenario table
- What to check before buying furniture decor
- Surface preparation and installation: what's important to know
- Preparing the furniture facade
- Glue for polyurethane furniture decor
- Sealing joints and painting
- Mistakes when buying furniture decor: seven typical blunders
- Ready-made kit schemes: five real scenarios
- Scenario one: wardrobe in the bedroom
- Scenario two: dresser in the hallway
- Scenario three: classic style kitchen fronts
- Scenario four: built-in wardrobe up to the ceiling
- Scenario five: classic style sideboard
- Complete shopping list: what you need for furniture decor
- Basic set
- Extended set
- Frequently Asked Questions
- About the Company STAVROS
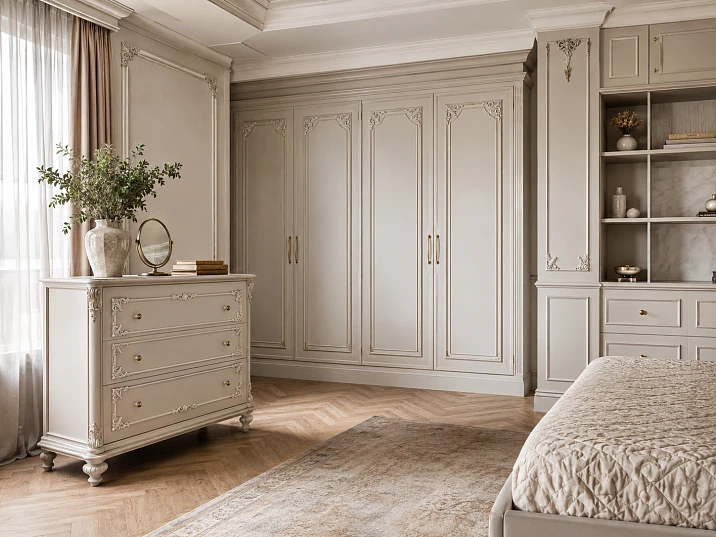
Look at your wardrobe. Or your chest of drawers. Or your kitchen fronts. They are functional — that's a fact. But do they look the way they should in the interior you created? The question is not rhetorical. This is where the story of polyurethane furniture decor begins: when the function is already there, but the character is not.
Polyurethane furniture decor is not 'embellishment' for the sake of embellishment. It is a tool that allows you to turn a mass-produced front into a custom one, update old furniture without replacement, add a classic or neoclassical accent where it is missing. And do it yourself — without a carpentry workshop, without a milling machine, without special education.
But for the result to be convincing, you need to understand: what exactly to buy, in what quantity, for which front, and in what sequence. This text is a buyer's guide, not an album of ideas.


What you need for furniture decor: a set, not individual parts
The main mistake when buying furniture decoration made of polyurethane — buying elements 'one by one', without a systematic understanding of the set. A person orders a beautiful overlay, glues it to the door — and realizes that one overlay in the middle of a smooth front looks lonely and random. Or buys moldings for a frame — and doesn't know what to do with the corners.
For furniture decor, a set is needed. A specific collection of elements, each performing its own role.
Moldings — create a frame contour on the facade. Straight profiles that are mounted along the perimeter of a door or drawer, forming a rectangular or square outline.
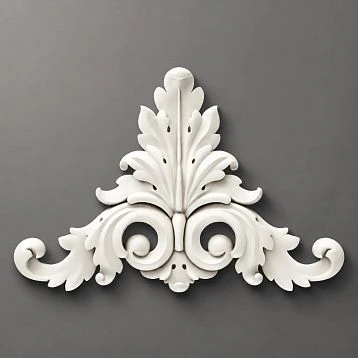
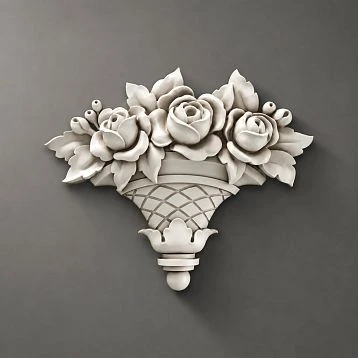
Overlays — the central decorative accent inside the frame or a standalone element on a smooth facade. Floral medallions, ornamental inserts, shaped overlays.
Corner elements — special parts for framing corners without complex 45° miter cuts. Neat corners with no risk of error.
Cornice profile — for the top line of a cabinet or sideboard. Creates a 'finish' for the top of case furniture.
Baseboard profile — for the bottom line. Frames the transition from furniture to the floor.
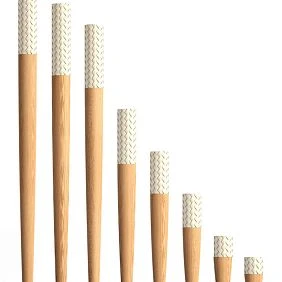
Brackets — decorative supports for shelves, consoles, open sections.
Installation materials — glue, acrylic sealant, primer, paint.
Only as a set do these elements create what is called 'expensive furniture'.




Where polyurethane furniture decor looks appropriate: application areas
decoration for polyurethane furniture applied more broadly than it seems at first glance. It's not just a "classic cabinet" in a baroque interior. Here is a real list of objects where polyurethane decor works:
Sliding wardrobes and built-in wardrobes — frame moldings on the facades create the illusion of classic paneled doors. A standard laminated chipboard facade turns into "custom-made furniture."
Swing wardrobes — frames made of moldings + central overlays turn smooth doors into classic facades.
Chests of drawers and cabinets — small overlays and thin moldings add a decorative accent to each drawer. A simple IKEA chest of drawers with properly selected decor looks like an antique piece.
Kitchen facades — frames made of moldings for painting. Classic, Provence, neoclassical — everything is realized with polyurethane decor.
Sideboards and display cabinets — cornice profile on top, frames on facades, overlays on partitions.
Consoles and cabinets in the hallway — decorative overlays on side panels, moldings along the perimeter of the facade.
Bed headboards — frames made of moldings on a soft or wooden panel create a classic headboard.
Decorative wall panels — frames made of moldings across the entire wall allow you to create a "study" or "library" finish.
About how how to update a chest of drawers with stucco molding using moldings and decorative overlays — a separate material on the STAVROS website with practical examples.
Our factory also produces:

Which elements to choose: typology of furniture decor
Let's break down each category in detail — with a description of the function, size range, and logic of application.
Get Consultation
Polyurethane moldings for furniture
Molding is the basis of any furniture decor. It is a linear profile that is mounted along the perimeter of the facade, creating a frame contour. Moldings made of polyurethane for furniture differ from ceiling ones: they are usually narrower and have a lower relief, because a furniture facade is not a ceiling plane, the scale is different here.
Width of molding for furniture: 15–40 mm is the optimal range. A narrow profile of 15–20 mm is for a delicate contour on a small facade. A wide one of 30–40 mm is for a large cabinet or sideboard facade.
Relief: from a smooth profile ring to an ornamental band. For classic style — relief. For neoclassical and modern classic interiors — smooth or with one profile band.
Length: moldings are sold by linear meters. Calculate the perimeter of each facade + 15–20% reserve for cutting corners.
Important nuance: the corners of the molding frame need to be cut at 45° with precision. The slightest mistake — an ugly joint. That is exactly why corner elements exist.
Corner moldings and corner elements
Polyurethane corner moldings — special parts that are installed in the corners of the frame. They eliminate the need for precise cutting of the molding at 45°: straight sections of molding are mounted "butt" to the corner elements, and the corner itself is decorated with a pre-cast decorative element.
Why this is important for furniture: on a furniture facade, the distances are small, and any inaccuracy in the corner is immediately noticeable. The corner element makes the frame neat even during the first installation — without expensive tools and special skills.
Corner elements can be square (a simple square with a profile), rosettes (a small decorative medallion in the corner), or thematic (flower, leaves, geometric shapes).
Decorative appliqués for furniture
Polyurethane overlays for furniture — the central accent of the facade. They are mounted inside the frame or in the center of a smooth facade without a frame.
Types of pads:
-
Floral medallions — rosettes with petals, leaves, curls.
-
Ornamental horizontal inserts — for placement along the horizontal axis of the facade.
-
Corner decorative overlays — for corner accents.
-
Figurative heraldic elements — cartouches, rocailles, masks.
The size of the overlay should match the facade: the overlay occupies no more than 30–40% of the facade area inside the frame. For a dresser drawer 40 cm wide — the overlay is no more than 12–15 cm in width.
Molding decor: inserts and accents
Decor for polyurethane moldings — special inserts that are mounted into profile grooves or on top of moldings as an additional decorative layer. This is the "jewelry level" of furniture decor — when the frame is already there, but you want to add a detail that makes it unique.
Cornice profile for the top line of furniture
A cabinet without a cornice finish on top looks "chopped off." The cornice profile from the assortment molding and cornices is mounted along the upper perimeter of the cabinet, creating a finished top line. This is especially important for built-in cabinets that do not reach the ceiling: the cornice "softly" connects the cabinet to the ceiling plane.
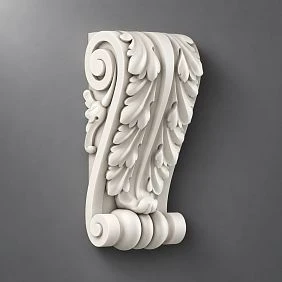
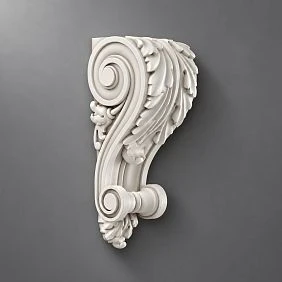
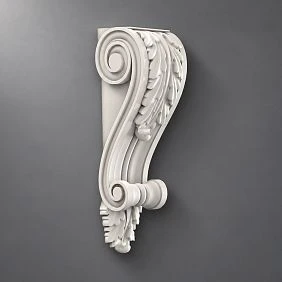
Polyurethane brackets for furniture
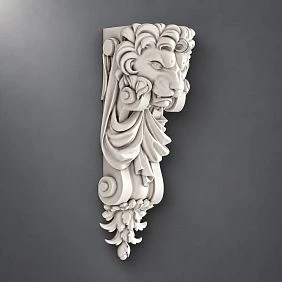
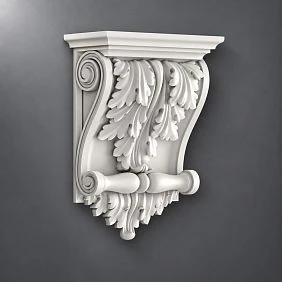
Polyurethane brackets — decorative supports used as an architectural accent in furniture with open shelves, console elements, or decorative niches. A bracket under a sideboard shelf, under a console countertop, under a protruding element of a built-in system — this is a detail that adds volume and classical logic.
How to choose the size of decor for a specific facade
Size is not a matter of personal taste. It's about proportion. The wrong size of decor on a facade creates a feeling of "something is off" — and this feeling cannot be fixed with paint.
The rule of margins
The molding frame should be set back 3–5 cm from the edge of the facade on each side (for a facade width of 40–60 cm) or 5–7 cm (for a facade width of 60–90 cm). This creates "breathing room" between the edge of the facade and the frame outline.
If the frame is too close to the edge, the facade looks cramped. If the frame is small relative to the facade, it gets lost.
Rule of overlay relative to the frame
The overlay inside the frame should occupy no more than 30–35% of the frame's interior space. An overlay that "fills" the entire interior field of the frame creates visual overload. An overlay that gets lost in a large field looks random.
Rule of repetition
If the furniture has multiple doors, use the same set of decor on each door. The same frame, the same overlay, the same corner elements. The rhythm of repetition creates the feel of "custom-made expensive furniture."
Rule of handles
The handle is part of the facade. The placement of decor must account for the handle: the frame should not "encroach" on the handle mounting point, and the overlay should not compete with the handle for attention.
Recommendation: first determine the handle position, then design the decor around it.
Rule of hinges
If hinges are visible on the facade (surface-mounted hinges), the decor should not cover them. Consider the hinge placement when designing the frame.
Decor for different furniture types: specific recommendations
Decor for a wardrobe
A wardrobe is the largest piece of furniture decor. Its facades have a significant area, and the decor here should be proportionate.
Frame made of moldings: molding width 20–35 mm. For a two-door wardrobe, a frame on each door. For a four-door wardrobe, a frame on each door plus a cornice profile on top.
Overlay: a medallion with a diameter of 80–120 mm in the center of the frame. Or a horizontal overlay along the door axis.
Cornice: a top finish is mandatory for wardrobes that do not reach the ceiling.
Style: for a classic interior, use relief moldings and a medallion with ornament. For neoclassicism, use a smooth or finely relief profile without complex ornament.
More details about How to make a cabinet or console more expensive — the logic is the same as for a wardrobe: moldings, overlays, and correct proportions.
Decor for a dresser
A dresser is a set of drawers. Each drawer is a separate "facade" with its own field for decor.
For drawers: thin molding 12–20 mm wide along the perimeter of the drawer. A small overlay in the center — a medallion 50–80 mm or a horizontal accent.
Top panel of the dresser: if the dresser is used as a vanity table or decorative surface, the side panels can be decorated with thin moldings.
Style: for a classic dresser — relief ornament. For a Scandinavian or Provence dresser — white moldings with minimal relief.
Mistake: using the same size molding for drawers as for cabinet doors. A drawer is smaller — the molding should be narrower.
Decor for kitchen facades
The kitchen is a special case. Here there is moisture, grease, steam, and temperature fluctuations. And here the decor should be not only beautiful but also functionally compatible with the operating conditions.
What is important for the kitchen:
-
Choose moldings with a low relief — complex ornamentation accumulates grease and is difficult to clean.
-
Painting — special furniture enamel with water-resistant properties.
-
Frames — tight fit with glue, no gaps where moisture can get in.
-
Sealant — acrylic, all joints are sealed.
Kitchen styles:
-
Classic and Provence — frames made of moldings with moderate relief + small overlays.
-
Neoclassical — thin smooth frames.
-
Country — simple moldings with minimal profile.
Color: kitchen decor is often painted in a single color with the facade — white, cream, gray. A two-color option is possible: facade in color, decor white.
About how how to choose stucco molding for baroque style furniture — for those designing a kitchen in historical styles.
Decor for built-in furniture
Built-in furniture is a special category. It often has non-standard sizes and atypical proportions. Facades can be very tall (up to the ceiling), very wide, or very narrow.
For tall facades (up to the ceiling): one frame for the entire facade or two frames (top and bottom) vertically. A cornice profile on top is mandatory.
For wide facades: frames can be divided by vertical molding lines into several "panels."
For narrow facades: thin molding, without overlays — only a frame. An overlay on a narrow facade (up to 30 cm) creates a cramped look.
Cornice for a built-in wardrobe: connects the wardrobe to the ceiling. If the wardrobe does not reach the ceiling, the cornice "covers" the top end and creates the impression that the furniture is "built-in" more professionally.
Decor for sideboards and display cabinets
A sideboard is furniture with character. Greater decorative richness is acceptable here than in a wardrobe.
What to include:
-
Frames made of moldings on each door.
-
Overlays — embossed, with ornament.
-
Cornice profile on top — mandatory.
-
Polyurethane brackets under protruding shelves.
-
Baseboard profile at the bottom.
What to buy for a specific task: scenario table
| Object | Moldings | Overlays | Crown Molding | Brackets |
|---|---|---|---|---|
| Sliding wardrobe | Frames on each facade | Medallion in the center of the frame | On top | No |
| Commode | Thin profile on drawers | Small accent | No | No |
| Kitchen | Frames + moderate relief | optional | No | No |
| Built-in wardrobe | Frames, vertical lines | optional | Mandatory | No |
| Sideboard/showcase | Frames + detailing | Relief overlays | Mandatory | Under shelves |
| Console | Molding around the perimeter | Side overlays | No | Under countertop |
What to check before buying furniture decor
Before placing an order, go through this checklist. It will save you from mistakes.
Base material. MDF, laminated chipboard, wood, plywood — different materials require different surface preparation and possibly different glue. Check the compatibility of the glue with the facade material.
Facade width. Measure each facade. Not "approximately" — precisely. Width determines the width of the molding and the size of the overlay.
Facade height. For drawers — height of each drawer. For doors — full height.
Handle location. Mark on the sketch where the handle is. The decor should not interfere with its installation.
Hinges. Are there visible hinges on the facade? Where are they located?
Number of facades. How many doors, how many drawers. Multiply the perimeter of each by their quantity — this is the molding consumption. Add 20% for trimming.
Number of overlays. One for each facade (or for each drawer, if it's a chest of drawers).
Corner elements. 4 pieces for each frame — if you use corner elements instead of trimming.
Glue and sealant. Specialized glue for polyurethane + acrylic sealant for joints.
Primer and paint. Acrylic primer + furniture enamel or furniture paint.
Surface preparation and installation: what is important to know
Preparing the furniture facade
Glue polyurethane furniture decor Applying to a dirty, greasy, or glossy surface means it will peel off in a few weeks. Surface preparation is 50% of success.
Step 1: Cleaning. Remove grease, dust, old coating (if needed). The surface must be clean and dry.
Step 2: Degreasing. Wipe the surface with a solvent or degreaser.
Step 3: Matting. If the surface is glossy (lacquered MDF, PVC film) — light sanding with fine sandpaper (240–320 grit) to create an adhesive surface.
Step 4: Primer. Apply acrylic primer to the facade surface in the area where the decor will be installed.
Glue for polyurethane furniture decor
For installing polyurethane decor on furniture, a specialized glue for polyurethane products is used. Some craftsmen also use acrylic mounting glue — but it is important to check compatibility with the facade material.
Applying glue: a thin layer on the back of the decor + a thin layer on the prepared facade surface. Wait 2–3 minutes until "tactile tackiness", then apply the element and press.
Fixation: for large elements — use tape for 20–30 minutes until fully set.
Joint sealing and painting
After installing all decorative elements — sealant in the joints between the decor and the facade. Carefully, without excess smears. After drying — sanding the joints with fine sandpaper.
Then — priming the decor. And only then — final painting. Water-based furniture enamel or specialized furniture paint.
About proper molding installation — in the guide on installing polyurethane molding, where corners, joints, and painting are detailed. The full algorithm for installing stucco molding — in practical guide to stucco installation.
Mistakes when buying furniture decor: seven typical blunders
Mistake one: too large decor.
An overlay that takes up 60–70% of the facade area is not "rich," it's "cramped." The ratio of decor to empty space should favor space.
Mistake two: different styles in one set.
A classic acanthus medallion in the center and geometric moldings around the perimeter — that's a style conflict. All decor in one set — one ornamental language.
Mistake three: different sizes on identical facades.
If the cabinet has four identical doors — four identical frames with identical overlays. Different sizes on identical facades — looks like an installation error.
Mistake four: decor interferes with handles.
The frame overlaps the handle mounting point. Or the overlay covers the handle hole. Always plan decor considering handles before starting installation.
Mistake five: no material reserve.
Bought exactly as much molding as needed per calculation. One bad cut — and you're short 10 cm. Always take 15–20% extra.
Mistake six: painting without primer.
Polyurethane accepts paint well — but only after priming. Without it, the paint will apply unevenly and start peeling.
Mistake seven: installation on an unprepared surface.
Glossy facade without sanding, greasy surface without degreasing — adhesive doesn't hold. Surface preparation is mandatory.
Ready-made kit schemes: five real scenarios
Scenario one: wardrobe in the bedroom
Facade: 4 sliding doors, each 60 × 220 cm. Style: neoclassical.
Set:
-
Smooth molding 18 mm — along the perimeter of each door, indentation 5 cm from the edge.
-
Square corner elements — 4 pieces per door (16 total).
-
Horizontal overlay 10 × 4 cm — along the axis of each door.
-
Profile cornice 55 mm — along the top line of the wardrobe.
-
Painting: white enamel to match the facades.
Scenario two: chest of drawers in the hallway
Facade: 5 drawers, width 80 cm, height of each drawer 14 cm.
Set:
-
Thin molding 12 mm — along the perimeter of each drawer, indentation 2.5 cm.
-
Corner elements — 4 pieces per drawer (20 total).
-
Medallion 50 mm — centered on each drawer.
-
Painting: facade color + medallions and moldings in matching tone.
Scenario three: kitchen facades in classic style
Facade: 8 upper doors (40 × 70 cm) + 4 lower doors (60 × 90 cm).
Set:
-
Relief molding 22 mm — frames on each door.
-
Corner elements with floral motif — 4 pieces per door.
-
Overlays: on lower doors — medallion 80 mm, on upper doors — no overlays.
-
Painting: white furniture enamel with water-resistant properties.
Scenario four: built-in wardrobe up to the ceiling
Facade: 3 doors 60 × 280 cm (ceiling 2.8 m).
Set:
-
Profile molding 25 mm — double frame on each door (top and bottom section).
-
Vertical molding along the door axis — separates the frames.
-
Cornice 80 mm — along the top perimeter.
-
Corner elements in all corners of the frames.
-
Paint: white to match walls and ceiling.
Scenario five: classic style sideboard
Facade: 2 lower doors 50 × 80 cm + 2 upper glazed doors 50 × 100 cm.
Set:
-
Relief acanthus molding 30 mm — frames on the lower doors.
-
Ornamental overlays 100 × 80 mm — on the lower doors.
-
Wide cornice with ornament — on top.
-
Polyurethane brackets — for the protruding upper section.
-
Decor for Molding — inserts into profile grooves.
-
Painting: white with delicate gilding of relief details.
About how how to combine stucco and carved wood decor on furniture — a separate material for those working with mixed textures.
Complete shopping list: what you need for furniture decor
Basic set
-
Polyurethane moldings for furniture — with a 20% margin.
-
Corner moldings — 4 pieces for each frame.
-
Decorative Inserts — one for each facade.
-
Adhesive for polyurethane products.
-
Acrylic sealant.
-
Acrylic primer.
-
Furniture enamel or furniture paint.
Extended set
-
Cornice profile for the top line of the cabinet.
-
Decor for Molding — inserts and accents.
-
Polyurethane brackets — for shelves and consoles.
-
Sandpaper 240–320 grit.
-
Painter's tape.
-
Brushes or roller for painting.
| Task | What to buy |
|---|---|
| Frame on the facade | Molding + corner elements |
| Central accent | Decorative overlay |
| Top finishing of the cabinet | Cornice profile |
| Frame detailing | Decor for moldings |
| Shelf support | bracket |
| full set | Moldings + overlays + cornice + mounting materials |
Frequently asked questions
Can polyurethane decor be glued to laminated chipboard?
Yes, provided proper preparation: sanding the surface with 240 grit sandpaper, degreasing, priming. Without these steps, the glue will not provide reliable adhesion to the smooth laminated surface.
What is better for a furniture facade — moldings or overlays?
They solve different tasks. Molding creates a contour — structures the facade, makes it "framed". Overlay is a central decorative accent. In a complete set, both are used. If you need to choose one — moldings provide a more noticeable structural effect.
Can it be painted decoration for polyurethane furniture in a dark color?
Yes. Polyurethane can be painted in any color after priming. Dark color (gray, anthracite, black) is a relevant modern technique for furniture in neoclassical or contemporary style.
How to calculate the amount of molding?
Measure the perimeter of each frame (two width segments + two height segments). Multiply by the number of facades. Add 20% for trimming and reserve. The result is the required number of linear meters.
How many overlays are needed for a cabinet with four doors?
One for each door — total 4. If the doors are large and the frame is divided into two fields — one overlay in each field (8 pieces).
Are corner elements needed or can the molding be cut at 45°?
Cutting at 45° gives a beautiful result — but requires a miter box and precise tools. Without it, the corners will be uneven. Corner moldings solve this problem: straight segments are joined with a ready-made corner element. For a first experience — definitely corner elements.
How long does the glue dry after installing decor on furniture?
Initial setting — 20–30 minutes (do not touch, keep under pressure). Full drying — 24 hours. Priming and painting — no earlier than 24 hours after installation.
About the company STAVROS
STAVROS — manufacturer and supplier polyurethane products for furniture, interiors and architectural decor. The STAVROS catalog has everything needed for furniture decor: Polyurethane appliqués, Moldings and cornices, corner elements, Decor for Molding, Brackets and a wide assortment stucco decoration for facades of any complexity.
STAVROS works with private clients and professional designers across Russia. Consultations on kit selection, calculation of required materials, fast delivery. When you need not just "buy an overlay" but assemble a set of furniture decor that works — STAVROS helps do it right.