Article Contents:
- What a solid wood handle means
- First, determine what the handle should open and how
- Size relative to the front: what you see on the layout
- Length, cross-section and clearance under the handle
- How to test the grip on an installed sample
- Edges and radii at contact points
- Knob, pull, profile or cup pull
- Knob handle
- Bracket handle
- Profile handle
- Shell handle
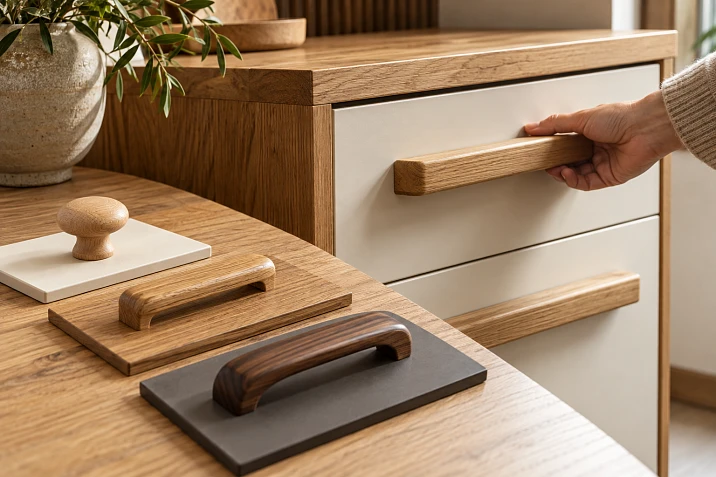
In the photo the handle looks large enough, but your fingers barely fit between it and the front. You have to pull the drawer with your fingertips, and the inner edge presses into your hand. Increasing the overall length will not necessarily fix this problem: the cause may be the cross-section, the projection, or the shape of the inner surface.
Wooden furniture handles are chosen together with the front. You need to see their size on the furniture, check the natural grip, the position of the mounting, and the feel of the finished coating. The wood and the surface pattern complement this choice, but do not replace it.
It is more convenient to first select a specific model, install a sample on a test facade and check how it opens. After that, you can approve the finish, drill the remaining parts and order a set for one item or a small series.
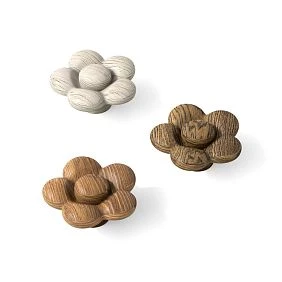
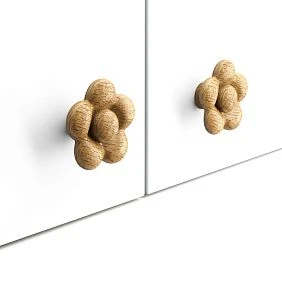
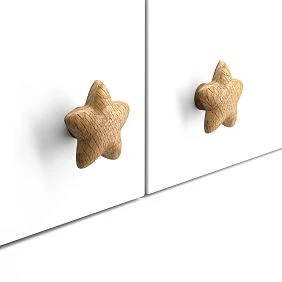
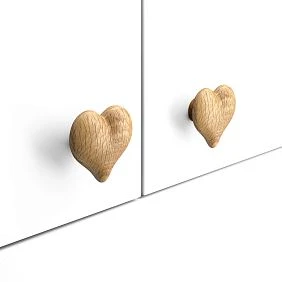
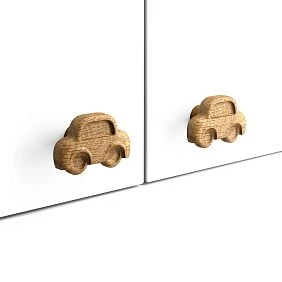
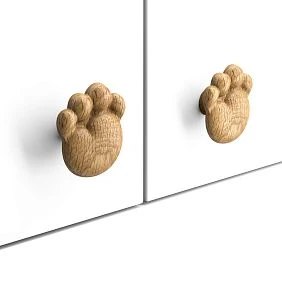
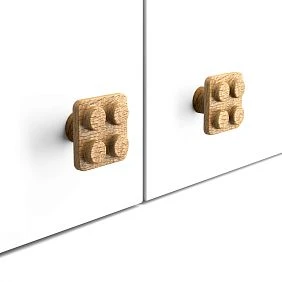
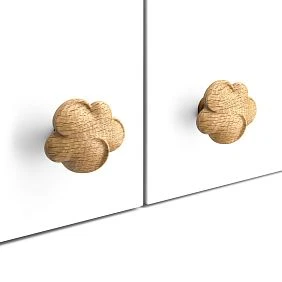
What does a solid wood handle mean
This refers to a handle whose wooden part is made of natural wood. A color name such as "oak" or an image of a wood grain does not by itself confirm the material. Check the description of the specific version, including the construction and fastening elements.
Solid wood also does not mean that any product is necessarily cut from a single solid piece without gluing. The construction of the blank is clarified by the model. For a clear finish this matters: visible joints and grain matching must correspond to the furniture's design intent.
In the solid wood furniture handles start with the shape and installation conditions. Good wood does not compensate for an uncomfortable inner edge or incompatible fastening. The material is assessed as part of a finished product that will be used every day.




First determine what the handle should open and how
A cabinet door, a wide dresser drawer and a small cabinet facade have different conditions of use. The installation height, the direction of hand movement, the resistance to opening and the space around the furniture all matter.
For an upper door, check whether it is convenient to reach the handle from below. For a lower drawer, check whether you have to twist your hand too much. Near a wall or in a kitchen corner, assess where a protruding handle will end up when the adjacent facade is opened.
The size and weight of the door do not by themselves determine the opening force. Hinges, runners, seals and adjustment all have an effect. If the mechanism sticks, choosing a larger handle does not eliminate the cause. First bring the furniture into its intended working condition.
Then decide what kind of grip the user needs: two fingers on a knob, several fingers under a bow handle, or on the extended edge of a profile. If a pinch grip is inconvenient, compare options that allow a confident grip with several fingers. It is worth testing this with the movement that will actually be used to open the furniture.
Our factory also produces:
Size relative to the front: what is visible on the mockup
A large handle on a small door can come close to the frame and take up almost all the free space. A small one on a wide front sometimes gets lost, but that does not yet prove it is inconvenient. The visual scale and the working grip are checked separately.
Make a full-size handle template and place it on the drawing or a test front. Mark the edges, the axis and the adjacent decor. On a framed door, focus on the available mounting surface, not just the overall size of the panel.
Compare several positions: closer to the edge, on the stile axis, in the center of the drawer. Do not choose the distance solely by symmetry. The handle must retain room for gripping, and its base must not fall on the profile bevel or an unsuitable area of the panel.
There is no universal ratio of handle length to front width. What matters is how the chosen model looks on the specific furniture and whether its shape allows you to apply force comfortably. Paper helps with the first question; the second requires a three-dimensional sample.
Get Consultation
Length, cross-section and free space under the handle
Two handles of the same length can feel completely different in the hand. One has a thin rounded bar and open space for the fingers. The other has a thick rectangular cross-section, and part of the clearance is taken up by the bases.
| Parameter | What it helps to check |
|---|---|
| Overall length and width | Scale on the front, proximity to edges and decor |
| Protrusion from the front | Protrusion into space and possible collisions |
| Cross-section in the grip area | How the handle sits in the fingers and where pressure occurs |
| Clearance | Is there space between the inner surface and the front |
| Working grip length | Which part of the handle is actually accessible to the hand |
| Center-to-center distance | Whether the mounting point layout is suitable |
Protrusion does not equal clearance. Illustrative example: the outer surface of a straight crossbar is 34 mm from the front, and its thickness toward the front is 14 mm. This leaves 20 mm of free space in that area. The example shows the difference in measurements, not a recommended size for any hand.
On a shaped model, the clearance varies along the length. The central section may be comfortable, while near the bases the fingers will press against the narrowing. Measure the working zone specifically and examine the cross-section, not just the overall dimensions from the product page.
How to check the grip on a mounted sample
Holding a separate handle in your palm is useful, but it is not enough. The front panel restricts how your fingers approach it, and the installation height changes the position of your hand. Attach the sample in the intended way to a test panel of the same thickness, then check it on the actual furniture assembly.
Open and close the door several times with a natural movement. Do not adjust your hand specifically to the shape. See whether you can immediately find a comfortable grip point, whether you have to hold the handle with your fingernails, and whether your knuckles touch the front panel.
For a drawer, assess the grip during the pulling motion, not just at the first moment. For a pivoting door, check how the position of your hand changes as you open it. If the model will be mounted vertically and horizontally on different fronts, test both positions separately.
It is useful to give the sample to the people who will use the furniture. Hand sizes and habitual movements vary. A handle that is comfortable for a craftsman at the workbench may be uncomfortable for a user on the bottom drawer.
Edges and radii at contact points
The front face of a wooden handle may be carefully finished, while the inner edge remains too sharp for the chosen grip. Inspect and feel the areas that bear the load: the underside of the crossbar, the neck of the knob, the edge of the cup pull.
Check the transitions, small radii and internal corners. The working surface should have no damaged areas or fuzz that catch the skin. Both the geometry and the preparation need to be assessed: a smoothly sanded sharp edge can still press into your fingers.
If the chosen shape is uncomfortable, do not expect to fix everything with a thick layer of coating. Significant reworking of the edges can change the silhouette, the thickness of the part and the mounting area. For a series, it is safer to choose a suitable model or to agree on the finishing in advance and check a sample after it.
Information about product quality help clarify surface preparation options. Record the selected finish in the order, and assess convenience definitively after the specified finishing.
Knob, pull, profile or cup
The handle type determines how the hand approaches it, but within each group the shapes differ noticeably. Compare specific models by their working area, and check the mounting scheme in their documentation.
Knob handle
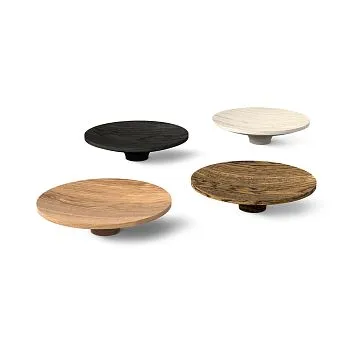
wooden knob handles provide a compact accent on a door or drawer. For grip, not only the diameter of the front part matters, but also the projection, the shape of the neck, and the back surface.
A wide flat knob may look comfortable but leave little space behind it. A small rounded model, by contrast, may have a sufficiently pronounced grip area. Check whether you can hold the handle without squeezing hard with your fingertips.
If single-point mounting is specified, clarify how the position is fixed. For a shaped knob, accidental rotation is noticeable on the front. Excessive tightening should not replace the solution provided by the design.
Pull handle
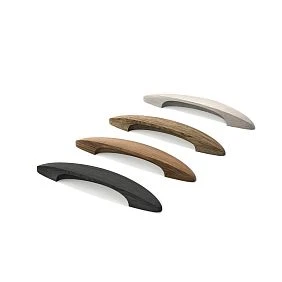
У wooden handle brackets check the clearance, the available bar length and the cross-section. A pull may allow a multi-finger grip, but large bases or a strong bend can reduce the usable space.
Do not confuse the overall length with the distance between mounting points. Equally long models may have different mounting schemes. For installation using two holes, you need exactly the dimension between their axes, confirmed for the selected finish.
Check how the hand enters under the pull from above, below or the side. On a bottom drawer and a tall cabinet door, the same model may require different movements. The position on the front is agreed with this, not chosen from a photo alone.
Profile handle
У wooden profile handle the cross-section shape plays the main role. A long piece may look like a calm line along the facade, but comfort is determined by the recess, the protrusion and the position of the fingers.
Clarify the installation method: where the mounting part is located, whether the facade needs treatment, and how the ends are finished. You cannot transfer the installation scheme of another profile solution just because of a similar name.
If the profile runs next to an adjacent drawer, check the working clearance and access to the grip. Not every ready-made wooden handle can be shortened arbitrarily: the possibility of trimming depends on the model, the fastening points and the end finish.
Cup handle
У wooden shell handles the inner cavity needs to be examined. The external dimensions do not show how deeply the fingers fit and which edge bears the force.
Try the model in the intended orientation and at the required height. A shell handle that is comfortable on a middle drawer may require an awkward movement on a tall facade. The position of the finger entry and the distance to the nearest edge of the furniture are important.
Evaluate the treatment of the inner surface after painting. It is this part that is in constant contact with the hand, although it is almost invisible in the overall appearance of the chest of drawers.
Beech and oak: the material must support the chosen shape
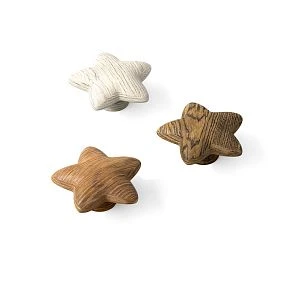
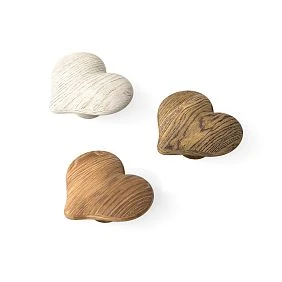
Beech furniture handles can be considered when a less pronounced texture is needed or a covering paint is planned. Oak handles are often chosen for a noticeable wood grain and a connection with other oak details. These are possible scenarios, not a mandatory distribution of finishes by species.
The species itself does not determine comfort. With the same external size, differences in cross-section and edges may be more noticeable than the difference between beech and oak. First approve a suitable shape, then compare its versions and the finishing result.
Under a clear finish, evaluate the grain across the entire visible surface, including the ends. Natural wood may show variations in shade and grain. If the handles form a pair on one drawer, decide in advance how closely they should match in appearance.
Under enamel, the wood grain pattern plays a lesser role, but preparation remains important. Opaque paint does not guarantee that the pore relief or machining marks will disappear without the preparation prescribed by the technology.
When to choose handles without a finish
uncoated furniture handles convenient for a workshop that finishes furniture with its own system. You can match the color of the handles with the fronts, legs and wooden decor, and check the overall gloss and surface character.
However, the same composition does not necessarily produce the same shade on different substrates. A test coat is needed next to a front sample. For a transparent finish, the base tone and wood absorption are taken into account; for enamel, the preparation and the appearance of the finished film.
Check the handle after the entire selected finishing sequence. What matters is how the contact side feels, whether any buildup has appeared in the inner area, and whether a comfortable grip has been preserved. Before such a check, the coating must dry and acquire its properties in accordance with the manufacturer's instructions.
Include the preparation time for a complex shape in the batch calculation. A simple crossbar and a deep shell require different access to the inner areas. The ability to buy an unfinished part means freedom of choice in finishing, but not the absence of finishing operations.
When a handle with a ready-made finish is suitable
If Wooden handles with coating match the project, the workshop can exclude its own painting of these parts. At the same time, it is necessary to check the exact execution, geometry, fastening and combination with the front.
The color on the screen does not confirm a match in the room. Place a physical sample against the furniture under the intended lighting. Compare not only the tone but also the degree of gloss: two surfaces close in color may be perceived differently.
For wooden handles in the kitchen, take into account the conditions of use: frequent touching, soiling, possible splashes and cleaning. Suitability is determined by the selected coating system and care recommendations. Solid wood by itself does not make a handle insensitive to water and any cleaning agents.
If a ready-made option is not suitable, do not plan repainting without checking compatibility. Sometimes it is wiser to choose an unpainted model intended for your own finishing.
The fastening is checked before drilling the front
In a new project, first select the handle, then clarify the installation diagram and carry out the marking. If holes already exist, they become a constraint on the choice: the distances, position and compatibility of the specific model need to be checked.
For two-point fastening, verify the center-to-center distance, orientation and location of the holes relative to the handle's overall dimensions. For single-point fastening, verify the axis position and the intended fixing of the part. The number of holes should not be guessed from appearance.
For a threaded connection, clarify the thread parameters, the permissible engagement and the fastener length taking into account the front thickness. A screw that is too long may bottom out before the handle is pressed against the base; one that is too short will not provide the intended connection. There is no universal screw for all wooden handles.
The scope of delivery is checked separately: fasteners and pre-drilled holes should not be assumed to be included by default. If you need to select furniture hardware, rely on the requirements of the selected model, not just on the section name.
Do a trial installation on a panel of the same material and thickness. Check that the bases fit flush, that there is no play and that the fasteners are accessible. Transfer the marking template onto the finished fronts only after checking the resulting connection.
The handle and the front are checked together
After test-fitting on a panel, assess the handle as part of the furniture. Mouldings, carved overlays, neighbouring handles and the position of the cabinet relative to the wall all matter. On a separate flat surface these constraints are not visible.
For a framed facade, check whether the handle base fits entirely within the designated area. Do not place the fastening on the edge of the profile just for a nice position on the front side. For a movable panel and other structurally special areas, the mounting solution must match the facade design.
On paired doors, check the distance between the handles in the closed position and when opening. In the corner of the kitchen, inspect the possible collision of a protruding handle with the adjacent facade. On a chest of drawers, make sure the hand reaches the bottom drawer without an awkward stop against the upper handle.
If two handles are provided on a wide drawer, check opening under the accepted conditions of use and according to the requirements of the runners. Two grip points do not by themselves guarantee even movement. Coordinate the placement with the drawer design rather than automatically increasing the number of handles.
It is also useful to look at the furniture from the side. A strongly protruding part may be comfortable for the fingers but take up extra space in a narrow passage. In that case, compare another shape with a sufficient working area while maintaining a confident grip.
Why buy one handle first
A sample is needed to go through the whole process on a specific model: measure, install, check by hand, and evaluate after finishing. This way you can reject an unsuitable cross-section before purchasing twelve, twenty-four, or forty identical parts.
It is convenient to carry out the check sequentially:
- Verify the item number, size, and material of the received handle.
- Inspect the working edges and the mounting side.
- Install the sample on a suitable panel and check the fastening.
- Assess the position and opening as part of the furniture.
- Carry out the agreed finish if the handle is without a coating.
- Repeat the grip check and approve the execution.
Samples of the wood species or color from the section product samples can help with the finish, but do not replace the handle itself for checking the cross-section. To compare two shapes or two wood species under a clear coating, the corresponding specimens are needed.
If the wooden handles for the cabinet and the drawer unit differ in size, both versions are checked. Reducing the model changes not only the external scale: the space for fingers may shrink or the fastening may change.
How to calculate the set for furniture and a small batch
The quantity is determined by the approved facade layout. For example, a chest of drawers has four drawers and each has two handles. One item requires 4 × 2 = 8 pieces. For six identical chests of drawers — 8 × 6 = 48.
This is a conditional composition for a specific project, not a rule to put two handles on any drawer. If some facades use a different model, each position is counted separately.
The trial handle has already been purchased, but its purpose affects the additional order:
| What was decided about the sample | Reserve in the new order | How many to order additionally for a series of six dressers |
|---|---|---|
| Save separately for control | 0 | 48 |
| Use a suitable sample in one dresser | 0 | 47 |
| Save separately and add two spare handles | 2 | 50 |
| Use the sample in furniture and add two spare handles | 2 | 49 |
A previously purchased sample in the last column is not counted as a new purchase. It can be included in furniture only if it matches the approved specification and remains suitable after testing. The two spare handles are given as an example; there is no mandatory reserve percentage.
For a series, the agreed item code, size, wood and finish are fixed for each position. If knobs and pulls are used on one item, these are two different components of the set, not grounds to combine them under the common name "wooden handles".
What to record in the specification
After the sample is approved, save the data by which the purchaser can repeat the purchase and the assembler can perform the installation. Photos are useful as a supplement but do not replace dimensions and the mounting diagram.
| Field | What to specify |
|---|---|
| Place of application | Furniture model and specific front |
| Handle | Full SKU, type and product link |
| Finish | Size, wood, surface preparation |
| Installation | Number of holes, center-to-center distance if applicable, fasteners |
| Position | Orientation and distances from selected edges or axes |
| Finishing | Exact finish variant or approved technology |
| Quantity | Consumption per item, series requirement and separate reserve |
| Sample | Approval date and storage location |
If one handle is installed on fronts of different thicknesses, check the fasteners separately for each case. Similar furniture appearance does not mean the same screw length.
When the shape, size or finish changes, update the record. For a new inner edge, repeat the grip check; for a different mounting scheme, perform a trial installation. This way the approved result is not lost between the first sample and the series.
Batch acceptance and reordering
Check the delivery against the specification before marking all fronts. Verify the quantity, item codes, dimensions, wood species and finish option. Inspect the contact areas and bases, and compare the installation dimensions against the project requirements.
For a clear finish, lay out the future pairs side by side. Matching by grain pattern and tone is done within the agreed requirements for natural wood. One successful sample does not guarantee that all handles will have the same grain alignment.
Place a reorder using the saved product record, again confirming the availability of the execution and the lead time. If a similar replacement is offered, compare the cross-section, clear opening and mounting. A matching overall length and color does not yet confirm that the handle will fit the previous holes and be equally comfortable.
A reference sample is especially useful for checking the finish and the feel of the surface. Store it labeled with the project so that, on the next delivery, it is clear which option the new parts should be compared against.
Where to buy solid wood furniture handles
At STAVROS you can choose wooden furniture handles in various shapes, options without a finish and with a ready-made finish. For a new project, select a specific model by cross-section, grip and mounting pattern; then confirm the wood species, size and finish.
Before buying wooden furniture handles, prepare information about the front: material and thickness, available mounting area, handle position and whether holes are present. If you are unsure about the grip, start with a sample and test it at the required height.
On the page with conditions for manufacturers shipping is stated from one piece. This lets you first evaluate the chosen execution and, after approval, order the exact quantity. Availability and lead time are confirmed based on the order contents; the collection procedure is in the section payment and delivery.
A suitable solid wood handle remains comfortable after installation and finishing: there is enough room for the fingers, the working edge does not press, the mounting matches the front, and the surface is coordinated with the furniture. Once these conditions have been checked on a sample, the set can be selected by the fixed parameters and repeated in subsequent items.