


Article Contents:
- Polyurethane revolution: from heavy plaster to lightweight plastic
- Molding elements: dictionary of architectural forms
- Wall molding decor: panels, frames, compositions
- Plaster decoration for walls and ceilings: symmetry and accents
- Types of molding by style: from antiquity to modernism
- Combining molding with wooden decor: balance of plasticity and texture
- Molding installation: flawless installation technology
- Molding interior style: how to choose the right match
- Frequently Asked Questions
- Can Polyurethane Moldings Be Used in Humid Areas?
- How to calculate the required amount of curtain rod?
- Can polyurethane molding be painted in dark colors?
- What is the difference between polyurethane molding and polystyrene molding?
- Is It Necessary to Prime Moldings Before Painting?
- Can molding be installed on stretch ceilings?
- How long does it take to install molding in a room?
- How to care for polyurethane molding?
- Can molding from different collections be combined?
- Can molding be installed independently without experience?
- Conclusion: choice of professionals

The walls are silent. Ceilings loom as white voids. Corners cut through space without softening, without transition. But just introducemolding— and the interior finds its voice. Cornices form the crown of the room, rosettes become focal points, moldings draw architectural graphics on surfaces. Plaster decor is not mere ornamentation, but the language of classical architecture translated into modern materials. How to choose the right elements among hundreds of options? How to combine molding with wood, creating a balance of lightness and solidity? Let's examine in detail — with an understanding of materials, styles, and installation technology.


Polyurethane revolution: from heavy plaster to lightweight plastic
For centuries, molding was created from plaster — a noble but capricious material. A two-meter plaster cornice weighed 10-15 kilograms, required reinforced fastening, and risked collapsing if improperly installed. Installation took days, craftsmen worked in pairs, erecting scaffolding under ceilings. Moisture destroyed plaster, causing it to yellow, crack, and crumble. Restoration cost more than new construction.
Polyurethane moldingschanged the rules of the game. Material density of 180-350 kilograms per cubic meter versus 1200-1400 for plaster — a sixfold difference. A two-meter cornice now weighs one and a half kilograms, installed by one person in an hour, without assistants or special equipment. Polyurethane does not absorb moisture, withstands temperatures from minus forty to plus eighty degrees, does not yellow over time, and does not crack from building settlement.
Casting technology ensures perfect reproducibility. A master model is created by a sculptor manually or modeled in a 3D program with subsequent printing. A silicone mold is made from the master model, into which liquid polyurethane is poured. After polymerization, the element is extracted — with absolutely precise replication of every relief detail, every line, every scroll. Hundreds of copies from one mold are identical down to the micron.


Molding elements: dictionary of architectural forms
— everything must correspond to the chosen era.form a system where each detail has a function and a name inherited from ancient architecture. Understanding terminology is critical for correct selection and combination.
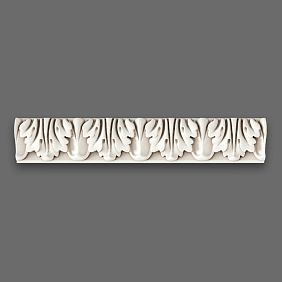
Ceiling cornice — a horizontal element forming the transition from wall to ceiling. Width varies from compact 50 millimeters to monumental 300 millimeters. The profile includes projections and recesses creating interplay of light and shadow. Simple cornices have 2-3 profile elements, complex ones — 8-12. A cornice can be smooth or ornamented — with meander, acanthus leaves, rosettes, egg-and-dart motifs.
Molding — a universal profiled element narrower than a cornice, used for wall articulation, panel framing, creating frames. Width 20-80 millimeters, standard length 2000 or 2400 millimeters. Molding is installed vertically, horizontally, diagonally — depending on the compositional task.
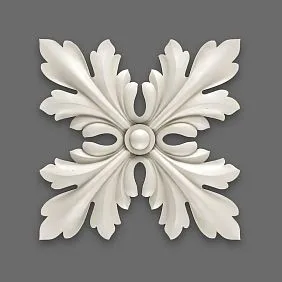
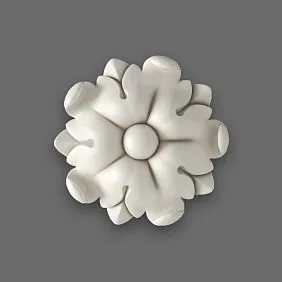
Rosette — a round, oval, or polygonal element with radial ornamentation, installed on the ceiling at the chandelier mounting point or as an independent decorative accent. Diameter from 200 to 1500 millimeters. Ornament varies from simple concentric circles to complex compositions with plant motifs, scrolls, figures.
Corner element — a decorative overlay for room corners, wall and ceiling joints, panel framing. Size from 50×50 millimeters to 300×300 millimeters. Ornament is symmetrical, often including scrolls, leaves, geometric shapes.
Central overlay — a rectangular or square element with relief decoration, installed in the center of a panel, above a doorway, on a wall as an accent. Sizes from 80×80 millimeters to 600×800 millimeters. Ornament can be plant-based, geometric, or narrative.
Pilaster — a vertical element imitating a flat column projecting from the wall. Consists of base, shaft, capital. Height corresponds to room height — from 2200 to 3500 millimeters. Width 80-250 millimeters. The shaft can be smooth, fluted (with vertical grooves), or ornamented.
A column is a three-dimensional cylindrical element, unlike a flat pilaster. Polyurethane columns are hollow, with a wall thickness of 8-15 millimeters, reducing the weight to 3-8 kilograms at a height of 2.5-3 meters. Diameter is 150-500 millimeters. A column includes a base, shaft, and capital according to classical orders—Doric, Ionic, Corinthian.
A console is a projecting bracket that visually supports a cornice, shelf, or balcony. Its shape is curvilinear, with an S-shaped or spiral curve. Height is 100-400 millimeters, projection is 50-300 millimeters. Consoles are installed under cornices, on the sides of fireplaces, and doorways, creating an illusion of structural support.
Our factory also produces:


Wall decoration molding: panels, frames, compositions
Decorative stuccoon walls transforms planes into architectural canvases. The paneling technique—dividing a wall into sections framed by moldings—creates rhythm, proportion, and visual richness.
Classical paneling divides a wall into three horizontal zones. The lower third is a plinth 900-1000 millimeters high, finished with wooden panels or painted a dark shade. The middle zone is the main wall field, divided by vertical moldings into rectangular sections 80-120 centimeters wide. The upper zone is a frieze 200-300 millimeters high under the ceiling, often decorated with ornamentation or painted in a contrasting color.
A frame composition creates rectangles or squares on a wall using moldings. Inside the frames, patterned wallpaper, contrasting paint, fabric inserts, mirrors, or paintings are placed. Frame proportions follow the golden ratio—side ratio approximately 1:1.618. The distance between frames and from frames to wall corners is uniform, creating visual balance.
Frame corners are reinforced with corner overlays—decorative elements 80-120 millimeters in size, concealing molding joints and creating accents in the corners. Frame centers are marked with central overlays 150-300 millimeters in size, forming focal points of the composition.
High wall sections between windows are divided by vertical moldings running the full height of the wall, imitating pilasters. This creates vertical rhythms, visually raises ceilings, and structures the space. Verticals are complemented by horizontal moldings at two-thirds of the wall height, forming intersections.
Get Consultation
Molding decoration for walls and ceilings: symmetry and accents
Plaster ornament for walls and ceilingsoperates according to compositional laws, where symmetry creates order and accents create focal points for the gaze.
A ceiling rosette in the center of a room is a classic accent. Its diameter is selected using the formula: room area in square meters multiplied by 10-15 gives the rosette diameter in centimeters. For a 20-square-meter room, a rosette 600-800 millimeters in diameter is optimal. The rosette is installed exactly at the ceiling center, determined by the intersection of diagonals. A chandelier is hung in the center of the rosette, creating functional and aesthetic unity.
Corner overlays at the junctions of ceiling cornices and vertical wall moldings conceal complex joints and create decorative accents. The overlay is chosen to match the style of the cornice and moldings—classical scrolls for Baroque profiles, geometric shapes for Neoclassicism, floral motifs for Art Nouveau.
Over-door overlays are placed above door openings, turning a utilitarian element into an architectural detail. The overlay can be a horizontal rectangle, imitating a pediment, or arched, repeating the door's top shape. The overlay width matches the door opening width plus 100-200 millimeters on each side, creating a visual frame.
Consoles under cornices are installed with a uniform spacing of 800-1200 millimeters, creating rhythmic vertical accents. The console visually supports the cornice's weight, although structurally the cornice is mounted independently. This is a play of architectural logic where decoration imitates structure, creating a sense of reliability and solidity.
Types of molding by style: from antiquity to modernism
Types of moldingsdiffer in stylistic affiliation, which determines the choice of profiles, ornaments, and proportions.
Classical style is based on ancient orders. Cornices include elements of Doric, Ionic, and Corinthian orders—beads, coves, astragals, egg-and-dart, acanthus leaves. Profiles are clear, symmetrical, and subordinate to geometric logic. Ornamentation is restrained—meanders, egg-and-dart motifs, palmettes. Color is traditionally white or cream, emphasizing relief through play of light and shadow.
Baroque and Rococo—the triumph of decorativeness. Molding covers ceilings and walls with a continuous carpet of ornament. Profiles are curvilinear, asymmetrical, and dynamic. Ornamentation is lush—scrolls, shells, floral garlands, putti, masks, cartouches. Each element is detailed, creating a sense of excess and luxury. Gilding, patination, and polychrome painting enhance the decorativeness.
Neoclassicism simplifies classicism, preserving architectural logic but reducing decorativeness. Profiles are clear, but ornamentation is minimal or absent. Lines are straight, proportions are strict. Colors are light—white, light gray, cream. Molding structures space without overloading it with details.
Empire—the military version of Neoclassicism. Ornamentation includes military trophies, laurel wreaths, eagles, torches, swords. Profiles are massive, geometry is strict. Colors are contrasting—white with gold, white with dark green or burgundy. Molding demonstrates strength, solemnity, and imperial grandeur.
Art Nouveau rejects symmetry and geometry. Profiles are fluid, organic, resembling plant stems, waves, or tongues of flame. Ornamentation includes irises, lilies, female faces with flowing hair, peacock feathers, dragonflies. Molding creates a sense of natural growth rather than constructedness.
Art Deco combines geometry with decorativeness. Profiles are symmetrical but include stepped forms, zigzags, and sun rays. Ornamentation is stylized—geometric flowers, animals, human figures. Colors are contrasting, often using metallic shades—gold, silver, bronze.
Contemporary minimalism uses molding sparingly. Simple cornices without ornamentation, smooth moldings with rectangular cross-sections, absence of rosettes and overlays. Molding creates clear lines, structures space, without drawing attention to itself. Color is white, blending with walls and ceiling.
Combining molding with wooden decor: balance of plasticity and texture
Molding and wood are complementary materials, enhancing each other's characteristics. Molding is light, bright, plastic, and reflective. Wood is heavy, warm, textured, and light-absorbing. The combination creates a balance where each material enhances the qualities of the other.
Classical scheme—white molding on walls and ceiling, wooden elements in the lower zone and on doors. A polyurethane ceiling cornice forms the crown of the room. Walls are divided into panels by moldings. The lower third of the wall is covered with wooden panels of oak or walnut, stained in dark shades. Doors are wooden, furniture fronts are wooden. Floor is parquet. The contrast of white upper part and dark lower part creates visual stability—light above, heavy below.
Inverse scheme—wooden molding and cornices, polyurethane molding on walls. A ceiling cornice of stained oak creates a warm frame. Wooden moldings form panels on walls. Inside the panels—white polyurethane overlays create relief on a smooth painted surface. The contrast of warm wood and cold white molded decor creates dynamism.
Monochromatic scheme—wood and molding painted the same color. Polyurethane cornices and wooden baseboards are painted white, blending with the walls. The difference in materials is discernible only through relief and texture—smooth molding versus textured wood. This scheme is used in Scandinavian interiors, where light, airy space is important.
Accent scheme—molding and wood are used sparingly, creating accents. A polyurethane rosette on the ceiling in the center of the room. Wooden carved overlays on furniture fronts. Polyurethane moldings frame one accent wall. A wooden cornice above windows. Materials do not cover all surfaces but place visual points that form the composition.
Molding installation: technology for flawless mounting
The quality of installation determines how long the molding will last and how professional it will look. The installation technology for polyurethane molding is simpler than that of plaster, but requires precision and care.
Surface preparation is a critical stage. The ceiling and walls must be dry, strong, and free from dust and grease contamination. Loose areas are reinforced with deep-penetration primer. Peeling coatings are removed. Irregularities exceeding 5 millimeters are leveled with putty—polyurethane is flexible, but significant variations will create waves on the cornice.
Marking is performed using a laser level or chalk line. For a ceiling cornice, a horizontal line is marked on the wall at a distance from the ceiling equal to the height of the vertical part of the cornice. For wall moldings, lines are marked level or vertically using a plumb line. Marking accuracy ensures even installation—a deviation of 2-3 degrees over a length of 3 meters is noticeable to the naked eye.
Cutting corners requires a miter saw or miter box with the ability to set a 45-degree angle. For inside corners, both elements are cut at 45 degrees, forming a right angle when joined. For outside corners, the cut is reversed. The cut must be clean, without chips. The ends after cutting are lightly sanded with fine abrasive to remove burrs.
Adhesive is applied to the back of the element. For lightweight profiles, an intermittent line every 50-70 millimeters is sufficient. For heavy, wide cornices, adhesive is applied in a continuous serpentine pattern. If the cornice width exceeds 100 millimeters, adhesive is additionally applied to the surface of the wall and ceiling.
Installation is performed by pressing the element against the surface along the marking. Pressure is maintained for 30-60 seconds for initial adhesive setting. Excess adhesive protruding along the edges is removed immediately with a damp sponge before the adhesive dries. The element should not shift after installation—the full adhesive setting time is 12-24 hours.
Joining straight sections is done butt-to-butt with careful fitting. The ends of the joined elements must be perfectly even—any gap will be noticeable. The joint is glued with the same adhesive, and excess is removed. After drying, the joint is filled with acrylic putty, sanded with fine abrasive, and painted to match the molding color.
Finishing includes priming and painting. Polyurethane is primed with acrylic primer to improve paint adhesion. Painting is done with acrylic paint in two coats with intermediate drying of 4-6 hours. For complex reliefs, a brush is used, thoroughly painting the recesses. For smooth surfaces, a roller or spray gun is acceptable.
Molding and interior style: how to choose the right match
stucco styleThe styles of the molding and interior must match, otherwise dissonance arises, destroying the integrity of the space.
A classic interior requires molding with clear profiles, symmetrical patterns, and noble restraint. Cornices 100-200 millimeters wide with beads, coves, and astragals. Wall paneling moldings 40-80 millimeters wide. Rosettes 600-1000 millimeters in diameter with concentric circles of acanthus leaves. Color white or cream, with possible light patina in the recesses to emphasize the relief.
A modern interior uses molding minimally. A simple ceiling cornice without ornament, 50-100 millimeters wide, creating a clear boundary between wall and ceiling. No rosettes, overlays, or complex compositions. Wall moldings are rarely used, only for clear zoning or framing an accent area. Color white, blending with the walls.
Loft allows molding as a contrasting element. Brick or concrete walls and elegant polyurethane molding create an interesting juxtaposition of industrial roughness and classical refinement. Molding is used sparingly—a cornice under the ceiling, moldings around a mirror, a rosette on the ceiling. The color can be white for maximum contrast or tinted gray to soften the contrast.
Provence loves molding with floral motifs, painted in pastel tones. Cornices with grapevines, leaves, flowers. Overlays with bouquets, birds, rustic motifs. Color ivory, pale blue, lavender, with a worn effect on protruding areas, imitating natural wear.
Art Deco requires geometric molding with clear stepped forms. Cornices with zigzags, sun rays, steps. Overlays with symmetrical compositions including circles, triangles, trapezoids. Color contrasting—white with black, gold with dark blue, silver with burgundy.
Frequently Asked Questions
Can polyurethane moldings be used in humid areas?
Yes, polyurethane does not absorb moisture, does not deform, does not swell. Polyurethane molding is ideal for bathrooms, kitchens, pools, saunas. Unlike plaster, which yellows and crumbles in humid environments, polyurethane retains its properties for decades. It is recommended to use moisture-resistant adhesive and paint for installation and finishing.
How to calculate the required amount of crown molding?
Measure the perimeter of the room along the cornice installation line. Add 10 percent for corner cutting and possible defects. If the room perimeter is 20 meters, 22 meters of cornice will be needed. With a standard element length of 2 meters, that's 11 pieces. For complex rooms with bay windows, niches, it is better to draw a plan and calculate each section separately.
Can polyurethane molding be painted in dark colors?
Yes, but with limitations. Polyurethane expands when heated. Dark colors absorb heat, which can cause element deformation in sunlight or near heat sources. For dark painting, choose molding installed on north-facing walls or in shaded areas. Use paints with thermal stabilizers.
How does polyurethane molding differ from polystyrene molding?
Density and strength. Polyurethane has a density of 180-350 kg/m³, polystyrene—15-35 kg/m³. Polyurethane molding is strong, does not crumble, and holds relief clearly. Polystyrene molding is lightweight but fragile, with less defined relief. Polyurethane is more expensive but more durable and of higher quality. For high-traffic areas, choose polyurethane.
Is it necessary to prime the molding before painting?
Mandatory. Primer improves paint adhesion, reduces consumption, and ensures even painting. Use acrylic primer, apply with a brush in one coat, painting all recesses of the relief. Drying time 2-4 hours. After priming, apply paint in two coats.
Can molding be installed on stretch ceilings?
Yes, but with features. The ceiling cornice is attached to the wall, not the ceiling. A gap of 2-3 millimeters is left between the top edge of the cornice and the stretch ceiling to compensate for the thermal expansion of the fabric. For hidden lighting behind the cornice, a mounting strip is installed during the ceiling installation stage.
How long does it take to install molding in a room?
For a standard 20-square-meter room, installing a ceiling cornice takes 3-4 hours for an experienced craftsman. Installing moldings for three wall panels adds 2-3 hours. Installing a rosette—30 minutes. Filling joints, priming, painting in two coats require another 4-6 hours including drying time. Total: two working days.
How to care for polyurethane molding?
Regular dry cleaning—removing dust with a soft brush or dry cloth. Once a month—wet cleaning with a slightly damp cloth, wrung out from excess water. Do not use abrasive cleaning agents that scratch the surface. For painted molding, mild detergents diluted in water are acceptable.
Can molding from different collections be combined?
Yes, if the styles are compatible. Classic profiles from different manufacturers can be combined, matching by width and relief character. Do not mix classic with modern or baroque with minimalism—style dissonance will destroy harmony. If in doubt, consult a designer or order samples for visual comparison.
Can molding be installed independently without experience?
Yes, installing polyurethane molding is accessible for beginners. Precise measurements, careful corner trimming, and proper adhesive application are critical. Study video tutorials, practice on scraps, start with simple elements—a straight cornice without corners. For complex compositions with multiple joints, it's better to hire a professional.
Conclusion: Choosing professionals
Molding is an investment in timeless beauty. High-quality polyurethane molding with clear relief, correct geometry, and professional installation will last for decades, maintaining its original appearance. Cheap alternatives made of low-density polystyrene foam yellow, crumble, and lose their relief after a few years.
Company STAVROS has specialized for over twenty years in the production and supply of decorative interior elements, including a full range of polyurethane molding. The catalog includes hundreds of items—cornices from compact 50 millimeters to monumental 300 millimeters, rosettes with diameters from 200 to 1500 millimeters, moldings, pilasters, columns, overlays, consoles, corner elements. Each product is made from polyurethane with a density of 250-350 kg/m³, ensuring strength and clarity of relief.
STAVROS offers molding in various stylistic directions—classical, Baroque, neoclassical, Art Nouveau, contemporary minimalism, Art Deco. This allows selecting elements for any interior, from formal living rooms to laconic bedrooms. The possibility of custom manufacturing based on client or designer sketches opens up space for exclusive solutions.
Additionally, STAVROS produces wooden decor—baguettes, moldings, baseboards, cornices, overlays made of solid oak and beech. This allows creating harmonious compositions that combine the lightness of polyurethane molding and the warmth of natural wood. An integrated approach—molding plus wood from a single manufacturer—guarantees stylistic unity, compatibility of proportions, and high execution quality.
STAVROS works with both professionals—designers, architects, construction companies—and private clients creating their interiors independently. Technical support, consultations on element selection, calculation of required quantities, and installation recommendations are part of the standard service. Delivery across all of Russia ensures product accessibility regardless of geography.
Choosing STAVROS products means choosing the tradition of classical decor, realized with modern materials and technologies. This isBuy moldingswhich means investing in beauty, durability, and professional quality. It is the choice of those who understand that true luxury lies not in price, but in flawless execution, harmony of proportions, and the eternal relevance of classical forms.


