Article Contents:
- Ceiling medallion for a chandelier: what it's for and how it works
- Visual integration of lighting
- Scaling and proportions
- Functional Advantages
- Ceiling decor: cornices, moldings, and comprehensive solutions
- Ceiling cornice: the boundary between two worlds
- Moldings and decorative ceiling articulation
- Coffers: architectural depth
- Materials: polyurethane as the optimal solution
- Advantages of polyurethane molding
- Relief quality and detailing
- Ecological Safety
- Choosing a medallion: size, style, ornamentation
- Size determination
- Styling and ornament
- Color solution
- Installation: step-by-step technology
- Surface Preparation
- Cutting Elements
- Applying adhesive and installation
- Sealing Joints and Final Finishing
- Combining with lighting: technical nuances
- Running wiring through a medallion
- Thermal conditions and fire safety
- Built-in medallion lighting
- Stylistic scenarios for ceiling decoration
- Classical interior: the nobility of restraint
- Technological aspects of creating ceiling decoration
- Modern style: minimalism with a hint
- Eclecticism: bold combinations
- Frequently Asked Questions
- Can moldings be installed on a suspended ceiling?
- What adhesive to use for installation?
- How to Calculate the Required Amount of Material?
- Is It Necessary to Prime Moldings Before Painting?
- How to Care for Ceiling Molding?
- Can molding be removed and reused?
- Which molding is better — polyurethane or plaster?
- How does molding affect the price of an apartment when selling?
- How long does it take to decorate a ceiling with molding?
- Can Polyurethane and Plaster Molding Be Combined?
- What mistakes are most commonly made during installation?
- STAVROS Company: your partner in creating perfect ceilings
The ceiling is the fifth wall of a room, which is most often ignored when decorating an interior. Yet, it holds immense potential for creating impressive decorative compositions. When you decidebuy ceiling molding for chandeliersandBuy ceiling molding, you open the doors to a world where lighting becomes an architectural event, and an ordinary chandelier becomes the center of attention.
Properly decorating the ceiling around a light fixture changes the perception of the entire room. The space gains vertical dynamics, the gaze is drawn upward, and the room appears taller and more majestic. A decorative ceiling medallion for a chandelier is not just an ornament: it is a functional element that conceals mounting hardware, visually enlarges the light fixture, and creates a harmonious transition from the ceiling plane to the volume of the lighting fixture.


Ceiling medallion for a chandelier: what it's for and how it works
Many perceive a ceiling medallion as an unnecessary extravagance, an attribute exclusive to palace interiors. This is a misconception. Even in modestly sized apartments, a properly chosen medallion solves a multitude of practical and aesthetic tasks.


Visual integration of lighting
Imagine a medium-sized chandelier on a perfectly smooth white ceiling. It hangs in a void, like a randomly attached object with no connection to the surrounding space. The mounting plate is visible, wires are sticking out, the overall impression is one of sloppiness and incompleteness.
Now imagine the same chandelier, framed by an elegant ceiling rosette with a diameter of 60-80 centimeters featuring a floral ornament. The rosette creates a visual base from which the chandelier seems to grow organically. Mounting parts are hidden in the central medallion, wires are concealed, everything looks thoughtful and professional.
The rosette acts as an architectural anchor. It ties the light fixture to the ceiling plane, creating the illusion that the chandelier is not a random element, but an integral part of the architectural composition. This is especially important for heavy multi-arm chandeliers, which without a rosette appear too massive and oppressive.
Our factory also produces:


Large-scale decorative elements create a sense of monumentality and solidity. Wide planks, massive beams, and large carved details are suitable for large buildings with expressive architecture. However, it is important not to overdo it — excessively large elements may overwhelm the space.
Designers know the secret: the size of an object is perceived not absolutely, but relative to its surroundings. A small chandelier against a large rosette appears more significant than the same chandelier on an empty ceiling. The rosette creates a visual context that increases the perceived scale of the light fixture.
Conversely: an excessively large chandelier that threatens to overwhelm the interior with its size looks more harmonious against an even larger rosette. The rosette takes on part of the visual weight, distributing it over a more extensive area of the ceiling.
Designer rule: the diameter of the rosette should be 120-150% of the diameter of the widest part of the chandelier. For a chandelier with a diameter of 60 cm, a rosette of 70-90 cm is optimal. For a compact 40 cm light fixture, a rosette of 50-60 cm is suitable. This ratio creates visual balance without excessive theatricality.
Get Consultation
Functional Advantages
Behind the aesthetics lies practicality. A ceiling rosette protects the area around the mounting assembly from dirt. Over time, a dark halo forms around the chandelier—traces of dust settling in the rising currents of heated air from the lamps. The rosette masks these stains, especially if painted in a contrasting color or has a patinated finish.
When replacing a chandelier, the rosette hides traces of the old mounting. Often, the new light fixture has a different configuration of the mounting plate, leaving holes from previous fasteners visible. A rosette of sufficient diameter covers the entire problematic area, eliminating the need to spackle and repaint the ceiling.
In old houses with uneven ceilings, the rosette masks surface defects around the hanging point. Cracks, unevenness, stains—all are hidden behind the decorative element, creating the illusion of a perfectly smooth ceiling.
Ceiling decor: cornices, moldings, and complex solutions
The potential of ceiling decor is not limited to a single rosette. To create a trulya beautiful stucco ceiling, it is necessary to think comprehensively, building a system of decorative elements that work together.
Ceiling cornice: the boundary of two worlds
A ceiling cornice (cove, baseboard) is a decorative molding that runs along the perimeter of a room at the junction of the ceiling and walls. Functionally, it conceals the technological seam that is always present in this zone due to thermal expansion of materials and installation features.
But the aesthetic role of the cornice is far more important. It creates an architectural frame for the ceiling, turning it into an independent decorative element. A ceiling without a cornice is simply the room's lid. A ceiling with a cornice is an architectural plane that has boundaries, form, and significance.
The width of the cornice affects the perception of the room's height. A wide cornice (12-20 cm) visually lowers the ceiling, making the room more intimate and cozy. This is good for high rooms (from 3 meters), where a more intimate atmosphere is desired. A narrow cornice (5-8 cm) practically does not affect the perception of height, leaving the room airy.
The profile of the cornice sets the stylistic tone of the interior. A classic profile with acanthus and meander ornaments refers to antiquity. A simple rectangular profile with minimal relief suits modern interiors. A Baroque cornice with lush swirls and floral motifs creates an atmosphere of luxury.
Moldings and decorative division of the ceiling
Moldings are narrow decorative strips used to create geometric compositions on the ceiling. From moldings, rectangles, squares, ovals, circles—any shapes that divide the ceiling into zones—are formed.
Why is this needed? A large, smooth ceiling is visually heavy and monotonous. The eye has nothing to catch onto, the gaze slides over emptiness. Decorative division creates structure, rhythm, interest. The ceiling becomes an active participant in the interior composition.
A classic technique is creating a central medallion around the chandelier. A circle or rectangle is formed from moldings, inside which the ceiling rosette and chandelier are placed. This highlights the lighting zone as the main, focal point of the ceiling.
A more complex option is a system of concentric frames that run from the central rosette to the perimeter of the ceiling. This creates the effect of a recessed vault, visually increasing the height of the room. This looks especially impressive when the frames are painted in different shades of the same color (a gradient effect from dark to light).
In rectangular rooms, moldings are used to create a geometric grid: the ceiling is divided into 4-9 rectangles, with a decorative rosette or ornamental overlay in the center of each. This is a technique from classical palace interiors that emphasizes the monumentality and status of the space.
Coffers: architectural depth
Coffers are recessed panels on the ceiling, framed by massive beams or wide moldings. Historically, coffers served a structural purpose (lightening the weight of stone vaults), but in modern interiors, this is a purely decorative technique.
A coffered ceiling looks expensive and complex. It creates a play of light and shadow, adds volume, and forms a sense of height even in rooms with standard 2.7-2.8 meter ceilings. The secret is that the eye perceives not absolute height, but visual complexity: a complex ceiling seems higher than a simple one.
Modern coffers are created not from wood or stone, but from lightweight polyurethane moldings. This radically simplifies installation and reduces the load on the floor slabs.Buy ceiling mouldingscan be found in ready-made kits for forming a coffered grid—the manufacturer offers elements of precisely calculated sizes with corner joining parts.
Inside each coffer, you can place a decorative overlay, create a contrasting color scheme (for example, the interior of the coffer in deep blue, and the frame in white), or install spot lighting. This turns the ceiling into the main decorative element of the interior.
Materials: Polyurethane as the Optimal Solution
Traditionally, decorative molding was made from plaster or wood. It is beautiful but impractical: heavy weight, difficult installation, fragility, and lack of moisture resistance. Modern technology offers an alternative—high-quality polyurethane, which eliminates the drawbacks of traditional materials while preserving all their aesthetic merits.
Advantages of Polyurethane Molded Decoration
Weight is a critical parameter for ceiling decor. An 80 cm diameter plaster rosette weighs 8-12 kg, requires powerful fasteners, and risks collapsing if poorly installed. A polyurethane rosette of similar size weighs 800-1200 grams—10 times lighter. It can be securely fastened with ordinary adhesive without additional anchors.
Ease of installation—polyurethane can be cut with a regular handsaw, glued with a special compound (like liquid nails), and requires no special skills. Installing a ceiling rosette takes 20-30 minutes; a cornice around a 4×5 meter room is mounted in 2-3 hours. Plaster molding requires a professional team and several days of work.
Moisture resistance—polyurethane is completely inert to water. It can be installed in bathrooms, kitchens, and pool areas. Plaster deteriorates under such conditions, while wood warps and rots.
Durability—high-quality polyurethane lasts for decades without losing shape, relief, or strength. It does not crack (unlike plaster), does not dry out (unlike wood), and does not deform with temperature fluctuations.
Paintability—polyurethane can be easily painted with any paints (acrylic, oil, alkyd), accepts patination, gilding, and any decorative techniques. The surface can be repainted multiple times without prior preparation.
Quality of relief and detailing
Skeptics claim that polyurethane is inferior to plaster in relief clarity. This was true for early generations of polyurethane molding, but modern pressure casting technology provides detailing indistinguishable from plaster counterparts.
Good polyurethane has a dense structure without pores, a smooth surface without cavities, and clear relief with fine detailing of ornamentation. Acanthus leaves have veins, volute scrolls have thin edges, and rosettes have deep shadows in the center of the composition.
European polyurethane (German, Italian) surpasses Asian polyurethane in material quality and casting precision. This affects durability and appearance. Therefore, when choosing, it is important to pay attention to the origin of the raw materials and the manufacturer's production technologies.
Oak skirting boards are an indispensable element of classic interior styles. In the English style, oak skirting boards with rich carving emphasize the aristocracy and solidity of the space. Dark wood tones harmonize beautifully with traditional materials — natural stone, leather, bronze.
Modern polyurethane is an environmentally neutral material. It does not emit harmful substances, has no odor, and is hypoallergenic. It is certified for use in residential spaces, including children's rooms and bedrooms.
The material does not support combustion (flammability class G1-G2) and does not release toxic gases when heated. This is important for elements located near light fixtures where heating from lamps is possible.
Bio-resistance—polyurethane is not attractive to mold, fungi, insects, or rodents. Unlike wood, it does not become food for pests and does not require antiseptic treatment.
Choosing a rosette: size, style, ornamentation
Manufacturers' catalogs offer hundreds of ceiling rosette models. How to choose the one that will perfectly fit your interior?
Determining size
The size of the rosette is determined by three factors: the size of the chandelier, the ceiling height, and the room area.
For a chandelier with a diameter of 40-50 cm (standard for rooms of 12-18 sq.m), a rosette with a diameter of 50-70 cm is optimal. For a large chandelier of 60-80 cm (living rooms of 25-35 sq.m), a rosette of 80-100 cm is needed. For compact spotlights, a rosette of 30-40 cm is sufficient.
Ceiling height affects the permissible rosette size. With ceilings of 2.5-2.7 meters, large rosettes (over 80 cm) visually weigh down and reduce space. It is better to choose compact models of 50-70 cm. With high ceilings of 3-3.5 meters and above, small rosettes get lost; large ones of 80-120 cm are needed.
Room area dictates the scale of decor. In a small bedroom of 12 sq.m, a large rosette looks absurd. In a spacious living room of 40 sq.m, a compact rosette goes unnoticed. Proportionality is the key to harmony.
Stylistics and ornament
Rosettes vary in ornamentation style: classical, Baroque, Art Deco, Modernist, minimalist.
Classical rosettes use antique motifs: acanthus, meanders, laurel wreaths, rosettes with concentric circles. This is a universal choice for interiors in classical, neoclassical, and English styles. They look noble, restrained, and never go out of fashion.
Baroque rosettes abound in scrolls, lush floral compositions, putti (baby angels), and grape clusters. These are for palace-style interiors where demonstrative luxury is important. They require appropriate surroundings—rich furniture, heavy curtains, gilding.
Art Deco rosettes operate with geometry: zigzags, rays, stepped forms, stylized solar symbols. Suitable for interiors of the 1920s-1930s or modern eclectic spaces where graphic quality and rhythm are valued.
Modernist rosettes have smooth biomorphic forms, asymmetrical compositions, and stylized plants with long curved stems. These are for interiors in the Art Nouveau style, where the fluidity of lines and organic forms are important.
Minimalist rosettes—simple geometric forms with minimal relief: concentric circles, simple rays. For modern interiors where classical molding serves as a subtle hint at tradition, not its direct quotation.
Color solution
The traditional choice is white. A white rosette on a white ceiling creates an elegant play of light and shadow; the relief is revealed through volume, not color. This is a fail-safe solution for any interior.
Contrast coloring—a rosette in a color different from the ceiling. For example, a gold rosette on a white ceiling (a classic of palace interiors), dark gray on light gray (modern graphics), colored on a neutral background (eclecticism). Contrast enhances the decorative effect, making the rosette the main accent of the ceiling.
Patination—a technique where contrasting paint (usually gold, silver, bronze) is applied to the recesses of the ornament. This emphasizes the depth of the relief, creating an effect of antiquity and nobility. A white rosette with gold patina—a classic of classics.
The stone or metal effect is achieved with special paints containing corresponding pigments. A rosette can appear as if carved from marble, cast from bronze, or forged from iron—while physically remaining lightweight polyurethane.
Installation: step-by-step technology
Installing a ceiling rosette and cornices does not require professional skills. Anyone who can handle tools can manage it by following the correct technique.
Surface preparation
The ceiling must be clean, dry, and sturdy. Peeling paint, crumbling plaster—all of this must be removed. The surface is degreased (can be wiped with alcohol or acetone), which improves the adhesive's bond.
If the ceiling is uneven, it is advisable to level the rosette installation area with filler. The rosette has a rigid shape and does not follow the surface curvature. On an uneven ceiling, gaps will be visible along the rosette's edge, through which the ceiling will show.
Marking is a key stage. For the rosette, the exact center of the ceiling is determined (intersection of the room's diagonals). For the cornice, a perimeter line is marked at the required distance from the corner (usually along the cornice's top edge). Use a laser level or water level—accuracy is important.
Cutting elements
Ceiling cornice is sold in planks 2-2.4 meters long. For a room, planks need to be cut according to wall lengths. Cutting is done with a fine-toothed saw (for metal) or a miter saw.
Cornice corners are joined at a 45-degree angle (for rectangular rooms). A precise miter cut is critical for a neat joint. Use a miter box (a tool for cutting at a set angle) or a miter saw with a rotating table.
The rosette is usually installed whole without cutting. But if electrical wiring needs to pass through the rosette's center, a hole of the required diameter (usually 3-5 cm) is cut in the middle. Cutting is conveniently done with a utility knife or a narrow saw.
Applying Adhesive and Installation
Special polyurethane adhesive is used (acrylic adhesive like 'liquid nails' or two-component polyurethane adhesive). The adhesive is applied in a zigzag or dots pattern along the contour of the element's back side at 5-10 cm intervals.
The element is applied to the ceiling according to the markings and pressed with even force. It is important not to shift the element after pressing—this disrupts the adhesive bond. Press the rosette from the center to the edges, squeezing out air and excess adhesive.
Fixation until the adhesive sets (15-30 minutes)—props are used (for cornice), painter's tape (for rosette). After setting, the fixatives are removed; the adhesive reaches full strength in 24 hours.
Joint sealing and final finishing
Joints between cornice elements, gaps between the rosette and ceiling are sealed with acrylic sealant (white or paintable). Sealant is applied from a gun in a thin strip, smoothed with a wet finger or spatula.
After the sealant dries (4-6 hours), final painting is done. Elements are painted with water-based acrylic paint in 1-2 coats. Use a roller for smooth surfaces, a brush—for working into recesses of the ornament.
If patina is desired, first apply the base color (usually white), then a patinating compound (gold, silver, bronze paint) is rubbed into the recesses with a brush. Excess is wiped off with a cloth, leaving patina only in the recesses.
Combination with lighting: technical nuances
A decorative rosette and a lighting fixture should work as a pair. This requires considering the technical nuances of lighting installation.
Running wiring through the rosette
Most rosettes have a central through-hole 5-10 cm in diameter. This is sufficient for running electrical wire and installing a chandelier mounting plate.
If the rosette is installed on an already mounted chandelier, proceed as follows: the chandelier is temporarily removed (only the mounting plate and wire outlet remain), the rosette with a pre-cut central hole is installed on the ceiling, the wire is routed through this hole, the chandelier is re-hung. The chandelier's decorative cap conceals the rosette's central part with the mounting plate.
If installation is done from scratch, first install the rosette, then route the wire through its center, mount the plate, hang the chandelier. This is simpler but requires planning the electrical work during the renovation stage.
Thermal conditions and fire safety
Incandescent and halogen lamps get very hot. If a chandelier hangs close to the ceiling, the heat can damage the molding (polyurethane softens at temperatures above 80-100°C).
For such cases, maintain distance: at least 20-25 cm from lamps to the ceiling (and rosette). If the chandelier design does not allow this, switch to LED lamps—they hardly heat up.
Modern LED chandeliers are safe in this regard. LED elements generate minimal heat, allowing the rosette to be mounted flush with the light fixture without risks.
Built-in rosette lighting
An impressive technique—built-in lighting inside the rosette. An LED strip is mounted behind the rosette (between the rosette and ceiling), with its light passing through the rosette's translucent center or special slots in the ornament.
This creates an effect of the rosette glowing from within, especially impressive in the evening. The ornament is illuminated, shadows deepen, and the rosette appears more three-dimensional and dramatic.
Implementation requires a rosette with a corresponding design (manufacturers offer special models for lighting) and an LED strip with a power supply hidden in the ceiling void or a wall niche.
Stylistic scenarios for ceiling design
The decorative solution for the ceiling depends on the overall interior style. Let's consider several popular options.
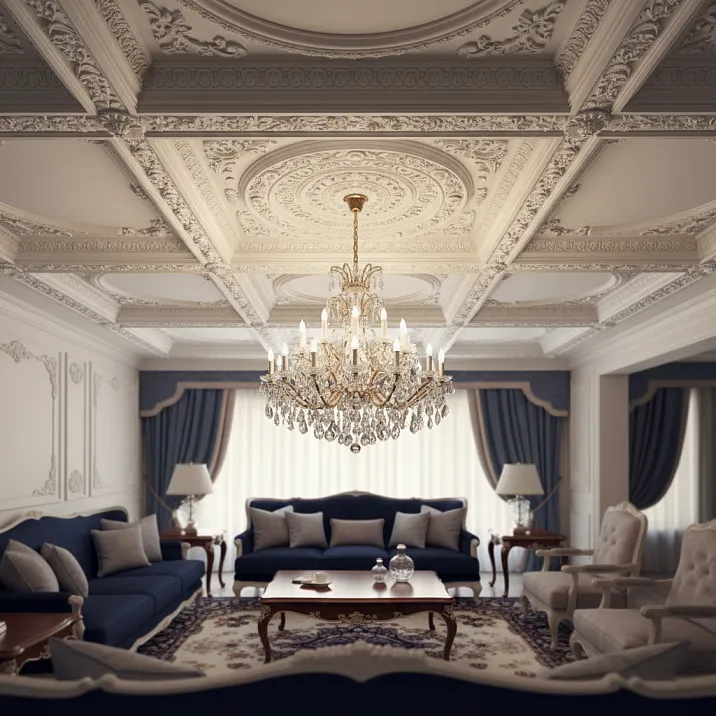
Classical interior: the nobility of restraint
Classicism employs antique forms. The ceiling is decorated with a wide cornice (10-15 cm) featuring an acanthus or meander ornament, a medium-sized central rosette (60-80 cm) with floral motifs, and possibly moldings forming a rectangular frame around the rosette.
Color scheme: white on white (monochrome with chiaroscuro play) or white with gold patina (for more formal interiors). The chandelier is a classic multi-arm one with crystal pendants or fabric shades.
Room 20 sq.m, ceiling 2.8 m: 12 cm wide cornice around the perimeter (cost 4000-6000 rubles per room), 70 cm diameter rosette (2500-4000 rubles), molding for the frame around the rosette (1500-2000 rubles), glue and sealant (500 rubles), paint (1000 rubles). Total: 9500-14000 rubles for materials plus 5000-8000 for installation (or DIY). Result: an elegant classical ceiling.
Baroque: theatricality and opulence
Baroque style requires an excess of decoration. The ceiling is decorated with a wide cornice with rich ornamentation (15-20 cm), a large rosette (80-120 cm) with lavish stucco, and many additional elements (corner appliqués, garlands, cartouches).
Color: white with abundant gold patina or fully gilded ceiling decor. The chandelier is multi-arm with massive crystal pendants and a gilded frame.
Baroque requires large budgets: for a 25 sq.m room, 30000-50000 rubles may be spent on decorative materials alone. But the result is impressive — the ceiling becomes the main element of the interior, to which all other components are subordinated.
Modern style: minimalism with a hint
Modern interiors do not completely abandon stucco but use it in measured doses. A simple-profile cornice (narrow, 5-7 cm, smooth or with minimal relief), a compact rosette of laconic design (40-50 cm, geometric, without excessive ornamentation).
Color: monochrome (matching the ceiling) or contrasting (dark decor on a light ceiling). The chandelier is of modern design (geometric shapes, metal, glass).
Budget is minimal: 5000-8000 rubles for materials for an 18 sq.m room. But the effect is significant — the ceiling gains structure and completeness while remaining laconic.
Eclecticism: bold combinations
Eclectic interiors mix elements from different eras. Unexpected solutions are possible here: a Baroque rosette in a minimalist space, a classical cornice in an industrial loft, gilded stucco in a bright Scandinavian room.
The key to success is balance. One bright decorative element against a restrained background works as an accent. Many heterogeneous elements create chaos. Choose one thing: either an impressive rosette with a simple cornice, or a rich cornice with a compact rosette.
Color experiments are welcome: a colored rosette on a neutral ceiling, a cornice in a contrasting color, patination in unusual shades (copper, silver, turquoise). The chandelier can be anything — from vintage to ultra-modern.
Frequently Asked Questions
Yes, there are special lightweight polyurethane rosettes for stretch ceilings that are glued directly onto the fabric with a special adhesive that does not damage the material. An alternative option is installation
Yes, but with limitations. Stucco is not glued onto a stretch fabric — it does not hold. Instead, embedded elements are used: before stretching the fabric, wooden or plastic platforms are attached to the base ceiling, to which the stucco is screwed through the fabric after stretching. This requires planning at the stage of stretch ceiling installation.
Alternative — lightweight polyurethane rosettes on double-sided tape (they hold on stretch fabric if the rosette is very light, up to 300-400 grams) or rosettes that are glued not to the ceiling but to the chandelier's mounting plate (they hang from the chandelier, not the ceiling).
Which adhesive to use for installation?
Optimally — special adhesives for polyurethane: acrylic adhesives like Tytan, Moment Montazh, Quelyd or two-component polyurethane compounds. They provide reliable bonding, are elastic (compensate for thermal deformations), and do not damage polyurethane.
Do not use adhesives based on organic solvents (like '88') — they corrode polyurethane. Do not use regular PVA — insufficient strength for ceiling mounting.
How to calculate the required amount of material?
For cornice: measure the room's perimeter (sum of all wall lengths), add 10% for trimming and possible errors. If the perimeter is 18 meters, buy 20 meters of cornice (usually 8-10 planks of 2-2.4 meters each).
For rosette: one piece of the required diameter. Buy with a slight size margin — better a rosette slightly larger than slightly smaller.
For moldings (if creating frames or coffers): draw a scaled ceiling diagram, sketch the planned frames, measure their total length, add 15% for corner trimming.
Is it necessary to prime the molding before painting?
Quality polyurethane stucco is supplied primed — it can be painted immediately. If there is no primer (cheap items) or the primer is damaged during transportation, prime with one coat of acrylic primer.
Primer improves paint adhesion, evens out surface absorbency, reduces paint consumption. Use primer from the same manufacturer as the paint.
How to care for ceiling plasterwork?
Minimal care. Dust is removed with a dry soft cloth, brush, or vacuum with a brush attachment. Clean ornament recesses with a narrow brush.
If the stucco gets dirty (kitchen, where grease settles), wash with a damp sponge and mild detergent (soap solution). Do not use abrasives or aggressive chemicals.
Painted stucco can be repainted multiple times. Simply apply a new coat of paint — no preliminary preparation is required (if the old paint holds firmly).
Can stucco be removed and reused?
Theoretically yes, practically difficult. During removal, stucco is often damaged (breaks, cracks), especially if the adhesive is high-quality and holds firmly.
If removal is needed (e.g., when moving), carefully cut the adhesive layer with a thin knife, slowly separating the element from the ceiling. Chances of keeping the element intact are higher for large parts (rosettes, long cornice planks) and lower for small and thin ones.
Which molding is better — polyurethane or plaster?
For ceiling decor, polyurethane is preferable based on its overall characteristics: lighter (10 times), easier installation, moisture-resistant, more durable, cheaper. Plaster only wins in eco-friendliness (natural material) and prestige (traditional palace material).
If the budget is unlimited and authenticity is important (restoration of a historical interior), choose plaster. For modern projects, high-quality European-made polyurethane is optimal.
How does molding affect the cost of an apartment when selling?
Quality molding increases interior appeal and can raise the apartment's value by 3-7% (for the above-average segment). Buyers perceive molding as a sign of status and quality renovation.
But the effect depends on execution: harmonious, well-installed, and painted molding adds value; cheap, crooked, inappropriate molding subtracts value (perceived as poor taste that will need redoing).
How long does it take to decorate a ceiling with molding?
For DIY installation: preparation and marking (2-3 hours), installing cornice around the room perimeter (3-4 hours), installing rosette (1 hour), sealing joints (1 hour), painting (2-3 hours including drying between coats). Total: 2 days including glue and paint drying time.
A professional crew will complete everything in 1 day (for a standard room). Complex projects with coffers, multiple elements, patination may take 2-3 days.
Can polyurethane and gypsum plasterwork be combined?
Technically yes, aesthetically undesirable. Materials have different surface textures, slightly different white shades (even when painted with the same paint), different reactions to lighting. Adjacent elements made of different materials look heterogeneous.
If you still combine them (e.g., handmade plaster rosette and polyurethane cornice), separate them spatially: rosette in the center, cornice around the perimeter — they don't directly neighbor, the material difference is less noticeable.
What mistakes are most commonly made during installation?
Wrong size selection (too large or small rosette for the room), crooked marking (rosette off-center, cornice uneven around perimeter), poor cornice corner cutting (gaps in corners), insufficient glue amount (elements fall off), excess glue (squeezes out, stains surface), painting before sealing joints (seams visible), using unsuitable glue (damages polyurethane or doesn't hold).
Main recommendation: don't rush, mark carefully, use quality materials and tools, follow the technology.
Company STAVROS: your partner in creating perfect ceilings
When it comes to high-quality ceiling molding that will transform your interior and last for decades, the name STAVROS is synonymous with reliability and impeccable quality. For over twenty years, STAVROS has been producing European-level polyurethane decorative molding, combining classical forms with modern technology.
The STAVROS production base is located in St. Petersburg and equipped with high-precision equipment from European manufacturers. This achieves relief clarity comparable to handmade plaster molding while retaining all polyurethane advantages: lightness, moisture resistance, durability.
The STAVROS catalog features over 200 modelsceiling rosewith diameters from 30 to 150 cm, dozens of ceiling cornice options from 5 to 25 cm wide, moldings for creating coffers and decorative frames. Each series is developed by professional designers considering classical proportions and modern interior requirements.
A STAVROS feature is using high-quality two-component polyurethane from German production. This material has increased density, no pores or cavities, ensures perfect surface smoothness and clarity of the smallest ornament details. Factory primer is applied under factory conditions and ensures perfect adhesion of any paint materials.
The STAVROS logistics service delivers products throughout Russia. Special packaging prevents transport damage — each element is wrapped in protective film and placed in a rigid box with fixators.
Customer technical support includes free consultations on element selection, calculation of required material quantities, recommendations for installation and finishing. STAVROS specialists will help choose the optimal solution for your project considering interior style, room dimensions, and budget.
The STAVROS design studio offers services for developing individual ceiling design projects. Designers create 3D visualizations allowing you to see the result before work begins, select perfect element combinations, adjust the concept.
Choosing STAVROS, you get not just decorative elements, but a comprehensive solution for creatinga beautiful ceiling with moldingthat will become an adornment of your home for many years. Start transforming your interior with the ceiling molding catalog — and discover limitless possibilities for decorative space design overhead.
The ceiling is the final frontier of interior design that many overlook, focusing on walls, floors, and furniture. But it's the ceiling that has the greatest potential for creating a 'wow effect': it's fully visible from any point in the room, not blocked by furniture, works as a large canvas for decorative compositions. When you decide to buy ceiling molding and a chandelier rosette, you're investing in a transformation that changes the character of the entire space. Your home deserves a ceiling that inspires looking upward.