Article Contents:
- What Counts as Arched Doorway Trim?
- A casing, a border, and a wall frame are not interchangeable
- The arch begins at the springline
- Semicircular arches
- Segmental and elliptical arches
- Rounded corners on an otherwise rectangular opening
- Strategy 1: A clean arch with framed wall sections
- Strategy 2: A traditional arch with purpose-made curved casing
- Strategy 3: Architectural portal with straight pilasters and a top accent
- When solid wood is the strongest design choice
- When rigid polyurethane molding makes sense
- Where MDF belongs—and where it does not
- Coordinate trim width with the scale of the room
- The semicircle formula and what it does not tell you
- Worked example: one 36-inch arched opening
- For a segmental arch, start with the rise
- Prepare the wall and locate the finished line
- Attach wood and polyurethane with material-specific methods
- Finish at the springline deliberately
- Option A: Painted plaster or drywall curve
- Option B: Radius-specific flexible casing
- Option C: Custom curved woodwork
- Option D: Segmented decorative construction
- The crown or keystone as a controlled accent
- Where trim meets the floor or baseboard
- 1. Transitional dining room
- 2. Minimalist kitchen-to-breakfast nook passage
- 3. Traditional entry with a strong threshold
- Paint-grade molding and wall color
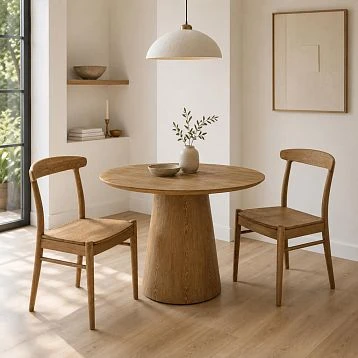
- Natural oak or beech tones
- Decorative lighting without unsafe improvisation
- Questions to ask before approving a substitute
- Can ordinary polyurethane molding bend around an arch?
- What is the best molding for a small arched doorway?
- How much trim do I need for a 36-inch semicircular opening?
- Can I use wooden molding for an arched door frame?
- Do I need a carpenter for an arched opening?
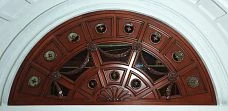
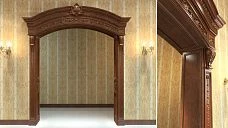
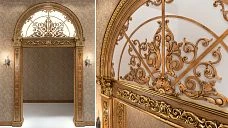
An arched doorway can make an ordinary passage feel intentional, but the trim around it has to follow the opening rather than fight it. The most reliable approach is to decide which parts of the design are straight, which actually follow a curve, and which are decorative details on the flat wall beside the arch. Choose a profile for each job, record the arch geometry, and dry-fit the design before applying adhesive or driving fasteners. That is the practical starting point for arched doorway trim, whether the house is a compact remodel, a traditional home with wide passageways, or a modern interior with a softly rounded opening.
This guide adapts the STAVROS article on decorating arches with moldings for American homeowners, remodelers, and interior designers. It covers wood molding, polyurethane molding, coordinated wall trim, proportion, measurement, installation, finishes, and realistic purchasing decisions. It also explains an essential limitation: a straight decorative strip is not automatically a flexible arch molding. A genuinely curved opening may require a manufacturer-approved flexible profile, accurately fabricated curved woodwork, or individually designed segments. The ordinary straight profiles mentioned here are useful for straight jambs, flanking wall panels, and architectural accents; their suitability for the radius itself must be established separately.
What Counts as Arched Doorway Trim?
The phrase can describe several different components. The jamb is the inner surface of the opening, the casing frames its perimeter on the wall, and the return is a detail that ends or transitions a projecting piece of trim. The upper curve may be a true semicircle, a shallow segmental arch, an elliptical opening, or a manufactured profile with a nearly flat top and rounded shoulders. Decorative wall molding can sit a few inches outside the casing without touching the curved edge. That distinction matters: it often creates the look a homeowner wants with considerably less specialized fabrication.




A casing, a border, and a wall frame are not interchangeable
A structural or functional casing conceals the joint between a finished wall and the door opening. Its width, projection, and attachment method should suit that joint. A narrow molding laid on the wall is usually an applied decorative line, not necessarily a substitute for a full casing. A larger frame surrounding an arch belongs to the wall design and needs clearance from light switches, furniture, door swings, and baseboards. When planning wall trim molding, draw all three outlines in different colors. If the design becomes crowded at the shoulders of the arch, simplify it before ordering material.
An open passage without a hinged door may give you more latitude than an operable doorway. Where there is a door, keep required clearances and avoid interfering with hinges, stops, weatherstripping, or the sweep of the door. In hallways, also check whether new projecting trim would narrow an already tight circulation path. A decorative addition should not create a snag point at shoulder height.
Наша фабрика также производит:
Смотреть весь Каталог продукции
The arch begins at the springline
The springline is the imaginary horizontal line where the curved portion starts. Below it, most traditional archways have two straight sides. Those sides are a natural location for conventional straight wood molding or polyurethane profiles. Above the springline, the centerline of any trim that truly tracks the curve changes direction continuously. A rigid straight strip cannot make that transition simply because it is thin. Trying to force it often produces a flattened curve, popped joints, or cracked finish.
A useful alternative is a straight rectangular surround with an ornamental centerpiece above the opening. Another is to treat the arched perimeter as a clean painted plaster edge while placing symmetrical wall frames on both sides. Both solutions respect the arch while using standard stock efficiently.
Получить консультацию
Identify the Shape Before Choosing a Profile
A drawing labeled only “arched doorway” is not enough for reliable quantities. Photograph the opening head-on, then note the width at the springline, the rise above that line, the height of each vertical side, and the available wall area outside the opening. In an older house, measure left and right sides independently. A visually symmetrical opening may be out of level, and the finished drywall surface may wander along the curve.
Semicircular arches
For a true semicircle, the rise above the springline is half the opening width. A 36-inch clear opening therefore has an 18-inch nominal inside radius. The curved length measured along that inside edge is approximately 56.55 inches, using the formula π × radius. That figure does not include either vertical side. It also does not automatically equal the length required for a casing centered farther out from the opening. Measure along the planned trim centerline for the best material estimate.
The semicircle is relatively straightforward to draw with a compass or template. It is not necessarily straightforward to fabricate in wood. A continuous wood profile following a consistent 18-inch radius may require specialized curved millwork, while a preformed flexible product must explicitly support that radius and installation environment.
Segmental and elliptical arches
A shallow arch rises much less than half its width. It can look restrained and contemporary, particularly in a kitchen-to-dining-room passage or a long hallway. Its upper edge does not have the same length as a semicircle of equal span. Do not apply the semicircle formula to every rounded opening. For an actual circular segment, you can calculate the radius from half the span and the rise, then determine the arc angle; a full-scale cardboard template is often more useful on site than a calculated number alone.
Elliptical arches are more complex because their curvature changes from the center to the shoulders. Flexible material that works on one part of an ellipse may be stressed more sharply near another. For these openings, make a measured template or capture a detailed profile drawing. Give the supplier the tightest radius and the cross-sectional orientation of the proposed trim, not just the overall width.
Rounded corners on an otherwise rectangular opening
Many newer interiors use rectangular passages with only the top two corners softened. A continuous round-headed casing may be unnecessary. Straight side casing and a straight header can be separated by a finished plaster transition, or made-to-order corner pieces can complete the profile if available. The choice depends on whether the desired effect is a traditional architectural arch or a restrained softened doorway. Select the simplest construction that actually matches the intended appearance.
Three Design Strategies That Work in American Interiors
Before selecting product codes, decide how strongly the doorway should read in the room. Each of the following strategies is viable, but they place the decorative emphasis in different locations. None assumes that a standard straight STAVROS molding bends around an arch.
Strategy 1: A clean arch with framed wall sections
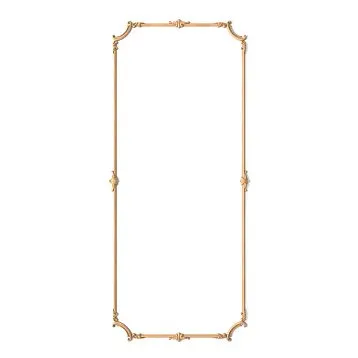
Keep the curved opening itself smooth, paint the inner reveal in the wall color, and add rectangular decorative frames to the flat wall on either side. This is particularly useful when the radius is tight or irregular. The straight sections can use STAVROS polyurethane wall moldings or wood trim, depending on the intended finish and substrate. The wall frames can repeat the spacing used elsewhere in the home, creating continuity without a complicated curved fabrication job.
For a smaller opening, use one tall rectangular frame on each side rather than a crowded collection of narrow rectangles. For a broader opening, match the frame tops and bottoms to architectural features such as the baseboard height and adjacent door headers. Aim for balance between the frame width and the remaining painted wall, not a rigid universal measurement.
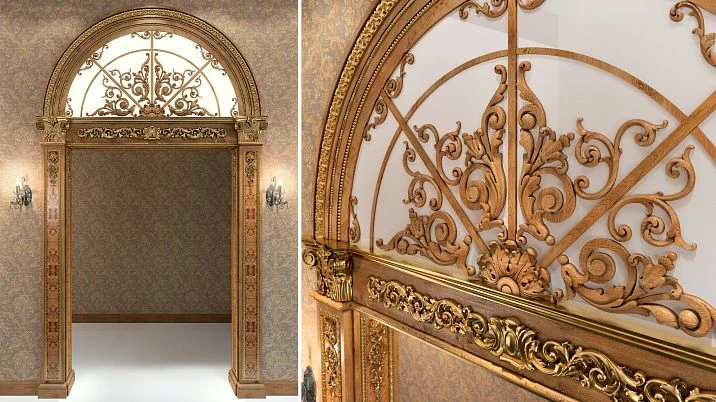
Strategy 2: A traditional arch with purpose-made curved casing
Choose a curved casing fabricated to the verified shape of the opening, then use matching straight stock below the springline. The curved part may be made from approved flexible trim, engineered woodwork, or custom solid-wood segments. A supplier needs the radius, springline dimensions, face width, thickness, and profile drawing to quote an appropriate solution. A large decorative cross-section that looks excellent on a straight jamb may be difficult or impossible to reproduce neatly on a tight radius.
The advantage is a convincing continuous outline. The tradeoff is planning, fabrication, and fitting complexity. Budget extra time for shop drawings and a full-size template. Do not assume a stock product is approved for bending merely because its material name contains “polyurethane.”
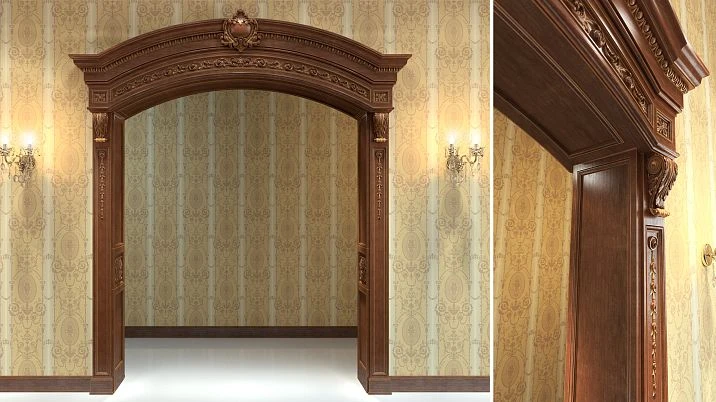
Strategy 3: Architectural portal with straight pilasters and a top accent
Frame the lower and side portions with paired straight vertical elements, then finish the upper wall with a centered decorative motif or simple horizontal composition that does not pretend to follow the arch. This works in neoclassical living rooms, formal dining rooms, and wider openings between public rooms. You can coordinate wooden trim profiles with nearby baseboards and door casings. Keep the applied ornament flat on the wall, with adequate space from the curved opening, rather than attaching projecting pieces over the reveal.
The key is restraint. A heavy horizontal element over a low opening can make the room feel compressed. A slimmer profile with a carefully placed center accent is often more convincing than stacking several unrelated moldings.
Wood, Polyurethane, MDF, and Flexible Trim: Choosing Honestly
Material selection is not simply a ranking from inexpensive to premium. It determines how the molding behaves when cut, finished, joined, and exposed to normal room movement. More importantly, it determines what can be done safely at the radius. Where the job calls for a curved profile, verify the specific manufacturer's limits rather than relying on a category label.
| Material or format | Best role in this project | Main limitation to check |
|---|---|---|
| Solid oak or beech molding | Straight side trim, coordinated natural-wood details, framed wall accents | Standard straight stock will not become a smooth small-radius arch without specialized fabrication |
| Standard rigid polyurethane molding | Straight decorative borders and flat-wall picture frames | Do not assume a conventional rigid stick can be bent along the arch |
| Paint-grade MDF molding | Straight painted trim where the environment and product permit | Sensitive to moisture exposure and not a substitute for radius-specific curved casing |
| Manufacturer-approved flexible trim | Curved casing when its cross-section and minimum radius are compatible | Confirm minimum radius, installation temperature, adhesive, paint system, and orientation |
| Shop-fabricated curved wood or segmented assembly | Custom arches and matching historic profiles | Requires measured drawings, skilled fabrication, and careful joint planning |
When solid wood is the strongest design choice
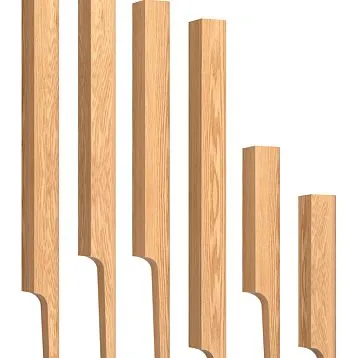
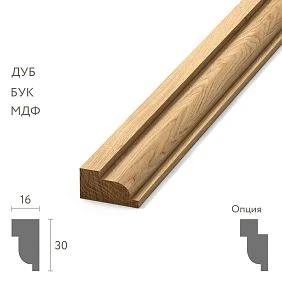
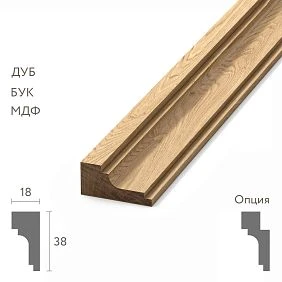
Wood offers visible grain, familiar joinery, and a way to relate an arched opening to existing oak floors, beech cabinetry, or wood door trim. STAVROS lists wooden molding profiles in oak and beech, with particular product variants determining length and finish. A narrow MLD-001 wooden molding has a nominal 10 × 6 mm cross-section (about 0.39 × 0.24 inches). It can be an elegant straight-line accent next to an arched opening; that specification does not imply any approved bending radius.
Choose stain-grade wood when a natural grain appearance is central to the project and the supplied stock supports that finish. For paint-grade work, solid wood is also possible, but it may require careful priming, filling, and paint-compatible caulking. Wood movement should be anticipated at transitions to drywall and to other materials. Keep trim away from persistent moisture or address the building-envelope problem first.
When rigid polyurethane molding makes sense
Polyurethane is helpful where the goal is an applied decorative profile on a flat, stable wall. It can visually coordinate with a curved doorway even if it never touches the curved portion. For example, MLDPU-001 is listed in a 10 × 6 × 2,600 mm format (about 0.39 × 0.24 × 102.36 inches). Use the catalog drawing to inspect the contour, then decide whether that scale suits a nearby wall frame.
Different polyurethane formulations and profiles have different stiffness. There is no reliable rule that says “polyurethane bends.” The straight STAVROS MLDPU profiles referenced in this guide are treated as straight stock. If a curve is required, request explicit suitability information for a different flexible product or arrange a fabricated solution. The distinction prevents wasted purchases and unsafe improvisation.
Where MDF belongs—and where it does not
Paint-grade MDF is common in American interior trim projects because it creates a consistent surface and accepts factory milling. Some STAVROS wooden-molding product pages list MDF as a selectable material for particular lengths, while others list oak or beech. Read the actual SKU configuration. A solid-wood article and an MDF variant are not equivalent products simply because their visible profile looks similar.
Use MDF only within its stated interior service conditions, protect cut ends appropriately, and avoid assuming it can be soaked or kerfed into a smooth arch. In a bath, laundry room, or enclosed but condensation-prone entry, determine the moisture exposure and substrate conditions before choosing the material.
Comparing Actual STAVROS Profiles for the Straight Sections
The product examples below provide real design references, not a promise that any listed item is flexible. Product sizes are expressed in millimeters first because the STAVROS drawings use metric dimensions; rounded inch equivalents help with a U.S. project sketch. Confirm the current size variant and material on the linked listing before ordering.
| STAVROS profile | Material listed | Approximate face × projection | Appropriate straight-line use |
|---|---|---|---|
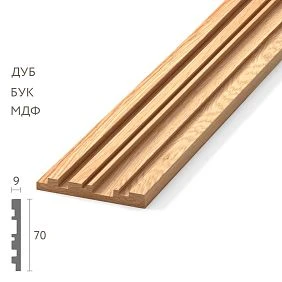
| MLD-001 | Oak, beech; MDF variants shown | 10 × 6 mm / 0.39 × 0.24 in | Fine outline near an arch or small adjacent wall frame |
| MLD-004 | Oak, beech; MDF variants shown | 15 × 8 mm / 0.59 × 0.31 in | Restrained side detail and clean wall geometry |
| MLD-020 | Wood options; check chosen variant | 16 × 11 mm / 0.63 × 0.43 in | Moderately developed straight molding line |
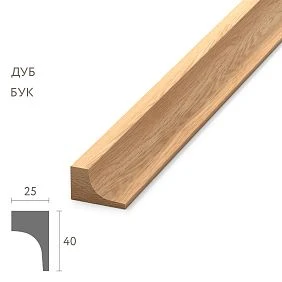
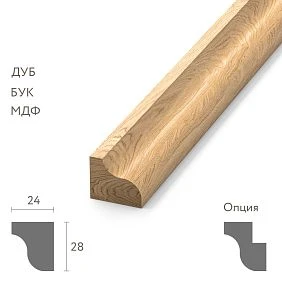
| MLD-024 | Oak or beech | 40 × 25 mm / 1.57 × 0.98 in | Stronger architectural side emphasis where space allows |
| MLDPU-002 | Polyurethane | 22 × 11 mm / 0.87 × 0.43 in | Applied decorative frames on flat wall portions |
| MLDPU-003 | Polyurethane | 35 × 12 mm / 1.38 × 0.47 in | Broad flat-wall framing in larger rooms |
A wide profile needs room to breathe. Wooden molding MLD-024 can make a substantial visual statement on a straight wall return, but using a large projection where a hallway is narrow or an arch shoulder is close to a cabinet can create a collision. Measure projection as carefully as face width. A deeply shaped profile can also throw stronger shadows, which may be attractive in a formal room and distracting beside a minimalist opening.
For a middle-weight decorative line, compare MLD-004 with MLD-020. Their cross-sections differ, so identical face widths do not guarantee the same visual effect. Obtain samples when possible and view them beside the actual opening under the intended lighting.
Coordinate trim width with the scale of the room
In an 8-foot-ceiling hallway, a 3/8-inch accent molding on the flanking wall may be more balanced than a 1-1/2-inch decorative border immediately hugging the curve. A tall living room with high baseboards, a wide opening, and deep window casing can comfortably support a stronger profile. These are design tendencies, not building standards. Use a mock-up: cut a short sample, temporarily tape it to the wall, and stand at the normal viewing distance. If the profile reads like a line in one room and an obstacle in another, trust the room rather than a generic dimension chart.
For profile combinations, use consistent projection hierarchy. Typically one element establishes the main outline while a smaller line adds a secondary rhythm. Mixing three complex profiles around a modest arch can create too many intersecting shadows at the shoulders. If the design requires both wood and polyurethane, place each material where it does its own job and provide a deliberate transition between them.
Measure the Opening and Calculate Curved Length Correctly
Measurements should describe the finished wall, not merely the rough opening hidden behind drywall. Check the interior edge, the proposed trim centerline, and the outer edge of the trim if the profile has appreciable width. Curves that look concentric on paper can be surprisingly uneven in older buildings. Record left and right dimensions separately and verify plumb using a long level or laser.
The semicircle formula and what it does not tell you
For a true half-circle, the curved length at radius r is πr. If the opening is 36 inches wide and the inside curve is a true semicircle, r = 18 inches and the inside arc measures about 56.55 inches. If you plan a decorative line whose centerline lies 1 inch farther out from that inner edge, its radius is approximately 19 inches and the upper half-arc measures about 59.69 inches. That difference of about 3.14 inches is real, even before allowance for joints or offcuts. Make sure you are measuring the line you intend to trim.
A simple length formula is useful for estimating overall scope, but it does not establish that a particular straight stock length can become a curved strip. Fabricated curved components may be priced and supplied by the piece or by a custom radius, while straight side casings can be ordered by stock length. Keep those estimates separate.
Worked example: one 36-inch arched opening
Assume an open passage is 36 inches wide at the springline, the straight vertical run from the chosen lower termination to the springline is 64 inches on each side, and the top is a true semicircle. A one-inch outward offset to the intended trim centerline gives a top arc of about 59.69 inches. The two straight sides total 128 inches, for an overall traced centerline length of approximately 187.69 inches, or 15.64 linear feet. This is a geometry estimate, not a cut list.
If you are using straight trim only on the two 64-inch sides, you need two intact side pieces of at least 64 inches before waste. A 94.49-inch wood stock option might supply one side piece from each of two strips, leaving offcuts for small flat-wall details. The upper 59.69-inch curved portion remains a separate fabrication problem. Do not divide 187.69 by the length of a rigid stick and assume the answer gives you a valid continuous arch casing.
| Measurement | Example result | Use |
|---|---|---|
| Clear arch span | 36 in | Establish nominal inner radius for a semicircle |
| Inner semicircle radius | 18 in | Determine inside arc geometry |
| Intended casing centerline radius | 19 in | Estimate curve length at the chosen trim path |
| Semicircular centerline arc | 59.69 in | Quote a curved component or flexible system |
| Two straight side runs | 128 in total | Plan conventional straight stock |
| Total geometric centerline | 187.69 in / 15.64 ft | Cross-check the overall takeoff, not the cut plan |
For a segmental arch, start with the rise
Let c be half the opening width and h be the rise from springline to the arch crown. For a circular segment, radius R = (c² + h²) / (2h), with matching units. The included angle is 2 × arcsin(c/R) in radians, so the arc length is R multiplied by that angle. For example, a 48-inch-wide opening with a 10-inch rise has c = 24 inches and R = (576 + 100) / 20 = 33.8 inches. The arc angle is about 1.58 radians and the centerline of the opening's circular segment measures about 53.5 inches. Shift the radius and remeasure when the trim lies outside that edge.
The formula assumes the curve is a circular segment. Not every installed arch satisfies that assumption. For an ellipse or an imperfect remodel opening, a full-size template, flexible measuring tape, or digitized contour is more dependable. Ask the fabricator which measurements they require instead of sending one number labeled “radius.”
Plan the Adjacent Wall Composition Before Buying
Draw the opening, wall frames, baseboards, light switches, and furniture on one elevation. Mark the springline and decide whether decorative rectangles should align with it or sit slightly lower. Use painter's tape to test the geometry from both adjoining rooms. A profile such as MLDPU-002 can define a straight applied wall frame, but it does not solve the radius of the arch. Label every line as curved or straight on the drawing.
For two rooms with different wall colors, decide where the transition occurs: at the center of the opening, at the face of the casing, or along a deliberate reveal. A crisp color boundary makes even modest trim look integrated. Avoid a decorative frame that has to squeeze awkwardly behind a switch plate or light fixture; redesign its location instead.
Cutting the Straight Pieces and Preparing the Work Area
Accurate straight cutting remains important even when the curved head is fabricated separately. Create a cut list for each side: mark long points and short points of miters, record the face orientation, and distinguish finished measurements from rough opening dimensions. Wall corners are not always perfectly square, so measure the actual joint angle instead of assuming every cut must be 45 degrees.
Use a fine-tooth blade appropriate to the selected wood, MDF, or polyurethane product. Support the stock close to the cut, make a test joint with offcuts, and follow the saw manufacturer's eye and dust protection instructions. Avoid closing large cutting errors with caulk. When a stock strip is shorter than the intended straight run, specify the splice location instead of hiding an unplanned butt joint in a prominent place.
A nominal 2,400 mm strip is about 94.49 inches; a 2,600 mm strip is about 102.36 inches. Confirm which lengths the chosen variant actually offers and plan individual pieces, not simply total linear feet. These figures describe straight stock only, never a guaranteed method for forming the curved head.
Install Straight Jamb Trim Without Distorting the Arch
The lower straight sections often create most of the architectural effect. Install them carefully before addressing the curve. A crooked vertical line will make an otherwise smooth arch look skewed, and the transition at the springline will draw attention to every small error.
Prepare the wall and locate the finished line
Inspect paint adhesion, loose plaster, damaged drywall, and existing trim. Scrape failing coatings and repair unstable material first. Clean the contact area and allow it to dry. Use a laser or long level to mark the left and right vertical lines; compare their distance from the opening at the top, middle, and bottom. If the opening is visibly irregular, decide whether to maintain a constant offset from the edge or preserve a perfectly plumb architectural line. Either can work, but the drawing must establish the choice.
For a painted surface, check the adhesive maker's recommendation for preparation and cure. Some finishes require scuff-sanding or priming; other systems prohibit certain solvents. Do not install trim over damp, moldy, or moving surfaces and assume the decoration will conceal the underlying problem. Correct the wall condition first.
Attach wood and polyurethane with material-specific methods
Solid-wood casing may use appropriate finish nails or other mechanical fastening into sound framing, often combined with an adhesive when the manufacturer's guidance permits. Locate wall services before fastening, particularly near light switches. Fastener size, spacing, and placement should match the substrate and product dimensions. In hollow or fragile walls, an adhesive-only plan may be inadequate for heavy trim; conversely, exposed fasteners may unnecessarily damage a small decorative polyurethane strip.
For a rigid polyurethane decorative strip on a flat wall, select the mounting adhesive recommended for that exact profile and the actual paint or plaster substrate. Work from the layout marks, hold the piece temporarily as specified, and keep adjacent surfaces clean. For a wider profile such as MLDPU-003, the face can make even a small misalignment more visible. Check level continuously rather than relying on the first pencil line alone.
Finish at the springline deliberately
The meeting point between the vertical trim and the upper arch is a design decision, not merely the place where the saw cut ends. If a purpose-made curved casing continues the profile, its cross-section and projection should match the side legs precisely. If the arch remains plastered without a curved casing, terminate the vertical accent in a clean return or a planned decorative block on the flat wall. Avoid a raw square-cut end where it will catch clothing or look unfinished.
Install any decorative transition block only after verifying that it is an actual compatible item, not a placeholder in the sketch. A small shadow gap can sometimes look more intentional than an improvised join between mismatched materials, but it must be consistent on both sides.
How to Treat the Curved Head Without Forcing Straight Molding
There are four responsible approaches to a curved head: leave the curve smooth and untrimmed; commission a curved component; use flexible molding explicitly rated for the radius; or employ a professionally designed segmented assembly. Each produces a different appearance and requires different tools. Choose deliberately instead of bending a straight stock profile until it appears to fit.
Option A: Painted plaster or drywall curve
A clean arch with no casing around the curved head is often the most modern option. Finish the bead, compound, and paint with care. The edge should appear continuous when viewed under natural side lighting. Keep the vertical decorative elements below the springline or on the flanking wall, so their straight geometry reads as intentional. In a short passage, painting the interior reveal a slightly deeper tone than the adjacent wall can emphasize the depth of the opening without adding a projecting profile.
This option is also an effective budget control. Instead of spending on custom radius work, invest in neatly proportioned flat-wall frames and a sound surface finish. It is especially appropriate where the existing arch is slightly irregular and would be difficult to match with a rigid prefabricated curve.
Option B: Radius-specific flexible casing
Flexible trim can be useful if the product manufacturer confirms both the required radius and the direction of bending. A profile may bend around one axis but not another. Ask for written information on minimum permitted radius, substrate preparation, fasteners, adhesives, joint treatment, and painting. A supplier may offer flexible variants that visually coordinate with a rigid straight version; verify their actual profiles and finish behavior before committing.
The flexible curved section should be templated and trial-positioned to check for twisting, rippling, or spring-back. It may require temporary supports until the adhesive cures. Do not heat, soak, or chemically soften an unspecified product as a workaround. Neither the standard polyurethane MLDPU-004 nor the other straight profiles named here is presented as a guaranteed bendable arch casing.
Option C: Custom curved woodwork
Custom wood casing is attractive when the arch is a major architectural element or the room already contains substantial stained wood. The work can involve shaped laminations, carefully machined components, or another shop-approved method. Supply the actual curve template, finished face width, molding section, desired species, stain reference, and visible joint requirements. If the woodwork is to match existing trim, provide a physical sample rather than relying solely on photographs.
Curved wood should be installed with the building's normal movement and humidity conditions in mind. Confirm where the piece is fastened, how it meets the straight legs, and how the finish will be repaired if a joint opens slightly. This is generally a specialist task when the profile is ornate or the radius is tight.
Option D: Segmented decorative construction
A segmented arch uses multiple short pieces arranged to approximate the curve. This is not the same as simply making a series of random straight cuts. The segments require an accurate geometric layout, a suitable joining method, and intentional treatment of the facets. In a modern geometric design, visible facets may be part of the look. In a traditional arch that is supposed to read as smooth, poorly made facets will appear as errors. A stepped or fan-shaped decorative pattern is often more successful than a failed imitation of a single curved molding.
A competent millworker can decide whether the joints and thickness of the chosen stock support such a pattern. For DIY projects, a straight applied border on the wall around the opening is generally simpler, less wasteful, and easier to finish.
The Springline, Keystone, and Baseboard Details
A convincing arch is often decided by three small junctions: where the straight side meets the curve, where the crown sits at the top, and where the side trim terminates above the floor. You do not need elaborate ornament at all three. In many rooms, one clearly developed junction and two quiet transitions create the best hierarchy.
The crown or keystone as a controlled accent
The keystone is the central feature historically associated with masonry arches. In purely decorative residential trim, a keystone-like ornament can be applied as a visual cue without being a load-bearing component. It must never be presented as supporting the opening. Choose a piece whose scale fits the width and rise of the arch, and confirm that its back is suitable for the wall surface. A large cartouche over a shallow passage can overwhelm the opening; a restrained center element can provide just enough emphasis.
The original STAVROS article discusses carved ornament and composed arches. The American adaptation keeps that design opportunity while separating visual language from construction. Decorative moldings, wooden appliqués, and painted motifs are not structural modifications to the lintel or arch support.
Where trim meets the floor or baseboard
A high, modern baseboard may make an added arch casing look too short if the vertical element simply stops at its top. Traditional casing sometimes meets a plinth block whose projection and width establish a deliberate transition. In a modern room, the side trim may instead align with the finished top of the existing baseboard, using a precise return. Check how much the baseboard projects from the wall. A thin molding mounted above a thick baseboard can end in an exposed step unless the designer resolves the junction.
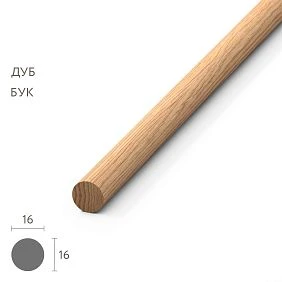
Where the project uses wood trim, a compact MLD-026 solid-wood molding can be evaluated as a straight accent near the lower wall. Its listed 16 × 16 mm section is approximately 0.63 × 0.63 inches. Whether that particular square-ish profile harmonizes with the baseboard is a visual choice, not an automatic recommendation. Confirm its length and material variant before incorporating it into the cut schedule.
Three Room-by-Room Design Applications
The best arch trim ideas serve real American rooms, not only formal spaces. These design scenarios are editorial examples rather than claims about completed STAVROS projects. Adjust them to the actual opening geometry and existing finishes.
1. Transitional dining room
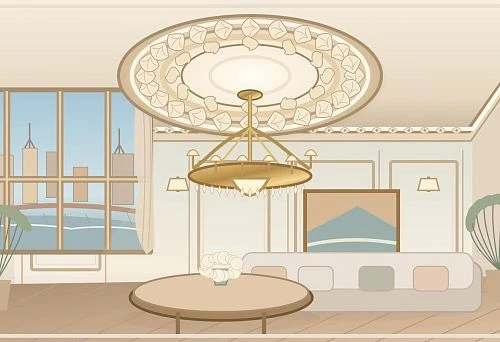
In a dining room with crown molding, tall baseboards, and a statement light fixture, the opening can support a more traditional composition. Consider matched vertical casing with a shop-made curved head, a carefully sized central accent, and two large flat-wall panels that echo the existing trim. The STAVROS wooden molding catalog provides reference profiles for the straight runs; the curved component would still need separate confirmation or fabrication.
Paint the trim and wall in the same shade for quiet relief, or use a restrained contrast if the dining room has adequate light. Oversized ornate profiles can compete with the dining table and chandelier, so view samples under both daytime and evening lighting.
2. Minimalist kitchen-to-breakfast nook passage
Here the opening is softly rounded but the kitchen cabinetry is crisp and planar. Rather than forcing a classic casing into a contemporary setting, leave the arch smooth and coordinate two clean horizontal wall details at the same height as adjacent cabinet elements. A small MLDPU-001 profile on the flat wall can provide subtle definition. Keep trim clear of cabinet doors, drawer pulls, and cleaning splash zones.
Kitchens are high-use spaces. The substrate, finish cleanability, and edge durability matter more than adding multiple decorative layers. Confirm the environmental suitability of the selected finish, especially near sources of cooking vapor or repeated wiping.
3. Traditional entry with a strong threshold
A broad entry arch between a foyer and family room may benefit from fuller straight side details and a professionally fabricated curved head. If the house already has oak door trim, a stained wood arch casing can help establish continuity. For a painted option, compare profile proportions such as MLD-024 against the adjacent door casing before commissioning its curved counterpart. The standard listing itself should not be bent or assumed to have a matching flexible version.
A well-proportioned entry design reads from several viewpoints: directly from the front door, obliquely from the staircase, and from the adjoining room. Make a full-height mock-up if the opening is a primary focal point.
Paint, Stain, and Lighting: Finish the Details as One System
The paint or stain treatment is part of the architecture, not merely an afterthought. A continuous color can make the trim feel built into the wall; a controlled contrast can outline an opening; natural wood can introduce a warmer material reference. All three are valid. The strongest result is the one that makes the transitions at the arch, jamb, and baseboard look deliberate.
Paint-grade molding and wall color
For painted trim, choose a compatible primer and finish system for the exact substrate. Paint-grade wood, MDF, and polyurethane do not have interchangeable preparation requirements. Follow the product and coating manufacturer's directions, including curing conditions and recommendations for cut ends. Smooth joints as appropriate for the material. Use paintable caulk only where movement and joint design make it suitable; do not cover significant structural or fitting gaps with filler.
The same-color approach works well for wall molding ideas that emphasize shadow rather than contrast. In a small hallway, a matte or low-sheen finish may soften the effect. A higher-sheen trim against a matte wall highlights the profile more strongly, including small surface imperfections. Test the actual finish on a sample before committing.
Natural oak or beech tones
Stained wood can make an arched opening feel connected to a traditional staircase or built-in furniture. However, a stain color viewed on a screen is not a reliable match to existing trim. Order or prepare a sample using the chosen wood species and coating. Oak and beech show grain and color differently, and engineered or laminated blanks may have variation that becomes more visible under transparent finishes. If the goal is a perfectly uniform opaque color, paint may be more appropriate than an elaborate staining schedule.
Where the arch uses both natural wood and painted polyurethane, use a clean physical separation. A random butt joint between the materials can reveal differences in thickness and texture. A specified reveal or decorative block can make the transition easier to read.
Decorative lighting without unsafe improvisation
Side lighting can reveal the depth of an applied profile, while concealed lighting can emphasize the arch's shape. But decorative molding must not automatically be treated as an electrical raceway or heat-management system. Plan the lighting hardware, access, wiring method, and service clearance with the manufacturer and a qualified electrician as required by local rules. Do not run unprotected wiring through improvised channels, bury drivers behind inaccessible trim, or fasten lighting to a profile not designed to support it.
For many projects, a pair of wall sconces placed thoughtfully beside the opening is simpler and more maintainable than trying to illuminate the curved edge itself. Their light can create the desired shadow without changing the arch construction.
Ordering Checklist and Project Handoff
Before placing a request or buying material, consolidate the design into a short specification. This protects the customer, the installer, and the person choosing products. It also helps prevent substitutions between visually similar but mechanically different trim types.
- Record the original article's design goal and the actual condition of the opening: span, rise, springline, side heights, wall substrate, and any asymmetry.
- Specify whether the curved head is to remain painted, receive a flexible rated profile, or be fabricated in wood. Do not leave the curve method as an assumption.
- Choose the straight-trim product code, material variant, stock length, cross-section, and desired finish from the live STAVROS listing.
- Draw separate elevations for both sides of the opening, including wall frames, baseboards, switches, lights, and furniture clearances.
- Prepare a cut list for straight stock and a separate template or shop drawing for any curved component.
- Confirm which adhesives, fasteners, fillers, and coatings are compatible with the selected materials and surfaces.
- Check the seller's actual shipping destinations and packaging arrangements before relying on any delivery date or U.S. availability.
- Keep a sample of the selected finish and a labeled drawing at the job site so multiple trades follow the same specification.
For additional product context, compare wooden and polyurethane moldings with the actual detailed product pages. The category name alone does not confirm a bending radius, fire rating, installation certification, or delivery eligibility. Those require item-specific information.
Questions to ask before approving a substitute
If the requested molding is not available in the preferred length or material, ask whether the alternative has the same visible face width, projection, profile silhouette, paint requirements, and joint behavior. A visually similar product can create a very different shadow around an opening. If the alternative is proposed for the curved head, written confirmation of radius suitability is essential. Do not approve it because a product photo happens to show a curved room or decorative arch nearby.
For a renovation in the United States, also clarify who is responsible for the building substrate, trim carpentry, electrical work, and final painting. A decorative product supplier does not automatically provide local installation, code review, or site measurements.
Common Mistakes and How to Avoid Them
Forcing a rigid profile to bend. This is the largest technical error in many arched doorway projects. Even a relatively narrow stock profile may be too stiff for a tight radius or for the required bending orientation. Use straight trim where the wall is straight; commission an approved solution for the curve.
Using the inside arch measurement for the outer casing. Offsetting the line outward changes the radius and therefore the arc length. A small change in offset accumulates across the half-circle. Mark the intended trim centerline and measure there.
Confusing an applied wall border with full casing. A thin decorative line can be beautiful, but it may not conceal a rough joint between two finish surfaces. Decide which component solves the functional edge detail and which is purely visual.
Overloading the springline with ornament. Too many decorative blocks, mismatched projections, and layered profiles can make a low opening look heavy. Choose a dominant trim line, then subordinate or omit secondary details.
Ordering by total linear feet only. Straight pieces must be nested from the available stock lengths, taking account of orientation, miter waste, defects, and joint position. Curved pieces need a different purchasing method entirely.
Assuming the U.S.-facing website means domestic inventory. An English-language, USD-displaying catalog does not establish that a specific item is stocked or delivered in the United States. Confirm logistics before making a schedule or customer promise.
Frequently Asked Questions About Arched Doorway Molding
Can ordinary polyurethane molding bend around an arch?
Not reliably as a general rule. Flexibility depends on the formulation, section geometry, orientation, and manufacturer's minimum-radius specification. The ordinary straight MLDPU items linked in this article should be treated as straight stock unless the manufacturer expressly confirms a flexible application. Choose a rated flexible system or custom-made curved component when the design must follow the arch.
What is the best molding for a small arched doorway?
Often the best solution is a clean, painted curved edge with narrow decorative straight profiles on the sides or flat walls nearby. Small openings have limited space for wide trim and ornamental blocks. If you want a traditional continuous casing, send a measured template and ask for a curved profile specifically made for the opening.
How much trim do I need for a 36-inch semicircular opening?
For the inside half-circle alone, the nominal arc length is about 56.55 inches. Add the actual straight side runs and remeasure the curve along the planned trim centerline, because a trim offset changes its radius. Then separate straight-stock quantities from the curved-component fabrication request. A simple number of sticks is not enough to confirm the installation method.
Can I use wooden molding for an arched door frame?
Yes, wood can be part of a well-designed arched surround. Straight wooden molding is suitable for the vertical and flat-wall sections when installed as intended. The curved head typically requires purpose-made woodwork or another approved detail. Standard MLD-027 wooden molding is a useful straight-profile reference, not a promise of bendability.
Do I need a carpenter for an arched opening?
A confident DIY installer may handle simple straight side trim and decorative wall rectangles. A custom curved wood casing, complex segmented joinery, significant substrate repair, or electrical lighting work normally calls for specialist skills. Work involving potential structural changes, fire or egress requirements, or hidden building services should be reviewed under the applicable local requirements.
Build the Arch Around the Opening, Not Around a Catalog Photo
A successful arched doorway design begins with the real geometry of the room. Keep conventional straight trim on straight surfaces, use radius-specific fabrication when you truly need a curved casing, and coordinate the material, scale, and finish with the rest of the interior. A painted plaster curve with well-proportioned wall frames can be just as architectural as a continuous ornate wood surround, and often easier to execute well.
Start by taking a few measurements and drawing the springline, then compare actual STAVROS straight wood molding options with the polyurethane decorative molding range for the flat sections of the project. If the arch itself must receive trim, obtain written guidance or a shop drawing for a purpose-made curved component before ordering. That sequence turns an attractive inspiration image into a realistic plan for a finished American interior.