Article Contents:
- Wooden House and Skirting Board: Why You Can't Install According to an Urban Scenario
- How a Wooden House Differs from a Concrete One in Terms of Finishing
- Three Main Mistakes When Installing Skirting Boards in a Wooden House
- Installation Rules Dictated by Physics
- House Shrinkage and Gap: How to Properly Attach Skirting Boards in a Wooden House
- Compensation gap: how much to leave
- Sliding Fastener: Principle and Installation
- When You Can Attach Permanently: Signs of Stopped Shrinkage
- Skirting Board for Cladding: Cove, Triangle, Boot
- Cladding as Interior Finishing for a Wooden House
- Three Main Profiles for Cladding
- Standard K-Series Skirting Board for Cladding: When Appropriate
- Lower End of Cladding: Why It Needs to Be Closed Properly
- Wooden Coves: The Best Choice for Log and Frame Houses
- Why Cove is the Optimal Option for a Wooden Interior
- Cove Sizes: How to Choose the Right One
- Cove in a Log House: The Nuance of a Hewn Corner
- STAVROS Coves: Production Quality
- Skirting Board for Bathhouse and Sauna: Moisture-Resistant Species and Selection Rules
- Bathhouse — An Extreme Environment for Wood
- Correct Wood Species for Skirting Board in a Bathhouse
- Coating for Bathhouse Skirting Board: Only Special or None
- Skirting Board Installation in a Bathhouse: Wet Area Rules
- Attachment on a Moving Base: Sliding Fastener for a Wooden House
- Principle of Movable Fastener: Engineering Logic
- Table: Which Fastener for Which House
- Finish Nails vs. Self-Tapping Screws in a Wooden House
- Skirting Board Acclimatization: A Mandatory Step for a Wooden House
- Why Acclimatization in a Wooden House is More Important Than in a City Apartment
- Combining Baseboards with Other Wooden Molding in the House
- Unity of Wooden Elements: How to Assemble an Interior
- FAQ: Answers to Popular Questions About Baseboards in a Wooden House
- About the Company STAVROS

A wooden house is a living organism. It breathes, it settles, it changes with the seasons. This is why in a wooden house you cannot simply take a baseboard, apply liquid nails, and forget about it. In six months, it will either pull away from the floor, warp across its width, or become permanently frozen to the wall at a point of settlement and pull the wall cladding with it.
Baseboards in a Wooden House— is a separate engineering task. With its own rules, its own logic, and its own solutions, which are fundamentally different from installing baseboards in a concrete apartment. This difference needs to be understood before purchasing the material—not after.
In this article—everything you need to know about wooden baseboards for a house made of logs, timber, or frame construction. Why settlement changes everything. How to properly attach baseboards to a moving base. Which profile to choose for cladding. What to install in a sauna. And whyWooden Crown Moldings— is the best choice for most wooden interiors.


Wooden House and Baseboards: Why You Cannot Install According to a City Scenario


How a Wooden House Differs from a Concrete One in Terms of Finishing
In a reinforced concrete house, the walls and floor slabs are monolithic. They do not move relative to each other, either vertically or horizontally. A baseboard nailed to the floor and pressed against the wall stands there motionless—floors do not sink, walls do not settle.
In a wooden house, everything is different. Wood is a hygroscopic material: it releases and absorbs moisture depending on the season. In a house made of logs or timber, this means constant vertical movement of the walls (settlement) and horizontal movement of the logs (expansion-contraction across the grain). These movements never stop—they simply become smaller over time.
A new house made of fresh timber—settlement over the first two to three years: from 5 to 10 cm in wall height for a room height of 2.5 m. That's 2–4% of the height. A house made of glued laminated timber—settlement is significantly less, 1–1.5%. A house made of rounded logs—settlement 3–5%. A frame house made of dried lumber—1–1.5%, practically like glued laminated timber.
Now ask yourself: if a wall 'drops' by 5 cm over two years, and the baseboard is nailed firmly to the floor and pressed against the wall—what will happen? There are two options. Either the wall, moving downward, will tear the baseboard away from the floor. Or the baseboard will deform, forming humps and gaps.
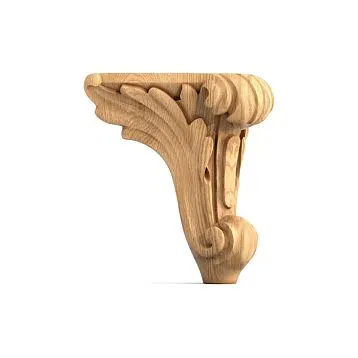
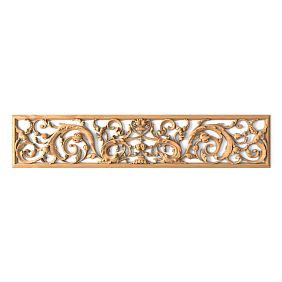
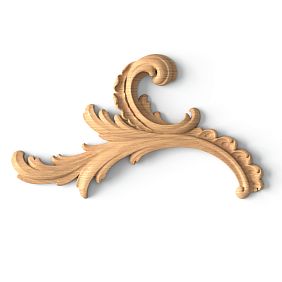
Our factory also produces:


Three Main Mistakes When Installing Baseboards in a Wooden House
First mistake: liquid nails. A baseboard glued to a wall with liquid nails in a new or 'live' house is a disaster after one season. The glue holds firmly, the wall moves—the glue tears the cladding. No adhesive compounds in a wooden house when installing baseboards.
Second mistake: nails into the wall. Nailing a baseboard with nails simultaneously to the floor and to the wall means creating a 'dead point' that settlement will tear apart. The baseboard must be attached to only one thing: either the floor or the wall—but not to both.
Third mistake: installation immediately after construction. In a new house made of fresh timber, finish work (including baseboards) is done no sooner than one to one and a half years after assembling the log house. Ideally—after two years. Before that—rough installation or nothing.
Get Consultation
Installation Rules Dictated by Physics
From the analysis of mistakes, the rules follow:
-
The baseboard in a wooden house is attached only to the floor—not to the wall. The wall moves, the floor (if it is an independent wooden deck or concrete screed) does not.
-
There must be a technical gap between the top edge of the baseboard and the wall—5–10 mm—closed decoratively, but physically free.
-
Or sliding fasteners are used—a special clip that allows the wall to move independently of the baseboard.
-
Fastening elements—only into the floor (if the floor is wooden—finish nails or screws at an angle, heads countersunk).
House Settlement and Gap: How to Properly Attach Baseboards in a Wooden House
Compensation Gap: How Much to Leave
Baseboards in a Wooden Housemust leave freedom for the wall—physical freedom. This means that either a soft seal (polyethylene foam) is placed between the back wall of the baseboard and the wall surface, or the baseboard is simply not pressed tightly against the wall.
The size of the gap—depending on the type of house and age:
| Type of house | Age | Recommended gap |
|---|---|---|
| Fresh log | Up to 2 years | 15–20 mm |
| Timber with natural moisture content | Up to 2 years | 10–15 mm |
| Timber with natural moisture content | 2–5 years | 5–10 mm |
| Glued laminated timber | Any | 3–5 mm |
| Rounded log | Up to 3 years | 8–12 mm |
| Frame house (dry board) | Any | 2–3 mm |
| "Old" house (10+ years) | — | 2–5 mm |
How to decoratively cover this gap? This is where the correct choice of baseboard profile comes in: a baseboard with sufficient height overlaps the gap with a large margin, and the gap remains hidden during any wall movement.
Sliding fastener: principle and installation
A sliding fastener for baseboards in a wooden house is a special cleat (metal or plastic) with a longitudinal groove that allows the baseboard to shift relative to the wall vertically. The principle is simple:
-
The cleat is attached to the wall with a screw through the groove
-
The baseboard snaps into the cleat
-
During shrinkage, the wall pulls the cleat downward — the cleat slides along the groove — the baseboard remains in place
Sliding fasteners are used during the first 3–5 years of a new wooden house's life while shrinkage is active. After 5–7 years — the fastener can be replaced with a permanent one or simply left as is.
Important: a sliding cleat for baseboards should not be confused with a cleat for clapboard — they are structurally similar but differ in groove geometry and load.
When you can fasten permanently: signs of stopped shrinkage
Even in an old house, some "liveliness" of the wood remains — this is normal. But "installation" shrinkage (the kind that damages finishes) stops. Signs:
-
Doors and windows operate without sticking in different seasons
-
Gaps in log corners do not change
-
Old baseboard (if present) shows no signs of deformation
-
The house is over 5–7 years old
Under such conditions — the baseboard can be installed using the standard method: finishing nails into the floor + pressure against the wall. A 3–5 mm compensation gap is still recommended — simply as insurance.
Baseboard for clapboard: cove, triangle, boot
Cladding as interior finishing for a wooden house
Cladding is historically the most common material for interior lining of a wooden house. It is a profiled board with a tongue-and-groove system: each board 'fits' into the previous one, forming a continuous wall surface. In a wooden house, it's an ideal solution: the cladding also 'moves' along with the wall, is fastened with clips, and leaves expansion gaps.
Wooden skirting board for cladding— is a skirting board that:
-
Is visually compatible with the cladding (same wood species, same finish, or at least the same style)
-
Properly covers the lower end of the cladding
-
Does not hinder the movement of the cladding during expansion and contraction
Three main profiles for cladding
Cove (or quarter-round) — the most popular profile for a wooden house. Triangular cross-section with a concave hypotenuse: it adheres simultaneously to the floor and the wall, covering the internal corner. It does not protrude into the room space — it's inconspicuous, modest. For cladding — it's ideal: it covers the lower gap and at the same time allows the cladding to move, as there is always an angle between the floor and the wall.
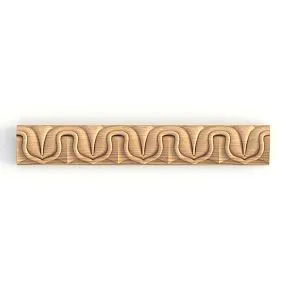
Wooden coves by STAVROS— made from solid oak and beech, in various sizes: from 14×14 mm to 30×30 mm. The most concise and functional choice for a wooden interior.
Triangular skirting board (corner profile) — similar to a cove, but with a straight hypotenuse. Geometrically precise — looks good in Scandinavian and minimalist wooden houses. Covers the corner, does not protrude into the space.
'Shoe' (skirting board with a shelf) — a skirting board with a characteristic L-shaped cross-section: a vertical part (adheres to the wall / cladding) and a horizontal shelf (overlaps the floor). This is the 'classic' skirting board for cladding — it covers the lower end of the cladding from above, providing a wide overlap of the gap. During shrinkage — the horizontal shelf allows the wall to move downwards, while the skirting board 'advances' along the wall.
Standard K-series skirting board for cladding: when it is appropriate
Classical shaped K-series skirting board (K-006, K-016, K-071) in a wooden house with cladding — is appropriate in the case when:
-
The house is already settled (7+ years), shrinkage is minimal
-
The cladding is mounted on drywall or OSB (independent frame)
-
A 'more interior' aesthetic is needed, rather than a basic cove
For example, a wooden country house with 'Euro-cladding' and laminated flooring — here K-006 (from 440 rub./linear meter) made of oak with oil finish to match the cladding looks richer than a cove. The main thing is proper fastening: only to the floor, with a gap to the wall.
Lower end of the cladding: why it needs to be covered correctly
The lower end of the cladding is the open end-grain surface of the wood. This is the most hygroscopic zone: the end absorbs moisture dozens of times faster than the side surface. If the end of the cladding is not covered by a skirting board or cove — moisture from the floor, from cleaning, from condensation rises up the end into the cladding. The cladding darkens, rots from below, loses its shape.
The correct solution: the lower end of the cladding should not touch the floor — a gap of 5–10 mm, and this gap is covered by a skirting board or cove. The end is treated with an antiseptic before installing the cladding. This is basic prevention of biological damage to the lower zone of the lining.
Wooden coves: the best choice for log and frame houses
Why a cove is the optimal choice for a wooden interior
Wooden Crown Moldings— this is not a 'cheap substitute' for a regular skirting board. It is a fundamentally correct choice for a wooden house, dictated by architectural logic:
Firstly, the cove works in the corner. It covers the internal corner between the floor and the wall — precisely where there is always a gap in a wooden house. A regular skirting board presses against the plane of the wall: with an uneven wall — gaps along the entire length. The cove 'enters' the corner — it works in two planes simultaneously and forgives irregularities in both.
Secondly, the cove does not protrude into the room. In small wooden houses with low ceilings, a protruding skirting board visually 'eats up' space. The cove is inconspicuous: it hides in the corner.
Thirdly, the cove is easier to install during shrinkage. The triangular profile, during vertical movement of the wall, does not create a 'lever' — it simply slides along the floor surface. To fasten a cove in a wooden house — with a nail at an angle into the corner. Simple and reliable.
Cove sizes: how to choose the right one
Coves are produced in several standard sizes by leg:
| Size (leg×leg) | Gap coverage height | Application |
|---|---|---|
| 14×14 mm | Minimum gap | Narrow gaps, final fitting |
| 20×20 mm | Up to 15 mm | Standard for clapboard |
| 25×25 mm | Up to 20 mm | Log house, uneven corners |
| 30×30 mm | Up to 25 mm | Houses with large compensation gap |
| 40×40 mm | Up to 35 mm | New houses during active shrinkage period |
For most timber and rounded log houses where finishing is done after primary shrinkage — standard 25×25 or 30×30 mm.
Cove molding in a log house: nuance of hewn corners
In a house made of hand-hewn logs "in bowl" or "in paw" joints, the interior walls are uneven. The logs don't create perfectly flat walls; the angle between floor and wall isn't geometrically straight. This is precisely why standard K-series baseboards perform poorly in a hewn log house: they only make contact with the wall at a few points.
Cove molding works. It "fits" into the corner regardless of how accurate the angle is. Small gaps between the cove molding and the log are normal and aesthetically justified for a log interior.
Wood species for cove molding in a log house: pine, larch (if the house is coniferous) or oak (if durability is desired). Finish — same as on clapboard: oil, wax, or unfinished.
STAVROS cove moldings: manufacturing quality
Wooden cove moldings made from solid oak and beechSTAVROS are made from kiln-dried wood with 8–10% moisture content — a standard critical for wooden houses. Cove molding made from raw wood in a wooden house behaves just as unpredictably as the entire house: warps, cracks, pulls away from surfaces.
Sanded to P180 — surface is ready for applying oil, wax, or varnish without additional processing. Standard strip length is 2.5 m, which is optimal for installation in rooms of a wooden house.
Baseboard for bathhouse and sauna: moisture-resistant wood species and selection rules
Bathhouse — extreme environment for wood
Wooden skirting board for sauna— is a category requiring separate discussion. A bathhouse isn't a "wet room" in the conventional sense. It's an extreme environment:
-
Temperature in steam room: 70–100°C (in sauna up to 120°C)
-
Humidity: from 100% in steam rooms to 10–20% in dry saunas
-
Cycle: heating — cooling — heating. Repeated multiple times per session
-
Condensation: constant after each session
Wood in such an environment works under extreme stress. It expands with heat and humidity, contracts when cooling. Each cycle causes micro-damage: unnoticeable under normal conditions, but accumulating with 200–300 cycles per year.
Suitable wood species for sauna baseboards
Abachi (Triplochiton scleroxylon) — an African wood species, market leader for sauna wood. Low thermal conductivity (doesn't burn skin), resistance to high temperatures, doesn't release resin when heated. Suitable for benches, shelves and — yes — for baseboards in steam rooms. Available in Russia — possible, price — higher than domestic species.
Larch (Larix sibirica) — the best Russian option for saunas. High moisture resistance (contains natural arabinogalactan). Rot resistance. Moderate thermal conductivity. Only drawback: resinousness — at high temperatures resin can 'emerge' to the surface. Solution: use only well-dried larch, perform initial 'heating' of sauna without final coating — resin emerges and burns off.
Aspen (Populus tremula) — traditional wood species for sauna construction in Russia. Practically resin-free, resistant to rot in humid environments. Low price. Drawback: soft (250–350 HB), mechanically unstable. For baseboards — sufficient, load is minimal.
Siberian cedar (Pinus sibirica) — aromatic coniferous wood. Releases phytoncides when heated — additional 'therapeutic' function. Moderate resinousness, good moisture resistance. Beautiful reddish-pink color under oil.
What should not be used in steam rooms:
-
Oak — darkens in saunas and tannins become active
-
Beech — cannot withstand humidity-temperature cycles, warps
-
Coniferous woods (except larch and cedar) — release resin at high temperatures, burn skin
-
MDF, particleboard — any wood-based panel materials swell and deteriorate
Coating for sauna baseboards: only special or none
In steam rooms and washing areas, regular varnishes and enamels are not used. Reasons:
-
Varnish softens at high temperatures and 'sticks'
-
Varnish blocks phytoncides and natural wood aroma
-
Varnish cracks with sudden temperature changes
Options for saunas:
-
Uncoated — the most traditional and correct option for steam rooms. Wood breathes, releases phytoncides, develops patina over time.
-
Special sauna oils (Sauna Oil, Tikkurila Supi Laudesuoja) — formulations based on linseed or tung oil, adapted for high-temperature environments. Protect from moisture, don't block aroma, don't burn.
-
Coating only in anteroom and washing area — there temperature doesn't exceed 50–60°C, regular oil-wax is acceptable.
Installing baseboards in saunas: wet area rules
Fastening — only mechanical: finishing nails or stainless steel screws with concealed heads. No adhesive: adhesive detaches within one season under high humidity conditions.
Base gap: in washing area — a gap for water drainage is mandatory. Baseboard shouldn't 'trap' water against wall. Between bottom edge of baseboard and floor — 3–5 mm (filling with waterproof sealant is only acceptable in areas without direct water exposure).
Solid wood productsin saunas must be acclimatized before installation: bring into room for 48–72 hours, allow wood to adjust to sauna's humidity level. Installing unseasoned wood — warping after first heating session.
Fastening on moving foundation: sliding fasteners for log houses
Principle of sliding fasteners: engineering logic
Sliding fasteners are the answer to the question: how to keep the baseboard in place if the wall moves? The principle: the fastener "holds" the baseboard in space while allowing the wall to move vertically independently of the baseboard.
There are several design options:
Option 1: Clamp with a longitudinal groove. A metal clamp is attached to the wall with a screw through a longitudinal groove (groove length 10–20 mm). When the wall shrinks, the screw slides in the groove. The baseboard, snapped into the clamp, remains in place.
Option 2: Wooden guide + groove in the baseboard. A wooden strip (sub-baseboard) is attached to the floor, and there is no fastener on the wall at all. The baseboard is placed on the strip from the bottom side and "hugs" the corner. The wall is free. The simplest and historically traditional method.
Option 3: Fastening only to the floor + "free" top. The baseboard is nailed to the floor with finishing nails through the lower part (horizontal "shelf" or base). The top edge of the baseboard presses against the wall without fixation—it simply rests against it. When the wall shrinks, it slides down along the back face of the baseboard. A compensation gap is maintained at the top edge.
Table: which fastener for which house
| Type of house | Age | Fastening method |
|---|---|---|
| Log / raw timber | Up to 2 years | Clamp with groove (sliding) |
| Log / timber | 2–5 years | Fastening to floor + free top |
| Glued laminated timber | Any | Finishing nail / screw into floor |
| Frame | Any | Finishing nail / liquid nail (in settled) |
| Old house (10+ years) | — | Standard installation |
Finishing nails vs. screws in a wooden house
Finishing (or casing) nails are a traditional and reliable method of fastening baseboards in a wooden house. Diameter 1.4–1.8 mm, length 45–65 mm. They are driven at an angle into the corner (through the fillet) or into the floor (through the base of the baseboard). The heads are countersunk with a nail set and concealed with wood filler.
Advantages of nails over screws in a wooden house:
-
Do not split dry wood upon impact (a screw creates pressure across the grain)
-
Allow micro-movements (a nail "bends" during shrinkage, a screw does not)
-
Simpler and faster to install
Screws are permissible: stainless steel or galvanized, with countersinking of the hole. Important: for oak and larch—only with pre-drilling, otherwise splitting.
Baseboard acclimatization: a mandatory step for a wooden house
Why acclimatization in a wooden house is more important than in a city apartment
A wooden house is a "living" space with variable humidity. In summer, if the house is not constantly heated—air humidity is 55–70%. In winter with heating—20–35%. The fluctuations are significant.
A wooden baseboard, delivered from production (moisture content 8–10%), must "adopt" the humidity of the specific room before installation—otherwise, after installation, it will first absorb moisture and expand (forming bulges), and then, when heated, release moisture and shrink (forming gaps).
Acclimatization rules:
-
The baseboard is delivered to the room in packaging
-
Unpacked and laid out horizontally—not "standing" in a stack
-
Cured indoors for 48–72 hours at operating temperature and humidity
-
Only after that — installation
In a new house before final finishing — heat the house in operating mode for at least 2–3 weeks, then acclimate the material.
Combining baseboards with other wooden moldings in the house
Unity of wooden elements: how to assemble the interior
In a wooden house, wooden baseboards are not a solitary element. Nearby are:
-
Clapboard or wooden wall paneling
-
Door frame casings
-
Thresholds and cornices
The unity of these elements is the key to a 'cohesive' wooden interior.STAVROS K-series wooden moldings— is a system: baseboards, casings, cornices — from one series, one wood species, under one finish. This eliminates visual mismatch.
Additionally for a wooden house, the following are in demand:
-
Decorative overlays and moldingsfor finishing corners and transitions between coverings
-
Wooden cornices— ceiling molding, which together with the baseboard forms a 'frame' for the wooden room
-
Furniture legsmade of oak or pine — for built-in furniture in the style of a wooden house
FAQ: answers to popular questions about baseboards in a wooden house
When can baseboards be installed after building a wooden house?
In a house made of natural moisture timber — no sooner than 1.5–2 years later. In a house made of glued laminated timber — after 6–8 months. In a frame house made of dry boards — after 3–4 months after completing interior finishing. The main indicator of readiness: doors and windows operate without seasonal sticking.
Can plastic baseboards be used in a wooden house?
Technically — yes. But visually — conflict: plastic looks alien surrounded by natural wood. Additionally, plastic has a significantly higher coefficient of thermal expansion than wood — with temperature fluctuations in a wooden house (especially seasonal), plastic may 'swell' or create gaps. Solid wood behaves synchronously with the house.
What is better in a wooden house — a cove molding or a regular baseboard?
For log houses and timber houses in the first 5–7 years — cove molding unequivocally. For a settled house with even walls — the classic K-series profile is possible. For a house with clapboard — a baseboard 'for clapboard' (boot) or cove molding.
Should baseboards be painted in a wooden house?
Depends on the style. In a 'natural' wooden house — oil or wax that preserve the texture. In plastered rooms of a wooden house — painting is possible. In a sauna — only special sauna oil or no finish.
How to eliminate the gap between the baseboard and the floor?
If the gap is small (up to 3 mm) — acrylic sealant matching the baseboard color. If large — the baseboard needs to be reinstalled considering the expansion gap. Silicone sealant is not used in wooden houses — it doesn't take paint, tears during movement.
Wooden cove moldings or plastic ones in the corners of a wooden house?
Wooden — always. Plastic cove moldings look inappropriate in a wooden interior, behave unpredictably with humidity fluctuations, and cannot be oiled.
About the company STAVROS
A wooden house is a special story. Here, every material must 'understand' the logic of living wood.STAVROS K-series millwork products— coving, baseboards K-034, K-006, K-016, and taller profiles — are made from kiln-dried 8–10% moisture content solid oak and beech. This is fundamental for a wooden house: stable moisture content of the source material = predictable behavior in the interior.
P180 sanding — the surface is ready for applying oil, wax, or varnish without additional processing. Geometry is precise: batten length is 2.5 m with a straightness tolerance of 1 mm. This is especially important in a wooden house with uneven walls: a straight baseboard is installed without 'gaps' between the strip and the wall.
Wooden coves by STAVROS— from 14×14 mm to 40×40 mm — standard for clapboard, log houses, frame houses.Solid Oak Productsare available both retail (from 1 piece) and wholesale. Delivery throughout Russia and CIS countries. Stock program — shipment on the day of order.
For non-standard cross-sections — custom production subject to order quantity.
STAVROS — for those who build a wooden house consciously and want every finishing detail to last as long as the house itself.