Article Contents:
- Why this combination is convenient for renovation
- Installation speed: from marking to finish
- No dust and dirt
- Reversibility
- What advantages does polyurethane decor provide
- Accuracy of relief reproduction
- Lightweight with high strength
- Moisture resistance
- Paintability and compatibility with any paints
- Maintenance-Free Durability
- Dimensional Flexibility
- Material Pairings: Characteristics and Compatibility
- Slatted Panels: Solid Wood and MDF
- Polyurethane Decor: From Cornice to Medallion
- How to Combine Smooth and Textured Surfaces
- The Principle of Texture Contrast with Color Unity
- The Principle of Material Contrast with Tone Coordination
- The Principle of Relief Depth
- Where to Place Accent Zones
- Living Room: TV Wall as an Architectural Object
- Bedroom: Headboard as an Architectural Alcove
- Hallway: First Impression Through Rhythm
- Study: Workspace Through Architecture
- Kitchen: Zoning Through Contrast
- Systematic Approach: From One Wall to a Unified Interior
- Common Thread: Repetition of Tone and Profile
- Progression of Saturation
- Slatted Panels as Zoning
- What Matters for Long-Lasting Results
- Proper Base
- Material Acclimatization
- Proper Adhesive and Installation Temperature
- Joint sealing
- Room microclimate
- Installation and Joint Errors
- Error 1: Installing Slat Panels Without Checking Vertical Alignment
- Error 2: Incorrect Corner Cutting of Polyurethane Cornices
- Error 3: Neglecting the Junction of Slat Panel to Cornice
- Error 4: Using Mounting Foam Instead of Adhesive
- Error 5: Painting Polyurethane Without Primer
- Error 6: Uneven Slat Spacing
- MDF Slat Panels for Painting Paired with Polyurethane: The Perfect Union for Monochrome Systems
- Popular Color Solutions
- Additional features: slatted panels with lighting and polyurethane decor
- Slatted modular wall panel: convenience and versatility
- How to correctly choose the type of polyurethane decor for a specific style
- FAQ: Answers to Popular Questions
- About the Company STAVROS

Imagine a situation: you want an interior with architectural depth, relief, classic or modern wall structure—but without plastering work, without gypsum dust in the air, without drying layers, without a crew for two weeks. Is this possible? Not just possible—this is exactly how most truly expressive modern interiors are built.
slatted panels for interior wall finishingfrom solid oak or MDF combined withpolyurethane decor—cornices, moldings, pilasters, rosettes—deliver a result visually indistinguishable from 'expensive classic renovation,' yet installs much faster, requires no wet processes, and is suitable for DIY installation. This is not a compromise. This is a sensible choice backed by an understanding of materials.


Why this combination is convenient for renovation
Renovation is always about managing resources: time, money, nerves. Any wet process—plastering, gypsum molding, cement screed—requires waiting, humidity and temperature control, additional layers, and final sanding. One of the main requests people bring to professional designers: 'I want it beautiful and without chaos for three months.'
Slatted wall panelsand polyurethane decor solve exactly this problem. Both materials are installed on the same principle: attachment to a prepared (leveled, primed) base using mounting adhesive and mechanical fasteners. No wet mixtures. No drying layers. The result is visible the same day.


Installation speed: from marking to finish
installation of slatted panelsInstalling panels on a wall area of 8–12 m² takes 4–6 hours, provided the base is pre-prepared and level. Add 2–3 hours for installing cornices, moldings, and other polyurethane decorative elements around the perimeter — and within one working day, you get a completely transformed room.
For comparison: applying decorative plaster (preparation, primer, several layers with drying intervals) takes 5–7 days for just one wall. Installing gypsum stucco requires special mortars, material handling skills, and long drying times. The advantage of the 'dry' approach is obvious.
Our factory also produces:


No dust or dirt
When working with MDF or solid oak slatted panels, the only dust is sawdust from cutting to the required length. This is easily cleaned up with a vacuum cleaner. Polyurethane elements are cut with a saw or sharp knife with minimal waste. As a result, after renovation, a total room cleanup is not needed, which is especially important when dealing with one room in a residential apartment.
Get Consultation
Reversibility
This is a topic rarely discussed but of great practical importance. Slatted panels and polyurethane decor are, in principle, removable without damaging the wall. If you want to update the interior in 10 years — removing the slats and replacing them with new ones is significantly easier and cheaper than stripping off plaster and applying new plaster.
What advantages does polyurethane decor offer?
Polyurethane Decor— it is not a budget substitute for stucco. It is a separate class of materials with its own merits, some of which are unavailable to either gypsum or wood.
Precision in reproducing relief
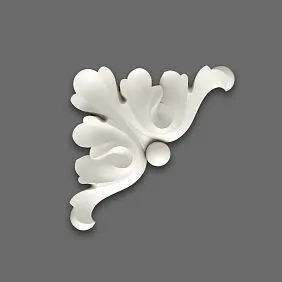
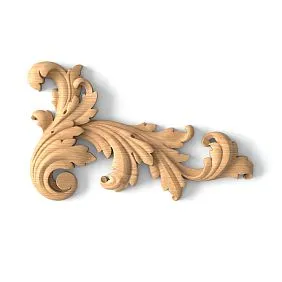
Polyurethane is cast in molds with a high level of detail: thin acanthus leaves, small bead-and-reel patterns, fine fluting on a pilaster shaft — all reproduced with a precision unattainable in hand sculpting. Each mass-produced item is identical to the previous one, ensuring a uniform pattern when installing several identical elements.
Lightweight yet highly durable
The average density of polyurethane for decorative items is 150–220 kg/m³. A linear meter of cornice with a cross-section of 80×60 mm weighs about 350–450 g. A similar plaster cornice weighs 2.5–3 kg. This is a fundamental difference: a 4-meter polyurethane cornice can be held with one hand while applying adhesive with the other. A plaster one would require two workers.
Moisture resistance
Polyurethane ItemsThey do not absorb water, do not swell, and do not rot. This opens up possibilities for using polyurethane decor in rooms with high humidity—kitchens, hallways, bathrooms (with normal ventilation). Plaster items deteriorate with regular contact with moisture—polyurethane ones last without limitations.
Paintability and compatibility with any paints
Polyurethane decor accepts water-based, alkyd, and acrylic paints without preparation. This means that a cornice, molding, or pilaster made of polyurethane can be painted to an exact RAL or NCS shade—and achieve a perfect match with the wall color, adjacent molding, or paneling.
Durability without maintenance
Polyurethane requires no special care: it does not crack within the operating temperature range (−40...+70 °C), does not change color under UV exposure when coated, and does not react to standard household chemicals. Its service life is practically unlimited under normal household conditions.
Dimensional flexibility
Polyurethane elements are produced in standard lengths but are easily shortened to any size without special equipment. For non-standard rooms—sloped ceilings, arched openings—Decorative stuccopolyurethane can be cut and bent (within the material's elasticity limits) much more easily than plaster counterparts.
Materials in pairs: characteristics and compatibility
Before moving on to combination techniques, it's important to clearly understand the properties of both participants in this design union.
Slatted panels: solid wood and MDF
slatted panels for wallsare made from two main materials, and the choice between them is not a question of 'better or worse', but a question of purpose.
Solid oak. Natural fiber texture, living pattern, uniqueness of each slat. Warm amber tone that deepens and enriches over the years. Density 700–750 kg/m³. Moisture content at production exit 8–10%. Coating: oil-wax, varnish, tinting.Wooden slat panelsmade of solid oak is the choice for those who want a natural material with tactile warmth and individual character.
MDF for painting. Perfect geometry, zero surface grain, precise color from any catalog. Density 780–820 kg/m³. Does not deform with humidity fluctuations (within normal limits).slatted MDF panelis the choice for monochrome systems, Scandinavian minimalism, modern classics, where color is more important than texture.
Both materials are produced in standard cross-sections: slat width from 10 to 70 mm, pitch from 30 to 200 mm, load-bearing base thickness 9–18 mm. Panels are supplied in sheets or modules 600–1200 mm wide.
Polyurethane decor: from cornice to medallion
Assortmentof stucco elementsmade of polyurethane covers the entire spectrum of architectural decor:
-
Ceiling cornices — from 40 mm to 200 mm in profile height;
-
Moldings — from 15 mm (thin border) to 100 mm (wide framing profile);
-
Pilasters with bases and capitals — width from 60 to 200 mm;
-
Ceiling medallions and rosettes — diameter from 100 to 600 mm;
-
Coffered frames — for creating a coffered ceiling without structural changes;
-
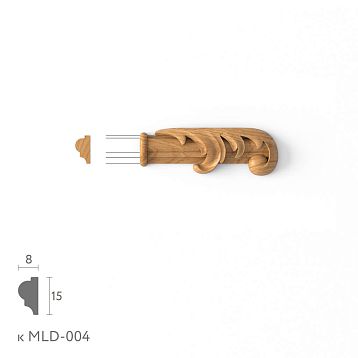
Keystones, consoles, brackets — accent architectural elements;
-
Corner blocks — for joining moldings in external and internal corners.
All thesePolyurethane Itemsare compatible within a single catalog: their profiles are coordinated in scale and style, allowing systems to be assembled without adjustment.
How to combine smooth and textured surfaces
Slatted paneling is a linear rhythm. Polyurethane decor is a textured ornament or a strict profile line. How do two such different textures coexist?
The principle of texture contrast within color unity
The most reliable way to combine slats and polyurethane decor is a monochrome system. When both the slats, the cornice, and the moldings are painted in one color (or coordinated tones), the surface is perceived as a single architectural statement. The difference between elements is read only through form and relief—this is precisely what creates a sense of richness with a restrained color palette.
paintable slatted wall panelsMDF slats paired with polyurethane moldings and cornices of the same tone are a classic of the monochrome approach. White, warm gray, soft beige, or anthracite—any of these colors, with tonal unity, combines smooth and textured into one system.
The principle of material contrast with tone coordination
The second approach: natural oak in the slats—and white polyurethane in the cornices and moldings. Here the contrast is intentional: the warm, living texture of wood against a pure white profile. This creates the effect that designers call 'expensive neoclassical interior'—this is exactly how wooden panels with white molded frames historically looked in French châteaux and English country houses.
Important condition: the white polyurethane must be precisely white—without creamy, yellowish, or grayish deviations. If the slats are made of golden oak, the ideal white for polyurethane is RAL 9010 (warm white) or RAL 9003 (neutral white). Cold RAL 9016 next to warm oak creates an unpleasant contradiction.
The principle of relief depth
A slatted surface has its own relief—the slats protrude 10–25 mm above the base. A polyurethane cornice or molding also has depth. For the system to look organic, you need to monitor the ratio of depths.
Rule: The cornice projection from the wall must be no less than the depth of the slatted panel. If the slats project by 20 mm, the cornice should project at least 20–25 mm. Otherwise, the cornice will appear 'recessed' into the slatted surface and lose its architectural conviction.
Optimal ratio for most living spaces:
| Slat depth | Min. cornice projection | Rec. cornice projection | Molding width |
|---|---|---|---|
| 10–15 mm | 20 мм | 30–40 mm | 40–60 mm |
| 15–20 mm | 25 мм | 35–50 mm | 55–75 mm |
| 20–25 mm | 30 мм | 45–60 mm | 65–90 mm |
| 25–35 mm | 35 мм | 50–70 mm | 80–110 mm |
Where to place accent zones
An expressive interior is built on hierarchy: there is the main element—and everything else that works to support it. An accent zone is the focal point, the area with maximum decorative richness. All other space serves as a calm background.
Living room: TV wall as an architectural object
Slatted panels in the living room interior—the most common and one of the most effective applications of this combination. The wall with the TV is framed with polyurethane moldings around the perimeter: cornice along the top edge, pilasters on the sides. Slats serve as the background within this frame. The result is not just a TV niche, but a portal-like architectural composition.
For such a wall, the optimal installation sequence is:
-
Zone marking — defining horizontal and vertical boundaries;
-
Installation of slatted panel on the main wall field;
-
Installation of vertical moldings along side boundaries;
-
Installation of horizontal molding along the lower boundary (if present);
-
Installation of polyurethane cornice along the upper boundary;
-
Filling joints with acrylic sealant + painting.
Bedroom: headboard as an architectural alcove
slatted panels in the bedroomabove the headboard combined with polyurethane moldings around the perimeter — a solution that creates that feeling of an 'embracing' space, making sleep deeper and the room cozier. Polyurethane decor here serves as an architectural frame: it limits the field of the slatted surface and gives it the status of an independent object.
Height of the slatted headboard zone: usually from the upper edge of the mattress (plus 200–300 mm) to the ceiling or to the lower line of the ceiling cornice. Width — according to the width of the bed plus 200–400 mm on each side.
Hallway: first impression through rhythm
Slatted panels in the hallway interiorAlong one or two walls plus a polyurethane cornice along the upper boundary — this solution transforms a functional 'outerwear storage' into a full-fledged architectural space. The hallway sets the tone for the entire house: if it is expressive and cohesive — expectations for the rest of the space automatically increase.
For a narrow corridor, it is especially important that the slatted panels are vertically oriented — vertical slats visually raise the ceiling. A polyurethane cornice along the ceiling creates a horizontal finishing line, which, against the vertical slats below, is perceived as an accent contrast.
Study: Workspace through Architecture
In a home study, the accent zone is the wall behind the desk. It is this wall that is visible on video calls, and it is this wall that creates the working atmosphere.slatted panels for interior wall finishingIn dark oak or a dark painted tone behind the workspace, polyurethane moldings and a cornice around the perimeter — this is a statement of solidity and professionalism.
Kitchen: Zoning through Contrast
Slatted panels in the kitchenThey perform not only a decorative but also a functional role: they designate the dining area or bar counter area, separating it from the food preparation work zone. Polyurethane decor in the kitchen requires a moisture-resistant coating — varnish or paint with a good washable surface. Otherwise — full possibilities as in other rooms.
Systematic Approach: From One Wall to a Unified Interior
One accent wall with slats and moldings — that's good. A unified finishing system for the entire apartment — that's an outstanding interior result. How to move from a fragment to the whole?
The Guiding Thread: Repetition of Tone and Profile
If the same type of polyurethane cornice and the same color system are used in all rooms of the apartment, the interior is perceived as a single, well-thought-out whole. This does not necessarily mean identical decor in every room—each can have its own accent. But the common thread of a unified cornice profile and a coordinated palette ties everything together into a system.
Progression of saturation
A competent approach: the saturation of decor increases from functional areas (hallway, entryway) to formal ones (living room). Hallway—cornice without relief decor and minimal molding. Living room—cornice with ornament, pilasters, frame moldings, slatted panels with lighting. Bedroom—restrained decor, accent only above the headboard.
Such progression works like the development of a musical theme: you enter the apartment and its main visual theme gradually 'unfolds'.
Slatted panels as zoning
slatted wall panels for interior finishingcan be used not only as a decorative element but also as a tool for zoning open layouts. Slats on the wall defining the living area in a 'kitchen-living room' space visually separate it without creating a physical partition. Polyurethane molding along the upper boundary of the slatted zone completes this zoning.
What is important for the durability of the result
Expressiveness is important. But an interior that loses its appearance after three years is a failed result regardless of its initial beauty. Let's examine what ensures the durability of the 'slats plus polyurethane' system.
Proper base
Both materials require a level and stable base. A slatted panel installed on an uneven wall with variations exceeding 3 mm per meter will create noticeable deformations along the slat lines. A polyurethane cornice glued to an unprimed ceiling will begin to detach over time.
Base preparation is a mandatory stage that cannot be shortened even in the pursuit of speed. Minimum list:
-
Wall putty: deviations no more than 3 mm over 2 meters (using a straightedge);
-
Priming: strengthening primer in 2 coats with drying between;
-
For slatted panels on battens — additional check of the horizontal and vertical alignment of the battens.
Material acclimatization
installation of slatted panels on the wallPanels made of natural oak must be preceded by mandatory acclimatization — 48–72 hours in the room at working temperature and humidity. Wood is a living material that adapts its dimensions to environmental conditions. Panels delivered from the cold and installed immediately may develop gaps at the joints after a few days.
Polyurethane decor does not require acclimatization, but it is also recommended to keep it at room temperature for 4–6 hours before installation — especially during the cold season.
Correct adhesive and installation temperature
Adhesive for polyurethane products — acrylic mounting adhesive or specialized polyurethane adhesive. Important: the mounting gun must ensure even application without "empty" zones. Voids under a polyurethane cornice create points of deformation under mechanical stress.
Installation temperature: not below +10 °C. At lower temperatures, most mounting adhesives slow down polymerization, and the product may shift before setting.
Joint sealing
The joint between a polyurethane cornice and the wall (ceiling) is the most vulnerable spot in terms of durability. With the slightest building movements (settlement, thermal deformations), microcracks can appear here. Solution: sealing with a paintable acrylic elastic sealant. Not a rigid putty compound — it cracks. Specifically elastic acrylic, which allows for slight movements.
Room microclimate
Solid oak slat panels are durable at a stable air humidity of 45–65%. At lower humidity (during the heating season without a humidifier), the wood dries out, joints open up, and cracks may appear along the slats. Polyurethane decor is not sensitive to humidity, but wood requires attention.
Installation and jointing errors
Even with excellent materials, the result can be ruined by installation errors. Let's look at the most common ones.
Error 1: Installing slat panels without checking vertical alignment
The vertical alignment of the slats must be checked with a spirit level or laser level when installing each panel. A deviation of even 2 mm over a height of 2.5 m is visually noticeable—especially with light slats on a dark background.
Installation of batten panelsInstallation always starts from a corner or center vertical line and proceeds in both directions—not 'where it's more convenient,' but according to the markings.
Error 2: Incorrect corner cutting of polyurethane cornices
The internal corner of a cornice is cut at 45°. The external corner—also at 45°. But the actual angle of a room is rarely exactly 90°—there are usually deviations of 1–3°. If you cut strictly at 45° without checking the actual angle, a gap will appear at the joint.
Solution: Before cutting, measure the actual angle with a bevel gauge or protractor. Divide it in half—this will be the cutting angle for each element. Gaps up to 3 mm are sealed with acrylic sealant and become invisible after painting.
Error 3: Neglecting the junction of the slat panel to the cornice
The slatted panel reaches the ceiling — and where the battens 'meet' the bottom line of the cornice, there should be a neat adjoining transition. If the cornice is installed after the slatted panel — its lower edge should overlap the upper ends of the battens by at least 10–15 mm. If the cornice is mounted first — the battens are cut along the lower line of the cornice with a gap of 3–5 mm (to compensate for possible movements).
Mistake 4: Using mounting foam instead of adhesive
Mounting foam is a quick solution, but not suitable for decorative elements. The foam expands after application and deforms lightweight polyurethane products. After the foam sets, the cornice may warp to the side or cause the surface to bulge. Only specialized mounting adhesive or acrylic mounting compound should be used.
Mistake 5: Painting polyurethane without primer
Polyurethane is a material with low water absorption. Without special primer, the paint applies unevenly, creates 'tension', and peels off within 6–12 months. A mandatory step: priming the polyurethane surface with an acrylic or alkyd primer with good adhesion. After drying — 2 coats of finish paint. This is how the coating lasts long.
Mistake 6: Uneven batten spacing
When installing panels butt-jointed horizontally (when one section continues another), it is important that the batten spacing continues without shifting at the joint. If section A has a 60 mm spacing, section B should continue the same spacing without deviation. To achieve this, before installing each subsequent section, marking is done: find the center of the last batten of the previous section, and from it, count the first spacing of the next one.
Installation of slatted wall panels— is a process that benefits from planning: marking the entire surface before starting to attach the first section will save time and prevent errors.
MDF slatted panels for painting paired with polyurethane: the perfect union for monochrome systems
A combination that deserves special mention, which can be considered the dominant trend in residential interior finishing today:Painted MDF plank panelsplus polyurethane cornices and moldings painted in a unified tone.
MDF gives the battens perfect geometry and zero surface porosity—paint goes on evenly and is not absorbed. Polyurethane reproduces the complex profile of cornices and moldings with precision down to fractions of a millimeter. Both materials are easy to cut, glue, and paint—and when painted, they are indistinguishable from each other in tone.
Result: a monochrome system where battens, cornices, and moldings form a unified sculptural wall surface. All this without wet processes, in 1–2 working days, with a final result in the 'studio design project' category.
Popular color solutions
-
Warm white (RAL 9010)—Scandinavian minimalism, modern classic;
-
Light gray-beige (RAL 9001 or similar)—a neutral universal for any style;
-
Sage green / Dusty green (RAL 6021, 7010)—a current natural tone, organically combines with wood;
-
Petrol blue / Dark blue (RAL 5008, 5011)—a strong color accent for studies and living rooms;
-
Charcoal (RAL 7021, 7026)—loft, modern classic, study style;
-
Terracotta / Ochre (RAL 8003, 8023)—a warm earthy palette, Mediterranean notes.
Additional features: slatted panels with lighting and polyurethane decor
Slatted panels with lighting— is a separate chapter in the conversation about expressiveness. When a lighting solution is added to the combination of 'slats plus polyurethane decor,' the effect reaches a completely different level.
The LED strip, built into the cornice profile above the slatted wall, directs light from top to bottom. Each slat casts a shadow on the next—so a smooth wall during the day transforms into a textured three-dimensional volume in the evening. Polyurethane cornices with a niche for lighting are produced in series and are specifically designed for this application.
Spotlighting directed along the slatted surface from the bottom molding upward creates the opposite effect—an 'ascending' relief. This is especially effective with dark slats on a light background or dark slats without an additional background.
Slatted modular wall panel: convenience and versatility
slatted modular wall panel— is a structure in which the slats are already fixed on a supporting base at a set pitch. It is mounted as a solid sheet, not as a set of individual slats.
Advantages of the modular format combined with polyurethane decor:
-
Accelerated installation: the entire wall surface at once, without marking the pitch;
-
Precise, repeating rhythm without deviations;
-
Ease of transportation and storage;
-
Compatible with any polyurethane cornices and moldings.
Standard modular panel size: 600×2400 mm or 1200×2400 mm. For a wall area of 12 m², 5–6 panels with a width of 1200 mm are required. Installation takes 3–4 hours.
How to correctly choose the type of polyurethane decoration for a specific style
One of the most frequent requests: 'I want slatted panels and cornices. How to choose a cornice that will fit?' The answer depends on the style.
| Style | Cornice type | Molding type | Pilasters |
|---|---|---|---|
| Scandinavian minimalism | Rectangular, 40–60 mm | Flat, 15–25 mm | None or minimalist |
| Modern Classic | With a soft profile, 60–90 mm | Heel + shelf | Smooth, without order |
| Neoclassical | Classical multi-part, 80–140 mm | Frame with heel | Ionic or simplified |
| Loft | None or minimal corner | None or rectangular | No |
| Art Deco | Geometric ornamental, 60–100 mm | Stepped | Strict smooth |
| English style | Rich, 100–180 mm | Denticular or egg-shaped | Doric or Ionic |
FAQ: Answers to popular questions
Can you install slatted panels for interior wall finishing yourself?
Yes.DIY slatted panel— quite a realistic task with basic tools. You'll need: a laser level, drill, saw (miter or hand saw), mounting adhesive, gun. A detailed guide for all stages includes base preparation, marking, installation, and finishing of joints.
Which polyurethane cornice to choose for a 2.5 m ceiling?
For a 2.5 m ceiling, a cornice height of 60–90 mm is optimal. A larger cornice (100–140 mm) visually 'compresses' the space with a low ceiling. A minimalist cornice of 40–50 mm is acceptable but may be barely noticeable. The golden mean for standard apartments is 70–85 mm.
Is a lath needed under slatted panels?
Depends on the wall evenness and panel design. Modular panels on a flat wall are mounted directly with adhesive and dowel-screws. If the wall has variations over 5 mm, a lath of wooden battens or metal profile is needed to level the plane.
Which tone of slatted panels best complements white polyurethane decor?
Natural light oak, tobacco tint, mocha, walnut — all these warm tones harmoniously complement white polyurethane decor. Cool tones (gray ash, bleached oak, ashy) pair better with cool white or light gray polyurethane.
How to avoid seams when painting the 'MDF slats plus polyurethane cornice' system?
Before painting, fill all seams between elements with acrylic elastic sealant, remove excess with a damp finger, let dry. Prime the entire system with a single layer. Paint the entire slat surface with a roller; use a brush for cornice and molding details. Apply the second coat after the first is completely dry.
Where to buy slatted panels and polyurethane decor as a set?
The STAVROS website features the full range of both materials. You canbuy slatted panelsand polyurethane decor in one order, with guaranteed compatibility of tones and profiles.
Can polyurethane decor be used in the bathroom?
Yes. Polyurethane is completely moisture-resistant. The only requirement is good room ventilation to prevent condensation. MDF slatted panels in wet areas require moisture-resistant grade MDF or replacement with solid wood with oil coating.
About the company STAVROS
The complete system we have described throughout this article —slatted panels for interior wall finishingfrom oak and MDF array,Polyurethane Decorin the form of cornices, moldings, pilasters, rosettes, and other elements — this is the assortment of one Russian manufacturer: the company STAVROS.
STAVROS is a full production cycle: from timber harvesting and drying to cutting slats with a tolerance of ±0.1 mm and producing polyurethane decor in its own molds. Over 4000 items, 39 product groups, possibility of custom manufacturing from individual drawings. Delivery across all of Russia.
STAVROS works with design bureaus, architectural studios, construction companies, and private clients. Consultation on system selection is free. If your interior deserves expressiveness without unnecessary complications — start with the right choice of materials. Start with STAVROS.