Article Contents:
- A small front: why ten millimeters can change the whole composition
- A drawer, a door, and a combined cabinet require different solutions
- Small pull-out drawer
- Hinged cabinet door
- Cabinet with a drawer and a door
- When a small knob is not suitable
- Long handle on a wide but low drawer
- Two mounting points: calculating coordinates
- If the cabinet stands against the wall
- If there is a bed nearby and a narrow passage
- Example of a pair of cabinets configuration
- Key HL-019: a small button as a precise accent
- Button HL-036: one design in three sizes
- Proun HL-053-1M: compact geometry and a ready finish
- Handle in the color of the facade
- Contrasting handle with visible wood
- Ready finish for quick installation
- Test color sample before the entire series
- Door Panel Thickness and Screw Length
- What to do if the decorative button spins
- When it's better not to change the handle at all
- Which handle to choose for a 250–300 mm wide front?
- Is one knob better or two small handles?
- Can a single wooden knob be installed on a door?
- Which is more important: the overall length of the handle or the center-to-center distance?
- Can a new handle be fitted without reworking the old holes?
- Why is a small knob sometimes inconvenient?
- Should the handles on two bedside tables be mirrored?
- Which is better for a white nightstand — beech or oak?
- Can a wooden handle be painted to match the facade color?
- How many handles should be ordered for two nightstands with two drawers?
- When is it better not to buy a new handle?
- Where can I buy small wooden handles for a nightstand?

On the front of a 340 mm wide nightstand, a 240 mm long handle takes up almost the entire front surface. On a wide dresser, the same handle may seem small. That is why choosing wooden handles for a nightstand based only on a product photo is unreliable: a size that looks good on its own sometimes turns out to be disproportionate to the front and uncomfortable for the fingers.
For compact furniture, the starting point is the finished front and the way it opens. First, measure the width and height of the drawer or door, determine a convenient place to apply force, then choose the shape, check the actual grip, the projection from the surface, and the mounting pattern. Drilling is done only after a specific model and its installation dimensions have been approved. On a nightstand with one small drawer, neighboring parts will not hide a mistake: the single handle immediately becomes the center of attention.
Wood allows you to choose a soft rounded knob, a restrained pull, or a more expressive geometric piece. But neither beech nor oak by itself makes a product convenient: even a neatly finished small knob can be too difficult to grip, and a striking long pull can catch on the bed or wall when the door opens.
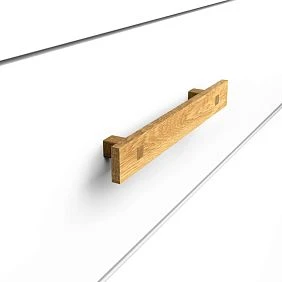
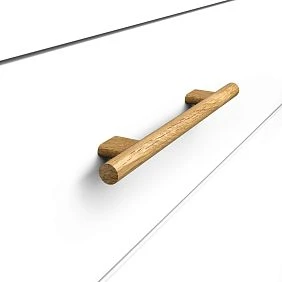
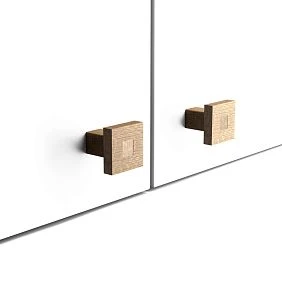
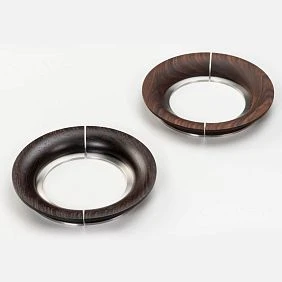
Small front: why ten millimeters can change the entire composition
Imagine a cabinet with a single drawer 320 mm wide and a front height of 160 mm. A wooden knob 30 mm wide will take up about 9.4% of the front width. A knob 74 mm wide is already 23.1%. These are different visual solutions, even though the difference between the handles themselves is only 44 mm.
On a large wardrobe door, changing the handle size by 40–50 mm may barely affect perception. On a compact cabinet, it is immediately noticeable: there is less free space around the handle, it begins to compete with the frame or panel, and the line of the front is perceived differently.
Size should be assessed in two directions. By width — how much horizontal space the handle occupies. By height — whether there is enough room between its outline and the top or bottom edge of the drawer. For a round knob, the diameter affects both directions equally; for a long pull, its face length, height, projection, and the position of the mounting points matter separately.
First measure the front, then mark the intended outline of the handle on paper or masking tape. Compare it under normal lighting and from your usual distance. On a bedside cabinet, a person sees the handle mainly from the side and from above, not only straight ahead. Therefore, a side view is also useful, showing how much the piece protrudes from the plane.
A single grip point sometimes looks more precise than a long horizontal line. But on a wide and heavy drawer, a small knob can be inconvenient. In that case, the question is settled by a trial opening, not by the percentage of the front width.




A drawer, a door, and a combined cabinet require different solutions
Our factory also produces:
Small pull-out drawer
On a pull-out drawer, the hand creates force in the direction the runners move. If the drawer is positioned symmetrically, a single handle is often installed along the central vertical axis of the front. But when choosing the height of the handle within the front, you need to take into account the depth of the drawer, the nature of the grip, and a possible decorative frame.
When the handle is positioned too close to the top edge, fingers may bump into the countertop or an adjacent panel. Too low a position sometimes forces you to pull the drawer at an awkward angle. Therefore, the geometric center is a good starting point, but not a substitute for a test fit.
For a drawer with significant opening force, compare a knob with a short pull. A pull usually offers more options for gripping with fingers, but its real usefulness depends on the space under the bridge and the quality of the mounting.
Get Consultation
Hinged cabinet door
For a door, the hinge side and the position of the free edge matter more. If the hinges are on the left, the handle is usually placed closer to the right side rather than in the center of the panel: this makes it easier to create leverage for opening. However, the distance from the edge should not be chosen without taking into account the width of the frame, the mounting area, and possible collision with adjacent furniture.
On the door of a small cabinet, a handle that protrudes too much can hit the wall when opening. Moreover, a simple measured gap between the closed front and the wall does not guarantee anything: the handle moves in an arc together with the door.
Before drilling, check the movement of the front with a full-size mock-up of the protruding part. If it still hits the wall or the bed even after adjusting the position, it is worth choosing a more compact model, changing the opening angle limit in the provided way, or reconsidering the cabinet layout.
Cabinet with a drawer and a door
If there is a small drawer on top and a hinged door below, the same handle model does not necessarily have to be installed at identical coordinates.
On a drawer, a central position is convenient. On a door, the position is determined by the hinges and the free edge. Visual unity is achieved through the same material, shape, and finish; strictly identical offsets can worsen convenience.
Check how the handles are perceived in the closed position. If the upper knob and the lower pull are of different sizes, they can be unified with the same wood and the same coating. But two randomly chosen decorations on a small cabinet often create unnecessary competition.
Knob or pull handle: mounting method and grip first
Most knob handles have one main mounting point. Many pulls have two, but the product type alone does not replace a drawing: there are exceptions, concealed fixings, and original mounting solutions.
The difference is fundamental, because after drilling the front, the choice of new items is limited by the position of the holes. A single knob usually requires determining one coordinate. A pull requires two coordinates and the exact distance between them.
| Handle option | When to consider for a cabinet | What to check before ordering |
|---|---|---|
| Compact wooden knob | One small drawer, a minimalist door | Grip comfort, mounting point, and rotation clearance |
| Large knob | Medium front, a noticeable decorative accent | Free space around, finger room |
| Short pull | A frequently used or wider drawer | Space under the handle and mounting points |
| Long handle or profile | Graphic composition on a smooth front | Front share, projection, actual center-to-center distance |
| Geometric handle with a ready-made finish | Custom-made cabinet where the accent matters | The mounting system, shade, and compatibility with the front |
One should not assume that a knob is necessarily worse on a heavy drawer or that a pull is always stronger. The force depends on the slides, the weight of the contents, and the quality of the connection to the front. A specific handle is tested on a real mechanism, not judged by its shape alone.
When a small knob is not suitable
A small wooden handle can look almost perfect on a 280 mm wide front. But if the edges are too smooth, the projection is small, or a wide decorative frame is nearby, fingers will have trouble getting a grip.
You need to determine not only the overall dimensions but also the working grip zone: where the fingertips rest, whether there is room for bending, whether the hand slips when pulling, and whether the finish prevents a secure hold on the piece. Try opening it several times from a normal position, including with one hand. If you have to hook your nails on a narrow edge to grip it, it is better to choose a different geometry.
In a small bedside cabinet, a person often opens the drawer at night without looking directly at the handle. Therefore, tactile convenience here is no less important than visual proportion.
Handle scale relative to the front: a simple calculation without invented standards
To compare two handles, it's convenient to use the ratio of their face size to the width of the front:
Width share = visible handle length / front width × 100%.
This is a tool for compositional analysis, not a standard requirement. A share of 15% is not automatically correct, and 70% is not automatically wrong: sometimes a long handle deliberately forms the main horizontal of the cabinet. But without calculation, it is difficult to explain why the options are perceived so differently.
Consider a front panel 400 mm wide. A 30 mm wide knob occupies 7.5% of the width. A 140 mm long handle — 35%. A 280 mm long option — 70%. Since the other parts of the cabinet have not changed, it is the handle that begins to define the character of the front panel.
| Frontal size of the handle | Facade width | Width share | What to Check |
|---|---|---|---|
| 30 мм | 400 мм | 7,5% | Grip sufficiency |
| 53 мм | 400 мм | 13,3% | Visual proportionality |
| 74 мм | 400 мм | 18,5% | Free space above and below |
| 140 мм | 400 мм | 35% | Alignment with the center and fastening |
| 280 мм | 400 мм | 70% | Does the long line interfere with the frame and edges |
For a round knob, you can additionally compare the diameter with the height of the front. A 74 mm knob on a 140 mm high drawer occupies 52.9% of its height. After centering, only 33 mm will remain between its conventional top and bottom edges and the edges of the front. If there is a 30 mm wide frame inside, the free central field will be even smaller.
This is already a reason to reject the model or change the composition, rather than simply reducing the offset by eye.
Long pull on a wide but low drawer
A TV stand may have a drawer 650 mm wide and 120 mm high. A 220 mm long handle occupies only about a third of its width, but its cross-section can almost fill the height of the central field. Therefore, the width coefficient is not enough here: you need to check the product height, protrusion, and finger access.
If there is a horizontal decorative line on the front, the handle can either support it or disrupt the rhythm. Choose one expressive technique; several parallel large lines at a small height are often perceived as a cramped composition.
Where the handle center is located on a small drawer
For a calm symmetrical composition of a single knob, the starting point is the geometric center of the front.
If the width is 380 mm and the height is 180 mm, its coordinates, measured from the top-left corner, are:
- horizontally: 380 / 2 = 190 mm;
- vertically: 180 / 2 = 90 mm.
These are the coordinates of the intended mounting center if the handle design allows the fastener to be placed at its visual center. For an asymmetrical model, the center of the visible contour and the mounting point may not coincide — in that case, use the manufacturer's drawing and evaluate the result separately.
If the front has a panel, frame, or carved overlay, the center of the entire panel does not necessarily coincide with the center of the free decorative field. For example, an overlay may shift the visual emphasis upward. In this case, the handle may be positioned differently, but the entire composition should be marked out in advance.
The habit of "drilling at the halfway mark with a ruler" without taking into account the actual grip location is especially dangerous here. It is necessary to check whether there is enough distance between the handle and adjacent parts of the cabinet when opening. If the drawer has a top rail protruding above the front, it may interfere with fingers, even though the geometric center is calculated correctly.
Two mounting points: calculating coordinates
Suppose that on the same 380 × 180 mm front, a bow handle is selected for which the center-to-center distance of 96 mm is confirmed by the drawing. This dimension in the example is arbitrary and does not refer to any STAVROS model named below.
With horizontal centering, the mounting points will be:
190 − 96 / 2 = 142 mm;
190 + 96 / 2 = 238 mm.
With the selected center line, the vertical coordinate of both points is 90 mm.
Check both coordinates, the distance between them, the actual handle outline, and the clearance for the screw heads on the back side of the front. If a runner, drawer edge, or another structural element is nearby, a different placement scheme will be required.
Center-to-center distance is the distance between the centers of the mounting holes, not the overall length of the handle. A pull with an overall size of 140 mm does not necessarily have a mounting distance of 128, 96, or any other value. The drawing is the primary source.
Handle on the door: the grip point depends on the hinges
On a hinged door, the opening torque is created relative to the hinge axis. The handle is usually placed closer to the free edge of the door leaf to make the door more convenient to use.
Suppose a door 360 mm wide opens on left hinges. If the project specifies a handle center offset of 60 mm from the right edge, its horizontal coordinate from the left edge will be:
360 − 60 = 300 mm.
This is an example of calculating the coordinate, not a universal recommended offset. On a real door, the position depends on the frame width, hinge design, available mounting area, and adjacent furniture.
The upper or lower vertical position is also determined by convenience. On a bedside table, the door may be opened while sitting on the bed; on a hallway cabinet, while standing. There is no single "correct handle height" for all doors here.
If the cabinet stands against a wall
After choosing the position, be sure to check the handle's path when opening. For a preliminary test fit, you can attach a wooden or cardboard protrusion to the facade mockup equal to the candidate's overall projection.
Carefully open the door to the expected angle and check whether the protrusion hits the wall. Take into account opening restrictors and the actual hinges. Even if there is 30 mm to the wall when the door is closed, a handle with a 25 mm projection may encounter an obstacle while moving along its arc.
If a conflict arises, changing the handle model is often easier than reworking a finished cabinet or shifting the entire furniture arrangement.
If there is a bed nearby and a narrow passage
A handle that protrudes too much may catch on the bedspread or clothing, or be in a person's movement zone. A small but sharp-edged piece sometimes creates more inconvenience than a rounded handle of somewhat larger size. Therefore, evaluate not only the projection but also the shape of the exposed edges, the direction of the protrusion, and the position of the cabinet relative to the mattress.
Two bedside tables: mirrored or identical arrangement
In a bedroom with two tables on either side of the bed, there are at least two working scenarios. In a symmetrical composition, the doors can be mirrored: the hinges are located on opposite sides, and the handles are closer to the bed or, conversely, facing outward. With an identical facade design, both tables repeat the same mounting scheme regardless of their location.
The choice must be made before drilling. You cannot assume that two tables will automatically become mirrored just by placing one on the left and the other on the right. For hinged doors, an error in the hinge side results in inconvenient access.
With a mirrored layout, a coordinate system from the corresponding edge is used. For example, the handles of both doors can be positioned 55 mm from the free edge; however, their absolute coordinates from the left edge turn out to be different.
For drawers, the logic is different: central handles on two facades of the same size can usually be marked out using a single template. But the height marks must match on the products themselves. A difference in the position of the centers by 4–5 mm, almost imperceptible individually, becomes more noticeable when two tables are placed symmetrically on either side of the bed.
Example of a set for a pair of nightstands
Suppose each bedside nightstand has two drawers. It has been decided to install one wooden knob on each front.
Total quantity: 2 nightstands × 2 drawers = 4 handles.
If the fronts are the same size and a single handle version is chosen, the order can be placed as one line item for four pieces. If the upper and lower drawers differ in dimensions and require two physical sizes, the specification will include two line items of two handles each.
After receiving the parts, they are checked not only by quantity but also by size, material, finish, and mounting method. The fact that they belong to the same model line does not guarantee the same version.
Handle projection: a dimension that is hard to see in a photo
In this context, projection means the distance by which the installed handle protrudes in front of the front plane. This value does not necessarily coincide with one of the lettered dimensions in the product card: the manufacturer may designate different dimensions A, B, C, and D.
The actual projection is checked against the drawing and, preferably, on a sample. For a knob, it is useful to estimate the distance from the front to the area where fingers grip. For a pull, the free space between the bar and the surface.
A checklist of conditions for inspection will help you avoid buying a beautiful but inconvenient piece.
| What to check | Why this matters for a nightstand | How to check |
|---|---|---|
| Protrusion beyond the front | The handle may catch on a wall, bed, or a person passing by | Mockup in the actual place |
| Space for fingers | It is difficult to slip a hand under the pull or knob | Opening several times with one hand |
| Sharp protruding edges | The handle may snag fabric | Inspection and trial grip |
| Pull direction | The force may be inconvenient | Check on the installed front |
| Rear screw position | The fastener may intersect the drawer structure | Inspect the back side |
| Rotation capability | An asymmetrical knob can change orientation | Mounting test according to the instructions |
You shouldn't invent universal numbers like "the overhang must always be at least 25 mm." Comfort depends on the shape, hand size, grip direction, and opening force.
Three real STAVROS handles: how to use them on a compact cabinet front
For comparison, it's convenient to take three products with different shapes and finishes: Key HL-019, Button HL-036 и Proun HL-053-1M. They don't need to be declared the three universally best options for a cabinet. Each solves its own design task, and each needs to be checked against the drawing.
| Model STAVROS | Confirmed dimensions, mm | Variants | What to check on the cabinet |
|---|---|---|---|
| Key HL-019 | A × C = 30 × 20 | Beech and oak, without finish | Grip of a small knob and position of the single part |
| Button HL-036 | A × C × D: 37 × 22 × 15; 53 × 27 × 18; 74 × 29 × 25 | Beech and oak, without finish | Which size is proportionate to the front and comfortable for the hand |
| Proun HL-053-1M | A × B × C = 28 × 28 × 29 | Beech and oak, ready-made finish options | Color matching, mounting pattern, and the role of geometric shape |
Values A, B, C, and D are given in the sequence shown in the cards. Do not automatically assume that size C is the handle projection: the physical orientation of each dimension is determined from the technical drawing. Actual installation dimensions are also needed to select the fasteners.
Key HL-019: a small button as a precise accent
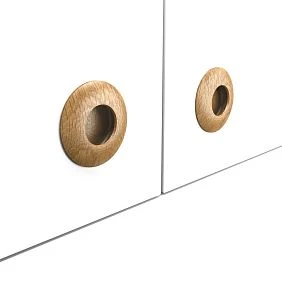
Key HL-019 has a confirmed size of 30 × 20 mm. The product belongs to wooden knob handles and is supplied without finish; the manufacturer's card states that the mounting kit is included in the price. Oak and beech options are available.
On a 300 mm wide drawer front, a 30 mm face dimension will occupy 10% of the width if the selected orientation actually produces that projection. This ratio allows the handle to be considered a compact accent, but it does not answer the question of ergonomics. You need to make sure it is comfortable to grasp at the specific height and with the actual opening force.
For a smooth bedside cabinet, one small knob may be enough as a decorative detail. If the front is decorated with a protruding molding, first check whether it blocks finger access.
When selecting one such handle after renovation, it is important to record the material and finish: unfinished beech and unfinished oak may absorb oil and stain differently.
Button HL-036: one design in three sizes
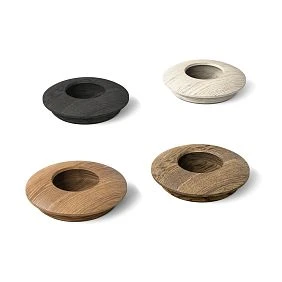
The advantage of the Button HL-036 series for furniture layouts is the availability of three physical sizes in one recognizable shape. The product card confirms versions of 37 × 22 × 15, 53 × 27 × 18, and 74 × 29 × 25 mm. They are supplied unfinished, beech and oak options are available, and the mounting kit is included in the price.
Let's take a 340 mm wide front. Based on the first designated dimension A, the proportions will be as follows:
| Dimension A of the Button handle | Facade width | Share by width |
|---|---|---|
| 37 мм | 340 мм | 10,9% |
| 53 мм | 340 мм | 15,6% |
| 74 мм | 340 мм | 21,8% |
The numbers help compare scale, but they do not establish a rule. A 74 mm handle can be a justified accent on a simple smooth front panel; a 37 mm model may leave more free space, yet prove less convenient for a particular mechanism.
A real check includes a grip test and trial opening. You cannot choose by width at random, relying only on the idea that “a small cabinet should have a small knob.”
The series is convenient for a cabinet with several front panels of different sizes: for example, a narrow upper drawer can be assigned a small knob, and a large lower one a medium one. However, it is worth checking whether the variety of sizes turns out to be excessive for a compact piece. Sometimes identical knobs on two front panels are perceived as neater.
Proun HL-053-1M: compact geometry and a ready-made finish
Proun HL-053-1M — a small wooden element with dimensions of 28 × 28 × 29 mm according to the STAVROS product card. The range lists versions in beech and oak with color options; the manufacturer describes a geometric decorative shape and delivery with fastening elements. Despite its compact size, the description classifies the series as a pull-handle type. Therefore, the exact number of mounting holes, their position, and orientation should be taken from the drawing rather than inferred from the name or size.
The main difference from the unpainted models under consideration is the ability to choose a ready-made finish. For a small cabinet, this reduces your own painting operations, if the color really suits the front panel.
When choosing a handle for ready-made white or dark furniture, an image on a screen is not enough. Assess the actual degree of gloss, the shade under the room's lighting, and the combination with the cabinet body material. For a pair of cabinets, it is desirable that both handles belong to the same approved finish option.
Beech or oak: the handle material should match the task, not the trend
A wooden handle comes into contact with the hand much more often than many decorative furniture elements. Therefore, the choice of wood species and finish is related simultaneously to appearance, ease of cleaning, and the surface's resistance to everyday use.
Beech is advisable when an opaque enamel is planned and the handle needs to match the front in a single color. It can also be used with a clear finish, but the result should be evaluated on a sample. Areas with end grain may take stain differently than longitudinal grain.
Oak is often chosen for its open texture. A small oak handle on a painted cabinet can create a warm contrast. However, natural wood varies in shade and grain arrangement, so two oak knobs from different batches will not necessarily look identical under clear lacquer.
Species selection should not be turned into an absolute rule: beech is not intended exclusively for enamel, and oak does not always have to remain clear-finished. The specific product is selected based on the available options and the actual finishing system.
For bedside furniture, tactility is especially important. A rough area, a poorly sanded edge, or a finish that feels unpleasant to the touch will be felt every time it is opened. Before approving a batch, run your hand along the entire contour and check the accessible interior surfaces.
An unfinished wooden handle or a product with a ready-made finish
If the cabinet body is made to order and painted to a specific sample, unpainted wooden handles allow the finish to be coordinated with the furniture at the same time.
But the phrase "unfinished" does not mean the product can be painted with any composition without preparation. The quality of sanding, the priming recommendation, and compatibility with the chosen system should be checked.
A small knob has a particular trait: its relief and edges are visible up close, and finish defects are constantly under your fingers. That is why a test coat on the actual piece gives more information than a small flat sample of the same wood.
Handle in the color of the facade
If the knob is painted with the same enamel as the body, it is perceived as part of the overall geometry. This is useful when the front already has a frame, decorative molding, or noticeable wood texture on other parts. At the same time, the surface of the knob itself must withstand the expected number of touches and cleaning.
A color formula does not replace a sample. On wood and a panel front, the same composition can produce a different texture; due to lighting, a small convex part sometimes looks darker than the adjacent flat surface. Check the handle directly on the cabinet after the coating has dried.
Contrasting handle with visible wood
An oak knob under clear lacquer on a white front becomes a standalone accent. This technique is especially expressive if the cabinet shape is simple and additional decor does not distract attention.
However, on a very small front, several large contrasting elements can create visual clutter. It is better to choose the main focal point in advance: the knob, an overlay, a decorative frame, or a pronounced front pattern.
Ready-to-install finish
Wooden handles with coating are suitable when the available color and level of gloss match the project. For a single cabinet being updated, this may be more convenient than buying separate paint and arranging painting work.
But one should not assume the coating is automatically suitable for any use. It is necessary to study the manufacturer's recommendations, cleaning conditions, and the actual quality of the product. When ordering several handles, check for a single color variant, not just the model.
Test coat before the full series
For custom furniture, a sensible sequence is: one physical sample → preparation → test coating → check next to the facade → approve the technology → finish the remaining parts.
If the coating must match the wooden legs of the cabinet, compare the samples after they are completely dry and under the same lighting. A color match of raw oil or wet stain does not yet guarantee the final result.
Do not forget to treat the open surfaces of the handle provided by the manufacturer: they also come into contact with skin, moisture, and care products.
Installation and drilling: first approve the handle, then the holes
When the facades arrive at the workshop, the temptation to quickly drill all identical parts is strong. However, even a small series of eight cabinets requires an approved drilling map: after drilling, changing the type of knob to a pull handle is no longer possible without reworking or masking the holes.
The working sequence for new furniture is as follows:
- Determine the dimensions of the facade and the type of opening.
- Choose a specific article number, material, and physical size of the handle.
- Obtain a mounting drawing or a single sample.
- Check the grip and projection on an actual door or a working mock-up.
- Agree on the coordinates of one hole or a pair of holes.
- Make sure that on the inner side of the front, the fasteners do not interfere with structural elements.
- Make a mounting template and test it on a trial piece.
- Drill according to the map and install the handle without damaging the finish.
- Inspect the result with the cabinet closed and open.
Do not specify the hole diameter or drilling depth "for all wooden handles." These values are determined by the mounting of the specific model. Some products use a through bolt from the back of the front, while other designs are built differently.
Facade thickness and screw length
A 16 mm thick furniture front and a 22 mm thick front may have the same face handle, but the fasteners will need to be of different lengths.
First, the thickness of the door or drawer itself is determined, then washers, additional spacers, the required thread engagement, and manufacturer limitations are taken into account. The screw must not bottom out in a blind hole before proper tightening, and insufficient thread engagement can lead to a weakened fastening.
Over-tightening is especially dangerous for a wooden handle: it can damage the internal fastening assembly or the front surface of the cabinet door. Do not use an arbitrarily longer screw just because the short one seems unreliable.
Before purchasing furniture hardware compare the handle's supplied hardware with the cabinet door thickness. If the fasteners are already included in the product listing, this does not eliminate the need to verify their suitability for your design.
What to do if a decorative knob spins
With a round symmetrical knob, a slight rotation is almost imperceptible. With a square or asymmetrical handle, it immediately disrupts the composition.
If the item is mounted at a single point, its ability to maintain orientation depends on the design of the mounting surface and the fastening. You should not arbitrarily add a second screw to a wooden handle, drill through it, or use an aggressive adhesive without technical justification.
First, check that the included fasteners are correct and that they are compatible with the cabinet face. If the manufacturer has a designated means of fixing the orientation, use that. For a series of cabinets, it is best to document one approved scheme in the installation instructions.
If the nightstand is already drilled: replacement without extra holes
When updating a finished nightstand, the selection order is reversed. First, you need to determine the parameters of the existing holes, and only then look for suitable wooden furniture handles.
A single existing hole usually limits the choice to models with compatible single-point mounting. Two holes require matching center-to-center distance — but it is also important to check their position relative to the decor and whether the new handle sufficiently covers the old marks.
You should not choose a long pull solely by its overall length. If the holes are spaced 96 mm apart, but the attachment points on the model you like are positioned differently, the swap will not be a simple replacement.
Before disassembly, photograph the old handle on the front, then remove it and measure between the centers of the holes. Inspect the edges: marks from old bases, cracks, and finish damage may remain visible even under a new handle.
If the old holes do not fit, the solution must include a front repair plan: proper filling, finish restoration, and new marking. Do not drill holes next to damaged edges without assessing the material's strength. This is especially important for a thin panel or slab front.
When it is better not to change the handle at all
If the existing handle is comfortable, holds securely, and matches the furniture, replacing it for a slight change in shape may not be worthwhile. Especially when the old holes do not align with the new model and a full repainting of the front is required.
If there is a complaint about a stiff drawer, first check the slides, the cabinet's skew, the soft-close mechanism, and possible jamming. A larger handle will not fix a mechanism fault, although it may sometimes allow more force to be applied — and that can worsen the damage.
Handle and decorative overlay: how not to clash two accents
On a small cabinet, one often wants to combine a wooden handle, a molding frame, and a carved overlay. Such a combination is possible, but the parts must be laid out at the same time.
Let's imagine a front 360 mm wide and 200 mm high. The decorative overlay occupies the central area, and the craftsman plans to place a round knob there as well. If the overlay is attached first, the handle may be left with neither a compositionally justified place nor a sufficient flat mounting area.
Instead, mark the boundaries of all elements on the drawing: the outer contour of the front, the inner field of the frame, the overlay, the finger movement zone, and the drilling point or points. After that, check the distances between them on the mockup.
If the carved decor is already quite active, a calm, small knob is more useful. If the facade is completely smooth, an expressive handle sometimes allows you to skip an additional overlay: the cabinet gains one clear accent.
No technique is mandatory. It is important that the decorative scheme does not impair access to the handle and does not force drilling the mounting in an unsuitable place.
One trial handle before ordering a set
Buying one physical handle can save you from redoing a series of facades. It is used to check the dimensions, hole positions, actual grip, projection, material, and coating quality.
For a pair of bedside cabinets with two drawers each, the main order is four handles. If the model is new to the workshop, it is reasonable to first test one sample on an unnecessary trial panel of the same thickness or on a specially prepared mock-up.
If the chosen size looks good on a 350 mm wide facade, this does not yet mean that it will suit a narrow 240 mm door. Each differing group of facades must be checked separately.
The sample is kept together with the drawing. After approval, there is no need to choose the handle again from a catalog image: the workshop reproduces the exact article number, size, finish, and drilling coordinates.
How to prepare a handle schedule for cabinets
For an order of several items, a line like “wooden handles — four pieces” is not enough. A catalog may contain several size, wood species, and color variants of the same model.
| Product | Handle design | Location | Quantity |
|---|---|---|---|
| Left cabinet, top drawer | Approved button, beech, unfinished | Centered on the facade | 1 |
| Left cabinet, bottom drawer | Same execution | Centered on the facade | 1 |
| Right cabinet, top drawer | Same execution | Centered on the facade | 1 |
| Right cabinet, lower drawer | Same execution | Centered on the facade | 1 |
| TOTAL | 4 |
For a production order, additionally record the article number, full dimensions, material, finish, mounting type, hole size and coordinates, facade thickness, and sample number. If the right cabinet is a mirror image of the left one, this is shown in the handle layout map, not only in the label "right".
If a cabinet includes a door and a drawer, it is not necessary to order the same shape for two different opening methods. A pair of similar handles can be approved, but each variant must get its own line in the specification. This will prevent accidental mix-ups during installation.
For a small furniture series, it is useful to also keep the supplier's order number. Six months later, it will be easier to repeat the exact approved version rather than search for a handle with a similar photo.
How much do handles for a pair of cabinets cost: compare identical versions
The cost of a set depends on the model, physical size, wood species, and finish condition. At the time of checking on October 11, 2026, the STAVROS product pages listed the following prices for specific options:
| Proven finish | Price per handle | Four handles |
|---|---|---|
| Key HL-019, 30 × 20 mm, beech, unfinished | 1 110 ₽ | 4 440 ₽ |
| Button HL-036, 37 × 22 × 15 mm, beech, unfinished | 750 ₽ | 3 000 ₽ |
| Button HL-036, 53 × 27 × 18 mm, beech, unfinished | 1 020 ₽ | 4 080 ₽ |
| Proun HL-053-1M, 28 × 28 × 29 mm, beech, white ready-finish option | 850 ₽ | 3 400 ₽ |
This compares the actual prices of the named finishes, but not products that are equivalent in technology: Proun already has a finish, while Key and Button are offered unpainted in the table. The difference in purchase cost is not equal to the difference in total cost.
For an unpainted handle, you need to account for trial finishing, primer, paint or oil, and labor. For a ready finish, check whether the furniture color works without additional work. In both cases, consider delivery and compatibility of the included hardware separately. Prices, availability, and ordering terms may change, so before paying, check the selected options directly in the product pages.
If one knob is 250 rubles more expensive than another, then for two cabinets with two drawers, the difference in the cost of four handles is 1,000 rubles. But the decision cannot be made based on that figure alone. A more expensive handle may fit the grip better or not require painting yourself; a cheap one sometimes turns out to be a poor fit during installation and forces you to replace the front.
For custom furniture, the cost of a drilling error is often more significant than a small difference in the price of the hardware.
Where to buy wooden handles for a chest
В the STAVROS wooden furniture handles catalog you can compare products by shape, size, material, and finish option. If you need a compact handle for one small drawer, start with button handles. For a wider drawer or a different grip style, explore Wooden handle brackets.
A buyer who is about to purchase wooden furniture handles should know in advance not only the number of fronts, but also their thickness, opening type, and whether there are existing holes. For a new furniture project, it is better to first choose a specific handle, then create a drilling map. When updating a finished cabinet, first take measurements of the previous holes and the mounting location.
When wooden handles are needed for a bedside table, check separately the proximity of the bed and the wall. Even the most beautiful handle is unsuitable if it is awkward to grasp from a lying position or if it hits an obstacle when the door is opened.
To order a set for two nightstands, make a short list: item code, size, oak or beech, finish, mounting type, quantity, installation coordinates. If precise color matching is needed, approve one sample before the main finishing. If a ready-made finish is available, check it in the room under real lighting.
If you are interested in wood preparation, STAVROS information is useful about the quality of wooden products. For professional purchasing, you can review terms for furniture manufacturers и payment and delivery procedure.
A well-chosen handle on a small nightstand often remains almost unnoticed until the moment of use. That can be a good result: the front looks seamless, it is comfortable for the hand, and the mounting does not require rework after drilling.
Frequently asked questions about wooden handles for a nightstand
Which handle should I choose for a 250–300 mm wide front?
Start with a compact knob or a short handle whose physical dimensions do not cover the main part of the front. Then check the actual grip and installation. A universal diameter cannot be assigned based on width alone: the height of the front, the frame, and the opening force all matter.
Is it better to use one knob or two small handles?
For a small symmetrical drawer, one central knob is often convenient in the composition. Two handles require two grip zones and coordinated placement, and sometimes make use more difficult. The decision depends on the width and weight of the drawer, the runners, and the design task.
Can a single wooden knob be installed on a door?
Yes, if it is suitable in terms of mounting method and convenient at the free edge of the door. Check the hinge side, the space for fingers, and the opening path near a wall or bed.
What is more important: the overall length of the pull or the center-to-center distance?
For visual composition, both dimensions are taken into account. For drilling, the determining factor is the confirmed distance between the centers of the mounting points. The overall length does not allow you to calculate the center-to-center distance on your own.
Is it possible to find a new handle without reworking the old holes?
Yes, if the new model matches the existing mounting pattern and covers the previous finish marks. With two holes, the center-to-center distance must match; with one, the single mounting must be compatible. In other cases, a separate solution for repairing the front will be required.
Why is a small knob sometimes inconvenient?
Its edges may not provide enough support for the fingers, the projection may be too small, and a heavy drawer may require noticeable effort. The best way to check is to try one real handle on a working front before making the main purchase.
Should the handles on two bedside cabinets be mirrored?
Not necessarily. Mirroring is especially worth discussing for hinged doors on both sides of the bed. For symmetrical drawers, identical marking along the central axes is often sufficient. The decision is fixed before drilling.
Which is better for a white cabinet — beech or oak?
Both materials can be used with the appropriate finish. If an opaque enamel in the color of the front is planned, a beech handle with suitable preparation can be considered. If a natural wood contrast is required, oak with a clear coating can provide a more pronounced texture.
Can a wooden handle be painted to match the front?
Yes, if the design and coating system are intended for such treatment. Prepare the surface, do a test paint, and make sure the shade and gloss match. One should not assume that the same paint will give the same texture on wood and on a panel front.
How many handles should I order for two cabinets with two drawers each?
If each of the four drawers has one handle, the basic requirement is four pieces. If the layout is different, the quantity is determined by the front plan. If there are different physical sizes within one series, separate purchase lines are created.
When is it better not to buy a new handle?
If the problem is faulty runners, a skewed drawer, or a damaged mounting point, the mechanism or front must be repaired first. Replacing the hardware does not eliminate such a cause.
Where to buy small wooden handles for a nightstand?
Choose a specific model in the STAVROS catalog, check the physical size, material, finish option, and mounting drawing. For a ready-made cabinet, also measure the previous holes, and for a new project, approve a sample first and only then drill the fronts.