Article Contents:
- Why a kitchen handle is not the same as a bedroom cabinet handle
- First the front type, then the handle design
- One kitchen does not necessarily require one handle size
- Which type of wooden handle to choose for the kitchen
- Wooden knob handle: a compact grip point
- Wooden pull handle: a full grip for drawers and doors
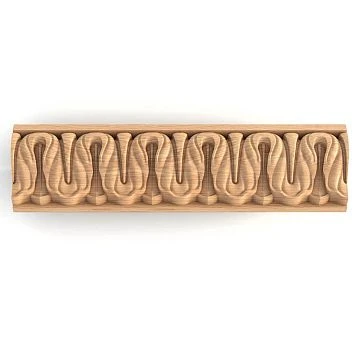
- Profile handle: a long line instead of a separate accent
- Surface-mounted wooden handle: check not only the front but also the edge
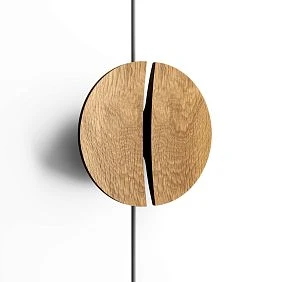
- Recessed handle: when the protrusion needs to be reduced
- Shell handle: a distinctive shape for framed and classic fronts
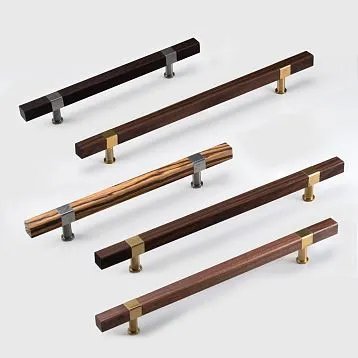
- T-bar handle: a compact accent with a pronounced grip
- What to check on a coating sample
- Center-to-center distance cannot be taken from the outer length
- Is a reserve needed
- Drill first, buy later
- Choosing the size based only on the facade width
- Measure the total length as the center-to-center distance
- Ignore the angular trajectory
- Buy the full set before checking the finish
- Assume that a wooden handle must always remain natural
- Use a single size for the sake of formal uniformity
- Which wooden handles are suitable for the kitchen?
- Where to buy wooden handles for kitchen fronts?
- Which is better for the kitchen — a knob handle or a pull?
- Is a wooden profile handle suitable for the kitchen?
- Which wood to choose for a handle — beech or oak?
- Can wooden handles be painted to match the kitchen color?
- Which handles are best to choose with a factory finish?
- How to choose the handle size for a wide drawer?
- How to check whether handles will collide in a corner kitchen?
- When should handles be decided on — before or after drilling the fronts?
- Should the same handles be used on upper and lower cabinets?
- Can I buy the handles first and then plan the hole positions?
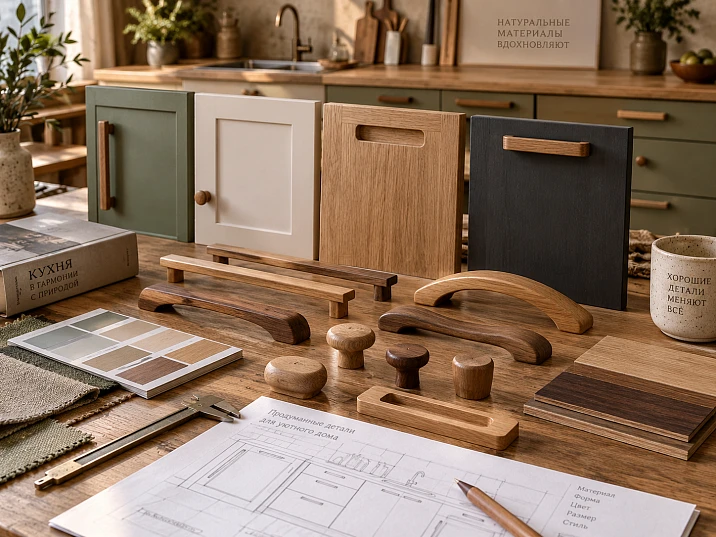
A handle can look perfect on a sample front and turn out to be inconvenient once the kitchen is assembled. The reason is usually not the design as such. A tall pantry unit, a narrow upper cabinet, a heavy pull-out drawer, and a corner module door have different movement paths, different grip zones, and different clearance around the front. If you choose hardware only from a photo, these differences are discovered too late — after drilling.
For a kitchen, it is better to reverse the order: first determine which front the handle opens and how a person will grip it, then check the dimensions, mounting method, protrusion, material, and finish. Only after that should you approve a specific SKU. This approach is especially important for wooden handles: natural wood gives the project the right tactile quality and allows the hardware to be tied to the fronts, countertop, or other decor, but in a kitchen the handle also remains a working part that is constantly gripped by hand and regularly cleaned.
Therefore, the query "wooden kitchen handles" is not a question of which shape is more beautiful. It is a matter of configuration. For one kitchen, a compact button handle may prove rational; for another, a bar pull with a full grip; for a third, a profile or recessed model with a small protrusion. Sometimes one design family suits the entire composition, but the sizes within the family have to be varied. Sometimes the same handle on all fronts looks neat but performs poorly on a wide bottom drawer.
At STAVROS, wooden furniture handles are gathered in a separate catalog of wooden furniture handles. There are models without coating and with a ready finish, as well as separate types — buttons, bar pulls, profiles, surface-mounted, recessed, shells, and others. The task before ordering is not just to choose a preferred option, but to link it to the geometry of the kitchen.
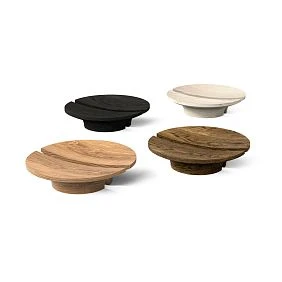
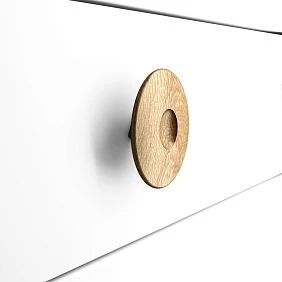
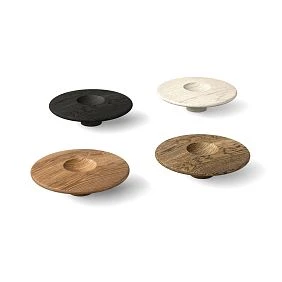
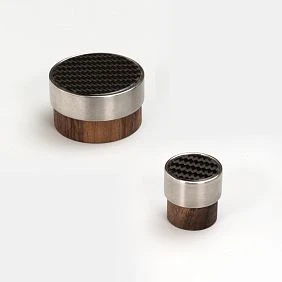
Why a kitchen handle is not the same as a handle for a bedroom cabinet
A kitchen handle is more often grabbed on the go, with one hand, sometimes right after cooking or washing. It is located next to the work area, dishes, food, and appliances. Bottom drawers may open under load, upper fronts — with a grip from below or the side, and on corner modules two handles sometimes end up almost opposite each other.
Therefore, four things are checked at once for a kitchen handle: grip, protrusion, placement, and surface.
Grip answers a simple question: can the front be opened with one natural motion, without prying the handle with fingertips. Protrusion shows how much space the handle takes in front of the front and whether it interferes with the neighboring door, wall, column, or passage. Placement determines whether the handle is convenient to use at the exact point where it will be installed. Surface matters because of regular contact with hands and cleaning.
For the bedroom, some of these requirements also exist, but the usage scenario is different. On the STAVROS website there is already a separate article about why kitchen and bedroom handles should not be chosen by the same principle. Here it is more useful to go deeper: to examine the wooden handle specifically as a concrete component of a kitchen facade — from the grip shape to approving the SKU before drilling.
There is another practical difference. In a kitchen, handles almost never exist one at a time. Ten, twenty, or thirty identical components form a rhythm. A small error in the installation height of one handle is unnoticeable on a single facade, but a row of eight drawers immediately reveals it. That is why model selection and production marking are closely linked here.




First the facade type, then the handle design
A handle you like should not determine the geometry of a finished kitchen after the fact. First, look at the facade.
A smooth facade usually has a large free surface. It is easier to place a knob, pull, surface-mounted, or profile model on it. On a framed facade, the working area is already limited by the frame and the panel. On a narrow drawer, a long handle may physically not fit or may visually take up almost the entire width. On a tall pantry unit, on the other hand, a knob that is too small may turn out to be unsuccessful in both scale and grip.
| Facade or module | What to check before choosing | What is especially important |
|---|---|---|
| Smooth door | free surface, opening side, adjacent facade | handle position and projection |
| Frame facade | frame width, panel field, drilling zone | so that the fastener does not fall into an undesirable profile zone |
| Narrow drawer | actual facade width | total length of the handle and margins at the edges |
| Wide drawer | opening method, load, hand position | full grip and installation rigidity |
| Upper cabinet | installation height and grip direction | ability to grasp the handle without an awkward wrist twist |
| Tall cabinet or column | façade height and working grip point | handle scale and a unified line with adjacent façades |
| Corner module | trajectories of two doors | handle collision and opening angle limitation |
Particularly careful work is required with a framed façade. Visually, on the drawing, the central part may seem large enough, but the mounting point of a two-point handle is not determined only by its overall length. The fastener locations matter. If the holes fall on different profile levels or into an undesirable zone of the frame, a beautiful option turns into a production problem.
Therefore, before approving the handle, the furniture maker must have not only the render and the façade drawing, but also the actual dimensions of the selected product.
Our factory also produces:
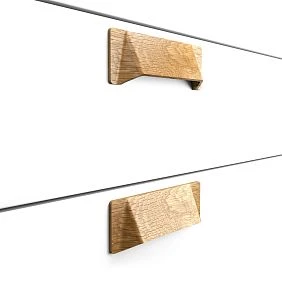
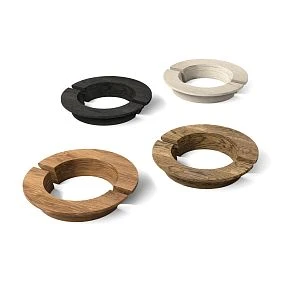
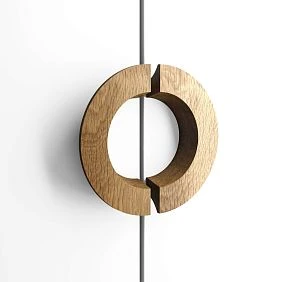
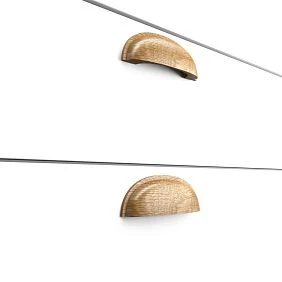
One kitchen does not necessarily require one handle size
The same model on all façades creates an even rhythm, but it is not always convenient. A kitchen may include a 300 mm wide drawer, a standard door, a wide lower drawer, a tall cabinet, and a narrow bottle rack. If a handle of the same size is placed on every part, the design consistency will be preserved, but the proportions may not be.
A workable option is one series, several sizes, if the specific series is actually produced in several dimensions. Then the shape remains recognizable, and the handle scale changes together with the façade. But the availability of the required sizes cannot be assumed. It is checked against the card of the specific SKU.
There are three dimensional concepts that must not be confused:
- overall length of the handle — the external dimension of the part;
- projection or depth — how far the handle extends from the front plane;
- center-to-center distance — the distance between the centers of the mounting holes on a two-point handle.
A knob does not have a center-to-center distance as a two-point parameter: its mounting is single-point. For a pull handle, it is critical. For a surface-mounted, profile, or recessed model, the mounting pattern may be different, so the parameters of one design cannot be transferred to another.
Verification on the front should be physical or based on an accurate drawing. A good technique for a preliminary assessment is to cut a paper or cardboard template to the handle's external dimensions and place it on the front. Such a mockup will not test tactile feel or mounting, but it will immediately show the scale, the margins at the edges, and any conflict with the frame. Before drilling, this is not enough: the final drilling must still be based on a real sample or precise manufacturer data.
Get Consultation
Which type of wooden handle to choose for the kitchen
The type of handle is best chosen not by the name of the style, but by hand movement and the construction of the front. The same interior can be assembled with knobs, pull handles, or profiles, but the person will use the kitchen a little differently in each case.
Wooden knob handle: a compact grip point
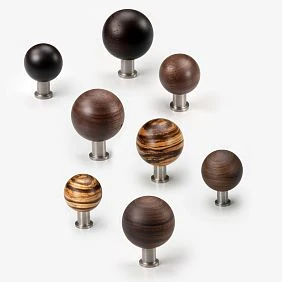
wooden knob handles they are convenient where a long grip line is not needed. Single-point mounting simplifies placement on small fronts and gives more freedom in layout. A knob works well on upper cabinets, small drawers, buffet sections, and compact doors.
But compactness is not a universal advantage. On a wide, deep drawer filled with dishes, a person pulls the front toward themselves with their whole hand. A small knob concentrates the force at a single grip point. This does not mean it cannot be used; it means the sample needs to be tested on an actual drawer and with an actual pull-out system.
For the kitchen, it is useful to evaluate not only the diameter or width of the knob, but also its projection. If the part is almost flush against the front, there may not be enough room for fingers. If it protrudes too much, it becomes more noticeable in the walkway and potentially conflicts with neighboring fronts.
A knob is especially convenient when designing a series of fronts of different widths: one small part depends less on the size of the door. But in a large kitchen, many separate points can create an overly fragmented rhythm. Here the decision already depends on the architecture of the fronts, not just on functionality.
Wooden bar pull: a full grip for drawers and doors
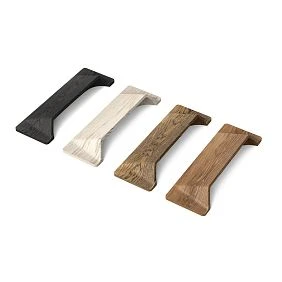
У wooden bar pull two mounting points and space for several fingers. On a kitchen drawer, this is often perceived more naturally: the palm does not search for a small point but immediately gets a line of grip.
Before ordering a bar pull, five parameters are checked: overall length, center-to-center distance, projection, free space for fingers, and position relative to the front frame. Overall length is needed by the designer. Center-to-center distance is for production. Projection matters in use. These values cannot be replaced by a single “handle size.”
Let's imagine a front 450 mm wide. Two bar pulls may have the same overall length but different positions of the mounting points and different shapes of the ends. In the render, the difference is small. For the drilling map, it is fundamental.
On a wide drawer, a bar pull usually provides a more confident grip than a small knob, but even here one should not introduce an artificial rule like “beyond 600 mm, only a bar pull.” The weight of a filled drawer depends on its depth, contents, and slides, while convenience depends on the specific shape of the handle. The system is tested as a whole.
Profile handle: a long line instead of a separate accent
The query "profile kitchen handles" combines different materials and constructions, so it cannot be automatically equated with wooden models. But as a grip type, the profile handle is also important for wooden hardware.
wooden profile handles they change the perception of the facade. A knob reads as a point, a pull as a separate detail, a profile as a line. On calm flat facades, this allows the hardware to become part of the kitchen's geometry rather than a separate decorative spot.
But a profile is especially demanding when it comes to dimensions. You need to know not only the length, but also the mounting method, the position relative to the edge, the grip depth, and whether the facade can be opened without pinching your fingers. If the profile occupies a significant portion of the width, the slightest error in the horizontal will be noticeable next to neighboring facades.
For long models, you also need to decide in advance whether the profile will be the same length on different modules or whether its dimensions will follow the width of the facades. Both solutions are possible. A random mix is not.
Surface-mounted wooden handle: check not only the facade, but also the edge
Surface-mounted wooden handles are interesting because visually they can work closer to the edge of the facade and not repeat the geometry of a classic pull. That is why the query "surface-mounted handle for a kitchen facade" cannot be viewed as purely stylistic.
With a surface-mounted model, you need to check its actual fit: where the fasteners land, what part of the surface it covers, whether access to the back side is required, and whether it interferes with the edge and the neighboring element. These conditions differ across constructions.
On a frame facade, a surface-mounted handle can solve one problem and create another. For example, visually it may sit well on the frame, but the fastening area may end up too close to the edge. That is why the type can be determined from a photo, but the installation technology cannot. It is clarified for a specific model.
Recessed handle: when the protrusion needs to be reduced
Mortise wooden handles they are useful in projects where protruding hardware gets in the way: near a passage, on closely spaced fronts, in a minimalist composition, next to elements that could catch on a standard handle.
This solution comes at a cost — installation becomes more demanding. A recessed element cannot be treated as a bracket that you simply place and drill two holes into. The geometry of the recess, the depth, and the mounting method are determined by the specific model. Production must receive this data before the fronts go into final finishing.
This is where the "we'll adjust it later" mindset is especially dangerous. If, after painting, it turns out that the recess needs to be deeper, wider, or shifted, the correction affects an already finished surface. That is why a recessed model should be approved earlier than standard surface-mounted hardware.
Shell handle: a distinctive shape for framed and classic fronts
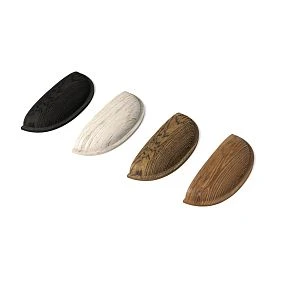
Wooden shell handles they give a different grip character: fingers go in from below or into a formed grip zone. This shape looks logical on fronts where the furniture itself has a pronounced frame, panel, or a more substantial, "furniture-like" composition.
For the kitchen, the shell raises a practical question — how accessible the grip zone is for cleaning. The deeper and more complex the shape, the more carefully you need to check how easy it is to wipe the area that fingers constantly touch. You should not draw a general conclusion that a textured handle is impractical. You need to evaluate the specific geometry you are planning to order.
On drawer fronts, the shell can form an expressive horizontal row. On hinged doors, the same model requires checking its orientation. That is why a single SKU does not always mean a single installation method on all fronts.
T-bar handle: a compact accent with a pronounced grip
T-bar wooden handles occupy an intermediate position between a knob and a longer pull handle. Visually, they remain compact, but they provide a crossbar that is easier to grip with your fingers.
This type is useful when a standard round knob feels too neutral, while a long bow handle already clashes with the narrow width of the cabinet front. But here too, you need to check the protrusion: the crossbar may turn out to be wider than it appears in a frontal photo.
In the kitchen, a physical tryout is especially useful. A handle that is comfortable to grasp with two fingers on a display stand may feel different when installed under a countertop or high on an upper cabinet.
Beech or oak: the handle material should be tied to the finish
The choice between beech and oak is often framed as a competition between species. For a kitchen handle, a different question is more useful: what finish should result after coating.
Beech is logical to consider in projects where the handle will be painted with an opaque finish — for example, in the color of the cabinet front. In this scenario, the wood grain is not the main visual effect. What matters is that the part suits the chosen preparation and painting system.
Oak is more interesting when the wood should remain visible. A clear or semi-transparent finish allows the material's natural grain to be used as part of the composition. This is especially appropriate if the kitchen already has oak elements: a countertop, open shelves, slats, decorative details.
But the rule “beech only under enamel, oak only under a clear finish” would be too crude. The specific finishing system, shade, desired texture, and condition of the blank matter more than a short formula. The material is chosen together with the finish.
There is also a practical reason to make a sample. A small handle perceives color differently than a large cabinet front surface. On a cabinet front, the shade reads as a field; on a handle, the same color sits on edges, rounded areas, and in shadows. Even with the same paint, visual matching is better assessed on a finished part rather than by a color number.
Unpainted handle or ready-made coating
STAVROS has separate unpainted wooden handles и Wooden handles with coating. For a furniture maker, this is not a cosmetic fork in the road, but part of the production process.
An unfinished handle is convenient when the finish needs to be integrated into the project: painted to match the facade, matched to your own tinting, coordinated with other wooden details, or run through a single finishing system as an entire batch. But then responsibility for the final surface shifts into the workshop's production process.
A handle with a ready-made finish reduces the number of operations. It does not need to be included in the facade painting cycle, dried together with the batch, and monitored for compatibility with your own technology. But you do need to make sure that the ready-made color and gloss level suit the project.
For a kitchen, the surface is especially important because of regular contact. One should not promise chemical resistance, moisture resistance, or coating durability “in general” based on the word lacquer, oil, or enamel. These are properties of a specific system and a specific finish. If the project uses aggressive household chemicals or requires a special operating regime, the finish characteristics need to be clarified with the manufacturer or tested on a sample.
What to check on a coating sample
A sample is needed not just to place the color next to the facade. Check it with your hands.
- Take the handle the way you would open the actual facade.
- Run your fingers along the edges and transitions of the shape.
- Look at the surface in side light: on a small volume, unevenness is more noticeable than in a catalog photo.
- Match the gloss level to the front.
- Check how the area that fingers will touch looks.
- If the workshop applies its own finish, run the full technological cycle on a single part and only then approve the batch.
Be especially cautious about the idea of "painting the handles later in the same color." A matching color name does not guarantee the same visual result on different substrates and geometries. A test part costs less than redoing a whole set.
Handle protrusion and adjacent fronts
On a front elevation drawing, a handle is almost two-dimensional. In a real kitchen, it is precisely the third dimension that often creates the problem.
Suppose two fronts meet at a 90° angle. Each of them opens normally on its own. But the handle of the first front, as it turns, sweeps an arc and approaches the second one. If the second one also has a protruding handle, the parts may collide before the door opens to the required angle.
You need to check not the distance between the handles in the closed position, but the path of movement.
The simplest check for an approved sample:
- install or temporarily fix the handle in its design position;
- open the first front along its entire working path;
- note the minimum clearance to the adjacent handle, countertop, wall, or side panel;
- repeat the movement for the adjacent front;
- separately check the simultaneous position of two open elements if such a scenario is possible.
On the drawing, this can be simulated, but a physical check is especially useful for a complex corner where hinges with non-standard kinematics are used.
The protrusion also affects the passage. If the handles are on the end of the island or next to a narrow passage, a few extra centimeters become noticeable. Here, a profile, surface-mounted, or recessed design may be more rational than a large pull — not because it is "more modern," but because it takes up less working space.
A special problem of the corner kitchen
The corner module is a place where the usual rule of handle placement often breaks down.
On a straight run, all handles can be aligned along a single axis and the position repeated from front to front. In a corner, two planes appear, two opening paths, and often two handles that face each other.
Check:
- which door opens first;
- where the edge of the second door passes;
- whether the handles themselves collide;
- whether the handle hits the adjacent front;
- whether it restricts access to the inner corner;
- whether a hand fits between two protruding elements.
If a conflict arises, it's not only the model that can be changed. Sometimes a different handle position on one front is enough. In another project, it's wiser to keep the position but choose a handle with a smaller protrusion. And sometimes it's more appropriate to use a different handle type specifically on the corner section. The latter option requires careful stylistic consistency, but it can solve a real ergonomic problem.
This is a good example of why "one SKU for the whole kitchen" is not a mandatory goal. Consistency matters, but it should not impair how the furniture works.
Upper and lower cabinets: identical handles or one series
There are three normal strategies.
One SKU throughout the kitchen. Suitable if the front sizes are close enough, the chosen handle is comfortable both above and below, and its scale does not conflict with wide drawers.
One series in different sizes. This is often the most flexible approach. The shape and finish remain consistent, but long fronts get a larger handle, while compact ones get a smaller one.
Different types in one system. For example, knobs on upper cabinets and pulls on lower drawers. This solution requires more discipline: you need to repeat the material, finish, character of lines, or another obvious connection, otherwise the kitchen looks like a collection of random hardware.
You should not automatically consider upper cabinets "light" and lower ones "heavy." What matters are the actual dimensions of the doors, the mechanism, the location, and the method of grip. For example, a tall upper front may be inconvenient to open with a small knob if it is positioned at the wrong point.
Wide kitchen drawer: why a small knob is not always the best option
A wide drawer tests a handle more rigorously than a small door. The user pulls a large surface, and inside there may be heavy dishes, jars, or kitchen appliances. It is impossible to pre-assign an allowable weight for a specific wooden handle without manufacturer data and a mounting system, but ergonomics can be checked.
Open a loaded drawer with a sample handle or a temporary installation. If movement requires hooking with two fingers, repositioning your grip, or pulling the handle at an awkward angle, the problem is already visible.
The second question is one handle or two. Two handles on a wide drawer can visually balance the front, but they force the user to decide which one to pull. If the slides are sensitive to skewing, asymmetric force may be felt more strongly. There is no universal rule: the decision depends on the width, drawer construction, chosen handle, and mechanism.
The third question is scale. A small knob may be physically convenient but get lost on a large front. A long pull, on the contrary, can turn the handle into the main horizontal line. This is already a design choice, but it should be made after an ergonomic check, not instead of it.
Wooden handle and frame front
A frame front sets its own grid. There are vertical and horizontal frame elements, a central panel, and sometimes a decorative profile. The handle should not simply "fit" inside this construction — its mounting must fall within the allowable zone.
First determine which element of the front the handle should be located on. Then overlay on the drawing not the outer silhouette, but the mounting points. For a pull, these are the two centers of the holes; for a knob, one point; for a recessed model, the contour of the cutout; for a surface-mounted model, the layout specified by the particular construction.
If the front is already manufactured, the solution becomes stricter. You cannot move the frame for the sake of a handle you like. This means the assortment is filtered by the actual available area.
If the front is still being designed, it is better to do the opposite: choose a specific SKU, get its dimensions, and only then finalize the width of the working fields. This is especially useful in custom furniture, where the handle is part of the composition, not a final accessory.
First one handle — then drilling the entire batch of fronts
The most expensive mistake in this topic does not happen in the store. It happens when the drilling map is approved based on approximate data.
For a two-point handle, the phrase “the center-to-center distance seems to be about 128 mm” is unacceptable. If the holes are drilled and the actual distance is different, the problem is already in the front. With a painted part, correction is especially unpleasant.
The working sequence for the workshop looks like this:
specific SKU → physical sample or confirmed drawing → actual dimensions → fitting on the front → approval of position → drilling map → control front → APPROVED → batch drilling → purchase of the full set.
On a small private project, some stages can be combined. The meaning does not change: the handle must be determined before the irreversible operation.
Center-to-center distance cannot be taken from the external length
For a pull handle, the external length and the center-to-center distance are different values. For example, the handle visually occupies 160 mm. This says nothing about whether the holes are at 96, 128, 160 mm or have some other geometry. Any number without a product card, drawing, or physical measurement is an assumption.
First, obtain the dimensions of the specific product. Then transfer them to the template or the control program. After that, make one test front and install the handle. Only once the fit is confirmed does it make sense to start the series.
For a knob, the center of one hole and the fastener length are checked. For a recessed handle, it is no longer the center-to-center distance but the entire cutout geometry. For a profile, a dedicated process diagram may be required. That is exactly why a generic "furniture handle drilling guide" is not enough for all types.
How to create a handle specification for the kitchen
Ordering handles "by the number of doors" is too rough. In the specification, each front must be linked to a specific SKU.
Minimum table for production:
| Position | Facade | Handle type | Article | Size | Mounting/drilling pattern | Material | Finish | Quantity |
|---|---|---|---|---|---|---|---|---|
| 1 | Upper door | Button | after approval | By card | 1 point, position according to the map | Beech/oak | As per project | By number of facades |
| 2 | Lower door | Bracket | after approval | By card | center-to-center distance by SKU | Beech/oak | As per project | By number of facades |
| 3 | Wide drawer | bracket/profile | after the test fits | By card | according to the model drawing | Beech/oak | As per project | By number of drawers |
| 4 | Corner module | selected type | after trajectory verification | By card | By map | Beech/oak | As per project | Separately |
Such a table seems excessive until the first repeat order. Six months later, it saves time: you don't have to remember which handle was on the project, what the material was, and how the batch differed.
For serial work, it makes sense to keep the card URL and approval status nearby: sample, approved, ordered, installed. Then a model liked at the design stage won't go into production until it's checked.
Is a reserve needed
Mathematically, the number of handles equals the number of installation points. If a kitchen has 18 fronts and each has one handle, the base requirement is 18 pieces.
In practice, a workshop may decide to order an extra part as a service reserve, especially if custom finishing, a non-standard SKU is used, or the project needs to be serviced for many years. But this is not a universal rule and not a percentage "for waste": handles are not cut like linear trim. The reserve here is needed not because of cutting, but as a buffer for damage, replacement, or future repair.
One model for the entire kitchen series: what to record
If a handle has passed testing and will be reused in other projects, it should be turned from a "favorite detail" into a proper entry in the components database.
Fix:
- exact name and SKU;
- outer dimension;
- center-to-center distance or other mounting geometry;
- the material;
- finish option;
- product page URL;
- photo of an installed sample;
- template or drilling pattern;
- list of projects where the model has already been used;
- notes about areas where it is not suitable.
The last item is often more valuable than a photo. For example: "do not use on the inner door of a corner module without checking for collision" or "on a narrow frame facade, the fastening extends beyond the working area." Such a note turns the workshop's accumulated experience into a system.
ORB HL-002M as an example of verifying a real SKU
Instead of an abstract discussion about buttons, it is useful to look at a specific model. ORB HL-002M Furniture Handle at the time of review, it is presented on the STAVROS website as a wooden handle with a coating for furniture, including kitchen fronts. The product page lists dimensions of 44 × 44 × 45 mm, and the materials include oak and beech.
What do these numbers give the designer? It is already possible to make an initial assessment of the scale and projection. A part about 44 mm wide will be perceived as a compact accent, while a C dimension of 45 mm requires checking the space in front of the front — especially in a corner and near a passage.
But the product page does not replace a physical trial. The convenience of a spherical shape depends on where the handle is located: on an upper cabinet, a small drawer, or a heavy lower front. One SKU can be logical in one place and less convenient in another.
If you need a similar idea for your own finish, the catalog also has unfinished wooden handles. It is worth comparing not only price and appearance, but the entire production scenario: who does the finishing, how the sample is approved, when the front is drilled, and who is responsible for batch matching.
How to tell that a handle is a poor choice before ordering the entire batch
There are several signals you can catch on a sample.
The fingers do not fit into the grip naturally. The handle may look neat, but require a precise “hook.” On an upper door, this quickly becomes irritating.
The hand twists. Often the problem is not the shape, but the position. Move the sample and repeat the motion before changing the model.
The handle catches on the adjacent front. This is already a geometric incompatibility. You need to change the position, projection, type, or opening scheme.
On a framed facade, the fastener lands in an awkward spot. Don't drill "wherever it ends up." Either choose a different size or change the position before approval.
The surface feels unpleasant after several grip cycles. Tactility can't be judged from a render.
A handle looks good on its own, but bad in a row. Lay it out in the visualization or temporarily install several samples. Repetition changes the perception of scale.
Different sizes in a series turn out to have different characters. It happens: the small and long versions of the same shape may not read as one family. Check the exact sizes that will go into the project.
Mistakes when choosing wooden handles for the kitchen
Drill first, buy later
The reason is clear: the facades are already in production, and the handles will be "chosen later." The consequence: the holes dictate the assortment. If the suitable model has a different center-to-center distance, the choice narrows sharply.
Solution: approve the SKU before drilling.
Choosing a size based only on the facade width
Width is needed, but it doesn't show the drawer's mass, the grip method, the handle's position, or nearby obstacles.
Solution: evaluate the assembled facade and check movement by hand.
Measure the total length by center-to-center distance
This is a technical error that can ruin a batch of facades.
Solution: take installation dimensions only from the product card, drawing, or physical measurement of the sample.
Not accounting for the angular trajectory
When closed, the handles may be far apart, but when opening they can collide.
Solution: check the arc of door movement.
Buying the full set before checking the finish
The color on a screen, a small wood sample, and a finished handle may be perceived differently.
Solution: approve one real part under the lighting in which the kitchen will be installed.
Assume that a wooden handle must necessarily remain natural
Wood is the material of the part, not a mandatory color. An unpainted handle can be included in your own finishing system if the specific product and technology are suitable for it.
Solution: choose the material together with the final finish.
Use one size for the sake of formal uniformity
Uniformity is useful until it starts to interfere with proportions and grip.
Solution: check whether one series can be used in several sizes.
When a wooden handle may not be the best solution
Not every kitchen needs to be fitted with wooden handles just because there is wood in the project.
If the handle is in an area where it is constantly exposed to water or aggressive contaminants, and the requirements for the specific coating cannot be confirmed, the issue of use should be resolved first. If the passage is so narrow that any noticeable protrusion interferes with movement, it is better to look for a design with minimal projection or another opening solution. If the kitchen has already been drilled for existing two-point hardware, the new handle must match the mounting pattern or will require a separate solution for the old holes.
There is also a design case: the front already has a lot of active joinery geometry — a frame, carving, overlays, a complex profile. An additional expressive handle can overload the composition. Then a calm shape works better not because it is “more fashionable,” but because it leaves the main role to the front.
Being willing to reject a model you liked after checking it is a normal part of design.
Where to buy wooden kitchen handles
It is more convenient to start with the general catalog of STAVROS wooden furniture handles, and then filter the assortment by the production task.
If the workshop plans its own finishing, look at unpainted wooden handles. If you need a ready-made surface — Handles with Finish.
For selection by design, separate categories are available:
- wooden knob handles;
- Wooden handle brackets;
- profile handles;
- Surface-mounted wooden handles;
- Mortise wooden handles;
- shell handles;
- T-bar handles.
Before buying a full set, narrow your choice down to specific article numbers, check the dimensions and mounting geometry, order or obtain a sample, do a test fit on the required types of fronts, and only after that finalize the drilling map. Then wooden kitchen handles become not the last decorative purchase, but a properly designed furniture element.
FAQ
Which wooden handles are suitable for the kitchen?
Suitable are those models that are compatible with a specific front in terms of size, fastening, protrusion, and grip method, and whose finish matches the intended use. For compact fronts, knobs and T-bar models can be considered; for drawers, pulls or profiles; to reduce protrusion, recessed solutions. The type itself does not guarantee convenience: the sample needs to be tested on real furniture.
Where to buy wooden handles for kitchen cabinet fronts?
At STAVROS, wooden models are collected in the section wooden furniture handles. From there, you can go to unfinished options, coated handles, and filters by construction type. For production, it is more convenient to first determine the required type, then compare specific SKUs by dimensions and installation diagram.
What is better for the kitchen — a knob handle or a pull handle?
For a small front, a knob provides a compact single-point grip and takes up little space. A pull handle allows you to grasp it with several fingers and is often more convenient on drawers. The choice changes with the front: on a small door, a large pull handle may be excessive, while on a wide, heavily loaded drawer, a small knob should definitely be tested in use.
Is a wooden profile handle suitable for the kitchen?
Yes, if the specific model is suitable for the front construction, installation method, and grip depth. A profile is especially interesting on calm, flat fronts, where the handle should be perceived as a line. Before ordering, you need to check the length, position relative to the edge, protrusion, and installation technology.
What to choose for a handle — beech or oak?
The choice is best tied to the finish. If the handle will be painted with an opaque coating, beech may be a rational option. If you need to preserve the visible wood texture and tie the handle to other oak details, it makes sense to consider oak. The final decision is made after a sample with the finish that will be used in the project.
Can wooden handles be painted to match the kitchen color?
For this, choose models designed for further finishing and make a test sample. You need to check not only the color match, but also the surface quality on the curves and in the grip area. It is better to send the full set for finishing after one finished part has been approved.
Which handles are better to choose with a ready-made finish?
A ready-made finish is convenient when custom painting is not required and the chosen option already matches the project in color and surface. For the kitchen, it is worth evaluating the sample by hand and clarifying the properties of the specific finishing system if there are special requirements for care or chemical resistance.
How to choose the handle size for a wide drawer?
Match the overall length of the handle to the width of the front, then separately check the grip and the operation of a loaded drawer. Do not assign the size based only on visual proportion. For a pull handle, also fix the center-to-center distance and make sure the mounting points fall within the permissible area of the front.
How to check whether the handles will collide in a corner kitchen?
It is not enough to measure the gap in the closed position. You need to check the trajectories of the doors when opening. On the sample or in an accurate model, trace how the handles move relative to each other, neighboring fronts, the wall, and the countertop. If a conflict arises, change the position, protrusion, or type of handle before drilling.
When should the handles be determined — before or after drilling the fronts?
Before drilling. First, approve the specific SKU and its installation dimensions, then make a drilling map and, preferably, a control front. Drilling a batch using an approximate center-to-center distance is risky: after finishing, correcting the holes becomes significantly more difficult.
Should the same handles be installed on upper and lower cabinets?
There is no mandatory rule. You can use one SKU, one series in different sizes, or different types united by material and finish. The solution should simultaneously preserve the visual system and provide a comfortable grip on each type of front.
Can I buy the handles first and then design the position of the holes?
This is precisely the safe sequence for a custom or expensive kitchen. Once you have one real handle, you can measure it, try it on the front, check the protrusion, and only then finalize the drilling. For a workshop, such a sample becomes a reference piece before ordering a batch.