Article Contents:
- Why wooden dresser handles should be chosen as a single system
- First, measure all the drawers and create a map of the fronts
- What else needs to be measured
- When it's better to leave one handle
- When two handles may be more appropriate
- When two handles will be inconvenient
- One model on all drawers
- One shape in different sizes
- Knobs on narrow drawers and pulls on wide ones
- One handle in the center
- Two handles on one front
- Calculating hole positions for pull handles
- When handles have a single hole
- Two upper drawers and one wide lower drawer
- Do not transfer coordinates between different fronts without checking
- Handle closer to the top edge
- Vertical centering on each front
- Uniform offset from the top edge
- Consider the actual position of the dresser
- Why front width alone is not enough
- Free space around the handle
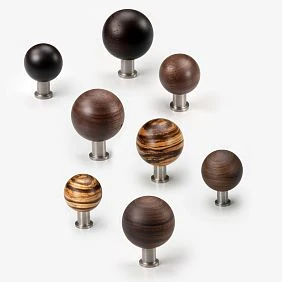
- Wooden knob handles
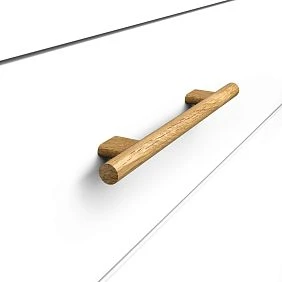
- Wooden pull handles
- Wooden profile handles
- Shaped and decorative handles
- How to check the center-to-center distance on a finished handle
- How to test a handle before buying the full set
- Handle and content weight
- Example
- Not every wooden handle is mounted the same way
- Mounting specifics for solid wood and MDF
- When beech is the rational choice
- When oak is more interesting
- Can different wood species be combined
- Unfinished handles for custom finishing
- Handles with ready-made coating
- Finishing all handles in a single batch
- Frame front
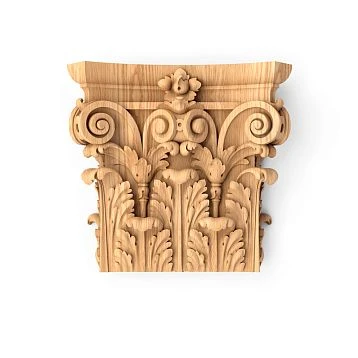
- Carved overlay
- Moldings on the facade
- Rustic HL-057M — a large wooden handle as a striking accent
- Pebble HL-065-3M — a combination of wood and a metal detail
- Proun HL-053-1M — compact geometry
- Why you shouldn't choose based only on the collection name
- Example one. Two small drawers on top and three wide ones below
- Example two. Four drawers of the same width but different heights
- Example three. A modern chest of drawers with wide smooth fronts
- If the new handle is smaller than the previous one
- If the new handle is larger
- Should you replace all the handles
- Is a spare handle needed
- How to calculate the cost of a set
- Why it is useful to keep an approved sample
- Identical handles are chosen without considering different facade sizes
- Two handles are installed only because the drawer is wide
- Centers are measured from different edges
- Holes are drilled according to the overall length of the pull
- Not accounting for the vertical position of handles
- The entire set is purchased before fitting
- Choosing a finish based only on a photo
- They ignore the mounting and the thickness of the front
- Designing decor and handles independently
- Can you install different wooden handles on the upper and lower drawers?
- Do you always need to install two handles on a wide drawer?
- How can you tell if a wooden handle is too large?
- Can you use one handle model in different sizes?
- Why do the same handles look different on two identical dressers?
- Is it worth installing two small knobs instead of one large one?
- How do you correctly measure the distance between two handles?
- Can a handle be installed on a facade with carved decor?
- Are beech handles suitable for an oak dresser?
- How can I avoid differences in the shade of wooden handles?
- Should the same distance from the top edge be kept on all facades?
- Can handles be changed after the chest of drawers has been made?
- How many handles are needed for a dresser with five drawers?
- Should I buy spare handles?
- Can wooden handles for a dresser be ordered one piece at a time?
- Which selection order is the most reliable?

On a dresser with two narrow top drawers and three wide bottom drawers, the same wooden handle can look completely different. On a small facade it takes up a noticeable part of the surface, while on a wide one it almost gets lost. If two handles are placed on all drawers, the top row will look overloaded. If one small knob is left everywhere, the bottom drawers may become inconvenient to open.
The decision depends not only on the shape of the handles. First you need to determine the width and height of each front, choose the number of grip points, and build the overall layout. Only after that does it make sense to select specific wooden handles for the dresser.
For narrow drawers, one centered handle is often enough. On wide ones, you can use one elongated pull, two small handles, or a pair of knobs. None of these options is mandatory: modern slides allow many wide drawers to be opened with a single central handle, and two symmetrical handles are often chosen primarily for the furniture's design.
There is another consideration as well. The placement of a handle on one front may be correct, but the entire composition of the dresser may still be unsuccessful. For example, the holes on each drawer are drilled exactly in the center, but handles of different shapes and sizes form a chaotic pattern. Fixing such a mistake after finishing the fronts is much harder than before drilling.
Therefore, the choice should begin with the whole piece of furniture, not with a single handle you like.
Why wooden handles for a dresser should be chosen as a single system
A dresser is perceived primarily through the repetition of horizontal lines. The fronts form rows, the gaps set the rhythm, and the handles become the most noticeable points on these surfaces.
For a dresser with four identical drawers, the scheme is relatively simple. If one handle is installed on each front, the four points form a vertical row. If two are installed on each, two parallel verticals appear. A mistake in the placement of one handle disrupts this order.
The situation is more complex with dressers where the upper drawers are divided into two sections, while the lower ones span the full width of the cabinet. Here, it is no longer enough to focus only on the center of each individual front.
Imagine a chest of drawers with two drawers 350 mm wide at the top and three large fronts 760 mm wide below.
If one wooden knob is installed on each of the upper drawers, two symmetrical points will appear. For the lower fronts, central handles can be used, but then a different vertical composition results: two points at the top and one in the middle of each lower row.
Another option is to keep two points at all levels. Then the upper knobs and the lower pairs of handles can form two vertical rows if their coordinates relative to the entire cabinet are aligned.
Both schemes are acceptable. The difference lies in the impression the chest of drawers should make.
Single central handles emphasize the integrity of wide lower fronts. They work well on modern furniture with simple surfaces and few details.
Paired placement creates a more pronounced repeating pattern. It is often appropriate on traditional dressers, where symmetry is supported by the shape of the legs, framed fronts, and decorative trim.
Handles of different sizes in the same shape allow you to maintain visual unity, even if the drawer widths differ by almost double.
Therefore, the entire set should have common features: shape, placement method, material, surface character, or at least a clear principle of combination. It is not necessary to use completely identical items, but the differences between them should be meaningful.
В the STAVROS wooden furniture handles catalog you can select items of various shapes and finishes. It is best to compare them immediately at the scale of your dresser's fronts.




First, measure all the drawers and make a map of the fronts
Until the drawer dimensions are known, discussing the number of handles remains speculation.
For new furniture, dimensions are taken from the design documentation. For a finished chest of drawers, measure the fronts themselves, not the internal drawers or the cabinet opening. These values can differ significantly.
Record the width and height of each visible front, its thickness, its position relative to neighboring drawers, and the opening features.
It is convenient to create a small table.
| Drawer | Facade width | Front height | Preliminary diagram |
|---|---|---|---|
| Top left | 350 мм | 140 мм | One knob |
| Top right | 350 мм | 140 мм | One knob |
| Medium | 760 мм | 220 мм | Two knobs or one pull |
| Lower | 760 мм | 300 мм | Two knobs or one pull |
The dimensions are given as an example, not as a manufacturing standard for chests of drawers.
Such a table immediately reveals several features.
The upper fronts have a small height, so a large vertical handle may take up almost the entire space between the edges. The bottom drawer is noticeably taller, but this does not yet mean that its handle should be larger in all measurements.
The width of the lower drawers allows for a paired arrangement to be considered. However, the solution needs to be checked taking into account the slides, the weight of the contents, and the convenience of opening with one hand.
Our factory also produces:
What else needs to be measured
The thickness of the front. This will be needed to select the mounting screw. This is especially true for handles with through-mounting from inside the drawer.
Free space behind the front. The inner wall of the drawer, its mounting elements, and the design of the runners sometimes prevent installing the screw in the chosen location.
Distance to neighboring parts. A protruding handle may interfere with opening a nearby door or catch on another decorative element.
The position of the front relative to the carcass. If the drawers are offset to the left or right, their local centers do not necessarily coincide with the central axis of the entire chest of drawers.
The pull-out depth. To assess convenience, you need to open the drawer fully and check how the hand interacts with the handle at different stages of movement.
If a furniture series is being designed, measurements are recorded immediately in a shared specification. Otherwise, identical chests of drawers may end up with different offsets simply because the fronts were marked out by several craftsmen.
Get Consultation
One or two handles per drawer: which solution to choose
The number of handles is not determined by a single front width number.
You cannot assume that up to a certain width one handle is always needed, and beyond it two are mandatory. For a chest of drawers with quality slides and a properly calculated design, one central pull can work perfectly on a wide drawer.
At the same time, two small handles can be justified even on a relatively compact front if the style of the furniture requires it.
When it's better to leave a single handle
A single central handle is usually convenient when the drawer opens smoothly, little effort is required, and the user can grip it confidently with one hand.
This placement offers several practical advantages.
First of all, the force is applied near the central axis of the front. With properly functioning slides, this is convenient for smooth, even pulling.
Drilling is also simpler. A knob handle often needs just one mounting hole. A pull handle requires two, but the entire mounting assembly stays in the central part of the front.
Finally, a single handle leaves more free surface. On a wooden front with a beautiful veneer or solid wood grain, this is especially noticeable.
For example, a chest of drawers with three wide oak drawers may look calmer with three elongated horizontal handles than with six separate knobs.
When two handles may be more appropriate
Paired placement is worth considering if you need to emphasize the symmetry of a traditional chest of drawers or align wide lower drawers with two narrow upper ones.
Two handles create two visual centers instead of one. As a result, a wide front is perceived as more divided.
From a practical standpoint, a paired arrangement allows the user to use both hands, but by itself does not guarantee easier opening.
If a person pulls only the left handle of a wide drawer, the force is offset relative to the center. With a certain design, this can create additional skewing. The nature of the movement depends on the rigidity of the drawer, the slides, and the load distribution.
Installing two handles does not fix weak runners, an incorrectly assembled drawer, or insufficient rigidity of the front panel.
For a heavy wide drawer, first check the rated load of the slides, the geometry of the box, and the fastening of the front. The number of handles is chosen after that.
When two handles turn out to be inconvenient
For a dresser standing next to the bed, the user may open the drawers with one hand while positioned to the side. If the handles are located far apart, they will have to pull on one of them.
If the drawer moves stiffly, such a scenario can be inconvenient.
Another limitation is large decorative handles. Two massive wooden pieces on a single front can take up more space than the composition allows.
In that case, one elongated pull often proves more rational than a pair of large knobs.
One long handle or two short ones on a wide front
These solutions have different design logic.
A long horizontal handle is perceived as a continuation of the drawer line. It emphasizes the width of the front, especially if it has a simple geometric shape.
Two short handles create separate points with a free field remaining between them. This pattern is more often associated with classic dressers and furniture with pronounced division of fronts.
| Criterion | One long handle | Two short handles |
|---|---|---|
| Appearance | Single horizontal line | Symmetrical pair |
| One-handed use | Usually convenient with central installation | Depends on the drawer design |
| Number of handles | One | Two |
| Number of holes | By the design of the specific model | By the design of both handles |
| Markup requirements | Central axis and center-to-center distance | Additionally, the symmetry of the two pieces |
| Suitable character of the furniture | Often modern, minimalist | Often traditional or decorative |
The table does not mean that a long handle is necessarily modern, and a pair of knobs is necessarily classic. The shape of the pieces themselves can change the perception.
For example, an elongated wooden pull with smoothly finished edges may suit a solid wood chest of drawers with traditional proportions. And two small geometric handles look good on a strict modern front.
The difference is especially noticeable on drawers 700–900 mm wide. One handle draws the composition toward the center. Two distribute attention across the width.
Before making a decision, it is useful to take two photos of the front with the handles temporarily attached. In the first, place one long model. In the second, two short ones.
You need to compare the entire dresser as a whole, not a cropped section of one drawer. It is the overall view that shows which scheme aligns better with the upper and lower rows.
How to position handles on drawers of different widths
For a dresser with non-uniform fronts, there are three main schemes. Each solves a specific problem.
One model on all drawers
This is the most consistent solution if the handle shape is sufficiently versatile.
For example, on two narrow upper fronts, one wooden knob is placed on each. On the wide lower ones, two of the same knobs are used.
The model, size, finish, and projection remain the same. Only the quantity changes.
The advantage of this scheme is the pronounced unity of the hardware. All handles look like parts of a single set.
Difficulty arises when the same model turns out to be too large for the upper drawers or not convenient enough on the lower ones.
There is also a visual nuance. Two small knobs on a large front can look too disconnected if a huge empty space remains between them. Therefore, what matters here is not only the repeatability of the model but also the distance between the centers.
One shape in different sizes
If the manufacturer offers several sizes of the same model, you can create a more flexible composition.
Compact knobs are installed on the upper drawers, and elongated pieces of the same shape on the lower ones.
With this approach, the character of the curves, the surface profile, the material, and the finish remain consistent. Only the scale differs.
This is especially useful for chests of drawers with a significant difference in the width of the fronts.
However, it is not necessary to increase the handle size strictly in proportion to the drawer width. If the lower front is twice as wide as the upper one, it does not follow that the handle must also be exactly twice as long.
The size is chosen taking into account the overall look of the furniture and ease of grip.
Knobs on narrow drawers and pulls on wide ones
The third option is based on a difference in functions.
Compact upper drawers get one knob handle each. Pulls are installed on the lower ones, as they are easier to grasp with the whole hand.
This scheme makes sense if the lower drawers are intended for heavier contents or are used significantly more often.
But the knob and the pull should match.
It is better when they are unified by the same wood, edge treatment, geometry, or finish.
A randomly chosen round knob in light beech and a large dark shaped pull can look like parts from different pieces of furniture. This is acceptable only with a deliberate contrasting design.
For a single collection of chests of drawers, it is preferable to approve a hardware family in advance rather than choosing each handle separately after the fronts are manufactured.
How to calculate the symmetrical position of wooden handles
A visually correct scheme must have precise coordinates.
For calculation, it is convenient to take the upper left corner of the front as the reference point. Horizontal dimensions are measured to the right from the left edge, vertical dimensions downward from the top.
All values are specified in millimeters.
One handle in the center
If the front width is designated as W, the horizontal coordinate of the handle center is:
X = W / 2
For example, for a drawer with a width of 460 mm:
X = 460 / 2 = 230 mm.
The handle center must be located at a distance of 230 mm from the left edge.
If this is a symmetrical bracket with two mounts, point X denotes the geometric center of the handle itself, not one of the holes.
To calculate the holes, a separate parameter is required — the center-to-center distance.
Two handles on one front
Let the facade width be 800 mm.
Suppose, after evaluating the composition, it is decided to place the centers of the handles at a distance of 200 mm from the left and right edges.
Then the coordinates are as follows:
-
Left handle: 200 mm from the left edge.
-
Right handle: 800 − 200 = 600 mm from the left edge.
The distance between the centers of the handles is:
600 − 200 = 400 mm.
The midpoint between them is at 400 mm — exactly on the central axis of the front.
The selected 200 mm offset is an example of a design decision, not a mandatory standard for all 800 mm wide drawers.
If a different handle model is installed, the value may need to be changed.
Calculating the hole positions for bow handles
Suppose an 800 mm wide front has two symmetrical bow handles. The centers of the products are located at 200 and 600 mm.
The center-to-center distance of each bow handle is 96 mm.
Half of the center-to-center distance:
96 / 2 = 48 mm.
For the left bracket, the hole coordinates will be:
200 − 48 = 152 mm;
200 + 48 = 248 mm.
For the right:
600 − 48 = 552 mm;
600 + 48 = 648 mm.
This gives four drilling points.
| Element | First hole | Second hole |
|---|---|---|
| Left bracket | 152 мм | 248 мм |
| Right bracket | 552 мм | 648 мм |
The scheme is mathematically symmetrical.
But before drilling, you must make sure that the selected handle actually has a center-to-center distance of 96 mm and that its mountings are positioned symmetrically relative to the outer contour. For handles with a complex or asymmetrical shape, this assumption may not hold.
Drilling should be done according to the installation drawing of the specific product, not just based on the calculation of its overall position.
When handles have one hole
For two identical knob handles, the calculation is simpler.
If the front is 800 mm wide and the centers are chosen at 200 and 600 mm, two holes will be required.
But the precision of the layout remains critical: even a slight offset of one handle disrupts the symmetry.
On a smooth, solid-color front, the deviation is especially noticeable, since there are almost no other details around the handles to distract the eye.
How to keep the common axis of handles across multiple drawers
Having multiple fronts requires two coordinate systems.
The first relates to each individual drawer. It is needed for correct handle installation.
The second relates to the entire dresser. It is what determines the visual alignment between the drawers.
For a dresser with identical wide fronts, the task is simple: the centers of the single handles should be located on one common vertical line.
Let's say three drawers are each 800 mm wide and have the same position relative to the cabinet. The center of each handle will be at 400 mm from the left edge of its front.
If all the fronts are positioned evenly one above the other, the three handles form a straight vertical row.
However, for a dresser with two narrow upper drawers, this rule no longer works literally.
Each upper drawer has its own center. If you simply align all centers with the cabinet axis, the handles of the upper drawers will be shifted toward the inner sides of the fronts.
Therefore, the overall composition is determined first.
Two upper drawers and one wide lower drawer
Suppose the upper left and upper right drawers are positioned symmetrically relative to the middle of the dresser.
Each has one handle installed.
This creates two vertical lines passing through the centers of the upper fronts.
If two handles are placed on the lower wide drawer, they can be positioned along the extension of these lines.
With this solution, the upper and lower rows form a single grid.
If, however, the lower drawer gets one central pull, a different composition is created: two points at the top and one in the middle at the bottom.
There is no mistake here. This is a different visual principle.
It looks bad when different patterns appear by accident: the upper handles are placed at the quarter-widths of the dresser, the middle ones are slightly closer to each other, and the lower ones are significantly farther apart with no visible reason.
Such inconsistency is clearly noticeable on finished furniture.
Do not transfer coordinates between different fronts without checking
This is especially true for dressers where the upper part is narrower than the lower one or there are protruding side posts.
For two fronts 400 and 800 mm wide, the same 150 mm offset from the edge creates different proportions.
For a narrow drawer, the center of the handle will be close to the edge, while for a wide one it will be significantly farther from the middle.
Sometimes equal offsets are needed by design. But more often you have to calculate the position relative to the common axis of the dresser or coordinate the proportions of individual fronts.
Before approving the drawing, draw all handle centers on a single diagram. Even a simple scaled sketch allows you to detect a violation of the vertical lines before the furniture is manufactured.
At what height should handles be installed on fronts of different heights
The horizontal position determines symmetry, while the vertical one determines convenience and the character of the pattern.
For a drawer with a height of 200 mm, the geometric center is located 100 mm from the top edge.
For a front with a height of 300 mm — at a distance of 150 mm.
If both fronts receive a handle in the center, the coordinates will differ, but the placement principle remains the same.
This centering is often suitable for dressers with simple rectangular fronts.
There are other options as well.
Handle closer to the top edge
On a tall bottom drawer, the handle is sometimes installed above the geometric center.
This can make gripping easier, especially if the dresser is low and the user opens the drawer while standing.
For example, with a front height of 300 mm, a handle located 100 mm from the top edge will be 50 mm above the center.
At the same time, the lower part of the front will remain more free.
But if a similar offset is applied to a 100 mm high front, the handle will end up almost at the bottom edge or entirely outside the permissible installation zone.
Consequently, the same absolute offset is not suitable for every design.
Vertical centering on each front
For a strict geometric composition, a rule can be set: all handles are positioned at the center of their fronts.
Then for drawers with heights of 120, 200, and 300 mm, the vertical coordinates will be 60, 100, and 150 mm respectively.
This solution emphasizes the individual proportions of each drawer.
However, on the lower deep front, the handle may end up too low for a familiar grip.
Uniform offset from the top edge
Another scheme assumes an equal distance from the top edge of the front to the center of the handle.
It can be convenient on a dresser where drawers have different heights but a repeatable position of handles relative to the top line of each front is required.
Here you need to check that the lowest part is not excessively close to the bottom edge of a narrow front.
You cannot simultaneously apply vertical centering and an equal offset from the top edge if the fronts have different heights. These are two separate rules, and you need to choose between them.
Take into account the actual position of the chest of drawers
On a chest of drawers 750 mm high, access to the top and bottom drawers differs from access to furniture 1100 mm high.
A person can open the bottom drawers by leaning slightly, while the top ones can be opened almost without changing body position.
Therefore, before final marking, it is worth installing test handles at the intended height, placing the chest of drawers in its working position, and opening the drawers several times.
When making furniture for a specific customer, such a check is especially useful.
How to choose the size of a wooden handle relative to the width of the front
A 160 mm handle is not inherently large or small.
On a front 320 mm wide, it takes up half the width. On an 800 mm front, only a fifth.
Because of this, the same model affects furniture proportions differently.
For a preliminary comparison, you can use the coefficient:
K = handle length / facade width.
For example:
| Facade width | Handle length | Coefficient |
|---|---|---|
| 320 мм | 160 мм | 0,50 |
| 500 мм | 160 мм | 0,32 |
| 800 мм | 160 мм | 0,20 |
| 1000 мм | 160 мм | 0,16 |
The table shows the change in relative scale. It does not set recommended dimensions and does not mean that any coefficient value is universally better than another.
At a coefficient of 0.50, the handle becomes a very prominent horizontal detail. At 0.16, it looks more compact relative to the facade width.
For a modern chest of drawers, a long handle is sometimes deliberately chosen that occupies a significant part of the front plane.
For a classic chest of drawers with carving and frame elements, much more compact hardware may be required so that it does not compete with the decor.
Why facade width alone is not enough
Let's imagine two drawers each 600 mm wide.
The first one is 100 mm high. The second is 300 mm.
The same round wooden handle 60 mm in diameter will take up more than half the height of the first front, but only a fifth of the second.
In width, the proportion is the same; in height, it is completely different.
Therefore, the size of a round, square, or shaped handle must be compared with two dimensions of the front.
For elongated horizontal pulls, the overall length and profile height matter more. For large wooden knobs, the width and height of the visible part are key.
Don't forget about projection either: a handle that is compact in frontal dimensions but has a large protrusion can appear much more massive than a flat elongated model.
Free space around the handle
Another useful parameter is the distance from the outer contour of the handle to the nearest edge of the front.
If the front is 400 mm wide and the handle is 240 mm long and positioned exactly in the center, the remaining space on each side will be:
(400 − 240) / 2 = 80 mm.
On a 300 mm wide front, the same handle will leave 30 mm on each side.
In the second case, the composition will appear significantly denser, even if the mounting is technically possible.
And if the front additionally has a frame or molding, you should consider not the full size, but the available free area inside the decorative trim.
Knob handle, pull or profile: which shape suits a chest of drawers
The shape determines not only the appearance but also how the drawer is used.
Wooden knob handles
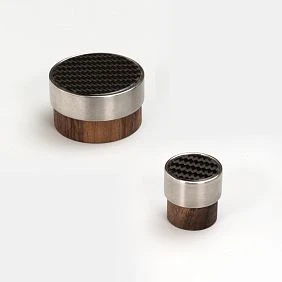
A knob creates a distinct, focused accent. It is especially appropriate on small upper drawers, chests with a traditional composition, and furniture where a minimal amount of hardware is required.
A round knob does not impose a pronounced horizontal line. This makes it easier to combine with fronts of varying widths.
At the same time, the size and shape of the grip area are of practical importance.
A very small knob can be awkward to grip with the fingers. If the base is wide but the protruding part is not pronounced enough, the hand may slip.
Another problem is large knobs on narrow fronts. They can take up too much space, especially if the drawer is short in height.
For small chests, it is convenient to consider wooden STAVROS knob handles, comparing the diameter, thickness, projection, and construction of a specific model.
If a handle has an asymmetrical wood grain pattern or a pronounced orientation, identical items are best installed with a coordinated grain position.
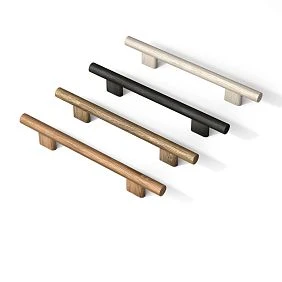
Wooden pull handles
A pull handle typically provides an elongated grip area between the mounting points.
It is convenient when you need to grip it with several fingers and pull the drawer toward you.
Particularly careful selection of a pull handle is recommended for wide lower drawers used for storing clothes, linens, or other bulky items.
However, the pull handle itself does not indicate the permissible load on the drawer. It is necessary to separately assess the strength of the product, the mounting method, and the design of the slides.
The following characteristics are important for a pull handle:
-
overall length;
-
center-to-center distance of the mounts;
-
projection from the front surface;
-
free space for fingers;
-
dimensions of the support areas;
-
shape and finishing of the inner edges.
For example, two handles of the same total length may have different available grip areas. One is made with wide support sections, while the other leaves room for fingers along almost its entire length.
Therefore, it is difficult to assess comfort from a single photo.
In the section wooden bar handles for furniture you can choose a suitable shape, but the mounting dimensions should be checked against the product page and drawing of the selected item.
Wooden profile handles
A profile handle usually has a stronger effect on the horizontal pattern of a chest of drawers.
It is perceived as an independent line that can visually continue the boundary of a drawer or emphasize its width.
This option is interesting for furniture with smooth fronts and a minimum of additional decor.
But a long profile handle is not always convenient on a narrow drawer. Its dimensions may almost match the width of the front, leaving side margins that are too small.
The mounting diagram should be checked separately. On profile models it may differ from the usual bracket, so you cannot replace one type with another without studying the mounting.
Suitable options are presented in the category wooden furniture profile handles.
Shaped and decorative handles
If a handle has a complex shape, it cannot be evaluated by width and height alone.
You need to look at how it will sit next to the front frame, a carved overlay, or a decorative panel.
On a small drawer, an intricate shaped handle can become the main visual element. On a large dresser, several such details can create excessive ornamental density.
Therefore, it is better to first check a decorative shape on one front, and then evaluate its repetition on the entire dresser.
Do not confuse the overall length of the handle with the distance between the mounting points
For a furniture maker, this distinction is fundamental.
The overall length describes the external dimensions of the product. The center-to-center distance shows the distance between the centers of the mounting holes.
These dimensions may not match.
Suppose the overall length of the bracket is 150 mm, and the distance between the holes is 128 mm.
If you mistakenly use 150 mm for drilling, the handle cannot be installed.
On a new front, the problem will have to be corrected with additional machining. On a finished painted front, such a mistake may require major repair or the manufacture of a new part.
A mounting diagram is needed to calculate drilling.
It must indicate the coordinates of the mountings, the diameter of the holes, and other parameters of the assembly provided for by the design.
If the dimensions on the drawing are designated by the letters A, B, C, or D, you cannot automatically assume that A is the length and B is the center-to-center distance. The designations must be read according to the specific manufacturer's diagram.
How to check the center-to-center distance on a finished handle
If the handle is attached with two screws, measure the distance between the centers of the mounting points.
The most convenient way is to use a caliper or a proven mounting template.
Measuring along the outer edges of the decorative bases is not suitable: the diameter of the base does not necessarily coincide with the hole coordinate.
If in doubt, place the product on a paper template, mark the mountings, and measure the distance between their centers.
For a new facade series, it is better to take the final value from the drawing, and use the actual handle for a verification check.
Grip comfort matters more than visual symmetry
Even perfectly marked handles can turn out to be inconvenient.
This is especially noticeable when using deep lower drawers.
Let's imagine a bedroom dresser. The top drawers are meant for small items and move almost effortlessly. The bottom ones are deeper and are filled with bed linen.
On the upper facade, a small wooden knob may be quite sufficient. On the lower one, the same knob can prove less convenient if significant effort is required to pull it out.
However, the opening effort depends primarily on the slides, the load, the correctness of assembly, and the condition of the mechanism.
Choosing an oversized handle instead of fixing the drawer slide issue is pointless.
How to test a handle before buying the full set
Install the sample on a test drawer front or temporarily attach the handle in the position specified by the design without damaging the finished surface.
Then perform a few actions.
Open the drawer with one hand while standing directly in front of the dresser. Try doing the same while standing slightly to the side.
Check whether it is comfortable to grip the handle with your fingers, whether your hand touches the drawer front surface, and whether you have to twist your wrist unnaturally.
Pay special attention to the initial movement when the drawer is in the closed position.
With a handle that has a small projection, it can be difficult to get your fingers under the protruding part. A handle that is too large may require more space in front of the furniture.
If two handles are planned, check opening with both hands and alternately with one hand on each.
The result is assessed by the actual behavior of the drawer, not only by the symmetry of the holes.
Handle and weight of contents
The weight of the drawer together with its contents must be compared with the permissible load of the slides. If necessary, check the construction of the front and the fastening of the box.
Two handles do not increase the permissible load of the slides.
Installing a more massive wooden pull does not make a weak construction stronger either.
If a heavy drawer moves with skewing, first correct the cause, and only then choose a convenient grip area.
Choosing handles before drilling the front panels
The most costly mistake when making a chest of drawers is drilling all the fronts before approving a specific handle model.
For example, for six drawers, holes are pre-drilled for a specific center-to-center distance. Then the customer chooses a different collection whose mounts are positioned differently.
As a result, you either have to find a compatible model or redo the finished fronts.
On a painted surface, filling extra holes is especially difficult: even a carefully executed repair may differ in color, texture, and degree of gloss.
Therefore, the order of work should be reversed.
-
Determine the handle layout. Decide where there will be one handle and where two, and which vertical axes should align.
-
Choose specific models and sizes. Specify the item code, material, finish, installation diagram, and dimensions.
-
Get one sample handle. Make sure its shape, projection, and mounting actually fit.
-
Check the placement on the front. Assess the scale of the handle within the overall composition.
-
Approve the drilling map. Lock in the hole coordinates for each drawer type.
-
Make and check the template. After a test installation, use it for the remaining fronts.
A sample handle is especially useful when producing several identical chests of drawers. A mistake that goes unnoticed on the sample will be repeated on every piece in the series.
Mounting template: how to avoid misaligned handles
For a single chest of drawers, marking out can be done manually using a measuring tool. But with several identical fronts, it is more reliable to use a template or drilling jig.
The template sets a fixed position for the holes relative to the chosen edge.
Let's imagine five identical 600 mm wide drawers.
If the craftsman marks out each front separately, a slight deviation when transferring dimensions can cause the handles to end up on different vertical axes.
When using a single proven template
How to check the fasteners and front thickness
Even with precise hole coordinates, the handle may turn out to be incompatible with the selected front.
One of the reasons is the fastening screw.
Its required length depends on the thickness of the front and the design of the handle itself. The value is also determined by washers, spacers, the depth of the threaded connection, and the design of the fastening unit.
It is impossible to assign a single universal screw to all wooden handles.
Example
Let's assume the front panel is 18 mm thick.
The handle is secured with a screw that passes through the front from the inside.
If the threaded portion must enter the corresponding handle bushing, the required engagement depth must be taken into account. The screw must not be too short.
However, excessive length is also unacceptable: the screw may hit the bottom of the threaded hole, failing to ensure reliable pressing of the product against the facade.
Therefore, the suitable length is determined according to the manufacturer's instructions and verified during a trial installation.
Not every wooden handle is attached in the same way
Different models may use metal screws, threaded inserts, special mounting elements, or other solutions.
Therefore, when choosing a handle, it is necessary to check not only the number of holes but also the entire fastening assembly.
If the handle is installed at two points, the correct fit of both support pads is important.
If the base has a significant contact area, the front surface must allow it to sit flush without skewing.
On a textured facade or near a protruding molding, fulfilling this condition can be more difficult.
Features of fastening to solid wood and MDF
On solid wood fronts, the grain direction and the construction of the part should be taken into account.
Holes must be drilled carefully in MDF, and the face coating must not be damaged during drilling.
For veneered fronts, preserving the thin decorative layer is essential.
The through hole must match the fastener. An excessively large diameter weakens the precision of the fit, while too small a one can damage the finish during installation.
When tightening, unevenness of the base must not be compensated for with excessive force. This can cause damage to the surface or to the fastening assembly itself.
If the included hardware is not suitable in length, a compatible replacement with the required specifications is selected, rather than using the first screw that fits.
To complete your order, please refer to the section STAVROS furniture fittings catalog.
Beech or oak: which wood to choose for chest of drawers handles
There is no universal answer to the question of the best wood species.
Beech and oak differ in grain pattern, surface structure, and visual perception after finishing.
But the choice depends primarily on the design of the chest of drawers and the available finish of the specific handle model.
When it makes sense to choose beech
Beech handles can be a convenient option for furniture intended to be painted with opaque enamel.
If the handles and fronts are to receive a single color, the natural wood grain ceases to be the main decorative factor.
For example, the chest of drawers is painted white, gray, or another coordinated shade. The wooden handles are intended to be coated with the same enamel.
In this case, the quality of surface preparation, the compatibility of finishing materials, and the consistency of the product shape are more important.
Beech can also be used with a clear finish if its own grain pattern suits the design intent.
Calling it exclusively a material for painting is incorrect.
When oak is more interesting
Oak has a recognizable wood grain that can become an independent part of the handle's design.
If the chest of drawers is made of oak or oak-veneered, handles made of the same species allow you to create a coordinated look.
When coated with oil, clear lacquer, or tinting compounds, the wood grain remains visible.
However, even parts made from the same species will not necessarily match in color.
The shade depends on the specific wood, surface preparation, and the finish applied.
A solid oak handle and an oak veneered front can look different, especially when the grain direction differs.
Can different species be combined?
Yes, if the difference is intended as part of the design.
For example, light wooden handles can stand out against a dark front, while a richer wood can create contrast on a light surface.
But you should not randomly mix several shades on a single dresser.
If different species are used because of the availability of certain models, it is better to make finish samples in advance and compare them side by side.
And one more practical limitation: the availability of a beech or oak option must be checked in the product page for the specific item. Not every model is produced in all species.
Unfinished wooden handles or items with a pre-applied finish
For a made-to-order dresser, the choice of finish can be no less important than the shape of the handles.
There are two main approaches here.
Unfinished handles for custom finishing
If the chest of drawers is coated with enamel according to the selected sample, it is logical to consider unpainted wooden furniture handles.
They can be included in the general process of preparing and finishing wooden parts, if the technology and design of the specific product allow it.
For example, fronts and handles must be painted in the same shade.
To do this, first make a test paint on wood prepared similarly to the future product.
After drying, compare the color with the facade under natural and artificial lighting.
Keep in mind that wood and MDF can behave differently when applying the same coating. As a result, the shade, texture, and degree of gloss may differ.
Different surface preparation may be required to achieve a coordinated appearance.
Unpainted handles are also convenient when the designer wants to leave a visible wood grain on them and select an individual tint.
Handles with a ready-made coating
If a suitable color is already available in the manufacturer's range, you can reduce your own painting operations.
For this, choose Wooden handles with coating.
Before purchasing, you should compare the shade with the material of the dresser.
This is especially true for transparent and semi-transparent finishes, through which the wood grain is visible.
The color in the product photo does not guarantee an exact match with the front. Lighting, screen settings, and differences in materials affect visual perception.
If strict matching is required, it is better to use a physical sample.
Finishing all handles in one batch
For a chest of drawers with several drawers, it is desirable that the handles have a coordinated finish.
If some items are coated with matte lacquer while others have a more pronounced gloss, the difference may be noticeable even with the same color.
When painting yourself, it is convenient to process the entire set within a single technological operation.
For serial furniture, the finishing parameters should be fixed in the specification: material, coating composition, shade, gloss level, and approved sample.
This will make it possible to repeat the set on the next order.
When wooden handles need to match carved decor
Not the entire surface of the drawer is free for installing a handle.
On a classic dresser, the fronts may feature framed borders, panels, carved overlays, and decorative moldings.
If the handle position is determined independently of these elements, a conflict is possible.
For example, a central carved overlay is placed on a 240 mm high front. A handle installed exactly at the geometric center may cover part of the ornament.
Moving the handle up or down sometimes solves the problem, but changes the overall composition of the drawers.
Therefore, in such projects, the free working area must be determined first.
Frame facade
If the front has a wide frame, the handle is usually placed taking into account the inner field or the structural zone provided by the project.
On a narrow drawer, the internal area may be too small for a large handle.
Then it is possible to choose a more compact handle, change its position, or adjust the decorative design itself before manufacturing the front.
Carved overlay
When using carved decorative inlays you need to match their actual dimensions with the handle's overall dimensions in advance.
The depth of the relief should be checked especially carefully.
If the overlay protrudes from the plane of the facade, it may interfere with gripping the handle or visually clash with it.
Do not place handle fasteners through decorative relief without a connection point provided for by the design.
Moldings on the facade
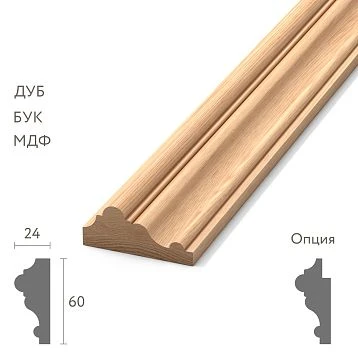
Wooden moldings form the boundaries of decorative fields.
The handle must be located within a suitable installation zone and must not overlap the profile unless this is provided for by the design.
When calculating the free field, not only the width of the molding is taken into account, but also the projection of its relief.
For example, 280 mm of free space remains between two vertical moldings. A 260 mm long handle fits mathematically, but in fact leaves only 10 mm on each side.
Such a solution may look visually cramped, and with a significant overhang of decorative elements, it may be inconvenient.
Here it is more useful to choose a more compact model than to try to occupy all the remaining space.
Examples of STAVROS wooden handles for different solutions
The STAVROS catalog presents models with various geometries, materials, and finishes. They can be used as a starting point when choosing hardware for a chest of drawers.
However, the actual dimensions and mounting method must be checked on each product page separately. The models shown below are not interchangeable in terms of drilling pattern.
Rustic HL-057M — a large wooden handle as a striking accent
Rustic furniture handle HL-057M made of oak with a pronounced end-grain pattern.
The product page lists a size of 100 × 100 × 36 × 32 mm according to the manufacturer's designations.
Such a model differs significantly in perception from a small round knob.
It should be considered a prominent decorative detail. On a wide front, one such handle can become the central accent.
If two large handles are placed on a single drawer, it is necessary to check whether they overload the composition.
This is especially true for dressers with carved fronts, complex panels and numerous decorative elements.
The wood grain itself is expressive enough. Therefore, next to such a model, it is better to assess in advance the number of other accents.
For a small upper drawer, a handle of this scale may turn out to be excessively large.
Pebble HL-065-3M — a combination of wood and a metal element
Pebble furniture handle HL-065-3M represents a different character of design.
The product card lists the size as 67 × 46 × 39 mm. Available options include different wood species, and the design combines a wooden part with a metal base.
For a chest of drawers, this model is interesting when the handle should be a noticeable standalone detail, but not turn into a long horizontal line.
It can be used on fronts where a combination of natural material and a metal element is required.
However, matching the handle size to the available field does not yet mean the entire composition is correct.
If several Pebble handles are planned for one dresser, you need to check their quantity, placement, wood color, and the consistency of the metal parts.
Such handles should be matched especially carefully with other hardware: hinges, decorative overlays, or metal parts of the base.
Proun HL-053-1M — compact geometry
Furniture handle Proun HL-053-1M has the dimensions listed in the product card: 28 × 28 × 29 mm.
The model is available in oak and beech versions with various finishes.
Its geometric character makes it suitable for handles on chests of drawers with simple fronts, where decorative hardware should not take up much space.
The compact shape can be useful on upper drawers.
But the size must be evaluated together with the ease of grip and the mounting mechanism. Especially if the drawer is expected to be opened regularly under load.
Why you shouldn't choose based only on the collection name
Rustic, Pebble, and Proun serve one common function — they allow you to open a furniture front.
But their sizes, materials, appearance, and construction differ.
For one project, it is more important to preserve the natural oak grain. For another, to achieve a compact geometric shape. For a third, to combine wood with metal elements.
Therefore, you should choose a model after determining the number of handles, the available front area, and the intended opening method.
The collection name and photo help evaluate the appearance, but they do not replace checking the specifications.
How to choose handles for a chest of drawers with different top and bottom drawers: three practical examples
Example one. Two small drawers on top and three wide ones below
Let's assume the top fronts are 350 mm wide each, and the bottom ones are 760 mm.
One wooden knob is planned for each of the upper fronts.
Two options are being considered for the bottom ones.
The first is two identical knobs on each wide front.
Number of handles:
2 × 1 + 3 × 2 = 8 pieces.
The result is a repeating pattern with two points in each row.
The second scheme — one elongated handle on each lower front.
Quantity:
2 buttons + 3 handles = 5 items.
In the second case, the layout will become less monotonous, but the lower drawers will get a more pronounced horizontal accent.
The choice should be made taking into account the character of the furniture and the required grip area.
Example two. Four drawers of the same width but different heights
Let's assume all fronts are 600 mm wide.
The height from top to bottom is 120, 160, 220, and 300 mm.
Since the width is the same, all single handles can be aligned along a single vertical axis.
But the vertical position will require a separate solution.
If each handle is centered by height, the coordinates from the top edge will be:
-
60 mm;
-
80 mm;
-
110 mm;
-
150 mm.
This option preserves the geometric symmetry of each front.
If all handles are placed at the same distance from the top edge, for example at 60 mm, on the lowest front the handle will be close to the center, while on the tall one it will be noticeably above it.
The difference will change the visual perception.
For this chest of drawers, you need to compare both schemes on the drawing and then check their convenience on a test sample.
Example three. A modern chest of drawers with wide smooth fronts
Let's imagine a chest of drawers about a meter wide with three large drawers.
The fronts are smooth, without decorative frames or carvings.
You can install one long wooden handle in the center of each front.
This solution will create three horizontal lines that repeat the shape of the drawers.
Another option is two small buttons on each front.
Then, instead of horizontal lines, two vertical groups of dots will appear.
With the same wood and finish, both options can look consistent.
The difference will be in the character of the piece: one will emphasize the width and simplicity of the surfaces, the other the rhythm of repeating details.
A visual try-on of handles at actual size is especially useful here. A computer model without the exact scale of the hardware can distort the impression.
How to buy one sample handle before ordering the full set
For a furniture workshop, a trial purchase allows you to check what is not always obvious from the catalog.
First, the intended model is selected.
Then a single handle is obtained and placed against a trial front or a finished furniture sample.
The overall size, projection, finger position, and actual mounting dimensions are checked.
If the handle has a finish, it is compared with the color of the front.
Such a check is especially useful when choosing wooden items, since the grain and shade of natural wood can vary.
After checking the sample, you can proceed to the full set.
For furniture manufacturers, this also allows coordinating the hardware with the customer before producing all the facades.
For example, a designer plans to use large wooden handles on the lower drawers. In the visualization, they look convincing.
But after fitting, it turns out that the handle protrudes more than expected, or does not combine well with the decorative frames.
If this is discovered before drilling, the model can be replaced without reworking the furniture.
The STAVROS catalog allows ordering products from a single piece, so a trial sample can be considered a separate stage of selection.
For recurring projects, it is useful to keep the approved handle together with its article number, drawing, and finish sample.
If the handles are being changed on an already finished dresser
Replacing hardware differs from choosing handles for a new item.
Existing fronts may have old holes, marks from previous bases, and finish damage.
In such a situation, you cannot start with a new composition without checking the constraints.
First, remove one old handle and inspect the surface underneath it.
Then determine the number of mounting holes and measure the distance between them.
For a pull handle, the center-to-center distance is especially important.
If it does not match the new model, the existing holes may be unsuitable.
Installing a different handle may require drilling, and the old holes will remain exposed.
If the new handle is smaller than the previous one
An area of finish in a different shade may remain under the old hardware.
Sometimes an imprint of the base or scratches are visible.
A new compact handle does not always cover these marks.
Therefore, before purchasing, you need to compare the outer contour of the old and new part.
If the new handle is larger
The increased size sometimes helps cover the previous mark, but other limitations arise.
The handle may end up too close to the edge of the front or to neighboring decor.
Moreover, a larger size does not guarantee that the old drill holes will match.
Should all handles be replaced?
If the old items are still in good condition and comfortable to use, replacement may not be needed at all.
When one handle breaks, it is reasonable to first try to find the same model or a compatible equivalent.
A complete replacement of the set is justified if identical items are no longer available, the old holes are compatible with the new hardware, or a comprehensive update of the dresser's finish is planned.
For ready-made furniture, first check whether the existing holes can be preserved, and only then choose new handles and their placement.
How many wooden handles should be ordered for a chest of drawers
The quantity is determined by the layout of each front.
You cannot calculate the set based only on the number of drawers: one drawer may have one handle, another may have two.
For example, a chest of drawers has five drawers.
The top two get one knob each. The bottom three get two each.
Summary:
2 × 1 + 3 × 2 = 8 handles.
For ordering, it is useful to create a separate configuration table.
| Drawer group | Number of drawers | Handles per facade | Total handles |
|---|---|---|---|
| Top narrow | 2 | 1 | 2 |
| Medium wide | 2 | 2 | 4 |
| Lower wide | 1 | 2 | 2 |
| TOTAL | 5 | 8 |
If different models are used, the quantity is calculated separately for each.
Is a spare handle needed
There is no single mandatory reserve.
For a single home dresser, an exact quantity is sometimes sufficient.
For a furniture workshop producing a series, an additional reserve may be reasonable, especially if the hardware has a custom finish or if reordering it takes time.
The decision depends on the cost, availability of the item, the likelihood of damage during work, and the production volume.
Buying extra handles automatically for every dresser is not required.
How to calculate the cost of a set
If all handles are identical, the cost of the items is determined by multiplying the price of one piece by the quantity.
When using two models, the calculation is performed separately.
For example, for a layout with two upper knobs and six lower handles:
Cost of items = 2 × price of button + 6 × price of bottom handle.
If necessary, the cost of fasteners, finishing, and delivery is added to the resulting sum, if these items are not included in the product price.
When choosing between two configurations, it is useful to compare more than just the cost of the handles.
For example, one handle per front may require fewer installation operations than two. But if it requires special finishing or non-standard fasteners, the savings will not be so obvious.
Current prices and available options should be checked in the product cards before placing an order.
How to prepare a specification for a furniture workshop
For a single chest of drawers, a table with models, dimensions, and quantities is sufficient.
But when reproducing furniture, it is better to record more information.
For example:
| Facade | Handle model | Quantity | Position |
|---|---|---|---|
| Top left | Model A | 1 | Centered on the facade |
| Top right | Model A | 1 | Centered on the facade |
| Medium | Model B | 2 | Symmetrical pair |
| Lower | Model B | 2 | Symmetrical pair |
Item codes, materials, dimensions, finish, and fasteners are added to the table.
The hole coordinates are stored separately.
This is especially important when using handles from the same collection in different sizes. They may look similar but have different mounting parameters.
To reorder a chest of drawers, you must specify the full product designation.
Why it is useful to keep an approved sample
After a few months, the workshop may need to produce another chest of drawers from the same series.
If only photos of the finished furniture remain, it will be much harder to match the hardware precisely.
Therefore, it is useful to attach information about the selected handle, its drawing, and a finish sample to the documentation.
If the product is no longer manufactured, such a data set will make it possible to identify a suitable equivalent more quickly.
For furniture manufacturers, STAVROS provides a separate section with terms of cooperation.
Common mistakes when choosing and placing handles for a chest of drawers
Identical handles are chosen without considering different facade sizes
On the top drawer, the handle takes up half the width, while on the bottom one it is barely noticeable.
The reason is choosing a model without assessing its scale on each front.
Fix: sketch all drawers and compare the relative sizes of the handles. If necessary, use different sizes from the same series.
Two handles are installed only because the drawer is wide
The quantity is chosen based on a conventional width threshold, without checking the runner design and the usual way of opening.
As a result, a wide drawer is inconvenient to use with one hand.
Fix: test the drawer with one central handle and with two symmetrical ones. Then choose the solution taking into account convenience and appearance.
Centers are measured from different edges
One front is marked from the left edge, another from the right, and a third along the line of the adjacent part.
If the sizes or positions of the drawers differ, this can create misalignment.
Fix: define a single coordinate system and use approved templates.
Holes are drilled along the overall length of the bracket
The external size of the handle is mistakenly taken for the center-to-center distance.
After drilling, the hardware does not align with the holes.
Fix: use the installation drawing and verify the actual mounting centers.
Vertical handle placement is not taken into account
On some fronts, the handles are centered; on others, they are at the same distance from the top edge.
As a result, the composition looks inconsistent.
Fix: choose one principle for each group of drawers and, if necessary, justify changing it for individual fronts.
They buy the entire set before fitting
After delivery, it turns out that the handle has an inconvenient projection or doesn't fit the scale.
Fix: first test one sample on the actual facade, especially if the dresser is non-standard or produced in series.
Choosing a finish based only on a photo
On screen the shade looks right, but on the furniture it differs in color or sheen.
Fix: compare physical samples under the room's typical lighting.
Ignoring the mounting and thickness of the cabinet front
The handle fits in shape, but the screw turns out to be unsuitable, or the mounting assembly interferes with the internal parts of the drawer.
Fix: check the entire mounting structure before drilling.
Decor and handles are designed independently
After installation, it turns out that the handle overlaps the carved overlay or is too close to the molding.
Fix: first create a general layout of the front with the actual dimensions of all elements.
When new wooden handles do not need to be purchased
Not every change to a dresser requires replacing the hardware.
If the existing handles are convenient, securely attached, and match the furniture's finish, they can be kept.
When updating the fronts, it is sometimes enough to clean and tidy up the existing pieces, if their condition and type of finish allow such treatment.
If the handles are inconvenient only because the drawer opens with great effort, first check the slides and the construction of the drawer box.
If one item is damaged, it is sometimes more reasonable to replace only it while keeping the rest of the set.
There are situations when wooden handles do not fit the original concept at all: for example, the project calls for a completely smooth facade and opening with a special mechanism.
In that case, adding protruding hardware just for decoration is not required.
A good handle should match the design and character of the furniture. Its presence is not a mandatory condition for a quality dresser.
Where to buy wooden handles for a chest of drawers
You can find and buy wooden handles for a chest of drawers at STAVROS furniture handles catalog.
To make a selection, first determine the number of handles on each front, their size, and the required shape.
If custom painting is planned, consider products without a finish. For a chest of drawers with a finished surface, you can choose handles in a suitable factory finish.
When placing an order, it is helpful to have the following information:
-
dimensions of the chest of drawers' fronts;
-
the approved layout plan;
-
item codes of the selected models;
-
material and finish option;
-
the quantity of handles of each type;
-
the thickness of the fronts and fastening requirements.
For a complex project, an installation drawing and a finish sample will also be required.
When purchasing handles for a series of identical chests of drawers, you should agree in advance on consistent dimensions, material, and color.
After selecting specific items, you can assemble a set and clarify payment and delivery terms for STAVROS.
Frequently asked questions about wooden dresser handles
Can different wooden handles be installed on the upper and lower drawers?
Yes. Small knobs can be used on the upper compact fronts, and pulls on the lower wide ones. It is advisable to match them in wood, finish, or the character of their geometry so that the furniture is perceived as a single piece.
Is it necessary to install two handles on a wide drawer?
No. The number of handles depends on the drawer design, slides, ease of opening, and design. One central handle can be quite convenient on a wide front. Two are more often used for symmetry or for the two-handed grip envisioned by the project.
How can you tell if a wooden handle is too large?
Attach its full-size template to the front panel. Assess the remaining margins on the sides and in height. If the handle takes up almost all the available space, covers the decor, or interferes with neighboring elements, consider a more compact model.
Can you use the same handle model in different sizes?
Yes, if the manufacturer offers the required versions. This allows you to keep the overall shape of the hardware and match the scale to the width of individual drawers. But the mounting dimensions of each option need to be checked separately.
Why do the same handles look different on two identical dressers?
Perception is influenced by the color and texture of the front panels, the placement of the handles, the height of the dresser, nearby decor, and lighting. The same handle can be barely noticeable on a textured wooden front and striking on a solid painted surface.
Is it worth using two small knobs instead of one large one?
This solution can work well if you need to create a paired composition. But it does not guarantee greater convenience. You should check how the drawer opens with one hand and determine symmetrical coordinates for the knobs.
How do you correctly measure the distance between two handles?
Measure the distance between the geometric centers of the handles themselves, not between the nearest edges. When calculating the mounting holes, additionally take into account the installation dimensions of each model.
Can a handle be installed on a front with carved decor?
Yes, if a suitable flat mounting area is provided for it and it does not conflict with the relief. The placement of the mounting and decorative elements should be coordinated before drilling.
Are beech handles suitable for an oak chest of drawers?
Yes, if such a combination suits the design intent. With opaque finishing, the difference in the natural wood grain may be almost imperceptible. With a clear finish, the contrast between beech and oak will be more pronounced.
How can you avoid differences in the shade of wooden handles?
For custom finishing, use an approved color sample and an agreed coating technology. If the handles are purchased ready-made, check their workmanship and compare physical samples when an exact match is required.
Should the same distance from the top edge be kept for all fronts?
Not necessarily. You can center the handles by the height of each front or use the same offset from its top edge. The choice depends on the composition of the dresser and convenience. These rules should not be mixed randomly.
Can the handles be changed after the chest of drawers is manufactured?
Yes, if the new items are compatible with the existing holes or additional processing of the fronts is acceptable. If the drilling pattern does not match, you need to assess in advance how to cover the old holes and traces of the previous hardware.
How many handles are needed for a chest of drawers with five drawers?
If one handle is provided for each drawer, five items will be needed. If two drawers get one each and three get two each, eight will be required. The quantity is always calculated according to the approved layout plan.
Should spare handles be purchased?
For a single dresser, a stock reserve is optional. In serial production, extra quantity can be useful, especially if the model has a custom finish or is difficult to reorder. The decision is made taking into account the cost and availability of hardware.
Can wooden handles for a chest of drawers be ordered one piece at a time?
The STAVROS catalog offers the option to order individual pieces. This is convenient for checking a single sample before outfitting an entire dresser or for replacing a single handle. The availability of a specific finish and ordering conditions should be confirmed on the product page.
Which selection procedure is the most reliable?
First, measure the fronts and determine the placement of the handles. Then choose the models, compare their dimensions with the furniture, and check the mounting and finish. After test-fitting one handle, confirm the hole coordinates, prepare a template, and calculate the quantity for the entire set.
This procedure helps preserve the symmetry of the dresser, ensure comfortable opening of the drawers, and avoid unnecessary drilling into finished fronts.