Article Contents:
- For a chair, the leg height is part of the seat height
- First measure the chair, not the old leg
- The total length of the part and its working height are different dimensions
- How to calculate the leg height for a new chair
- What to do if you need to preserve the original seat tilt
- Why you can't judge strength by leg thickness
- Turned chair legs
- Carved legs for a chair
- Geometric wooden legs
- Beech legs
- Oak legs
- How to check a replacement without final painting
- Calculating quantity for a series of armchairs
- Situation one: replace short legs and lighten the look of the armchair
- Scenario two: making a chair with slanted tapered legs
- Scenario three: restoring an old chair with carved front supports
- Can you replace only the two front legs?
- How do you know if the height listed in the product card matches what you need?
- Can you increase the height of a chair without changing the legs?
- What should you do if the new legs are identical but the chair wobbles?
- Will the legs from a sofa fit an armchair?
- What should I do if the armrests have become too high relative to the table?
- Should I order spare wooden legs for one armchair model?
- Can wooden legs be installed on an armchair with a transformation mechanism?
- Are tall legs suitable for a heavy armchair?
- What information is needed to order beech or oak legs without making a mistake?
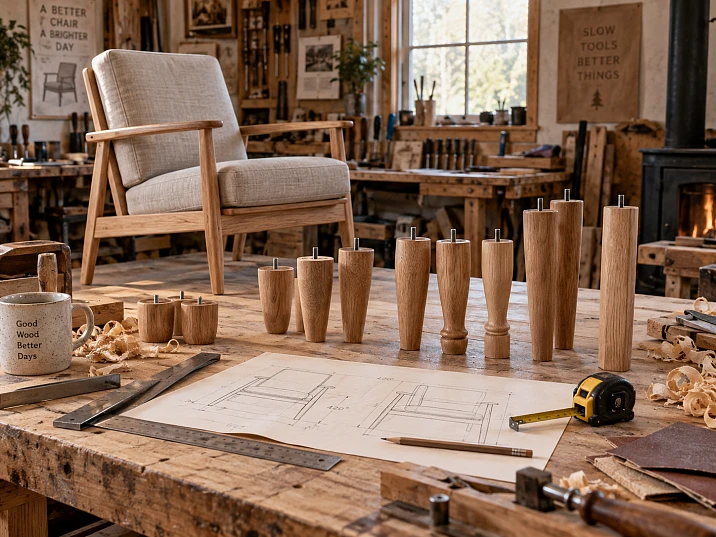
An armchair has wooden legs 80 mm high. The owner wants to replace them with more prominent ones, 150 mm high: there will be more space under the body, cleaning will be easier, and the armchair itself will look lighter. But if the new supports extend 150 mm below the frame, the seat will rise by about 70 mm. Someone who used to place their feet on the floor may find that they now have to stretch their legs out. Conversely, a 150 mm leg partially recessed into the structure will give a completely different result.
Wooden legs for an armchair are chosen based on the desired seat height and the frame design, not on a photo you like. First, measure the armchair, then calculate the actual vertical extension of the support, check the mounting plate, and only after that select the shape, wood species, and finish. For an armchair being made from scratch, the order is similar: first determine the height of the finished seat, then how much of that height can be accounted for by the leg.
This helps avoid a common mistake: a beautiful set has already been purchased and painted, but after assembly the armchair looks different from the drawing, and sitting in it has become uncomfortable.
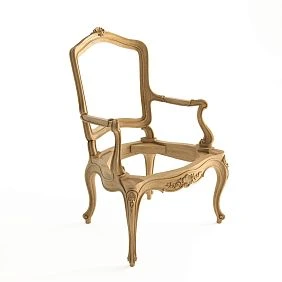

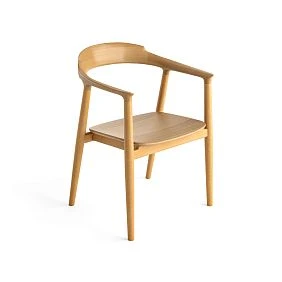
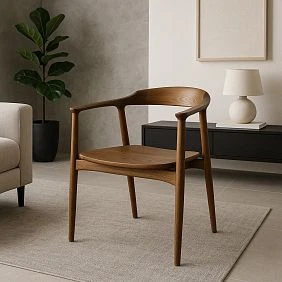
For a chair, the leg height is part of the seat height
An upholstered chair is perceived as a single object, but its height is made up of several parts. At the bottom is the support, above it is the lower frame or another frame element, then come the seat base, the padding, and the soft cushion. In some models, part of this set is hidden by the upholstery, so from a photo it is impossible to determine exactly where the leg ends and the frame begins.
If you replace only the wooden supports and leave the body, upholstery, and soft filling unchanged, the entire rigid block of the chair will rise or fall. The distance from the floor to the front edge of the seat, the height of the armrests relative to the floor, the clearance for cleaning, the position of the chair relative to the table, and its silhouette in the room will all change.
But there is a subtlety. The distance between the seat and its own armrests usually remains the same with such a replacement: they move together with the frame. Therefore, discomfort cannot be explained by the armrest necessarily becoming higher relative to the seated person. The real problem is more often the position of the feet, the height of the knees, the ease of getting up, and the chair's new relationship to nearby furniture. If the seat is also modified or the cushion thickness is changed, the geometry is already different.
On a low club chair, a short leg may be part of the design: the wide lower edge of the body almost touches the floor, and the furniture feels stable and squat. On a chair with an open wooden base, a long support, by contrast, emphasizes the construction. Neither solution is automatically more comfortable. Comfort is determined by the seat height, seat depth, backrest angle, and the user's actual characteristics.
If you need an original choice of shapes, the STAVROS catalog offers wooden chair legs. However, even having a model in the "Chair" application section does not remove the need to check the specific frame: the height and mounting method are determined for each product separately.




First measure the chair, not the old leg
Place the chair on a flat, hard floor. If there is a thick carpet under the legs, it will create an error during measurement: the pile compresses, and the result will differ from the geometry on a hard surface. You will need a tape measure, a ruler or square, a level, a sheet of paper for notes, and, if the design allows, access to the lower part of the body.
Measurements are more conveniently taken in two states: without a person and with the load typical for this chair. The first shows the dimensions of the item, the second — the actual seating position. They cannot be recorded as a single value.
| What to measure | From where and to which point | Why it's needed |
|---|---|---|
| Seat height without load | From the floor to the selected reference point on the front part of the seat | Base value for calculation after replacement |
| Seat height under load | To the same point with the same position of the person and the cushion | Assessment of real seating comfort |
| Full length of the old leg | By the size of the part, if available | For comparison with the drawing or product card |
| Vertical offset of the old leg | From the support plane of the body to the floor vertically | Key dimension when replacing a support |
| Clearance under the lowest part of the body | From the floor to the lowest fixed part, not to the visible upholstery | Understanding cleaning feasibility and appearance |
| Mounting area | Width, length, thickness and available space in the frame | Checking the attachment of the new support |
| Position of mounting points | Between the front, rear, and side nodes | Checking stability and installation geometry |
You need to choose one reference point on the seat and not change it between measurements. On an armchair with a thick cushion, the height at the front edge and in the central area can differ noticeably. When the edge is measured first and then, after replacement, the center, the resulting difference says little about the legs. For a soft cushion, it is useful to record separately the height of the upper front edge and the body position in the usual posture.
It is useful to photograph the armchair strictly from the side, placing a ruler against the visible leg. A second photo from below will show the fasteners and the lower frame. For restoration, this is often more valuable than a general photo of the interior: disassembling a finished armchair just to determine the type of plate is inconvenient and sometimes risky.
Do not forget about the horizontality of the base. If the rear part of the armchair is initially lower than the front, measuring only the two front supports is not enough. When replacing, it is necessary to preserve the design seating tilt, and not mechanically level all four visible parts.
Our factory also produces:
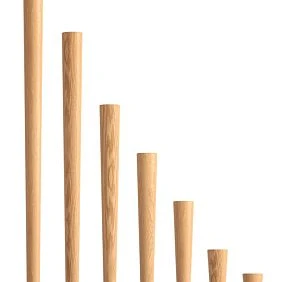
The total length of the part and its working height are different dimensions
Let's imagine a leg 150 mm long. Its upper part enters the mounting socket by 20 mm, and a glide is installed at the bottom, adding 4 mm. With vertical installation, if there are no other offsets, the support will protrude from the corresponding mounting plane by approximately 134 mm: 150 − 20 + 4. This is a conditional example, not a characteristic of a specific STAVROS model.
On another armchair, the same part is attached entirely under the lower plane via a plate. Then there is no recess, but the thickness or offset of the mounting node appears. For an angled leg, the angle must also be measured. In the catalog, the length may be indicated along one dimensional axis of the drawing, and the vertical distance from the frame to the floor does not have to match it.
Therefore, in your working notes, record two numbers separately: “part length according to the drawing” and “overhang below the frame after assembly.” When they are mixed up, mistakes are made even with a correctly selected article number.
In the manufacturer's dimension tables, individual parameters may be designated by the letters A, B, C, and other symbols. The meaning of a specific letter is determined by the drawing of the selected article number: you cannot automatically assume that the letter A always denotes height and B always denotes upper width. For one shape, the list of dimensions may differ from another, especially if there is a tilt or a carved protrusion.
Get Consultation
How to calculate the new seat height
For a chair whose frame and soft padding are not being changed, the preliminary calculation looks like this:
New seat height ≈ old seat height + protrusion of the new support − protrusion of the old support.
Here we are talking specifically about the vertical protrusion of the installed leg, including the effect of the standard glide and the mounting assembly. If the tilt, insertion depth, position of the mounting plane, or the cushion itself changes, a simple difference in lengths cannot be used without additional measurements.
Suppose the height of the unloaded seat is currently 420 mm, and the old legs protrude 95 mm below the frame. After installation, the new ones will protrude 135 mm. Then the calculation gives:
420 + (135 − 95) = 460 mm.
This means that, with the soft block unchanged, the front reference point of the seat will rise by approximately 40 mm. This is already a noticeable change for a user accustomed to the previous chair.
Another example shows why the label “150 mm leg” alone is not enough. Two options have the same nominal length, but one protrudes 150 mm below the body, while the other protrudes only 125 mm due to structural recessing. The difference in seating position will be about 25 mm, even though both products in the selection have the same nominal size.
| Hypothetical situation | Old protrusion | New overhang | Changing seat height |
|---|---|---|---|
| Need more clearance | 80 мм | 130 мм | +50 mm |
| Changing the shape while keeping the seating position | 110 мм | 110 мм | 0 мм |
| The chair turned out to be too high | 150 мм | 115 мм | −35 mm |
| The new leg goes deeper into the frame | 120 мм | 100 мм | −20 mm |
These are calculated illustrations with all other chair elements unchanged. They do not define universal dimensions for ordering. The actual overhang of the new part is confirmed by a drawing or a trial installation.
How to calculate the leg height for a new chair
When making a chair from scratch, it is more convenient to work backwards: from the required seat height to the support. For example, the design seat height without load is 440 mm. From the frame's support plane to the upper reference point of the seat, according to the drawing, it comes out to 315 mm. The required distance from the floor to this support plane will be about 125 mm.
440 − 315 = 125 mm.
Now you need to select a leg and mounting that, once assembled, will provide a vertical offset of 125 mm. If the design is intended for a visible height of 125 mm, a leg with a nominal length of 125 mm is not yet the finished answer: the glide, recess, angle, and mounting plate must be checked.
This is especially useful for a workshop producing several chairs with the same upholstered unit. Supports of different shapes can be matched by working offset while keeping the seat height within the established design tolerance. This approach makes it possible to change the character of the furniture without accidentally altering comfort.
Why the seat is at a different height when unloaded and under a person
The soft cushion compresses. The amount of deformation is affected by its filling, thickness, base construction, and the weight and posture of the seated person. When choosing supports, these circumstances cannot be reduced to a general rule such as “a seat height of 450 mm suits every chair.”
Let us imagine that the top point of the uncompressed cushion is at a height of 455 mm from the floor. In the normal seated position of a particular person, its position in the control zone drops to approximately 425 mm. If supports with an offset 40 mm greater than before are added to the chair, the unloaded height will approach 495 mm, and the observed loaded height will approach 465 mm, if the cushion compression has not changed. This caveat is fundamental: a different cushion, a different seated position, or a change in the frame tilt may produce a different result.
To check, there is no need to look for a single “correct” number in a table. Seat the person for whom the chair is intended, ask them to take their usual posture, and assess the actual signs:
- the feet have comfortable contact with the floor, and the person does not have to reach with their toes;
- the front edge of the seat does not create excessive pressure under the thighs;
- in the seated position, there is no need to constantly slide forward in order to support the legs;
- a person can sit down and stand up comfortably without unnatural movement of the torso;
- the height of the armchair matches the coffee table, side table, or work surface for which it is intended.
For a lounge chair and a reading chair, these characteristics are assessed differently. A deep reclined seat allows a different leg position than a more upright one. If the model is intended for a specific person, their real-world trial is more useful than an average range from advertising.
Armchairs for elderly users and people with limited mobility are checked separately. Sometimes a slight increase in height makes standing up easier, but sometimes it worsens foot support. The geometry of such an armchair should not be changed based only on the appearance of the legs; if there are special seating requirements, they are determined by the appropriate specialist.
High and low supports: what actually changes
The clearance underneath is a noticeable part of the appearance. Raise a massive upholstered body above the floor, and a strip of light appears beneath it. Against a light floor, a heavy armchair visually becomes less bulky. With a low armchair, the lower line, on the contrary, gathers the body into a single volume. Neither effect can be assessed separately from the seat height.
Legs that are too high can make a familiar armchair feel like a taller stool: the knees and feet end up in a different position, the way you stand up changes, and the armrests rise relative to the table. With a narrow base and supports extending beyond the body's footprint, additional stability checks will be required. You cannot compensate for unreliable fastening with the fact that the solid wood looks thick and strong.
Legs that are too low reduce the distance under the body. Sometimes this interferes with cleaning, sometimes it only changes the visual impression. For a large armchair with wide armrests, a low seat may be a necessary part of the design. Short wooden legs are not a sign of poor furniture if the construction and height are designed that way.
Checking the clearance should take into account the lowest point underneath. The frame may protrude above the mounting plane, and there may be slats, straps, upholstery staples, or decorative bottom fabric under the seat. If you want a brush or vacuum attachment to pass under the armchair, measure their actual height and compare it with the minimum free passage. The leg height in the catalog does not provide such an answer.
Raising the armchair solely for robotic cleaning is risky without checking the passage width and the position of the legs. The device may physically fit under the front edge but not pass between the supports or get caught on a low crossbar. For such a scenario, it is useful to make a simple height and width template out of cardboard before changing the furniture's construction.
Front and rear legs: when the same set doesn't fit
On some chairs, the front leg is a standalone decorative element, while the rear leg continues upward and becomes part of the side panel or back frame. In other designs, the front and rear supports are attached at different angles; in some, the supports are hidden by upholstery, with only the lower part visible. Therefore, an order for "four identical wooden legs" cannot be considered universal.
When inspecting from below, determine whether the front and rear elements belong to the same structural type. Check not only the length, but also the position of the mounting points, the direction of the part's axis, the way load is transferred to the frame, and the geometry of the floor under the chair. In particular, if the rear legs are under an angled frame, their full length may differ from the front ones even with a similar vertical extension.
Four identical legs are suitable when this is provided for by the chair's design: the mounting points are identical, the vertical extension of all four supports matches the design, the attachment position does not cause skewing, and stability is confirmed on the assembled product. Under this condition, a single SKU can indeed be included in the specification in a quantity of four.
If an old chair has rear supports made as a continuation of the load-bearing back posts, replacing them with separate purchased legs may require reworking the load-bearing assembly. Here the issue is no longer selecting a nice part, but the furniture's construction. Such an assembly should not be reworked without calculation and verification.
What to do if the original seat tilt needs to be preserved
First, determine the position of the seat relative to horizontal on the old chair. Then check the difference in actual heights of the front and rear assemblies. If the new legs change this difference, the tilt of the entire seating part may change; for a deep chair, this is sometimes more noticeable than a change in absolute height.
For example, the new set raised the front points by 40 mm, but the rear ones by only 10 mm. The relative difference will be 30 mm: the body will rotate if the design allows such geometry, or it will end up in a forcibly stressed position if it does not. A situation where one corner "doesn't reach" the floor must not be allowed. For a chair being designed anew, the front and rear extensions are coordinated according to the base drawing; for an existing one, the scheme provided for by the design is reproduced.
Straight and angled wooden legs for a chair
For a straight support, the axis is usually positioned vertically. This simplifies preliminary calculation, but does not eliminate questions of attachment and embedding. An angled leg adds another parameter — the installation angle — and often shifts the point of contact with the floor outward relative to the attachment point.
If the length of the angled part is given along its axis, a simple geometric estimate of the vertical component is the product of that length and the cosine of the angle of inclination from vertical. For example, for a nominal axial length of 160 mm and a 12° tilt, the vertical component will be about 156.5 mm, and the lateral offset of the lower end will be about 33 mm. This is a calculation for an idealized straight axis, without taking into account the fit, the shape of the tip and the base plate.
A real shaped leg may have a curved profile, an angled mounting surface, or an offset attachment. Therefore, when purchasing, a drawing with mounting dimensions is preferable. Even a small discrepancy in the angle can change the position of the support foot and the overall dimensions of the armchair.
Angled legs are checked especially carefully when the armchair stands close to a wall, a doorway, or other furniture. At the top, the body may pass between objects, while at floor level the protruding legs already catch on a neighboring object or passage. With deep upholstery, this protrusion is often almost unnoticeable in the overall view.
The support footprint and the direction of forces also change. One cannot assume that legs splayed widely to the sides automatically make any armchair stable: the result depends on the placement of the center of gravity, the width of the base, the condition of the frame, the fasteners, and the actual loads. If a person leans on the armrest while getting up, a load arises that differs from calmly sitting in the center of the armchair.
The upper platform of the leg must fit the lower frame of the armchair
Two wooden furniture supports of the same height can have completely different upper parts. One has a narrow round end and a central stud. Another has a wide square platform. A third has its upper face cut at an angle. This is not a decorative trifle: it is here that the force from the seat is transferred to the leg.
Suppose the lower wooden frame of the armchair has an available width of 55 mm. A leg with an upper cross-section of 70 mm may protrude beyond its edge. Sometimes the design provides for an additional overlay or corner block, and sometimes there is no such place at all. Solving the issue by installing the fastener “wherever it fits” is dangerous: the screw may end up too close to the edge, hit the joint between parts, or pass through a thin section of wood.
Before purchasing, check:
- The size and shape of the support surface. Compare the dimensions of the upper part of the leg with the actually available area on the armchair.
- The material of the load-bearing base. A solid wood frame, a plywood element, and a structure with thin panels require different solutions; upholstery fabric is not a load-bearing base.
- Location of mounting holes. Check whether there is room for a stud, threaded insert, plate, or another standard fitting.
- Distance to edges and joints. It is necessary to understand where mortise-and-tenon joints, ties, brackets, and other parts run.
- Position of the leg in plan. Make sure that after installation it does not catch the decorative trim and does not extend beyond the specified dimensions.
- Possibility of subsequent maintenance. Access to the fastening will be needed if the joint has to be checked or tightened.
There is no universal safe drilling depth or single screw-to-edge distance for all such structures. They depend on the frame material, fastener diameter, grain direction, joint dimensions, and load. If there is no drawing of the leg, it is more reasonable to request one from the seller than to drill holes at random.
Extra care should be taken with old furniture. Behind dense upholstery there may be a frame with previous repairs, cracks, or weakened joints. A new sturdy leg will not eliminate damage to its mounting point. During restoration, the load-bearing joint itself is repaired first, and only then is replacement of the support considered.
How to choose the fastening: stud, threaded insert, or mounting plate
The name "wooden leg" says nothing about how it should be connected to the chair. There are different solutions, and they cannot be freely substituted for one another just because the fastening is available for sale.
Stud and threaded insert. One option is a stud in the leg that screws into the matching threaded part of the base. Such a joint is convenient for disassembly, but it requires matching threads and properly prepared load-bearing material. If the old chair already has a metal insert, its condition and compatibility must be checked, rather than assuming that any screw of similar diameter will fit.
Mounting plate. It can serve as an intermediate element between the leg and the frame. Plates differ in mounting method, dimensions, thickness, and, in some versions, angle. An angled plate can change the position of the leg axis; along with this, the vertical offset and the location of the floor contact point change.
Direct mechanical fastening. Some designs use self-tapping screws, bolts, or special connecting parts. This solution is acceptable when it is provided for by the manufacturer or designed for the given frame. It is not advisable to recommend that all customers drill several holes in the chair and screw the leg on directly: not all supports have a suitable mounting plate, and the base material may not be strong enough.
Structurally integrated support. A leg that continues the upright or is built into the frame may be a non-removable part of the product. Replacing it with a separate purchased part is already a modification of the design, not a simple assembly operation.
In practice, the procedure is as follows: first determine the structure of the lower frame, then choose the leg model, obtain its dimensions and recommendations, and after that select compatible fasteners. The STAVROS catalog has a separate section furniture hardware for legs, but the final set depends on the specific item number and installation scheme.
For a clear example, you can open the product page of the turned furniture leg MN-145. This model lists height options, and the description outlines methods for direct and angled mounting with the corresponding hardware. This is a useful example of how closely the chosen leg and fastener are connected. However, the recommendations for MN-145 cannot be automatically applied to all other models.
Why strength cannot be assessed by leg thickness
A thick solid wood leg looks sturdy. However, for a chair, the entire load transfer chain matters: seat — frame — joint — fastener — wooden support — glide — floor. The weakest point may not be in the wood, but in a loose bushing, a cracked corner block, or a thin mounting plate.
A common mistake is to mentally divide the user's weight by four and decide that each leg bears exactly a quarter of the load. When sitting on the edge, resting a hand on the armrest, or moving the chair, loads are distributed unevenly. Lateral forces are also possible, which increase the demands on the joint. Therefore, the permissible load on a finished chair cannot be honestly stated based on diameter or wood species alone.
If the product is intended for a public space, intensive use, or a user with special requirements, verified specifications are requested and the entire construction is checked. The advertising phrase "strong wooden legs" does not replace testing of the finished furniture.
Glides: a few millimeters on which the result depends
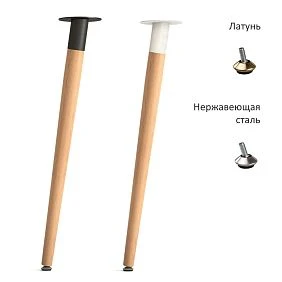
The glide is located at the very end of the support and is usually almost invisible. Nevertheless, it can change the final height of the chair, the position of the leg on the floor, and the nature of contact with the surface. Its role is especially noticeable on angled legs: if the lower end is designed for vertical installation, when tilted the support may touch the floor not with its entire intended area. For some models special solutions are provided, but compatibility is checked against the product description.
There are hard, soft, felt, sliding, and adjustable glides. The choice depends on the floor and the use. On wooden decking or parquet, a suitable protective element is often used, but it is impossible to promise a complete absence of marks without knowing the material, the load, and the contamination between the glide and the floor. A grain of sand under a sliding element can scratch the surface regardless of the product's advertising.
An adjustable glide usually has a height adjustment range. It is useful to take this into account when fitting a chair to minor floor unevenness, but using the adjustment instead of a correctly calculated main leg length is undesirable. If reaching the seat height requires almost fully unscrewing the element, the question arises of the permissible working position of the mechanism itself.
When calculating the extension, record the leg height together with the installed glide. If you compare old supports without glides with new ones with them, it is easy to get extra millimeters on paper. And if there is a carpet under the chair, check the contact separately under normal operating conditions: the actual height and stability on a soft surface may differ.
For a furniture workshop, it is useful to record the glide type in the specification. Otherwise, the first batch of chairs will stand on one set of hardware, and the next on a visually similar but differently sized one.
Not only height: the cross-section, scale, and position of the leg under the body
On a small chair with narrow armrests, a massive turned leg can pull attention from the object itself to its base. On a wide, deep chair, too-thin supports sometimes look temporary, as if the body were placed on random props. This is a visual impression, not a measurement of strength: load-bearing capacity is determined separately.
To evaluate the proportions, look at the chair from the distance at which it is usually seen in the room. For the workshop, a simple technique is useful: cut out a full-size silhouette of the intended leg from thick cardboard and place it against a photograph of the chair taken strictly from the side, or place the template next to the body during a test assembly. A two-dimensional template will not show the entire shape, but it will help you see whether the upper part is too wide and whether the leg disappears behind the upholstery.
The cross-section can vary in different parts of the piece. On a tapered leg, the upper part is wide and the lower part is considerably narrower. On a turned model, the diameter changes along the height. On a carved one, decorative elements sometimes protrude. Judging such a leg only by its maximum overall dimension is just as wrong as assuming its thickness is the same along the entire length.
Also check its position relative to the edge of the frame. If the leg is hidden too deep under the soft skirt of the armchair, its pattern will be almost invisible. If it protrudes too far outward, the silhouette will change, and protruding elements will appear next to the armchair that you can bump your foot against. For narrow passages, the latter is especially important.
On an armchair with tall wooden armrests, you can echo their pattern with the support profile. But literally repeating every decorative detail is not necessary. Sometimes a calm geometric leg better balances a complex fabric pattern or carving on the visible wooden parts.
Turned, carved, and geometric legs: which shape to choose
A catalog of shapes has practical value: the type of processing determines how the leg is perceived under the soft body, how it should be finished, and how noticeable small discrepancies between parts are. This is already a question not so much of height as of the character of the furniture and the consistency of the set.
Turned legs for an armchair
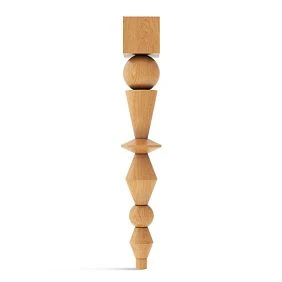
A turned support creates its silhouette through changes in diameter along the vertical axis. This can be a smooth taper, a thickening in the upper part, a short neck, or a sequence of rounded transitions. Such profiles read well on armchairs where a significant part of the leg is visible and the upholstery does not cover its upper half.
For a classic armchair with a rounded armrest, a smoothly profiled leg can support the overall plasticity. For a small armchair in a modern interior, the simplest turned shape, without many rings, is sometimes better suited. When the profile is worked out in too much detail on a short piece, the pattern blurs from a distance.
In a set of four, it is important to compare the uniformity of height and profile. A slight difference in the position of the decorative thickening between the front legs can be more noticeable than a difference in wood tone. In mass production, a specific article number and finish are approved for such a support, not just the verbal description “turned leg.”
You can start choosing models in the section turned furniture legs. After selecting by shape, you must return to dimensions and installation.
Carved legs for an armchair
A carved support is appropriate when the lower part of the chair becomes a standalone decorative zone. This is typical of furniture with an open base, a pronounced lower apron, wooden armrests, or classic upholstery. The pattern can be floral, geometric, or based on relief scrolls.
A special challenge arises here — the orientation of the pattern. If one face of a carved leg is designed differently from another, during installation you need to understand which way it should face: forward, outward, or toward the visible corner. You cannot order four identical parts and only discover during assembly that the front and rear positions require mirrored orientation. A specific model may be symmetrical, but this should be verified.
When choosing, assess the scale of the ornament. In a close-up photo, the relief may appear expressive, but on a chair under wide upholstery it will be almost completely hidden. Before ordering, it is useful to mark on the side view of the chair the boundary below which the leg will actually be visible.
In the section carved furniture legs it makes sense to compare not only the silhouette but also the placement of the decorative part. For a chair where only the lower third of the leg is visible, the shape of precisely this section is especially important.
Geometric wooden legs
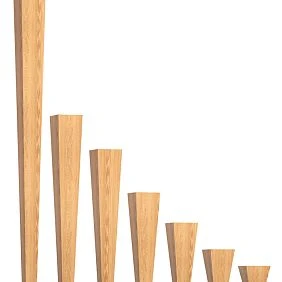
A geometric support may have a square, rectangular, or multifaceted cross-section, pronounced taper, and flat planes. Its advantage for a minimalist chair is a clear silhouette: under normal lighting, the facets and angle are legible, and attention remains on the shape of the seat.
For such a leg, not only the length but also the orientation of the facets matters. If the front pair is rotated differently from the rear pair, the silhouette may lose its integrity. This is especially noticeable in models where one wide plane faces the viewer and the adjacent one is significantly narrower.
You can compare the actual specifications of specific models in the catalog. For example, geometric leg MN-146 is available in several height options; the product page also lists recommended fastening elements. This shows why the model name alone does not yet describe a ready-to-order variant. A small upholstered armchair and taller furniture may use different size versions of the same item code, but the suitability of each version for a specific design is checked separately.
Other shape options are collected in the section geometric furniture legs.
Beech or oak: choosing the material based on finish and construction
Wooden armchair legs are often searched for as solid wood supports. But the choice of species cannot be reduced to the advice that “oak is stronger, so it is always better.” The reliability of the finished product depends on the cross-section, grain direction, quality of the blank, connection to the frame, and the nature of the load. For a furniture maker, it is equally important what color should result after finishing and whether the legs will match the exposed wooden parts of the armchair.
Beech legs
Beech is suitable for turned and geometric parts, including for subsequent application of opaque enamel. If the armchair is designed with smooth black, white, or colored legs, the expressive wood grain will still be covered by the finish. In such a project, choosing beech may be reasonable both in appearance and in organizing the painting process.
But “beech for enamel” does not mean that any beech part can be painted immediately without preparation. It is necessary to check the surface quality, sanding, gluing quality, and the recommended primer and coating system. On a complex turned profile, the transitions in cross-section require special attention: paint may accumulate there differently than on wide, flat areas.
Oak legs
Oak is often chosen when the visible texture is to be preserved. Semi-transparent tinting, oil, or lacquer allow the wood to remain a noticeable part of the armchair’s appearance. However, the same shade name does not guarantee the same final color: the original tone of the blank, grain direction, sanding, and the chosen finishing composition affect the result.
If the wooden armrests are already stained, it is difficult to match a new oak leg to them based on an on-screen image. It is more reliable to make a test finish on a suitable sample and compare it with the existing parts under daylight and artificial lighting. At the same time, take into account that the old coating may have changed shade over years of use.
| Task | What is usually worth considering | What to check before deciding |
|---|---|---|
| Legs for opaque enamel | Beech or another compatible finish for painting | Surface quality and preparation for the chosen system |
| Preserve visible texture | Oak in a suitable finish for tinting | Texture match, test color sample, protective layer |
| Match the color of the wooden armrests | Material compatible with the existing finish | Sample next to the actual chair |
| Produce a series of identical chairs | Uniform material and finish method for the entire batch | Consistency of blanks, shade, and dimensions |
| Refresh an old armchair without your own painting workshop | Legs with a pre-finished coating | Availability of the required color, shape, height, and mounting |
If you like the pattern of a particular leg but it is only sold in an unsuitable material, that is not yet a reason to look for a color replacement at any cost. First, check the available finish options for this item. Not every material is offered for every model and every size.
Unfinished legs or supports with a pre-
An unfinished surface also comes in different types. One blank is intended for subsequent finishing with opaque enamel, another for a clear coat or tinting. The "for enamel" option should not be understood as the name of a finished color. It describes the product's readiness for a specific type of subsequent finishing. It is also important to consider the quality of sanding, especially if the leg has carved sections.
When finishing legs yourself, keep an eye on several points: the surface must be prepared for the specific coating; decorative recesses must not become places where a thick layer accumulates; the bottom end face requires the protection specified by the manufacturer; before installation, the coating must fully go through the necessary stages of drying and developing its properties. Do not screw on a freshly painted leg in such a way that the mounting plate damages the still-fragile coating.
There is another practical nuance. If the sample is made of oak, but the entire batch is ordered in beech, it is sometimes impossible to transfer the shade "one to one" even when using a product with the same name. The finish sample must correspond to the working material and preparation method. For custom furniture, coordinate not only the color according to the fan deck, but also the actual surface after finishing.
Even a perfectly matched color will not fix an unsuitable seat height. Therefore, the final finish is approved only after checking the dimensions and the mounting of the supports.
Trial assembly: the most reliable way to check the fit
The calculation helps to select suitable dimensions. The final answer is given by the chair installed on the selected supports with the correct mounting. For a one-off restoration, this is a check before the final finish. For production, it is a mandatory stage of approving the sample before purchasing the batch.
The working sequence is as follows:
- Compare the actual parts with the order. Lay out the legs, compare the markings, material, top and bottom sections, height according to the drawing, and the location of the fastening elements. If necessary, measure each leg separately.
- Assemble a trial mounting unit. Check that the fasteners match the leg and the frame. Do not use questionable holes or damaged inserts; if the scheme is unclear, first clarify it with the manufacturer or furniture designer.
- Install the full specified set. It is impossible to properly assess the height and stability of the chair by placing it on one new leg and leaving the others old if their geometry differs.
- Check the support on a level floor. The chair should not wobble due to an assembly error. If a skew is detected, determine the cause: different offsets, incorrect angle, loose plate, uneven base, or frame defect.
- Repeat the seat measurement. Use the same reference point that was recorded before replacement. Separately determine the minimum clearance underneath and the actual height of the armrests from the floor.
- Check ease of use. Assess normal seating, the ability to place your feet, standing up, access to a side table, and the position of the chair in the room.
- Evaluate the appearance at full scale. In a catalog photo, the leg may look large; under an actual armchair, its size is perceived differently. Look at the product from the front, side, and diagonally.
- Record the chosen option. Write down the item code, size variant, material, finish, fasteners, glide, and installation method. If necessary, save photos of the assembly.
A trial assembly does not mean skipping strength verification: if there are questions about stability or load-bearing joints, they should be resolved by a furniture construction specialist. This is especially true when modifying an armchair whose supports were previously part of the load-bearing frame.
For an accurate finish check, it makes sense to separately obtain Product samples or make a test finish on a suitable workpiece. However, the color should be agreed upon after resolving the height issue: repainting does not fix unsuitable geometry.
How to check a replacement without final finishing
If the legs are purchased unfinished, it is first useful to check their structural suitability on clean prepared parts without damaging the surface. In some cases, this will allow you to reject an unsuitable option before expensive finishing. But if special mounting holes or modification of the product are required for the check, clarify the return policy in advance and do not drill the item without an agreed decision.
Do not trim one leg to eliminate wobbling until the cause has been identified. With a skewed frame, such an operation may hide the defect in only one position of the armchair. On a different floor or after a change in load, the problem will reappear.
Four legs are one specification, not four random purchases
When ordering for one armchair, it is convenient to record the set immediately as one line item with a quantity. For a conventional model with identical supports, the entry might look like this:
Chair leg — manufacturer STAVROS — item code — size according to drawing — beech or oak — finish — fastening — glide — 4 pieces.
If the front and rear legs differ, create two lines. Specify their purpose: front left and right pair, rear left and right. If there is a directional carved pattern, add the pattern orientation. In production, this is a simple safeguard against an unpleasant mistake: the correct item codes may arrive in the required total quantity but turn out to be unsuitable for specific installation locations.
| Position in the set | Item code and version | Quantity per chair | What to control |
|---|---|---|---|
| Front legs | Approved front model | 2 pcs. | Height, visible shape, pattern direction |
| Rear legs | Approved rear model | 2 pcs. | Vertical offset, angle, fasteners |
| Mounting elements | For two specific models | By design | Compatibility and installation method |
| Floor protectors | Approved type | By the number of provided supports | Height, floor contact, finish |
The table is an example specification for a chair with four separate legs, not a universal set for all models. For a chair with integrated rear posts or a shared base, it will be different.
Calculating quantities for a chair series
A workshop produces ten identical chairs with two front legs of one type and two rear legs of another. The requirement is 20 front legs and 20 rear legs, 40 in total. But a single overall figure of "40 pieces" is not enough for purchasing. If only the front item code is mistakenly repeated in the order, forty visually suitable parts will arrive, from which it is impossible to assemble the approved series.
The same logic applies to finishing: if the front legs are supplied unfinished and the rear legs are coated, these must be two clearly distinct items. A match in color by name does not yet guarantee a match on the finished furniture. For a series, it is better to approve a sample set rather than each leg separately.
The number of spare parts is determined by the specifics of the project, delivery times, the acceptability of subsequent replacements, and the risk of damage during processing. There is no need to automatically add an arbitrary ten percent to the order: a unique carved pair may require a separate reserve for orientation, while for a standard mass-produced item, the ability to quickly reorder is sufficient. The decision is fixed before the batch is launched.
For repeat purchases, do not save only the item code. You need the size, species, quality of sanding and preparation for finishing, the fasteners used, and the type of glide. The same model line may contain versions that look similar in photos but differ in size and components.
Three situations in which the selection of supports solves different problems
Situation one: replace short legs and lighten the look of the armchair
There is a deep armchair with closed lower upholstery. The clearance under the body is 75 mm, and the height of the unloaded seat is 430 mm. The owner wants a clearance of about 120 mm. The difference is 45 mm. If the new design raises the rigid body by these 45 mm, the seat height will be about 475 mm without load.
This arithmetic immediately shows the hidden cost of the visual solution. If the existing seating position was already at the limit of comfort, raising the entire armchair for cleaning may be unreasonable. An alternative would be a less massive leg shape while maintaining a similar vertical offset, modifying the lower decorative upholstery within the permissible project, or another cleaning method. Seat height must not be thoughtlessly sacrificed for clearance.
Situation two: make an armchair with angled tapered legs
In the drawing, the armchair looks compact, but the lower ends of the supports extend outward. The craftsman measured only the upper width of the body, not taking into account the spread contact points with the floor. After assembly, the armchair took up more space in the tight area between the side table and the wall.
A top view drawing prevents this mistake: mark the four attachment points, the directions of the leg axes, and the extreme points of their lower ends. Then check the overall floor footprint of the armchair and the passage next to it. Only then approve the installation angle. Changing the angle at the last moment can also change the vertical offset, so the seating height is rechecked.
Situation three: restore an old armchair with carved front supports
The chair has retained its front carved legs, but the rear ones are damaged. The logic of "let's buy four identical new ones" seems simple until it turns out that the rear parts are part of the backrest frame structure. Here, selecting a set from a photograph is pointless. First, determine whether the original assembly can be restored, whether a part needs to be made to a sample, or whether the frame needs to be reworked.
In some cases, buying ready-made legs is not the best option at all. If it is necessary to preserve the historical construction, proportions, and traces of the original manufacture, a restoration solution tailored to the specific item is more appropriate. The gain in purchasing speed should not destroy the load-bearing assembly.
Mistakes that cause legs which look suitable to not fit the chair
Choosing from a single photograph. A catalog image rarely shows the actual seat height, frame thickness, and leg insertion depth. Before ordering, you need a dimensional drawing and measurements of your chair. A match in decorative style is not proof of compatibility.
Replacing nominal length with working extension. The buyer subtracts the old 100 mm from 150 mm and expects a 50 mm rise. But the new part goes into the socket, while the old one sat on a plate. The resulting rise differs from the calculated one. You need to compare the distance from the same reference plane to the floor.
Buying four identical supports without inspecting the underside. At the two front positions, the fit is indeed the same, while the rear ones differ in angle or are part of the frame. The solution is a layout diagram of all supports before placing the order.
Trying to match the fasteners later. The leg has already been painted, but the suitable plate does not fit on the lower frame, or the standard stud does not match the existing thread. First the assembly is agreed upon, then finishing and final assembly are carried out.
Assessing stability by wood species. An oak leg does not compensate for a weak chair frame or damaged fasteners. The entire structure is checked with regard to loads during normal use.
Incorrect comparison of cushion height. Before replacement, the chair was measured without a person, and after, with someone sitting, or different points on the cushion were used. The resulting difference is mistakenly attributed to the supports. Measurements are taken in the same way.
Ignoring the floor covering. The glide does not match the floor; on hard flooring it leaves marks, or the chair stands poorly on carpet. The type of bottom contact is chosen together with the leg, not after a problem appears.
Finishing before checking the structure. After a test paint, it turns out that the leg is too tall or does not fit into the frame. First, the geometry and compatibility are confirmed, then the set is finally painted.
All these errors occur at different stages. Therefore, the single recommendation "check the dimensions" is too general. You need to know which dimension to check, relative to which plane, with which fasteners, and in which state of the seat.
When new wooden legs do not need to be purchased
Sometimes a complaint about uncomfortable seating is not caused by the supports at all. If the cushion has lost its elasticity, the sagging depth has increased, the straps have loosened, or the seat base has deformed, replacing the wooden legs will not restore the correct body position. It will only raise the entire damaged soft block higher. First, you need to determine the cause of the change in seating.
You should also not start with a purchase if:
- the lower frame has cracks, loose joints, or signs of serious repair;
- the leg is a non-removable part of the load-bearing structure;
- a change in height disrupts the agreed ergonomics of the chair for a specific user;
- the selected model has no confirmed method of safe attachment to the existing base;
- the goal is only access for cleaning, and the required lift makes seating uncomfortable;
- the historical design of the furniture must be preserved, and a mass-produced part does not match it.
Here, the best investment may be restoring the frame, replacing the filling, making a custom support according to a drawing, or abandoning the height change. The commercial objective is not to persuade a person to buy four parts regardless of the result.
Where to buy wooden legs for an armchair and how to place an order
When the required offset, shape, and mounting method are known, you can move on to the catalog. On STAVROS, there is a dedicated category for this task wooden armchair legs. In it, you can start selecting by product type, style, and dimensions. If you need to compare a wider range, the general section will be useful wooden furniture supports.
For a buyer searching for "wooden armchair legs to buy," it is more useful to prepare the details of their item right away than to choose based on price alone. For selection, it is enough to put together a short working request:
- whether the armchair is existing or new, its dimensions and the design of the lower frame;
- the current seat height and the desired height after installation;
- required vertical extension of the support and permissible deviation;
- whether the front and rear legs are identical or different;
- required shape, beech or oak, painted or unpainted surface;
- mounting method or request for selection of compatible fasteners;
- number of chairs and number of legs of each type;
- need for glides, drawings, a sample, or a trial batch.
If you have decided to buy wooden chair legs, do not mix in the order the product height from the listing and the calculated height of the installed assembly. It is useful to provide the seller with both values along with an explanation. It is equally important to specify the required version: a single item code may cover several sizes and material options.
For furniture makers and manufacturers, the following pages are useful terms of cooperation with manufacturers и STAVROS catalogs and drawings. Agreed documentation reduces the risk of discrepancies in repeat orders. The rules for shipping products, payment options, and order receipt are provided in the section payment and delivery.
The price of a set depends not only on the price tag of a single leg. For a real estimate, the quantity and designs of the supports, fasteners, glides, finishing materials, painting work, a possible sample, and delivery are calculated separately. If the front and rear legs differ, their cost is calculated as two line items. The current price and availability should be checked in the product pages of the selected items before placing an order.
Availability "for an armchair" in a category does not exempt you from a design check. The buyer should leave the product page not with the abstract confidence that "the wood works," but with a clear set of details: dimensions, material, fastening, installation method, finish, and the expected height of the finished armchair.
Frequently asked questions about wooden armchair legs
Can only the two front legs be replaced?
Sometimes it is possible if the design allows such a replacement and the intended height, angle, support, and stability are preserved afterward. But this is not a universal way to refresh the appearance. If the two rear supports have a different structural purpose, the decision is made based on their connection to the frame. Selecting two front legs based only on decorative similarity to the previous ones is not enough.
How can you tell whether the height listed on the product page matches the required one?
Open the dimensional drawing and find which axis the dimension is measured along. Determine whether part of the leg will be recessed into the base, at what angle it is installed, and how much the fastener with the glide will increase the offset. Then compare the calculated value with the required distance from the frame to the floor. If the diagram is unclear, request clarification for the specific item code.
Can the height of an armchair be increased without changing the legs?
Sometimes the seat height is changed by repairing or replacing the soft filling, but this affects the feel of the seat, the seating depth, and the height relative to the armrests. For some designs, another structural modification of the base is also acceptable. Such solutions cannot be considered equivalent to simply replacing the supports: they are checked separately against the armchair's construction.
What should I do if the new legs are identical but the armchair rocks?
First, place the chair on a guaranteed level floor and check the tightness of the assembly joints. Then compare the actual vertical offsets of all supports, the position of the frame joints, and the presence of any frame distortion. Even identical parts at different seating angles can produce unequal contact height. Do not arbitrarily saw down one leg until the cause has been found.
Will sofa legs fit a chair?
Visually similar wooden sofa legs may fit a chair according to certain parameters, but the designation "for a sofa" alone does not confirm compatibility. Compare the height of the installed support, the top plate, the mounting, the permissible load pattern, the number of support points, and the position of the lower frame. The model is chosen by design, not just by the furniture name in the filter.
What should I do if the armrests have become too high relative to the table?
Check how much the new support has raised the entire body. If the armrests were part of a rigid frame and their height relative to the seat has not changed, the problem may lie precisely in the new relationship between the chair and the table. It is necessary to assess whether it is acceptable to return to the previous vertical offset or to change the adjacent furniture; it cannot be fixed by simply replacing the armrest upholstery.
Should spare wooden legs be ordered for one chair model?
There is no mandatory universal quantity. For a standard production model, the ability to repeat the article number and finish is important. For unique carved parts and complex custom painting, a spare is sometimes justified, since if damaged, an individual leg is harder to reproduce accurately. The decision depends on the project timeline, the number of chairs, and the availability of the chosen finish.
Can wooden legs be installed on a chair with a transformation mechanism?
Only if this is provided for by the design and the legs do not interfere with the movement of the mechanism, its supports, and operating positions. In a chair with a pull-out footrest, swivel or folding base, the load may be transferred through completely different points. Simply replacing the original parts by size and thread without checking the mechanism's operating pattern is unacceptable.
Are tall legs suitable for a heavy chair?
Height alone does not determine whether a support is suitable. It is necessary to evaluate the chair's load-bearing structure as a whole, the dimensions and material of the leg, the specifics of its connection to the frame, and stability in use. One cannot conclude from a photograph of a tall oak leg that it is safe for any heavy chair.
What data is needed to order beech or oak legs without mistakes?
Prepare the item code, dimensional specification, wood species, preparation option for the finish, processing quality, number of parts, front and rear support layout, compatible fasteners, and glides. If the project requires a specific seat height, attach a calculation of the actual extension. For custom finishing, an approved color sample is useful.
What should be known before purchase
A successful set of wooden legs for a chair is not determined by how expressive they look separately from the furniture. In the finished chair, three results must come together: comfortable actual seating, a reliable connection to the frame, and the correct proportions of the body above the floor.
If you are replacing supports on an already finished chair, start with the seat height under a person and without load. Determine the vertical extension of the previous parts and calculate how much the new extension will change the position of the entire body. If you are making a chair from scratch, set the seat height in advance and derive from it the required distance from the frame to the floor.
After that, you can calmly choose a turned, carved, or geometric shape, beech or oak, an unfinished version or a ready-made finish. The specific item code is agreed with the mounting point and fasteners, the set is checked during a trial assembly, and the approved specification is used for the final order. It is precisely this sequence that makes it possible to change the appearance of the chair without ruining its seating.