Article Contents:
- How a furniture leg differs from a decorative leg
- From cabinet to floor: start with the support scheme
- First the height of the finished furniture, then the height of the wooden leg
- Example: a bedside table with a specified height
- Example: a long TV stand with a height restriction
- What makes up the height: a working table
- Why a narrow tall leg requires more careful joining
- Cross-section and appearance are related but distinct tasks
- Five checks for a single joint
- Threaded rod and mating threaded insert
- Mounting plate
- Connection via tenon, dowels, or frame
- Glides and adjustable elements
- Why the center support may not work
- Why simply dividing the weight by the number of legs is misleading
- Turned models
- Carved models
- Geometric models
- Compare samples after finishing, not raw wood
- Finish before assembly or after?
- What to check during a trial assembly
- Example of cost comparison without an invented market price
- Can wooden furniture supports be replaced with another model without modifying the carcass?
- Should adjustable glides always be installed?
- What should I do if a suitable model is a few millimeters taller than the calculated height?
- Can I buy wooden supports from different batches and assemble one set?
- Why does a cabinet on six supports still wobble?
- Can a tall decorative support be installed under a massive wardrobe?
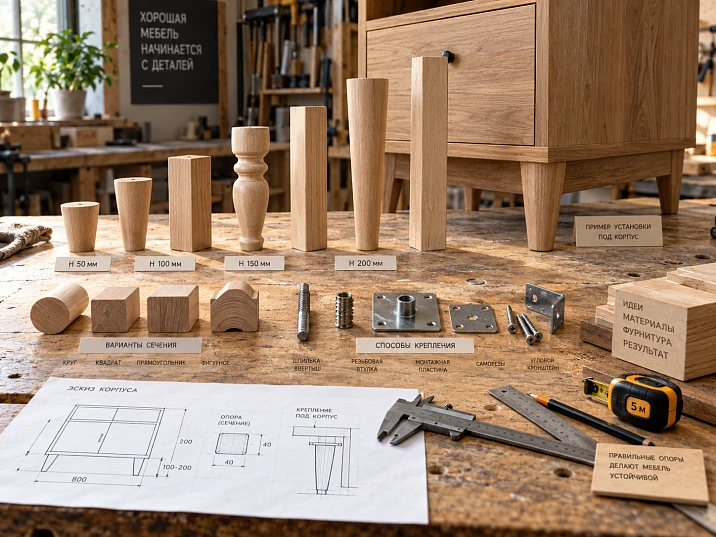
On a chest of drawers drawing, four wooden supports may look flawless. The problem shows up later — when the carcass is assembled, the fronts are adjusted, and the legs need to be attached. The top plate of the chosen model turns out to be wider than the area at the side panel, one of the mounting holes falls too close to the edge of the bottom panel, and the rear support interferes with the plinth. Changing the leg design is easy. Reworking a finished carcass base is far more expensive.
Wooden furniture supports are chosen based on the furniture's construction, not on a photo in a catalog. First, determine where the weight of the carcass and its contents is transferred, what the overall height of the item should be, where the support points are located, and how much space is available for mounting. Then check the top cross-section of the support and the mounting assembly, and only after that compare the shape, wood species, and finish.
For a joinery workshop, this sequence solves a quite measurable problem: a model once agreed upon can be used in subsequent items without reworking the base again. But there is no universal wooden leg for any cabinet furniture. The same element that works well under a small cabinet may prove unsuitable under a long sideboard — not because of poor wood, but because of a different load-transfer pattern and lateral forces.

How a furniture support differs from a decorative leg
In retail, the names “leg” and “support” often refer to the same item. For a furniture maker, the difference arises not in the catalog but on the assembly drawing. A decorative leg is described primarily by its shape: turned, carved, straight, shaped. A support is an element involved in transferring the load from the furniture to the floor. A wooden part can perform both functions at the same time, but a beautiful profile is not enough to consider it suitable for a specific carcass.
Let's trace the load path in an ordinary cabinet. The weight of the top, carcass, fronts, and contents is transferred to the side panels, partitions, bottom panel, or a separate frame. The force must then reach the supports and, through the floor glides, the floor covering. If a leg is attached to a thin section of the panel that itself noticeably flexes, the strong, solid wood of the leg will not eliminate the weak point.
The direction of the forces also matters. Vertical load is only part of what the support assembly handles. When a heavy drawer is pulled out, someone leans on the edge of a cantilever, or the carcass is shifted slightly across the floor, lateral forces and a bending moment appear at the attachment point. A tall, narrow support is more sensitive to such effects than a low, wide one, even if both are made of the same species.
Therefore, when choosing furniture legs and wooden supports three questions need to be separated:
-
Does the part fit geometrically? The required height, top and bottom cross-section, attachment point, permissible position under the carcass.
-
Can it be reliably integrated into the structure? There is a load path, sufficient base for fastening, and no conflict with rails and partitions.
-
Does it match the appearance of the product? The profile is consistent with the proportions of the fronts, and the species and finish match the carcass.
Only after answering the first two questions does it make sense to make a final choice of decorative pattern. At the same time, a leg belonging to the category of furniture supports does not by itself mean confirmed load-bearing capacity for any furniture: the characteristics of the specific model and fastening assembly must be checked separately.




From carcass to floor: start with the support scheme
On a small bedside table, the load is often transferred to the corner supports through a sufficiently rigid frame. With a wide TV cabinet, the situation is more complicated: there may be a long section of the bottom between the outer legs, and in the middle a partition and heavy equipment. If there is no longitudinal reinforcement or additional support point underneath, the carcass can sag even though the legs themselves remain intact.
One should not begin the calculation with the formula "divide the weight of the furniture by four." It shows only the average share under ideal, uniform support. In a real product, the load is distributed differently: individual sections are filled differently, the floor is uneven, the rigidity of the bottom is not uniform, and a pulled-out drawer shifts the center of gravity. Some supports may be loaded more heavily than others.
When designing, mark on the bottom view which body elements are actually load-bearing. The lower decorative cover and the structural frame are not the same thing. A thin back panel also usually does not replace a full-fledged base for leg fastening.
Pay especially close attention to the following assemblies:
-
Body corners. Does the weight transfer from the side panel to the mounting point, or is there a weak overhang between them?
-
Internal partitions. Does the point of maximum load coincide with an additional support point or bottom reinforcement?
-
Long spans. Can the bottom panel sag between the outermost supports?
-
Worktop or top cover overhang. Does it create a lever that makes the furniture easier to tip over?
-
Narrow and tall bodies. Do they need to be secured to the wall to prevent tipping, regardless of leg strength?
For tall cabinet furniture, tip-over protection is a separate task. Four wide wooden supports do not replace the body-to-wall fastening provided by the design. The forces are especially significant when loaded drawers are pulled out and when the upper part of the furniture is subjected to impact.
If the base design has not yet been determined, it is too early to choose the final leg SKU. First, you need at least a simple working bottom view with the body dimensions, partition layout, and intended mounting points.
Our factory also produces:
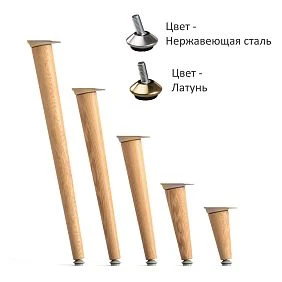
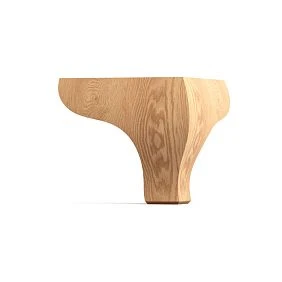
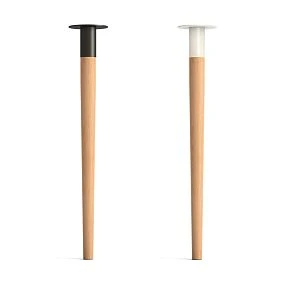

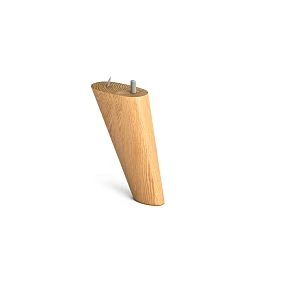
First the height of the finished furniture, then the height of the wooden support
One of the most common miscalculations occurs when agreeing on the overall height. The furniture maker chooses a cabinet body 500 mm high and a 150 mm support, expecting to get a product 650 mm high. After assembly, the top panel, mounting plate, or glide is added — and the actual size no longer matches the design. Sometimes the opposite happens: the thickness of the top panel was included in the body size in advance, but then it was added again.
To avoid ambiguity, first establish what exactly is called the body height in your drawing: the distance from the bottom to the top of the finished body together with the top panel, or only the height of the side panels without the top panel.
A convenient notation for a product with supports looks like this:
Overall height from the floor = height of the assembled body + actual height of the support in the installed state + additional height of mounting and floor elements not included in the first two dimensions.
If the mounting plate is recessed and the glide is already included in the specified leg size, there is no need to add them again.
Get Consultation
Example: a bedside table with a specified height
Suppose the customer needs a table with an overall height of 560 mm. Its body in the final assembly has a height of 420 mm. In the chosen mounting method, the plate adds 3 mm, and the glide adds another 5 mm. Then the required height of the wooden support itself is:
560 − 420 − 3 − 5 = 132 mm.
This is a calculation example, not a statement that a leg exactly 132 mm exists on the market. If the suitable profile in the catalog has a height of 130 mm, you need to decide whether the difference in the final height is acceptable. Sometimes it is more reasonable to adjust the body by 2 mm. Cutting a finished turned support without approval is not allowed: after changing the length, the proportion of the lower section may be disrupted, the technological platform may disappear, or the fastening area may be exposed.
Example: a long TV stand with a height restriction
Let the design height be 520 mm, the cabinet height be 400 mm, and the total addition from the plate and the glide be 8 mm. That leaves 112 mm for the leg. However, if the cabinet will stand under a wall-mounted screen, you need to take into account not only the height on the drawing, but also the actual placement of the equipment, possible floor rise, and installation tolerances.
Here it is useful to make one fragment of the base or assemble the cabinet on temporary supports of the required height. Checking on site may show that 520 mm looks good on the drawing, but interferes with the desired placement of the drawers or creates an inconvenient gap with the screen.
What the height consists of: working table
| Size | What is measured | Where the error occurs |
|---|---|---|
| Design height of the furniture | From the finished floor to the highest point of the finished product | The height is calculated without the top cover |
| Height of the assembled cabinet | From the lower plane of the base to the top of the cabinet, taking into account the adopted assembly scheme | The cover or decorative strip is counted twice |
| Height of the wooden support | From the upper working plane to the lower working plane of the leg | They look only at the overall dimensions in the photo |
| Installation gap | The thickness of the plate, spacer, or gap created by the mounting assembly | They consider the plate recessed, although it protrudes |
| Floor-standing element | A glide, adjustable foot, or other part between the wood and the floor | They do not take into account its height in the installed state |
On a chest of drawers, the height of the supports affects the position of the upper drawers and the working height of the top. On a console, the same dimension determines the clearance for legs or for objects placed underneath. On a low cabinet, an extra 30–40 mm can visually change its relationship with the fronts. Therefore, one “standard” height cannot be carried over from one product to another, even if the carcasses are similar.
How to choose the upper and lower cross-section of the support
Two wooden elements of the same height can behave completely differently. One model has a massive upper part and a narrow end at the floor; another has an almost constant square cross-section; a third has a complex turned shape with a pronounced thin neck. When a craftsman looks only at the maximum width, he misses the most important areas.
A furniture leg has three distinct sections: the top mounting section, the minimum working section, and the floor contact area. They can have different dimensions and serve different functions.
The top section determines where the connection to the cabinet body can be made. The narrowest neck is especially sensitive to lateral force. The bottom section affects how pressure is distributed on the floor covering, stability, and the choice of glide. The maximum decorative diameter sometimes tells you almost nothing about the dimensions of the mounting plate.
If the leg is square, the drawing specifies width and depth. If it is round, it shows the diameter of the working top surface and a separate diameter of the bottom contact patch, if they differ. For a shaped model, it is useful to request a diagram with several key dimensions rather than settling for a single overall size.
Why a narrow, tall leg requires more careful connection
Imagine two posts 180 mm tall. One has a wide top section, the other ends in a small round plate. Under a strictly vertical load, both could theoretically bear the weight. But a sideways push on the cabinet body creates a moment at the connection point. Increasing the post height, all else being equal, increases the lever arm of the lateral force, while a small plate leaves less room for fasteners and reinforcement.
This does not mean every tall leg needs to be thick. The structure can be reinforced with a frame, aprons, a metal connector, or by changing the mounting location. However, the solution must be planned at the design stage, not after the finished parts are received.
Cross-section and appearance are related but distinct concerns
Under a light cabinet with thin fronts, an overly massive bottom section sometimes looks out of proportion. Under a heavy sideboard, the opposite is true: narrow wooden legs can visually create the impression that the cabinet is resting on temporary supports. This effect depends on the clearance height, the depth of the fronts, the visible width of the leg, and how far it is recessed relative to the front edge.
The top section is chosen based on the connection, while the visual scale is checked in the front view of the furniture. If the chosen decorative model does not fit the calculated mounting assembly, you should not reduce the mounting surface by eye. It is better to compare another model from the wooden furniture legs section or reconsider the design of the base.
Mounting area: the dimension that is easy to forget
A leg may have a wide decorative "head", but it must adjoin the cabinet strictly with a specific flat surface. If the top edge is rounded, beveled, or has protruding ornamentation, the nominal dimension of the part is not yet equal to the usable contact area. For mounting, you need to know the actual working area.
Let's examine a conditional joint. On a cabinet, the bottom panel ends flush with the side panel. The craftsman selects a support with a top plate of 90 × 90 mm, but the existing flat section of the base at the front corner allows only 70 × 85 mm to be placed without intersecting the decorative strip. Physically, the support can be attached, but it will partially end up without bearing or will hit the adjacent part. Fastening it in such a position is risky.
A common attempted fix is to move the leg inward. Sometimes this is indeed possible. But now the support may end up far from the side panel, the load will pass through a flexing section of the bottom, and the front will begin to overhang at the front. The solution must be checked in a bottom view and on a section, not just by the available free space.
Five checks for a single joint
-
Contact surface. Does the upper part of the leg have a sufficiently flat surface for the chosen mounting method? Does a bevel or radius interfere?
-
Edges of the base. Are holes, dowels, or other fastening elements too close to the panel edge? Permissible distances depend on the panel material and the specific fastener.
-
Ribs and partitions. Does a dowel, confirmat, connector, drawer side, or crossbar pass through the mounting zone?
-
Moving elements. Does the fastener catch on the runner, lower drawer, hinged front, or extension mechanism?
-
Tool access. Can fasteners realistically be tightened after the cabinet is assembled without damaging the finish of adjacent parts?
For verification in production, it is enough to print a 1:1 scale outline of the upper working platform and transfer the attachment points onto it. A paper template immediately reveals a conflict with a partition or the edge of a panel. However, the dimensions in the template must correspond to the actual model, not an approximate photograph.
The surface area of the top alone does not prove the strength of the joint. For example, a nominal 60 × 60 mm platform has an area of 3600 mm², while a 30 × 30 mm one has 900 mm², which is four times less. This does not mean the first leg will withstand four times the load. Strength depends on the wood, grain direction, actual contact area, fastener placement, base construction, and applied forces. Area is only one of the parameters.
How to attach wooden furniture legs to a cabinet
The mounting method cannot be guessed from the appearance of the leg. Even similar wooden furniture legs may be supplied with different preparations: with a threaded stud, with holes for fasteners, without drilling, or with a seat for a mortise connection. The configuration of the selected item must be confirmed in its product page and when ordering.
Threaded stud and mating threaded insert
This option is convenient where the design is intended for detachable leg installation. It is important that the thread, engagement length, dimensions of the mating part, and the material it is installed in all match. If a threaded insert is fixed in a thin panel without sufficient holding area, the weak point will be the base, not the leg.
Before series installation, check whether the stud reaches the bottom of the hole before the top plate is pressed tightly against the cabinet. Otherwise, the leg may appear tightened but will actually remain with a gap.
Mounting plate
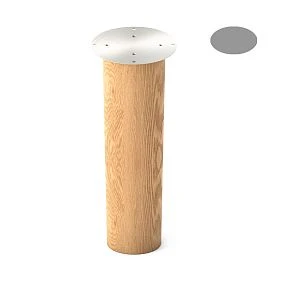
The plate allows the fasteners to be distributed across several points, but it does not automatically make any base reliable. On a thin bottom, you need to check where the screws enter, whether there are connecting elements nearby, and how loads are transferred from the plates to the load-bearing parts of the cabinet. The plate can also increase the overall height of the item.
If the bottom of the cabinet is made of panel material, it is important to consider its ability to hold the selected fasteners. A screw suitable for solid wood will not necessarily be equally reliable in the edge or face of a laminated panel. The fastener length and drilling are chosen for the specific material and joint; there is no universal value for all cabinets.
Connection via tenon, dowels, or frame
In furniture with a wooden frame, the support may be part of the frame structure. This scheme can be more convenient than fastening at a single point to a flat bottom panel: lateral forces are transmitted through the rail and adjacent parts. However, the quality of the connection is determined by the precision of the fit, a suitable adhesive joint, the geometry, and the fastening of the frame.
If the support is involved in forming the load-bearing wooden frame, it cannot be replaced with a randomly selected leg of "similar size." The dimensions of the tenon and mortise, the depth of the joint, and the position of the axes are structural parameters, not decorative details.
Glides and adjustable elements
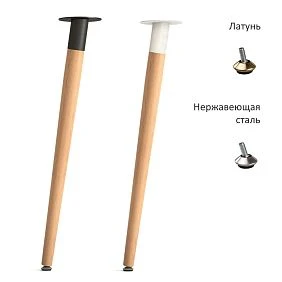
A glide is often provided between a wooden leg and the floor. It helps protect the end grain of the wood and the floor covering from direct friction. However, the material and contact area of the glide must be matched to the specific floor. A hard, small tip can leave marks on a soft covering even with a sturdy support.
An adjustable element can compensate for a minor floor unevenness if it is provided for by the design and allows the required load. However, it should not be turned to its extreme position to straighten a severely skewed cabinet. First, assembly errors are ruled out, then the floor is checked, and only after that is the available adjustment range used.
To select the appropriate parts, it is worth looking separately at hardware for mounting furniture legs. The presence of plates, studs, or glides in the section does not mean automatic compatibility with any wooden support: verify their dimensions and method of connection.
Four, five, or six supports: the number depends on the cabinet
Four legs are customary for a chest of drawers or a cabinet because four corners conveniently define the supporting rectangle. But for a long body, installing four wooden parts by itself does not yet prove sufficient rigidity of the base. Conversely, for a small rigid cabinet, a fifth leg may be unnecessary if it does not participate in load transfer.
| Scheme | Where it is usually considered | What to check |
|---|---|---|
| Four corner supports | Small cabinet, rigid chest of drawers, compact body | Load-bearing connection of corners, rigidity of the bottom, protection against tipping |
| Four corner and one central | Body with pronounced load in the central part | Which structural element the central leg rests on and whether it touches the floor |
| Six supports: front and rear lines of three each | Long TV stand, wide chest of drawers, separate sideboards | Alignment of intermediate supports with partitions and longitudinal reinforcements |
| Supports together with the frame or plinth | Cabinets, heavy case furniture, structures with special loads | The performance of the entire base, not the number of decorative legs |
Why a central support may not work
Suppose a long cabinet rests on four legs at the edges. A fifth leg is added in the middle, screwed to the bottom panel. If the fifth leg is even slightly shorter than the others or the floor has a dip, it may not touch the floor at all. Formally there are five support points, in reality — four. If the central leg is slightly longer, part of the load will be transferred to it, which can change the deflection and create undesirable stress in the base.
A joint check of the geometry of all supports and the supporting elements of the carcass is needed. Adjustable units make setup easier, but require correct design and monitoring after furniture installation. And adding an intermediate leg to a weak bottom without reinforcement may only shift the point of bending.
Why simply dividing mass by the number of legs is misleading
For an approximate comparison, sometimes a conventional total mass of furniture with contents of 120 kg is taken and divided by four supports: the average value is 30 kg per point. If six are installed, arithmetically it becomes 20 kg. This is not a calculation of the permissible load for the model and not a guarantee of weight distribution. The sufficiency of each support and connection must be determined by the characteristics of the products, the rigidity of the structure, the placement of loads, and operational impacts.
Added to this are forces that cannot be reduced to total mass: the user pulled out a fully loaded drawer, leaned on the edge of the countertop, moved the chest of drawers, or bumped a leg while cleaning. It is precisely in these situations that the stability of the carcass and the strength of the fastening against lateral bending matter.
The number of supports is chosen according to the support scheme, not out of the habit of "four for any furniture." For unusual dimensions, high weight, or public use, the calculation and testing of the assembly are performed as part of the design of the specific product.
Supports for a nightstand, chest of drawers, wardrobe, and console: what changes
Even when a craftsman uses one collection of ready-made parts, the operating conditions of the furniture differ. A small nightstand experiences relatively modest loads, but may have a thin bottom and little space for fasteners. A large wardrobe requires a stable base and prevention of tipping. For a console, shallow depth comes to the fore, which makes the overhang of the top panel and the force applied at the front especially significant.
| Furniture item | The main design question | What to check before ordering |
|---|---|---|
| Bedside table | The height of the finished product and the small installation area at the corner | The upper platform of the leg, opening of the lower drawer, protrusion of the front |
| TV stand | Long bottom and possible partitions under equipment | Spans between supports, intermediate support, position of cable holes |
| Commode | Load from the body and contents, change in center of gravity when drawers are pulled out | Fastening of supports under the side panels, rigidity of the base, measures against tipping |
| Cabinet | Height, weight, lateral forces, stability | Frame or plinth, load transfer path, need for wall mounting |
| Console | Shallow depth relative to height | Stability under load on the front edge, type of connection between supports and rails |
| Buffet | Significant weight and often a protruding decorative body | Combining supports with structural partitions, lower rail, overall geometry |
In practice, for dressers, cabinets, and nightstands it is useful to select supports not only by their purpose in the catalog, but also by the design of the specific piece of furniture. The label "for a chest of drawers" indicates the product's area of application, while final compatibility is determined by the assembly drawing.
There is also a difference between freestanding furniture and an item built into a niche. If a cabinet is installed against a wall and is hardly ever moved, the base structure can be designed for a single position and additional fastening. A freestanding chest of drawers that may be repositioned requires different attention to lateral loads and protection of the joints. When designing the base, it is necessary to take into account the entire expected service life, not just installation in the workshop.
Turned, carved, and geometric supports: what lies behind the shape
The choice of shape is usually left until the end. And yet it affects the construction: different profiles have different available space for fasteners, the direction of visible faces, and the location of the thinnest part of the leg.
Turned models
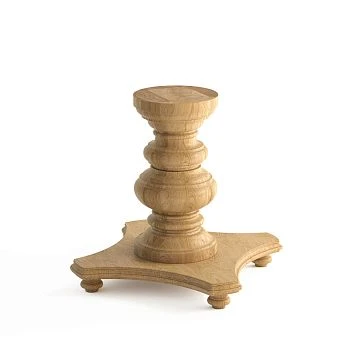
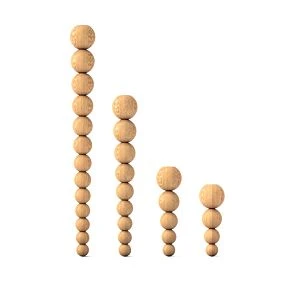
A turned support is built around an axis of rotation. It is characterized by rounded transitions, beads, necks, cones, and spherical elements. This profile is well suited to furniture where the pattern of the lower part should harmonize with panels, frames, and other classic detailing. But with a heavily profiled piece, you cannot take the maximum diameter as the size of the mounting top.
When selecting, turned furniture supports request or check the dimensions of the top plane, the height, and the method of connection. If an entire series of chests of drawers is being repeated, this data matters more than the number of decorative rings on the profile.
Carved models
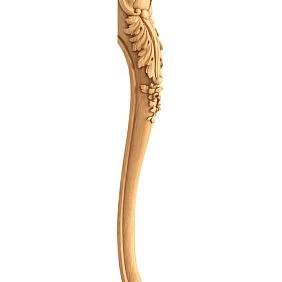
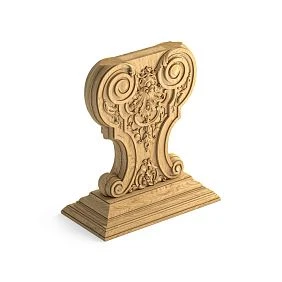
A carved leg may have a directional pattern: the front face is more expressive than the side. For corner placement, this is fundamental. Four identically positioned pieces will not always produce a symmetrical appearance if the relief has a specific orientation. Before ordering carved furniture supports clarify whether there are left and right versions and how the front side is positioned.
Excessively protruding relief may also end up in an area that is constantly bumped during cleaning or when moving furniture. For a working piece, this must be taken into account along with aesthetics.
Geometric models
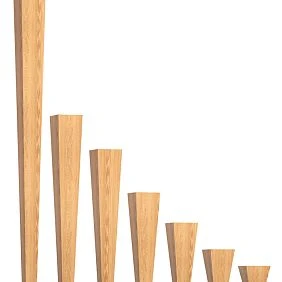
Straight, tapered, or faceted geometric furniture legs are more often chosen for calm cabinets with smooth fronts. Here, deviations in angles and mismatched facet orientation are especially noticeable: a single rotated leg can disrupt the rhythm of the entire lower line of the furniture.
Before installing a four-sided model, mark how it is oriented relative to the front panel. Do not assume that after tightening the threaded rod, each part will automatically stop with the correct side facing the front: the connection design must allow proper orientation to be ensured without loosening the fastening.
Beech or oak: the material is chosen together with the finish
Solid wood furniture legs are often ordered in beech or oak. Both materials are used in joinery production, but they differ in surface pattern and behavior during finishing. You cannot choose a species based on the principle that “this one is always stronger and therefore suitable for any load.” In a real product, what matters is the quality of the wood, the absence of dangerous defects, the construction, the dimensions, and the connection to the cabinet.
Beech has a relatively calm, uniform pattern. It is convenient for projects where the surface will be covered with opaque enamel or where a restrained wood appearance is required after tinting. With a clear finish, its pattern differs from the characteristic texture of oak; therefore, beech is not a complete visual substitute for an oak part.
Oak is chosen where the relief of the wood pores and the natural pattern become part of the appearance. When stained and clear-coated, the porous structure is noticeable, and it must be taken into account when selecting the tone. If the cabinet is made of another material with an oak imitation, a matching color name does not yet guarantee a matching texture and shade after coating.
Compare samples after finishing, not raw wood
Suppose a chest of drawers cabinet is painted in dark walnut, and the ordered legs are planned to be tinted to the same color. On unfinished beech and oak, the same stain may look different due to absorption and texture. Therefore, first make a test finish using the real technology: sanding, primer or pre-treatment, tinting, lacquer or oil. Then compare the sample not only under bright workshop lighting, but also next to the cabinet.
For opaque enamel, differences in pattern may matter less, but surface preparation and compatibility of the finishing system remain mandatory. When painting, the mounting surfaces, threads, and other connection areas must be protected from excess coating if it interferes with installation.
Separately inspect the end sections and thin profile elements. They may absorb the finish differently than the longitudinal surface. Therefore, you cannot judge the future appearance by a single painted flat board if the leg has pronounced relief and areas with different grain directions.
When it makes sense to buy unfinished supports
A finished coating has an obvious convenience: the craftsman receives a part with a completed surface and can reduce the number of finishing operations. But if the body and legs should become a visually unified piece, it is sometimes more advantageous to order unfinished elements and finish them together.
Unpainted furniture legs are usually considered in cases where the body is coated with enamel of a single color, a proprietary tinting system is used, patination is performed, or the coating is matched to an already approved customer sample. This option also helps the workshop avoid depending on the availability of a specific ready-made shade.
However, the word "unfinished" does not mean "requires no preparation." Before coating, check the quality of sanding, the absence of contaminants and glue on the surface, and possible burrs near threaded holes. Different finishing systems require their own preparation; follow the recommendations of the manufacturer of the material used.
Finish before assembly or after?
If the fastening must remain accessible, painting solid wood furniture supports separately from the body is often more convenient. You can properly finish the lower ends, hard-to-reach relief transitions, and inner surfaces near the mounting plate. Then the parts are assembled, avoiding damage to the coating by tools.
But with some frame joints, final finishing is done after assembly: the seams and junctions should look like a single whole. In such a construction, the glue surfaces are planned in advance. They must not be coated with a material that will impair the strength of the chosen joint if the technology requires gluing on clean wood.
for furniture assembly and finishing materials the same rule applies as for supports: you should choose a compatible system, not a random composition with a suitable color name.
There is also a production argument in favor of unpainted legs: when several items from the same collection are painted in a single cycle, differences between coating batches can be reduced by a shared process. But this requires discipline — consistent preparation, application sequence, and sample control. Joint painting by itself does not guarantee a color match.
How to select a support for an already designed cabinet
Once the cabinet is designed, parts should be selected not on a “liked it — bought it” basis, but through a consistent check. It takes less time than redoing the bottom panel after the furniture is manufactured.
-
Record the overall height of the furniture. On a single drawing, indicate the distance from the finished floor to the top point of the item.
-
Measure the assembled cabinet. Clarify whether the top cover and the lower decorative band are included in this dimension.
-
Calculate the available leg height. Subtract allowances for mounting and floor elements that were not taken into account earlier.
-
Mark the load path. Identify the side panels, partitions, rails, reinforcements, and their connection to the bottom panel.
-
Determine the position of each support. Mark the axes on the bottom view and check the offsets from the front and rear edges.
-
Check the top plate. Compare its actual dimensions with the free surface of the base.
-
Develop the fastening. Choose the type of connection and make sure it is compatible with the cabinet material and the support model.
-
Check the fronts and mechanisms. Attach projections of the extended drawers, doors, slides, and fasteners.
-
Determine the number of support points. Compare them with the load-bearing partitions and base spans.
-
Compare suitable profiles. Only after structural selection should you choose the decorative finish.
-
Clarify the material and finish. Beech or oak, unfinished surface or ready-made finish.
-
Check the sample. For a repeating item or a complex assembly, make a trial assembly with a real support.
-
Record the item code and finish. Enter the data into the working specification along with the mounting method.
If the required size is not in the catalog, first determine which parameter can be changed. For a cabinet that has not yet gone to cutting, it may be easier to change the height of the side panels. For a completed carcass, it is sometimes more reasonable to choose a different leg model or change the mounting assembly within the allowable project limits. Increasing the height with arbitrary spacers and trimming shaped parts without checking the geometry is a bad way to eliminate a selection error.
Why one real support should be checked before starting a series
One trial part is not needed for formality. Even a very detailed product page does not replace checking the fit of a specific carcass, mounting, and finish. This is especially noticeable in small-batch production, when a craftsman plans to produce, for example, twelve identical cabinets.
Suppose four legs are planned for each. Ordering 48 elements at once can be quick. But if after receiving them it turns out that access to the mounting screws is blocked by the lower partition, the entire batch of carcasses will have to be redone. One trial assembly allows you to detect such a mismatch before purchasing the whole batch.
What to check during a trial assembly
Measure the height of the actual part, the dimensions of the top plane, the axis deviation, the location of the pre-drilled holes, and the quality of the fit. If necessary, check the profile with a template. Note which side the support should face the front if the pattern is asymmetrical.
Then install it on a base sample made of the same material and the same thickness as will be used in the series. Use the planned fasteners and actual offsets. Check whether the screw protrudes from the back side, whether the wood splits near the mounting area, and whether a gap appears between the top of the leg and the body. For critical products, testing the joint should correspond to the purpose and intended use of the furniture.
Attach the trial assembly to the front or assemble one entire cabinet. Sometimes in a separate photo the shape seems balanced, but on the finished product a tall neck looks too thin relative to the wide lower rail. This can be detected before the model goes into production.
After checking, save the photo of the joint, the drilling drawing, the fastener designation, the result of the finish sample, and the item code. This is how a technically approved part emerges, rather than just an item in the procurement list.
If the work is based on a unified appearance across several products, it makes sense to also check one Product sample or a suitable available material sample, but it cannot replace testing the actual fastening joint.
Geometry and batch quality control before installation
Buy furniture supports not
Practical control procedure:
-
Sort the legs into sets for specific products, without mixing finishes and batches unnecessarily.
-
Measure the height from the working top surface to the working bottom point in the same way.
-
Compare the top platforms and drilling points with the working drawing.
-
Check the orientation of the pattern and the arrangement of the faces for visible corners.
-
Inspect the ends and platforms in the areas of future tight contact.
-
With a transparent finish, compare the texture and color of adjacent visible parts.
-
Check the fastening first on a trial assembly, and only then apply the sequence to the remaining products.
Tolerances for dimensions, finish, and quality must be based on the documentation of the agreed product or on the requirements of the specific project. A 1 mm difference cannot automatically be declared a defect or considered acceptable for any furniture: in a low chest of drawers without adjustment, such a discrepancy may be noticeable, while in another design it is allowed by the adjustment assembly.
To get acquainted with the supplier's approach to materials, the section is useful about the quality of STAVROS products. But acceptance of a specific order should still be carried out according to the agreed specifications and delivery terms.
How to record supports in a furniture specification
An oral note like "wooden legs, four pieces, about fifteen centimeters" is not suitable for repeatable production. It lacks the exact design, mounting assembly, and finishing requirements. A month later, the craftsman may order a model of the same shape but a different height, or receive an unfinished version instead of one ready for installation.
The specification records everything needed by the purchaser, assembler, and finisher. Below is a conventional example of the record format, not a description of an actual STAVROS product.
| Field | Example entry or filling rule |
|---|---|
| Product | Chest of drawers K-01, modification with supports |
| Article number | Exact item code from the selected product card, without substitution with a similar one |
| Support type | Turned, carved, or geometric |
| Material | Beech or oak — the specific agreed finish |
| Height | Actual size according to the documentation of the selected model |
| Top platform | Width × depth or diameter of the working surface |
| Bottom support | Contact size and type of base plate, if provided |
| Mounting | Stud, plate, or other approved assembly; drilling drawing |
| Orientation | Position of the visible side or faces relative to the front |
| Finishing | Uncoated or agreed technology and color sample |
| Quantity per product | According to the base drawing, e.g. 4 or 6 |
| Reserve | Separately agreed quantity for replacement and inspection |
| Link | Clean URL of the specific product page after selection |
| Check | Date and result of trial assembly, drawing version |
For a series of 12 chests of drawers with four legs each, 12 × 4 = 48 parts are required. If the workshop additionally decides to keep two spare parts for the entire batch, the purchase quantity will be 50. But the reserve cannot be chosen automatically: it depends on the possibility of reordering, lead time, risk of damage, color consistency, and delivery arrangements. A spare leg with a different finish may not solve the replacement problem.
Store in the specification not only the article number, but also the material, finish, and revision of the fastening solution. The same external profile does not guarantee that the drilling pattern will be identical across different orders. Having a product reference helps repeat the purchase, but it does not replace technical dimensions.
Ready-made leg or in-house production: where the workshop saves
A joinery workshop with turning or milling equipment may wonder: why buy wooden furniture legs if the part can be made in-house? The answer depends not only on the price of wood. The entire sequence of operations and the cost of occupied working time must be taken into account.
For a single turned or shaped leg, a suitable blank must be prepared, the profile set, machining performed, the surface sanded, dimensions checked, and, if necessary, the fastening point prepared. For a repeatable series, a template, tooling, control of consistent relief positioning, equipment setup, and allowance for possible defects will be added.
An example of cost comparison without an invented market price
Suppose a workshop needs 24 identical legs. It makes sense to calculate in-house cost according to the following scheme:
Manufacturing cost = cost of blanks + setup and machining time × internal hourly rate + consumables + finishing operations + expected defect losses.
Let us assume, purely for illustration, that setup and production of all parts take 11 hours, the internal cost of a production hour is 1,200 rubles, wood and consumables are 8,000 rubles, and additional operations and losses are estimated at 3,000 rubles. Then the estimated costs are: 11 × 1,200 + 8,000 + 3,000 = 24,200 rubles, or about 1,008 rubles per part before accounting for other workshop expenses. These figures are not STAVROS prices and do not describe a real production norm — replace them with your own data.
Purchasing is calculated differently:
Procurement cost = price of selected supports × quantity + delivery + required modification and finishing + acceptance costs.
Next, they compare more than just the final amount. If in-house processing occupies a machine that could produce more profitable cabinet parts, the economic benefit of outsourcing the operation to a supplier may be greater than the direct difference in the price of the legs. And if the workshop specializes in complex turning and regularly produces identical batches, in-house manufacturing may well be profitable.
There is an important condition: a ready-made support cannot be considered a cheap solution if it requires reworking the cabinet, making custom plates, or manually correcting each part. Adaptation costs must always be included in the comparison.
Mistakes that show up already during assembly
Some miscalculations are almost invisible when choosing from a catalog, but they are costly in production.
The support is selected by maximum diameter rather than by mounting surface. In the side view, everything looks suitable, but the fastener does not fit in the upper part. Solution: check the separate size of the working surface and the location of the holes.
A narrow leg is attached directly to a weak area of the bottom. The joint loosens under lateral forces, even though the leg wood is not damaged. Solution: provide structural reinforcement or a different base design and test the actual joint.
A sixth leg is added without considering the floor and rigidity. The additional support point either hangs in the air or raises the center of the base. Solution: first determine the load path, then coordinate heights, adjustment, and installation sequence.
They assume that any threaded stud fits any support. A visually similar connection may have a different thread, depth, or mating part material. Solution: verify the parameters of both parts before purchasing.
They drill mounting holes after final assembly of the drawers. The tool no longer fits into the required area, and the slides block access. Solution: prepare an installation plan in advance and check access with the actual tool.
They take dimensions from a photograph. Perspective and angle hide the real proportions, especially on carved details. Solution: take dimensions from the product card, drawing, or a measured sample.
They buy painted parts before the cabinet color is approved. After the final finish, a difference in shade or sheen appears. Solution: compare finish samples, and if necessary order unpainted parts for the overall process.
They select wooden supports only by the stated application area. The "for cabinet" category does not contain data on the specific mounting joint and the product's maximum load. Solution: check the construction, dimensions, and documentation of the model regardless of the product category.
A separate mistake is trying to solve the stability problem of a tall wardrobe with a decorative leg. If the cabinet can tip over when drawers are opened or a load is applied, changing the profile of the supports will not replace a stability calculation and the prescribed measures for wall mounting.
When it is better not to buy ready-made wooden supports
Sometimes rejecting a ready-made item is the more professional decision. If the furniture maker has already developed a frame construction in which the leg is a continuation of the side post and has a complex connection with the rails, a simple purchased part may not fit this scheme. Reworking the joints will cost more than making the required element to your own drawing.
Another case is a cabinet with a strictly limited height. Suppose the overall height of the product is coordinated with adjacent furniture, and a suitable ready-made support differs in size so much that the difference cannot be compensated without losing proportions. It is better to consider a custom order or a different base construction rather than quietly changing the dimension promised to the customer.
Finally, for heavy, tall, or products subjected to intense lateral forces, you cannot choose a part if there is insufficient data to verify strength and compatibility. Clarifying the specifications and testing the joint is more important than the desire to quickly close the purchase. The catalog helps to shortlist options, but it does not replace the furniture maker's design responsibility.
Where to buy wooden furniture supports for a specific project
If the height, support scheme, mounting location, and material are already determined, choosing a product becomes noticeably easier. In the STAVROS catalog, you can start with the general section wooden furniture legs and supportsthen narrow the search by type and purpose.
For a workshop planning its own painting, a useful section is unpainted solid wood supports. For items with a classic profile, you can compare turned and carved models; for a more understated body, geometric ones. And if we are talking about a cabinet or chest of drawers, it is more convenient to first look at Legs for chests, wardrobes, and side tables.
When you need a set for a specific item, before ordering prepare a short technical description: the furniture's purpose, overall height, dimensions of the bottom panel, number of supports, requirements for material and finish, and the intended mounting point. With this information, it is easier to compare several SKUs and notice incompatibility in time.
Queries like "buy furniture supports", "buy furniture legs" and "buy furniture legs and supports" bring a wide range of buyers to the catalog. For a workshop, however, a purchase should end not with choosing the most attractive model, but with checking a specific part against a specific drawing. If one model fits in shape but not in mounting plate, choose another version or rework the base before manufacturing the body.
Cost, availability of wood species, availability of finishing, and lead times depend on the specific product item and order conditions. Check current values directly in the product page of the selected item.
Frequently asked questions when selecting supports
Can wooden furniture supports be replaced with another model without modifying the body?
Only after comparing the height in the installed state, the top plate, the fastening, the position of the axes, and the load conditions. Matching quantity and external shape does not guarantee compatibility. If the old supports are connected to the apron or frame, reworking the entire assembly may be required.
Should adjustable leveling feet always be installed?
No. Whether they are needed depends on the floor covering, the design of the supports, height requirements, and the expected installation conditions. Adjustment is useful for compensating for minor unevenness, but it does not fix insufficient rigidity of the base and does not replace proper assembly of the cabinet.
What should be done if a suitable model is a few millimeters taller than the calculated height?
Check whether changing the final height is acceptable, whether parts of the cabinet that have not yet been manufactured can be adjusted, and whether another version is available. Trimming a finished leg is permissible only after checking its shape, bottom surface, and mounting design; for a shaped or coated model, it may be an unsuitable solution.
Can wooden supports from different batches be purchased and assembled into one set?
Geometry and appearance must be compared. For opaque painting, minor differences in the natural grain are sometimes less noticeable, but the requirements for dimensions and finish do not disappear. With a transparent finish, the difference in color and texture between batches can result in a non-uniform set. For a responsible appearance, it is better to coordinate a single version and a sample.
Why does a cabinet on six supports still wobble?
Possible causes include different leg heights, an uneven floor, a skewed cabinet, incorrect adjustment of intermediate points, or insufficient rigidity of the base. Before placing random shims, check the plane of the cabinet, the uniformity of the supports, and the actual points of contact with the floor. If the problem is related to the design of the bottom, additional adjustment alone will not eliminate it.
Can a tall decorative support be installed under a massive wardrobe?
Selection is possible only after checking the wardrobe structure and the entire support system. It is necessary to take into account the mounting of the supports, the rigidity of the lower frame, stability, load placement, and anti-tip measures. Matching width and height alone is not enough; without the required technical data, such a replacement should not be considered safe.
What must be ready before placing an order
Wooden furniture supports for a finished project should be selected based on the base drawing. The craftsman must have the overall furniture height, body dimensions, position of load-bearing elements, leg installation points, and available mounting area documented. After that, the fastening unit, number of supports, required cross-section, shape, and material are selected, the finish is agreed upon, and a sample is checked.
Then the support stops being a random decorative addition bought at the end of assembly. It becomes a pre-agreed part of the structure. For a one-off order, this helps avoid reworking the body; for a small series, it allows reproducing the same geometry, fastening, and appearance from one item to the next.
The final check before purchase is simple: the selected leg must be possible to place on a working drawing with real dimensions and fastening points. If even one unknown dimension remains on that drawing, it is better to complete the purchase after it has been clarified.