Article Contents:
- Why MDF baseboard requires a special approach when cutting
- What can be used to cut MDF baseboard: tool overview
- Miter saw (chop saw): the best choice
- Hand saw with fine teeth: a budget alternative
- Miter box: hand saw + guide
- Jigsaw: for non-standard tasks
- Circular saw: powerful but with caveats
- Comparative tool table
- What blade is needed for cutting MDF baseboard
- Why the number of teeth is critical
- Feed speed: slower — cleaner
- Test cut is mandatory
- White baseboard and baseboard for painting: special requirements
- MDF baseboard miter cut at 45 degrees: detailed guide
- Why a 45° miter cut is needed
- Inside corner: which plank faces where
- Outside corner: mirror logic
- Checking the angle before cutting: the step that is skipped
- When an angle other than 45° is needed
- Miter cutting MDF baseboard: how to set, secure, and not rush
- How to correctly set the angle on a saw
- How to properly secure the baseboard on the saw table
- How to cut tall MDF baseboard on a miter saw
- Why you shouldn't rush
- How to join MDF baseboard lengthwise: straight and angled joints
- Straight joint at 90°
- Angled joint at 45°: the professional choice
- Where to make the lengthwise joint
- Final joint finishing
- How to finish the baseboard end at a doorway
- Straight neat end
- End painting technique
- Small indent from the opening
- Wooden corner as a finish
- Extension element for complex joints
- White baseboard and paintable baseboard: how to cut without visible errors
- White MDF baseboard: strict cutting requirements
- Paintable baseboard: flexibility and freedom
- MDF baseboard cutting mistakes: 10 situations to avoid
- Step-by-step guide: cutting and installing MDF baseboard yourself
- What to buy for neat installation: complete list
- FAQ: Answers to Popular Questions
- About the Company STAVROS

One awkward cut — and the strip is ruined. A chip on the white baseboard, a torn end, a gap in the corner due to an incorrect miter — all of this turns the neat lower contour of the wall into evidence of sloppy work. It's frustrating when MDF Skirting Board chosen correctly, bought with a reserve, but the result is worse than expected only because you cut with the wrong tool or without the proper technique.
The question "what to cut MDF baseboard with" sounds simple, but behind it lies a whole system of knowledge: which tool to choose, which blade to install, how to secure the strip, how to set the angle, what to do with non-standard wall angles, how to finish the end at the door. This guide is the answer to all these questions at once. Consistently, in detail, without digressions from practice.
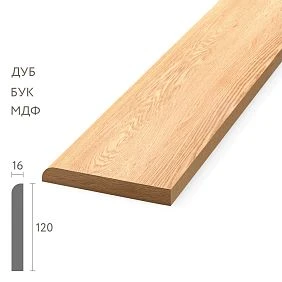
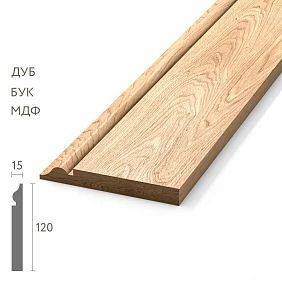
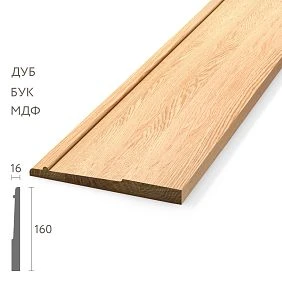
Why MDF baseboard requires a special approach when cutting
MDF is a special material. It is not wood and not plastic. In structure, it is pressed wood fibers with a binding resin: a homogeneous board without layers, without fibers, without a directional texture. It sounds like an advantage for cutting — and in many ways it is. But there is a nuance.
When cut with a rough tool, MDF crumbles and produces chips on the surface. This is especially dangerous for baseboards with a decorative coating: laminate or enamel on the surface is a thin layer that tears under a rough tooth. On dark decorative baseboards "like wood," a chip looks like a light mark. On a white baseboard with enamel, it looks like a crack.
That is why cutting MDF baseboard cannot be equated to cutting a board. Here, not only the tool is important, but also the characteristics of the cutting element, feed speed, cutting direction, and method of securing the strip.
A good cut is:
-
A clean edge without chips or fiber tears
-
A flat cut surface without slope or "sag"
-
Precise angle (45° or any needed)
-
Smoothness allowing minimal finishing
If the cut turns out like this — the baseboard fits tightly in the corner, the end neatly meets the trim, the joint along the length is almost invisible. This is the result achieved by the right choice of tool and technique.




What can be used to cut MDF baseboard: tool overview
Let's start with the main point: not every cutting tool is suitable for MDF baseboard. We'll consider all available options — from professional to budget.
Our factory also produces:
Miter saw (chop saw): the best choice
A miter saw is the professional standard for cutting baseboard. A stationary or benchtop tool with a rotating table that allows setting the cutting angle with an accuracy of 0.5°. Cuts quickly, evenly, and repeatably.
Advantages of a miter saw for MDF baseboard:
-
Precise angle setting — from 0° to 45° and more
-
Stable position of the baseboard during cutting (the plank lies on the table)
-
Ability to make a bevel cut (end chamfer)
-
High speed operation with large volume
The main condition: the blade must be suitable (more on this in the next section). With the right blade, a miter saw produces a cut that requires almost no finishing.
Get Consultation
Hand saw with fine teeth: a budget alternative
A fine-tooth hand saw for wood (18–22 teeth per inch) allows cutting MDF without chipping when using the correct technique. Movements should be smooth, without jerks, with light pressure.
Limitations: achieving a precise 45° angle without a guide is extremely difficult. The cut takes significantly longer. Surface quality is worse than with a miter saw.
Conclusion: a hand saw is for one-off jobs and single cuts at a 90° right angle. For 45° cuts without a miter box, it is not recommended.
Miter box: hand saw + guide
A miter box is a plastic or metal tray with slots to guide the saw at 45° and 90°. Paired with a fine-tooth hand saw, it provides acceptable cutting accuracy.
Important limitation: most budget miter boxes have a saw slot width of 30–50 mm, while a tall MDF baseboard (80–120 mm) simply does not fit in a standard miter box. For such baseboards, you need either a wide metal miter box or a full-size miter saw.
For baseboards up to 60–70 mm high, a miter box works quite satisfactorily with careful work.
Electric jigsaw: for non-standard tasks
A jigsaw with a wood blade for clean cuts is a tool for special cases: cutting a hole, bypassing an obstacle, making a curved cut. For straight cuts and 45° angles, a jigsaw is not suitable: ensuring perfect perpendicularity of the blade to the plane of the plank is practically impossible without a guide rail.
Exception: a jigsaw with a guide rail. In this case, the straight cut turns out even. But this is already a more complex setup.
Circular saw: powerful, but with caveats
A hand-held circular saw cuts MDF quickly and cleanly — with the right blade. A straight cut along the marking with a guide gives a good result. For a 45° cut, blade tilt adjustment is needed — not all circular saws allow precise setting of 45° with the required repeatability.
For one-time cutting of baseboards at home, a circular saw is excessive and less convenient compared to a miter saw. But if there is no miter saw and a circular saw is available — it works with proper technique.
Comparative table of tools
| Tool | Angle accuracy | Cut quality | Convenience | For a high baseboard |
|---|---|---|---|---|
| Miter saw | High | Excellent | High | Yes |
| Hand saw + miter box | Medium | Good | Average | No (up to 60–70 mm) |
| Hand saw without miter box | Low | Satisfactory | Low | No |
| Jigsaw | Low | Satisfactory | Average | Conditionally |
| Circular saw | Medium | Good | Average | Yes |
What blade is needed for cutting MDF baseboard
If the tool is 50% of success, then the blade is the other 50%. An unsuitable blade will ruin the cut even on the most expensive miter saw.
Why the number of teeth is critical
MDF is a dense, homogeneous material. When cutting with a coarse blade with large teeth, each tooth "tears" off a piece of the surface instead of cutting it. On the laminated surface of the baseboard, this manifests as chipping or fine cracks along the cut line.
Minimum number of teeth for clean cutting of MDF baseboard:
-
Blade diameter 160 mm — at least 48 teeth
-
Blade diameter 190–210 mm — at least 60 teeth
-
Blade diameter 250–305 mm — at least 80–96 teeth
Blades marked "for laminated materials" or "for MDF" are the optimal choice. Trapezoidal-flat tooth geometry (ATB or TCG) provides minimal material breakout during cutting.
Feed speed: slower is cleaner
Even with the right blade, the speed of moving the saw through the plank affects cut quality. Fast feed = vibration = chipping. Slow, smooth feed without jerks = clean cut.
Rule: press the plank firmly but without haste. The blade should "pull" the material, not "chop" it.
Test cut — mandatory
Before cutting the baseboard to size, make a test cut on a scrap piece. This will take 30 seconds. Evaluate the cut quality: are there chips, is the edge straight, is there any "overhang" of the angle. If the cut is clean — you can work. If there are chips — check the disc mounting, its rotation direction, and the condition of the teeth (a dull disc also causes chips).
White baseboard and baseboard for painting: special requirements
on white MDF baseboard with factory enamel, every chip is clearly visible — white enamel contrasts with gray MDF at the end. It is the white baseboard that requires the cleanest cut: a disc with 80+ teeth, slow feed, mandatory priming and touch-up of the end after cutting.
— is a horizontal element that frames the room at the bottom of the walls where the wall meets the floor. Skirting boards perform several functions: they hide the technological gap between the wall and floor covering (necessary for thermal expansion), protect the lower part of the wall from mechanical damage, create visual completion, and may conceal wiring. slightly more "forgiving": minor cut imperfections will be covered by putty and paint during final finishing. But this is no reason to cut carelessly — the cleaner the cut, the less work during finishing.
Cutting MDF baseboard at 45 degrees: detailed guide
This is the most technically complex and most common type of cut when installing baseboards. Let's break it down completely.
Why a 45° cut is needed
In the corners of the room, two pieces of baseboard meet. If both are cut at 90° — they create an open joint where the MDF end is visible. With a 45° cut, the ends of both pieces are hidden, and the two beveled cuts fit tightly together.
A 45° miter cut is used for:
-
Internal corners of the room (two planks facing each other)
-
External corners (two planks diverging in different directions)
Each type of corner has its own cutting sequence.
Internal corner: which plank faces where
Imagine a room corner you are looking at. The left wall goes left, the right wall goes right. The baseboard on the left wall enters the corner, and its right end needs to be cut at 45° towards the wall. The baseboard on the right wall is mirrored.
How to set up the miter saw for an internal corner:
-
Place the baseboard on the saw table with the face side up
-
For the left plank, turn the blade 45° to the left
-
For the right plank, turn the blade 45° to the right
-
The cuts should be directed so that when joined, the 'outer' side of the baseboard is longer than the 'inner' side
For an internal corner, it is important: the beveled surfaces of both cuts should face the wall, not the viewer.
External corner: mirrored logic
An external corner — for example, a protruding pillar or the corner of an open niche. Here the baseboard goes around the corner from the outside. Both cuts are at 45°, but in the mirror direction relative to the internal one.
For an external corner:
-
The beveled surfaces of the cuts face outward (toward the viewer)
-
The 'inner' side of the plank (against the wall) is longer than the 'outer' side
-
This is the opposite of an internal corner
An external corner with an MDF baseboard is the most vulnerable point. The sharp edge at the joint of two planks easily chips. The optimal solution: Wooden angle made of solid wood, which covers the joint and simultaneously protects this vulnerable spot. It does not require precise cutting and looks much neater than an open MDF joint.
Detailed breakdown of all types of work with corners of wooden baseboard — in a separate article, where the nuances of non-standard angles and working with various profiles are analyzed.
Checking the angle before cutting: a step that is skipped
Most angles in real apartments are not 90°. This sounds like an exaggeration, but it's true. Plaster flows unevenly, walls diverge slightly, the builder's angle and the finisher's angle are different things. 88°, 91°, 93° are typical values.
If you cut both strips at exactly 45° and bring them together at an 88° angle, you'll get a gap at the apex of the corner. Small, but noticeable. At a 92° angle, there will be a gap along the edges.
How to measure the angle:
A protractor (digital or mechanical) is applied to both walls at the corner. The obtained value is divided by 2. Each strip is cut at this angle. At an 88° angle, each strip is cut at 44°. At a 92° angle, at 46°.
If there is no protractor, use the "cardboard template" method: insert thick cardboard into the corner, draw lines of both walls, divide the angle with a bisector. The template is applied to the strip for marking.
When an angle other than 45° is needed
Non-standard angles are not exotic. Arched openings, sloped ceilings, bay windows, pylons — here the angle can be 30°, 60°, 120°, or any other. A miter saw with precise adjustment allows setting any angle down to tenths of a degree. This is one of the main advantages of a professional tool over a miter box.
Cutting MDF baseboard: how to set, secure, and not rush
"Trimming" in the context of a baseboard refers to both the tool (a miter saw) and the process of cutting the ends. Let's examine the technique in detail.
How to correctly set the angle on the saw
Most miter saws have a scale with fixed positions: 0°, 15°, 22.5°, 30°, 45°. For cutting baseboards, you need a 45° angle — or another angle if the wall corner is non-standard.
Algorithm:
-
Loosen the locking handle of the turntable
-
Rotate the table to the desired angle
-
Tighten the handle with moderate force (not "until it cracks," but firmly)
-
Make a test cut on an MDF offcut
-
Apply the offcut to a corner template or to another cut — check for alignment
If the saw has play in the rotation mechanism, this is critical. Even 0.5° of play will result in a noticeable gap when joining two strips. Regular checking of the lock before work is mandatory.
How to correctly secure the baseboard on the saw table
The baseboard must lie motionless on the table. Any shift during cutting results in angle deviation, chipping, or a crooked end.
Correct plank position:
-
Face side up (so that any chipping, if it occurs, ends up on the back side)
-
Pressed against the fence (vertical table stop)
-
If necessary, hold it with your free hand in an area far from the cut line (no closer than 15 cm from the blade)
Some craftsmen prefer to cut with the face side down — the logic is that the blade moves from bottom to top, and chipping then goes to the bottom (back) side. This works but requires precise marking on the back surface.
Universal advice: make a test cut both ways — face up and face down — and evaluate which gives a cleaner edge with your specific blade.
How to cut tall MDF baseboard on a miter saw
A baseboard 100–120 mm high is already a significant size for a miter saw. Not all saws can handle such height in one cut.
If the saw table is not high enough for the baseboard to stand vertically against the fence — flip it: place the face side on the table and the back side against the fence. The saw now cuts horizontally through the width of the baseboard. This method works for a straight 90° cut.
For cutting a high baseboard at 45°, a saw with a slider function (sliding carriage) is best: it allows for wider cuts.
If the saw cannot handle the required height in one cut, do not make a double cut "from both sides." This is guaranteed to result in an uneven end. It is better to use a hand saw with markings for that specific cut.
Why you shouldn't rush
The main mistake when working with a miter saw is sharply and quickly lowering the handle. This creates vibration, the blade "hits" the baseboard instead of cutting it. The result is a ragged cut and chipped edges.
Correct technique: lower the handle evenly, allowing the blade to reach full speed before contacting the material. The downward motion should be smooth, without acceleration in the middle or a jerk at the start.
How to join MDF baseboards lengthwise: straight and angled joints
Long walls require joining several planks. This joint is the second most visible after corners.
Straight joint at 90°
End to end, both cuts at 90°. Fast, simple. If both cuts are perfectly straight and flat, the gap will be minimal.
Weak point: with any unevenness in the wall at the joint point, one plank will be slightly pushed forward relative to the other, creating a step. This is visible in the light.
A straight joint is acceptable, but only on flat wall sections and with high-quality cutting.
Angled joint at 45°: a professional choice
Both ends are cut at 45° in the same direction: one end faces 'forward', the other 'backward'. When joined, the beveled surfaces overlap each other.
Advantages of an angled joint:
-
With a slight offset of the planks in depth, the bevel creates a shadow that hides the step
-
When the glue dries and the material naturally moves, the joint does not 'open up'
-
Visually almost invisible when done correctly
Technique: both planks are placed on the saw table, the first is cut at +45°, the second at -45° (mirror image). When aligned, the beveled surfaces meet, and the 'overlap' ensures reliability.
Where to make a joint along the length
First rule: not in the center of the most visible wall. The eye, upon entering the room, immediately finds the front wall opposite the door — this is the most noticeable spot. A joint here will be visible under any lighting.
Best places for a joint:
-
Against a side wall that is not in the line of sight from the entrance
-
In an area covered by furniture: behind a sofa, behind a cabinet
-
Near a doorway — but not flush against it, 20–30 cm away
Second rule: the joint must align with a clip or nail attachment point. If the joint 'hangs' between attachment points, any movement of one plank will cause the joint to separate.
Final joint finishing
After installation and glue drying: apply acrylic sealant to the joint, smooth with a wet finger. For paintable baseboard: putty + sanding + painting. With quality work, the joint disappears completely.
Important rule: do not 'cover' a bad joint with a thick layer of sealant. Sealant shrinks when drying, and the excess will contract after a few weeks, revealing everything underneath. The correct solution is to redo the joint and apply a minimal finishing layer of sealant.
How to finish the baseboard end at a doorway
The end at the door is the most visible baseboard termination in the entire room. This work must be done especially carefully.
Straight neat end
90° cut — strictly perpendicular to the front plane of the plank. The end is primed with acrylic primer-isolator (1 coat), painted in the color of the baseboard (2 thin coats). The baseboard is brought flush to the casing or left with a minimal gap (1–2 mm) followed by filling with sealant.
This is a standard and working method provided the end is perfectly finished. Open gray MDF near the casing is unacceptable.
Touch-up painting of the end: technique
Tool — a thin synthetic brush 10–15 mm wide. Primer is applied first, dries for 20–30 minutes. Then two thin coats of acrylic enamel matching the baseboard color with intermediate drying.
It is more convenient to paint the end before installation: the plank lies horizontally, with free access to all edges. After installation, touch-up is done with a thin brush in the hard-to-reach narrow gap between the baseboard and casing — this is more difficult.
Small offset from the opening
If the baseboard stops 5–8 mm from the casing, a small space is formed, which is finished independently. This is a deliberate design technique in minimalist interiors: the boundary between the baseboard and door frame is intentionally emphasized by air. The end must also be treated in this case.
Wooden corner as a finish
Wooden corner bracket is installed vertically at the point where the baseboard ends near the opening. It completely hides the MDF end, smooths the transition, and adds completeness. It looks especially organic with wooden doors and wooden casings.
Made of solid oak or beech, tinted to match the doors or a wooden skirting board — a wooden corner turns this joint from a "finish" into an "accent".
Extension element for complex joints
If a step forms between the end of the baseboard and the casing (due to a difference in thickness), a small vertical extension strip covers this transition. wooden molding a narrow profile as a vertical extension strip — a professional and elegant solution.
White baseboard and paintable baseboard: how to cut without visible mistakes
The choice of baseboard coating affects how "forgiving" the cutting and installation process will be.
White MDF baseboard: strict cutting requirements
White MDF Skirting Board with factory white enamel — a material that does not forgive cutting mistakes. The white enamel on the surface is a thin layer that chips, peels, and leaves gray "tears" on the cut line when cut incorrectly.
What to do:
-
Blade — only fine-toothed, 80+ teeth for 250+ mm diameter
-
Mandatory test cut on scrap before starting work
-
Face down or apply masking tape along the cut line (it prevents the laminate from chipping)
-
End after cutting — primer + white acrylic enamel, 2 coats
Masking tape technique: before cutting, apply masking tape to the front surface of the baseboard along the cut line. Cut through the tape. After cutting, carefully remove the tape. The tape holds the decorative coating and significantly reduces the risk of chipping.
Baseboard for painting: flexibility and freedom
— is a horizontal element that frames the room at the bottom of the walls where the wall meets the floor. Skirting boards perform several functions: they hide the technological gap between the wall and floor covering (necessary for thermal expansion), protect the lower part of the wall from mechanical damage, create visual completion, and may conceal wiring. — clean MDF surface without a decorative layer. The risk of decorative chipping is zero: there is nothing to chip. But even here, cut cleanliness is important: a ragged end is harder to putty smoothly.
After installing the baseboard for painting, all ends, joints, and corners undergo final finishing:
-
Puttying all cut defects and joints
-
Sanding P400
-
Acrylic primer-sealer (1 coat)
-
First coat of paint
-
Light sanding P400–P600
-
Finish coat of paint
After this cycle, almost all cutting imperfections disappear under the paint. That's why paintable skirting boards are the best choice for those working for the first time or unsure of the accuracy of their cuts.
MDF skirting board cutting mistakes: 10 situations to avoid
1. Cutting with a rough wood blade. A large tooth for solid wood guarantees chips on MDF. Only a fine-tooth blade for laminated materials.
2. Not securing the skirting board. The plank moves during cutting — the cut is crooked, the angle is inaccurate. Fixing it to the stop ruler and controlling it by hand is mandatory.
3. Confusing the cutting direction. The left and right planks for one corner are mirror cuts. A mistake in direction means a ruined plank. Before cutting: mark with a pencil which end of which plank you are cutting.
4. Not checking the actual wall angle. Assuming all angles are 90° and cutting exactly at 45°. With a non-standard angle, a gap is guaranteed.
5. Making the length joint in the most visible place. The center of the front wall is the most visible spot. The joint will be noticeable in any light.
6. Not painting the end. Gray MDF in the cut next to a white or decorative skirting board looks rough and unfinished. The end is always painted.
7. Cutting with the front side up without masking tape. On white skirting boards, this risks chipping along the cut line. Tape solves the problem.
8. Trying to close large gaps with a thick layer of sealant. Gap larger than 2–3 mm — first putty, then sealant. Otherwise, the sealant will shrink and reopen the gap.
9. Cutting without a test cut. The first cut is always on a scrap piece. This is insurance against ruining the material.
10. Not checking the fit of cut planks before installation. Place the cut ends of two planks together before installation. There's a gap — redo the cut, don't rely on sealant.
Step-by-step instructions: cutting and installing MDF baseboards yourself
Sequential algorithm from marking to final finishing:
Step 1 — Measurement and marking. Measure the length of each wall with a tape measure. Measure all corners with an angle finder. Create a cut list indicating the length and angle of each end.
Step 2 — Tool preparation. Install a fine-tooth blade (80+ teeth). Check the locking of the miter table angle. Make a test cut on a scrap piece.
Step 3 — Cutting planks. Start with the longest walls. For each plank: set the angle, secure the plank, make a smooth cut. Evaluate the quality of each cut.
Step 4 — Checking corners. Place the cut ends of planks against corner areas "dry". Gaps minimal? Can install. Gaps noticeable? Adjust the cut angle.
Step 5 — End treatment. Prime and paint all ends that will be visible at doorways.
Step 6 — Installation. Apply glue, secure the planks with finishing nails or clips. Start from the corner, move towards doorways.
Step 7 — Final finishing. Sealant along the top seam. Putty for joints and attachment points. For paintable baseboard — full cycle of final finishing.
Detailed information about installation of MDF baseboard to various bases and rules for attaching MDF baseboard is provided in the full guide.
What to buy for neat installation: full list
MDF Skirting Board — with correctly selected profile, height, and decor. Selection by interior, ceiling, and doors — considering height recommendations.
MDF baseboard for painting — for non-standard colors and for the most "forgiving" installation with final finishing.
White MDF Skirting Board — with factory enamel for standard white interiors. Requires clean cutting and careful edge treatment.
Wooden baseboard — for classic interiors and areas with maximum durability requirements. Cut with the same tools as MDF, but taking into account the direction of the grain.
Wooden corner bracket — for finishing external corners and door ends. Hides all complex joints, does not require a perfect cut.
wooden molding — an additional decorative element for designing transitions and horizontal belts.
Trimming Items — a full range of extensions: transition profiles, decorative strips, connecting elements for any non-standard nodes.
About how to choose the right Which MDF Skirting to Choose for a specific type of floor and doors — in a separate guide.
FAQ: Answers to popular questions
What is the best way to cut MDF skirting boards?
The best tool is a miter saw with a fine-tooth blade (80+ teeth for a 250 mm diameter). For one-time work — a hand saw with a fine tooth paired with a miter box (for skirting boards up to 60–70 mm) or with a homemade guide.
Can MDF skirting boards be cut with a hand saw?
Yes, under the condition: fine tooth (18–22 teeth per inch), smooth movements without jerking, fixing the plank. For a 45° cut, a guide is needed — a miter box or a homemade template. For high skirting boards (80–120 mm), a hand saw is more difficult to work with than a miter saw.
What disc is needed for MDF baseboard?
Fine-tooth disc with at least 60–80 teeth for a diameter of 190–250 mm. Marked "for MDF" or "for laminated materials". Tooth geometry ATB or TCG. A dull disc is worse than a proper new one.
How to cut MDF baseboard at 45 degrees?
On a miter saw: set the turntable angle to 45°, secure the strip, smoothly lower the handle. For an internal corner: left strip — turn the disc left, right strip — right. For a non-standard angle: measure with a protractor, divide by 2, set the required angle.
What to do if the wall angle is not 90 degrees?
Measure the actual angle with a protractor. Divide by 2. Set this angle on the miter saw. For an 88° angle — each strip at 44°. For 93° — at 46.5°. A small gap after joining is sealed with acrylic sealant.
How to join MDF baseboard along the length?
The best method is a 45° bevel joint ("lock"): both ends are cut at 45° in the same direction, the beveled surfaces overlap each other. The joint location is not in sight (not the center of the front wall), at the point of clip or nail attachment.
How to cover the end of the baseboard at the door?
Three working options: the end goes under the casing (best); a straight finished end (primed and painted); a wooden corner covers the end vertically. Exposed gray MDF at the end is unacceptable.
How to cut white MDF baseboard without chipping?
Fine-tooth blade (80+ teeth). Masking tape along the cut line. Face side down or up — depends on the saw (make a test cut). Smooth, slow feed without jerks. After cutting: prime the end and paint it white.
About the company STAVROS
The right baseboard is not just about choosing the height and profile. It's about a material that cuts well, gives a clean cut, and requires minimal finishing of the ends.
STAVROS is a Russian manufacturer of decorative products from solid wood and MDF. MDF baseboards are made from E1 class board with a uniform dense structure, which provides a clean cut when working with a fine-tooth blade. The decorative coating is a laminated PVC film applied by full wrapping: both the face side and the ends of the profile are covered. This reduces the risk of decorative chipping during cutting and minimizes the need for additional end treatment.
In the Stavros catalog — MDF Skirting Board all popular heights from 60 to 150 mm: white with enamel, paintable, wood grain. Solid wood corner pieces for finishing external corners and ends at doorways. Moldings, cornices, linear products — everything needed for a complete and neat lower interior contour from one manufacturer.
STAVROS works with retail customers and professional installers throughout Russia. Delivery to Moscow, Saint Petersburg, and regions. Check MDF skirting board price per meter, get advice on selection and place an order — on the website.