Article Contents:
- Contour as architecture: why the strip is not just a frame
- What to buy for a decorative contour: kit from the first page
- How this approach differs from the usual "hang moldings on the wall"
- Where baguette strip is used: from facades to portals
- Built-in wardrobes and dressing rooms
- Furniture facades in classic and neoclassical style
- Wall inserts and decorative panels
- False panels and side panels
- Ceiling-height furniture
- Decorative portals and partitions
- Wooden layout: what it is and how it differs from slats
- Table: when to use what
- How to distribute wood and polyurethane: the two-zone principle
- Wood zone: edges, contours, load
- Polyurethane zone: relief, accent, molding
- Combination: wooden frame + polyurethane center
- Shaped wooden layout: a master's special tool
- How to calculate baguette slats for a facade: practical guide
- Step 1: draw a facade diagram
- Step 2: calculate the perimeter of each facade
- Step 3: add a margin
- Step 4: divide by the rod length
- Step 5: count piece decor
- Built-in cabinet for painting: step-by-step decoration scheme
- Stage 1: preparing facades
- Stage 2: installing wooden slats around the perimeter
- Stage 3: installing polyurethane decor
- Stage 4: sealing
- Stage 5: Priming
- Stage 6: Painting
- Ready-made decor kits for specific projects
- Kit: built-in wardrobe with classic fronts
- Kit: furniture fronts with imitation paneling
- Kit: wall insert behind the console
- Kit: ceiling-height furniture — upper zone
- Kit: decorative portal for a fireplace or niche
- Mistakes that cost the most
- Mistake 1: ordering a slat without a facade diagram
- Error 2: not accounting for profile thickness
- Error 3: installing too wide a batten on a small facade
- Error 4: active wooden profile + active polyurethane relief on the same facade
- Error 5: not accounting for handles and hinges
- Error 6: forgetting sealant for joints
- Error 7: using the same color for wood and polyurethane without surface preparation
- Error 8: not ordering extra material
- What you need to know about wooden decor and polyurethane when installing together
- Installation sequence
- Different adhesives for wood and polyurethane
- Acclimatization of wooden elements
- STAVROS: from wooden battens to molded cornices — everything in one catalog
- Frequently Asked Questions



Contour as architecture: why a batten is not just a frame
The word "baguette" in our culture has a stable association: a frame for a painting or mirror. Gilded or black, wide or narrow — but always a frame. This is a correct but extremely incomplete picture.
Professionals — carpenters, furniture project designers, masters of classic interiors — have long used it molded trim completely differently. Not as a framing for a painting, but as a constructive decorative element that defines the contour of a furniture facade, built-in section, wall insert, or decorative portal.
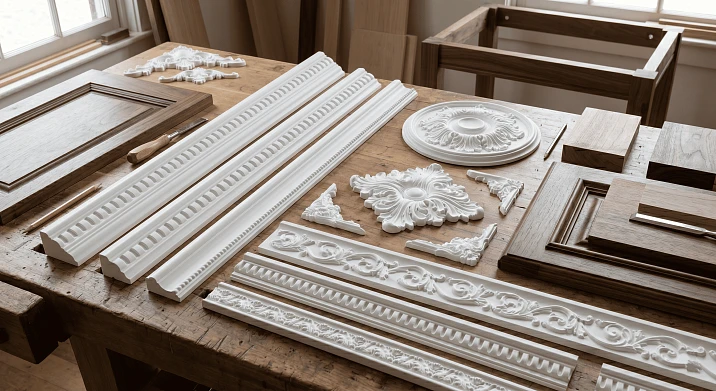
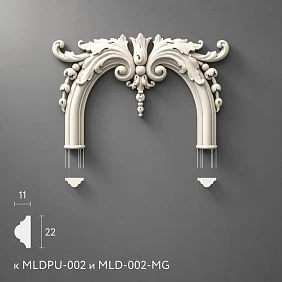
A wooden batten with a shaped profile, laid along the perimeter of a cabinet facade, creates a clear visible edge — durable, tactile, precise. And Polyurethane moldings и Polyurethane appliqués add relief, stucco completeness, and decorative depth inside this frame.
Together they form a system — not a set of individual elements, but a cohesive decorative architecture of the facade. This article is about such a system — how to assemble it, what to buy, and what not to miss.




What to buy for a decorative contour: a kit from the first page
Before diving into details — a specific list. If you already know exactly that you are making a facade, built-in wardrobe, or wall insert, this kit will help you not miss any items when placing an order.
Wooden items:
-
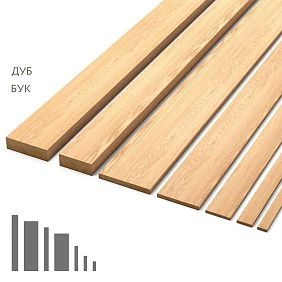
Solid wood baguette batten — profile molding for the facade contour;
-
Decorative wooden glazing bead — for internal division of the facade;
-
Decorative Wooden Tiling — for complex profile areas;
-
Wooden decor and overlays — accent carved elements.
Polyurethane items:
-
Moldings made of polyurethane — relief profile inside the wooden contour;
-
Polyurethane moldings — cornice area of the top furniture line;
-
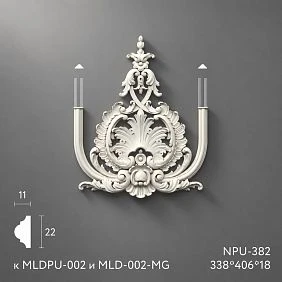
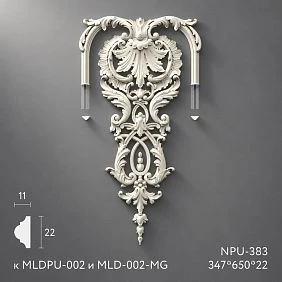
Polyurethane appliqués — decorative central accents of the facade;
-
Decor for Molding — corner inserts;
-
Polyurethane trim — baseboard line.
Installation and finishing materials:
-
Fasteners for wooden profile (finishing nails, liquid nails, self-tapping screws);
-
Mounting adhesive for polyurethane — correct choice of glue;
-
Acrylic sealant — for joints and seams;
-
Primer — mandatory before painting polyurethane;
-
Paint — matching the furniture color or a contrasting accent;
-
Varnish or oil — for unpainted wooden elements;
-
Profile allowance of 10–15%.
Key idea: wooden Picture frame strip creates a rigid, durable outline. polyurethane decor adds relief, depth, and molded completeness inside this outline. They don't compete — they distribute functions.
Our factory also produces:
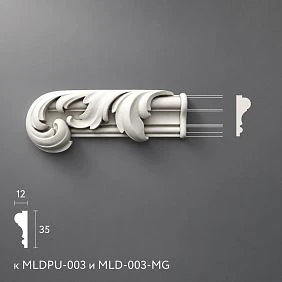
How this approach differs from the usual "hang moldings on the wall"
This is an important distinction — and it's worth understanding right away.
When they say "moldings on the wall," they mean creating decorative frames directly on the wall surface: polyurethane profile is glued along the perimeter of a rectangle, corners are covered with inserts. This is wall decor.
When they say "baguette strip for the facade," the situation is different. The strip is mounted on the facade of a furniture piece — either flush into the plane, into a groove, or on top of the panel. It frames the facade, divides it into zones, or creates an imitation of a panel. This is furniture decor.
Fundamental difference:
-
On the wall — only decorative load, no mechanical impact;
-
On the furniture facade — possible door impact, vibration from opening and closing, accidental hand contact.
That is why the outer contour of the facade is better made of wood — from molding trim or decorative molding. Wood withstands mechanics. And Polyurethane moldings goes inside — where there is no constant contact, and where relief for painting is needed.
Get Consultation
Where baguette strip is used: from facades to portals
Built-in wardrobes and dressing rooms
A built-in wardrobe in a classic interior is not just flat facades. It is an architectural element that should be "read" as a continuation of the wall finish. And here Wooden Picture Frame on the facades plays a key role: it breaks up a large plane into visual sections, creates depth, and gives the cabinet a "furniture" — rather than just a "box" — character.
Application scheme for a built-in wardrobe:
-
Along the outer perimeter of each door — a batten with a straight or slightly shaped profile;
-
Along the inner horizontals or verticals of the facade — a thinner one wooden floor;
-
In the central zones — Decorative Inserts or Polyurethane appliqués;
-
Along the top line of the cabinet to the ceiling — cornice profile made of polyurethane molding.
Furniture facades for classic and neoclassical styles
Facades for painting — an ideal base for combining wooden profiles and polyurethane decor. After painting in a single color, the difference in materials visually disappears — only the relief and shape remain.
For kitchen, wardrobe, and furniture facades for painting, the standard scheme is:
-
Wooden Picture frame strip along the perimeter of the facade (width 15–30 mm);
-
Polyurethane molding — a relief insert inside the frame;
-
Decor for Molding — corner inserts;
-
Primer + paint.
Wall inserts and decorative panels
A wall insert is a limited section of the wall that stands out with decor: a different color, material, or relief. Wooden Picture frame strip frames the borders of this insert from the outside; molded decoration made of polyurethane works inside — as a relief filler or as a central accent.
This works especially well behind a console, bed, or fireplace: the wooden frame creates a clear visual "pocket," and the polyurethane Decorative stucco inside this pocket adds depth.
False panels and side panels
The side panels of a built-in wardrobe and the open ends of sections are areas often overlooked. But they are visible when viewed from an angle.
Wooden Decorative paneling or Decorative Wooden Tiling on the side creates the feeling that the furniture is 'worked through' from all sides. Polyurethane appliqués on the side panel adds an extra accent.
Furniture up to the ceiling
Built-in furniture 'from floor to ceiling' is one of the most demanding tasks. The top cornice, the transition to the ceiling, the horizontal division lines — all of this must be harmonious.
Upper belt diagram:
-
Polyurethane moldings — cornice profile in the area where the wardrobe meets the ceiling;
-
Wooden Picture Frame — horizontal rail on the transition line from the facades to the cornice;
-
Polyurethane trim — baseboard line at the bottom.
Decorative portals and partition walls
A portal is a decorative arch or rectangular frame around a fireplace, niche, or passage. It is a complex project where wooden and polyurethane decor work together particularly expressively: the wooden Picture frame strip creates a rigid load-bearing frame of the portal, and polyurethane decor — brackets, capitals, overlays, relief inserts — form a rich stucco decoration.
Wooden layout: what it is and how it differs from a batten
Two adjacent terms require differentiation.
A baguette batten is a profiled molding with a decorative cross-section: a figured groove, bevel, step, or a combination of several geometric elements. It is used as a visible contour — its profile works "on display."
Wooden layout is a more universal term for a thin wooden profile used as a divider, frame, or decorative insert. Decorative wooden layout can be flat, with a chamfer, with a small groove, or with a figured profile.
Decorative Wooden Tiling — is a separate category: it is a layout with an expressive cross-section used as a decorative element in complex projects: French panels, display case divisions, internal contours of portals.
Table: when to use what
| Task | What to choose |
|---|---|
| External cabinet facade contour | Baguette rail — durable visible profile |
| Internal facade division | Wooden layout — thin divider |
| Complex portal profile | Shaped wooden layout |
| Panel imitation | Layout + polyurethane molding inside |
| Side panel | Wooden decor or layout |
| Top cornice | Polyurethane stucco + wooden slat |
| Central facade accent | Polyurethane overlay or wooden overlay |
How to distribute wood and polyurethane: the two-zone principle
The most common question when designing facade decor: what should be made of wood and what of polyurethane? This question has a clear practical answer.
Wood zone: edges, contours, load
Wooden Picture frame strip и decorative layout work where:
-
There is mechanical load: opening the door, hinge vibration, accidental impact;
-
A precise rigid profile without deformation is required;
-
The profile is a visible and tactile edge;
-
The strength of the surface coating is important (wood varnish lasts longer than polyurethane paint in wear areas).
Specific positions:
-
Outer perimeter of each facade;
-
Horizontal and vertical crosspieces inside the facade;
-
Side edges and ends of sections;
-
Areas around handles;
-
Bottom line of the furniture.
Polyurethane zone: relief, accent, molding
polyurethane decor works best where:
-
No constant mechanical contact;
-
Need a molded relief for painting;
-
Important is a repeating pattern (molding always has the same profile along the entire length);
-
Requires quick and precise installation without complex carpentry operations.
Specific positions:
-
Central zones of facades inside a wooden frame;
-
Top cornice;
-
Decorative overlays on the upper thirds of facades;
-
Moldings on the wall next to furniture;
-
Corner frame inserts.
Combination: wooden frame + polyurethane center
This is the most expressive scheme. Wooden Rail creates a strong rectangular frame around the perimeter of the facade or its zone. Inside this frame — Polyurethane molding as a smaller insert, or decorative insert in the center, or simply a clean painted plane with a small accent.
Result: a facade with a tactile wooden edge and an elegant stucco center — a classic of furniture craftsmanship.
Shaped wooden molding: a master's special tool
Decorative Wooden Tiling is a profile with a more complex cross-section than a regular flat molding. Rounded grooves, double chamfers, semi-oval protrusions — such molding works as an independent decorative element, not just as a divider.
Where it is used:
-
French panels on walls — when a horizontal or vertical decorative line with a pronounced profile is needed;
-
Divisions of glass display cabinets — the layout fixes the glass and simultaneously decorates the front plane;
-
Upper frieze of a chest or cabinet — a horizontal line under the countertop;
-
Inner contour of a decorative portal — paired with polyurethane overlays.
Important technical detail: the shaped layout is mounted either in a groove (for glass) or on the surface (with glue or nails). When mounting on the surface, it is important to consider the profile thickness when calculating the final overhang.
How to calculate a baguette strip for a facade: practical instructions
Calculating the strip differs from calculating a linear molding for a wall — here a diagram of each facade is needed.
Step 1: draw a diagram of the facade
Draw each door with actual dimensions. Mark where the strip will go: only along the perimeter or also inside (division into sections, imitation of a panel).
Step 2: calculate the perimeter of each facade
Formula: (height × 2) + (width × 2) = perimeter of one facade. Multiply by the number of identical facades. Add the perimeters of different facades.
Step 3: add margin
Margin — 15% of the total linear footage for trimming, joints, corners. When working with corner joints of slats at 45°, add another 5% — total 20%.
If you use Decor for Molding (corner inserts) instead of cutting at 45° — a margin of 10% is quite sufficient.
Step 4: divide by the length of the rod
Standard length of wooden linear molding is 2.4 m or 3 m depending on the assortment. Divide the total footage by the length of the rod, round up.
Step 5: count piece decor
Decorative Inserts, Polyurethane appliqués — according to the layout scheme: how many facades × how many overlays per facade. Corner decorative inserts for moldings — 4 pieces per rectangular contour.
Built-in wardrobe for painting: step-by-step decorating scheme
This is one of the most common requests: a built-in wardrobe with sliding or hinged doors, painted facades, classic style. Let's break it down step by step.
Stage 1: preparing the facades
MDF or chipboard facades are sanded, leveled, and dust-free. If the facades are made of natural wood, the surface evenness is additionally checked.
Stage 2: installing a wooden strip around the perimeter
Wooden baguette strip is mounted around the perimeter of each facade: using liquid nails or finishing nails + PVA wood glue. Corners — either cut at 45° or decorative inserts.
Important: the strip must be strictly flush with the facade or slightly protruding. A recessed strip loses its profile when painted.
Stage 3: installing polyurethane decor
Moldings made of polyurethane are mounted with assembly adhesive inside a frame made of battens. The adhesive for polyurethane must be special, without organic solvents. Details on choosing the adhesive are in the article. what to glue polyurethane molding with.
Stage 4: sealing
All joints between the batten and the facade, between the molding and the facade, are sealed with acrylic sealant. This is critical: without sealant, cracks appear along the joint line under the paint.
Stage 5: priming
Primer is applied to all surfaces, including the wooden batten (primer with adhesive effect) and polyurethane elements (universal acrylic primer). Without primer, paint adheres poorly to polyurethane.
Stage 6: painting
2–3 coats of paint. The first coat is thin — to reveal defects. After the first coat, sand with fine sandpaper (240–320). The second and third coats are the main ones. Recommended paint for facades is alkyd enamel or acrylic with a semi-matte finish.
Ready-made decor kits for specific projects
Kit: built-in wardrobe with classic facades
Task: sliding or hinged wardrobe, 4–6 doors, painted white, style — modern classic.
-
Wooden baguette strip — perimeter of all facades + 20% reserve;
-
Moldings made of polyurethane — thin insert inside each facade;
-
Decor for Molding — 4 pieces per facade × number of doors;
-
Polyurethane moldings — upper cabinet cornice, linear length by width;
-
PU glue, sealant, primer, white paint, 10% reserve.
Set: furniture facades with panel imitation
Task: kitchen or cabinet facades made of MDF, imitation of classic paneling, painting.
-
Decorative wooden glazing bead — horizontal and vertical divisions of the facade;
-
polyurethane overlay — into the central zone of each section (optional);
-
Wooden handles — by number of facades;
-
Sealant, primer, paint.
Kit: wall insert behind the console
Task: decorative wall area behind the console in the hallway or living room, width 80–100 cm, height from floor to 180–200 cm.
-
Wooden baguette strip — outer contour of the insert;
-
Moldings made of polyurethane — inner frame;
-
Decor for Molding — corner inserts;
-
Decorative stucco — accent at the top of the insert;
-
PU adhesive, sealant, primer, paint.
Kit: furniture up to the ceiling — upper zone
Task: built-in system "up to the ceiling", design the transition from the body to the ceiling and the bottom line.
-
Polyurethane moldings — cornice profile, linear length along the width of the cabinet + 15%;
-
wooden plank — horizontal line under the cornice;
-
Polyurethane trim — baseboard line at the base;
-
PU adhesive, sealant, primer, paint.
Set: decorative portal for a fireplace or niche
Task: portal around a fireplace or decorative niche, style — classic, painted white or cream.
-
Wooden baguette strip — pilaster posts and horizontal entablature;
-
Decorative Wooden Tiling — internal portal profiles;
-
Polyurethane appliqués — decorative capitals and brackets;
-
Decor for Molding — keystones and corner accents;
-
Wall Decor — relief inserts in the frieze areas;
-
PU glue, wood fasteners, sealant, primer, paint, 15% spare.
Mistakes that cost the most
Mistake 1: ordering a batten without a facade diagram
This is the main mistake. Without a diagram, you cannot accurately calculate the linear footage. Buy less — not enough. Buy more — overpayment and excess leftovers. A diagram with dimensions of all facades is a mandatory first step.
Mistake 2: not accounting for the profile thickness
A wooden batten has a thickness of 8–15 mm. If the facade opens to the side and there is a wall or another facade nearby, the batten may obstruct opening. Before purchasing, check: with the door fully open, the batten should not touch the adjacent facade or wall.
Mistake 3: installing a batten that is too wide on a small facade
A batten 40 mm wide on a 400 × 700 mm facade will take up 40 mm on each of the 4 sides. The internal free field is 320 × 620 mm. This is acceptable. But a batten 60 mm wide on the same facade will leave 280 × 580 mm inside — already cramped. Rule: batten width should be no more than 10% of the smaller side of the facade.
Mistake 4: active wooden profile + active polyurethane relief on the same facade
If a wooden batten already has a complex shaped profile, a rich molding with deep relief inside is not needed. This is overloading. Rule: complex batten — simple molding inside. Simple batten — expressive molding or overlay.
Mistake 5: not accounting for handles and hinges
The batten should not conflict with handles and hinges. Check in advance: where the handles will be, the batten should not create a step that interferes with the grip. A surface-mounted hinge requires a flat mounting surface — a batten next to the hinge can create a protrusion that hinders its installation.
Mistake 6: forgetting sealant for joints
The joint between a wooden batten and the facade surface is a thin gap. When painting without sealant, the paint simply covers the gap without filling it. After the first thermal expansion of the wood, a crack appears along the joint line. Acrylic sealant before painting is mandatory.
Mistake 7: using one color for wood and polyurethane without surface preparation
Wood and polyurethane accept primer and paint differently. Without proper preparation, there will be different gloss, different texture, and a noticeable color mismatch under certain lighting. Solution: use the same primer on all surfaces, paint from the same batch, and apply in the same direction.
Mistake 8: not ordering extra material
Cutting a wooden batten at 45° results in a loss of 5–10 cm on each side. For 20 corners, that's 100–200 cm of waste. The minimum allowance for wooden profiles is 15–20%.
What is important to know about wooden decor and polyurethane when installing them together
Installation sequence
Correct order:
-
The wooden batten is installed first — it creates the base;
-
Polyurethane elements go inside the finished wooden frame;
-
Sealing all joints;
-
Priming;
-
Painting.
Violating this sequence is a typical mistake. If you paint the wooden batten first and then install the polyurethane molding, the joint will be less well sealed.
Different adhesives for wood and polyurethane
The wooden batten is glued with PVA or solvent-free liquid nails. Polyurethane moldings — only with special installation adhesive for polyurethane. Adhesive with organic solvents will dissolve the polyurethane from the inside.
Never glue polyurethane with 'Moment', nitro glue, or glue 88 — this guarantees profile deformation.
Acclimatization of wooden elements
Wooden Rail и layout After delivery, they should sit in the room for 24–48 hours. The wood adapts to the humidity. If installed immediately, slight warping and joint separation may occur.
STAVROS: from wooden batten to stucco cornice — everything in one catalog
When a decorative project includes wooden profiles and polyurethane stucco, the most sensible solution is to work with one manufacturer. This eliminates stylistic mismatches, differences in proportions, and difficulties in selecting compatible elements.
STAVROS is a manufacturer of decorative products from solid wood and polyurethane, operating since 2002. Production is in St. Petersburg. The company's history includes the restoration of historical sites, where profile accuracy and stylistic unity are professional standards.
The STAVROS catalog offers a complete set for decorating facades and built-in furniture:
-
Bagette strip and wooden molding — profile molding for contours and frames;
-
Wooden decor and overlays — carved accent elements;
-
Furniture Handles — 32 models, 4 finishes, made of solid beech;
-
Pogonazh iz massiva — glazing bead, layouts, architraves;
-
Moldings made of polyurethane — facade and wall profiles;
-
Polyurethane appliqués — decorative elements for facades and walls;
-
Decor for Molding — corner and lock inserts;
-
Polyurethane wall decor — accent elements for wall zones;
-
Polyurethane moldings — cornices, rosettes, relief profiles;
-
Polyurethane trim — baseboard and profile linear molding.
Order — from one piece. Delivery across all of Russia. Warehouse — Saint Petersburg. Showrooms in Saint Petersburg and Moscow. Shipping time for stock items — from 3 business days.
STAVROS is not just a profile supplier. It is a decor system where wooden slats and polyurethane moldings are created in a single proportional world. This is the main condition for a facade assembled from different materials to look like a single whole.
Frequently asked questions
Where can picture frame molding be used besides picture frames?
On built-in wardrobe and furniture facades, wall inserts, false panels, decorative portals, partitions, and as upper horizontal belts of furniture. Wooden baguette strip — is primarily a furniture and architectural contour.
Can wooden slats and polyurethane moldings be combined on the same facade?
Yes — this is the best solution. Wooden Rail creates a strong outer frame, Polyurethane molding adds relief inside. After painting in a single color, the facade looks like a classic joinery product.
What to buy for the decorative contour of a furniture facade?
Wooden molded trim, Moldings made of polyurethane, Decor for Molding for corners, wood fasteners, polyurethane glue, acrylic sealant, primer, paint, and 15–20% spare profile.
When is it better to use wood, and when polyurethane?
Wood — for the outer contour, durable edges, areas of mechanical impact. Polyurethane — for relief decorative inserts, overlays, and stucco elements without load. A combination of both — for facades to be painted in a classic style.
How to avoid overloading the facade with decor?
One main accent: either an expressive wooden slat with a clean center, or a simple frame with rich polyurethane decor inside. A complex wooden slat + a rich polyurethane molding + a large overlay — that's three accents on one plane. That's overload.
Is sealant needed when installing the slat?
Absolutely. The seam between the wooden slat and the facade plane must be filled with acrylic sealant before priming and painting. Without this, after 1–3 months of use, a crack will appear along the joint line — wood and MDF/particleboard react differently to temperature changes.
How to calculate the wooden slat for cabinet facades?
Draw a diagram of all facades with actual dimensions. Calculate the perimeter of each facade (height × 2 + width × 2). Multiply by the number of identical facades. Add 15–20% spare for cutting and joints. Divide by the length of the rod (2.4 or 3 m), round up.