Article Contents:
- Gypsum Moldings: Traditions and Limitations
- History of Gypsum Decoration
- Drawbacks of Gypsum
- Where Gypsum Maintains Its Advantage
- Polyurethane: Revolution in Decorative Finishing
- Composition and Production
- Advantages of Polyurethane
- Drawbacks of Polyurethane
- Comparison Table: Gypsum vs. Polyurethane
- Types of Polyurethane Moldings
- Ceiling Cornices (Galleries)
- Wall Moldings
- Ceiling Rosettes
- Brackets and Consoles
- Pilasters and Half Columns
- Corner Elements
- Decorative appliqués
- Baseboards
- Tools and Materials for Installation
- Measuring Tools
- Cutting Tools
- Adhesive Materials
- Adhesives and Installation Materials
- Common Installation Mistakes
- Conclusion

Decorative wall finishing is an art of creating space with character, depth, and architectural expressiveness. For centuries, the main material for ornamental decoration has been gypsum — pliable, allowing for the finest detailing, but fragile, heavy, and requiring professional skills to work with.Installation of Polyurethane Moldingsrevolutionized the approach to decorative finishing — a lightweight modern material retains all the aesthetic beauty of classical moldings, yet is accessible for DIY installation, requiring no special education or years of experience.
Polyurethane adhesive and proper installation technology turn interior decoration into an engaging activity accessible to every homeowner. Polyurethane moldings weigh five times less than gypsum, do not crack or crumble, are resistant to humidity and temperature fluctuations, and visually indistinguishable from traditional gypsum after final painting. This makes polyurethane the optimal choice for modern interiors, where classical aesthetics must combine with practicality, durability, and the possibility of self-implementation without hiring expensive specialists.
In this article, we will thoroughly examine the advantages of polyurethane moldings over gypsum, and break down the step-by-step technologyof installing moldingsWe will study types of adhesive compositions and tools, learn to create perfect 45-degree joints, discuss finishing and painting. After reading, you will have a full understanding of how to transform your interior using polyurethane molding, creating a classic or modern premium design at reasonable costs.


Gypsum molding: traditions and limitations
To understand the revolutionary nature of polyurethane, one must recognize what we are comparing it to.


History of gypsum decoration
Gypsum has been used to create architectural decoration for millennia. Ancient Egyptian temples, classical Greek and Roman buildings, Renaissance palaces, Baroque churches, classical mansions — everywhere gypsum molding was applied. The material allowed for the creation of the finest detail — lace-like ornaments, three-dimensional reliefs, portrait medallions, complex capitals for columns.
The technology of manufacturing gypsum molding required high craftsmanship. First, a sculptor created a model from clay or wax. A mold — multi-part, made of plaster or silicone — was taken from the model. Liquid plaster was poured into the mold, after which the element was removed, manually refined with chisels, sanded, and installed in place. Large elements required reinforcement with metal rebar or wooden frames.
Russian tradition of gypsum molding manifested in the palaces of St. Petersburg and Moscow — Winter Palace, Catherine Palace, estates of Ostanokino and Kuskovo demonstrate the virtuosity of plasterers of the 18th-19th centuries. Delicate floral garlands, putti, cartouches, rosettes covered the walls and ceilings of grand halls.
Our factory also produces:


Drawbacks of gypsum
Weight — the main problem. A gypsum ceiling rosette with a 60 cm diameter weighs 8–12 kg. A cornice with a 15 cm overhang weighs 15–20 kg per linear meter. This creates a significant load on structures, requires strong fasteners, complicates installation. Installing large elements requires two or three people, special scaffolds or sturdy ladders.
Brittleness — gypsum cracks easily upon impact, crumbles upon falling, scratches during careless handling. Transportation requires careful packaging — each element is wrapped in several layers of protective materials. Installation requires care — even the slightest misalignment during installation can cause cracks. Chipping at corners, cracks due to building settlement — typical problems of gypsum decoration, requiring periodic restoration.
Moisture sensitivity — gypsum is hygroscopic, absorbs moisture from the air, softens upon direct contact with water, loses strength in humid environments. Gypsum molding is absolutely not used in bathrooms, kitchens with high humidity, saunas, swimming pools, or on building facades. Even in dry rooms, during seasonal humidity increases, gypsum may deform, develop mold, and lose whiteness.
Installation complexity — installing gypsum molding requires professional skills acquired over years of practice. Elements are mounted on gypsum plaster, which must be properly prepared (consistency, setting time). Additionally, heavy parts are secured with metal pins embedded into walls or ceilings. Joints between elements are carefully filled with liquid plaster, sanded for invisibility. The process is labor-intensive, lengthy, expensive, and requires experience. Self-installation by an unprepared person is practically impossible — high risk of improper installation, cracking, or collapse of elements.
Cost — quality gypsum molding is expensive at every stage. Handmade production or small-batch casting into molds requires master craftsmen’s time. Complex logistics due to weight and fragility — special packaging, careful loading/unloading, cargo insurance. Expensive installation — high qualifications of specialists are paid accordingly. All this increases the final project cost by 3–5 times compared to polyurethane. Gypsum decoration remains a choice for elite interiors with large budgets.
Get Consultation
Where gypsum retains its advantage
Uniqueness — gypsum allows creating exclusive elements based on individual client sketches. Sculptural compositions of high artistic value, portrait medallions with realistic facial features, intricate ornaments with minute detailing (leaves with veins, flowers with petals) — here gypsum is indispensable. The sculptor’s handwork reaches the level of art.
Restoration of historical interiors — restoring lost elements in architectural monuments requires the use of authentic materials and technologies. During restoration of palaces, estates, and 19th-century mansions, traditional gypsum is used to ensure new elements fully match the originals in material, manufacturing technique, and surface texture. This requirement is mandated by restoration standards and respect for historical authenticity.
Status — for certain client segments, material authenticity matters. "Real" handcrafted gypsum molding is perceived as more valuable, prestigious, and exclusive compared to factory-produced polymer. This is a subjective perception based on traditions and cultural norms, but it influences choices in the premium segment and when creating unique interiors.
Ecological purity — gypsum is an absolutely natural mineral material, containing no synthetic additives. For people with heightened sensitivity to chemicals or principled supporters of natural materials, gypsum is preferable to polymers.
Polyurethane: revolution in decorative finishing
Polyurethane — a synthetic polymer obtained by reacting polyols and isocyanates. The material was developed in the mid-20th century by German chemists, initially used in industry (insulation, sealants, coatings), then found widespread application in construction and decoration due to its unique combination of properties.
Composition and production
Modern polyurethane molding is made from high-density rigid polyurethane foam (300–400 kg/m³). Two liquid components (polyol and isocyanate) are mixed in precise proportions, undergoing an exothermic reaction that releases carbon dioxide, which foams the mixture. The foamed mass is poured into silicone or polymer molds, where final polymerization and hardening occur.
Molds are manufactured with high precision, ensuring clarity of all relief details — from large elements to the smallest beads and ornaments. Modern pressure casting technologies allow producing elements with detailing sufficient to imitate handcrafted gypsum molding from a visual distance (over 1 meter).
After removal from the mold, elements undergo finishing treatment — trimming of gates (flash), sanding of ends, quality control. Quality polyurethane molding from European and Russian manufacturers has a dense, fine-porous structure, absolutely smooth surface, sharp relief details without blurring. Cheap Chinese products may have large surface pores, blurred relief, unevenness, incorrect geometry — this is due to low-quality raw materials, incorrect component ratios, or use of worn molds.
Advantages of polyurethane
Lightness — fundamental advantage. Density of polyurethane foam 300–400 kg/m³ versus 1200–1400 kg/m³ for gypsum. This means that for the same volume, polyurethane is 3–4 times lighter than gypsum, and considering the porous structure of polyurethane foam — up to 5 times lighter. A rosette with 60 cm diameter weighs 200–300 grams versus 8–12 kg of gypsum. A cornice with 15 cm overhang weighs 1–2 kg/m versus 15–20 kg/m.
Practical consequences are obvious: reduced load on wall and ceiling structures (critical for old buildings with weak floors), simplified transportation (a rosette can be carried in one hand, cornices can be loaded without helpers), installation becomes accessible for one person without physical preparation, no need for heavy fasteners (adequate adhesive is sufficient, metal pins are unnecessary).
Strength and impact resistance — polyurethane is an elastic polymer capable of absorbing impacts without breaking. A random ball strike, furniture collision during rearrangement, children’s play — all this polyurethane molding withstands without damage. The material compresses upon impact, then returns to its original shape. Gypsum, in a similar situation, cracks, breaks into pieces, or chips.
Polyurethane does not crumble when cut — it can be sawed without fear of material crumbling at the edges. It does not crack over time due to building settlement — elasticity compensates for minor structural movements. Maintains integrity for decades without requiring restoration. This is especially valuable in homes with children, pets, and active use of rooms.
Moisture resistance — fully polymerized polyurethane absorbs practically no moisture. Water absorption coefficient is less than 1% by volume. The material does not swell upon wetting, does not deform under high air humidity, does not lose strength upon contact with water. This radically expands the area of application.
Polyurethane moldings are installed in bathrooms — ceiling cornices, baseboards, mirror and niche moldings withstand steam, condensation, water splashes without consequences. In kitchens — high humidity from cooking and washing dishes is not a problem. In pools and saunas — extreme humidity and temperature do not cause deformation. On building facades — rain, snow, fog, dew do not damage the decor.
Polyurethane does not develop mold or fungi — the absence of organic components in its composition deprives microorganisms of a nutrient medium. Even after prolonged use in humid conditions, the surface remains clean. This is critical for bathrooms, basements, and poorly ventilated rooms.
Heat resistance — the softening temperature of polyurethane is around 120-150°C, melting point around 300°C. Under normal operating conditions (even near radiators with surface temperature of 60-70°C or powerful halogen lamps), the material is absolutely stable. Moldings can be installed near ceiling lights, wall sconces, recessed spotlights without risk of deformation due to heating.
Withstands temperature fluctuations from -40°C to +80°C without changing shape or properties. This allows use on facades in any climate zone — from the Far North to southern regions. The material does not crack from freezing or soften from summer heat.
Certain flexibility — standard rigid polyurethane foam has a modulus of elasticity allowing slight bending without damage. This simplifies installation on non-ideal flat walls — the molding slightly bends, following the surface profile, filling irregularities. Special flexible moldings made of elastic polyurethane are available for decorating curved surfaces — arched openings, round columns, bay windows, curved walls.
Flexible moldings can bend with radii from 30 cm (narrow, thin profiles) to 2-3 meters (wide, heavy profiles). This opens possibilities for decorating complex architectural forms that cannot be finished with rigid plaster without creating numerous small elements.
Ease of installation — lightweight (can be held with one hand), ability to cut with a standard saw, adhesive mounting without metal nails, fast-drying adhesives — all this makes installation accessible to non-professionals. Installing moldings transforms from an exclusive service of specialists into a weekend project for homeowners.
No special equipment required — a miter saw is preferred, but a hand saw and a chisel can suffice. No assistants needed — one person can handle all operations. No experience in plastering required — the technology is fundamentally different, based on adhering pre-made elements. Mistakes are easily fixable — if an element is glued unevenly, it can be carefully removed (while the adhesive hasn't fully set), cleaned of adhesive, and reinstalled correctly.
Ecological safety — fully polymerized polyurethane is chemically inert and does not emit volatile organic compounds into the room’s atmosphere at room temperature. The material is certified for use in residential spaces, children’s rooms, and medical facilities. It has no odor (quality polyurethane from reputable manufacturers), does not cause allergic reactions upon contact or inhalation in rooms with polyurethane moldings.
It is necessary to distinguish between fully cured polyurethane of ready-made products (safe) and the polymerization process of two-component polyurethane adhesives and sealants (which emit volatile substances and require ventilation). After completion of installation and full drying of the adhesive, the room is absolutely safe.
Affordable price — polyurethane moldings are significantly cheaper than plaster moldings with comparable appearance. Industrial production with automated processes reduces labor costs. Low cost of raw materials (polyols and isocyanates are produced in large volumes by the chemical industry). Easy logistics due to low weight and strength (does not break during transport). Easy installation, allowing savings on specialist services.
All of this reduces the final project cost by 3-5 times compared to plaster. Polyurethane makes classic architectural decoration accessible to the middle class, owners of ordinary apartments and houses who want to create a beautiful interior without excessive expenses.
Disadvantages of polyurethane
For objectivity, it is necessary to mention disadvantages, although for most applications they are not critical.
Flammability — polyurethane foam belongs to fire hazard group G3-G4 (normally flammable to highly flammable materials). When exposed to open flame, polyurethane ignites and burns, releasing toxic gases (cyanides, carbon monoxide). This requires compliance with fire safety regulations, especially when installed near open flame sources (fireplaces, stoves).
Modern manufacturers add flame retardants (flame inhibitors) to the composition, raising the fire hazard group to G2-G3 and significantly reducing the speed of flame spread. Applying fire-retardant coatings to finished moldings further improves fire safety. In real operating conditions (absence of direct contact with fire), the risk of polyurethane molding catching fire is minimal.
Limited detail — molding technology in molds provides high, but not absolute, detail. The smallest elements smaller than 1-2 mm may appear blurred, less sharp than with hand-carved plaster. Manual trimming of small details with a chisel (as done with plaster for unique elements) is impossible — polyurethane is harder to cut than plaster.
For 99% of interior projects, the detail of polyurethane moldings is more than sufficient — at visual perception distance (2-4 meters from floor to ceiling cornice), elements appear perfectly sharp. However, for exclusive sculptural compositions, portrait medallions with realistic faces, and highly complex unique ornaments, hand-carved plaster remains unmatched.
Perception of 'artificiality' — for certain audiences (aesthetes, authenticity lovers, premium segment clients), polymer is perceived as less prestigious, 'not real' material compared to 'noble' plaster. After quality painting, it is visually impossible to distinguish polyurethane from plaster (only by touch can one feel slightly less hardness), but for certain people, the psychological factor of 'knowledge' about the material is important and influences subjective perception of the interior.
Thermal expansion — the linear thermal expansion coefficient of polyurethane is 80-150×10⁻⁶ °C⁻¹, higher than plaster (25-30×10⁻⁶ °C⁻¹). With significant temperature fluctuations (e.g., turning off heating in winter with temperature drop from +22°C to +5°C), minimal linear size changes of elements may occur (elongation when heated, contraction when cooled).
This requires proper jointing technology — leaving a compensatory gap of 0.5-1 mm between element ends, filled with elastic sealant or putty. Rigid butt joints may lead to joint bulging during thermal expansion. In rooms with constant temperature (apartments with central heating, offices with air conditioning), this problem is practically nonexistent.
Comparative table: plaster vs polyurethane
| Characteristic | Plaster molding | Polyurethane molding |
|---|---|---|
| Weight of elements | Heavy: cornice 15-20 kg/m, rose Ø60 cm — 8-12 kg | Light: cornice 1-2 kg/m, rose Ø60 cm — 200-300 g |
| Impact resistance | Brittle, cracks and breaks | Impact-resistant, elastic, does not crack |
| Moisture resistance | Absorbs moisture, softens, deforms | Moisture-resistant, suitable for humid areas |
| Application | Only dry rooms, interiors | Any rooms, facades, wet zones |
| Installation difficulty | High, requires professionals | Low, suitable for self-installation |
| Room installation time | 2-3 days by professionals | 1 day by yourself |
| Material Cost | Expensive: cornice 1500-3000 rub/m, socket 8000-15000 rub | Affordable: cornice 300-600 rub/m, socket 1500-3000 rub |
| Installation cost | Expensive: 800-1500 rub/m, 2000-4000 rub per socket | Affordable: 200-400 rub/m or DIY (free) |
| Decor detail | Maximum, manual finishing with a chisel is possible | High, limited by form accuracy (sufficient for most projects) |
| Durability | Decades with careful use and dryness | Decades with minimal care, resistant to impacts and moisture |
| Repairability | Complex: chips are repaired with plaster, require skill | Simple: chips are patched, scratches are covered |
| Ecological | Absolutely natural mineral material | Inert polymer, safe after polymerization |
| Transportation | Complex: brittleness requires multi-layer packaging, weight increases delivery cost | Simple: strength and lightness simplify transportation |
| Flammability | Non-combustible material (NC) | Combustible (G2-G4), requires fire retardants |
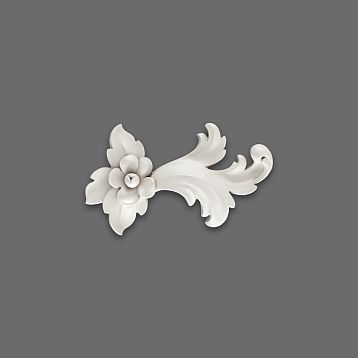
Types of polyurethane molding
Polyurethane decor assortment covers all classical architectural finishing elements, allowing to reproduce any historical style or create a modern interpretation.
Ceiling cornices (gables)
The most common and popular type of polyurethane decor — profiled strips for wall-ceiling junctions. Projection width on the wall varies from 30 mm (minimalist narrow cornices for modern interiors with 2.5–2.7 m ceilings) to 250 mm and more (luxurious wide multi-profile cornices for high 3.5–4 m ceilings in classical interiors).
Profiles vary in complexity and style. Simple geometric profiles — one or two concave quarter-circular elements, straight shelves, bevels. Suitable for minimalism, Scandinavian style, modern neoclassicism. Classical multi-profiled profiles — combinations of 3–7 elements: tori (convex semicircular elements), concave elements (cavetto), S-shaped profiles (gussets), reverse concave elements (cabochons), flat horizontal platforms (shelves). Reproduce the classical architectural orders — Doric, Ionic, Corinthian cornices.
Decorative cornices with ornaments — relief patterns applied to the profile surface: beads (small spheres forming a chain, oval, egg-shaped elements with arrows between them), teeth (small rectangular protrusions imitating beam ends), pearl (string of small hemispheres), plant motifs (stylized leaves, scrolls). Used in rich classical interiors — Baroque, Empire, Victorian style.
Cornices with hidden lighting — special profiles with a ledge for mounting LED strips. Light is directed toward the ceiling, creating a "floating" ceiling effect and soft diffused illumination. A modern solution combining classical form with technology.
Cornices can be straight (rigid) for flat ceilings and flexible for curved surfaces. Flexible cornices are installed on arched openings, bay windows with curved walls, round columns, curved decorative structures. Standard straight cornice strip length is 2 meters, dictated by ease of transportation and installation (element fits into a car, easily carried by one person).
Moldings — decorative overlays of various profiles — are used to create wall panels. The classic scheme — dividing the wall into three tiers using horizontal moldings. The lower tier — panels 90-120 cm high from the skirting board. The middle — main zone up to the frieze. The upper — frieze 30-50 cm below the cornice.
Profiled strips for creating wall frames, horizontal bands (friezes), vertical spatial divisions. Width from 20 mm (thin strips for delicate graphic decor) to 150 mm (wide heavy moldings for monumental panel systems), protrusion thickness from wall 10–30 mm.
Profiles from flat rectangular strips (minimalism) to complex multi-element convex profiles (classicism). Moldings are used to frame wall panels (boiserie), mirrors, paintings, televisions, door and window openings, creating classical panel systems with filigree.
Wall moldings transform a flat wall into an architecturally complex surface. Vertical moldings divide walls into sections, creating an illusion of greater room height. Horizontal moldings at 90–120 cm from the floor (chair back height) create a classical division between panel and field, protecting walls from furniture damage. Rectangular frames made of moldings on a single-color painted wall create elegant graphics; within frames, you can place patterned wallpaper, contrasting paint, or decorative plaster.
Flexible wall moldings for decorating arches, curved walls, round and elliptical columns. Bend radius is determined by molding width — the narrower the profile, the smaller the minimum radius it can bend without deformation. Narrow moldings 20–40 mm bend over a 30 cm radius, medium 60–80 mm — over 1 meter, wide 100+ mm — over 2 meters.
Ceiling Rosettes
Round, oval, or polygonal decorative elements for installation under chandeliers, emphasizing the ceiling composition's center. Diameter from 200 mm (for small rooms 10–12 m² and compact fixtures) to 1200 mm and more (for grand halls, living rooms with high ceilings and large multi-arm chandeliers).
Ornaments are diverse. Concentric circles — the simplest variant, several circles of different diameters create a stepped structure from center to edge. Radial rays — lines or ribs radiating from the center, like sun rays, create dynamism. Petal rosettes — stylized flowers with symmetrically arranged petals (4, 6, 8, 12, 16, 24 petals depending on complexity).
Plant motifs — acanthus leaves, oak leaves, laurel wreaths, grapevines, roses, radiating from the center in radial symmetry. Geometric patterns — meanders (continuous broken lines), braids (interwoven ribbons), stars (4, 5, 6, 8-pointed), inscribed polygons in a circle, creating complex graphics.
Multi-tiered rosettes — with several relief levels, creating significant depth (up to 30–50 mm from ceiling surface to the most protruding point of the ornament). Such rosettes are used in high spaces where details must be visible from a distance.
Most large rosettes (diameter over 50 cm) are divided into two halves along the diameter for easier installation on already mounted chandeliers. Halves are glued to the ceiling around the electrical wire, then the joint between them is filled with putty and becomes completely invisible after painting.
Rosettes for wall-mounted fixtures (pendants) with diameter 100–300 mm. Installed on the wall at the fixture mounting point, hiding wires, creating decorative framing. Oval rosettes for horizontally elongated fixtures.
Brackets and Consoles
Decorative support elements for cornices, shelves, window sills, creating an illusion of support (though real load-bearing function is performed by hidden fasteners). Sizes range from small 100x150 mm (for light shelves) to massive 400x600 mm (for imitating support of heavy ceiling beams in half-timbered or rustic styles).
Styles are diverse. Classical with volutes (S-shaped scrolls) and acanthus leaves — for order architecture, reproducing forms of ancient consoles. Geometric modern — simple triangular, trapezoidal shapes with sharp edges, suitable for minimalism and loft. Carved ornamental — with plant garlands, putti (baby angels), masks, creating luxurious Baroque or Rococo decor.
Brackets are installed underCeiling Moldingin corners and at equal intervals along wall length, creating an illusion that the cornice rests on them (in reality, the cornice is held by adhesive). Under shelves and countertops, consoles serve not only decorative but also some supporting function — additionally supporting the structure.
Pilasters and half-columns
Vertical decorative elements imitating columns, attached to walls (half-columns — half of a round column, pilasters — flat rectangular protrusions with capitals and bases). Used for vertical wall division, framing door and window openings, creating symmetrical compositions.
Structurally consist of three parts. Base (base) — widened lower part, installed at the skirting board level. Shaft (body, fust) — vertical central part, may be smooth or with fluting (vertical grooves). Capital (finish) — decorative upper part, most ornamented.
Height from 1 to 3 meters depending on room ceiling height. Orders (types of capitals) reproduce classical: Doric (simple capital with square abacus and round echinus), Ionic (capital with characteristic volutes — spiral scrolls), Corinthian (rich capital with acanthus leaves and small volutes).
Pilasters and half-columns create monumentality and grandeur of interiors, suitable for grand parlors, offices, halls. Symmetrical placement on both sides of door openings, fireplaces, large mirrors creates a classical portal.
Corner elements
Special details for decorating internal (regular) and external (projecting) wall corners, simplifying installation and improving aesthetics. Replace labor-intensive 45-degree miter cuts of moldings.
Corner blocks for cornices — pre-made elements in the shape of a quarter circle (for internal corners) or three-quarters circle (for external corners), inserted into the corner. Straight cornice strips are joined to them with 90-degree straight cuts. Advantage — no need for precise 45° miter cuts, which require skill and miter saw. Disadvantage — corner block may not perfectly match the cornice profile, noticeable transitions may occur.
Corner overlays for wall moldings — square or rectangular decorative elements with ornament, installed at frame corners. Moldings are joined to overlays with straight cuts; the overlay hides the joint and becomes a decorative accent (rosette at the frame corner).
Decorative appliqués
Ornamental elements for decorating flat surfaces — walls, doors, furniture facades, fireplace surrounds. Sizes vary from miniature 50x50 mm (for furniture) to large 600x400 mm (for central wall panel sections).
Ornamental motifs. Botanical — leaves (acanthus, oak, laurel), flowers (roses, lilies, sunflowers), grape clusters with vines, garlands of fruits and flowers tied with ribbons. Geometric — rosettes, stars, meanders, braids, squares and rhombuses. Classical — volutes, Ionic capitals, beads, dentils. Figurative — putti (cherubic infants), mascarons (faces), animals (lions, eagles), heraldic symbols (escutcheons, crowns, monograms).
Application. Central appliqués for wall panel moldings — transform a simple smooth molding frame into an ornate decorative panel. Corner appliqués for frames — installed at four corners, they complete the composition. Horizontal friezes — elongated appliqués 300-1200 mm long with botanical or geometric ornaments, for placement above doors, under ceiling cornices, on frieze sections of walls.
Baseboards
Planks for finishing wall-floor junctions, concealing the gap between them, protecting the lower part of the wall from damage during cleaning and furniture movement. Height ranges from 40 mm (low baseboards for minimalist interiors) to 200 mm (high baseboards for classical interiors with high ceilings).
Simple (straight or slightly rounded, without pronounced elements) and complex profiles (with beads, curved sections, shelves, reproducing classical architectural profiles). Baseboards with cable channels — have an internal cavity or removable cover for concealed installation of electrical and television wires, internet cables.
Polyurethane baseboards have significant advantages over wooden and plastic ones. Water resistance — withstands floor cleaning, does not deform from water exposure (critical in kitchens, bathrooms, hallways). Flexibility — conforms to minor wall irregularities without creating gaps. Easy installation — adheres with glue, does not require special screws. Paintability — can be painted any color, blending with walls or creating contrast.
Tools and materials for installation
Installing polyurethane molding requires a minimal set of tools, most of which are available in any home or easily purchased at a hardware store.
Measuring Tools
Tape measure — for measuring wall lengths, room heights, distances between elements, sizes of cut fragments. A 5-7 meter length is sufficient for most rooms. A tape measure with a lock and magnetic tip is preferable for ease of use when working alone.
Construction level — for checking the horizontal alignment of ceiling cornices and horizontal moldings, and vertical alignment of pilasters and vertical elements. A 60-100 cm length is optimal — shorter is inaccurate on long elements, longer is inconvenient in confined spaces. A bubble level is simple and reliable. A laser level is more convenient for marking long lines — projects a horizontal or vertical line across the entire wall, simplifying the installation of cornices around the room perimeter.
Square — for checking right angles (90°), marking perpendiculars. A carpenter’s square with 25-30 cm legs is sufficient. Used for marking molding frames, checking room corner angles.
Construction pencil — for marking on walls, ceilings, and the molding elements themselves. Hard pencils (2H-4H) are preferable, leaving a thin, clear line that does not smudge. White pencils or chalk are used for dark surfaces.
Cutting tools
Metal hacksaw — primary tool for cutting moldings, cornices, baseboards. Fine-toothed blade provides a clean cut without chipping or tearing material. A hacksaw with a bolster (reinforced top plate) gives a smoother cut. Blade length 25-30 cm. Hold the hacksaw at a slight angle to the surface, cut smoothly without heavy pressure — polyurethane cuts easily, excessive force causes jerky, uneven cuts.
Miter box — device for cutting at precise 45° and 90° angles. It consists of a tray with slots on side walls guiding the hacksaw. A simple plastic miter box costs 200-500 rubles, providing acceptable accuracy for non-critical joints. A professional metal adjustable miter box allows setting any angle with precision to the degree, costing 2000-5000 rubles.
Miter saw (miter saw) — power tool for professional installation. Provides perfectly accurate, absolutely flat cuts at any specified angle in seconds. A manual miter saw costs from 5000 rubles, an electric one with extension (for wide cornices) from 10000 rubles. Not necessary for one-time repairs, but if planning to install molding in multiple rooms or regularly perform repairs — it’s an investment that pays off in time savings and quality.
Construction knife (painter’s or office knife with replaceable blades) — for trimming small elements, cleaning up saw marks, removing flash, trimming excess glue. The blade must be sharp — replace or break segments as they dull.
Adhesive materials
Polyurethane mounting adhesive — specialized compositions on various bases.
Acrylic adhesives ("liquid nails", "construction acrylic") — universal water-soluble compositions. Advantages: white color (not visible on white molding), fast setting (element holds 1-2 minutes), excess easily removed with a damp cloth before drying, no strong odor, safety (no solvents). Disadvantages: lower strength compared to polymer adhesives, limited water resistance after drying (not recommended for bathrooms, facades). Examples of brands: Moment Montazh MV-50, Titan Wild, Quelyd Mastifix Ultra.
Mounting adhesives and materials
Mounting adhesive — primary material for attaching polyurethane molding. Acrylic adhesives (Moment Montazh, Tytan Styro 753, Orac DecoFix) are optimal for interior work — fast setting (1-2 minutes), no odor, easily removed with a damp sponge. Polymer adhesives (Soudal Fix All, Tytan Professional) are used for wet areas and facades — provide maximum strength, but require ventilation during application.
Joint adhesive — bonds ends of elements at joints, preventing seam separation. Use fast-drying cyanoacrylate-based adhesives (Cosmofen) or high-viscosity PVA.
Auxiliary materials: acrylic putty for filling joints, deep-penetration primer for surface preparation (improves adhesion by 30-50%), acrylic sealant for filling gaps, water-emulsion paint for final finish.
Tools: metal hacksaw or miter saw, miter box for 45° cuts, adhesive gun, tape measure and level, rubber putty knife, paintbrushes and roller, P180-P320 sandpaper, ladder.
Typical installation mistakes
Mounting on unprepared surfaces — gluing to dusty, unprimed walls causes peeling. Always clean and prime the surface.
Insufficient adhesive — saving money results in elements detaching. Apply generously, excess is easy to remove.
Inaccurate corner cutting — rushing creates gaps at joints. Use a quality miter box or miter saw, check angles on scraps before cutting all elements.
Ignoring marking — mounting by eye causes misalignment and waves. Use a laser level for precise marking.
Premature painting — painting before the adhesive fully cures (less than 24 hours) may shift the elements.
Mounting on wallpaper — gluing over wallpaper creates an unreliable connection. Mount on plastered or painted surfaces.
Conclusion
Polyurethane molding has made classical architectural decoration accessible, practical, and easy to install. Lightweight, durable, water-resistant, affordable, and capable of self-installation — advantages making polyurethane the optimal choice for modern interiors.
Proper installation technology guarantees longevity and flawless appearance. Careful surface preparation, precise cutting of elements, high-quality adhesives, neat joint sealing, and professional painting create a result indistinguishable from expensive gypsum molding, but at reasonable prices and with your own hands.
Transform your interior with classic cornices, elegant moldings, and exquisite rosettes — polyurethane molding opens up to you the world of architectural decoration, accessible to everyone.