Article Contents:
- Boxes and bands: architectural concealment of utilities
- Vertical boxes for risers and main lines
- Horizontal boxes under the ceiling
- Floor boxes for horizontal runs
- Decorative bands as joint concealment
- Box-seats and benches with storage function
- Joints with baseboard: where floor meets wall
- Baseboard construction with cable channel
- Corner connections and branches
- Materials and finish for baseboards
- Integration of outlets and switches
- Service access panels: invisible access to engineering
- Access panels behind cabinet doors
- Hidden access panels in wooden wall cladding
- Mirror and picture access panels
- Floor access panels in wooden flooring
- Ventilation ducts: how air circulates unnoticed
- Ventilation grilles under decorative screens
- Supply dampers behind window casings
- Kitchen exhaust ducts in wooden boxes
- Bathroom ventilation through decorative outlets
- Lath as decorative ventilation panel
- Acoustics: sound without visual noise
- Built-in ceiling speakers behind lath screens
- Floor-standing speakers in wooden casings
- Built-in wall speakers behind pictures
- Subwoofer under bench or in chest
- Audio wiring in baseboards and moldings
- Questions and Answers
- Conclusion

The paradox of modern living space: the more technology provides comfort, the stronger the desire to not see it. Russian-style interior design requires visual purity — no wires, pipes, vents, or cable channels. The eye should glide over fine wood, natural textures, cozy details, without bumping into utilitarian elements of engineering systems.
But how to hide dozens of meters of utilities — water, sewage, electricity, ventilation, internet cables, audio wires — in an interior where every detail carries semantic weight? How to mask access panels without compromising the integrity of the wooden cladding? How to integrate ventilation ducts into a space with beams and cornices? How to place home theater speakers while preserving the authenticity of the ambiance?
The solution lies in using traditional architectural elements — boxes, moldings,wall moldingsand baseboards — as functional casings for engineering systems. What is hidden behind drywall and suspended ceilings in modern minimalism is masked in Russian style by wooden structures that seamlessly integrate into the overall composition and even become its ornament.


Boxes and moldings: architectural concealment of utilities
A box is a volumetric structure concealing horizontal or vertical sections of engineering systems. In Russian style, a box is not merely utilitarian cladding, but a full-fledged architectural element solving both technical and aesthetic tasks simultaneously.


Vertical boxes for risers and main lines
Water supply, sewage, and heating risers run vertically through all floors of the house. Pipe diameters range from 50 mm for water supply to 110 mm for sewage. Accounting for insulation and installation gaps, a box for a single riser requires an internal cross-section of at least 150x150 mm. If there are multiple risers, the cross-section increases to 200x300 mm or 250x250 mm.
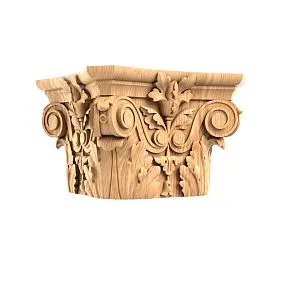
In Russian interiors, vertical boxes are styled as pilasters — vertical rectangular protrusions decorated similarly to columns. The base of the pilaster, 20–30 mm wider than the box body, is formed by overlay profiles — baseboards or wide moldings 100–150 mm high. The pilaster body is clad with wooden boards, MDF panels, or plywood 10–18 mm thick.
The capital of the pilaster — the upper expanded part — is created using a stepped set of profiles. The lower tier is a wide molding 80–100 mm, the middle tier is a profile 60–80 mm, and the upper tier is a narrow profile 40–60 mm with rounded edges or grooves. The total capital height is 250–400 mm depending on room height and pilaster proportions.
The pilaster surface may be smooth and painted, lacquered while preserving wood texture, or adorned with carved overlays — rosettes, diamonds, botanical motifs. In grand rooms, pilasters are made in pairs, framing doorways or mirrors, visually transforming technical necessity into architectural composition.
Our factory also produces:


Horizontal boxes under the ceiling
Horizontal ventilation, air conditioning, and electrical conduits are laid under the ceiling along the room perimeter or from risers to consumption points. Box height depends on duct diameter — from 150 mm for a 125 mm round duct to 400 mm for a 200x200 mm rectangular duct, accounting for insulation.
In Russian style, a horizontal box is styled as a frieze — a horizontal band at the upper part of the wall between the main plane and ceiling. The lower boundary of the frieze is formed by an overhanging profile — cornice or molding 100–150 mm wide, protruding 50–80 mm from the wall. The vertical plane of the frieze is clad with boards or panels and may be decorated with horizontal grooves, meanders, or botanical ornamentation.
The upper boundary of the frieze is finished with a second profile — ceiling cornice, creating a transition to the ceiling. If the box runs along the room perimeter, it is perceived as a lowered ceiling, which is appropriate in Russian interiors — it creates an intimate atmosphere, making the space cozier.
An important nuance — there must be access for servicing utilities inside the box. For this, removable sections of cladding 600–800 mm long are provided at locations of valves, access panels, and connections. The removable section is secured with magnets or hidden latches and visually indistinguishable from fixed sections.
Get Consultation
Floor boxes for horizontal runs
Distribution of heating and water supply pipes along the first floor’s floor or above the ceiling requires creating floor boxes 80–150 mm high. In modern interiors, such boxes are covered with screed, but in Russian style with wooden floors, screed is not applicable.
The solution — creating a podium along the wall 400–600 mm wide, within which pipes are laid. The podium is clad with the same boards as the main floor — solid oak, ash, or larch 20–22 mm thick. A podium height of 80–120 mm allows placing pipes up to 32 mm diameter with 20–30 mm insulation.
The podium is not perceived as a box — it becomes a functional interior element. Furniture such as planters, benches, and chests are placed on the podium. Along windows, the podium transforms into a low, wide bench with soft cushions — a traditional element of Russian peasant houses. Heating pipes are hidden beneath the bench, additionally warming the seat.
At access points to valves and connections within the podium, hinged or removable floor sections are provided, disguised as ordinary boards. Joints are made along the tongue-and-groove connection line, making them visually imperceptible.
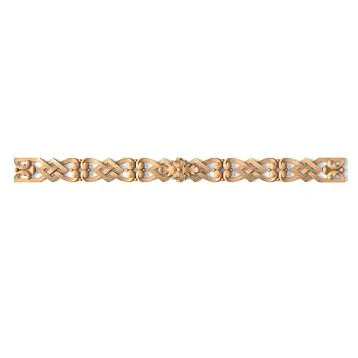
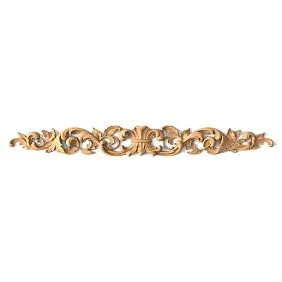
Decorative moldings as joint concealment
A molding is a horizontal band on the wall dividing the plane into tiers. In Russian architecture, moldings were used to visually segment tall walls, create proportions, and indicate levels of ceilings.
In modern interiors, moldings conceal horizontal utilities laid at 900–1200 mm from the floor — water supply pipes to faucets, electrical cables to outlets, low-voltage lines. The molding is formed by three elements: a lower profile 40–60 mm wide with a lip, a central board 120–180 mm high and 20–25 mm thick, and an upper profile 60–80 mm wide with a protrusion.
The total molding height of 200–300 mm is sufficient to accommodate pipes up to 25 mm diameter and cables up to 3x2.5 mm². Behind the molding, a space 40–60 mm deep is created for laying utilities. The molding is mounted to the wall via 40x40 mm battens installed at 600 mm intervals. Between battens — empty space for pipes and cables.
The molding is painted in a contrasting color relative to the wall — white on light beige, dark brown on ochre, gray on white. Contrast emphasizes the horizontal line, visually expands the room, and makes the height more comfortable. The molding may be adorned with carved ornamentation, overlay elements, or painting.
Boxes-benches and benches with storage function
Built-in furniture — a traditional approach in Russian interiors, where every element is multifunctional. A bench-box under the window conceals a radiator, supply pipes, and regulating valves. Externally, it appears as a wooden bench 450–500 mm high, 400–500 mm deep, and as wide as the window plus 200–400 mm on each side.
The front panel of the bench is a decorative screen covering the radiator. The screen is made of wooden slats with a cross-section of 20x40 mm spaced 30-40 mm apart, ensuring circulation of warm air. The slats can be vertical, horizontal, diagonal, forming geometric patterns — diamonds, lattice, or a Christmas tree shape.
The upper part of the bench is a hinged seat or removable cover providing access to the radiator for maintenance. The seat is covered with the same board as the floor, or with a softer material — 10-12 mm thick plywood covered with fabric and 30-40 mm thick foam padding. This creates a comfortable seating area with a view of the street.
Additional storage is organized under the seat — shoe boxes, bookshelves, niches for small household items. The bench transforms into a multifunctional element: a technical cabinet, a heating system, a seating area, and a storage system.
Where the floor meets the wall: junction with skirting board
MDF skirting board with a channelThis is not just a decorative strip covering the gap between the floor and the wall. It is a functional element inside which power cables, low-voltage lines, internet and television cables are routed.
Skirting board construction with cable channel
Modern skirting board for engineering communications consists of two parts: the base mounted to the wall and a removable decorative cover. The base has an internal cavity with a cross-section of 15x25 mm up to 25x40 mm depending on the height of the skirting board. The cavity is sufficient to accommodate 3-5 cables with a cross-section of 3x2.5 mm² or 5-8 low-voltage cables of twisted pair type.
The base is mounted to the wall with 4x50 mm self-tapping screws or dowels spaced 500-600 mm apart. Mounting points are located at cable passages to avoid damaging them. After laying the cables, the decorative cover is installed, which snaps onto the base or attaches via magnets.
The height of the skirting board is chosen depending on the interior style and number of cables. For minimal wiring — power and one low-voltage cable — a skirting board height of 60-80 mm is sufficient. For a full system — power, internet, television, telephone, and audio — a skirting board height of 100-120 mm is required.
In Russian style, preference is given to high skirting boards 100-150 mm with profiled upper parts — coves, rounded edges, bevels. A high skirting board visually raises the wall, creating a sense of solidity and concealing the uneven lower edge of wooden wall cladding.
Corner joints and branches
In interior and exterior corners, the skirting board is connected at a 45-degree angle or butt joint using corner covers. When connected at a 45-degree angle, the cable channel continues uninterrupted, and cables smoothly turn. When connected by butt joint in an interior corner, an angular insert with an enlarged channel section is installed, where cables from both sides are gathered and redistributed.
At cable outlets to outlets, switches, and connection points, the skirting board has cutouts or special junction boxes are installed. A junction box is an extended section of the skirting board 120-150 mm long with a side hole for cable outlet. The cable exits vertically upward to an outlet installed at a height of 300-400 mm from the floor, or horizontally to a wall connection point.
The junction box is masked by a surface-mounted outlet, a potted plant composition, or a decorative element. In Russian interiors, a vertical molding often runs from the skirting board to the waist or cornice, within which the cable is laid. A 60-80 mm wide molding with an internal cavity of 15x20 mm becomes a vertical cable channel, seamlessly integrated into the wooden wall cladding.
Materials and finishing of skirting boards
Skirting board is made from solid wood — oak, ash, beech — or MDF with subsequent finishing. Solid wood skirting board is stronger, more durable, retains texture, but more expensive and more difficult to process. MDF skirting board is lighter, cheaper, allows creating complex profiles, easily painted in any color.
Solid wood skirting board is finished with varnish, oil, or wax highlighting the wood grain texture. The shade is chosen to match the floor or 1-2 tones darker for contrast. A dark skirting board on a light floor creates a clear boundary, visually outlining the room perimeter. A light skirting board on a dark floor blends with the wall, creating an impression that the wall continues down to the floor.
MDF skirting board is primed, painted with acrylic enamel in 2-3 layers with intermediate sanding, and covered with protective varnish. The color is chosen to match the wooden wall cladding and molding. White skirting board — a universal solution for light interiors. Gray, beige, ochre — for warm natural palettes. Dark brown, black — for contrasting solutions.
Integration of outlets and switches
Outlets located at a height of 300-400 mm from the floor logically connect with the skirting board as a single composition. The outlet is installed in a wooden or MDF frame of 100x150 mm, painted in the same color as the skirting board. The frame is mounted to the wall, becoming part of the wooden finish.
Alternative — built-in outlets in the skirting board body. A skirting board height of 120-150 mm allows installing a standard-sized 85x85 mm outlet in its upper part. The outlet is covered by a hinged lid when not in use, blending with the skirting board surface. When needed, the lid is lifted, providing access to the outlet.
Light switches located at a height of 900-1000 mm are similarly styled — wooden frames matching the style of moldings and trim. A 100x100 mm frame is made from the same material as the wall decorative elements, creating visual unity.
In entrance areas, outlets and switches are concealed behind decorative panels that open by pressing. A 200x300 mm panel with carved ornament is mounted on magnets, and when pressed, it swings open, revealing the outlet and switch block. The closed panel is indistinguishable from surface-mounted decorative wall elements.
Service access panels: invisible access to engineering systems
Water, gas, electricity meters, heat accounting nodes, distribution collectors, shut-off valves, and inspection hatches for sewage — all these elements require periodic access for maintenance, reading, and repair. In Russian interiors, technical access panels are concealed so that they cannot be detected without knowing their location.
Access panels behind hinged cabinet doors
The simplest solution — place technical nodes inside built-in cabinets, and provide access through hinged doors. Water meters are installed in kitchen cabinets under the sink behind doors 400-600 mm wide. Electrical panels are mounted in hallways in cabinets 150-200 mm deep, covered with doors featuring wooden panels.
Door panels are made from the same material and in the same style as the main furniture. Frame-and-panel construction — frame from solid wood 60-80 mm wide, panel from 6-10 mm thick plywood or 16-20 mm solid wood — is characteristic of Russian style. The panel can be smooth, with a beveled edge, or decorated with carved ornament.
The door is mounted on hinges with a closer, ensuring smooth closing. The handle is recessed into the door surface — flush-mounted or concealed, opened by pressing. From the outside, the door is indistinguishable from doors of ordinary cabinets, integrated into the furniture facade.
The walls inside the cabinet are painted white or light gray, and LED lighting is installed that turns on when the door is opened. Meters and devices are mounted at a height of 1200–1500 mm for ease of reading. Below, shelves are arranged for small household items, transforming the technical cabinet into a functional storage zone.
Hidden access panels in wooden wall cladding
When a technical unit is located in a wall covered with wooden cladding, a removable panel is created that visually matches the fixed cladding. The panel, sized 400x600 mm or 600x600 mm, is cut from the same material as the main cladding — boards, planks, or panels.
The panel is attached to hidden magnets installed around the perimeter at intervals of 200–300 mm. Neodymium magnets with a diameter of 10–15 mm and thickness of 3–5 mm, each with a holding force of 3–5 kg. Four magnets hold a 400x600 mm panel with a force of 12–20 kg, sufficient for secure fixation and easy opening.
A hidden beveled edge — a 45-degree angled cut 2–3 mm wide — is made around the panel’s perimeter, creating a micro-gap of 0.5–1.0 mm with the main cladding. The gap is practically invisible but sufficient to lift the panel with a thin object — a knife, putty knife, or plastic card.
The panel’s texture and pattern are chosen so that seams align with natural cladding lines — joints between boards, panel boundaries. If the cladding is vertical, panel seams run along vertical joints. If horizontal, along horizontal ones. The panel is painted simultaneously with the main cladding, ensuring identical color and tone.
A niche 80–120 mm deep is organized behind the panel, sufficient for placing meters, faucets, and distribution boxes. The inner walls of the niche are painted white, and battery-powered LED lighting is installed that turns on when the panel is opened.
Mirror and picture access panels
In reception areas — living rooms, dining rooms, bedrooms — technical access panels are disguised as mirrors or pictures. A 600x800 mm mirror in a carved wooden frame is mounted on hinges to the wall like a door. Behind the mirror — a niche with an electrical panel, low-voltage panel, and control node for the 'smart home' system.
The mirror opens 90 degrees, freeing access to equipment. In the closed position, it is a standard wall mirror performing its function. Hinges are hidden within the frame thickness and are not visible from outside. Fixation in the closed position — magnetic latch or mechanical latch.
Alternative - a framed painting or photograph, 700x900 mm, covering the technical access panel. The frame is mounted on two upper hinges and can be swung upward or sideways. The artwork may be painted - landscape, still life, narrative composition - or graphic - engraving, lithography. It is important to choose a subject that matches the interior style.
Floor access panels in wooden flooring
Sanitary sewer inspection hatches, hot water floor connection points, and pipe distribution nodes are located under the floor. Access to them is organized through floor access panels cut into the floor covering.
A 400x400 mm or 600x600 mm access panel is cut from the same boards as the main floor. If the floor is made of solid boards 120–150 mm wide, the panel consists of 3–4 boards glued into a panel and reinforced from below with 40x40 mm cross braces. If the floor is parquet, the panel is assembled from individual planks glued onto a 10–12 mm thick plywood base.
The access panel is installed in an opening cut into the subfloor between joists. Around the opening perimeter, a 50x50 mm frame is mounted, on which the panel rests. The panel may be removable — simply lying in the opening, held by its own weight — or hinged and swinging open.
A removable access panel is extracted using a special key — a steel rod 6–8 mm in diameter with two bent ends, inserted into hidden holes along the panel’s edges. Holes 8–10 mm in diameter and 30–40 mm deep with internal threads are spaced 300 mm apart. The key is inserted, the panel is lifted, and removed.
A hinged access panel opens upward at an angle of 90–110 degrees. Hinges are hidden, recessed into the board thickness, and not visible from outside. Fixation in the open position — stop or gas lift. Visually, the panel is indistinguishable from the main floor — board seams align with the overall pattern, texture direction continues, tone and color are identical.
Ventilation ducts: how air circulates invisibly
Ventilation system — an essential element of comfortable living. Supply ventilation brings fresh air from outside, while exhaust ventilation removes stale air from bathrooms and kitchens. Ducts with a cross-section of 125–200 mm are laid under the ceiling, behind walls, and in floors. Supply and exhaust points are fitted with grilles that, in Russian interiors, must be inconspicuous or decorative.
Ventilation grilles under carved screens
Standard plastic or metal grilles disrupt the style of wooden interiors. Solution — cover them with carved wooden screens featuring openings for air passage. Screens sized 300x300 mm or 400x400 mm are made from 20–25 mm thick boards with carved ornamentation.
The ornament is created using through carving — removing material completely through, forming holes shaped like geometric figures, plant motifs, or stylized patterns. The total area of openings constitutes 40–60% of the screen’s area, ensuring air passage with minimal aerodynamic resistance.
The screen is mounted on the wall or ceiling 20–30 mm away from the standard ventilation grille. The gap is necessary for free air circulation. Mounting — on hidden brackets or magnets, allowing the screen to be removed for cleaning the grille.
The screen is painted to match the color of the wooden wall cladding or a contrasting color — white on dark walls, dark on light walls. The carving may be accentuated with patina — applying dark paint into the recesses of the ornament, creating an aged effect and depth of relief.
Supply air vents behind window casings
Supply ventilation is often organized through window vents — devices built into the upper part of the window frame or into the wall above the window. The vent has an external grille protecting against rain and insects, and an internal grille regulating air flow.
In Russian interiors, the internal vent grille is hidden behind a wooden window casing. A 100–150 mm wide casing is installed around the window, covering the joint between the frame and the wall. At the top of the casing, at the height of the vent, a 30–40 mm wide, 200–300 mm long slot is cut for air passage.
The slot is covered by a decorative strip with a 10–15 mm gap, forming an air channel. The strip may be latticed, carved, or profiled. Air passes through the slot, behind the strip, and exits into the room through the gap. The air flow is directed upward toward the ceiling, not causing discomfort to people sitting near the window.
Air flow regulation is performed by a vent flap accessible after removing the strip. The strip is attached to magnets, easily removable for access to the vent control and for filter cleaning.
Kitchen exhaust ducts in wooden casings
The range hood above the stove is connected to the ventilation duct via an air duct with a diameter of 125-150 mm. The air duct is laid openly under the ceiling or behind suspended cabinets to the point of connection to the ventilation duct.
In a Russian interior, an open air duct is covered with a wooden casing styled as a ceiling beam. A 150x150 mm or 200x200 mm casing is clad with 20-25 mm thick boards, painted in the color of ceiling beams or a contrasting dark shade.
The casing is mounted to the ceiling using adjustable-height hangers. Inside the casing, the air duct, wrapped in 10-20 mm thick insulation to prevent condensation, is secured with plastic clamps. Direct metal-to-wood contact is prohibited — it causes vibrations and noise.
The ends of the casing are covered with decorative caps — wooden panels with carved ornamentation or smooth panels. At the point of connection to the ventilation duct, a removable section of the casing is provided for access to the connection and maintenance.
Ventilation of bathrooms through decorative outlets
Exhaust ventilation from bathrooms is discharged into the ventilation duct through an opening in the wall or ceiling with a diameter of 100-125 mm. The opening is covered with a grille equipped with a backflow damper to prevent reverse draft.
In a Russian interior with a bathroom finished with wooden panels, the grille is concealed behind a round or square carved outlet with a diameter of 200-250 mm. The outlet is made from moisture-resistant material — teak, larch, or thermally treated wood — or from MDF with a moisture-resistant coating.
The central part of the outlet is a through hole with a diameter of 120-140 mm, covered with an ornamental lattice of thin crossbars. The ornament creates openings covering 60-70% of the central hole’s area, ensuring free airflow. Behind the outlet, a standard ventilation grille with a backflow damper is installed.
The outlet is mounted to the wall or ceiling with screws whose heads are recessed and covered with wooden plugs. The outlet is coated with a moisture-resistant lacquer in 3-4 layers or with oil suitable for humid environments, protecting against swelling.
Railas a decorative ventilation panel
Decorative slats arranged with a 20-40 mm gap form a ventilated panel covering the air duct, technical casing, or ventilation equipment zone. A panel of 20x40 mm slats with a 60 mm spacing (20 mm slat, 40 mm gap) allows up to 65% airflow, ensuring effective ventilation.
The slat panel is mounted on a frame of 40x40 mm beams fixed to the wall or ceiling. Slats are attached to the frame with concealed-head screws, screwed in from the backside at an angle or through pre-drilled holes, subsequently sealed with plugs.
The slat panel can be horizontal, vertical, or diagonal, forming geometric patterns. Horizontal slats visually expand the space, vertical slats raise the ceiling, diagonal slats create dynamism. Combining slats of different thicknesses and spacing creates a rhythmic pattern, transforming the ventilation panel into a decorative accent.
Slats are painted to match wall color, forming a unified plane, or in contrasting colors to emphasize texture and rhythm. White slats on a dark wall create a graphic grid. Dark slats on a light wall form a strict geometric pattern. Natural wood under lacquer provides a warm, natural texture.
Acoustics: sound without visual noise
Home theater systems, multi-room audio, and background music require speaker placement in living areas. Modern speakers are technological devices with minimalist design, which does not fit Russian interiors. Solution — integrating acoustics into architectural elements or using acoustically transparent screens.
Built-in ceiling speakers behind slat screens
Ceiling-mounted built-in speakers with a diameter of 165-200 mm are installed in the ceiling or under the suspended ceiling. The speaker is directed downward, distributing sound evenly throughout the room. The visible part of the speaker is a circular grille with a diameter of 200-240 mm, usually white or black.
In a Russian interior with a wooden ceiling, the speaker grille is covered with a slat screen. The screen, sized 400x400 mm or 500x500 mm, is assembled from 20x40 mm slats with a 30-40 mm gap. Slats are arranged radially from the center or parallel to each other, forming a grille.
The screen is mounted to the ceiling at a distance of 50-80 mm from the surface using metal brackets or wooden beams. The speaker is positioned behind the screen, and sound passes through the gaps between the slats with minimal loss — the slat screen is acoustically transparent.
The screen is painted to match ceiling beams or highlighted with a contrasting color. A group of 4-6 screens of identical size, symmetrically arranged on the ceiling, creates a rhythmic composition behind which a multi-channel acoustic system is hidden.
Floor-standing speakers in wooden casings
Floor-standing acoustic speakers 900-1200 mm tall are a mandatory element of a quality stereo system. Factory-finished speakers are typically black, gray, or with chrome metal accents — stylistically foreign to wooden interiors.
Solution — manufacturing wooden casings that cover the speakers. The casing is a rectangular box 50-80 mm larger than the speaker’s dimensions, open on the front side. The speaker is installed inside the casing, with the front face containing the drivers either left open or covered with acoustically transparent fabric.
The casing is made from 20-25 mm thick boards or 15-18 mm thick plywood, joined with dowels or screws. The outer surface is veneered with premium wood species — oak, ash, walnut — or painted to match furniture color. The top lid of the casing may be adorned with carved ornamentation, inlays, or applied elements.
The front face of the casing is framed with a 60-80 mm wide frame, within which acoustically transparent fabric in black, gray, or beige is stretched. The fabric is acoustically transparent — it transmits sound without distortion. The speaker behind the fabric is not visible, and the casing is perceived as a piece of furniture — a narrow cabinet, stand, or console.
Built-in wall speakers behind paintings
Rectangular wall speakers sized 300x400 mm or 400x600 mm are mounted in a wall niche 80-120 mm deep. The speaker is covered with a grille upholstered with acoustical fabric.
In a Russian interior, a painting in a frame is placed 30-50 mm in front of the speaker, stretched on a stretcher. The canvas is an acoustically transparent material, transmitting sound frequencies from 80 Hz to 18 kHz with attenuation not exceeding 2-3 dB. The paint layer is thin and does not obstruct sound.
The painting is mounted on adjustable-depth hangers, ensuring a gap between the canvas and the speaker. The hangers are metal and invisible from the room’s side. The painting should have a dense paint texture that conceals the speaker — abstract, impressionist, or ornamental compositions. Subjects with sharp outlines are unsuitable — the speaker grille is visible through them.
The frame of the picture is made of wood 60-100 mm wide, painted or gilded in the tradition of Russian icon frames. The heavy, bulky frame additionally masks the technical purpose of the composition, transforming the speaker into a work of art.
Subwoofer under the bench or in a chest
A subwoofer — a low-frequency speaker reproducing frequencies 20-120 Hz — is usually made in the form of a cube 400x400x400 mm or 500x500x500 mm. Its placement on the floor disrupts the visual purity of the interior.
In Russian style, the subwoofer is integrated into furniture — a bench, a chest, or a podium. A wooden bench 500 mm high and 500 mm deep with an open space inside becomes the subwoofer’s enclosure. The subwoofer is installed inside, with the front face featuring the driver facing outward.
The front panel of the bench — a slatted grille with 30-40 mm gaps — allows low-frequency sound to pass through. Slats 40x40 mm spaced 70 mm apart create a rhythmic grid, behind which the technical equipment is not visible. The subwoofer operates while remaining invisible.
Alternative — a decorative chest 600x500x500 mm styled as vintage. The chest is made of wood or MDF, covered with carving, wrought metal inlays, and patina. The subwoofer is placed inside, with hidden slots in the lid and sides for sound output.
The chest-subwoofer becomes a functional interior item: a technical device, a storage system (upper compartment above the subwoofer), and a decorative accent. No one will guess that the vintage chest is part of an acoustic system.
Audio wiring in baseboards and moldings
Audio cables with cross-section 2x2.5 mm² are laid from the amplifier to the speakers. In a stereo system — 2 cables to the front speakers. In a 5.1 home theater system — 6 cables to five speakers and the subwoofer. In a multi-room system — dozens of cables to speakers in different rooms.
All cables are laid hidden — in baseboards with cable channels, behind moldings, in boxes, under the floor, behind wall cladding. From the baseboard, the cable rises to the speaker via a vertical molding or behind furniture. For ceiling speakers, cables run through the ceiling void or behind the suspended ceiling.
Where cables pass through wooden elements — beams, studs, cladding — holes 12-15 mm in diameter are drilled, and the cable is threaded through a protective corrugated tube. This prevents cable insulation from being abraded by hole edges and protects the cable.
Cable connections are made in distribution boxes hidden behind removable panels or in niches behind furniture. White plastic boxes 100x100x50 mm are mounted to the wall; cables are connected via terminals or soldering, and connections are insulated with heat-shrink tubing.
Questions and answers
What height should a baseboard with a cable channel have for full communication routing?
For power, internet, TV, and telephone, a baseboard 100-120 mm high with an internal channel cross-section of 25x40 mm is sufficient. A channel of this cross-section can accommodate 5-8 standard-diameter cables. For a more densely equipped system with audio cables and additional lines, a baseboard 150 mm high or a dual-channel baseboard is required.
How to make an invisible access hatch in a wooden wall for access to meters?
A panel made from the same material as the main cladding is cut out, with a hidden 45-degree bevel 2-3 mm wide around the perimeter. The panel is mounted on 4-6 neodymium magnets 10-15 mm in diameter with 3-5 kg holding force each. Panel seams align with cladding seams, and texture and color are matched. The panel is painted together with the cladding.
Can you hide a kitchen hood ventilation duct in a wooden box?
Yes, a box 150x200 mm in cross-section is clad with 20-25 mm thick boards. Inside, a 125-150 mm diameter duct, wrapped in 10-20 mm thick insulation, is placed. The box is styled as a ceiling beam and painted to match ceiling beams. The duct is secured inside the box with plastic clamps without rigid contact with wood to avoid vibration transmission.
How to cover a radiator in a Russian interior?
The radiator is covered by a wooden slatted bench 450-500 mm high. The front panel — a slatted grille 20x40 mm with 30-40 mm spacing — allows air circulation. The top part — a hinged seat on hinges — provides access to the radiator. The screen becomes functional furniture — a seating area with storage inside.
Is it necessary to insulate audio cables when running them through wooden structures?
Audio cables have double insulation; additional insulation is not required. When passing through wooden elements, cables are threaded through a plastic corrugated tube 16-20 mm in diameter to protect against abrasion from hole edges. The corrugated tube is secured with plastic clips, avoiding rigid contact with wood.
How to install ceiling speakers in a wooden ceiling with beams?
Speakers are mounted between beams in the suspended ceiling. The visible grille of the speaker is covered by a 400x500 mm slatted screen made of 20x40 mm slats with 30-40 mm gaps. The screen is mounted 50-80 mm from the ceiling on brackets, allowing sound to pass through the gaps without distortion. The screen is painted to match beam color or a contrasting shade.
What material to use for making service access panels in wet areas?
For bathrooms and toilets, moisture-resistant MDF, teak, larch, or thermally treated wood is used. The panel is coated with 3-4 layers of moisture-resistant lacquer or oil suitable for wet areas. A silicone sealant is installed around the panel perimeter to prevent moisture from penetrating behind the cladding. Mounting — on stainless steel magnets.
How to organize ventilation for a box housing heating pipes?
Ventilation openings are made in the top and bottom of the box, totaling 200 cm² per kilowatt of radiator power. The openings are framed with decorative grilles or slatted inserts with gaps. Warm air rises from the radiator and exits through the upper openings, creating natural circulation.
How many magnets are needed for secure fixation of a removable 600x600 mm panel?
For a panel of this size, 6-8 neodymium magnets 12-15 mm in diameter and 5 mm thick with 5 kg holding force each are sufficient. Magnets are installed around the perimeter with 200-250 mm spacing. Total holding force of 30-40 kg ensures secure panel fixation and easy opening without special tools.
Are gypsum board boxes suitable for engineering in a wooden interior?
Gypsum board boxes are technically permissible but require wood or MDF cladding to match the style. A gypsum box forms the geometry upon which wooden panels, moldings, and profiles are mounted. An alternative is 12-15 mm thick plywood or OSB boxes with subsequent cladding, which is simpler and faster to install.
Conclusion
A quiet interior is not the absence of technology, but its thoughtful integration into the architectural environment. Russian style provides a rich arsenal of tools to conceal engineering systems: boxes are styled as pilasters and friezes, baseboards become cable channels, service access panels hide behind mirrors and paintings, ventilation ducts are covered with carved screens, and acoustics are embedded into furniture.
Each technical element receives a decorative shell that does not merely conceal its utilitarian function but also enriches the interior. A vertical box for a pipe becomes an architectural pilaster, a horizontal box under the ceiling becomes an expressive frieze, a louvered ventilation panel becomes a rhythmic ornament, a column in a wooden casing becomes a piece of furniture.
The result is a visually clean space where technology operates unnoticed, creating comfort without visual clutter. The interior is perceived as a whole, the gaze glides over wooden surfaces, carved details, natural textures, without being interrupted by wires, pipes, or grilles.
STAVROS Company offers a full range of decorative elements for creating quiet interiors:Moldings for wallsvarious profiles,MDF baseboards with cable channelsfor concealed installation of utilities,railsfor ventilated panels, carved elements for decorating technical nodes. Each element is made from premium wood or quality MDF, can be painted in any color, and adapted to a specific project.
Choosing STAVROS solutions means you get not just decorative strips, but a thoughtfully designed system for integrating engineering into the interior, where traditional forms serve modern technologies, and comfort is achieved without compromising aesthetics.