Article Contents:
- What exactly are people looking for when they talk about light panels for slatted ceilings
- The physics of light on slatted ceilings: why it's important to understand
- The rhythm of slats as a light-shaping tool
- How a light panel changes the perception of a ceiling
- Polyurethane ceiling decor: architectural role in lighting scenarios
- Cornice with a niche for lighting: light as architecture
- Ceiling rosette for a chandelier: when slats recede
- Coffers and frames: geometric zoning with lighting
- How to choose scale and relief pitch: the mathematics of visual balance
- Rule of proportionality
- The Principle of Dominance
- The rule of unified tone
- When minimalism is needed, and when a decorative scenario is appropriate
- Minimalist scenario: light without decor
- Decorative scenario: light as theater
- Transitional scenario: strict modernity
- Errors of light and stucco conflict: analysis of real failures
- First error: spotlights directed upward directly at the rosette
- Second error: stucco cornice on a fine slat rhythm
- Third error: light panel for slatted ceiling next to an ornamental border
- Mistake four: different color temperatures in one space
- Mistake five: chaotic placement of light panels
- Practical combinations: light + decor that work
- Combination 1: wooden slatted ceiling + cornice with niche + island socket
- Combination 2: white MDF slatted ceiling + light panels + simple cornice
- Combination 3: wooden slatted ceiling + coffered frames + coffer lighting
- Installation logic: light and decor are designed together
- STAVROS: light and decor — a systematic solution
- FAQ: Answers to Popular Questions
The ceiling is silent. It is the only surface in the room that a person does not touch with their hands, does not approach closely, and looks at less often than the walls and floor. But it is the ceiling that sets the tone for the entire space. It determines whether the room feels spacious or oppressive, warm or cold, alive or dead.
When light panels for slatted ceilings appear on the ceiling — the space comes alive. When polyurethane ceiling decor is added to them — an architectural story emerges. But between 'comes alive' and 'works as a unified whole' — there is a huge distance. It can only be covered with an understanding of how light and relief interact, enhance, or destroy each other.
This article is about how to think about ceilings systematically. How a light panel becomes an architectural tool, not just a source of lumens. How polyurethane decor becomes part of a lighting scenario, not just randomly glued-on molding.


What exactly are people looking for when they talk about light panels for slatted ceilings?
Before giving answers, it's worth understanding the questions. Search queries on the topic of light panels for slatted ceilings are divided into several semantic groups—and each group reflects a different level of understanding of the topic.
First group: technical queries. 'How to install a light fixture in a slatted ceiling', 'light fixtures in slatted panels', 'light panel size'. These are queries from people who have already chosen a slatted ceiling and are now solving the lighting task. They are thinking about installation, span diameter, and lamp type.
Second group: aesthetic queries. 'Slatted ceiling with lighting photo', 'what does a light insert in a slatted ceiling look like'. These are queries from people looking for inspiration—they want to see the result before making a decision.
Third group: complex queries. 'Light panels for slatted ceilings and decor'—and this is where the real work begins. The person is thinking of the ceiling as a system: light plus architecture, function plus aesthetics. It is precisely this level of understanding that yields the best results.
Batten panels for ceilings— is not just a material. It is a system in which light and relief can work in sync, creating an effect unattainable by any of the elements separately.


The physics of light on a slatted ceiling: why it's important to understand
Light behaves differently on a slatted ceiling than on a smooth surface. And understanding this is the foundation for all design decisions.
Our factory also produces:
The rhythm of slats as a light-shaping tool
A slatted ceiling consists of alternating protruding elements (slats) and gaps or spaces between them. When light falls on such a surface from the side—at an angle to the direction of the slats—each slat casts a shadow on the adjacent one. The relief gains depth, the rhythm becomes more expressive, and the material 'plays'.
When light is directed perpendicular to the ceiling plane—straight down—the slats are evenly illuminated, shadows are minimal, and the relief flattens. The surface loses expressiveness and turns into just a 'striped ceiling'.
This means: the placement of light sources relative to the direction of the slats is a fundamental issue. Downlights in slatted panels, directed strictly downward, neutralize the decorative effect. Side lighting—or lighting directed at an angle—enhances this effect.
Get Consultation
How a light panel changes the perception of a ceiling
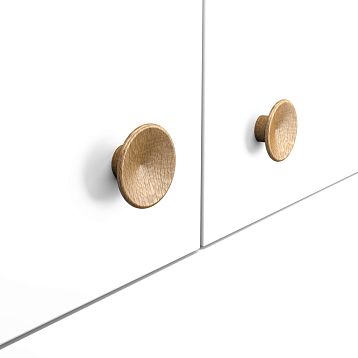
A light panel for a slatted ceiling is a transparent or matte insert element installed in place of one or several slats. Behind it is a light source (usually an LED strip). Such a panel creates a uniform glowing rectangle against a background of dark or wooden slats.
The effect is contrasting. A glowing strip on a dark background visually 'sinks' inward—creating an illusion of space behind the ceiling. This is a psychologically interesting sensation: the ceiling ceases to be a physical boundary; it becomes a 'window' to somewhere else.
Slatted panels with lightingThey are especially effective in wooden variants: warm light passing through a matte panel resonates with the warm hue of the wood. This tonal unity creates a sense of coherence and organicity.
An important nuance: the brightness of the light panel and the brightness of the main room lighting should be comparable. If the light panel is much brighter than the rest of the ceiling, it creates an unpleasant, glaring contrast. If it is much darker, it loses its accent. Dimming and balancing brightness levels are technical tasks that need to be solved before installation.
Polyurethane ceiling decor: the architectural role in a lighting scenario
Polyurethane ceiling decorationThis is a broad category. Cornices, rosettes, coffered frames, borders, decorative belts. Each of these elements, in the context of a slatted ceiling and light panels, plays different roles—and it is precisely the role that determines the appropriateness of the element.
Cornice with niche for lighting: light as architecture
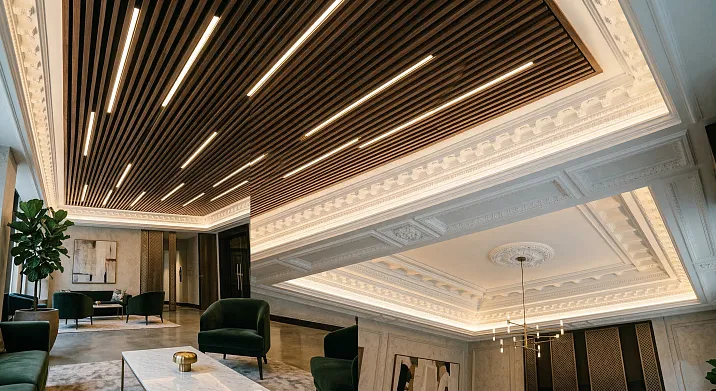
This is one of the most functional and elegant solutions.Polyurethane ceiling decorationIn the form of a cornice with a shelf-niche, it allows hiding the LED strip inside and directing the light upward — onto the ceiling plane. The result is a floating ceiling effect: it seems as if the ceiling surface is separated from the walls, hanging in the air.
When such a cornice surrounds a slatted ceiling around the perimeter — a powerful light frame is created. Slatted surface in the center, glowing contour around the perimeter. This technique visually raises the ceiling by 20–30 centimeters in perception — even if the physical height hasn't changed.
Technical requirement: the cornice must be at least 10–12 centimeters away from the ceiling plane so that the LED strip is not visible from below. At the same time, the ceiling slats should not 'bump into' the cornice — a technical gap of 5–8 mm is left between the ends of the slats and the cornice, which is covered by the cornice itself.
Ceiling rosette for a chandelier: when slats step back
Polyurethane moldings on the ceiling under the chandelier— a classic rosette — in the context of a slatted ceiling requires a special solution. Simply sticking a rosette onto the slats is not possible: technically it's incorrect (adhesion is unstable), and visually it's wrong (the rosette 'sinks' into the slatted rhythm, loses its relief).
The correct solution: an 'island' of smooth surface in the center of the slatted ceiling. A small rectangle or circle made of painted MDF or drywall, on which the rosette is placed. The slats either wrap around this island or stop before it. The rosette exists on a clean surface and fully reveals its relief.
If the chandelier has warm light, and behind the ceiling rosette around the perimeter of the 'island' an LED strip is hidden, which illuminates the rosette's relief from below — a theatrical effect is achieved: the relief lives in the light, shadows emphasize the ornament.Wooden slat panelsIn such a composition, they create a natural background against which a classic polyurethane medallion is read as a conscious quote, not as random decor.
Coffers and frames: geometric zoning with lighting
A coffered ceiling is a system of square or rectangular recesses formed by intersecting polyurethane frames. This is an advanced decorative architecture that can be integrated into a slatted ceiling system.
Один из сильных сценариев: реечный потолок покрывает всю плоскость, и поверх реек монтируется кессонная сетка из полиуретановых рамок. Внутри каждого кессона — или световая панель, или гладкая поверхность с точечным светильником. Рейки создают горизонтальный ритм, кессонные рамки создают клетчатую сетку, световые элементы внутри кессонов — равномерное зонированное освещение.
This is a complex and effective solution that requires careful planning. It is important here that the pitch of the coffered grid is a multiple of the pitch of the slatted rhythm — otherwise the grid and the slats will 'argue' in space, creating a visual conflict.
How to choose the scale and pitch of the relief: the mathematics of visual balance
This is the part of the topic that is rarely discussed — but it is here that key decisions are made.
Rule of proportionality
The pitch of the slats and the scale of the decorative element must be proportional. If the slat pitch is 40 mm (center-to-center distance), this is a fine, dense rhythm. A polyurethane cornice with a height of 20 mm against such a background will look like just another element in the fine rhythm — it will not 'switch' the scale. A cornice with a height of 60–80 mm is needed for it to be noticeable as an independent architectural element.
If the slat pitch is 100–120 mm (wide rhythm), a small cornice of 20–30 mm will be lost on the large field. Either a large cornice (80–120 mm) is needed, or a complete rejection of the cornice in favor of a simpler transition.
Rule: the scale of the decor must either significantly exceed the pitch of the slatted rhythm, or be commensurate with it with an exact multiple correspondence. Intermediate solutions are losing ones.
Rule of dominance
In any ceiling composition, one element must dominate. It can be the slatted rhythm — and then everything else is subordinate to it: simple cornices, neutral light inserts. It can be decorative molding — and then the slatted ceiling is present only in a separate area, not competing with the stucco ornament. It can be a light panel — and then the slats and decor exist as a neutral background.
Attempting to make everything dominant at once is a direct path to visual chaos.Wall finishing with slatted panelsand the slatted ceiling already creates a powerful rhythmic character for the space. Adding rich stucco decor on top of this rhythm must be a very conscious step — with a clear understanding of who is in charge here.
Rule of a single tone
The light panel produces light of a specific color temperature. Polyurethane decor is white or painted. Slats are wood, MDF, metal, PVC.
Tonal unity: if the slats are warm (oak, walnut, ash), the light panel should provide warm light (2700–3000 K), and the decor should be painted in a warm neutral white or beige. If the slats are cool (white MDF, metal), the light panel should be cool or neutral white (4000 K), and the decor should be pure white or gray.
Mixing warm slats with cool light creates an unsettling dissonance that is difficult to explain in words but impossible not to notice.
When minimalism is needed, and when a decorative scenario is needed
This is a key choice that defines the entire character of the ceiling. And there is no universal answer — only a contextual one.
Minimalist scenario: light without decor
Minimalism is when every element is extremely functional, and decor is replaced by precise material selection and perfection of details. In a minimalist scenario for a slatted ceiling:
-
Light panels are integrated into the rhythm of the slats—they do not protrude beyond the general plane and do not create additional relief.
-
No molding along the perimeter—only a simple corner cornice-bead to conceal the technical gap.
-
LED strip in the gaps between slats—uniform lighting without accent spots.
-
The color of the slats and light panels is uniform or similar.
slatted panels for wallsIn this scenario, they continue the ceiling's logic onto vertical surfaces. The space becomes a unified rhythmic statement—from floor to ceiling.
For which spaces is this scenario optimal? For home offices, for kitchen work zones, for bathrooms, for hallways, for bedrooms in modern styles (minimalism, Scandinavian, Japanese wabi-sabi).
Decorative scenario: light as theater
A decorative scenario is when the ceiling is the central artistic statement of the room. These are living rooms in classic and modern classic styles, formal entryways, dining rooms with high ceilings, libraries.
In a decorative scenario:
-
The slatted ceiling occupies a specific zone or the entire ceiling but is made from a material with expressive texture—oak, walnut, tinted ash.
-
Around the perimeter — a polyurethane cornice with a niche for lighting. The light is directed upward, onto the ceiling plane. The floating ceiling effect works as an architectural technique.
-
In the center — an 'island' of smooth surface with a ceiling rosette for a chandelier. The rosette is chosen large — 40–60 cm in diameter, with rich relief.
-
Light panels for a slatted ceiling are installed symmetrically, creating rhythmic luminous stripes on a wooden background.
Slatted panels in the living room interiorin such a scenario become part of the scenography — a surface that changes the mood when the lighting is switched.
Transitional scenario: strict modernity
Between minimalism and decor, there exists an intermediate scenario — strict modernity. This is a ceiling that has one decorative element and one lighting accent. No more.
For example: a slatted ceiling made of white MDF with background LED strips in the gaps — and one simple geometric polyurethane cornice around the perimeter without ornament, with a clean straight profile. Or: a slatted wooden ceiling without moldings — and one wide light panel above the work area.
In this scenario, the number of elements is limited, but each element is chosen with maximum attention to detail. It is this approach that yields a result that looks 'as if it was meant to be' — effortless, without ostentation.
Errors of conflict between light and moldings: analysis of real failures
Ceiling mistakes are especially painful — they are difficult to correct after installation. Here are the most common conflicts between lighting elements and decor.
First mistake: spotlights are directed upward directly at the ceiling rosette
Upward-facing lights (up-lights) in slatted panels create bright light spots on the ceiling plane. If the ceiling rosette is located directly within such a light spot, the rosette's relief 'burns out,' shadows disappear, and the ornament becomes unreadable. The rosette turns into a white spot on a white background.
Solution: do not direct up-lights toward decorative elements with relief. Illuminate the rosette separately—with side lighting at an angle that emphasizes, rather than destroys, the relief.
Second mistake: a molded cornice on a fine slatted rhythm
installation of slatted panelswith a 30–40 mm pitch creates a very dense rhythmic background. A polyurethane ceiling cornice 50–60 mm high 'drowns' against such a background—it is too comparable in scale to the slats and is perceived as just another element of the fine rhythm, not as an architectural frame.
Solution: on a dense slatted rhythm, either completely abandon the cornice (only a technical cove), or use a cornice 100+ mm high with a simple but large profile.
Third mistake: a light panel for a slatted ceiling next to an ornamental border
A light panel creates a glowing rectangle—a pure, clear, geometric spot. An ornamental polyurethane border next to it is an organic relief, natural forms, a historical quote. Two fundamentally different visual languages in immediate proximity create a sense of incompatibility.
Solution: between the light panel and the decorative border—a neutral zone (smooth surface). Or choose one of the two.
Fourth mistake: different color temperatures in one space
Light panels for slatted ceilings provide 4000 K light (cool neutral), while the chandelier in the center is 2700 K (warm). The ceiling becomes patchy: warm spots alternate with cool ones. Polyurethane decor, which should be white, appears yellowish or bluish—depending on which light source it is under.
Solution: all light sources on one ceiling should be of the same color temperature. If different scenarios are needed (warm evening, cool work mode)—use controllable LED strips with adjustable temperature.
Mistake five: chaotic placement of light panels
Light panels for slatted ceilings are placed where 'more light is needed'—without considering overall symmetry and rhythm. As a result, the ceiling looks as if several holes were randomly cut into it and lit up.
Solution: the placement of light panels is planned simultaneously with the placement of slats, at the design stage. Light inserts should be symmetrical, following the room's grid or the rhythm of furniture arrangement.
Practical combinations: light + decor that work
After analyzing principles and mistakes—specific working solutions.
Combination 1: wooden slatted ceiling + cornice with niche + island pendant light
-
Wooden slat panelsWarm tone (oak, ash) across the entire ceiling.
-
80 mm polyurethane cornice with a niche for warm white (2700–3000 K) LED strip around the perimeter.
-
Central 'island' 60×60 cm made of white MDF with a 40 cm ceiling rosette.
-
Chandelier with warm light 2700 K.
-
No spotlights — only cornice and chandelier.
Result: a warm, lively, cozy ceiling with a distinct architectural character. Wood creates a natural background, the cornice adds a floating effect, and the rosette serves as the focal point.
Combination 2: white MDF slatted ceiling + light panels + simple cornice
-
paintable slatted wall panelsin white — on the ceiling.
-
Three light panels for the slatted ceiling symmetrically, across the rhythm of the slats. Matte diffuser, LED 4000 K.
-
Simple polyurethane cornice with a straight profile (no ornament) around the perimeter.
-
No rosette — only built-in lighting.
Result: a clean, modern ceiling with an emphasis on light. The absence of a central chandelier makes the ceiling airy, and the space appears taller. Perfect for a kitchen, hallway, or home office.
Combination 3: wooden slatted ceiling + coffered frames + coffer lighting
-
Batten panels for ceilingsmade of dark wood.
-
Over the slats — polyurethane coffered frames creating an 80×80 cm grid. The frames are painted to match the wood color.
-
Inside each coffer — a recessed spot with warm light 2700 K.
-
Around the perimeter — a cornice with a niche for perimeter lighting.
Result: a palatial, luxurious atmosphere with modern technological execution. Dark wood, warm light, geometry of coffers — everything works in the same key. Suitable for a living room, library, or formal entrance hall with a height from 2.8 m.
Installation logic: lighting and decor are designed together
A separate section of this topic is the installation sequence. This is a practical story that often determines the result more than design decisions.
Correct sequence:
-
Designing the ceiling assembly as a whole: slats, lighting inserts, cornice, rosette — as a unified system.
-
Installation of the supporting frame for the slatted ceiling, taking into account the locations for installing lighting panels.
-
Wiring installation before mounting slats: cables for light panels, for LED strip in the cornice, for the chandelier socket.
-
Installation of slatted panels with openings left for light inserts.
-
Installation of light panels.
-
Installation of polyurethane cornice — after completing the slatted ceiling, closing the technological gap.
-
Installation of the chandelier socket — on the smooth surface of the 'island'.
-
Connection of all lighting circuits and final dimmer adjustment.
How to install slatted panelsFollowing this sequence ensures that wiring is hidden, light panels fit seamlessly, and polyurethane decor falls into place without improvisation.
The most costly mistake: the slatted ceiling is installed and closed, and only then is it decided to add light panels or hidden lighting. Demolition — labor intensity and cost of new installation.
STAVROS: light and decor — a systematic solution
STAVROS — a manufacturer for whichPolyurethane ceiling decoration— is part of a well-thought-out architectural system, not a set of separate decorations. Cornices with niches for lighting, ceiling rosettes for central chandeliers, coffered frames, and decorative borders—all these products are designed with real application in mind: with an understanding of how light works alongside them.
a wide rangeceiling decoration made of polyurethane— from strict geometric profiles for modern interiors to rich classical forms for formal spaces. Each element is a precise tool developed to work in a specific lighting and architectural context.
If your task is a ceiling where light and decor work as a single whole, STAVROS will provide not only materials but also an understanding of exactly how to apply them. Because a good ceiling is never accidental.
FAQ: Answers to popular questions
Can you combine light panels for a slatted ceiling and a ceiling rosette in one space?
Yes, but under two conditions. First: the rosette must be located on a smooth surface, not on a slatted section. Second: the color temperature of the fixtures in the light panels and the chandelier under the rosette must match.
Which LED strip to choose for a polyurethane cornice next to a wooden slatted ceiling?
For wooden slats, a strip with a color temperature of 2700–3000 K (warm white) is recommended. Brightness—at least 600 lm/m for perimeter lighting in a residential space. Color rendering index CRI—not lower than 90.
Does the presence of light panels affect the acoustics of a slatted ceiling?
Slightly. Light panels made of acrylic or polycarbonate have a harder surface than slats with fabric backing material. If acoustics are critical, special matte diffusers with micro-perforation are used.
At what height of a polyurethane cornice will the LED strip not be visible from below?
The cornice should be positioned 10–15 cm from the ceiling plane, and the tape shelf should be recessed at least 40–50 mm from the lower edge of the cornice. These are standard parameters for most STAVROS cornices with a niche for lighting.
Is it necessary to prime the surface of a slatted ceiling before installing polyurethane decor?
If the decor is mounted on slats — an adhesion primer is mandatory. If on a smooth MDF or drywall surface — a standard acrylic primer before applying mounting adhesive. Without primer, adhesion decreases by 30–40%.
How to calculate the number of light panels for uniform illumination?
One standard-size light panel (600×600 mm) with an LED strip of 1200 lm/m provides illumination for an area of about 3–4 m² with a ceiling height of 2.5–2.7 m. For comfortable task lighting (300 lux), calculate one panel per 3 m² of room area.