Article Contents:
- Why restoration is more important than replacement
- Condition assessment: where to start restoration
- Inspecting wooden baseboards
- Inspecting antique mirrors
- Restoring wooden baseboards: step by step
- Dismantling and labeling
- Cleaning and treatment
- Strengthening and restoring integrity
- Recreating the profile: how to copy an antique baseboard
- Patination: how to make a new element look old
- Restoring antique mirrors: working with delicate objects
- Restoring the mirror surface: is it possible?
- Restoring the wooden mirror frame
- Assembly and final finishing
- Recreating lost elements: when restoration is impossible
- Research and design
- Making historical copies
- Copying carvings and profiles: techniques and tools
- Taking a copy from a historical sample
- Hand carving: indispensable for complex elements
- Patination of new elements to look antique: the art of deception
- Multi-layer toning
- Mechanical creation of signs of aging
- Final treatment
- Installing restored elements
- Installing baseboards
- Installing the mirror
- Frequently Asked Questions
- Conclusion: preserving history through restoration

There are houses where history lives. Pre-revolutionary mansions with stucco on the ceilings, estates with carved window frames, merchant wings with parquet floors assembled by hand.Old wooden skirting boardsIn such houses, they are not just functional elements, but witnesses of an era when every detail was created by craftsmen with soul.An antique mirror in a frameMade of carved oak or gilded linden solid wood — a work of art that reflected the life of generations.
Restoring such houses requires not just skill, but a deep understanding of historical context, knowledge of ancient technologies, and respect for what past masters created. You cannot simply replace an old baseboard with a new one from the store — the harmony will be disrupted, and authenticity will disappear. You cannot throw away a darkened mirror with cracks — it is a memory that can and should be preserved.


Why restoration is more important than replacement
The modern construction market offers thousands of options for baseboards, architraves, and moldings. But none of them can replace a genuine element that is a century old. Why?
Historical value.Old wooden baseboardFrom a pre-revolutionary mansion — it is an artifact. Wood that is over a hundred years old, dried naturally, processed with tools that no longer exist today. A profile carved on 19th-century machines has unique features — slight inaccuracies that give the product a liveliness, distinguishing handmade work from industrial stamping.
Authenticity of material. In old houses, they used wood species that are rare or unavailable today. Karelian pine with a dense, fine-grained structure, Siberian cedar with an aroma that lasts for centuries, oak that grew under conditions that no longer exist. Replacing an old element with a modern one is replacing an original with a copy, even if it is of high quality.
Uniqueness of processing. Carpenters of the past worked by hand or on primitive machines that left characteristic marks. Modern CNC milling machines provide perfect geometry and absolute repeatability. This is good for mass production but kills individuality. Antique items have slight irregularities that create a play of light and shadow, making the element come alive.
Patina of time. Wood that has lived in a house for a hundred years has a special color, texture, and noble wear. New wood, even artificially aged, cannot fully reproduce this depth. The patina of time is not just a dark coating; it is a multitude of microscopic changes in the wood structure that create a unique visual effect.
Restoration allows preserving all of this, extending the life of genuine elements, and passing them on to future generations not as a museum exhibit, but as a functional part of a living house.


Condition diagnosis: where to start restoration
Before starting work, it is necessary to thoroughly examine all elements subject to restoration. Assess the degree of damage, determine what can be saved, what requires reinforcement, what is irretrievably lost and needs to be recreated.
Our factory also produces:


Inspection of wooden baseboards
Old baseboards suffer from time, moisture, mechanical damage, and insects. Typical problems:
Rot. The lower part of the baseboard, in contact with the floor, is especially vulnerable. If the house had high humidity, leaks — the wood could have started to rot. Rot is determined by pressing: if the wood is soft and gives way under finger pressure — it is affected. Small areas of rot can be removed, and healthy wood can be treated with antiseptics. If the rot is deep, affecting more than half the thickness of the baseboard — that section will have to be replaced.
Cracks. Wood dries out over time, and cracks appear along the grain. Small hairline cracks are not critical; they are part of natural aging. Deep cracks, splits that run through the entire baseboard — are a serious problem. They need to be reinforced: filled with epoxy resin mixed with wood flour, tightened with hidden dowels.
Signs of wood-boring beetles. Small round holes 1–2 mm in diameter, wood flour (dust) under the baseboard — signs of beetles. If the beetles are active (fresh dust) — treatment with insecticides is necessary. If the infestation is old (holes are dark, no dust) — the beetles are gone, and the wood needs to be strengthened with impregnation.
Mechanical damage. Chips, dents, worn corners. Minor defects are filled with putty; major ones are restored with inserts of suitable wood.
Loss of fragments. Often in old houses, baseboards are partially lost: removed during renovations, broken, rotted. These sections need to be recreated, replicating the historical profile and wood species.
Get Consultation
Inspection of antique mirrors
An old mirror in a wooden frame— is a complex restoration object, consisting of two parts: the mirror glass itself and the frame.
Mirror glass. Old mirrors (before the mid-20th century) were made using the amalgam method: a layer of mercury or silver was applied to the glass. Over time, the amalgam oxidizes, and black spots, cloudiness, and wear appear. If the damage is local (spots on the edges, in the corners) — the mirror can be preserved; this is part of its historical appearance. If the amalgam has flaked off over a large area — the mirror glass will have to be replaced, preserving the frame.
Frame. The wooden frame suffers from the same problems as baseboards: rot, cracks, chips, loss of fragments. But frames have specifics: they often have complex carvings, gilding, and multi-layered paint. Restoring such elements requires the highest qualification.
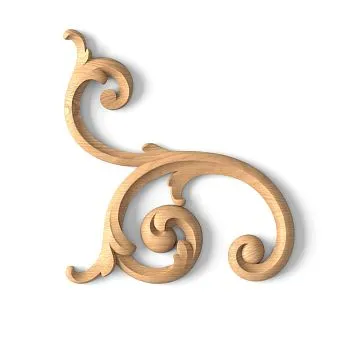
Carved elements. Scrolls, leaves, rosettes, garlands — the carved decor of frames is often damaged: fragments are chipped, details are worn away. Restoring carvings is a jeweler's work, requiring knowledge of historical ornaments and mastery of hand-carving techniques.
Frame coating. Old frames could be gilded (with gold leaf or imitation), silvered, painted with oil paints, or varnished. Layers of coating accumulate over decades, creating a complex structure. The restorer's task is to decide what to preserve, what to remove, how to restore the original appearance without losing historical authenticity.
Restoration of wooden baseboards: step by step
Demolition and marking
The first stage is careful demolition of the baseboards. You cannot simply rip them off — you can split or break weakened sections. You need to find the attachment points (nails, screws), carefully remove them or cut them flush, and remove the baseboard without applying excessive force.
Each removed element is marked: the room, wall, and fragment number are labeled. This is critical for subsequent installation—the baseboards must return to their exact places, especially if the house is uneven or the walls have deviations (typical for older buildings).
Cleaning and Treatment
Removed baseboards are cleaned of dust, dirt, and old coating (if it is damaged and cannot be preserved). Soft brushes, scrapers, and, if necessary, solvents for removing old varnishes and paints are used. Work must be done delicately to avoid damaging the wood.
After cleaning, treatment with deep-penetration antiseptics follows. Modern compounds kill fungus and mold, prevent beetle infestation, and do not alter the color or structure of the wood. The baseboard is impregnated and dried naturally (not with a hairdryer or in direct sunlight to prevent cracking).
Strengthening and Restoring Integrity
Cracked areas are reinforced with epoxy resin mixed with wood dust of the same color. The resin fills the crack, and the wood dust masks the repair. After curing, the repaired area is sanded flush.
Chips and dents are filled with wood putty. Two-component epoxy-based compounds are preferable—they are stronger and do not shrink. The putty is applied with excess, and after drying, it is sanded to match the baseboard's shape.
Lost fragments are recreated. If a small section is missing, it is cut from a similar wood species, fitted to the profile, and glued in. If an entire meter of baseboard is lost, a copy is made by replicating the historical profile on a milling machine or by hand.
Recreating the Profile: How to Copy an Antique Baseboard
HistoricalWooden baseboardsbaseboards often have unique profiles not found in modern catalogs. How to reproduce them?
Taking the Profile. A profile template (comb) is used: a set of thin metal or plastic plates pressed against the baseboard's end to replicate its shape. The resulting contour is transferred to paper, digitized, and serves as the basis for making a milling cutter or for manual processing.
Making the Cutter. For milling a unique profile, a special cutter—a tool bit replicating the baseboard's contour—is made. This requires lathe work and precision to tenths of a millimeter. The finished cutter is installed on a milling machine to process a blank from the same wood species.
Manual Processing. If the batch is small (a few meters), the profile can be carved by hand using planes, chisels, and wood files. This is time-consuming and requires skill but allows for the most accurate replication of the historical form, preserving the slight irregularities characteristic of antique items.
Patination: How to Make a New Element Look Old
A new baseboard fragment, even if it precisely replicates the profile, looks out of place next to old sections. It needs to be aged, given a patina.
Mechanical Aging. The surface is treated with metal brushes (brushing), which remove soft fibers, leaving the hard ones. This creates a relief that mimics natural wear. Corners are slightly chipped, and small dents are made (with an axe, chain)—this imitates mechanical damage from a century ago.
Chemical Toning. Stains, oils with dark pigments, and iron sulfate-based compounds are used (tannins in the wood react with iron, producing a noble gray-brown hue). Toning is applied unevenly: more in recesses, less on protrusions—creating an effect of natural darkening.
PatinationPatina Application. Dark patina (bitumen, acrylic) is applied into the profile recesses, ends, and cracks. Excess is wiped off with a soft cloth. The patina remains in the recesses, creating the illusion of accumulated dust and natural darkening over the years. The effect is enhanced if a thin layer of light wax is applied over the patina—as was done in old houses.
Restoration of Antique Mirrors: Working with Delicate Objects
Restoration of the Mirror Pane: Is It Possible?
The amalgam coating applied in the 19th or early 20th century degrades irreversibly. The process can be halted, but restoring lost amalgam areas at home or even in professional workshops is extremely difficult, nearly impossible. Modern re-amalgamation methods require special equipment and toxic materials (mercury), making the process unprofitable and hazardous.
Solution: If the amalgam spots are small and located along the edges, they can be left as part of the mirror's history. Many antique enthusiasts consider such defects noble, emphasizing the item's age. If the damage is significant, the mirror pane is replaced with a modern one, but the frame is preserved and restored.
Restoration of the Wooden Mirror Frame
The frame of aof an antique mirror—often a masterpiece of carving, a complex construction with many parts. Frame restoration involves several stages.
Disassembly. If the frame is composite (glued or assembled with tenons from several parts), it is carefully taken apart. Old glue is softened with water or steam (animal glue, used in the past, dissolves with heat and moisture), and the parts are separated. Each part is marked for subsequent correct reassembly.
Cleaning. The frame is cleaned of dust, dirt, and layers of old coatings (if required). For cleaning carved elements, soft brushes, toothpicks, and cotton swabs are used. The work is meticulous: every recess, every curl must be cleaned but not damaged.
Strengthening the Wood. As with baseboards—cracks are filled, chips are restored. But the work is finer: the frame has small parts, delicate carving; any roughness will be noticeable.
Restoration of Lost Carved Elements. If a fragment of the carving is broken off (a leaf, curl, part of an ornament), it is recreated. The carver studies the preserved sections, determines the style, dimensions, and proportions. The missing element is carved from a similar wood species (often linden or walnut—best suited for fine carving), fitted, and glued in. After toning, the insert becomes indistinguishable from the original.
Restoration of the finish. If the frame was gilded — it is decided whether to restore the gilding. Full restoration requires gold leaf, special primers, and the skill of a gilder. An alternative is conservation of the existing gilding: reinforcing flaking areas, light tinting of losses, and a final protective coating.
If the frame was painted — the composition and color of the paint are analyzed. Historical paints (oil, tempera) have a special hue that is difficult to replicate with modern acrylics. Professionals use traditional pigments, binders, and application techniques so that the new finish does not differ from the old one.
Assembly and final finishing
The restored frame parts are assembled back together. Wood glue is used (preferably animal-based — it is reversible, allowing the frame to be disassembled in the future if re-restoration is necessary). Joints are reinforced with splines and dowels. The assembled frame is clamped with clamps until the glue is completely dry.
After assembly — final finishing: sanding of joints (if required), tinting, application of a protective coating (wax, oil, shellac — depending on historical authenticity).
The mirror glass (the old one, if preserved, or a new one) is installed into the frame. Fastening is traditional: wooden beads or metal holders that do not disrupt the historical appearance.
Recreation of lost elements: when restoration is impossible
Sometimes elements are completely lost: an entire wall of a house is left without baseboards, a mirror survives only in a photograph. In such cases, not restoration but recreation is required — manufacturing a copy based on historical analogues.
Research and design
The first stage is historical analysis. Preserved fragments in other parts of the house are studied. Photographs (if available) are analyzed. Similar houses from the same period, region, and style are researched. Consultations with architectural historians and art historians are held.
Based on the collected data, a project is created: drawings, sketches, 3D models. The profile of the baseboard, the form of the carving, the wood species, and the finish are determined. All decisions are historically justified — one cannot invent; the original must be recreated.
Manufacturing historical copies
Stavros Companyhas unique experience in recreating historical interiors: participated in the restoration of the Alexander Palace, the Hermitage, and the Konstantinovsky Palace. The masters of STAVROS possess technologies that allow them to create copies indistinguishable from originals a century old.
Selection of wood. For recreation, the same wood species as the original is used. If the original is made of Karelian pine — Karelian pine is sought. If made of oak — oak of similar density and grain is used. The age of the wood is important: preference is given to old stock, seasoned wood — it is more stable, closer in properties to the historical material.
Processing using old techniques. Modern CNC machines provide perfect precision but kill the liveliness of the piece. For historical copies, a combination is used: the basic shape is cut on a machine, the final processing is done by hand. Carvers work with traditional tools (chisels, gouges), creating those slight irregularities characteristic of pieces from the past.
Wood CarvingIf an element has carved decoration — it is recreated entirely by hand. The carver studies historical samples, replicates the technique, style, and proportions.carved appliqués, moldings with ornament, figured elements — everything is carved as craftsmen did a hundred years ago.
Final processing and aging. The new piece undergoes artificial aging: brushing, tinting, patination, mechanical damage. The goal is not just to make the new look like the old, but to create the illusion of an original that has always been part of this house.
Copying carvings and profiles: techniques and tools
Taking a copy from a historical sample
If an original fragment (baseboard, casing, carved overlay) is preserved somewhere in the house — an exact copy is taken from it.
Direct copying. The simplest method — trace the contour on paper, take measurements with calipers, transfer to the blank, and cut. Suitable for simple profiles without complex carving.
Silicone mold. For carved elements, a silicone mold is made: the original is coated with silicone (two-component, food-grade or technical), which hardens, preserving all details. A copy is cast from this mold using plaster or epoxy resin, which serves as a model for the carver. Or the casting itself is used directly (if the material is suitable).
3D scanning. Modern technology: the original is scanned with a 3D scanner, resulting in a digital model accurate to tenths of a millimeter. Based on this model, a copy is cut on a CNC machine. The method is ideal for complex carved elements that are difficult to replicate by hand.
Hand carving: indispensable for complex elements
Despite modern technologies,hand wood carvingremains indispensable for recreating historical elements. A master carver sees the wood, feels it, works with the grain and direction of the fibers. A machine cuts mechanically; a carver works with understanding.
For carving, traditional tools are used:
-
Chisels (straight, gouges, corner) — for the main work
-
Keykarzy (bent-blade chisels) — for working in hard-to-reach places
-
Skew knives — for fine lines and small details
-
Ceraziki (narrow semicircular chisels) — for working on small elements
The carver works without haste, removing layer by layer, constantly checking against the sample. Any mistake can be critical: an extra millimeter cut off — and the proportion is broken, the element looks different. A carver's professionalism is determined not by speed, but by precision and feel for the material.
Patination of new elements to look antique: the art of deception
A new element, even one perfectly replicating the old form, gives itself away with its freshness. The wood is light, clean, without traces of time. It needs to be aged so that it does not differ from the genuine old elements.
Multi-layer toning
Old wood has a complex color: it's not one shade, but a layering of tones accumulated over decades. This can only be recreated through multi-layer toning.
Base layer. A light stain or tinting oil close to the natural color of aged wood (light brown, ochre, gray-beige) is applied. The wood absorbs the composition, acquiring the first layer of color.
Intermediate layers. 2–3 layers of stains or oils of different shades (darker, cooler, or warmer — depending on the desired result) are applied. Each layer is applied not uniformly, but selectively: with a brush, sponge, or rag, creating unevenness that imitates natural color change.
Accent layer. Dark patina (bitumen, acrylic, oil-based) is applied into the recesses of the profile, on the ends, and in cracks. This imitates the accumulation of dirt, natural darkening in places where light doesn't reach and dust collects.
Mechanical creation of time traces
Besides color, old wood has signs of use: wear, dents, scratches, rounded corners.
Brushing. A metal brush is run along the grain, removing soft layers and leaving hard ones. This creates a relief that imitates natural wear. The intensity of brushing is minimal to avoid overdoing it.
Dents and scratches. Random damage is inflicted with a chain, a bunch of keys, or a small hatchet: dents, impact marks, scratches. This imitates the mechanical impacts the wood has endured over a century. It's important not to overdo it: 2–3 noticeable dents per meter of baseboard is enough. An excess of damage looks artificial.
Rounding corners. The sharp edges of the profile are slightly rounded with sandpaper or a file. This imitates the natural wear that protruding parts are subjected to.
Final treatment
After toning and creating mechanical traces — the final coating. Traditional materials are used:
Wax. Applied with a soft cloth, rubbed into the wood, and polished. Wax creates a soft sheen, protects the wood, and accentuates the patina. Historically, wax was the main finish in old houses.
Shellac. A natural resin dissolved in alcohol. Applied with a brush or pad in several thin layers. Creates a warm amber hue characteristic of antique furniture and interior elements from the 19th century.
Oil. Natural linseed or special wood oils. Penetrate deeply, protect, accentuate the grain, and do not create a film on the surface.
The choice of coating depends on historical authenticity: what was used in the original is also applied in the copy.
Installation of restored elements
After restoration is complete, the elements are returned to their places. Installation must be performed so as not to damage the restored parts, ensure secure fastening, and preserve authenticity.
Installation of baseboards
Restored baseboards are mounted in the same places where they originally stood (remember the markings). Fastening is done using traditional methods: with forged nails (for maximum historical accuracy) or with modern screws, countersunk and concealed.
In old houses, walls are uneven, and baseboards often follow these irregularities. They cannot be forcibly straightened — they can break. The baseboard is carefully pressed, and fastening points are chosen to distribute the load without creating stress in the wood.
Joints in corners, connections of fragments — are executed as carefully as possible. Gaps are filled with wood-colored putty, and joints are toned to be inconspicuous.
Installation of the mirror
A restored mirror is a heavy and fragile object. Installation requires caution and proper fastening.
Frame mounting. The frame is attached to the wall using anchors, dowels, or hooks (depending on the wall type and mirror weight). The fastenings must be reliable, with a safety margin. For heavy antique mirrors (over 20 kg), use at least 4 mounting points.
Moisture protection. An old mirror is sensitive to humidity. An air gap (5–10 mm) is left between the frame and the wall to ensure ventilation. This prevents condensation buildup, which can damage both the frame and the mirror surface.
Final inspection. After installation, the mirror is checked: reliability of fastening, absence of distortions, quality of reflection. The frame is inspected for any damage incurred during installation.
Frequently asked questions
Can baseboards be restored independently?
Simple tasks (cleaning, minor reinforcement, filling small defects) — yes, can be done independently with basic skills. But complex restoration (restoring carving, recreating lost profiles, antiquing patination) requires professional knowledge and tools. Unskilled intervention can irreparably damage a historical element.
How much does restoring an antique mirror cost?
Depends on the complexity of the work. Simple cleaning and reinforcement of a frame without carving — from 5,000 rubles. Restoration of a carved, gilded frame with reconstruction of lost elements — from 30,000 to 100,000 rubles and above. Each case is individual; a specialist's assessment is needed.
How to find a restoration master?
Contact specialized workshops with experience working on historical objects. Ask for a portfolio, examples of completed work. A good restorer is not in a hurry, asks many questions, offers several solution options, and explains their actions. Beware of those who promise fast and cheap — quality restoration requires time and costs accordingly.
Can an old baseboard be replaced with a modern one?
Technically — yes. But this will destroy the historical appearance of the house. A modern baseboard, even a high-quality one, will differ: different profile, different wood, different finish. In a historical house, replacing authentic elements with new ones is a last resort, when restoration is truly impossible.
How to care for restored elements?
Minimally and delicately. Wipe dust with a dry or slightly damp soft cloth. Do not use aggressive cleaning agents or abrasives. Renew the protective coating (wax, oil) every 2–3 years — this prolongs the life of the wood, preserving its color and shine.
What to do if the historical sample has not been preserved?
Research analogues: other rooms in the house, neighboring houses from the same period, museum collections, archival photographs. Consult with architectural historians. Based on the collected data, recreate the element to match the era and style of the house as closely as possible.
Is it mandatory to use historical technologies?
Desirable, but not always mandatory. If a modern technology yields an analogous result without compromising the appearance and authenticity — it can be used. For example, using modern wood glue (PVA or polyurethane) instead of animal glue — provided the strength and reversibility of the joint are maintained.
How to distinguish quality restoration from poor restoration?
Quality restoration is invisible: the restored element looks like an original, the intervention is not conspicuous, the color, texture, and patina are natural. Poor restoration is noticeable: bright patches, unnatural color, rough filler, mismatched profiles, excessive or insufficient aging.
How long does restoration take?
From several weeks to several months — depending on the scope and complexity. Restoring a meter of baseboard without carving — 1–2 weeks. Restoring a carved mirror with reconstruction of lost elements and gilding — 2–3 months. Rushing in restoration is unacceptable: each stage requires time for drying, intermediate checks, and fitting.
Is approval required for restoration if the house is an architectural monument?
Yes, mandatory. Restoration of cultural heritage objects requires approval from monument protection authorities, project documentation, and author's supervision. Unauthorized restoration of a monument is an administrative offense, resulting in fines and an obligation to restore the original condition.
Conclusion: preserving history through restoration
Restoring an old house is not just a renovation. It is an act of respect for the past, for the craftsmen who created these walls, these baseboards, these mirrors. Every preserved element is a living connection to history, to the people who lived here before us.
Old wooden baseboards, restored with love and professionalism, will last another century.An antique mirror, whose frame has been restored according to all the rules, will reflect the lives of new generations, preserving the memory of past ones.
Restoration requires time, resources, and patience. But the result is priceless: you get not just a house, but a space filled with history, where modernity intertwines with the past, where every detail has a soul.
The company STAVROS possesses unique competencies in the field of historical interior restoration.Experience with cultural heritage objects— including the Alexander Palace, the Hermitage, and the Konstantinovsky Palace — enables STAVROS specialists to undertake projects of any complexity.
STAVROS workshops are equipped with both modern high-precision equipment and traditional hand tools. This allows for the recreation of elements of any complexity: from simple baseboards to the most intricate carved panels and furniture.
STAVROS carversmaster all techniques of traditional wood carving. They have studied historical samples in museums, worked with authentic 18th–19th century pieces, and restored lost elements of palace interiors. Each carver is not merely a craftsman but an artist who feels the wood, understands history, and can recreate the spirit of the era.
STAVROS technologists have developed unique methods of patination and artificial aging, allowing new elements to look like genuine antiques. Multi-layer toning, the use of traditional pigments and binders, and manual patina application—all these techniques make copies indistinguishable from originals.
The STAVROS quality control service inspects every product at all stages: from wood selection to final finishing. Only items that meet the strictest standards of historical accuracy and technical perfection leave the STAVROS workshops.
The STAVROS consulting service assists at all project stages: from initial diagnostics and restoration strategy selection to material choice and author supervision of installation. STAVROS specialists work closely with clients, historians, and architects, ensuring a comprehensive approach to preserving historical heritage.
STAVROS is not just a manufacturer of decorative wooden elements. They are guardians of tradition, masters for whom restoration is a calling, not just a job. By entrusting STAVROS with the restoration of your historical home, you receive a guarantee of professionalism, historical accuracy, and unwavering respect for the heritage of the past.
Contact STAVROS—and we will help preserve the history of your home, restore lost elements, and recreate the atmosphere of an era when every detail was crafted with soul and built to last for centuries.