Article Contents:
- Base Preparation: The Foundation of Successful Decor
- Why You Shouldn't Glue Decor onto Unprepared Walls
- How to Properly Prepare a Wall for Decor
- Common Mistakes in Base Preparation
- Why Corners Are the Most Challenging Area
- How to Use Wooden Corner Beads for a Perfect Look
- Internal and External Corners: Different Approaches
- Common Mistakes When Working with Corners
- What Determines the Choice of Material
- MDF Baseboard: Characteristics and Features
- Solid Wood Baseboard: Characteristics and Features
- Which is Easier to Install
- Which is Easier to Maintain
- Recommendations for selection
- Polyurethane Molding in Modern Interiors
- Choosing Adhesive for Polyurethane Molding
- Molding Installation Technology
- Common Mistakes in Molding Installation
- Features of Installation on Different Bases
- Realistic Assessment of Your Own Capabilities
- Tasks You Can Perform Independently
- Tasks Requiring a Professional Approach
- How to Determine Your Limits
- Combining DIY Work and Professional Assistance
- Unity of Style and Materials
- Sequence of Works in Comprehensive Finishing
- Visual Effects with Decor
- Mistakes in Preparation
- Errors during installation
- Mistakes in Finishing
- Regular Maintenance
- Repair and restoration
- Required Tools
- Materials That Determine Quality
- Types of Moldings and Their Application
- Technique for Creating Decorative Panels
- What Glue Is Best for Wooden Baseboards?
- Can You Install Molding in the Bathroom?
- How to Avoid Gaps at Baseboard Corners?
- When Should You Paint Molding — Before or After Installation?
- How Long Should the Glue Dry Before Further Work?
- Can You Glue Baseboards onto Wallpaper?
- What Gap Should You Leave Between the Baseboard and Flooring?
- What Is Better for Sealing Baseboard Joints — Sealant or Putty?
- How to Care for Wooden Moldings?
- Do You Need to Prime the Wall Before Installing Decor?

Anyone who has ever undertaken a renovation knows that sinking feeling of disappointment when the result doesn't meet expectations. The baseboard pulls away from the wall, gaps gape at the corners, the molding cracked just a month after installation. And the most frustrating part — having to redo it isn't because the materials were bad, but because mistakes were made during installation that no one warned about. Decorative finishing is an art that requires not only a creative approach but also a deep understanding of technical nuances. Today, we'll break down all the pitfalls encountered by both beginners and experienced craftsmen, and learn how to avoid them.
Why do some interiors look flawless for years, while others start to 'fall apart' after just a few months? The secret isn't luck, and not always even the quality of materials. The secret is in the details, in those little things that seem insignificant during the work phase but become critical during use. When you decide to perform decorative wall finishing yourself, you take responsibility for every joint, every corner, every millimeter of abutment. And to ensure this responsibility doesn't turn into a headache, you need to arm yourself with knowledge in advance.


Base Preparation: The Foundation of Successful Decor


Why You Shouldn't Glue Decor onto Unprepared Walls
Imagine this situation: you've purchased magnificent moldings, exquisite plasterwork, noble wooden corner pieces. Everything is packed, delivered, unpacked with anticipation and excitement. And now — the moment of truth: you start installation directly over old wallpaper or onto plaster covered in dust and greasy stains. What happens next? That's right — a slow-motion disaster. The decor will start to fall off, not immediately, but gradually, just when you've already celebrated the completion of the renovation.
Preparing the base surface isn't just a recommendation from a manual; it's the cornerstone of the entire process. The wall must be level, dry, clean, and have good adhesion. It sounds simple, but in practice, each of these conditions requires attention.
Surface evenness is the first thing to take care of. Minor wall irregularities may seem insignificant until you apply a straight molding or baseboard profile to it. That's when it becomes apparent that the wall 'plays' in waves, and gaps form between the decor and the surface. These gaps are not a cosmetic defect, but potential points of delamination. Adhesive works optimally only with tight contact between the bonded surfaces.
What to do if the walls are not perfect? There are several options:
- Level the walls with putty — the most correct approach
- Use decor with a more flexible structure
- Apply special mounting compounds with a filling effect
- Combine adhesive and mechanical fastening
Dryness of the substrate is an equally important parameter. Wall moisture should not exceed 8%. In new buildings, this indicator is often exceeded, especially if the house was recently handed over. Installing decor on a damp wall leads to the adhesive not gaining proper strength, and the decorative element itself can deform under the influence of moisture.
Surface cleanliness implies the absence of dust, grease stains, traces of old coatings. The wall must be primed with a composition corresponding to the type of substrate and the adhesive used. Primer performs a dual function: it strengthens the top layer of the wall and improves the adhesion of the adhesive composition.
Our factory also produces:


How to properly prepare a wall for decor
The preparation algorithm can be broken down into several sequential stages:
First stage — surface condition assessment. Apply a straightedge or long level to the wall in several places. Mark areas with depressions and bulges. Tap the wall — a dull sound may indicate voids under the plaster.
Second stage — cleaning. Remove all peeling coatings. If there is wallpaper on the wall — remove it completely in the decor installation area. If there is paint — check its adhesion with a tape test. If necessary, make notches or completely remove the paint layer.
Third stage — leveling. Fill cracks, chips, depressions. Use putty appropriate for the substrate type. After drying, treat the surface with sandpaper.
Fourth stage — dust removal. Go over the wall with a vacuum cleaner or a damp cloth. Allow the surface to dry completely.
Fifth stage — priming. Apply primer with a roller or brush. Wait for complete drying according to the manufacturer's instructions.
Get Consultation
Common mistakes in substrate preparation
One common mistake is neglecting drying time. Each stage requires a pause. Putty must dry for at least 24 hours, primer — from 2 to 6 hours depending on the composition. Haste at this stage negates all further efforts.
Another typical problem is material incompatibility. Gypsum putty does not adhere well to cement plaster without proper preparation. Alkyd primer is not compatible with water-dispersion adhesives. Before starting work, make sure all materials are compatible with each other.
Third mistake — ignoring temperature conditions. Most adhesive compositions and primers are designed to work at temperatures from +10 to +30 degrees Celsius. Outside these limits, chemical reactions proceed incorrectly, and bonding quality decreases.
Corner joining: the main headache for beginners
Why corners are the most difficult place
Corners are the point where several planes converge. And it is here that any inaccuracy becomes obvious. An uneven cut, incorrect angle calculation, curvature of the walls themselves — all this manifests itself with particular clarity at the joints.
The problem is exacerbated by the fact that corners in real rooms are rarely ideal. Theoretically, a room corner should be 90 degrees. In practice, this indicator varies from 87 to 93 degrees, and sometimes deviations are even more significant. This means that a standard 45-degree cut will not give a perfect result.
There are several approaches for working with corners:
Angle selection method. A special tool is used — an angle finder or a bevel gauge. The angle is measured and divided in half. It is at this angle that the cut of both joining parts is made.
Trial joint method. Several trial cuts are made on material scraps at different angles. The optimal option is selected, which is then applied to the working parts.
Joint concealment method. Instead of precise angle fitting, overlay elements are used — corner rosettes, decorative corners, or special connectors.
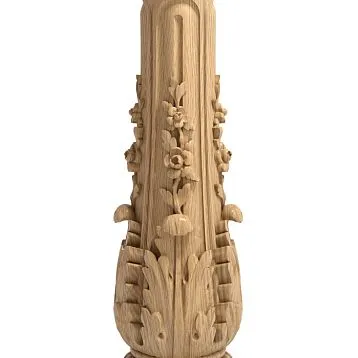
How to use wooden corners for a perfect appearance
Wooden corner bracket— is an elegant solution to the joining problem. Instead of struggling with a perfect cut, you install a decorative corner that simultaneously hides the joint and decorates the interior.
The advantages of using wooden corners are obvious:
- No precise miter cut required — parts are fitted butt-to-butt against the corner piece
- Conceals wall irregularities and installation inaccuracies
- Adds an additional decorative accent
- Simplifies repairs — if damaged, only the corner piece needs replacement
Wooden corner pieces are available in various sizes and profiles. Minimalist corner trims with symmetrical shelves suit modern interiors. Ornate corner pieces with carved patterns are appropriate for classical and neoclassical spaces.
When selecting a corner piece, several parameters should be considered. The shelf size must match the width of the elements being joined. The wood species is chosen to match the main decor's tone. The corner profile should harmonize with the room's style.
Wooden corner installation is performed using various methods:
With adhesive. A universal method for most cases. Construction adhesive or liquid nails are used. The corner piece is pressed against the wall and secured while the adhesive dries.
With nails or screws. Used for significant wall irregularities or high loads. Fasteners are countersunk and concealed with wood filler.
Combined method. Combining adhesive and mechanical fasteners ensures maximum reliability.
Internal and external corners: difference in approach
Internal corners are those forming a recess in the wall. External corners are protruding. The working techniques for them differ significantly.
When finishing internal corners, the main challenge is ensuring tight fitting of both pieces against uneven walls. The 'cold joint' method helps here: first, one piece is installed, then the second is fitted in place considering the actual angle geometry.
External corners are subject to mechanical impacts and require reinforced fastening. In this case, the wooden corner piece serves not only a decorative but also a protective function, preventing chipping and damage to the decor edges.
Typical mistakes when working with corners
First mistake — cutting without checking the angle. Automatically setting the miter saw to 45 degrees without preliminary measurement of the room's actual angle.
Second mistake — ignoring the cutting direction. When working with profiled elements, it's important to correctly orient the piece on the machine. Internal and external corner cuts are made in opposite directions.
Third mistake — lack of material reserve. Corners are where the probability of error is highest. It's necessary to have spare material for redoing unsuccessful elements.
Fourth mistake — incorrect sequence. Many start installation with corner elements, which complicates fitting. A more correct approach is to start from the corner but with straight sections, leaving the corner for the final stage.
Fifth mistake — neglecting finish treatment. Even with perfect fitting, the joint requires sealing. Acrylic sealant, matched to the decor color, allows making the joint completely invisible.
Choosing baseboard: MDF or wood
What determines material choice
Floor baseboard is an element combining functionality and aesthetics. It closes the expansion gap between the floor covering and the wall, protects the lower part of the wall from dirt and mechanical damage, and forms a finished interior appearance.
Baseboard MDFMDF and solid wood baseboard are two main options for quality finishing. Each has its advantages, and the choice depends on specific operating conditions, budget, and aesthetic preferences.
MDF baseboard: characteristics and features
MDF (medium density fiberboard) is a medium-density fiberboard. The material is obtained by pressing wood fibers with binding agents. The face surface of MDF baseboard can be covered with:
- Melamine film with decorative pattern
- Natural veneer of valuable wood species
- Primer for painting
- Factory-applied paint coating
Advantages of MDF Skirting Boards:
Geometric stability. MDF hardly reacts to changes in humidity and temperature under normal living conditions. The skirting board does not warp, crack, or lose its shape throughout its service life.
Smooth surface. MDF has a homogeneous structure without knots or resin pockets. This ensures a perfectly even surface for painting and prevents defects from showing through.
Wide range of profiles. The manufacturing technology allows for skirting boards of any configuration—from simple rectangular to complex multi-step profiles.
Affordable price. With a comparable appearance, MDF skirting boards are cheaper than solid wood counterparts.
Easy installation. The material is easy to cut, does not require special tools, and adheres well with standard adhesives.
Limitations of MDF Skirting Boards:
Sensitivity to direct water contact. Under prolonged exposure to moisture, MDF swells and deforms. This limits its use in bathrooms and other damp areas.
Lower mechanical strength. MDF is less resistant to impact loads compared to solid wood. Under strong mechanical stress, dents form on the surface, which are difficult to repair.
Difficulty in restoration. Damaged sections of MDF skirting boards are practically impossible to restore—the entire element must be replaced.
Solid Wood Skirting Boards: Characteristics and Features
Wooden skirting boards are a classic finishing element, tested over centuries. Solid wood products possess unique qualities unavailable to artificial materials.
Advantages of Wooden Skirting Boards:
Natural beauty. The texture of wood is unique. Each skirting board has an individual grain pattern, creating a special atmosphere in the interior.
Eco-friendliness. Solid wood is a completely natural material without synthetic additives. It does not emit harmful substances and creates a healthy microclimate.
Durability. With proper care, wooden skirting boards last for decades. Over time, they only acquire a noble patina.
Repairability. Scratches and minor damage can be sanded and refinished with varnish or oil. The skirting board regains its original appearance without complete replacement.
Prestige. Wooden skirting boards are visually and tactilely perceived as a premium finishing element.
Limitations of Wooden Skirting Boards:
Sensitivity to humidity. Wood is a hygroscopic material. Under sharp fluctuations in humidity, the skirting board may deform.
Need for protective treatment. To ensure durability, wooden skirting boards require coating with varnish, oil, or wax.
Higher cost. High-quality skirting boards made from solid valuable wood species are more expensive than MDF counterparts.
Demanding installation. Working with solid wood requires a more careful approach: pre-acclimatization of the material, humidity control during installation.
Which is Easier to Install
From an installation perspective, MDF skirting boards are somewhat easier to work with. They are lighter, more stable, and do not require special preparation. However, with basic skills, the difference in installation difficulty is minimal.
Features of Installing MDF Skirting Boards:
- The material is cut with a regular fine-toothed saw or jigsaw
- Cut ends are recommended to be treated with primer for moisture protection
- Installation is done with adhesive, clips, or screws
- Joints are sealed with color-matched acrylic sealant
Features of installing wooden skirting boards:
- Before installation, the material should be acclimatized in the room for 48-72 hours.
- Cutting is performed with a fine-toothed saw to avoid chipping.
- Mechanical fastening with pre-drilled holes is preferred.
- Screw heads are countersunk and concealed with wood filler.
Which is easier to maintain
In daily use, both materials perform well when usage conditions are observed.
MDF skirting boards require no special care. Periodic wet cleaning and protection from direct water exposure are sufficient. However, repairs are difficult if damage occurs.
Wooden skirting boards need periodic renewal of the protective coating (every few years). However, minor defects can be easily fixed locally, and if necessary, the skirting board can be fully restored.
Selection recommendations
Choose MDF skirting boards if:
- The budget is limited, but a quality result is required
- The room is dry and not subject to temperature fluctuations
- Painting the skirting board a specific color is intended
- Speed and simplicity of installation are important
Choose solid wood skirting boards if:
- Interior is designed in a classic style
- The flooring is parquet or solid wood boards
- Eco-friendliness and natural materials are important
- Long-term use with possible restoration is intended
Molding: nuances of installing polyurethane elements
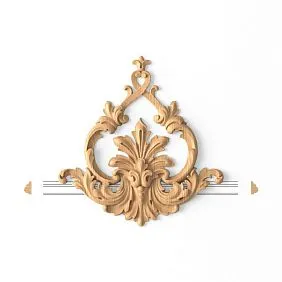
Polyurethane molding in modern interiors
MoldingsPolyurethane molding has firmly entered the arsenal of modern designers and finishers. This material allows creating complex decorative elements—cornices, rosettes, moldings, pilasters—at a relatively low cost and with accessible installation technology.
Polyurethane is a foamed plastic with a closed-cell structure. Quality products have a dense outer layer and a lighter core. This structure provides a balance between strength and lightness.
Advantages of polyurethane molding:
- Light weight—simplifies installation and reduces load on the base
- Moisture resistance—suitable for use in damp rooms
- Precise geometry—factory manufacturing guarantees element uniformity
- Flexibility—some products can be bent for curved surfaces
- Ready for painting—most products come with a primed surface
Limitations of polyurethane molding:
- Artificial origin - unlike gypsum or wood, polyurethane is a synthetic material
- Sensitivity to high temperatures - not recommended to place near heating appliances and lighting elements with strong heat
- Relatively limited selection of classic profiles - the range is inferior to handcrafted gypsum molding
Choosing adhesive for polyurethane molding
Proper adhesive selection is a key factor for successful installation. Universal adhesives are not suitable in this case. A specialized formulation specifically designed for polyurethane is required.
Types of adhesive compositions:
Polymer-based mounting adhesive. Provides strong bonding to various substrates - concrete, brick, drywall. Features high initial adhesion and rapid strength development.
Joining adhesive. Used for connecting elements together - at joints, corners, and connections. Offers increased elasticity and minimal shrinkage.
Universal "two-in-one" adhesive. Suitable for both mounting to substrate and joining elements. A compromise option for small-scale work.
Mistakes in adhesive selection:
- Using PVA glue - insufficient strength and moisture resistance
- Using silicone sealant - poor adhesion to polyurethane
- Using mounting foam - uncontrolled expansion deforms the products
- Using solvent-based adhesives - they destroy the polyurethane structure
Molding installation technology
Quality molding installation requires following the sequence of operations and attention to detail.
First stage - substrate preparation.
The surface must be level, dry, and dust-free. Fresh plaster - dried for at least 7 days. Painted surfaces - sanded to improve adhesion.
Second stage - marking.
Establish a horizontal line using a laser or water level. Determine junction and corner points. Lay out elements on the floor to verify size compatibility.
Third stage - element fitting.
All cuts and miters are made before applying adhesive. Use a miter box or miter saw. Joint quality is checked "dry fit".
Fourth stage - adhesive application.
Mounting adhesive is applied to the back of the element around the entire perimeter and in a zigzag pattern in the central area. Joining adhesive is applied to the end surfaces that will contact adjacent elements.
Fifth stage - installation.
The element is placed against the markings and pressed. Excess adhesive is removed with a damp sponge. Temporary fixation with painter's tape or screws in inconspicuous areas is provided if necessary.
Sixth stage - joint finishing.
After the adhesive dries (typically 24 hours), joints are filled with joint compound or acrylic sealant. Excess is removed, and the surface is sanded with fine sandpaper.
Seventh stage - painting.
Priming is performed before painting. Paint is applied in 2-3 coats with intermediate drying. Acrylic or latex formulations are recommended.
Typical mistakes in molding installation
First mistake — skimping on adhesive.
Insufficient adhesive or using cheap alternatives leads to molding detachment. This is especially critical for ceiling cornices, which are subject to pull-off forces.
Second mistake — installation without acclimatization.
Polyurethane stored in a cold room must be conditioned in the installation environment for at least 24 hours. Cold material bonds poorly and may deform when heated.
Third mistake — ignoring expansion joints.
On long runs and at junctions with different structures, expansion joints must be provided. They are filled with flexible sealant.
Fourth mistake — painting without preparation.
Applying paint directly onto the factory primer without additional treatment often results in uneven coverage and visible seams.
Fifth mistake — not observing drying times.
Each operation requires time. The adhesive must dry completely before sealing joints. Sealant must dry before sanding. Primer must dry before painting.
Features of mounting on different substrates
Different types of substrates require a specific approach.
Concrete. An ideal substrate for molding. Only dust removal and priming are required.
Brick. The surface is often uneven. Preliminary leveling with plaster is recommended.
Drywall. Requires enhanced priming. Large elements are additionally fastened with screws into the stud profiles.
Wood. Mechanical fixation is ensured. Possible wood movement due to humidity changes is taken into account.
Old paint. The surface is sanded. The adhesion strength of the paint to the substrate is checked.
DIY: what you can do yourself and when you need a professional
Realistic assessment of your own capabilities
Performing finishing work yourself is not only a budget saver but also a special pleasure from creation. However, it is important to soberly assess your strength and understand the limits of what is possible.
When working with decorative elements, there are operations accessible to a beginner and those that require professional skill and specialized tools.
Works that can be performed independently
Installation of floor skirting boards.
This is one of the most accessible operations for DIY. Modern fastening systems — clips, adhesive mounting, plastic connectors — make the work intuitive.
What you will need:
- Tape measure and pencil
- Miter saw or miter box with a hand saw
- Drill or screwdriver
- Mounting adhesive or clip system
- Sealant matching the skirting board color
Work sequence:
- Measure the room perimeter and calculate the material quantity with a 10-15% reserve
- Lay out the skirting boards along the walls, determining the optimal joint placement
- Make cuts starting from the most difficult areas (external corners, junctions with doorways)
- Secure the baseboard using the chosen method
- Seal joints and junctions
Installation of simple ceiling cornices.
Lightweight polyurethane or polystyrene cornices with small cross-sections can be installed independently.
Key points:
- Careful horizontal marking
- Precise mitering of corners
- Sufficient amount of adhesive
- Temporary fixation until dry
Installation of wall moldings.
Creating decorative panels from moldings is a creative task feasible for a non-professional.
It is important to observe:
- Accuracy of marking (use a laser level)
- Symmetry of panel placement
- Equal indents from corners and ceiling
Installation of decorative corners.
When usingwooden corner piecesthe task is simplified: there is no need to precisely miter the corners of the joining elements.
Painting of stucco.
Final painting is an operation that does not require special skills but affects the final result.
Recommendations:
- Use high-quality brushes and rollers
- Apply paint in thin layers
- Observe interlayer drying time
- For complex relief, use the 'dry brush' method
Works requiring a professional approach
Installation of multi-level ceilings with stucco.
Complex structures combining drywall, stucco, and built-in lighting require an integrated approach and coordination of several specialties: drywall installer, electrician, decorator.
Restoration of historical stucco.
Working with historical buildings involves special technologies and materials. Non-professional intervention can lead to loss of cultural value.
Installation of heavy decorative elements.
Massive cornices, columns, large rosettes require reliable fastening considering the load-bearing capacity of the base. An error can lead to collapse.
Complex carpentry work.
Manufacturing and installation of wooden panels, frames for decor, built-in furniture — tasks for a qualified carpenter.
Work at height.
Installation of decor at a height of more than 2 meters requires special equipment and safe work skills.
How to determine the limits of your capabilities
There are several criteria that help in making a decision about performing work independently.
Complexity criterion. If an operation requires specialized tools that you do not have and purchasing them is impractical — it is better to hire a professional.
Reversibility criterion. If a mistake is easy to correct (for example, re-gluing a baseboard) — you can take the risk. If the mistake is critical (ruined expensive material, structural damage) — it is worth entrusting the work to a professional.
Time criterion. A professional will complete the work in a day. It will take you a week, including learning and correcting mistakes. Assess what is more important to you — saving money or time.
Responsibility criterion. Work related to safety (electrical, load-bearing structures) must be performed by certified specialists.
Combining independent work and professional assistance
The optimal approach is a reasonable combination of your own efforts and professional help.
You can take on preparatory work:
- Surface cleaning
- Removal of old coatings
- Priming
- Marking
- Purchasing materials
And entrust to the professional:
- Wall Leveling
- Installation of complex elements
- Work requiring special tools
- Finish treatment
Such distribution allows for significant savings on labor costs while maintaining quality in key operations.
Decorative wall finishing: a comprehensive approach
Unity of style and materials
A beautiful interior is not a set of separate elements, but a harmonious composition. When planningdecorative wall finishing yourselfit is important to think in advance about how all decorative elements will combine.
Unity of style is achieved through:
- Coordination of profiles (baseboard, cornices, moldings in the same style)
- Unity of color palette
- Proportionality of elements to the size of the room
- Placement logic (symmetry, rhythm, accents)
Sequence of works for comprehensive finishing
The correct sequence of operations helps avoid rework and damage to already installed elements.
First stage — rough work.
Leveling walls and ceilings, laying utilities, installing drywall structures.
Second stage — installation of ceiling molding.
Cornices, rosettes, decorative beams are mounted before the final finishing of ceilings and walls.
Third stage — wall finishing.
Painting, wallpapering, applying decorative coatings are done taking into account the installed molding.
Fourth stage — wall decor.
Moldings, panels, overlay elements are installed on finished walls.
Fifth stage — flooring.
Laying parquet, laminate, tiles.
Sixth stage — floor skirting.
The finishing touch, masking the joint between floor and wall.
Visual effects with decor
Skillful use of decorative elements allows for adjusting the visual perception of space.
Increasing ceiling height:
- Vertical moldings on walls
- Narrow tall panels
- Light-toned decor
Expanding space:
- Horizontal lines
- Wide cornices on the ceiling
- Mirrors in Decorative Frames
Creating depth:
- Multi-level profiles
- Contrast lighting of molding
- Alternating planes
Adding coziness:
- Wooden elements in warm tones
- Soft profile curves
- Tactilely pleasant surfaces
Common mistakes and how to fix them
Preparation errors
| Mistake | Consequences | Solution |
|---|---|---|
| Installing on a damp wall | Decorative layer peeling, mold appearance | Dry the wall, use dehumidifiers |
| Dust on the surface | Weak adhesive bond | Remove dust, apply primer |
| Uneven base | Gaps between decor and wall | Level with putty |
| Incompatible materials | Coating rejection | Check compatibility in advance |
Installation errors
| Mistake | Consequences | Solution |
|---|---|---|
| Insufficient adhesive | Elements falling off | Apply adhesive generously, over entire surface |
| Inaccurate corner cutting | Gaps at joints | Use decorative corner pieces |
| Lack of fixation | Sliding before drying | Fix with tape, small nails |
| Ignoring shrinkage | Cracks at joints | Fill joints with elastic sealant |
Finishing errors
| Mistake | Consequences | Solution |
|---|---|---|
| Painting without primer | Uneven coating | Prime before painting |
| Thick paint layers | Drips, runs | Apply thin layers |
| Painting over wet sealant | Paint peeling | Allow drying time |
| Using unsuitable paint | Yellowing, cracking | Use specialized compounds |
Care for decorative elements
Regular maintenance
Decorative elements, like any part of the interior, require care. Regular cleaning and timely elimination of minor defects extend service life and maintain aesthetic appearance.
Wooden elements:
- Wipe with a dry or slightly damp cloth
- Avoid direct water exposure
- Periodically renew protective coating (wax, oil)
- Remove scratches with special pencils or stain
Using high-quality Wooden angle and other solid wood products, you get the possibility of restoration throughout the entire service life.
MDF elements:
- Wipe with a damp cloth without excessive wetting
- Avoid abrasive cleaners
- If chips appear — touch up to match the color
Polyurethane molding:
- Remove dust with a soft brush or vacuum with a soft attachment
- Wash with a damp sponge and mild detergent
- Refresh paint as it fades
Repair and restoration
Even with careful use, defects may appear over time. It is important to eliminate them promptly while the damage is minor.
Peeling from the wall:
- Carefully bend back the detached section
- Clean the contact surfaces from old adhesive
- Apply fresh adhesive
- Press and secure until completely dry
Cracks at joints:
- Widen the crack with a V-shaped knife
- Clean from dust and crumbs
- Fill with elastic sealant
- Smooth with a wet finger
- Touch up after drying
Chips and dents:
- Clean the damaged area
- Fill with appropriate type of putty
- Sand after drying
- Prime and paint
Tools and materials: where not to skimp
Essential tools
Quality results are impossible without proper tools. Here is the minimum set for working with decor:
Measuring tools:
- Tape measure (minimum 5 meters)
- Carpenter's square
- Angle gauge or bevel gauge
- Laser or bubble level
- Carpenter's pencil
Cutting Tools:
- Miter box with fine-toothed saw (for beginners)
- Miter saw (for serious volumes)
- Utility knife
- Sandpaper of various grits
Application tools:
- Caulking and adhesive gun for tubes
- Putty knives of different sizes
- Brushes and rollers for primer and paint
- Sponge for removing excess glue
Auxiliary:
- Drill or screwdriver
- Hammer
- Painters' tape
- Mixing containers
- Rags
Materials that determine quality
There is an unwritten rule: saving on materials means saving on results. Quality materials not only ensure durability but also simplify the work.
Adhesives and sealants:
Use compounds recommended by the decor manufacturer. Universal adhesives often do not provide sufficient strength.
Primers:
Choose primer according to the base type. Drywall, concrete, wood — each material has its optimal composition.
Paints:
Quality paint applies more evenly, requires fewer coats, and retains color longer. For decorative elements, acrylic and latex compositions are preferable.
Fillers:
For sealing joints, use specialized compounds with minimal shrinkage and good sandability.
Working with decorative moldings and cornices
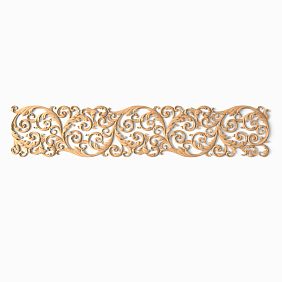
Types of Molding and Their Application
Moldings are a universal tool for creating architectural patterns on flat surfaces. They allow you to divide a wall into sections, frame decorative panels, and accentuate specific areas.
By material:
- Wooden — classic, suitable for any interior
- Polyurethane — lightweight, moisture-resistant
- Plaster — traditional material for classic stucco
- Polystyrene — budget option for painted surfaces
By profile:
- Flat — minimalist frames
- Convex — classic profiles with semicircular cross-section
- Multi-step — complex profiles for rich interiors
Technique for creating decorative panels
One popular application of moldings is creating decorative wall panels. This technique allows you to visually enrich a flat wall without complex plastering work.
Panel creation steps:
- Plan the composition — size, placement, number of panels
- Mark the wall
- Cut moldings to size
- Cut corners at 45 degrees
- Glue moldings according to markings
- Seal joints
- Paint the wall and moldings
Design recommendations:
- Maintain symmetry relative to the center of the wall
- Keep equal indents from room corners
- Consider the placement of furniture and decorative items
- Use contrasting or tonal painting to highlight panels
Frequently asked questions
What is the best glue for wooden baseboards?
For installing wooden baseboards, it is optimal to use polymer mounting adhesives labeled 'for wood' or 'universal'. Such compounds provide strong bonding and allow slight movement with humidity changes. 'Liquid nails' type adhesives are also suitable, but water-based compounds should be avoided as they may cause wood deformation.
Can stucco be installed in a bathroom?
Polyurethane and polystyrene stucco are suitable for wet rooms. Plaster stucco is not recommended for bathrooms without special hydrophobic treatment. Wooden elements are only permissible with quality ventilation and moisture-resistant protective coating.
How to avoid gaps at skirting board corners?
UseWooden corner piecesthat mask joints and simplify installation. If you prefer the traditional method with mitered corners, be sure to measure the actual room angle and make test joints on scrap material.
When should molding be painted — before or after installation?
It is recommended to paint molding after installation and joint sealing. This way you'll get an even coating without visible transitions at joints. The exception is if elements have different textures or colors according to the designer's concept.
How long should glue dry before further work?
Drying time depends on the type of glue, temperature, and humidity in the room. Approximately: initial setting — 15-30 minutes, partial drying — 2-4 hours, full curing — 24-48 hours. Joint sealing and painting should be done after the glue has completely dried.
Can skirting board be glued onto wallpaper?
Technically possible, but not the best option. During subsequent renovation, you won't be able to replace wallpaper without removing the skirting board. Additionally, glue adhesion to wallpaper is weaker than to the wall. It is recommended to install skirting board directly on the wall, and apply wallpaper with an offset.
What gap should be left between skirting board and flooring?
When installing on finished flooring, the skirting board should fit tightly to the flooring surface. The gap between the flooring itself and the wall (under the skirting board) is 8-12 mm for laminate and parquet, 3-5 mm for tile.
What is better for sealing skirting board joints — sealant or putty?
For skirting boards to be painted, it's better to use wood putty or acrylic putty — they sand well and create a smooth surface. For laminated or varnished skirting boards, use sealant matching the surface color.
How to care for wooden moldings?
Regularly remove dust with a dry soft cloth or special brush. Periodically (once a year or as needed) treat the surface with a protective agent — wax, oil, or special wood polish. Avoid using aggressive cleaning agents and excess moisture.
Should the wall be primed before installing decor?
Yes, priming is a mandatory preparation step. Primer strengthens the surface, reduces absorbency, and improves adhesive bond. Choose primer compatible with the wall type and adhesive.
Conclusion: Investing in quality always pays off
The path to a flawless interior lies through attention to detail, adherence to technologies, and use of quality materials. Every mistake made during decor installation manifests over time — in the form of gaps, cracks, peeling. Redoing always costs more than doing the job correctly the first time.
Company STAVROS has been creating decorative elements from natural wood and MDF for many years, meeting the highest quality standards. STAVROS products areBaseboards, moldings, cornices, corner pieces, carved decor, executed with impeccable geometric precision and high surface finish quality.
Quality materials forgive minor installation flaws. A straight skirting board will lay properly even with small wall irregularities. Precisely madeWooden anglewill close joints without additional adjustment. Stable product dimensions ensure perfect joints over large spans.
By choosing STAVROS materials, you choose durability, aesthetics, and ease of installation. This is an investment that will pay off with years of flawless appearance in your interior.
Regardless of whether you plan to performdecorative wall finishing yourselfor hire professionals, the foundation of success is quality materials, proven technologies, and attention to detail. Follow the recommendations from this article, and your renovation will be completed without rework — right the first time and for many years.