


Article Contents:
- Why the kitchen is the most demanding testing ground for decor
- Vertical rhythm and ceiling plasticity: a dialogue of two languages
- Where slatted panels are appropriate in the kitchen: zoning without compromises
- Accent Wall in the Dining Area
- Work zone backsplash: slats or classic?
- Peninsula and bar counter: slatted end panels
- Wall opposite the window: slatted background under upper cabinets
- Ceiling molding in the kitchen: making choices in real-world conditions
- Types of molding for kitchen ceilings
- Combination of slatted panels and moldings: three working concepts for the kitchen
- Concept 1: Classic kitchen interior with a modern accent
- Concept 2: Neoclassical with wood
- Concept 3: Scandinavian with polyurethane cornice
- Combination table: slats and moldings by kitchen styles
- Materials science for the kitchen: what to choose for slatted panels
- Moisture-resistant MDF MR — working standard
- Solid hardwood with proper coating
- Polyurethane — the ideal material for kitchen moldings
- Color as a tool for connecting slatted panels and moldings
- Monochromatic ensemble principle
- Tonal affinity principle
- Contrast principle with a common neutral base
- Proportions and scale: numbers you need to know
- Cornice height vs. room height
- Slat width vs. room scale
- Gap between slats: rhythm and perception
- Rosette: diameter vs. placement zone
- Wall finishing with slatted panels in the kitchen: technical installation nuances
- Wall preparation
- Load-bearing system
- Sealing
- Ceiling molding installation in the kitchen: from cornice to rosette
- Cornice installation order
- Corners are the most challenging area
- Socket: center and mounting
- Kitchen lighting with slatted panels and molding: three levels
- Level 1: General lighting
- Level 2: Task lighting above the cabinet
- Level 3: Accent lighting on the slatted wall
- Mistakes when combining slatted panels and ceiling molding
- Mistake 1: Ornamental slats + ornamental molding
- Mistake 2: Different color temperatures of lighting
- Mistake 3: Molding before installing slat panels
- Mistake 4: Too large an outlet for a small kitchen
- Mistake 5: Wooden slats in the stove area
- Mistake 6: Ignoring the baseboard and molding between slats and cabinetry
- Mistake 7: Cornice without primer before painting
- Practical tips for integrating two decorative systems
- Tip 1: Unified finish tone
- Tip 2: Start from the ceiling
- Tip 3: Samples under real lighting conditions
- Tip 4: Don't skimp on finishing elements
- Tip 5: Test cleaning before installation
- Cost of a comprehensive solution: kitchen with slats and molding
- FAQ: popular questions about combining slatted panels and molding in the kitchen
- About the Company STAVROS

There is a type of interior solution that evokes admiration in some and confusion in others. When a kitchen simultaneously features vertical wooden slats on the wall and classical plasterwork on the ceiling—it's either a masterpiece or a jumble. The difference lies in understanding the principles. Not in budget, not in square footage, not in 'expensive materials.' Precisely in understanding how two strong decorative elements can speak in one voice, rather than talking over each other.
Slatted panels in the kitchen interior and molding on the ceiling—this is a combination that at first glance seems complex. The natural rhythm of wood and the architectural plasticity of ornament. A modern material and a classical tradition. But it is precisely this tension between two decorative languages—when properly managed—that gives birth to an interior that is not forgotten.
How does it work? Where in the kitchen should slats be, and where should molding be the main voice? What mistakes does this combination not forgive? We'll break it all down—concretely, with numbers and specific solutions.


Why the kitchen is the most demanding testing ground for decor
The kitchen differs from any other room in an apartment in that here, decor must be functional. This is not just a nice statement—it's a strict technical limitation.
Temperature fluctuations from +20°C to +80°C near the stove. Constant humidity: boiling water, steam, condensation. Grease aerosols settling on any surface. Mechanical contact—shoulders, backs, hands with dishes. And with all this—the kitchen must also be beautiful, warm, conducive to conversation at the table.
This is precisely why choosing a decorative solution for the kitchen is not a matter of taste. It's a matter of materials science. A mistake in material in the kitchen announces itself in six months: peeling coating, yellowing, deformation, mold in the gaps.
slatted panels in kitchen interiorsWith the right choice of material and zoning, this is a solution that withstands kitchen loads.Ceiling moldingPolyurethane ones are too, provided they are placed in the correct zone. Together, they form a toolkit for a kitchen that has both character and lifespan.


Vertical rhythm and ceiling molding: a dialogue of two languages
Before moving on to materials and numbers, it's necessary to understand the architectural logic of the combination.
Slatted panels create a vertical rhythm. Repeating vertical elements—slat, gap, slat, gap—create movement from bottom to top. The gaze 'rises' along the slats. The space is elongated.
Ceiling molding creates a horizontal frame. Cornice, perimeter molding on the ceiling, a central rosette—this stops the gaze on the horizontal plane. The ceiling is 'framed,' gaining a boundary.
When the vertical rhythm of the slats 'meets' the horizontal frame of the molding, an architectural completion arises. Like an exclamation mark at the end of a sentence. The slats 'lift'—the molding 'receives.'
This is the key principle: slats work on the walls, molding on the ceiling. They don't compete because they are in different planes. Competition only arises when both elements start 'shouting' simultaneously: overly ornate slats + overly complex molding. The solution is to make one element accentual, the second a restrained background.
Our factory also produces:

Where slatted panels are appropriate in the kitchen: zoning without compromises
The kitchen is a room with clear functional zones. Each zone interacts with the slatted structure in its own way.
Get Consultation
Accent wall in the dining area
The dining area is the 'safest' place for slatted panels in the kitchen. There is no direct contact with steam from the stove, no oil splashes, no grease aerosols from the work zone. A slatted wall behind the dining table is the 'picture' of the space: a background against which family life unfolds.
Parameters for the dining area: slat width 50–70 mm, gap 12–16 mm, vertical orientation, height from floor to ceiling.Wooden slat panelsOak or ash with UV varnish is the optimal choice for this area: resistance to household stains, warm, living wood grain pattern.
Above the dining area, the ceiling is the place forceiling moldings: a cornice around the perimeter and a socket in the center above the table. Slatted wall + stucco cornice + pendant light above the table — a complete architectural composition.
Work zone backsplash: slats or classic?
The backsplash is the zone of maximum environmental aggression. Splashes, grease, steam, thermal shock from the stove. Wooden slats above the countertop are risky even with proper coating: the joints between slats accumulate grease deposits.
For the backsplash:MDF Plank Panelswith two-component polyurethane coating (hardness 2H–3H on the pencil scale) — provided there is a minimal gap of 6–8 mm with mandatory sealing of joints using neutral silicone. Or — abandon slats in the backsplash area altogether and use porcelain stoneware, tempered glass, stainless steel.
Slatted panels in the backsplash area are only appropriate in kitchens with induction cooktops and good ventilation — where the intensity of grease aerosols is minimal.
Peninsula and Bar Counter: Slatted Ends
The end wall of a kitchen island or peninsula is the perfect spot for a slatted panel. It's a small area (0.6–0.9 m × 0.9–1.1 m high), away from the stove, and clearly visible from the dining and living areas.Wall slat panels in interiorOn the end of the island, they create an accent that 'ties' the kitchen space to the living room into a unified enfilade.
Wall Opposite the Window: Slatted Backdrop for Upper Cabinets
A slatted panel on the wall where the upper wall cabinets are mounted is a non-standard solution. The slats are visible in the space between the cabinets and the countertop (usually 45–55 cm) and above the upper cabinets (up to the ceiling). It creates the feeling that the cabinets are 'built into' the slatted wall, not just hung on it.
Requirement: slats in this zone must be made only from moisture-resistant MR MDF with a hard coating. Wood above the sink or above a steam coffee maker is definitely not an option.
Ceiling Molding in the Kitchen: Choosing in Real-World Conditions
Classical plaster molding in the kitchen is beautiful but complicated. Plaster is afraid of humidity: with regular exposure to steam (especially in the stove area), plaster elements begin to crumble, lose their relief, and can peel off. In kitchens with good ventilation, this is less critical, but it still remains a risk factor.
Ceiling moldingPolyurethane molding is the right choice for the kitchen for three reasons:
Moisture resistance. Polyurethane does not absorb moisture, does not deform with humidity fluctuations, and does not crack with temperature changes. The kitchen is its natural environment.
Lightness. Polyurethane elements weigh 5–7 times less than gypsum ones of similar size. This is crucial for kitchen ceilings (often made of drywall).
Repairability. A damaged polyurethane molding element can be replaced without dismantling the entire structure. Gypsum does not offer such flexibility.
Types of molding for kitchen ceilings
Ceiling cornice (baseboard). Around the perimeter of the ceiling — the transition from the wall to the ceiling plane. Profile height: 55–120 mm depending on kitchen height. For a kitchen with a 2.7 m ceiling — a 60–80 mm cornice. For 3.0 m and above — 80–120 mm.Moldings made of polyurethane— a linear element that visually 'raises' the ceiling and creates a horizontal frame for paneled walls.
Rosette. A central round or square element above the dining table — for a light fixture or as a standalone decorative accent. Diameter: 200–500 mm. Proportion rule: rosette diameter ≤ 1/8 of the room's minimum dimension. For a 3.5×4.0 m kitchen — rosette no larger than 430 mm.
Corner elements. Ready-made corner sections of the cornice — eliminate the need to join flat strips at 45°. Precise corner geometry is guaranteed when using corner elements.
Moldings and friezes. Horizontal strips of ornament or smooth profile, placed on the ceiling parallel to the cornice — for zoning the ceiling plane. In a kitchen with a dining area, a molding framing the area above the table creates a 'ceiling carpet' — a visually defined island.
Combining paneled panels and molding: three working concepts for the kitchen
Concept 1: Classic kitchen interior with a modern accent
Walls:Slatted panels in the kitchenin the dining table area — MDF in warm white (RAL 9010) or milk tone. Slats 55 mm, gap 14 mm. Load-bearing base in the same white tone. Vertical orientation.
Ceiling: 80 mm polyurethane cornice around the entire perimeter, painted in the same white tone as the slats. Rosette 350–400 mm in diameter above the dining table. Above it — a classic pendant light with brass details.
Kitchen set: fronts in dark graphite (matte) or deep blue tone. Countertop — white quartz.
Logic: white slats and white molding — a unified 'white ensemble' on the ceiling and wall. Dark kitchen set — a contrasting accent. Brass details of the light fixture echo the gold hardware.
This concept is for those who want a modern kitchen with classical dignity. Nothing superfluous — only precise details.
Concept 2: Neoclassicism with Wood
Walls:MDF Plank Panelsin dark walnut tone (RAL 8019 or walnut veneer). Slats 60 mm, gap 16 mm. Height: from floor to start of cornice — continuous slatted plane.
Ceiling: profiled cornice 100–120 mm with ornamental shelf. Molding framing the dining area — rectangle along the perimeter of the zone above the table. Rosette 400 mm for a chandelier in classic style.
Key linking element: the ceiling cornice is painted in the same dark walnut tone as the slats — not white. This is fundamental: dark slats + white molding create contrast. Dark slats + dark molding — a unified space of 'wrapped' surfaces.
Floor: large marble-look tile, light gray. Ceiling: matte white between molding elements.
This concept is for spacious kitchens from 14 m² with ceilings from 2.8 m. Intimate, dark, luxurious — but without vulgarity. Because the details are precise.
Concept 3: Scandi with polyurethane cornice
Walls: slatted panels of natural ash with clear oil — a live wood grain pattern, light warm tone. Slats 50 mm, gap 14 mm. Only the dining wall.
Ceiling: minimalist smooth cornice 55–65 mm made of polyurethane, white. No rosette, no ornament. Just a crisp white transition line.
Cabinetry: white matte fronts. Wooden countertop from the same species as the slats — oak or ash.
Logic: slats are the main accent. The cornice is a laconic 'frame' that shapes the space without competing with the wood.
This concept is for small kitchens up to 10 m². Simple, honest, without unnecessary moves. Scandinavian minimalism with a classic cornice 'threshold'.
Combination table: slats and molding by kitchen styles
| Kitchen style | Tone of slats | Molding type | Stucco tone | Light fixture |
|---|---|---|---|---|
| Neoclassical | Dark walnut, anthracite | Cornice + rosette with ornament | To match the slats or white | Classic crystal chandelier |
| Modern Classic | White, milky | Profile cornice | White | Pendant with brass |
| Scandinavian | Light ash, oak | Smooth cornice | White | Minimalist pendant |
| Loft with classic ceiling | Anthracite, graphite | Cornice without ornament | White or matching slats | Industrial track |
| Tuscan / Provence | Warm oak, beige | Cornice + area moldings | Ivory, taupe | Wrought iron pendant |
| Minimalism | Gray, dark blue | No stucco (or smooth 40 mm cornice) | White | Recessed spotlights |
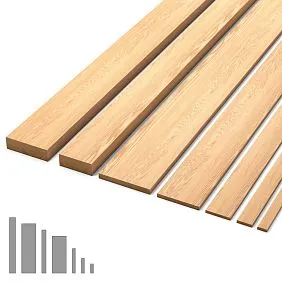
Materials Science for the Kitchen: What to Choose for Slatted Panels
Moisture-Resistant MDF MR — The Working Standard
slatted MDF panelMoisture-resistant MR class — the primary material for kitchen slatted constructions. The green edge when cut is a visual marker of the class. For the kitchen, this is not a recommendation but a requirement: regular MDF begins to delaminate at the edges within 1–2 seasons under kitchen humidity.
Coating for the kitchen: two-component polyurethane varnish or 2K acrylic enamel with a surface hardness of at least H on the pencil scale (optimally 2H). Matte or semi-matte — hides splashes and grease marks better than gloss. Gloss level: 5–20%.
Slat thickness for the kitchen: 18 mm — stronger against mechanical contact than 16 mm. Width: 45–65 mm for the dining area. Gap: at least 12 mm — with a smaller gap, grease deposits accumulate, which are difficult to remove.
Sealing edges and joints: neutral silicone matching the tone of the slats. This is not an aesthetic but a technical step: an unsealed MDF edge at the base of the construction accumulates moisture from floor washing.
Solid hardwood with the correct coating
Wooden slat panelsOak or ash in the kitchen — for the dining area and only with UV varnish: coating hardness 2H–3H, resistance to ethyl alcohol (wine drops, vinegar), cleaning agents with pH 6–8.
Oil coating in the kitchen — only in the dining area, away from splashes. Oil does not form a film — it penetrates the wood. If grease gets into the wood pores without a varnish barrier — indelible stains form.
Exception: thermowood. The pores of thermally modified wood are closed — the material is significantly less hygroscopic than regular solid wood. Thermowood with clear UV varnish in the dining area — acceptable.
Polyurethane is the ideal material for kitchen molding
Polyurethane ceiling decorationcombines characteristics that no other material provides in the kitchen:
-
Zero water absorption: steam environment does not damage the structure
-
Chemical neutrality: kitchen vapors (fat aerosols, vinegar steam during cooking) do not interact with polyurethane
-
Heat resistance: operating range -40°C to +80°C — covers any kitchen conditions
-
Easy installation: glue + acrylic sealant in joints — installation without special tools
-
Repaintability: when changing the concept — repainting with acrylic paint without dismantling
Important:Ceiling moldingmade of polyurethane is not a 'cheap replacement for plaster'. It is a professional material with different characteristics. For the kitchen, it is objectively better than plaster.
Color as a tool for connecting slatted panels and molding
Color is the main 'translator' between the two languages of kitchen decor. It is through color that battens and moldings begin to speak the same language or fall silent in conflict.
Principle of a monochrome ensemble
Battens and moldings in the same tone are a neutral, fail-safe strategy. White battens + white cornice: a unified architectural shell in which all other kitchen elements—the cabinetry, countertop, textiles—become the main characters.
A monochrome white or cream ensemble works in any kitchen from 7 m². It's not boring—it's disciplined.
Principle of tonal kinship
Battens in warm wood (oak, ash) + moldings in ivory or taupe (warm gray). Anthracite battens + moldings in cool light gray. Between the batten tone and the molding tone—one color family, but different lightness.
This is a more complex strategy, but when executed correctly—it gives depth and vibrancy. Tonally related colors create a space with 'atmosphere,' not just with finishes.
Principle of contrast against a common neutral base
Dark battens (walnut, anthracite) + white moldings on a white ceiling. The white moldings are only visible when the gaze has already risen from the dark battens to the light ceiling—these are punches in different weight classes that do not compete.
Important: contrast is only permissible with an even distribution of tonal weight. If battens occupy one wall, and the ceiling is a horizontal plane, they operate in different visual registers. If battens are on all walls (a totally dark room) + white moldings—the ceiling 'detaches' from the walls, creating an unpleasant void.
Proportions and Scale: Numbers You Need to Know
Visual harmony is not intuition. It's mathematics that designers turn into intuition through experience. There are specific rules of proportion for combining slatted panels and moldings.
Cornice height vs. room height
| Ceiling Height | Recommended cornice height |
|---|---|
| up to 2.6 m | 40–55 mm (smooth minimalist profile) |
| 2.6–2.8 m | 55–75 mm (simple profile, moderate relief) |
| 2.8–3.0 m | 75–100 mm (profiled with a shelf or ornament) |
| 3.0 m and above | 100–150 mm (full classical profile) |
A cornice that is taller than the recommended size visually 'lowers' the ceiling—the opposite of the intended effect.
Slat width vs. room scale
In kitchens less than 2.8 m wide — slats no wider than 55 mm. In more spacious kitchens — up to 70–80 mm. Wide slats in a narrow room create a 'stacked' effect — the wall appears closer than it is.
Gap between slats: rhythm and perception
Gap = 25–30% of the slat width — a classic proportion that works in any context. 55 mm slat → 14–16 mm gap. 70 mm slat → 18–20 mm gap. A smaller gap — 'denser', more monolithic, more classic. A larger gap — 'lighter', more airy, more modern.
Pendant light: diameter vs. placement zone
Pendant light over a dining table: diameter = 0.7–0.8 × table width. An 80 cm wide table → 55–65 cm pendant light. This rule ensures proportionality between the 'frame' and the light fixture beneath it.
Wall finishing with slatted panelsin the kitchen: technical installation nuances
Installing slatted panels in the kitchen differs from a bedroom or hallway in several important nuances.
Wall preparation
In the kitchen, walls often have old tiles in the backsplash area, adhesive residue, oil stains. Before installing the slatted structure: mechanical cleaning, degreasing with a solvent, deep penetration primer. Oil stains on the wall — treat with a special isolating primer, otherwise they will 'show through' the supporting structure base.
Load-bearing system
For the kitchen: metal profile PS 60×27 mm — not wooden beams. Wooden beams in the kitchen accumulate moisture and can become a source of mold behind the supporting structure. Metal is neutral, geometrically stable.
Stud spacing: 400 mm. Gap behind the structure: at least 20 mm — for air circulation. Lower and upper ventilation gaps: 10–15 mm. This is crucial: a closed space behind the slatted structure in the kitchen is a potential environment for condensation.
Sealing
All joints of the structure with adjacent surfaces—kitchen cabinets, backsplash tiles, floor—are sealed with neutral silicone matching the material color. Special attention: the joint at the floor (floor washing area) and the joint with the backsplash (splash zone).
Detailed technologyinstallation of slatted panels— from wall preparation to finishing elements.
Installation of ceiling molding in the kitchen: from cornice to rosette
Installationmolded decoration on the ceiling— a faster process than installing slatted panels. Polyurethane elements are lightweight, cut with a fine-toothed handsaw or miter saw, and secured with polyurethane mounting adhesive + finishing nail or screw.
Cornice installation sequence
-
Marking the cornice level with a 360° laser level—a strictly horizontal line around the entire perimeter
-
Applying mounting adhesive to the back of the element—evenly, without gaps at the ends
-
Pressing against the wall/ceiling—hold for 60–90 seconds
-
Securing with finishing nails every 30–40 cm
-
Joints between elements: degrease, apply acrylic sealant, smooth with finger
-
After the glue dries — apply a thin layer of finishing putty to the joints
-
Primer + painting
Corners — the most challenging area
Internal and external corners require precise 45° cuts (miter saw) or the use of ready-made corner elements. Ready-made corners — faster and more accurate for first-time experience. Freehand 45° cuts — only with a saw equipped with a precise angle guide.
Outlet: center and mounting
The center of the outlet must align with the center of the dining table or the axis of the light fixture. Marking: diagonals from the corners of the ceiling rectangle give the exact center. Mounting: mounting adhesive + one central screw (hidden under the chandelier hook or decorative element).
Lighting for a kitchen with slatted panels and molding: three levels
Lighting in a kitchen with two decorative accents (slats + molding) requires a three-level system.
Level 1: General lighting
A chandelier or pendant light fixture mounted in a ceiling socket. Diffuse light that fills the entire room. Color temperature: 3000K for warm-toned materials (oak, walnut), 3500K for neutral tones.
A chandelier over the dining table is the main source. It hangs from a ceiling socket, 'rhyming' with it in style. A classic socket → a classic chandelier. A smooth cornice → a minimalist pendant light.
Level 2: Task lighting above the cabinetry
Recessed spotlights or track lights above the countertop. Independent from the first level — so you can work at the counter without turning on the dining area light.
Level 3: Accent lighting on the slatted wall
Directional spotlights or track lights aimed at the slatted wall in the dining area. A 15–25° beam angle creates vertical shadows in the gaps between the slats — the wall 'comes to life'.Slatted panels with lighting— an LED strip behind the top row of slats is also possible.
All three levels are on independent switches or dimmers. The kitchen functions in different modes: breakfast, workday, festive dinner — and the lighting should change along with the scenario.
Mistakes when combining slatted panels and ceiling molding
Mistake 1: Ornamental slats + ornamental molding
Milled battens with decorative ribbing or fluting + ceiling cornice with ornamental frieze = visual noise. The surfaces 'shout over' each other. Rule: if battens have decorative relief — molding should be maximally laconic (smooth cornice). If molding is ornamental — battens should be smooth.
Mistake 2: Different color temperatures of lighting
Spotlights with 4000 K on the batten wall + chandelier 2700 K over the table = battens look cold-bluish, wood loses warmth. All light sources in a kitchen with wooden battens — in the same color temperature ±200 K.
Mistake 3: Molding installed before batten panels
Cornice is installed first — before mounting the batten structure. If molding is installed after battens — there is no access to the wall/ceiling joint, the cornice won't sit in the right place. Sequence: load-bearing system + molding → ceiling finish → battens → baseboard.
Mistake 4: Too large a rosette for a small kitchen
A rosette 600 mm in diameter in a 9 m² kitchen — it's a 'spot' on the ceiling that weighs down the space. Follow the proportion rule: diameter ≤ 1/8 of the room's shortest side.
Mistake 5: Wooden battens in the stove area
As already described — grease aerosols from frying settle on any surface. In the gaps of wooden battens, grease accumulates and polymerizes over time — it becomes impossible to remove. Stove area: only tile, glass, stainless steel, or MDF with a 2K-polyurethane coating and minimal gap with sealing.
Mistake 6: Ignoring baseboard and molding between battens and cabinetry
The bottom edge of the slatted structure should be finished with a baseboard made ofsolid wood trimor a metal profile. An open end of the structure next to the kitchen unit is not just an aesthetic issue but a hygienic one: the gap between the structure and the unit accumulates crumbs and grease.
Mistake 7: Cornice without primer before painting
Polyurethane is a material with low paint adhesion without primer. Paint without primer on polyurethane molding will peel within 6–12 months. Sequence: polyurethane primer (or special acrylic primer for plastic) → finish paint in 2 coats. Only this way is reliable.
Practical tips for integrating two decorative systems
Tip 1: Unified finish tone
If the kitchen has both slats and molding — choose one finish tone for both systems (white, cream, taupe) and use it for both elements. This creates a sense of a custom, well-thought-out interior. Even if the slats are made of natural oak — a white polyurethane cornice and moldings next to them emphasize their natural quality.
Tip 2: Start from the ceiling
Always start a kitchen project with the ceiling solution. Cornice height → scale of the rosette → height of the slatted structure → proportions of the unit. The reverse sequence (unit → slats → molding) often leads to there being 'no space left' for the molding.
Tip 3: Samples under real lighting conditions
Order samples and place them in the kitchen under real lighting — not in a showroom. MDF tone looks different at 2700K and 4000K. What seemed like the 'right beige' in the store may turn out 'yellowish' in the kitchen.
Tip 4: Don't skimp on finishing elements
Moldings made of polyurethane— transition elements between the vertical slatted plane and the horizontal ceiling — cost relatively little but 'bring together' the interior into a unified system. A vertical polyurethane pilaster at the edge of the slatted structure: gives it completeness, imitating a classic portal.
Tip 5: Test cleaning before installation
Before approving the type of slatted panels for the kitchen — test cleaning. Apply a drop of vegetable oil to the coating sample, wait 30 minutes, try to remove it with a damp cloth. A good 2K polyurethane coating — removes completely. A film of single-component acrylic paint — leaves a greasy mark. This is a critical check before ordering.
Cost of a comprehensive solution: kitchen with slats and molding
| Element | Area / Length | Material (RUB) | Installation (rub.) | Total (rub.) |
|---|---|---|---|---|
| Slatted wall of the dining area (MDF MR) | 8–12 m² | 20 000–45 000 | 12 000–22 000 | 32 000–67 000 |
| Slatted wall of the dining area (solid oak) | 8–12 m² | 45 000–100 000 | 15 000–25 000 | 60 000–125 000 |
| Polyurethane cornice | kitchen perimeter 12–16 m/l | 4 000–12 000 | 4 000–8 000 | 8 000–20 000 |
| Polyurethane rosette Ø 350–450 mm | 1 pc. | 1 500–5 000 | 1 000–2 000 | 2 500–7 000 |
| Zone framing moldings | 8–12 linear meters | 2 500–7 000 | 3 000–5 000 | 5 500–12 000 |
| Solid wood skirting from millwork | zone perimeter 6–10 linear meters | 2 000–8 000 | 2 000–4 000 | 4 000–12 000 |
Full budget for a 10–14 m² kitchen with a slatted dining wall and molding set: from 52,000 to 233,000 rubles depending on material choice.
FAQ: popular questions about combining slatted panels and molding in the kitchen
Can wooden batten panels be used in the kitchen near the stove?
Only in the dining area, no closer than 1.5 m from the cooking surface. The backsplash area behind the stove — only moisture-resistant MDF with a hard 2K coating or non-slat materials (tile, glass).
How often should polyurethane molding be refreshed in the kitchen?
Repainting every 7–12 years under normal use. Polyurethane does not degrade — only the coating may yellow from kitchen vapors. Repainting with acrylic paint without dismantling — 1 day of work.
Are slatted panels and molding appropriate in a small kitchen interior?
Yes, with proper scale. A cornice height of 55 mm (not 100) + one slatted wall (not all walls) + a rosette no larger than 300 mm. A concise cornice and one slatted accent wall make a small kitchen look finished, not overloaded.
Howinstall slatted panelsnext to wall-mounted cabinets?
The slatted structure is installed before hanging the cabinets. The cabinets are mounted through the slats into the wall via the load-bearing system. The cabinet mounting points are pre-marked positions on the load-bearing base of the structure, reinforced with 18 mm plywood inserts.
Is a special hood needed with slatted panels in the kitchen?
A hood is needed in any kitchen. But with slatted panels, it is critically important: a good hood with a capacity of ≥10–12 kitchen volumes/hour drastically reduces the amount of fatty aerosols on the walls. This directly affects the service life of the slat coating.
Will polyurethane molding turn yellow in the kitchen?
Non-yellowing brands of polyurethane (specified by the manufacturer) + acrylic paint with UV protection = minimal yellowing over 7–10 years. Molding made of cheap polystyrene yellows significantly faster — do not confuse the materials.
How to combine slatted panels with kitchen tiles?
The slatted structure joins the tile zone via a vertical corner profile (aluminum or PVC) or via a 3–5 mm gap sealed with silicone. No overlapping of tiles onto slats or slats onto tiles—only a clear boundary with a finishing element.
Can Islatted panels in kitchen interiorsinstall it yourself?
Yes, if it's about the dining area (not the stove area). The dining wall is a standard installation without complicating factors. The step-by-step guide forinstallation of slatted panelsis fully applicable to the kitchen dining area. Moldings are also easy to install yourself—polyurethane cuts and glues quickly.
About the company STAVROS
The kitchen is a place where decor should be as reliable as the kitchen itself. A beautiful material with the wrong coating will last a season. The right material with the right coating—decades.
STAVROS produces full-cycle architectural wooden and polyurethane elements for interiors. Own production in Russia: chamber drying of solid wood to 8–10%, CNC milling with ±0.1 mm precision, application of two-component coatings in controlled conditions of painting booths. All products come with documentation: declaration of conformity, emission class E1, technical specifications.
For your kitchen in the STAVROS catalog: slatted panels for the kitchenfrom MR MDF and solid wood with 2K coating;Wooden slat panelsmade of oak and ash with UV varnish;slatted MDF panelMR class with polyurethane coating;Ceiling moldingfrom non-yellowing polyurethane—cornices, rosettes, moldings;Moldings made of polyurethanefor framing the dining area;paintable slatted wall panelsfor precise RAL tone;Pogonazh iz massiva— skirting boards and moldings to finish joints.
Consultation on materials, proportions, and installation solutions for a specific kitchen — free of charge. STAVROS — when a kitchen is beautiful not only on opening day but also ten years later.


