Article Contents:
- When DIY installation is justified: an honest assessment
- Tools and consumables: a complete list without extras
- Tools for slatted panels
- Tools for stucco decor
- Consumables
- Wall and ceiling preparation: a step that cannot be skipped
- Wall preparation for slatted construction
- Ceiling and upper wall zone preparation for stucco
- Step-by-step installation of slatted panels with your own hands
- Stage 1: Material acclimatization
- Stage 2: Installation of the support system
- Stage 3: LED strip installation (if provided)
- Step 4: Installing the Slats
- Stage 5: Corner joints
- Stage 6: Bottom finishing element
- Stage 7: Sealing
- Installation of stucco decor with your own hands: from cornice to rosette
- Sequence of work with stucco
- Step 1: Cornice marking
- Step 2: Trimming the cornice in corners
- Step 3: Molding adhesive — selection and application
- Step 4: Filling joints
- Step 5: Priming the molding
- Step 6: Painting the molding
- Installing a ceiling rosette yourself
- Light rosette up to 300 mm in diameter
- Heavy rosette 400–600 mm in diameter
- Rosette on a drywall ceiling
- Installing wall moldings: DIY frame division
- Frame system layout
- Cutting at 90°
- Typical DIY installation errors: breakdown by category
- Errors during slat panel installation
- Errors during stucco molding installation
- What's better not to do without experience: an honest list
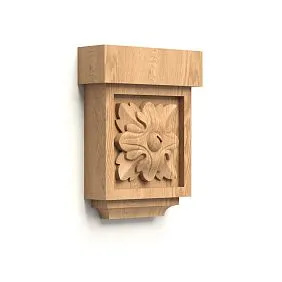
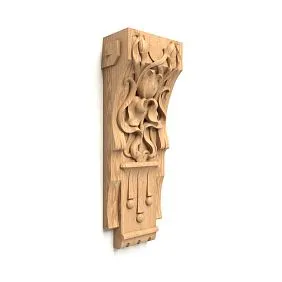
- Slat panels for ceiling
- Slat structure with integrated multi-zone LED lighting
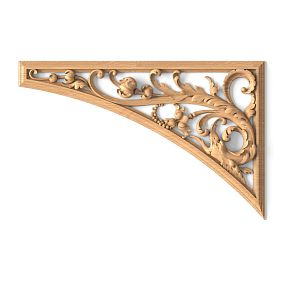
- Complex ornamental cornice on a shaped ceiling
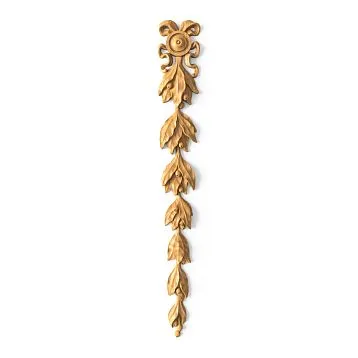
- Complete stucco molding system in a historical interior
- Installation of heavy sockets with a diameter of 500+ mm on a stretch ceiling
- Calculation of material quantity: formulas and examples
- Calculation of slatted panels
- Calculation of cornice
- Calculation of moldings
- Checkpoint after installation: how to evaluate the result yourself
- Checking the slatted structure
- Checking stucco decoration
- FAQ: Questions and Answers
- About the Company STAVROS

There is a type of people who are not afraid to take a screwdriver and a saw in their hands and do the repairs themselves. Not because they feel sorry for the money for a master — although that too — but because they want to do it with their own hands and know that they are responsible for it. You understand every joint, every screw, every layer of primer.
This article is for such people. There is no condescending tone of 'this is difficult, better call a professional'. Instead — an honest conversation: what is really simple when installing slatted panels yourself and installing stucco decoration, what requires attention, and what is better not to touch without experience. With specific technological steps, real numbers, and an explanation — why exactly this way and not otherwise.
Because good DIY installation is not intuition, but technology.


When DIY installation is justified: an honest assessment
Before starting the work, it's important to honestly answer three questions for yourself.
First: What exactly are you installing?
Slat panels on one accent wall is a job accessible to a person without special training. You'll need a laser level, a screwdriver, a miter saw, and carefulness.DIY Batten PanelsOn four walls with corner joints, pilasters, and built-in lighting — this is already a job with nuances where it's easy to make mistakes.
A ceiling cornice in a straight hallway — not difficult. A cornice with an ornament on a shaped ceiling with slopes — requires trimming experience.
Second: What is the acceptable result?
If you're prepared for the first joints to be imperfect and know where to 'hide' them (for example, in less noticeable corners) — DIY installation is justified. If a flawless result is required on all surfaces simultaneously — a professional craftsman is more reliable.
Third: Do you have the minimum set of tools?
Without a laser level, miter saw, and screwdriver, qualityinstallation of slatted panels yourselfis impossible. Attempting to 'make do' with a bubble level and a handsaw leads to accumulated errors that will be visible on the finished wall.


Tools and consumables: a complete list without the unnecessary
A professional installer arrives at the site with a case of tools. For the independent installation of slatted panels and decorative molding, the list is more modest, but each item in it is not optional, but mandatory.
Our factory also produces:

Tools for slatted panels
Laser level (laser level): mandatory. A bubble level does not provide sufficient accuracy when installing a support system 2–4 m long. A horizontal deviation of 3 mm over 3 m — and the slats will clearly 'drift'. A laser level provides ±0.2 mm/m.
Miter saw (miter saw) with a 45° angle: for precise trimming of slats at right and 45° angles. Angled joints made with a handsaw result in an error of 1–3°, which creates a noticeable gap in the corner.
Screwdriver: for mounting the supporting metal profile to the wall and attaching the slats to the profile. Minimum torque: 20–25 N·m.
Hammer drill: for installing anchors into concrete or brick walls. Without a hammer drill, an anchor in concrete is not an anchor, but a decorative element.
Roulette: minimum 5 m. For marking slats, load-bearing profile spacing, structure placement.
Vernier caliper: for controlling slat width (detecting batch errors).
90° construction square: for checking perpendicularity and right angles.
Construction pencil or painter's tape: for marking.
Get Consultation
Tools for stucco decoration
Miter box with saw (or miter saw): for trimming cornice at 45° in internal and external corners. Accuracy 45° ± 0.5° is acceptable. Error of 1–2° — noticeable gap in the corner.
80–100 mm spatula: for applying adhesive and filling joints.
Needle roller or brush: for priming surfaces.
25–38 mm painter's tape: for protecting adjacent surfaces when applying sealant and adhesive.
Construction sealant gun: for applying acrylic sealant into joints.
Consumables
| Material | Purpose | Expense |
|---|---|---|
| Acrylic primer | Wall/ceiling priming for load-bearing system | 150–200 ml/m² |
| Metal profile CD 60×27 | Load-bearing system of slat construction | As per plan |
| Straight hanger 60 mm | Profile attachment to wall | 1 pc. / 600–800 mm profile |
| Nail anchor 6×60 | Suspension mounting in concrete | By number of suspensions |
| Self-tapping screw 3.5×9.5 mm | Profile attachment to suspension | 2 pcs./suspension |
| PU-primer (primer) | Priming of molding before painting | 50–80 ml/linear meter |
| Mounting adhesive for molding | Attaching cornice, moldings | 1 tube / 5–8 linear m |
| Acrylic sealant | Filling molding joints | 1 tube / 10–15 linear m |
| Acrylic paint | Painting moldings | 100–150 ml/m² |
Wall and ceiling preparation: a step you cannot skip
The most common mistake of a DIYer is to start installation immediately. Without surface preparation. It seems like a waste of time: after all, the battens will cover the wall, the cornice will cover the joint. Why putty what won't be visible?
Because the load-bearing system of the batten structure requires a flat and solid surface. A dowel in crumbling plaster is a load-bearing element with unpredictable strength. And because the ends, junctions, and areas near the cornice will be visible in the structure — they must be prepared.
Preparing the wall for a slatted panel construction
Step 1: Diagnosis. Tap the wall to find voids in the plaster (a dull, hollow sound). In areas with voids, anchors won't hold. Remove any flaking plaster.
Step 2: Base repair. Cracks, voids, and chips: fill with repair compound or gypsum putty. Allow to dry completely (24–48 hours).
Step 3: Priming. Use universal acrylic primer. Apply with a roller or brush. Allow to cure for 2–4 hours. Primer strengthens the surface and improves adhesion.
Step 4: Marking. Use a laser level: mark vertical lines for the load-bearing profile spacing (300, 400, or 600 mm depending on the structure's weight). Mark a horizontal line for the top edge of the structure.
Preparing the ceiling and upper wall zone for molding
Step 1: Leveling. The ceiling cornice fits at the wall/ceiling joint. If the joint has a gap larger than 5 mm (common in old houses with uneven ceilings) — fill with finishing putty, allow to dry, then sand smooth.
Step 2: Priming the cornice zone. Apply acrylic primer to the area of the wall and ceiling where the molding will be glued. Without primer, the adhesive's adhesion is reduced.
Step 3: Painting. Paint the ceiling and upper wall zone before installing the slatted panel construction. After installation, accessing this area without risk of staining the slats will be impossible. This sequence is critical: first molding and ceiling, then slats.
Step-by-step DIY installation of slatted panels
DIY wall slat panelsare installed using the same technological sequence regardless of the slat material — MDF, solid wood, or veneer.
Step 1: Material acclimatization
Delivered slats are unpacked and laid out horizontally in the installation room for 24–48 hours. Mandatory in winter. Material from a cold warehouse has a temperature of -5 … +5°C; in a warm room it heats up and expands slightly. Installation without acclimatization means slats that will 'find' their final dimensions after fastening: the result is deformation.
Step 2: Mounting the support system
Support system — metal profile CD 60×27 mm. This is a standard profile for drywall structures, which is ideal for slat panels.
Support profile spacing: for MDF slats weighing up to 2 kg/m² — 600 mm. For heavier wooden slats (3–5 kg/m²) — 400 mm. For the bottom and top edges of the structure — a profile is mandatory regardless of spacing.
Wall mounting:
-
Into concrete/brick: 60 mm straight hanger + 6×60 mm nail anchor. Anchor spacing along the hanger length: 400–500 mm.
-
Into drywall: only through the supporting metal frame of the drywall. Fastening into the drywall itself is unacceptable.
-
Into wooden walls/timber: 4.2×65 mm screw directly into the wood.
Plane alignment: use a laser level to align all profiles into a single plane. Hangers allow adjusting the profile extension from the wall: 30–100 mm. Permissible plane deviation: ±1 mm/m.
Important nuance: leave a gap of 8–10 mm between the floor and the bottom profile — for ventilation behind the structure. A closed 'box' without ventilation is an environment for moisture accumulation.
Step 3: LED strip installation (if provided)
Before installing the slats. The LED strip is glued to the supporting profile in the area of the upper edge of the structure or the lower one — depending on the intended effect. The wire is routed through a special hole in the profile or along the gap behind the structure.
Strip type: SMD 2835 or 5630, power 10–14 W/m. Color temperature: 2700 K (warm white) or 3000 K (neutral warm).
Power supply: remote, behind the structure or in a box. Not inside the structure — to allow replacement.
Step 4: Installing the Slats
Starts from the edge of the structure — from one of the vertical sides. Direction: vertical (slats are vertical), which is the standard for most structures.
Attaching slats to metal profile:
Method A: Screws with visible head. Screw 4.2×35 mm through the front surface of the slat into the profile. The head is decorated with a cap or after installation is filled and painted. Simple but less aesthetic method.
Method B: Hidden fastening with clips. The clip (metal bracket) is screwed to the profile, hooks into the groove on the side edge of the slat. The slat is held without visible fasteners on the front surface. Requires slats with a special groove for the clip.
Method B: Concealed screws with elongated holes. For wooden slats that allow for wood 'movement': the hole in the slat is elongated, and the screw is not tightened all the way. Floating fastening.
Spacer template: to ensure an even gap between slats, make a template from a piece of MDF or wood of the required thickness (8–16 mm, depending on the project). Place the template between the slats during installation — all gaps will be uniform.
Vertical check: after every 3–4 slats, check the vertical with a laser level. It's easier to correct accumulated deviation on the 4th slat than to redo the 20th.
Step 5: Corner joints
Internal corner (angle between two walls, both slatted): slats are cut at 45° and joined in the corner. Miter saw accuracy is critical: a gap in the corner joint with a ±0.5° error is 0.5–1 mm. The gap is filled with color-matched acrylic sealant.
External corner (protruding corner): slats are also cut at 45°. An alternative is an aluminum corner trim that covers the joint and protects the ends from mechanical damage.
If one of the adjacent walls is not slatted: the slatted structure ends with a wall trim — a vertical MDF molding or metal J-profile.
Step 6: Bottom finishing element
Baseboard along the bottom edge of the structure. Options:
-
Floor baseboard matching the slats: mounted to the bottom edge profile and to the floor. Covers the gap between the floor and the structure.
-
Hidden skirting board: L-profile made of anodized aluminum. For minimalist concepts.
-
Molded MDF skirting board: matches the slats in color, with a profile. A more 'heavy' lower border.
Step 7: Sealing
Acrylic sealant around the perimeter of the structure: adjoining the ceiling (where there will be a cornice), adjacent walls, and floor. Applied with a gun, smoothed with a wet finger. Painter's tape on both sides — for a clean line.
Detailed step-by-step instructions with photos —slat panel on the wall DIY on stavros.ru.
Installing plaster decor yourself: from cornice to rosette
installation of polyurethane molding — this is more delicate work than installing slat panels. There is less 'rough' mechanics and more precision: mitering corners, sealing joints, priming, and painting.
Sequence of works with plaster molding
Molding is installed before the slatted structure. This rule has no exceptions:
-
Marking the position of the cornice and all elements
-
Priming the installation area
-
Installation of sockets (ceiling)
-
Installation of the cornice
-
Installation of moldings (if provided)
-
Painting the ceiling and upper wall zone
-
Installation of the slatted structure
-
Finishing elements of the slatted structure
-
Painting or finishing the slats
Breaking the sequence is a typical mistake in DIY repairs. If you paint the ceiling after installing the battens, you'll need to carefully protect the battens with painter's tape—and even then, contamination is inevitable.
Step 1: Marking the cornice
The cornice is installed at the wall/ceiling junction. Marking involves drawing a line along the perimeter of the wall at a distance from the ceiling equal to the width of the cornice's 'leg' (the horizontal part that adjoins the wall). This line is snapped with a chalk line or marked with a pencil along a laser beam.
Also, mark the center of each wall—for symmetrical placement of cornice joints.
Step 2: Cutting the cornice at corners
This is the key moment where most DIY enthusiasts fail.
Internal corner (the angle between two walls):
Cornice running along the left wall toward the corner: the right end is cut at a 45° angle in the direction 'toward the ceiling' (the angle opens inward).
Cornice running along the right wall from the corner: the left end is cut at a 45° angle in the opposite direction.
For a miter box: use the 45° groove. Position of the cornice in the miter box: 'face down,' back side up. This is the standard position for cutting ceiling profiles.
External corner (protruding corner):
The principle is the same, but 45° in the opposite direction. The ends "open outward."
Alternative to miter cutting: corner caps (sold with the cornice). These are ready-made elements for internal and external corners — simply inserted into joints without cutting. Angle precision is not required. An excellent option for beginners.
installing polyurethane molding— detailed instructions for all types of corners and joints with illustrations.
Step 3: Adhesive for molding — selection and application
Special mounting adhesive for polyurethane molding — not "liquid nails" and not universal construction adhesive. Why?
Polyurethane is an inert material with low surface energy. Ordinary adhesives have weak adhesion to it. Special composition: acrylic adhesive with adhesion modifiers for PU or PU foam adhesive.
Applying adhesive to the cornice:
-
Apply in a zigzag pattern on the back surface of the element at 2–3 points along the length
-
Additional "strip" along the perimeter of adjacent surfaces (top + bottom of the base)
-
Press firmly against the surface and hold for 30–60 seconds
-
Additional fixation: use construction fixing brackets or painter's tape along the entire length for 30–60 minutes (glue curing time at +20°C)
Important: apply glue to both surfaces (both the cornice and the wall/ceiling). Two-sided application increases adhesion by 1.5–2 times.
Step 4: Filling the joints
Joints between cornice elements and in corners are filled with acrylic sealant:
-
Sealant is applied with a gun
-
Smooth with a wet finger or wet spatula
-
Excess is immediately removed with a damp cloth
-
After drying (4–6 hours) — sand with P220 if necessary
For joints between the cornice and wall/ceiling ('dark gap' at the junction): use the same acrylic sealant. Apply at a 45° angle, smooth. Apply painter's tape on both sides of the application line for a clean edge.
Step 5: Priming the Molding
PU primer (special primer for polyurethane) is applied in a thin layer with a brush. Drying time: 2–4 hours before painting. Without primer, acrylic paint 'beads up' on the polyurethane surface or does not adhere firmly enough.
Primer check: drop water on the primed surface — the drop should spread (wetting). On unprimed PU — the drop forms a 'bead', the surface is not wetted.
Step 6: Painting the Molding
Acrylic paint, two coats:
-
First coat — brush, along the pattern, not across. Drying time 2–3 hours.
-
Second coat — brush or short-nap paint roller (3–5 mm). Drying time 4–6 hours until fully cured.
For white molding in a white interior: use the same tint as the ceiling. Apply the ceiling paint to the cornice and the ceiling simultaneously — a perfect color match is guaranteed.
Tips for Installing Decorative Molding— practical recommendations for surface preparation, adhesive selection, and painting on the website stavros.ru.
Installing a ceiling rosette yourself
Ceiling rosette — an element with nuances. Not all rosettes are mounted the same way.
Light rosette with a diameter of up to 300 mm
Weight: 200–350 g. Mounting with adhesive + a central dowel (for a light fixture). Sequence:
-
Mark the center of the rosette: intersection of room diagonals or design center.
-
Drill a hole for the wire (if for a light fixture) and a hole for a 6 mm dowel in the center.
-
Apply adhesive to the back surface in a zigzag pattern + along the perimeter.
-
Press against the ceiling, screw a self-tapping screw through the central hole into the dowel.
-
Painter's tape holds along the perimeter for 30–60 minutes.
-
Perimeter joints of the rosette with the ceiling — acrylic sealant.
Heavy rosette, diameter 400–600 mm
Weight: 500–900 g. Glue alone is insufficient. Required:
-
Glue + 3–4 anchors around the perimeter in hidden areas of the ornament
-
Hold for 2–4 hours (telescopic prop or multiple layers of painter's tape)
Rosette on a drywall ceiling
Only through the load-bearing metal frame of the drywall. A butterfly anchor into the drywall itself is insufficient for a heavy rosette. Reinforcement: a wooden backing or steel plate secured to the load-bearing drywall profile.
Installing molding on a wall: DIY frame layout
Molding frames on walls are one of the most elegant and simultaneously most accessible techniques for DIY installation.
installing polyurethane molding— fundamentally simpler than installing a ceiling cornice, because moldings are horizontal and vertical, and corners are always right angles — 90°.
Layout of the frame system
Step 1: Determine the frame dimensions. Standard ratio: frame width = 50–70% of wall width; frame height = 50–70% of the wall zone height.
Step 2: Draw the frames on the wall with a pencil. Check all diagonals: if the rectangle's diagonals are equal, the frame is correct.
Step 3: The spacing between frames must be equal. The margin from the wall edge = the spacing between frames. This is the basic rule of symmetry.
Step 4: Use a laser level to control the horizontality of the top and bottom sides of all frames. All top sides of the frames should be on the same horizontal line.
Cutting at 90°
Unlike cornices, molding frame corners are always 90°. This means the molding ends are cut at a right angle, and the frame corner is closed with a miter joint: two elements meet at the corner point at 90°.
For a neat right angle: use a square carpenter's square, a miter saw with a 90° stop. The gap in the right-angle miter joint is filled with sealant.
Alternative: corner caps for moldings — decorative square or rectangular elements that cover the frame corner. No cutting required, only joining the molding with the cap at a right angle.
Typical DIY installation mistakes: breakdown by category
Experience is gained through mistakes. But it's better to learn from others'.
Errors during slat panel installation
Error 1: Skipped acclimatization.
MDF slats delivered from cold storage in winter are installed immediately. After 2–4 hours in a warm room, the slats expand, deforming the structure. Solution: always allow 24 hours for acclimatization.
Error 2: Load-bearing profile fastened into a void.
The anchor fell into a gap between bricks or a hidden void in the wall. The profile "wobbles." How to detect: pull the profile with 5–10 kg of force after installation. It should be immovable. If it wobbles — remount the anchor 50–80 mm to the side.
Error 3: Uneven gap without a template.
Installing slats "by eye" without a spacer template. After 15–20 slats, the accumulated error creates noticeable unevenness in the rhythm. Solution: an MDF template of the required thickness is mandatory.
Error 4: Slats without a gap at the floor.
Slats installed flush with the floor. During wet cleaning — water gets under the structure. The unsealed bottom edge of the MDF swells. Mandatory gap: minimum 8–10 mm, covered by a baseboard.
Error 5: Load-bearing profiles not in the same plane.
Missed laser level control. The battens protrude in one place and recede in another. Visually, a 'wave' appears on the wall. On an MDF structure under even side lighting, this cannot be hidden.
Errors during installation of decorative molding
Error 1: Incorrect adhesive.
Used universal 'liquid nails' instead of specialized PU adhesive. After 6–12 months, the cornice begins to 'pull away' in the middle of its length, where there is no dowel fastening. Solution: only a special compound.
Error 2: No primer under the adhesive.
Adhesive applied to an unprimed ceiling surface. Adhesion is 2–3 times lower than calculated. First signs of delamination appear after 12–18 months.
Error 3: Painting without PU primer.
Acrylic paint applied directly onto polyurethane. The first layer went on—the second starts to bubble. After a year—delamination in 'flakes'.
Error 4: Too much adhesive—'squeezes out'.
Excessive adhesive squeezes out from under the cornice when pressed. Adhesive on the front surface of the molding is a disaster: acrylic adhesive does not sand down after drying and creates 'spots' of different sheen when painted. Solution: apply adhesive evenly—a zigzag on the back of the element, two thin strips along the edges.
Error 5: Painted everything after installation.
The ceiling was painted with a roller after installing the slatted panels. The slats are stained — cannot be removed, painting is inconvenient. The sequence rule is absolute.
Error 6: Trimmed the cornice 'on the first try'.
The corner was trimmed — and immediately glued. Dry fitting check was skipped. It turned out that the room corner is not 90°, but 92°. A 5 mm gap in the corner now needs to be masked. Rule: always dry fit before applying adhesive.
What is better not to do without experience: an honest list
There are jobs where DIY installation is theoretically possible, but in practice leads to a significant risk of poor results.
Slatted panels for the ceiling
Slatted panels for the ceiling DIY— this is a job for at least two people. Holding a slat against the ceiling overhead while simultaneously controlling vertical alignment and driving a screw is physically difficult. Without an assistant or lifting equipment, a quality result is unlikely.
Slatted structure with integrated multi-zone LED lighting
Multi-zone lighting with dimmers and a controller is an electrician's job. DIY installation without electrical skills risks short circuits and fire.
Complex ornamental cornice on a shaped ceiling
A ceiling with a break, arch, or slope requires individual trimming of each cornice element. This isn't a 45° miter box—it's manual finishing, fitting, experience.
Complete stucco decoration system in a historical interior
If you're restoring an apartment in an old building with preserved original stucco—that's a restorer's job. DIY matching of a new polyurethane element to a historical plaster relief without experience risks visual conflict that will ruin a valuable interior.
Installation of heavy rosettes 500+ mm in diameter on a stretch ceiling
A stretch ceiling requires a special mounting ring and reinforcement of the load-bearing structure. Without understanding stretch ceiling construction—risk of fabric destruction.
Material quantity calculation: formulas and examples
One of the most practical tasks in DIY renovation is correctly calculating the amount of material.
Slat panel calculation
Area of the structure: wall width × structure height. Example: wall 3.6 m × height 2.7 m = 9.72 m².
Number of slats: structure width / (slat width + gap). Example: 3600 mm / (55 mm + 13 mm) = 52.9 → 53 slats.
Cutting allowance: +10% of the calculated quantity.
Slat length: room height (or structure height). Standard length is 2400 mm or 2700 mm. If the height is 2.7 m, use 2700 mm slats without cutting.
Cornice calculation
Room perimeter: sum of all sides. Example: (4.5 + 3.2) × 2 = 15.4 m.
Length of one element: 2.0 m (standard). Quantity: 15.4 / 2.0 = 7.7 → 8 elements.
Allowance for corner cutting: +10–15%.
Molding calculation
Perimeter of each frame: 2 × (width + frame height). Example: 2 × (1.2 + 0.8) = 4.0 m. For three frames: 4.0 × 3 = 12.0 m / 2.0 m = 6 elements.
Stock: +15% (trimming + possible errors).
Checkpoint after installation: how to evaluate the result yourself
Finished installation — but before putting away the tools, go through the checklist.
Checking the slat structure
-
Gaps are uniform along the entire length of the wall (check with a template)
-
Slats are in the same plane (laser beam along the wall)
-
All ends are covered with baseboard and side strips
-
No loose slats (check with light pressure)
-
All joints in corners are foamed/sealed
Checking stucco decor
-
The cornice fits tightly to the joint along its entire length (no gaps >1 mm)
-
All corner joints are sealed
-
The surface of the molding is evenly coated with primer and paint
-
No areas with paint 'bubbles' (a sign of insufficient priming)
-
The rosette is symmetrical relative to the center of the room
FAQ: Questions and Answers
Can slatted panels be mounted on an uneven wall?
Yes, that's exactly what the load-bearing system made of metal profiles with hangers is for. The hangers adjust the profile's extension from the wall, compensating for unevenness up to 80–100 mm. Important: align all profiles into a single plane using a laser level.
What adhesive should be used for polyurethane molding?
Specialized mounting adhesive for PU molding. Proven types of compounds: polyurethane mounting adhesive or acrylic adhesive with a PU adhesion modifier. Neither universal PVA nor 'liquid nails' without the 'for polyurethane' label provide reliable adhesion.
How to hide an imperfect corner joint of a cornice?
Acrylic sealant is your best tool. Apply into the gap, smooth with a wet finger, let dry for 4 hours, sand with P180, paint to match. Gaps up to 3–4 mm are completely concealed by the sealant.
How much time is needed for DIY installation of an accent wall and cornice in the living room?
Slatted wall 3.5 m × 2.7 m: preparation — 2–3 hours, mounting the support system — 2 hours, mounting the slats — 3–4 hours, finishing elements — 1 hour. Total: 8–10 hours for one person. Cornice 15 linear meters: preparation — 1 hour, mounting — 3–4 hours, priming and painting — 3–4 hours (including drying). Total: 7–9 hours.
Is an assistant needed for installing wall slat panels?
For a wall structure — desirable but not mandatory: slats 2.4–2.7 m can be installed vertically alone. For a ceiling structure — an assistant is mandatory.
Can polyurethane cornice be glued without priming the surface?
Technically — yes. Practically — the adhesive's adhesion to unprimed chalk paint or loose plaster will be insufficient. The adhesive will 'tear off' along with the top layer of the base. Primer is a mandatory step.
What to do if a gap is visible between the cornice and the ceiling after installation?
Acrylic sealant: apply along the joint line, smooth, let dry, paint to match the ceiling color. Gaps up to 8–10 mm are eliminated by sealant without a trace.
How long after installing molding can it be painted?
Adhesive must fully cure: 12–24 hours at +20°C. Sealant in joints: minimum 4–6 hours. Acceleration: temperatures above +20°C reduce curing time. Don't rush: painting over insufficiently cured adhesive will cause element deformation.
About the company STAVROS
DIY installation is honest work requiring honest materials. A rail that warps after a season due to poor MDF drying isn't a 'craftsman's error'—it's a manufacturer's error. A cornice that peels after a year due to poor-quality polyurethane is the same.
STAVROS is a Russian manufacturer who understands this just like you do. In-house chamber drying of MDF. CNC milling with ±0.1 mm tolerance—rails that provide uniform gaps without correction templates. Factory painting with two-component polyurethane varnish. Polyurethane elements made from non-yellowing material with crisp relief. Emission class E1, declaration of conformity included.
For DIY installation in the STAVROS catalog and articles:
-
DIY Batten Panels— complete step-by-step guide: from preparation to finishing element
-
slat panel on the wall DIY— technology, tools, calculation
-
installation of polyurethane molding— practical guide for craftsmen 2026
-
installing polyurethane molding— clean corners, hidden joints, and painting
-
Tips for Installing Decorative Molding— practical recommendations from the manufacturer
-
Painted MDF plank panels— technology of perfect finish
-
slatted wall panels in the interior— architectural logic of application
Samples of slatted panels and molding — upon request. Consultation on materials, work sequence, and system selection — free of charge. STAVROS — because proper technology starts with the right material.