


Article Contents:
- Why these two clusters are searched together: the logic of an interior project
- Slatted panels for interior wall finishing: a complete material overview
- Classification by material
- Slat profile: shape as a design statement
- Spacing between slats: rhythm and visual character
- Module formats
- Types of slatted wall panels for interior finishing: a complete selection map
- Monolithic milled panels
- Slats on a backing
- Modular slat wall panel
- Soft slat panels
- Panels with Integrated Lighting
- Polyurethane molded decor: a system, not a collection of parts
- Ceiling cornices: architectural horizontals
- Moldings: structuring vertical and horizontal planes
- Baseboards: the lower boundary of the system
- Ceiling rosettes and overlays
- How to combine slats, moldings, overlays, and ceiling decor: a systematic selection method
- Principle of a unified stylistic key
- Principle of complexity hierarchy
- Principle of neutral space
- By rooms: which zones benefit the most
- Living room: the main stage
- Bedroom: an intimate space with maximum visual impact
- Study and library: an intellectual character
- Hallway and corridor: the first impression that lasts
- Children's room: a natural environment for growth
- Kitchen: conscious minimalism
- Technical parameters of polyurethane decor: what to look for when choosing
- Installation: the sequence that determines final quality
- Installation sequence of slatted panels
- Mounting of polyurethane decor
- Wall finishing with slatted panels: common mistakes
- First mistake: panels on all walls
- Second mistake: incorrect molding scale
- Mistake three: different styles of battens and moldings
- Mistake four: exposed MDF edges
- Mistake five: installing decorative molding before panels
- Sixth mistake: ignoring acclimatization
- Interior styles and recommended combinations
- Batten panels for ceilings: the fifth dimension of interior design
- Options for different budgets: how to avoid overpaying and not compromise on results
- How to read the catalog: guidelines for selection
- FAQ: popular questions about batten panels and decorative molding
- About the Company STAVROS

There are two categories of search queries that people enter at different times, for different reasons—but ultimately lead to the same project. The first is 'batten panels for interior wall finishing.' The second is 'polyurethane decorative molding.' At first glance—different topics. In practice—these are two tools of the same interior solution that work together more convincingly than each separately.
Why do these two queries merge into one project? Because batten wall panels for interior finishing create a rhythmic surface—lively, textured, warm. But any rhythmic surface requires completion: a top edge, a horizontal transition to the ceiling, architectural framing. And this is where polyurethane decor appears—cornices, moldings, overlays, rosettes—as a system that brings the interior to a state of finished space.
This article is a complete guide to both categories of materials. With technical details, design logic, room examples, and honest answers to questions that arise during the selection process.


Why these two clusters are searched together: the logic of an interior project
Let's break down what goes on in the mind of a person who ends up interested in both panels and polyurethane decor.
First comes the idea: 'I want to create an accent wall in the living room — something lively, textured, not just paint.' The search leads to slatted panels. They look at photos, choose the material, calculate the cost.
Then a question arises: 'How will this look at the ceiling? How to finish the top edge of the panels? How to make the transition?' And here the second query appears — moldings, cornices, stucco decor.
Third stage: 'What about the ceiling? There's a chandelier there — I want something around it. And the baseboard needs to be replaced — the old one won't suit the new wall.' And the project expands into a system wherepolyurethane interior itemsthey address not one, but several architectural junctions.
Thus, two queries become one project. And that is precisely why it's correct to consider these materials as a system — not as separate purchases.


Slatted panels for interior wall finishing: a complete material overview
slatted panels for interior wall finishing— these are decorative-constructive elements consisting of a flat base with slats applied to it. The base and slats can be a single unit (a milled module) or consist of a separate substrate and glued/attached slats.
Our factory also produces:


Classification by material
MDF panels are the dominant category in the market. MDF (Medium Density Fibreboard) is a medium-density fiberboard pressed at high temperature using binding resins. The density of the finished product is the defining quality parameter.
Density 750–850 kg/m³: products in this category are stable in residential conditions, do not deform under standard humidity fluctuations, mill precisely, and hold fasteners well. This is the working class for quality residential interiors.
Density below 700 kg/m³: softer products prone to deformation at unprotected edges, holding screws less effectively in frame mounting. Cheaper to purchase — but more expensive to operate.
slatted MDF panelFor painting — a separate and highly demanded format. The surface is primed, ready for application of any paint material. This offers maximum freedom in color choice — any shade from RAL, NCS, or Pantone catalogs.
Solid wood — the upper market segment.Wooden slat panelsMade from oak, ash, walnut, pine — each species with its unique texture, fiber character, and color palette. Solid wood requires acclimatization before installation — 24–48 hours in room conditions at standard temperature and humidity.
A key advantage of solid wood that is underestimated: the possibility of restoration. After 15–20 years, the surface of solid oak can be sanded and coated with new oil — and the panels will look like new. MDF does not allow such an operation.
WPC (wood-polymer composite) — a specialized material for conditions of high humidity, temperature fluctuations, and high mechanical load. Used less frequently in residential interiors but indispensable where wood cannot cope.
Get Consultation
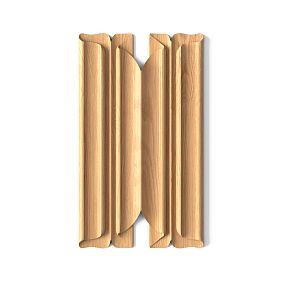
Slat profile: shape as a design statement
Rectangular slat with flat faces and sharp angles — maximum geometricity. Ideal for modern minimalism, art deco, contemporary. The shadow between slats is sharp, clear.
Chamfered batten — beveled edges at 30–45°. Creates softer shadow play. An intermediate option between geometry and organic forms.
Rounded batten — semi-cylindrical or elliptical cross-section. Smooth shadows, soft perception. Pairs well with classic molding and stucco decoration profiles.
Spacing between battens: rhythm and visual character
Spacing — the distance between the axes of adjacent battens — determines the density of rhythm and the visual perception of the surface.
Narrow spacing (8–15 mm) with narrow battens — frequent rhythm, the surface appears more 'textile-like', soft. Wide spacing (20–40 mm) — pronounced architectural quality, each batten reads separately. Medium spacing (15–25 mm) — universal, works in most interiors.
Module formats
Standard batten panel formats: 2400 × 120 mm, 2400 × 150 mm, 2700 × 120 mm, 3000 × 150 mm. Longer modules — 2700 and 3000 mm — create fewer horizontal joints at room height, which improves the visual result on large surfaces.
Types of batten wall panels for interior finishing: complete selection guide
slatted wall panels for interior finishing— a concept that encompasses several fundamentally different structural solutions.
Monolithic milled panels
A single panel made of MDF or solid wood, with slats milled into it. The base and slats are one piece. Advantages: precise and consistent slat spacing, no risk of individual elements shifting, installation as a single panel.
Slats on a base panel
Individual slats glued or nailed to a thin base panel. Allows using solid wood slats on an MDF or plywood base. Flexibility in material combinations.
slatted modular wall panel
A ready-made module of standard size with precisely calibrated slat spacing. Installed as a single unit, ensures a continuous rhythm when joining adjacent modules. Optimal for quick installation on large surfaces.
soft slat panels
A flexible format for non-standard surfaces: columns, arches, curved walls. Slats on an elastic base capable of taking on a curved shape. Indispensable where a rigid panel is physically unsuitable.
Panels with integrated lighting
Slatted panels with lighting— modules with an integrated LED strip in the space between the slats and the base. The lighting creates diffused light that accentuates the wood texture from within.
Polyurethane molding decor: a system, not a collection of parts
molded decoration made of polyurethane— this is not a set of separate ornaments. It is a system of architectural elements where each element serves a specific function and must be in the correct relationship with the others.
Ceiling cornices: the architectural horizontal
A cornice — a horizontal molding at the junction of the wall and ceiling — serves as the finishing element of a slatted surface and simultaneously shapes the architectural character of the room. It is the cornice that sets the stylistic tone: its profile is immediately noticeable upon entering the room.
For modern styles: a cornice with straight lines and a minimal profile, height 30–50 mm. For neoclassical: a stepped profile with a round and a shelf, height 70–100 mm. For classic: a rich multi-level profile with acanthus or other ornament, height 100–200 mm.
Cornice scaling principle: ceiling height in mm ÷ 30–35 = recommended cornice height in mm. For a 2.7 m ceiling: 2700 ÷ 32 = 84 mm — approximate optimum.
Moldings: structuring vertical and horizontal planes
Decorative polyurethane moldingIn linear format — these are moldings, waist profiles, battens, cover strips. They divide the wall into zones, create architectural articulation, and finish the edges of the slatted field.
A waist molding along the top edge of the slatted panel is a mandatory element if the panel does not run from floor to ceiling. Without it, the exposed MDF edge is unprotected, unattractive, and will become damaged over time.
Vertical moldings along the side edges of the slatted field — turn the accent zone into a framed system, giving it a finished look.
Baseboards: the lower boundary of the system
A polyurethane baseboard logically completes the slatted surface from below. In the 'slats + molding' system, the baseboard should belong to the same stylistic language as the cornice: a simple rectangular baseboard for a modern cornice, a classic figured one for a classic cornice.
Baseboard height: for low rooms (2.4–2.6 m) — 60–80 mm. For standard rooms (2.6–2.8 m) — 80–120 mm. For high rooms (from 3.0 m) — 120–200 mm.
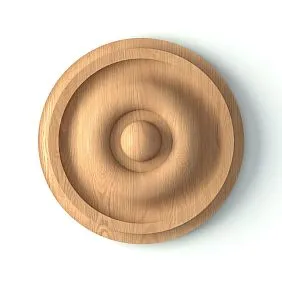
Ceiling rosettes and overlays
molded decoration made of polyurethaneincludes ceiling rosettes (light fixture trims), decorative wall overlays (framing systems, cartouches, consoles), and corner blocks for cornices.
A rosette is the most pinpoint and expressive element of the system. One rosette of the correct scale and profile on the ceiling above the central light fixture completes the project at a level that cannot be achieved by any other means.
How to combine battens, moldings, overlays, and ceiling decor: a systematic selection method
The most common mistake when working with these materials is to choose them separately, without considering their interaction. Battens — liked in one place. Cornice — found cheaper elsewhere. Rosette — chosen 'because it's beautiful'. As a result, three elements from three different styles create an interior without internal logic.
The systematic approach is built on three principles.
Principle of a unified stylistic key
All decorative elements in one room should belong to the same stylistic direction. Straight-line geometric battens — and a straight-line geometric cornice. Rounded battens with a natural texture — and a cornice with smooth curved profiles. Classic battens with a bevel — and a classic stepped cornice.
Style does not mean sameness. It means a common aesthetic logic that can be formulated in one word: rigor, naturalness, elegance, monumentality.
Principle of hierarchy of complexity
The most complex decorative element in a room is one. The ceiling cornice can be rich — then all other elements should be simpler. The batten surface can be dense and saturated — then the cornice should be restrained.
When all elements are equally saturated, the eye doesn't know where to look. A hierarchy of complexity creates a direction for attention.
The principle of neutral space
After every decorative accent, 'silence' is needed. A slatted wall — three other neutral walls. A saturated cornice — clean walls without overlays. A ceiling rosette — no other ceiling decorative elements.
Neutral is not emptiness. It is space that allows accents to work.
By rooms: which zones benefit the most
Slatted panels for interior wall finishing and polyurethane decor work in any room — but differently in each.
Living room: the main stage
The living room is the space for which this duo was created. The large wall area allows the rhythm of the slatted surface to unfold fully. The ceiling height provides scale for the cornice.Slatted panels in the living room interior— is a solution that, when executed correctly, completely changes the perception of space.
A typical scheme for a living room: one accent wall with slatted covering (the wall behind the sofa or behind the TV) + a perimeter ceiling cornice + a rosette above the central light fixture. Three elements — a complete system.
TV area with slatted panels— acquires special significance when complemented by a perimeter frame molding: a rectangle of molding around the slatted field turns the TV zone from a functional element into an architectural object.
Bedroom: an intimate space with maximum visual impact
In the bedroom, slatted wall panels for interior wall finishing serve as a backdrop for the most important architectural element—the bed headboard. An accent wall behind the bed, 2.0–2.4 m wide and reaching up to the ceiling, creates the feeling of an architecturally designed resting place.
slatted panels in the bedroomin warm natural tones—made of solid oak with light oil finish or MDF with wood-like coating—create that natural, calming background that cannot be reproduced with paint or wallpaper.
Molding decor in the bedroom is more restrained than in the living room. A thin, neutral cornice 40–60 mm. A frame molding around the slatted field. A ceiling rosette—only if there is a central light fixture on the ceiling axis. Without overload.
Study and library: an intellectual character
Dark slats made of solid walnut or painted MDF in graphite color—a classic technique for a study interior.Wooden slat panelscovering the full height of the wall in the study creates an atmosphere associated with library tranquility and concentration.
Molding decor in the study: a rich cornice as a sign of the space's status, a rosette above the desk or conference table. A monumental baseboard 120–150 mm high, finishing the wall from below.
Entrance hall and corridor: the first impression that lasts
Slatted panels in the hallway interiorin the lower zone—one of the most versatile techniques. A panel from the floor to a height of 100–130 cm protects the walls mechanically and creates a clear architectural division.
A waist molding along the upper edge of the lower zone is a mandatory finishing element. A ceiling cornice around the perimeter—with a ceiling height from 2.5 m. In a narrow corridor 6–8 m long, the slatted rhythm on the walls creates a perspective effect: the space visually elongates.
Children's room: a natural environment for growth
In the children's room, slatted panels serve a dual function: they create a natural, calming backdrop—and protect the walls from inevitable mechanical impacts. Panels in the lower zone are 100–120 cm high, in light natural tones.
Molded decor in the children's room is laconic: a thin cornice near the ceiling, a waist molding. Without complex profiles and bulky overlays—the space should remain light and airy.
Kitchen: conscious minimalism
Slatted panels in the kitchenare used sparingly—only in areas not directly exposed to steam, grease, and intensive mechanical loads. The dining area, the wall opposite the kitchen unit, the end wall—are permissible zones. The work apron above the countertop—is not.
Material for the kitchen: MDF with lacquered moisture-resistant coating or solid wood under high-quality water-repellent oil. Panel ends in high-humidity areas are additionally treated.
Technical parameters of polyurethane decor: what to look for when choosing
Density is the key technical parameter. Products with a density of 80–120 kg/m³ have a rigid monolithic structure, clear profile edges, and resistance to mechanical impacts. Products with a density of 40–60 kg/m³ are soft, with blurred edges, prone to deformation.
Check without documents: press your finger on the surface of the profile. A product with a density of 100 kg/m³ does not indent. A product with a density of 50 kg/m³ is noticeably softer, the surface gives slightly.
Standard element length: 2000 mm is the basic standard. Elements of 2500 and 3000 mm mean fewer joints on the wall, a better visual result. The presence of corner blocks in the system: allows mounting the cornice without 45° miter cuts, which is technically simpler and gives a clean result.
Installation: the sequence that determines the final quality
installation of slatted panelsalways precedes the installation of stucco decor — this is a fundamental rule. The logic: polyurethane moldings cover the ends and gaps of slatted panels, creating clean lines. If you install the cornice first and then mount the panels — the cornice will have to be trimmed or you'll have to put up with an unsightly gap.
Sequence of slatted panel installation
First stage: surface preparation. The wall must be clean, dry, and relatively even. The permissible deviation for direct installation (adhesive + finishing fasteners) is up to 5 mm over a length of 2 m. For greater deviation — a frame made of metal profile.How to install slatted panelson different types of substrates — described in detail in a special guide.
Second stage: marking. A horizontal level line — the base from which installation begins. Vertical marking lines every 40–60 cm — for positioning fastening points.
Third stage: material acclimatization. MDF and solid wood panels need to be kept in the room for 24–48 hours — this allows the material to adjust to the room's humidity and temperature, preventing deformation after installation.
Fourth stage: installation. Start from a corner or from the center, depending on the composition. The first panel — always level, regardless of the wall's evenness. Adhesive is applied to the backing in a zigzag pattern, additionally — finishing fasteners every 40–60 cm.
Fifth stage: trim elements. Corner overlays, end strips — completely cover the ends and corners of the panel field.
Installing polyurethane decor
After the slatted field is fully completed, stucco decor is installed.
Ceiling cornice: adhesive is applied to both contact surfaces (to the wall and to the ceiling). Corner blocks are installed first — they fix the geometry of the entire cornice. Straight elements are mounted from corner to corner. Joints are filled with acrylic putty and sanded with fine sandpaper after drying.
Moldings and baseboards — using the same technology. 45° miter cuts are made with a miter saw with precise angle adjustment.
Wall finishing with slatted panels: common mistakes
Knowing mistakes is more valuable than any advice on 'how it should be done'. Let's examine the most common ones.
First mistake: panels on all walls
Wall finishing with slatted panelsOn all four walls at once — a common misconception. The result is a space without an accent. A slatted surface requires a neutral background. Without neutrality, it ceases to function as an accent.
Second mistake: incorrect molding scale
A cornice 180 mm high in a room with a 2.5 m ceiling. Or a cornice 30 mm high in a room with a 3.2 m ceiling. In the first case, the cornice overwhelms the space. In the second — it gets lost and looks insignificant. Scale is not a matter of taste, but a technical one.
Third mistake: different styles of slats and moldings
Geometric Art Deco slats + a classic cornice with acanthus. Or rustic slats under aged oak + a strict minimalist molding. Both combinations create a stylistic disconnect that cannot be 'fixed' with final painting.
Mistake four: exposed MDF edges
An unprotected MDF panel edge is exposed fiber that absorbs moisture and dust, and warps when conditions change. Every edge of a slatted field must be covered: with molding, an extension strip, or at minimum, treated with a special sealant and painted.
Mistake five: installing decorative molding before panels
Installing a cornice first and then mounting the panels guarantees an unsightly result. Always panels first — then moldings. Molding covers the edges, it doesn't butt up against them.
Error #6: Ignoring acclimatization
MDF and solid wood panels, unpacked and immediately installed, change dimensions as they absorb the room's humidity. The result — deformed joints, protruding edges, 'bubbles' on the surface. 24–48 hours of acclimatization completely eliminates this problem.
Interior styles and recommended combinations
| Style | Slat profile | Finish | Crown Molding | Rosette |
|---|---|---|---|---|
| Modern minimalism | Rectangular, sharp | Solid color paint | Thin straight 30–40 mm | No |
| Scandinavian | Rectangular or rounded | White or light gray | Neutral white 40–50 mm | No |
| Neoclassical | Rectangular with bevel | White or beige | Stepped 70–90 mm | Geometric |
| Classic | Rounded or with bevel | White, cream | Rich 100–150 mm | Ornamental |
| Art Deco | Rectangular with sharp edges | Contrasting colors | Geometric 60–80 mm | Solar shape |
| Eco/natural | Natural wood texture | Oil, wax | Neutral or wooden | No |
Slatted ceiling panels: the fifth dimension of interior design
When slatted panels for interior wall cladding have already been chosen, the next logical question often arises: what about the ceiling?Batten panels for ceilings— this is a separate solution that creates a fundamentally different character of space.
A slatted ceiling creates the feeling of a 'wooden sky'. Combined with slatted walls, it forms complete immersion in the material. Combined with neutral walls, it makes the ceiling the main decorative accent.
With a slatted ceiling, a ceiling cornice is a mandatory structural element. It hides the gap between the end of the ceiling panels and the wall, creating a clean transition line.
Options for different budgets: how to avoid overpaying and not skimping at the expense of the result
The project budget influences the choice of materials — but should not influence the logic of the system. A well-planned project with a medium budget looks more convincing than a haphazard project with expensive materials.
Budget option: MDF for painting + thin neutral cornice + waist molding. Result: clean, laconic, stylish. With the right paint color — very convincing minimalism.
Medium option: MDF with high-quality coating or veneer + medium-scale cornice + waist molding + corner blocks. Result: a full-fledged decorative project with a good visual level.
Premium option: solid oak or walnut + rich classic cornice + rosette + frame system of moldings + monumental baseboard. Result: a space with a distinct architectural character and long-term value.
How to read the catalog: guidelines for selection
When viewing a catalog of slatted panels and polyurethane decor, it is important to pay attention to several things.
For slatted panels:
-
Base density (MDF: not less than 720 kg/m³)
-
Coating type (primer, varnish, veneer, oil)
-
Milling accuracy (tolerance for slat width)
-
Availability of corner extensions in the system
For polyurethane decor:
-
Material density (not less than 80 kg/m³)
-
Standard element length (preferably 2500–3000 mm)
-
Availability of corner blocks
-
Surface type (smooth for painting — better than porous)
Types of slat panels— a comprehensive overview of the entire range with technical parameters — a good starting point for systematic material study.
FAQ: Popular Questions About Slat Panels and Decorative Molding
Can slat panels for interior wall finishing be installed independently?
Yes. With basic tools—a level, tape measure, miter saw or handsaw, screwdriver—DIY slatted wall panelsinstallation is quite feasible. Critical: precise marking and correct first panel.
Is acclimatization needed for MDF panels?
Recommended. 24–48 hours in a room with normal temperature and humidity. For solid wood—mandatory.
How to choose a cornice profile if you don't know the interior style?
Refer to the slat profile. Straight edges on the slat—straight cornice. If the slat has a bevel—cornice with a slope or slight curve. Rule: no element should be more complex than its neighbor by more than one level.
How many linear meters of cornice are needed for a standard room?
Room perimeter minus door opening widths plus 8% reserve. For a 4 × 5 m room: (4 + 5) × 2 − 0.9 = 17.1 lm. With reserve: about 18.5 lm.
Is it suitablemolded decoration made of polyurethanefor wet rooms?
Polyurethane is water-resistant—it does not swell or crumble from moisture. However, in bathrooms with high condensation intensity, the adhesive bond may weaken. Additional fixation with self-tapping screws followed by puttying the fastening points is recommended.
How often should polyurethane moldings be repainted?
Under normal conditions—once every 8–12 years. With high-quality paint and a properly prepared surface—even less frequently. This is significantly less often than repainting walls.
Can solid wood slat panels be combined with polyurethane moldings?
Yes, and this is standard practice. A painted polyurethane cornice is indistinguishable from a plaster one. Combined with natural solid wood slats—it creates a very convincing system.
Which slats are better—wide or narrow?
Depends on the scale of the room. In small rooms (up to 15 m²)—narrow slats 10–20 mm create lightness. In spacious living rooms (from 25 m²)—wide slats 30–50 mm with wide spacing create monumentality.
About the company STAVROS
A project with slatted wall panels for interior finishing and polyurethane decor requires a supplier who thinks in systems, not individual items.
STAVROS is a Russian manufacturer of architectural materials for interior finishing. The STAVROS catalog presents a complete system for projects of any complexity:
-
Buy slatted panels for walls— high-density MDF, solid oak and ash, WPC, flexible modules, a wide selection of formats and finishes
-
molded decoration made of polyurethane— overlays, frame systems, rosettes, cartouches made of polyurethane with a density of 100–120 kg/m³
-
Decorative polyurethane molding— cornices, moldings, baseboards, corner elements in unified stylistic systems
-
Full range of polyurethane products— to complete any project from minimalism to classic
STAVROS provides delivery throughout Russia with professional packaging for long-length items. Free consultation on selecting compatible items, calculating material quantities, and choosing a stylistic solution — when placing an order.
An interior where everything is in its place — with STAVROS.


