Article Contents:
- What is Patina: Chemistry of Time in the Hands of the Master
- Types of Patina: From Classic to Avant-Garde
- Materials for Patinaing: Palette of Possibilities
- Acrylic Patinaing Compounds
- Wax Patinas
- Bituminous Patinas
- Metallic Paints
- Oil-Based Compounds
- Patinaing Techniques: From Simple to Complex
- Two-Tone Patinaing: Foundation of the Method
- Dry Patinaing: Delicacy of Tones
- Layered Patinaing: Depth Through Complexity
- Spray Application: Rustic Texture
- Crackle Effect: Network of Time
- Step-by-Step Technology of Patinaing Moldings
- Preparing Moldings
- Applying Base Coating
- Applying Patinaing Compound
- Removing Excess: Creating the Effect
- Final Finishing and Protection
- Patinaing Different Materials: Specific Approach
- Gypsum molding
- Polyurethane moldings
- Wooden Moldings
- MDF and Polystyrene Foam
- Stylistic Solutions: Patinaing for Different Interiors
- Classic: Reserved Nobility
- Baroque and Rococo: Luxury of Gold
- Provence and Country: Rustic Simplicity
- Loft: Industrial Patina
- Eclecticism: Freedom of Experimentation
- Patinaing Mistakes and How to Avoid Them
- Excess Patina
- Incorrect Color Choice
- Patinaing Over Incomplete Paint
- Lack of Protective Coating
- Uniform Treatment
- Care for Patinated Moldings
- Regular Cleaning
- Restoration of protective coating
- Local repair
- FAQ: Addressing Common Concerns
- Conclusion: Time in Your Hands
There is something magical in objects that have passed through decades. Time leaves its marks on their surfaces — noble patina, barely noticeable scratches, soft darkening in the recesses of relief. This layer of history cannot be crudely faked, but it can be skillfully recreated. Patinating moldings is precisely such an art, allowing new decor to acquire the soul of an old mansion, and giving interiors depth and aristocratic restraint.
Why does patinated molding look more expensive than ordinary? Because it tells a story. In every shadow, every golden gleam, every darkening, time is read. This is not just decoration — it is an artifact, even if created yesterday, yet carrying the energy of centuries. Let’s examine how to achieve this effect, which techniques to use, and which materials to apply, so the result looks convincing, not theatrical.


What is Patina: Chemistry of Time in the Hands of the Master
Patina is a natural deposit that forms on metals (copper, bronze, silver) as a result of oxidation. The green film on old bronze, the dark deposit on silver — this is patina. In nature, the process takes decades, but in decoration, we recreate it in a few hours, using special compositions and techniques.
Patinating moldings is not just painting. It is a multi-layered treatment that creates an illusion of natural aging. The base color is covered with darker or contrasting shades, which are then partially wiped away, remaining only in recesses, cracks, and relief areas. Thus, the effect of time is born: protruding parts are lightened (as if touched by generations of hands), recesses are darkened (where light did not penetrate, where centuries of dust accumulated).


Types of Patina: From Classic to Avant-Garde
Classic patina imitates oxidized bronze or copper — greenish, turquoise tones on a golden or dark background. This is the choice for interiors in the styles of Empire, Baroque, Classicism.
Silver patina creates the effect of tarnished silver — gray-black deposits on a light metallic background. Suitable for Neoclassicism, Art Deco, modern classicism.
Antique patina reproduces the appearance of ancient marble or limestone — warm beige, ochre tones with dark accents in recesses. Ideal for Mediterranean and antique interiors.
Gold patina — a luxurious variant, where dark accents are applied over gilding, emphasizing relief. The result is aged gold with depth and nobility. The choice for palace and representative spaces.
Color patina — a modern interpretation, using non-traditional shades: lilac, blue, burgundy. This is eclecticism, fusion, avant-garde — styles where experimentation is possible.
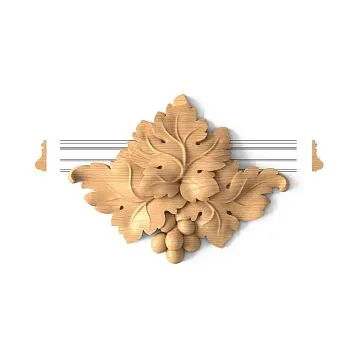
Our factory also produces:


Materials for Patina: Palette of Possibilities
The choice of materials determines not only the visual effect but also the durability and resistance of the coating.
Get Consultation
Acrylic Patina Compositions
Modern water-based specialized paints with added pigments and binders. Easy to apply, dry quickly (1-2 hours), no strong odor. Create a semi-transparent layer through which the base coating is visible. Suitable for all types of moldings: plaster, polyurethane, polystyrene, wood. Acrylic compositions are the optimal choice for DIY work.
Wax Patinas
Compositions based on natural wax with added pigments. Applied with soft cloth or brush, rubbed into the surface. Create a soft, velvety effect with a slight sheen. Wax patinas are especially good for imitating old wood, marble. Require polishing after application, which enhances the depth of color. Less durable than acrylics, but provide a more delicate, lively surface.
Bitumen Patinas
Dark, almost black compositions based on bitumen. Applied over the base coating, then partially wiped away with a solvent. Remain only in recesses, creating strong contrast and deep shadows. Bitumen patinas are ideal for dramatic effects, imitating old bronze with strong darkening. Require careful handling — excess bitumen will make the surface dirty, while insufficient bitumen will result in a flat appearance.
Metallic Paints
Contain metallic pigments (bronze, copper, aluminum), creating a metallic sheen. Applied as a base coating, over which patina of contrasting color is then applied. Metallic paints come in different dispersions: coarse gives a granular, textured surface, fine gives a smooth, almost mirror-like finish.
Oil-based compositions
Traditional materials used for centuries. Oil paints provide rich, deep colors that dry slowly (12-24 hours), allowing for adjustments during the process. Suitable for wooden and plaster moldings, they require a lacquer finish for protection and fixation.
Patina techniques: from simple to complex
There are many techniques, each producing its own effect. Techniques can be combined to create unique surfaces.
Two-tone patination: the basis of the method
The simplest and most common technique. The molding is painted with a base color (e.g., ivory, light gold, silver), fully dried. Then, a contrasting patina (dark brown, black, bronze) is applied with a brush or sponge, filling all recesses and covering the entire surface.
Before the patina dries (within 5-15 minutes, when it slightly sets), excess is wiped off with a soft cloth or sponge. On raised areas, the patina is almost completely removed, while it remains in recesses, creating shadows and depth. The result is a relief molding with emphasized texture, appearing as if it has collected dust and time over decades in its curves.
Dry patination: subtlety of tones
A more delicate technique, where patina is applied with a nearly dry brush. A small amount of paint is taken onto the bristles, the brush is wiped on paper to remove excess. Then, the patina is lightly applied to raised parts of the molding — leaf edges, molding edges, ornament peaks.
The effect is a soft, barely noticeable tone change, as if the molding were lightly dusted with gold or bronze. The technique requires patience and restraint, but the result appears very refined, without being刻意.
Layered patination: depth through complexity
A professional technique where multiple layers of patina in different shades are applied sequentially over a base color. Each layer is partially wiped, creating multi-layered depth and tonal gradation. Example: ivory (base) → ochre-gold (first patina, wiped 70%) → reddish-brown (second patina, wiped 90%, remaining only in deep recesses) → black (final, applied in the deepest spots only).
The result is incredible depth and realism; the surface literally plays with light, changing depending on viewing angle. The technique is labor-intensive and requires experience, but it delivers an effect unattainable with simple methods.
Spray: rustic texture
Patina is applied to the base coating using a spray method — with a brush or toothbrush, paint droplets are scattered across the surface. This creates an effect of splatter, aging, and rusticness. Suitable for interiors in Provence, country styles, where a light, casual, rustic simplicity is valued.
It is important to control droplet size and coverage density — excess will turn elegance into dirt. Spray is often combined with standard patination to enhance the effect.
Crackle: a network of time
A special technique that creates cracks on the surface. A crackle varnish is applied between the base coating and patina, which cracks upon drying, revealing the lower layer. Through the cracks, the base color shows, creating a network of fine lines — like on old paintings or ceramics.
Crackle requires precise adherence to technique and use of special materials. The result is impressive, but it is not achieved immediately — experience and patience are required.
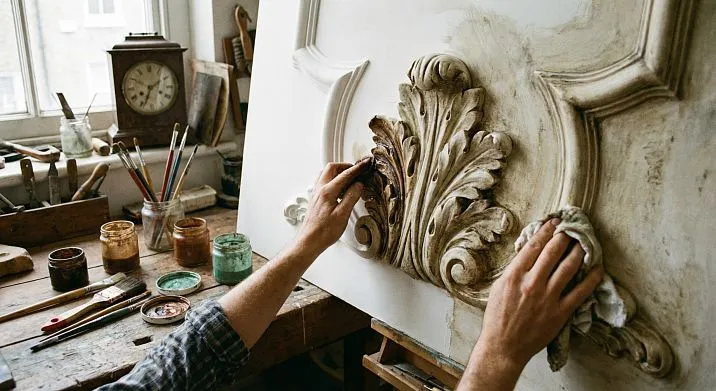
Step-by-step patina technique for moldings
Now from theory to practice. We will examine the process in detail so you can repeat it yourself.
Molding Preparation
The molding must be clean, dry, and degreased. If the element is new, straight from production — simply wipe with a damp cloth and dry. If the molding has already been installed and painted — check the strength of the old coating. Flaking paint is removed, the surface is sanded and dusted.
Polyurethane molding is primed with acrylic primer — it improves paint adhesion and evens out absorption. Plaster molding requires a more generous primer, as plaster absorbs moisture heavily. Primer dries in 2-4 hours, after which you can proceed to base coating.
Applying Base Coating
Choose the base color that will show through the patina. For classic bronze patina — golden or dark gold. For silver — light metallic gray. For antique — ivory, beige, ochre.
Paint is applied with a brush (for relief elements) or roller (for smooth surfaces). It is important to thoroughly paint all recesses, leaving no unpainted areas — they will appear as defects after patination. The first base layer dries in 1-2 hours (acrylic paints), after which a second layer is applied for density and even color.
After the second layer is fully dry (4-6 hours), you can proceed to patination. Do not rush — patina applied to an under-dried base may mix with it, producing a dirty tone instead of a noble tonal play.
Applying Patina
Take a soft wide brush (flattie) or sponge. Apply patina generously, without sparing material, covering the entire molding surface. Work quickly but carefully, filling all recesses. The patina should lie in an even layer, without drips or gaps.
Allow the patina to slightly set — 5-15 minutes (exact time depends on the type of compound, temperature, humidity). It should stop dripping but remain soft and pliable for removal. This is a critical moment — over-dried patina cannot be removed beautifully, while overly liquid patina will smear everywhere.
Removing excess: creating the effect
Take a soft, non-fiber fabric (microfiber, cotton) or a fine-pored sponge. Gently begin removing the patina from the protruding parts of the molding. Do not rub aggressively — the goal is not to remove everything, but to leave a thin, semi-transparent layer through which the base shines.
In recesses, depressions, and inner edges of the ornament, leave the patina almost untouched — there it creates depth, shadows, and volume. On edges, peaks, and protruding elements, remove it more actively — they should be lighter, as if touched by light and the hands of centuries.
Periodically step back and view the result from a distance. Patination is an intuitive process requiring artistic sensitivity. If the patina is too heavy in some areas, remove more. If it’s too light in others, add more, then partially remove it again. Work until you achieve the desired effect.
Final finishing and protection
After the patina dries (4–8 hours), the surface must be protected. Use acrylic lacquer — matte for a restrained effect, satin for a gentle sheen, glossy for a luxurious shine. Apply with a soft brush in a thin layer, without streaks.
Lacquer not only protects the patina from abrasion and dirt, but also enhances color depth, making tones more saturated. For maximum protection, apply two layers of lacquer with an intermediate drying time of 2–4 hours.
Patination of different materials: specific approach
Not all materials react the same way to patination. Each requires nuances.
Gypsum molding
Gypsum is an ideal base for patination. It is porous and absorbs paint well, creating a matte, noble surface. Gypsum molding requires thorough priming before painting — this reduces absorption, saves paint, and ensures an even result.
Polyurethane is smooth and non-porous. Without priming, paint will slide off, and the patina will apply unevenly. Always prime polyurethane with an adhesive primer before painting. After priming, polyurethane behaves almost like gypsum, accepting any paints and patinas.
Polyurethane Moldings
The advantage of polyurethane is its lightness, moisture resistance, and clear relief. Patinated polyurethane molding is suitable for humid areas where gypsum is undesirable.
The advantage of polyurethane is lightness, moisture resistance, and clear relief. Patinated polyurethane moldings are suitable for humid areas where plaster is undesirable.
Wooden molding
Wood has its own texture, which may either enhance or interfere with the patination effect. For wood patination, use semi-transparent compositions through which the wood grain structure is visible. Wax patinas are especially good on wood — they emphasize texture, creating a warm, lively finish.
Wooden molding can be patinated without a base color — the patina is applied directly to the wood, then partially removed, remaining in pores and recesses. The result is aged wood with emphasized texture.
MDF and polystyrene
These materials require especially thorough priming — their surface poorly holds paint. After priming, they behave normally and accept any patination techniques. Note that polystyrene is sensitive to solvents — use only water-based compositions.
Stylistic solutions: patination for different interiors
Patination is universal, but its interpretation depends on the interior style.
Classic: restrained elegance
In a classic interior, patination should be delicate. Base color — ivory, light beige. Patina — light gray-brown, subtle, emphasizing relief but not dominating. Effect — elegant molding, slightly aged but retaining clean lines.
Baroque and Rococo: gold luxury
Here, a gold patina is appropriate — abundant, vivid, dramatic. A base gilding (with gold leaf or metallic paint) is covered with a dark patina that remains in the deep recesses of the ornament, creating contrast and depth. Result — lavish, luxurious molding reminiscent of palace interiors.
Provence and country: rustic simplicity
Light, pastel base tones (cream, lavender, mint) with a light gray-brown patina applied carelessly, with scuffs. You can add a spray effect to create the appearance of a surface splattered with plaster. Result — cozy, homey molding, as if from an old farmhouse.
Loft: industrial patina
Unexpectedly, but patination works excellently in a loft. Imitating rusted metal, oxidized copper, and old cast iron on molding creates an industrial aesthetic. Base color — dark metallic (gray, graphite), patina — reddish, red-brown, mimicking rust. Result — rugged molding, organically fitting into brick and metal spaces.
Eclecticism: freedom of experimentation
Here, anything is allowed — colored patinas, combinations of gold and silver, mixed techniques. Molding can be bright, contrasting, eye-catching. Patination transforms into artistic painting, where each element is unique.
Patina Errors and How to Avoid Them
Even experienced masters sometimes make mistakes. Let's examine typical errors.
Excess Patina
The most common mistake for beginners is leaving too much patina, not removing excess properly. Result — a dirty, dark surface lacking depth and tonal variation. Patina should accentuate relief, not cover it.
Solution: Remove patina more actively, don't be afraid to wipe it off heavily — you can always add more. A thin, delicate layer is better than a thick, rough one.
Incorrect Color Choice
Patina close in tone to the base color does not create contrast; the effect is almost imperceptible. Too contrasting patina (black on white) looks harsh and unnatural.
Solution: Use patina 2-3 tones darker than the base for a soft effect, 4-5 tones darker for a pronounced effect. Avoid extremes.
Patinaing Over Wet Paint
Patina applied over a wet base mixes with it, producing a dirty intermediate color. The multi-layer effect is lost.
Solution: Strictly observe the drying time of the base coating. It's better to wait an extra hour than to ruin the work in haste.
Lack of Protective Coating
Unfixed patina wears off with touch, gets dusty, and loses its brightness. Especially critical for elements located in reachable zones — columns, pilasters, panels.
Solution: Always cover patinated stucco with varnish. This is not just protection, but also a final refinement that enhances the effect.
Uniform Treatment
Patining all elements identically makes the interior monotonous. In reality, time acts unevenly — more intensely in some places, less in others.
Solution: Vary the degree of patination. Central and accent elements — more intense patina. Secondary elements — light patina. This creates visual hierarchy and dynamism.
Care for Patinated Stucco
Properly executed and fixed patination requires no complex maintenance.
Regular cleaning
Dust is removed with a soft brush or vacuum cleaner with a brush attachment. Wiping with a damp cloth is possible, but carefully, without pressure — even through varnish, aggressive rubbing may damage the thin patina layer.
Restoration of protective coating
It is recommended to renew the protective varnish every 3-5 years, especially on elements exposed to mechanical stress. The surface is cleaned, slightly matte-finished with fine sandpaper (grit 320-400), and a new layer of varnish is applied.
Local repair
In case of damage to a patinated surface (scratch, chip), local repair can be performed: the damaged area is sanded, touched up with base color, then patinated to match the surrounding area after drying, and finally varnished.
Questions and Answers: Addressing Common Doubts
Can patina be applied to already painted stucco?
Yes, if the old paint is firmly adhered. The surface should be lightly sanded to improve adhesion, cleaned of dust, touched up with base color if necessary, then patinated using standard technique.
How long does patination take?
It depends on the complexity of the relief and the area size. One cornice 3 meters long — 1-2 hours of clean work plus drying time. A complex panel with abundant ornament — several hours. Considering drying times for base, patina, and varnish, the full cycle takes 2-3 days.
Are special skills required?
Basic patination is accessible to amateurs — the technique is simple, materials forgive mistakes. Complex multi-layer effects require experience and artistic sense. Start with simple elements, master the technique, then move on to more complex ones.
What brushes to use?
For applying patina — wide soft brushes (flats), for removing excess — rags or sponges. For fine detailing — artist brushes #2-6. Avoid stiff bristle brushes — they leave streaks.
Can patina be made reversible?
Yes, if you do not use a finishing varnish. Water-based patina applied to a primed surface can easily be wiped off with a damp sponge. This allows experimenting and adjusting the result. After achieving the desired effect, seal it with varnish.
Is patina suitable for exterior moldings?
Partially. For facades, you need special weather-resistant paints and varnishes. Ordinary interior compositions outdoors will quickly fade and deteriorate. Use exterior acrylic paints and polyurethane varnishes.
How to patina very fine relief?
Patina fine ornament using the spray or dry brush method. Standard application and removal may not yield the desired effect — there is too little space for tonal variation. Alternatively, use the wiping method: apply patina, lightly dry, then gently wipe off excess with a damp sponge.
Does patina combine with gilding?
It combines beautifully. Moreover, patina is a traditional way to enhance gilding, giving it depth. First, apply gilding (with gold leaf or metallic paint), then apply dark patina, partially removing it. The result is aged gold with play of light and shadow.
Can ceiling moldings be patinated?
Yes, the technique is the same. The difference is working at height, requiring good lighting to control the result. Use a ladder or scaffolding, and work with a partner who evaluates the effect from below.
Is it worth patinating all molding in a room?
Not necessarily. Sometimes it’s more effective to patina only accent elements — the central rosette, column capitals, fireplace trim — leaving the rest of the molding in base color. This creates hierarchy and draws attention to key details.
Conclusion: time is in your hands
Patinaing moldings is not just a decorative technique — it’s a way to infuse your interior with the spirit of history, creating an atmosphere filled with memories of the past, even if the house was built yesterday. It’s magic accessible to anyone willing to invest time, understand nuances, and feel the material.
Start small — try patinating a small element, a rosette or a piece of molding. Experiment with colors and techniques, find your aesthetic. Patina forgives mistakes, allows correction, teaches you to feel the surface, understand how light interacts with relief.
Remember: there is no perfect patina. Every piece is unique, bearing the mark of the artist’s hand. Do not strive for photographic accuracy in reproducing antiquity — strive to create a convincing illusion that moves, captivates, and makes you believe that this molding truly survived centuries.
STAVROS company offers a wide selection of molding in plaster, polyurethane, and wood, perfectly suited for patinaing. Our elements feature clear, expressive relief that fully reveals itself through patinaing in all its glory. We provide consultation on technique selection, material matching, and offer professional patinaing services for those who prefer to entrust the work to masters.
STAVROS specialists master all classic and modern techniques for decorating moldings: from traditional patinaing to complex gilding, from stone imitation to avant-garde color solutions. We work with projects of any complexity — from private apartments to museum exhibits, from intimate boudoirs to grand halls.
Your interior deserves molding that looks not like a new installation, but like heritage. Patinaing makes this possible. Start creating your noble antiquity today — with STAVROS, every detail acquires soul and history.