Article Contents:
- MDF as a Base for Paintable Items: Technology and Advantages
- MDF Plank Panels for Painting: Construction and Variants
- Paintable MDF Cornices: Completing Architectural Composition
- Color Solutions: From Monochrome to Bold Accents
- Painting Technology for MDF Items: From Preparation to Finish
- Installing Plank Panels: From Frame to Final Installation
- Design Techniques: Creating Unique Compositions
- Practical Aspects: Calculation, Purchase, Maintenance

Modern interiors require materials that combine manufacturing technology with creative freedom of application, where a standardized base becomes a canvas for individual color solutions. Such materials are plank panels and paintable MDF cornices — primed items ready to accept any shade, any finish, any design idea. Unlike laminated panels with fixed decor or natural wood with predetermined texture, primed MDF offers a clean form — geometry, profile, relief — which designers or interior owners fill with color according to their own vision.
This approach reflects a fundamental shift in the philosophy of finishing: from ready-made solutions to personalized ones, from limited decor choices to endless possibilities, from mass standard to individual expression.Paintable lath panelsAnd MDF cornices become tools for creating unique interiors, where color is not a compromise between manufacturer-provided options, but an exact match to the design intent, mood, or space concept. At the same time, all advantages of MDF as a material are preserved — dimensional stability, accessibility, ease of installation, ecological safety when using quality raw materials.


MDF as a Base for Paintable Items: Technology and Advantages
MDF (Medium Density Fiberboard) — a wood fiberboard of medium density, a material obtained by pressing fine-dispersed wood fibers at high temperature and pressure using binding agents. Unlike particleboard, which uses large wood particles, MDF consists of extremely fine fibers, providing a uniform dense structure without voids, chips, or delamination. The density of quality MDF is 720–870 kg/m³ — higher than that of many natural wood species, ensuring strength, hardness, and ability to hold fasteners.
For producing plank panels and cornices, high-quality MDF with precisely controlled density, humidity (6–8%), and minimal formaldehyde content (E1 or E0 emission class, safe for residential use) is used. Boards are milled on high-precision equipment, creating planks of specified width and thickness with perfectly flat edges, or profiled to create cornices with classic architectural profiles — coves, beads, grooves.
Priming is a key stage in preparing MDF items for painting. Raw MDF surface is porous and unevenly absorbs paint, leading to stains, material waste, and an uneven finish layer.Primed itemsundergo factory processing: the surface is sanded with fine-grit sandpaper to remove fuzz and irregularities, then coated with acrylic or polyurethane primer in one or two layers, followed by another sanding. The result is a perfectly smooth white surface, ready for final painting without additional preparation (though light sanding before painting improves the result).
Advantages of MDF for painting in interior finishing are numerous. Uniform structure ensures absence of knots, cracks, resin pockets typical of natural wood. Each plank is identical to another in color, density, surface quality. This is critical for creating rhythmic compositions, where differences between elements disrupt visual harmony.
Dimensional stability — MDF does not react to humidity and temperature fluctuations to the extent that solid wood does. Planks do not warp, shrink, or expand, maintaining geometry for years. This means gaps between planks remain stable, joints do not separate, and the structure does not deform. This is important for new constructions, where buildings undergo shrinkage in the first years — MDF withstands these processes without problems.
Workability — MDF is easily cut, milled, and drilled with standard woodworking tools. A table saw provides a clean cut without chips. A milling machine creates profiles of any complexity. It is possible to create non-standard plank sizes, cut to angles, and make recesses for outlets and switches directly during installation.
Paintability is ideal — a primed surface accepts acrylic, latex, alkyd, and polyurethane paints in an even layer without stains, runs, or orange peel (when following technology). Any color from thousands of color system shades can be achieved. It is possible to create effects — matte, glossy, satin, metallic, patina, concrete, stone.
Ecological safety of quality MDF class E1 or E0 is comparable to natural wood. Formaldehyde emission is minimal, below background levels in many rooms. Water-based acrylic paints additionally isolate MDF, practically eliminating any emissions.
Economic efficiency — paintable MDF planks and cornices are 2–4 times cheaper than similar solid wood items with comparable visual results after painting. The possibility of self-painting saves costs on pre-painted or laminated items.
Sound absorption — the textured structure of plank finishing with gaps between planks disperses sound waves, reducing reverberation and improving room acoustics. This is especially valuable in rooms with hard reflective surfaces (tile, glass, concrete), where plank finishing makes the acoustic environment more comfortable.


MDF Plank Panels for Painting: Construction and Variants
Plank panels — a decorative wall and ceiling finishing system consisting of parallel planks (planks) installed with regular gaps, creating a rhythmic linear texture.Lath MDF PanelsThey can be of two types: individual planks mounted individually on a frame, and ready-made panels with planks on a common backing.
Individual planks — boards of specified width, thickness, and length, mounted to walls or ceilings via a frame of wooden beams or metal profiles. Typical dimensions: length 2400–3000 millimeters (standard ceiling height), width from 20 to 120 millimeters (most popular 40–60 millimeters), thickness 10–20 millimeters. Planks may have rectangular cross-sections or profiled shapes with beveled edges or rounded corners for a softer visual effect.
Advantages of individual boards — maximum design flexibility. Can be installed vertically, horizontally, diagonally, creating geometric patterns — like a Christmas tree, checkerboard, or variable spacing. Gap width between boards can be adjusted from 10 to 100 millimeters depending on desired graphic effect and openness. Boards of different widths can be combined to create rhythmic compositions. Boards can be painted before or after installation — both options have advantages.
Disadvantages — labor-intensive installation. Each board must be installed individually, requiring careful marking to ensure parallelism and uniform gaps. Installing on a 10-square-meter wall may take an entire day. A frame is required — additional materials and labor. But for those who value individuality and are willing to invest time, the result justifies the cost.
Ready-made panels with boards on a backing — factory-made items where boards are already secured to an MDF or felt backing with precise spacing. Typical panel size is 2700–2800 x 600 millimeters, thickness 16–20 millimeters. The panel is a pre-assembled section of board cladding, mounted on the wall as a whole using adhesive or concealed mechanical fasteners.
Advantages of ready-made panels — fast installation. Walls are covered in hours, not days. Factory precision — all boards are parallel, gaps are identical. No frame is usually needed — panels are glued directly to flat walls. Built-in sound-absorbing backing (in acoustic models) improves comfort without additional materials.
Disadvantages — less flexibility. Board spacing is fixed and cannot be changed. Orientation is determined by the manufacturer (usually vertical). Difficulties with fitting in non-standard areas — around windows, doors, corners. Ready-made panels are more expensive than individual boards. But for commercial projects, tight deadlines, or situations where speed is critical — optimal choice.
Board profiles affect visual effect. Rectangular boards with sharp edges create a crisp graphic texture, emphasize lines, and produce contrasting shadows. Suitable for minimalist, loft, and modern interiors where formality is valued.
Boards with beveled edges (edges cut at 45-degree angles) create soft transitions of light and shadow, appear visually thinner, and produce a more delicate effect. Suitable for Scandinavian and neoclassical interiors.
Boards with rounded edges produce the softest effect, almost no sharp shadows. Create a sense of smoothness and comfort. Suitable for living spaces, children’s rooms, bedrooms, where coziness is important.
Combined profiles — boards with asymmetric cross-sections, where one edge is rounded and the other is beveled, create dynamic play of volumes. Used for original designer solutions.
Our factory also produces:


MDF cornices for painting: finishing architectural composition
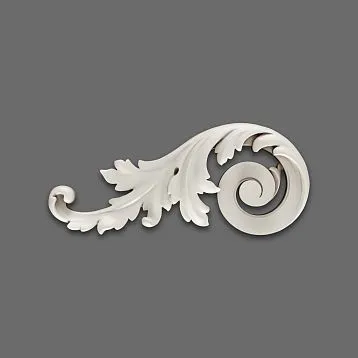
Ceiling cornice — element at the junction of wall and ceiling, creating transition, framing, and architectural completion.MDF Cornices for PaintingOffer the possibility to create classic architectural decoration in any color coordinated with the overall interior palette.
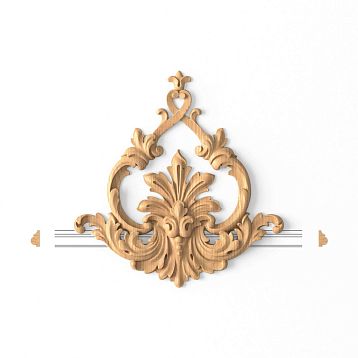
MDF cornices are produced by milling or pressing in molds, allowing profiles of any complexity — from the simplest cove (concave strip for smooth wall-to-ceiling transition) to multi-tiered cornices with classical elements: rosettes, moldings, beads, grooves. Cornice height varies from modest 30–50 millimeters for minimalist interiors to monumental 150–250 millimeters for classical spaces with high ceilings. Strip lengths are typically 2000–2400 millimeters for ease of transport and installation.
Grouted cornices are supplied with white acrylic primer, ready for final painting. Surface is smooth, lint-free, with clearly defined profile. Edges are also primed, simplifying preparation — just light sanding before painting.
Advantages of MDF cornices compared to alternatives:
Lighter than gypsum by 3–4 times — a 2-meter cornice weighs 3–5 kg versus 12–15 kg of gypsum. This simplifies installation, reduces wall load, and allows mounting on gypsum board structures without reinforcement.
Stronger than polystyrene — MDF is solid, does not crumble or break during transport and installation, withstands mechanical impacts. Polystyrene cornices are brittle and easily damaged.
Cheaper than wooden — a solid oak or ash cornice costs 3–5 times more than an MDF equivalent, despite minimal visual difference after painting.
More precise than polyurethane in profile details — milling MDF provides sharp edges and acute angles. Molded polyurethane may have rounded corners where sharp angles are required.
MDF cornices are sufficiently moisture-resistant for most residential spaces provided the material is properly painted, which isolates it. For bathrooms and kitchens, it is advisable to use moisture-resistant MDF (with green or blue end coloring) and moisture-resistant paints.
Using MDF cornices in combination with board panels creates a cohesive architectural composition. The cornice finishes the wall from above, while boards structure it vertically or horizontally — resulting in a complete architectural solution. Painting the cornice and boards in the same color enhances unity. Painting in different but harmonious colors creates layering and depth.
Installation of MDF cornices is done with adhesive (liquid nails, construction glue) with additional fixation using finishing nails or screws where adhesive is insufficient (long, heavy cornices). Joints between strips and in corners are filled with acrylic sealant, sanded, then painted — seams become invisible.
Get Consultation
Color solutions: from monochrome to bold accents
Main advantage of paintable items — freedom of color choice. Any concept can be realized: from classic white to ultra-modern bright accents.
Monochrome solutions — boards and cornice in wall and ceiling color. Creates a three-dimensional texture effect, where decoration is noticeable due to relief, light and shadow play, not color contrast. This is an elegant, restrained approach, characteristic of neoclassicism and minimalism. Light gray walls, light gray boards — only lines and shadows are visible. Beige walls, beige boards — tonal composition. Choosing the right paint is important — matte for walls and satin or semi-matte for boards to create a difference in light reflection while maintaining tonal unity.
Contrasting solutions — boards and cornice in color contrasting with walls and ceiling. Black boards on white walls — maximum graphic, dramatic solution. Each line is emphasized, creating a typographic clarity effect. Suitable for lofts, gallery spaces, modern minimalist interiors. White boards on dark walls (graphite, dark blue, emerald) — reverse contrast, boards as light lines on dark background, structuring space.
Contrasting solutions — rails and cornices in a color contrasting with walls and ceiling. Black rails on white walls — the most graphic, dramatic solution. Each line is emphasized, creating a typographic clarity effect. Suitable for lofts, gallery spaces, modern minimalist interiors. White rails on dark walls (graphite, dark blue, emerald) — reverse contrast, rails as light lines on a dark background, structuring the space.
Tonal contrasts are softer — boards 2–3 tones darker or lighter than walls. Gray walls, dark gray boards — noticeable but not aggressive contrast. Beige walls, brown boards — warm tonal play. Creates depth without destroying unity.
Accent colors — boards in bright, saturated color on neutral background. Yellow, orange, red, blue, green boards on white or light gray walls transform board cladding into the main color accent of the interior. One such accent sets the mood for the entire room. It is important to support the board color in other elements — textiles, decor, furniture — to ensure the accent does not appear random.
Gradient solutions — boards painted in gradient from one color to another vertically or horizontally. Technically more complex — each board is painted individually in its own gradient shade before installation. Result — smooth color transition, creating dynamism and movement. For example, from saturated blue at the bottom through light blue to white at the top — mimicking sky. From dark green through light green to yellow — natural gradient.
Two-tone solutions — alternating strips of two colors. Black and white strips alternate — rhythmic zebra. Gray and beige — soft alternation. Creates a more complex graphic than single-color strips.
Metallic effects — coloring strips with metallic pigments. Gold, copper, bronze strips on neutral walls — glamorous, luxurious solution for neoclassical, art deco interiors. Silver, steel strips — for high-tech, industrial styles.
Material imitation — coloring to resemble concrete, stone, rust, patina. Special decorative paints allow creating the texture of concrete surfaces, rusted metal on MDF strips. This adds an industrial character, texture.
Crown molding is usually painted either in the color of the ceiling (creates the impression that the ceiling smoothly transitions into the wall), or in the color of the walls (molding as a continuation of the wall), or in the color of the strips (if strips are mounted on walls — creates unity of decorative elements). A contrasting crown molding (e.g., black molding on white walls and ceiling) emphasizes the boundary, creating a graphic frame.
MDF product painting technology: from preparation to finish
Painting quality critically affects the final result — even perfect strips will look mediocre with poor painting.
Surface preparation begins with assessing the primer condition. Factory primer is usually good quality, but defects may exist — fuzz, dust, minor unevenness. Light sanding with fine sandpaper (grit 180-220) removes these defects, creating microtexture for better paint adhesion. Sand along the length of the strip, without heavy pressure. After sanding, thoroughly remove dust with a dry cloth or vacuum cleaner — dust in paint creates roughness.
If MDF is not primed (raw), primer is mandatory. Use acrylic primer for wood and MDF, apply with brush or roller in 1-2 coats. Pay special attention to ends and edges — they are more porous, absorb more, require an additional coat. Primer dries in 2-4 hours at room temperature. After the first coat dries, sand with fine sandpaper — primer raises fuzz, sanding removes it. Apply the second coat, sand again after drying. Result — perfectly smooth white surface.
Paint selection depends on desired effect and usage conditions. Water-based acrylic paint — optimal choice for interior MDF products. Eco-friendly (minimal volatile organic compound content), dries quickly (2-4 hours between coats, full drying 24 hours), odorless, easily tinted to any color, washable. Available in matte (for modern minimalist interiors), satin/semi-gloss (for classic, gives soft silk-like sheen), glossy (for glamorous, gives bright sheen).
Latex paint — a type of acrylic with added latex, improving elasticity, durability, washability. More expensive than regular acrylic, but longer-lasting. Suitable for high-traffic areas — hallways, kitchens.
Alkyd paint (enamel) — based on alkyd resins, thinned with solvents. Provides harder, more durable coating than acrylic. Takes longer to dry (8-12 hours between coats), has odor during application, requires ventilation. Suitable for areas where maximum coating hardness is needed — cornices, elements subject to mechanical contact.
Polyurethane paint — the most durable, creates coating resistant to abrasion, chemicals, water. Used for commercial objects, humid areas. Expensive, toxic during application (requires protection), takes long to dry.
Paint tinting — adding pigments to achieve desired color. Can buy ready-made paint in desired color (limited selection) or tint white base to any shade using color system catalogs (RAL, NCS, Tikkurila Symphony, etc.). Tinting in store using computerized machines gives precise repeatable result. Manual tinting with pigments at home gives uniqueness, but difficult to replicate exact shade when purchasing additional paint.
Painting tools depend on whether you paint before or after installation. Painting before installation (recommended for individual strips) — strips laid horizontally on stands, painted with roller or spray gun. Roller — accessible tool, gives even coating with careful work. Choose velvet or microfiber roller with short nap for smooth surface without stippling. Foam rollers leave bubbles. Spray gun (electric or pneumatic) gives most even, professional coating, saves time for large volumes, but requires skill, setup, and protection of surrounding area from splashes.
Painting after installation (possible but more complex) — strips already on wall, painted carefully with brush or roller, avoiding drips into gaps between strips. Protect background wall with painter’s tape or plastic sheeting. Use brush for hard-to-reach areas — ends, corners. Use roller for front surfaces.
Paint application technology: apply first coat thinly, evenly, without drips. Thin coat dries faster, lays smoother. Thick coat runs, forms drips, unevenness. Apply in direction along length of strip for uniformity. Allow to dry (2-4 hours for acrylic paint). Assess coating — does primer show through, are there undercoated areas? Easily sand with fine sandpaper (320-400) to remove fuzz and unevenness. Apply second coat similarly. For saturated dark colors or painting light primer to dark color, a third coat may be required.
Drying and curing — after applying the final coat, allow paint to fully dry and cure before installation or use. Acrylic paint dries to the touch in 2-4 hours, but full curing (when coating reaches maximum strength) takes 7-14 days. During this period, avoid mechanical impacts, washing, and intensive contact.
Protective coating — to increase durability and simplify maintenance, apply transparent acrylic or polyurethane varnish over painted strips. Matte varnish preserves paint’s matte finish while adding protection. Glossy varnish adds shine. Varnish is applied in thin layer after paint is fully dry.
Installation of strip panels: from frame to final mounting
Quality installation ensures longevity, smoothness, and aesthetics of strip paneling.
Wall or ceiling preparation begins with assessing flatness. Strip paneling conceals minor unevenness (up to 5 mm), but significant discrepancies will be noticeable — strips replicate the base’s relief. If wall has discrepancies over 10 mm, level with putty or drywall. Clean surface of dust, peeling coatings. Prime to improve adhesion and protect against mold (especially if there will be gaps with air circulation behind strips).
Frame for individual strips — system of wooden or metal profiles to which strips are attached. If strips are vertical — frame is horizontal (boards run horizontally). If strips are horizontal — frame is vertical. Frame spacing 40-60 cm — sufficient for rigidity, not excessive. Boards with cross-section 40x20 or 50x25 mm are mounted to wall with wall plugs and screws. Important to set frame in one plane, using level and adding shims under boards in wall dips.
Alternative to wooden frame — metal profile for drywall (CD-profile), more stable to humidity, but less convenient for attaching strips with screws.
Marking strip positions — critical stage for flatness. Mark position of first strip on frame or wall (usually from corner or edge of accent zone). From it, measure strip width plus gap width — this is position of next strip. Continue marking along entire length. Use level or laser level to check verticality (if strips are vertical) or horizontal alignment (if horizontal).
Strips are attached to frame either hidden or exposed.
Hidden mounting — screws are driven from back of strip into frame at an angle (angled drive), screw heads remain on back side, invisible from front. Requires care to avoid piercing front side. Result — clean surface without visible fasteners. Alternative — special hidden clips or rails, to which strips snap.
Exposed mounting — screws are driven from front of strip into frame, screw heads are visible. Faster and simpler than hidden. Screw heads can be left visible (if using decorative screws in bronze or black metal) or filled and painted to match strip color (heads are recessed, holes filled with putty, sanded, and painted).
Adhesive mounting without frame is possible if wall is perfectly flat and strips are lightweight. Use construction adhesive (liquid nails), applied to back of strip in zigzag or dots. Strip is pressed against wall, temporarily fixed with painter’s tape or supports until adhesive sets. Advantage — speed, no frame. Disadvantage — requires perfectly flat wall, impossible to remove strips without damage.
Installation of ready panels is simpler — panel is mounted entirely to wall. If wall is flat — with adhesive. If uneven — on frame with screws through MDF backing of panel (screws hidden behind strips). Panels join end-to-end, joint can be filled with sealant for invisibility or left as is.
Corner and opening treatment — complex areas. In internal corners, strips from two walls meet at 90-degree angle. Can leave gap (visually separates walls) or cut last strips at 45 degrees and fit tightly (requires precision). In external corners, similar — 45-degree joint or install decorative corner element. Around door and window openings, strips are cut to size, ends can be covered with trim or left open if end is neatly finished and painted.
Finishing after installation includes filling visible screw holes (if open mounting was used) with acrylic sealant or putty in the color of the planks, sanding, and touch-up. Check all joints — if gaps appear, fill them with sealant. Final cleaning from dust and installation marks.
Design techniques: creating unique compositions
Plank cladding — a flexible tool allowing the implementation of various design ideas.
Accent wall — one of the most popular techniques. One wall in the room (behind the bed headboard, behind the sofa, behind the TV) is clad with planks, while the rest remain smooth. This creates a focal point, structures the space, adds depth without overloading. An accent wall can be in contrasting color (black planks on light walls) or tonal (gray planks in a gray room — textured accent without color).
Partial cladding — planks are not applied to the entire wall, but only to part of it. The lower half of the wall (up to 100–120 centimeters) — creates a panel-like effect, visually lowers high walls, protects against damage in contact zones. The upper half — creates a visual lightness, planks as a floating upper zone. Central band — planks at eye level, form a horizontal belt, zone long walls.
Geometric patterns — planks are installed not parallel, but at angles, creating geometric designs. Chevron — planks at 45 degrees, changing direction in the center, form a classic parquet pattern. Herringbone — similar to chevron, but planks meet at angles with their vertices. Diagonal stripes — all planks at one angle, create dynamism, visually expand narrow spaces. Frames and panels — planks form rectangular or square frames on the wall, within which another finish or contrasting color may be applied.
Variable plank spacing creates a rhythmic composition instead of monotony. Alternating narrow and wide gaps (30 mm — 50 mm — 30 mm — 50 mm) creates a visual melody. Grouping planks — several planks closely spaced, then a wide gap, then again several planks closely spaced — forms vertical or horizontal stripes.
Combination of planks of different widths adds complexity. Wide planks 80–100 mm alternate with narrow 40–50 mm planks, creating a dynamic rhythm, richness of forms, individuality.
Integration of lighting — LED strips or linear fixtures are installed between or behind the planks. Light penetrating through gaps creates an effect of a floating glowing wall, highlights relief, adds drama. This can be main lighting (bright LED strips), decorative backlighting (color-changing RGB strips) or soft ambient lighting for evening use.
Combination with other materials — planks do not cover the entire wall, but are combined with other finishes. Planks on a concrete wall (loft), on brickwork (industrial style), on textile panels (texture combination), on mirrors (reflections multiply planks, creating a complex play of lines).
Transition from wall to ceiling — planks start on the wall and smoothly transition to the ceiling, creating a unified enveloping surface. This technique visually unites space, increases the sense of height, creates dynamic modern architecture.
Space zoning — planks as a semi-transparent partition. Vertical planks with gaps, not reaching the ceiling or installed at partial height, divide space into zones (living room and dining room, bedroom and work area), maintaining visual connection, light, and air. This is softer than a solid partition, more modern than a screen.
Practical aspects: calculation, purchase, maintenance
Correct material calculation, supplier selection, and maintenance ensure successful project implementation.
Calculation of plank quantity depends on cladding area, plank width, and gaps. Formula: number of planks = wall length / (plank width + gap width). Example: 4-meter wall, 60 mm wide planks, 40 mm gap. 4000 / (60 + 40) = 40 planks. Wall height 2.7 meters — need planks 2.7 meters or longer (cut to size). Total 40 planks at 2.7+ meters. Add 10% for trimming and waste — 44 planks. If planks are sold at 2.8 meters — perfect, 44 pieces. If at 2.4 meters — will need to join or order non-standard length.
Calculating valances — measure room perimeter, subtract door opening width (if valance does not pass over door). Add 10% for corner trimming. Valances sold in 2–2.4 meter lengths, calculate number of strips. Example: 18-meter perimeter, 2-meter valance. 18 / 2 = 9 strips + 10% reserve = 10 strips.
Paint calculation depends on the area to be painted and paint consumption. Plank area: number of planks × plank length × plank width × 2 (front and back sides, if painting before installation) or × 1 (only front side, if after installation). Example: 44 planks × 2.7 meters × 0.06 meters × 2 = 14.3 m². Acrylic paint consumption is usually 8–12 m² per liter per coat. 14.3 / 10 (average consumption) = 1.43 liters per coat. Two coats — 2.86 liters. Buy a 3-liter can. For valances, calculate area similarly.
Purchase from a reliable supplier — key to quality. Look for companies specializing in MDF products, offering full range of planks, valances, and accessories. Check primer quality — surface should be smooth, white, without stains, fuzz, or defects. Confirm formaldehyde emission class — E1 or E0 for residential use. Check geometry — planks should be straight, without twisting, edges parallel. Confirm delivery conditions — long planks require appropriate transport.
Maintenance of painted MDF products is simple. Remove dust with dry soft cloth, brush, or vacuum cleaner with soft attachment. Wipe stains with damp cloth and neutral cleaner. Avoid abrasives, aggressive chemicals, excessive moisture. Matte painted surfaces are more sensitive to abrasion than glossy ones — wipe carefully. Scratches on painted surfaces can be touched up — lightly sand the damaged area, apply paint of the same color with brush, blend edges.
MDF plank cladding and valances for painting — materials for those who value creative freedom, willing to invest time in creating a unique interior, seeking modern architectural expression at a reasonable budget.Primed itemsOffering a clean canvas on which you paint with color, create mood, realize visual concepts without limitations of factory decor. This is a balance of production technology and individual result, material accessibility and solution exclusivity.