Article Contents:
- Functions of casings in interior
- Covering the installation gap
- Creating visual framing
- Protecting corner openings
- Connecting function in interior design
- Types of casings for interior doors
- Classification by Profile Shape
- Classification by material
- Classification by mounting method
- Installation features
- Preparation for Installation
- Marking and Cutting
- Mounting methods
- Final finishing
- Practical Tips
- Choosing casings
- Installation
- Care for casings
- Conclusion
- Frequently Asked Questions
A door opening without casings looks unfinished, technically crude, lacking aesthetic completeness. Even the most expensive door loses a significant part of its appeal if the technological gap between the frame and the wall remains open, revealing mounting foam, wall irregularities, traces of construction work.Door casingsIt is the final touch that transforms a functional structural element into an architectural detail integrated into the interior, creating visual completeness and stylistic coherence of the space.
In architectural history, framing openings has always played an important role. From ancient portals with columns and architraves to Renaissance portals with rich carvings — humanity has always sought to give special significance to door and window openings. Casings are the modern embodiment of this multi-century tradition, adapted to the scale of residential interiors and modern materials.
Modern casings combine practical functionality with high aesthetic value. They mask technological gaps, protect the corners of the opening from damage, create a visual frame, and link the door with the surrounding interior. At the same time, the variety of materials, profiles, sizes, and finishing options allows finding a solution for any style — from strict classicism to ultra-modern minimalism.
Choosing and installing casings is an important stage in finishing renovation, requiring attention to detail and understanding of basic design principles. Properly selected and correctly installed casings can enhance even budget doors, while a poor choice or careless installation will spoil the impression of an expensive interior.


Functions of casings in interior
Casings perform a whole complex of functions, each of which is important for creating a comfortable, beautiful, and long-lasting interior. Understanding these functions helps to approach the choice of casings consciously, taking into account all aspects of their operation in space.


Covering the installation gap
When installing a door, a technological gap of 1 to 3 centimeters, sometimes more, remains between the door frame and the wall. This gap is necessary to compensate for wall irregularities, to fill with mounting foam providing thermal and acoustic insulation, and to allow the frame to be set strictly vertically regardless of wall curvature.
An uncovered gap looks extremely unattractive — mounting foam, pieces of plaster, wall irregularities, and traces of mortar are visible. Moreover, exposed mounting foam is susceptible to destruction from ultraviolet light, mechanical impacts, and moisture. Over time, it yellows, crumbles, and loses its insulating properties. An uncovered gap becomes a dust accumulation area, which is practically impossible to clean thoroughly.
The casing fully solves this problem, creating a neat frame around the opening. A standard casing width of 60–80 millimeters with a margin covers the technological gap even in cases where it is larger than usual due to particularly curved walls. At the same time, the gap under the casing remains functional — the foam continues to work as an insulator, but visually the opening appears flawless.
It is important to understand that covering the gap is not an attempt to hide flaws, but a normal construction practice. Similarly, baseboards hide the gap between the wall and floor, and cornices — between the wall and ceiling. These are elements of architectural culture, without which space appears unfinished.
Our factory also produces:


Creating a Visual Frame
Perception psychology dictates that an opening requires visual framing. An unframed opening is perceived as a technical hole, a break in the wall plane. Framed openings with casings become portals, architectural elements that not only allow passage but also attract attention, create a focal point, and structure the space.
Framing works on the same principle as a picture frame. Even a simple frame makes an image more significant, complete, and prominent. An elaborate frame can turn a modest engraving into a central element of the interior. Casings work similarly — they can be restrained or luxurious, but always make the opening more organized and professionally finished.
The width of casings determines the degree of visual emphasis on the opening. Narrow casings of 50–60 millimeters create a delicate frame, suitable for modern minimalist interiors. Medium casings of 70–80 millimeters are a universal choice for most applications. Wide casings of 90 millimeters and more make the opening a significant architectural element, characteristic of classical interiors.
The profile of the casing affects the character of the framing. A simple flat profile creates a modern graphic effect. A semi-circular profile adds softness and volume. A carved profile creates classic luxury. The choice of profile should match the style of the doors and the overall character of the interior.
Get Consultation
Protection of Opening Corners
The corners of the door opening are the most vulnerable areas, constantly subjected to mechanical impacts. During moving furniture, large items, and in daily use, the corners of the door regularly receive impacts, scratches, and abrasions. This is especially relevant for openings in frequently used rooms — hallways, kitchens, children’s rooms.
Unprotected corners gradually lose neatness — paint, wallpaper chips, plaster dents, and scratches appear. In the worst cases, the corners of the wall themselves may be damaged, especially if it is made of gypsum board. Repairing damaged corners is labor-intensive and often requires a complete redo of the finishing in the opening area.
Casings take impacts on themselves, protecting the wall. Even if the casing is damaged, it is significantly easier to repair or replace it than to restore the wall corner. MDF casings are sufficiently strong for normal operational impacts, wooden ones are even stronger. In case of serious damage, the casing can be removed and replaced with a new one without affecting the main finish.
Protective function is especially important in homes with children and pets. Children’s wheeled toys, bicycles, scooters regularly come into contact with openings. Casings create a buffer zone that absorbs active use, significantly extending the service life of the finish.
Connecting Function in Interior Design
Casings play an important role as a connecting element, uniting different parts of the interior into a unified whole. They can be coordinated in color, material, and style with baseboards, ceiling cornices, and other architectural elements, creating a cohesive finishing system. Such coordination is a sign of professionally designed interior.
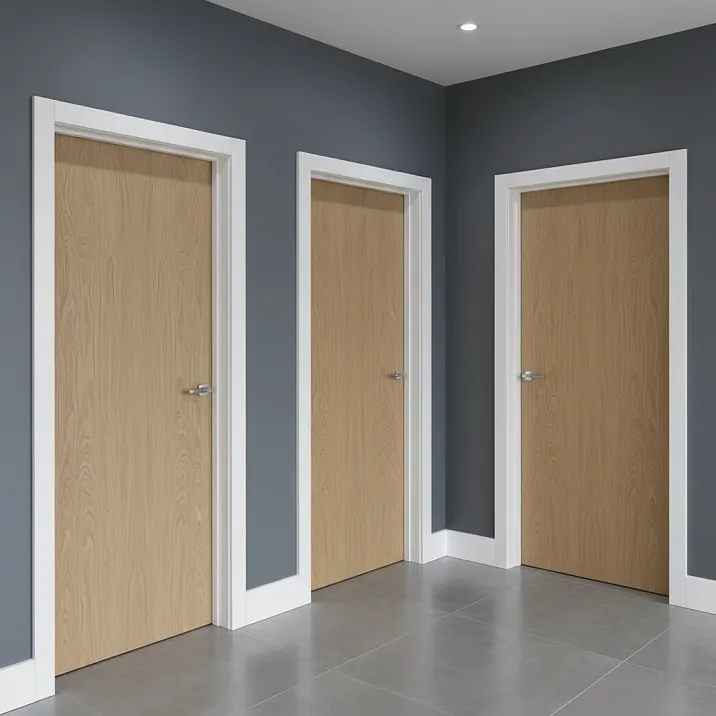
The color of the door casing can match the door panel color, creating a unified doorway composition. Alternatively, casings can be painted to match the wall color, visually blending in. Contrasting casings—white on dark walls or dark on light walls—create graphic effect, clearly define doorways, and make them accent elements.
A consistent casing style throughout all rooms of an apartment creates visual continuity of space. Even if rooms are decorated in different color palettes, identical casings act as a unifying element. This is especially important in open-plan layouts, where multiple zones exist within a single space.
Coordinating casings with baseboards is a basic design principle. The width, profile, color of casings and baseboards must be matched. Ideally, they are from the same manufacturer’s collection, where all elements are designed for compatibility. This creates a professional, systematic finish.
Types of door casings
The variety of casings available on the modern market allows finding a solution for any interior style, any budget, and any requirements for durability. Casings are classified by several parameters—profile shape, material, mounting method, and construction type.
Classification by profile shape
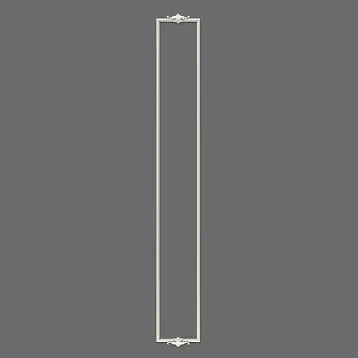
Flat or straight casings have a simple rectangular cross-section with a smooth surface. This is the most common and versatile type, suitable for most interiors. Flat casings are easy to produce, affordable, and simple to install. They look good with smooth doors, creating a modern, restrained look. The width of flat casings is usually 60–80 millimeters, thickness 8–12 millimeters.
Oval or rounded casings have an oval cross-section, a three-dimensional profile shaped like a half-moon or drop. They create a softer, more decorative look compared to flat casings, adding volume and play of light. Oval casings pair well with doors featuring rounded elements—rounded mullion corners, oval glazing. They are characteristic of neoclassical, Scandinavian, and soft modern interiors.
Drop-shaped casings are a variant of oval casings with an asymmetrical profile, where the maximum convexity is shifted to one edge. This creates a dynamic profile, interesting play of light and shadow. Drop-shaped casings are less common but create a distinctive look, suitable for original design solutions.
Decorative casings have a complex relief profile with various decorative elements—grooves, protrusions, carving, ornamentation. They create a rich, luxurious look, characteristic of classical, baroque, and Victorian interiors. Decorative casings are more expensive than simple ones and require appropriate surroundings—expensive doors, classical finishes, high ceilings. The width of decorative casings is usually greater—80–120 millimeters.
Carved casings are adorned with plant or geometric ornaments, crafted using wood carving or milling. This is the pinnacle of decorative art, transforming the casing into a piece of decorative-applied art. Carved casings are characteristic of exclusive classical interiors, restoration of historical spaces, and creation of unique design projects.
Classification by material
Solid wood casings made from pine, oak, beech, ash—classic choice with several advantages. Natural wood is eco-friendly, has a beautiful texture, feels warm to the touch, and creates a unique atmosphere. Wood casings can be repainted multiple times, restored, and serve for decades with proper care.Oak MDF casingswith oak texture are especially prestigious and durable.
MDF casings combine many advantages of wood with greater stability and accessibility. MDF does not deform due to humidity changes, has a perfectly smooth surface without knots, is easy to process and paint.Buy MDF door casingmeans getting optimal price, quality, and aesthetics ratio. After painting, MDF casings visually indistinguishable from wooden ones.
Laminated MDF casings are covered with decorative film imitating various wood species or solid colors. They are ready for installation, require no additional finishing, saving time. Laminated casings are practical, moisture-resistant, and easy to clean. They are ideal for matching with laminated doors of the same color.
Veneered casings are covered with a thin layer of natural veneer from premium species—oak, ash, walnut. Veneer creates a real wood texture at significantly lower cost compared to solid wood. Veneered casings are prestigious, eco-friendly, and have a noble appearance. They are coated with lacquer for protection and to highlight the texture.
PVC casings are plastic, moisture-resistant, and inexpensive. They are suitable for plastic doors on balconies, loggias, and humid areas. PVC casings are easy to maintain, do not fear moisture, and do not require painting. The downside is less noble appearance compared to wood and MDF, limited color range.
Classification by mounting method
Surface-mounted casings are the most common type, mounted on top of the door frame using various methods—nails, screws, glue. They are easy to install, do not require special frame preparation, suitable for any doors. Surface-mounted casings can be of any profile and material, ensuring reliable coverage of the mounting gap.
Telescopic casings have a special L-shaped profile with a longitudinal protrusion that inserts into the groove of the door frame or extension by the "tongue-and-groove" principle. This ensures hidden mounting without visible nails or screws, allowing slight adjustment of the frame width. Telescopic casings require a special frame with a groove, are more complex to install, but create a perfectly neat appearance.
Casing with cable channel has an internal cavity for concealed wiring. This is convenient for installing switches, lighting, and security systems without wall cutting. The cable channel is covered with a removable cover, providing access to wires for maintenance. Such casings are wider than standard—usually 80–100 millimeters.
Installation features
Quality installation of casings requires careful preparation, precision, and adherence to technology. Even the most beautiful casings will look poorly if installed carelessly with uneven lines, gaps at joints, visible fasteners.
Preparation for Installation
Geometry check—first step. The door frame must be installed vertically and lie in the same plane as the wall. Deviations exceeding 2–3 millimeters will cause problems—gaps, uneven gaps. Check is performed with a level and straightedge. If significant deviations are detected, it is better to correct them before installing casings.
Wall condition check—the wall should be relatively flat, strong, and clean. Loose areas are reinforced with primer, peeling coatings are removed. Irregularities exceeding 5 millimeters are best leveled, as the casing will follow the wall’s curves, creating gaps. Dust and dirt are removed to ensure good adhesion of glue or paint.
Trimming mounting foam—if foam protrudes beyond the frame plane, it is carefully trimmed flush with a sharp knife. Protruding foam prevents tight casing fit. It is important not to damage the frame and not to trim foam too deeply.
Tool preparation—requires a miter saw or miter box for precise 45-degree angle cuts, tape measure and pencil for marking, level for vertical control, fasteners—finishing nails or liquid nails, spackle for filling mounting points.
Marking and Cutting
Measuring the height of vertical casing: from the floor or from the top edge of the skirting board to the point of intersection with the horizontal casing. Measurement is taken with a 3-5 millimeter setback from the inner edge of the frame. This setback is necessary so that the casing does not interfere with door closure and creates a visual frame around the frame.
When joining at a 45-degree angle, the casing width is added to the measured height, as it is cut at an angle. When joining at a 90-degree angle, the dimension is taken exactly. For a room with a height from floor to top of frame of 210 centimeters, a 5-millimeter setback, and a 7-centimeter wide casing joined at a 45-degree angle, the length of the vertical casing will be 210 - 0.5 + 7 = 216.5 centimeters.
Casing cutting is done with a circular saw or a hand saw. For 45-degree joints, the casing is placed in the saw with the front side up, at a 45-degree cutting angle, and the direction is determined by whether it is the left or right casing. Precision is crucial — even a 1-degree deviation will create a noticeable gap. For 90-degree joints, one casing is cut at a right angle, and the other also is.
Trial fitting — before final installation, all casings are fitted to the opening, checking the quality of joints and the tightness of fit. If gaps are found, the casings are modified — trimmed or sanded. It is better to spend time on finishing than to fix errors after installation.
Methods of mounting
Finishing nail installation — the traditional method for wooden and MDF casings. Use thin, headless nails 40-50 millimeters long. Nails are driven in at 40-50 centimeter intervals and driven in 1-2 millimeters with a nail set. The nail holes are spackled and, after painting, become invisible. This method ensures secure fastening.
Liquid nail installation — a glue method that leaves no visible fastening marks. Glue is applied to the back of the casing in a zigzag or dot pattern. The casing is pressed against the wall and held for 2-3 minutes until the glue sets. This method is suitable for flat walls and provides a clean aesthetic finish. The downside is lower strength compared to nails.
Combined installation — glue plus nails — provides maximum reliability. Glue creates clamping force along the entire length, while nails secure until the glue sets and additionally reinforce the fastening. This is the optimal method for casings on non-ideal flat walls.
Screw installation is used less often due to more visible marks. Screws are driven in with pre-drilling, screw heads are countersunk, and holes are spackled. After painting, the fastening points are masked, but require more careful finishing than with nails.
Final finishing
Sealing joints and fastening points — all joints between casings, nail holes, and small gaps between casing and wall are filled with acrylic spackling compound. Spackling compound is applied with a rubber spatula, excess is removed. After drying, the spackled areas are sanded with fine-grit sandpaper until perfectly smooth.
Priming before painting is mandatory for unprimed casings. Primer creates an even surface and improves paint adhesion. Special attention should be paid to spackled areas — they must be thoroughly primed.
Painting is done in two to three layers of quality acrylic paint. The first layer may reveal defects, which are corrected with spackling compound. The second layer creates the main coating. The third ensures perfect coverage. Paint is applied with a brush for even coverage.
Practical Tips
Successful work with casings requires knowledge of practical nuances that come with experience. Following these tips will help avoid typical mistakes and achieve a professional result.
Choosing Casings
Door Matching — casings must harmonize with the door in style, material, and color. A classic door requires classic casings, a modern smooth door — simple flat casings. Casing color usually matches door color, creating a unified doorway composition. It is preferable for casings to be made of the same material as the door — wooden door with wooden casings, MDF door with MDF casings.
Matching with Skirting Boards — casing width should be close to skirting board width or slightly larger. Profile should also be matched — flat skirting boards with flat casings, decorative with decorative. Casing and skirting board colors are usually the same, creating a unified finishing system.
Room Height Consideration — for standard ceilings of 2.5-2.7 meters, optimal casing width is 60-80 millimeters. For low rooms, narrower casings of 50-70 millimeters are better. For high rooms, wider casings of 80-100 millimeters can be used.
Material Reserve — always take a 10-15 percent reserve for cutting angles and possible errors. It is better to have extra casing sets than to discover a shortage when installing the last opening.
Installation
Working in pairs simplifies installation, especially for long casings over 2 meters high. One person holds the top, the other the bottom, ensuring even pressing and controlling vertical alignment.
Temperature Regime — optimal installation temperature is 18-25 degrees. At lower temperatures, glue does not set properly. During drying, no drafts should be created — this may cause peeling.
Vertical Alignment Check — each casing is checked with a level before final installation. Even a small deviation from vertical will be noticeable and spoil the appearance.
Careful Joints — corners must fit tightly without gaps. If a gap remains, it can be masked with acrylic sealant, but it is better to achieve a tight joint through precise cutting.
Casing Maintenance
Regular Cleaning — casings are wiped with a soft dry cloth once a month during general cleaning. Dust in profile grooves is removed with a soft brush.
Wet Cleaning — as needed, with a slightly damp sponge without excess water. For stains, a mild soap solution is used.
Repairing Damage — scratches and chips are filled with spackling compound, sanded after drying, and repainted. Peeling sections are re-glued with fresh adhesive.
Repainting for Refreshment — after 5-7 years, casings can be repainted, restoring their original freshness and allowing a change in interior color scheme.
Conclusion
Interior Door Casings — the most important element in finishing an interior, transforming a technical opening into an architectural detail. They perform multiple functions — conceal mounting gaps, create visual framing, protect corners, and connect interior elements. Properly selected and professionally installed casings can enhance any door and interior.
Variety of Casing Types allows finding a solution for any style and budget. Flat, semi-circular, decorative — each type has its specific application. Wooden, MDF, laminated, veneered — different materials meet various requirements for durability and aesthetics.
Quality installation is critically important for the result. Careful preparation, accurate marking, correct cutting, secure fastening, and neat finishing — all of these determine the final appearance. Knowledge of practical nuances helps avoid typical mistakes.
STAVROS Company offers a wide range of door casings made from high-quality materials. Various profiles, sizes, and finishing options allow for the implementation of any project with a professional result.
Frequently asked questions
What width should door casings be?
For standard apartments, a width of 70-80 millimeters is optimal — universal, suitable for most doors and interiors. For narrow doors 60 centimeters, choose casings 60-70 millimeters. For wide doors 80-90 centimeters, casings 80-90 millimeters will suit. The casing width should be close to the baseboard width or slightly larger for a harmonious appearance.
At what angle should casings be joined?
There are two methods — at 45 and 90 degrees. Joining at 45 degrees is more aesthetic, creating a neat corner joint without visible ends, suitable for any profile. Requires precise tools and skill. Joining at 90 degrees is simpler, does not require precise cutting angle, easier to repair, but less aesthetic for decorative casings. Both methods work well for flat casings.
What is the best way to mount casings?
For wooden and MDF casings, the best method is finish nails 40-50 millimeters long. They provide secure mounting, and mounting points are easily concealed. Liquid nails are suitable for perfectly flat walls, creating a clean look without visible fasteners. The combined method — glue plus nails — ensures maximum reliability for uneven walls. Screws are used less often due to more visible marks.
How to choose the color of casings?
Casings are usually chosen to match the door panel color, creating a unified doorway composition. An alternative is casings in baseboard color, linking them into a single system. White casings are universal, suitable for any doors and walls. Contrasting casings — dark on light walls — create a graphic accent. The key is consistency between casings, baseboards, and other architectural elements.
How much does casing installation cost?
Professional installation costs 300-800 rubles per opening, depending on region and complexity. This includes marking, cutting, mounting, and joint sealing. Complex joints for decorative casings cost more. Painting costs an additional 200-400 rubles per opening. For an apartment with 8-10 openings, full installation with painting will cost 4000-12000 rubles. DIY installation saves money but requires tools and skills.
Can you install door casings yourself?
Installation is accessible for DIY if basic skills are available. Required tools: circular saw or miter saw, tape measure, level, fasteners, spackle. The main difficulty is precise cutting of corners. For the first time, it’s better to start with a simple opening. Straight sections are easy to install. Without experience or for multiple openings, it’s better to hire professionals.
What mistakes are commonly made?
Inaccurate measurement — casings become too short or too long, creating gaps. Incorrect cutting angle — joints don’t align. Insufficient fasteners — casings detach. Poor joint sealing — mounting points are visible after painting. Lack of vertical alignment control — casings are installed crooked. Asymmetry — gaps from the frame edge differ on different sides.
How often should casings be replaced?
With proper installation and maintenance, casings last 15-20 years or more. Wooden and MDF casings can be repainted to refresh their appearance without replacement. Replacement is needed for serious mechanical damage, door changes, or major renovations with a new interior concept. Regular maintenance extends service life.