


Article Contents:
- Before starting everything: what needs to be decided on paper
- What to check before starting installation
- Surface preparation: three types of walls — three approaches
- Concrete or brick wall
- Drywall wall (GKL)
- Wooden wall (log, timber, clapboard)
- Installation of slatted wall panels: complete technological chain
- Step one: Acclimatization of slats
- Step two: Installing the battens
- Step three: Marking the first batten
- Step four: Methods of fastening battens
- Step five: Spacers - the tool for equal gaps
- Step six: Cutting battens - tools and rules
- Step seven: Finishing elements of the batten system
- Installing polyurethane moldings: from cutting to final painting
- Tools for Installing Polyurethane Molding
- Choosing adhesive for polyurethane decor
- Cutting cornice corners: the main skill
- Step-by-step installation of cornice around the ceiling perimeter
- Installation of polyurethane rosettes and medallions on the ceiling
- Installation of decorative polyurethane beams
- Combining slatted panels and polyurethane decor in one space
- Gap between slatted field and ceiling cornice
- Typical installation errors: full breakdown
- Mistake 1: Installation Without Acclimatization
- Error 2: Uneven gaps without spacers
- Error 3: Adhesive squeezed into the gap
- Error 4: Cornice joint in the corner - 'separated'
- Error 5: Cornice 'sagged' in the span
- Error 6: Paint 'stretched' - brush marks visible
- Error 7: First rail not leveled
- Error 8: Molding on wet substrate
- Compatibility table for adhesive, substrate, and decorative element
- Frequently asked questions about installing slatted panels and polyurethane decor
- Can slatted panels be installed without lathing, directly on the wall?
- What filler should be used to seal the joints of polyurethane molding?
- How to fix a crooked gap between rails after installation?
- Installing polyurethane molding on the ceiling — is it possible without finishing nails?
- Should the back side of polyurethane decor be painted before installation?
- How to choose the correct cornice size for a room?
- Can you install slatted panels using only adhesive—without nails?
- Conclusion

Between 'I want this interior' and 'it turned out exactly like this' lies a distance determined by installation technology. You can choose perfect wooden slats, the right polyurethane molding, an exact color scheme—and still end up disappointed if the installation is done with errors. Crooked gaps between slats, molding that pulls away from the wall after a month, corner joints with visible cracks, molding with stains where adhesive seeped out—all these are consequences of violating the technology, not 'defective material.'
Installation of slatted wall panelsandinstallation of polyurethane molding—these are two independent processes with different logic, different tools, and different critical points. But in an interior, they are addressed in a single project, often in a single room, and an error in either one ruins the result.
This article is a complete guide. Not 'general advice,' but a specific technological sequence: from the wall condition to the final painting. For those who want to do it right the first time—without rework, without 'I'll fix it later.'


Before starting everything: what needs to be decided on paper
Professional installation doesn't start with a hammer drill. It starts with a drawing. Those who skip this stage pay twice: in materials and time.
What must be finalized before starting work:
Slat layout diagram. Where does the slatted field begin and end? How does it relate to doorways, outlets, switches? Are the widths of the edge slats at the walls the same on both sides, or is one side trimmed? Slat orientation—strictly vertical or horizontal?
Molding and trim diagram. Which elements go around the perimeter of the slatted field? Ceiling cornice—only in the slatted wall area or around the entire room perimeter? Are there molding frames on other walls?
Electrical diagram. Where are the outlets and switches—before installing the battens, you need to decide: to set them flush with the slats or mount them 'with an offset.' Where the LED wiring will run—if lighting is planned.
Balance of edge battens. One of the most common mistakes: battens are not laid out before installation, and the first batten starts from the wall edge 'as it happens'. As a result, one wall has a full batten, the other has a narrow 'stub' of 5–8 mm. Correct: lay out battens 'dry' (without adhesive), determine the position of the first batten so that the edge battens at both walls are of equal width.


What to check before starting installation
Before proceeding with the installation of wall panel battens or polyurethane decor, it is necessary to check the condition of the substrate. This is not a formality—it is a condition for the durability of the entire system.
-
Wall moisture. Permissible moisture content of plaster substrate for installing wooden battens: no more than 8%. Concrete: no more than 4%. Checked with a moisture meter. If the norm is exceeded—dry before installation (at least 2–4 weeks with normal ventilation).
-
Wall evenness. Deviation no more than 5 mm over 2 m length when installing battens on battens. When installing battens directly on the wall (without battens)—no more than 3 mm over 2 m.
-
Surface adhesion. Loose, crumbling plaster is not a substrate for installation. The wall must be primed to a solid state.
-
Presence of fungus and mold. Any biological damage is eliminated with antifungal treatment before installation—without exceptions.
Our factory also produces:

Substrate preparation: three wall types—three approaches
Get Consultation
Concrete or brick wall
The most common substrate in city apartments. Requires:
-
Dust removal — vacuuming or wet wiping.
-
Priming with deep-penetrating primer in 1–2 coats. The second coat — after the first is completely dry (4–6 hours at t +20°C).
-
Leveling with plaster if deviations exceed 10 mm (when mounting on lathing — optional, the lathing compensates for unevenness).
-
Re-priming after plastering.
For mounting polyurethane molding directly on a concrete or brick wall — additional finishing with putty to a smooth surface. Molding on a textured brick surface will not provide tight contact — the adhesive will 'hang' on the protrusions.
Drywall wall (GKL)
The most convenient base for all types of decorative mounting. GKL is even, primes easily, adhesive 'sticks' to it reliably.
-
GKL joints are puttied and sanded — this is a mandatory condition.
-
Priming the GKL surface with a water-soluble primer (Knauf Tiefengrund or equivalent).
-
Dry and warm surface — work at air humidity above 70% is not recommended.
Installation of slatted wall panels on drywall: the batten is attached to the frame profiles, not to the sheet itself. The slats are screwed to the batten—load is on the frame, not the sheet.
Wooden wall (log, timber, clapboard)
Wooden substrate requires a special approach when installing wooden slats:
-
The substrate must be dry and stabilized (not 'fresh' wood that is still shrinking).
-
Rigid adhesive on a wooden substrate is not recommended: different shrinkage rates of the substrate and slatted system will cause cracks. Only mechanical fastening—clips or screws.
-
Vapor barrier film between the substrate and batten—when installing on an exterior wooden wall.
Installation of slatted wall panels: complete technological sequence
Step one: Acclimatization of slats
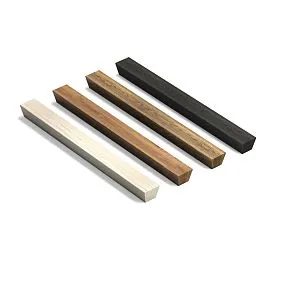
This is the requirement most often ignored—and later pay for it with deformation of installed slats. Wooden slats andLath MDF Panelsmust be brought into the room and kept there for at least 72–96 hours before installation.
Why: wood and MDF "breathe" — they absorb or release moisture depending on the room's humidity. Slats brought from a cold warehouse to a warm apartment absorb moisture and slightly expand. Slats brought from a humid warehouse to a dry heated room — dry out. In both cases, the geometry of the slats changes. If installed before acclimatization — after 2–4 weeks the slats will "warp": gaps will change, bulges will appear.
Acclimatization conditions: slats are stored horizontally on a flat surface (or vertically if length allows), not bundled in packs, in a room with installation temperature.
Step two: Installing the batten framework
Attaching slat panels to the wallis done using two methods: on batten framework and directly on the wall (direct mounting). The choice of method depends on the material and evenness of the wall.
The "batten framework" method is universal and most reliable. Used:
-
When wall deviations exceed 5 mm over 2 m
-
When concealed wiring behind slats is needed
-
When installing acoustic or thermal insulation behind slats
-
When installing slats on drywall (attaching to the frame)
Battens material:
-
Wooden batten 25×40 mm or 30×50 mm — for most applications
-
Metal profile CD 60×27 mm — for wet rooms and when higher precision is required
Battens spacing: 400–500 mm — for horizontal slats; 400–500 mm — for vertical slats (in this case, the battens are horizontal, and the slats are attached to the horizontal battens).
Battens installation:
-
Laser level — set vertical lines (for horizontal battens) or horizontal lines (for vertical battens).
-
Marking attachment points on the wall.
-
Drilling and installing dowels. Dowel diameter: 6–8 mm for concrete, 8 mm for brick.
-
Attaching battens to dowel screws with wedge inserts for leveling the plane.
-
Checking the plane with a level: all battens — in the same plane.
Critical parameter: deviation of the batten plane — no more than 2 mm per 2 m. It is the battens that determine whether the slats will 'lie' flat.
The 'direct mounting' method — used on even walls (deviation up to 3 mm per 2 m) and when there is no need for hidden utilities. Slats are attached directly to the wall via adhesive or clips.
Step three: Marking the first slat
The first slat is the 'zero' of the entire system. If it is installed unevenly — all subsequent slats will follow this error, and by the middle of the wall the deviation may become noticeable.
For vertical slats: the first slat is set strictly vertically using a laser level (or a spirit level at least 1 m long). Verticality is checked at two points (top and bottom of the slat).
For horizontal slats: the first slat is set strictly horizontally using a level. The first slat is the bottom one. Installation proceeds from bottom to top.
Position of the first slat against the wall: offset from the side wall = 'x' — calculated based on balancing the edge slats (see 'what to decide on paper').
Step four: Methods of attaching slats
installation of slatted panels on the wallis performed using one of three methods — or a combination thereof.
Method 1: Clips (concealed fastening)
A cleat is a metal bracket installed into the groove of a slat and screwed to the battens. The slat is held in the groove without visible fasteners on the front surface.
Advantages:
-
The front surface of the slat—without a single hole or screw
-
Demountability: the slat can be removed without damage
-
Suitable for slats with grooves for cleats
Limitations:
-
Requires slats with a technological groove
-
Minor shifting of the slat in the groove is possible during shrinkage
Method 2: Mounting adhesive + finishing nails
Mounting adhesive is applied in a zigzag or dotted pattern on the back surface of the slat. The slat is pressed against the wall or battens. A finishing nail 1.4–1.8 mm in diameter is driven at an angle through the slat into the battens—provides holding until the adhesive sets.
Advantages:
-
Suitable for slats of any profile
-
High reliability with proper adhesive
-
Ease of installation
Adhesive selection:
-
Polyurethane-based 'Liquid Nails' — a universal option
-
Acrylic mounting adhesive — for MDF on drywall
-
MS-polymer structural adhesive — for heavy solid wood battens
Important: adhesive is applied to the batten, not the wall. Distance from the edge of the batten to the start of adhesive application — 50 mm (to prevent adhesive squeeze-out through the gap).
Method 3: Screws through the batten (exposed fastening)
The screw is driven through the batten into the lathing or into a wall plug. The screw hole is countersunk, the screw is driven with slight countersinking, and the hole is filled with a wooden dowel or filler.
Used for heavy battens (solid oak 60×30 mm and larger), for battens without a groove for clips, for direct mounting on a wall without lathing.
Step five: Spacer shims — the tool for equal gaps
Equal gap between battens — not 'as it turns out'. This is a measurable parameter, achievable only with a tool. A spacer shim — a strip of MDF, plywood, plastic, or metal of the exact required thickness — is placed in the gap during the installation of each batten and removed after the adhesive sets.
Cut spacers of the required thickness from an MDF sheet in one pass — accuracy ±0.2 mm. One cutting thickness for the entire slat field.
Procedure:
-
Install the first slat.
-
Insert spacers (2–3 pieces along the height of the slat) into the gap.
-
Press the second slat against the spacers.
-
Secure the second slat (glue + nails or clips).
-
Remove the spacers after the glue sets (15–20 minutes).
-
Repeat.
Spacers can be left in the gap when installing with clips (if the spacers are precisely fitted to the gap width and do not interfere with the clips).
Step six: Cutting slats — tools and rules
Longitudinal cutting (reducing the width of the slat at the side walls): circular saw or band saw with a fence. Cut strictly parallel to the long axis of the slat. Sand the end after cutting with 120-grit sandpaper.
Cross-cutting (by length): miter saw at 90° is a mandatory tool. A hand saw produces an uneven, 'fuzzy' end — especially on wood species with a coarse grain (oak, ash). A miter saw provides a precise straight cut without further processing.
Bevels and chamfers: when installing slats into a 45° corner — use a miter saw with a swivel table. A 45° angle for an external corner, 45° for an internal corner.
Working around obstacles (sockets, switches): a slot in the slat is made with a jigsaw using a thin saw blade. The edges of the slot are sanded.
Step seven: Finishing elements of the slat system
After installing the main field of slats — install the finishing elements:
Lower baseboard.Pogonazh iz massivaA polyurethane baseboard is attached along the bottom edge of the slat field. It covers the bottom end of the slats and the gap between the slats and the floor.
Top cornice. A polyurethane cornice is attached along the top edge of the slat field. It covers the top end of the slats and the transition to the ceiling.
Side moldings. Along the side edges of the slat field — vertical moldings that cover the ends of the outermost slats.
Corner covers. Where the slat field meets a corner — internal or external corner elements.Slatted panels for interior finishingIn corner areas, special corner profiles are used or pieces are joined at a 45° angle.
Installation of polyurethane molding: from cutting to final painting
Now about the second part —installation of polyurethane molding. This is a different material, a different scale of the task, different tools — but the same logic: preparation, precision, consistency.
Polyurethane molding — cornices, moldings, rosettes, beams, pilasters — is easy to install under one condition: proper surface preparation and the right adhesive.
Tools for installing polyurethane molding
Basic set:
-
Miter saw — for trimming cornices at a 45° angle on corners
-
Miter box — an alternative for small volumes of work
-
Flexible spatula — for applying adhesive
-
Finish nails 1.4–1.8 mm, length 40–50 mm — for fixing until the adhesive sets
-
Nail gun or hammer with a nail set
-
Putty knife — for sealing joints
-
Sanding block + sandpaper 120–180
Specialized tools:
-
Angle template 45° / 90° — for controlling trimming
-
Laser level — for marking the horizontal line for cornice installation
-
Thin paintbrush — for applying primer to the back surface of polyurethane decor before installation
Choosing adhesive for polyurethane decor
Correct adhesive — one of the three key conditions for quality installation (alongside surface preparation and precise corner trimming). Adhesive for molding decor must:
-
Provide adhesion to polyurethane
-
Hold the element on a vertical surface until fully cured
-
Have minimal shrinkage (so the element does not "shift" during curing)
-
Allows puttying and painting over itself
Recommended types:
| Glue type | Base | Setting time | Features |
|---|---|---|---|
| Polyurethane construction adhesive (Titebond PU, Moment montage) | Any | 20–30 min | Universal, good adhesion to PU |
| MS polymer adhesive | Concrete, drywall, wood | 30–40 min | Elastic after curing |
| Specialized molding adhesive (Quelyd, Pattex) | Plaster, drywall | 15–20 min | Minimal shrinkage |
| Acrylic-based liquid nails | Drywall, plaster | 20–30 min | Cannot be used on wet surfaces |
Cannot be used:
-
Silicone sealant — not paintable, leaves glossy stains
-
Construction foam — too high expansion, deforms lightweight polyurethane decor
-
Epoxy adhesive — rigid, does not compensate for thermal expansion
Cutting cornice corners: the key skill
installing polyurethane moldingincludes the most technically demanding operation—cutting corner joints. This is where most people make mistakes, which they later 'patch up' with putty—with varying success.
Internal corner (room corner):
Left cornice section: cut at 45° to the right (the cut 'goes into' the wall).
Right cornice section: cut at 45° to the left.
With proper cutting: the ends of the two sections meet at a sharp angle without a gap.
External corner (column, wall protrusion):
Left section: cut at 45° to the left (the cut 'comes out of' the wall).
Right section: cut at 45° to the right.
Critical nuance: the angle in a room is rarely exactly 90°. At 88° or 92°, cutting strictly at 45° results in a visible gap. Rule: before cutting, measure the angle—and make cuts at (angle÷2). For an 88° angle—44°+44°. For 92°—46°+46°.
Miter saw vs. miter box:
Miter saw — accuracy ±0.5°, clean cut. Miter box — accuracy ±1–2°, for simple straight cornices of small cross-section. For cornices with a cross-section of 80×60 mm and larger — only a miter saw.
Step-by-step installation of cornice around the ceiling perimeter
Step 1: Marking the installation line
The laser level is set to horizontal line mode. The line is projected onto the wall at a distance of 'cornice height × sin(profile angle)' from the ceiling. Marking with a pencil around the entire perimeter — a reference line to which the lower edge of the cornice will be aligned.
For a cornice 80 mm high with a profile at 45° to the wall: the lower edge of the cornice on the wall is located 56 mm below the ceiling (80 × sin45° = 56.6 mm). This is the marking line on the wall.
Step 2: 'Dry' fitting
Before applying glue — assemble all corner joints 'dry' (without glue), ensure cutting accuracy. If necessary — adjust the cut. It is much easier to redo the cutting 'dry' than after applying glue.
Step 3: Priming the back surface
The back surface of the polyurethane cornice is treated with a thin layer of water-soluble primer — to improve the adhesion of the glue to the polyurethane. Drying time: 30–60 minutes.
Step 4: Applying glue
Apply adhesive in a "snake" pattern to the back surface of the cornice — both on the wall plane (lower edge) and on the ceiling plane (upper edge). Setback from the edge — 15–20 mm. Distance between "snakes" — 80–100 mm.
Step 5: Section Installation
Press the cornice against the ceiling and wall simultaneously, aligning the lower edge with the marking line. Hold for 30–60 seconds with manual pressure. Secure with finishing nails every 300–400 mm. Drive nails at an angle through the side surface of the cornice into the wall.
Step 6: Joint Sealing
Seal joints in corners and between sections with specialized acrylic putty (not gypsum!) — flexible, crack-resistant under micro-movements. Apply putty with a spatula in excess, remove excess with a wet finger or spatula.
After the putty dries (4–6 hours): sand with 120-grit sandpaper — smooth transition from putty to cornice surface.
Step 7: Final Painting
Before painting — prime the entire cornice surface with water-soluble primer. This seals the pores of the polyurethane and ensures even paint absorption.
Painting: acrylic paint, brush or 4 mm mini-roller. First coat — "thin" layer without covering pores. After drying (2–3 hours) — final coat with full coverage.
For a cornice matching the ceiling color: paint in the same shade as the ceiling — the cornice "dissolves" into the ceiling, only its shadow is visible. For a contrasting cornice: separate tint — the cornice becomes an accent architectural element.
Installation of polyurethane ceiling rosettes and medallions
Polyurethane ceiling rosettes— decorative circular elements — are mounted in the center of the ceiling 'field' or in the center of a coffer.
Mounting specifics:
-
Precise marking of the rosette center relative to the walls (not relative to the light fixture — the fixture is often off-center)
-
Applying adhesive evenly over the entire back surface
-
Pressing and holding for 60–90 seconds
-
For rosettes weighing over 300 g — additionally 2–4 finishing nails around the perimeter
For large-diameter rosettes (over 500 mm): additional fastening with dowels through the rosette body, followed by filling the holes with putty.
Installation of decorative polyurethane beams
polyurethane decorative beams— hollow U-shaped cross-section elements. Mounted by sliding onto a supporting wooden batten fixed to the ceiling.
Sequence:
-
Installation of a 40×40 mm wooden base batten on the ceiling: marking, drilling, dowels, screws.
-
Fitting polyurethane beam onto timber: beam should fit with minimal gap.
-
Applying adhesive to inner edges of polyurethane beam.
-
Mounting beam onto timber, pressing.
-
Finish nails through side edges of beam into timber — every 300–400 mm.
-
Filling holes with putty, sanding, painting.
Combining slat panels and polyurethane decor in one space
When both elements — slat wall and polyurethane decor — are present in one room, the question of installation sequence arises. Incorrect sequence creates technical conflicts: cornice installed before slats interferes with installation of top slat; slats installed before moldings prevent precise trimming of molding along slat edge.
Correct sequence:
-
Preparation of all surfaces (priming, puttying, drying)
-
Marking all elements on walls and ceiling
-
Electrical work (chasing, cable routing, mounting socket boxes)
-
Installation of lathing for slats
-
Installation of side vertical moldings around the perimeter of the slat field (they create a 'frame' for the slats)
-
Installation of slats (into the ready-made 'frame' of side moldings)
-
Installation of the top horizontal molding of the slat field (after installing the slats — it covers the top end of the slats)
-
Installation of the bottom baseboard
-
Installation of the ceiling cornice (after finishing the entire wall — the cornice is installed on top, covering the wall-ceiling joint)
-
Puttying of all joints
-
Priming of polyurethane decor
-
Painting of cornice and moldings
-
Final treatment of slats (oil, wax — if not applied at the factory)
Install the ceiling cornice last. This is crucial: the cornice covers the joint between the ceiling and the top of the wall, hiding any possible inaccuracies in the installation of wall elements.
Gap between the slatted field and the ceiling cornice
If the slatted field reaches the ceiling, and the ceiling cornice is installed around the entire perimeter, the lower edge of the cornice will 'overlap' the top slats. This is normal with proper planning: the cornice covers the top 20–40 mm of the slatted field. That's why the top slats don't need to be fitted perfectly to the ceiling—the cornice will hide the joint.
For a slatted field 'in a frame' (not reaching the ceiling): the top horizontal molding-frame is installed immediately after the slats. The ceiling cornice is installed separately, around the entire perimeter of the room, and is not connected to the slatted field.
Typical installation errors: complete breakdown
This is not theory. This is a list of what actually happens and what is difficult to fix later.
Error 1: Installation without acclimatization
Wooden slats were installed the day after delivery. After 2–3 weeks, the gaps 'shifted': where there were 12 mm, it became 9 mm and 15 mm. The reason is shrinkage due to drying in a warm, dry room.
Fix: acclimatization for 72–96 hours without exceptions.
Error 2: Uneven gaps without spacers
Gaps were set 'by eye'. As a result, the gap width varies across the entire surface, especially noticeable with lighting.
Fix: Remote spacers of a single thickness – without this tool, proper clearance is impossible.
Error 3: Adhesive squeezed into the gap
When applying adhesive too close to the edge of the batten – the adhesive squeezed into the gap under pressure and hardened into a 'ridge'. With wooden battens having an oil-based finish, the squeezed-out adhesive is difficult to remove without leaving marks.
Fix: Maintain a setback from the batten edge when applying adhesive – at least 50 mm. Immediately remove any excess adhesive that has oozed into the gap with a damp cloth before it hardens.
Error 4: The cornice joint at the corner – 'opened up'
The 45° cut was made precisely, but after a week, a 1–2 mm gap appeared in the corner joint of the cornice. Cause: thermal expansion of the polyurethane when heated by the sun (south-facing room) or adhesive shrinkage.
Fix: During installation, apply adhesive to corner joints not only on the back surface but also on the end faces (the cornice end faces at the joint – also with adhesive). Filling the joints after installation is mandatory.
Error 5: The cornice 'sagged' in the span
On a long span (over 2 m), the cornice sagged 2–3 mm downwards between the attachment points. Cause: the adhesive does not provide sufficient holding power until it fully cures without mechanical fastening.
Fix: Use finish nails – every 300 mm, not every 500–600 mm. On long spans – use temporary props until the adhesive fully cures (12–24 hours).
Error 6: Paint applied 'tightly' — brush marks visible
Paint applied without prior priming of polyurethane — absorbed unevenly, darker spots in pores, lighter spots on protrusions. Surface appears 'patchy'.
Correction: Priming is mandatory before painting. First coat of paint — 'thin', only to seal pores. Finish coat — second layer after the first is completely dry.
Error 7: First batten not aligned with level
First batten installed 'by eye' — slight deviation of 2–3 mm. By the middle of the wall, deviation accumulated to 8–10 mm. Last battens clearly 'deviate' from vertical.
Correction: Laser level — essential tool for marking the first batten. Spirit level is acceptable, but only if 80–100 cm long and with double-checking.
Error 8: Molding on damp substrate
Molding installed on a wall not yet dry after puttying or plastering. After 2–3 days, molding 'fell off' — adhesive did not bond to the damp surface.
Correction: Puttied substrate — complete drying for at least 24–48 hours. Check moisture with a meter. If in doubt — apply additional primer.
Compatibility table for adhesive, substrate, and decorative element
| Base | Element | Recommended adhesive | Additional fastening |
|---|---|---|---|
| Concrete | Polyurethane cornice | Polyurethane mounting | Finish nails |
| Brick | Polyurethane cornice | MS polymer | Dowels + nails |
| Drywall | PU molding | Acrylic mounting | Finish nails |
| Wooden lathing | Wooden slats | Polyurethane + cleats | Clips |
| Concrete | Wooden slats | Installation + mechanics | Dowels through the batten |
| Drywall | Wooden slats | Adhesive on batten + cleats | Cleats into the lathing |
Frequently asked questions about installing batten panels and polyurethane decor
Can it beinstall batten panelswithout lathing, directly on the wall?
Yes — provided that the wall is level (deviation up to 3 mm per 2 m), sturdy, and primed. Adhesive is applied to the back surface of the batten in a "snake" pattern. Additional fixation — finishing nails through the batten into the wall. If the wall is uneven, lathing is mandatory.
What type of putty should be used to fill the joints of polyurethane molding?
Only acrylic elastic putty. Gypsum-based putty cracks with micro-movements of the decor. Silicone sealant does not take paint and leaves stains. Acrylic putty or acrylic sealant (white, paintable) is the correct choice.
How to fix an uneven gap between battens after installation?
If the gap is already fixed with glue — removing the batten without damage is difficult, especially with polyurethane glue. Visual correction: for minor gap unevenness (±1–2 mm) — fill the wider gap with a wooden insert (thin batten of the required color), secure with glue. The result is acceptable with solid-color battens.
installation of polyurethane moldingOn the ceiling — is it possible without finish nails?
Only for lightweight elements (up to 150 g per linear meter) and with high-quality fast-setting adhesive. For a cornice weight of 200–400 g/m — finish nails are mandatory to hold it until the adhesive fully cures (from 12 to 24 hours depending on the adhesive).
Is it necessary to paint the back side of polyurethane decor before installation?
No — painting is not needed. Priming the back surface — yes, to improve the adhesive's bond to the polyurethane. A thin coat of water-soluble primer, 30–60 minutes drying time.
How to choose the correct cornice size for a room?
Guideline: cornice height (visible cross-section) = 1.5–2.5% of the ceiling height. For a 2.7 m ceiling — a cornice 40–67 mm in height. For 3 m — 45–75 mm. For 3.5 m and above — 52–87 mm. A larger cornice in a low room 'lowers' the ceiling. A smaller one in a high room 'gets lost'.
Can it beinstall slatted panelsOnly with adhesive — without nails?
For lightweight MDF battens (up to 3 kg/m²) on a flat, primed substrate — polyurethane mounting adhesive provides sufficient holding power after curing. Nails are only needed for fixation during the first 20–30 minutes until the adhesive sets. For heavy solid wood battens (over 5 kg/m²) — mechanical fastening is mandatory.
Conclusion
Installing wall batten panels and polyurethane moldings is a skill where no detail is random. Every step in this chain — acclimatization, marking, spacing shims, the right adhesive, precise corner cutting, element sequence — either creates quality or lays the groundwork for a problem. The good news: all these requirements are achievable on your own with the right tools and an understanding of the 'why'.
Wooden slat panelsmade of natural oak and ash,modular slat wall panelsfor system solutions,polyurethane cornices with LED slots, moldings, rosettes, and decorative beams — the full range of installation materials is available in the STAVROS company catalog.
STAVROS is a Russian manufacturer of wall batten systems made from natural wood and polyurethane decorative elements. Full-cycle production: from timber harvesting and drying to shipping finished products with factory-applied coatings. Professional consultation on material selection, system parameters, and installation technology — for those building an interior designed to last for years, not just a season.