


Article Contents:
- The Philosophy of Furniture Hardware: When a Detail Becomes Meaning
- Preparation Stage: Cabinet Analysis and Placement Planning
- Assessment of Cabinet Material
- Determining Optimal Installation Points
- Marking: precision as the basis of quality
- Professional Toolset: What You Really Need
- Basic Kit for Installing Handles
- Additional Tools for Working with Supports
- Installing Furniture Handles: Step-by-Step Technique
- Working with Overlay Handles
- Mounting Inset and Profile Handles
- Features of Working with Wooden Handles
- Installing Furniture Supports: The Foundation of Your Furniture
- Types of Furniture Supports and Their Mounting Methods
- Marking Support Installation Points
- Drilling Holes for Inserts
- Installing Inserts and Legs
- Leveling and Final Check
- Subtleties and Secrets of Professional Installation
- Working with Different Front Materials
- Ergonomics of Handle Placement
- Combining Different Types of Handles in One Set
- Protecting Surfaces During Installation
- Common Mistakes and How to Avoid Them
- First Mistake: Rushing and Neglecting Marking
- Second Mistake: Incorrect Choice of Fasteners
- Third Mistake: Overtightening Fasteners
- Fourth Mistake: Ignoring the Base Material
- Fifth Mistake: Not Maintaining Perpendicularity When Drilling
- Hardware Care: How to Extend the Life of Handles and Supports
- Regular inspection and tightening of fasteners
- Cleaning and protection of wooden elements
- Protection from Mechanical Damage
- Creative solutions: unconventional approaches to hardware installation
- Hidden handle mounting
- Asymmetric placement
- Combining materials
- Frequently Asked Questions: Expert Answers
- At what distance from the edge of the facade should the handle be installed?
- Can a wooden handle be installed on a glass facade?
- How to determine the required number of supports for a long dresser?
- What to do if you drilled a hole in the wrong place?
- Is it necessary to use any locking compounds for threaded connections?
- How often should the protective coating on wooden handles be renewed?
- Can the same furniture supports be used in the kitchen and living room?
- What is better — buying handles with a ready-made finish or painting them yourself?
- How to choose the height of furniture legs?
- Is it mandatory to use threaded inserts, or can legs be screwed directly into the body?
- Conclusion: the philosophy of quality installation

Have you ever thought about how to turn an ordinary furniture body into a work of art? How can one small detail completely change the perception of a dresser, wardrobe, or kitchen set? The answer lies in furniture hardware — those very handles and supports that many consider secondary elements. But this is a profound misconception.
Properly selected and installedFurniture Handlescan breathe life into the most modest furniture, and well-placed furniture supports will ensure not only the stability of the structure but also the visual lightness of the entire interior. This article is not just a set of technical recommendations. It is a deep dive into the world of professional furniture installation, where every millimeter matters, and every turn of the screwdriver is dictated by decades of experience.


The philosophy of furniture hardware: when a detail becomes the meaning
What makes furniture furniture? The body? The facades? Or is it those very tactile points of contact through which a person interacts with the object daily? The handle is the first thing your hand reaches for in the morning when you open the wardrobe. The support is the last thing that keeps your furniture from collapsing under the weight of time and contents.
ChoosingWooden handles, you are choosing in favor of eco-friendliness, natural beauty, and the unique texture of natural material. Solid wood possesses unique energy that cannot be replicated by synthetic analogues. Each wooden handle is an individual pattern of wood fibers, it is the warmth of nature in your hands, it is the philosophy of conscious consumption.
But beauty without functionality is an empty shell. That is why hardware installation requires not just technical skills, but a deep understanding of construction, materials, ergonomics, and aesthetics. Let's break down this process step by step, from philosophical foundations to practical millimeters.


Preparation stage: body analysis and placement planning
Before picking up the drill, stop. A professional furniture maker never starts work without thorough analysis. A finished body is not just a set of panels. It is a coordinate system within which the hardware must be placed so that the laws of symmetry, proportion, and functionality are observed.
Our factory also produces:


Assessment of body material
What is your body made of? Particleboard, MDF, solid wood? Each material requires its own approach to fastening. Particleboard tends to crumble under excessive force, MDF is denser and holds fasteners better, and solid wood requires consideration of grain direction. Facade thickness is a critical parameter. Standard 16-18 millimeters allow the use of most types of fasteners, but if you have thin facades or, conversely, massive paneled doors, choosing screw length becomes a non-trivial task.
Inspect the surface for defects, chips, and unevenness. If the body is covered with veneer or film, ensure that the coating is securely glued at the future fastening point. Delaminated veneer under the load of constant handle use can lead to the destruction of the entire fastening assembly.
Get Consultation
Determining optimal installation points
Where exactly should the handle be located? It seems like a simple question, but behind it lies a whole science. For hinged facades, the handle is traditionally placed on the side opposite the hinges, at a height that ensures maximum grip comfort. This is usually the upper third of the door for upper modules and the lower third for lower ones. But this is only a general rule that can and should be adapted to the specific situation.
For pull-out drawers, handle placement is determined by their height and type of construction. Tall drawers may have vertically oriented pull handles, while narrow horizontal ones may have compact push buttons or short horizontal profiles. Centering is key. The handle should be positioned strictly along the central axis of the front panel, unless the design concept intentionally calls for asymmetry.
Marking: accuracy as the foundation of quality
Marking is the moment when theory meets practice. Arm yourself with quality measuring tools: a tape measure, a square, a ruler. For professional work, a jig is indispensable—a special template that allows you to mark holes with perfect accuracy on multiple identical front panels.
Mark drilling points with a pencil or an awl. Remember: measure once, check seven times, drill once. An error in marking will lead to an asymmetrical handle placement, which is not only an aesthetic defect but also a functional one—the handle will create uneven load on the drawer hinges or slides.
Professional Toolkit: What's Really Necessary
The quality of work directly depends on the quality of tools. Saving on tools is a false economy that results in ruined front panels, stripped screw heads, and endless rework.
Basic Kit for Installing Handles
An electric drill or screwdriver is the foundation. Choose a model with adjustable speed and reverse. Precision and controllability are more important than raw power. For delicate work with front panels, a cordless screwdriver with low torque is preferable.
Wood drill bits of various diameters. For most furniture handles, you'll need 4-5 mm diameter bits for the mounting screws. If installing recessed or cup handles, larger diameter bits or spade bits may be required. Quality bits should be sharp and not cause chipping on the front side of the panel.
Screwdriver bits for driving screws—Phillips, slotted, Torx depending on the type of fastener supplied with the handles. Magnetic bits significantly simplify the work, especially in hard-to-reach places.
Measuring tools: tape measure, square, level, ruler, calipers for particularly precise measurements. A marking jig—if you're installing handles on a series of identical front panels, this device will pay for itself literally on the second or third piece.
Pencil, awl, or center punch for marking. Painter's tape—to protect the front panel surface from accidental scratches and chips.
Additional Tools for Working with Supports
Installationof furniture legsrequires a slightly different set. In addition to the basic tools already mentioned, you will need:
Larger diameter drill bits—for installing threaded inserts (metal threaded bushings) into which furniture supports are screwed. Typical diameters are 8-10 mm depending on the insert size.
Drill depth stop—a critically important accessory that allows drilling holes to a strictly specified depth, without risking drilling through the panel.
Wood glue or epoxy—for securing threaded inserts in holes, especially if the cabinet material is loose or prone to crumbling.
Level—for checking the vertical alignment of the supports. Even a slight tilt can lead to furniture instability.
Installing Furniture Handles: Step-by-Step Technology
Now that preparation is complete and tools are selected, we move on to the most critical stage—the actual installation. Remember: haste is inappropriate here. A professional differs from an amateur not in speed, but in the quality and thoughtfulness of every move.
Working with Surface-Mounted Handles
Surface-mounted handles are the most common type of hardware. They are attached to the front side of the panel using one or two screws that pass through the panel and screw into threaded holes on the back of the handle.
Start with precise marking. Place the handle on the front panel at the intended installation location and mark the centers of the fastener holes with a pencil. For handles with two mounting points, it is critical to maintain the center-to-center distance—it must exactly match the distance between the holes in the handle. Even a millimeter discrepancy will cause the screws not to fit or to fit at an angle, inevitably creating stress in the structure and leading to rapid hardware failure.
Use a jig or template. If you have several identical front panels, make a simple template from a piece of thick cardboard or thin plywood. Cut holes in it at the required points, and you can transfer the markings to the front panels with absolute accuracy.
Protect the front surface. Apply painter's tape at the drilling location—this will prevent chipping when the drill bit exits. Professionals often use a backing of thin plywood or fiberboard, pressing it against the front panel at the drilling point.
Drill carefully and perpendicularly. Position the drill bit at the marked point strictly at a right angle to the front panel surface. Start drilling at low speed, gradually increasing. Do not force the drill—let the bit cut through the material itself. Excessive pressure can cause chipping on the back of the panel or cause the bit to drift from the intended point.
Control the depth. If you are drilling a through hole, place a piece of wood or plywood under the front panel—the drill bit will enter the backing without causing exit chipping. If a blind hole is required (e.g., for a Euro screw), use a depth stop or mark the required depth on the bit with a piece of painter's tape.
Clean the holes of debris. Blow them out with compressed air or carefully clean them with a soft brush.
Place the handle against the front panel, aligning its mounting holes with the drilled ones. Insert the mounting screws from the back of the panel and start tightening them by hand or at the lowest speed of the screwdriver. Important: do not overtighten! Excessive force can compress the panel material, deform the handle (especially if it's wooden), or strip the threads. The screw should be snug, but without fanaticism.
Check the result. The handle should fit snugly against the front panel, not wobble, and have no gaps or play. Try opening the panel by the handle—the movement should be smooth, without sticking or squeaking.
Installing Recessed and Profile Handles
Recessed handles and profile sink handles require more complex processing of the facade. To install them, it is necessary to cut a recess or groove of a specific shape into the edge or plane of the facade.
Mark the contour of the future recess. Use the template supplied by the handle manufacturer or make it yourself according to the dimensions from the technical documentation.
For rectangular recesses, use a router with a straight bit. Set the routing depth according to the thickness of the handle profile. Work from the center to the edges, making several passes with a gradual increase in depth. This will prevent overloading the bit and ensure a clean recess.
For rounded recesses (for sink handles), you can use a large-diameter spade drill bit followed by finishing with a router or file. Some craftsmen prefer to make several smaller-diameter holes along the contour of the future recess and then connect them with a router or jigsaw.
Carefully sand the edges of the cutout with sandpaper. Any burrs or unevenness will interfere with handle installation and create gaps.
Insert the handle into the prepared recess. If additional screw fastening is provided (which is typical for profile handles), secure them similarly to the method described above for overlay handles.
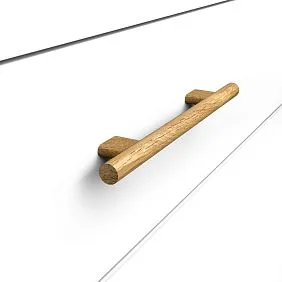
Features of working with wooden handles
buy wooden handles— means choosing naturalness and aesthetics, but this material requires special treatment during installation.
Wood is a living material. It reacts to changes in humidity and temperature, expanding and contracting. When installing wooden handles, do not tighten the screws to the limit—leave a microscopic play, allowing the wood to 'breathe.' This is especially critical for solid wood handles in rooms with an unstable microclimate.
Pay attention to the direction of the wood grain. When drilling holes in the handle itself (if required for non-standard fasteners), consider the grain direction—drilling across the grain requires greater care to avoid splitting.
Use soft spacers. If the handle design involves metal washers or nuts, place soft spacers made of felt, leather, or dense fabric between the metal and the wood. This will prevent the metal from pressing into the wood and forming dents.
Treat the ends of the holes. If untreated wood is exposed during drilling, coat it with varnish or oil to match the main finish of the handle. This will protect the wood from moisture and dirt.
Installation of furniture supports: the foundation of your furniture
If handles are the face of furniture, thenfurniture legs— is its foundation. Their correct installation determines stability, durability, and even acoustic comfort—squeaky furniture can drive anyone to a nervous breakdown.
Types of furniture supports and methods of their attachment
Furniture supports come in several types, and each requires its own installation approach:
Legs with threaded inserts. This is a classic option—a wooden or metal leg is screwed into a threaded insert (threaded bushing), previously installed in the furniture body. Inserts can be hammer-in or screw-in. Hammer-in inserts have a knurled outer surface and are hammered into a pre-drilled hole of a slightly smaller diameter. Screw-in inserts have external threads and are screwed into the wood like a screw.
Surface-mounted supports. Attached to the bottom of the furniture using screws or self-tapping screws through mounting holes in the support plate. Easy to install but less aesthetically pleasing, as the mounting plate often remains visible.
Adjustable supports. Have a height adjustment mechanism, allowing compensation for floor unevenness and leveling the furniture strictly horizontally. Especially important for kitchen modules and tables. Usually attached via a threaded insert or mounting plate.
Marking support installation points
Correct placement of supports is critically important for furniture stability. Basic principles:
Symmetry. Supports should be positioned symmetrically relative to the furniture's center of gravity. For a rectangular body, this usually means placement at the corners with a small offset from the edge (typically 30-50 millimeters).
Consideration of loads. If uneven loading is expected (e.g., heavy items will be stored in one part of the cabinet), additional intermediate supports may be required.
The minimum number of supports is four for stability. For long dressers, tables, and cabinets, it is recommended to install additional supports for every 800-1000 millimeters of length to prevent the bottom from sagging under load.
The offset from the edge should be sufficient so that the support does not protrude beyond the furniture's dimensions and does not create a risk of tripping, but not too large, otherwise stability will be reduced. The optimal offset is 30-60 millimeters from the edge for most structures.
Use measuring tools for precise marking. Measure and mark equal distances from the edges for all support installation points. Check the diagonals—the distances between opposite points along the diagonals should be equal; this guarantees that the supports are installed at the vertices of a correct rectangle.
Drilling holes for threaded inserts
The hole diameter for a threaded insert should be 1-2 millimeters smaller than the outer diameter of the insert for hammer-in models or match the manufacturer's recommendations for screw-in ones. A hole that is too large will lead to weak fixation and the insert falling out under load. A hole that is too small will cause the material to split when hammering in the insert.
The hole depth should be 2-3 millimeters greater than the length of the insert. This will ensure full seating of the insert without the risk of hitting the bottom of the hole, which could prevent complete installation.
Drill strictly perpendicular to the bottom panel plane. Even a slight angular misalignment will cause the leg screwed into the insert nut to stand not vertically, but at an angle, creating uneven load and furniture instability.
Use a depth stop. This is especially important when working with thin bottom panels — drilling through is very easy, and fixing such a mistake is almost impossible.
Clean the hole of chips and dust. Any foreign particles in the hole will prevent the insert nut from seating to its full depth.
Installation of Insert Nuts and Legs
For press-in insert nuts, use a mallet or hammer with a wooden spacer. Never strike the insert nut directly with a metal hammer — this will deform the threads and make it impossible to screw in the leg. Drive carefully, controlling vertical alignment. The insert nut should go into the hole until it stops; its top edge should be flush with the bottom panel surface or slightly below.
For screw-in insert nuts, use the appropriate tool — usually a hex key or a special bit. Screw in slowly, controlling vertical alignment. If you feel excessive resistance, stop — the hole diameter may be too small or there may be chip particles left in the hole.
For additional fixation, you can use wood glue. Apply a small amount of PVA or epoxy glue to the inner surface of the hole before installing the insert nut. This is especially recommended for loose materials like particleboard or when installing into the panel edge. Let the glue dry completely before screwing in the legs.
Screw the legs into the installed insert nuts. Do this by hand, without using tools, to feel the moment when the leg is seated all the way. Excessive force can strip the threads or deform a wooden leg.
Leveling and Final Check
After installing all supports, place the furniture on a level surface. Use a spirit level to check horizontality in all directions. If there is a tilt, it may mean:
-
Uneven floor. In this case, use adjustable supports or place a thin shim under the corresponding leg.
-
Different leg lengths. If you installed non-adjustable legs and a length difference is found, you will either have to replace the leg or carefully file down the longer one.
-
Non-perpendicular installation of insert nuts. This is a serious mistake that is difficult to fix after the fact.
Check stability. The furniture should not wobble when pressure is applied to the corners or when opening doors and drawers. If there is wobble, check the tightness of all legs — one of them may not be screwed in all the way.
Test the furniture under load. Load it to about half of its design capacity and leave it for several hours. Then check the horizontality and absence of deformations again. If everything is fine — you can fully load the furniture and put it into use.
Subtleties and Secrets of Professional Installation
The difference between a professional and an amateur lies in knowing the nuances that are not described in the instructions but are critically important for a quality result.
Working with Different Front Panel Materials
Laminated Particleboard (Laminated Chipboard). Laminated particleboard is the most common material for cabinet furniture. When drilling laminated chipboard, the main danger is laminate chipping on the front and back sides. Use sharp drills, start drilling at low speeds, and always place material under the back side at the drill exit point. To minimize chipping on the front side, apply masking tape or use a backing board.
MDF. A denser and more homogeneous material than particleboard. Drills easier, less prone to chipping. However, when installing handles on painted MDF, be careful — the paint may crack if excessive force is applied when tightening the screws. Use soft washers under the screw heads.
Solid Wood. The most rewarding material to work with, but requires consideration of the grain direction. When drilling across the grain, there is a risk of splitting, especially close to the panel edge. Use sharp drills, drill at medium speeds. Consider the seasonal dimensional changes of solid wood — wood expands with increased humidity and contracts with decreased humidity.
Ergonomics of Handle Placement
Correct handle placement is not only about aesthetics but also about ease of use. For upper wall cabinets, the handle should be located in the lower part of the door — it's more convenient to open by pulling down. For lower cabinets and cupboards — in the upper part, to open by pulling up.
The height of handle placement on tall cabinets and wardrobes should correspond to the average user height. Usually, this is 900-1200 millimeters from the floor — a level where the hand naturally reaches for the door without needing to stretch or bend over.
For drawers, place the handle in the center of the front horizontally, but with a slight upward shift from the geometric center vertically — this creates a visually more harmonious perception and is more convenient for gripping.
Combining Different Types of Handles in One Set
Modern design often involves combining different types of handles within one furniture set. For example, a kitchen may use long pull handles for tall fronts, short ones for narrow doors, and knobs for drawers. The main rule is to maintain unity of style, material, and color. All handles should be visually perceived as elements of one set, even if they are of different shapes.
Protecting Surfaces During Installation
A professional furniture maker never leaves traces of their work on the product. Use protective coverings — masking tape, film, soft cloth — to avoid scratches, dents, and dirt. Work on a clean, level surface. Place soft material under the front panel you are marking and drilling — this prevents dents from tool pressure.
Typical mistakes and how to avoid them
Even experienced craftsmen sometimes make mistakes. Knowing typical slip-ups will help you avoid them.
First mistake: rushing and neglecting marking
The most common mistake is to start drilling 'by eye' without making precise markings. The result is predictable — crooked holes, asymmetrical handle placement, and the need to redo the work. Never neglect the marking stage. Ten minutes spent on careful measurement and marking will save hours correcting mistakes.
Second mistake: incorrect choice of fasteners
The screws supplied with handles are not always suitable for a specific front panel. Screws that are too long can go all the way through and come out the other side. Screws that are too short will not provide a secure attachment. Always check the screw length before starting installation. Ideally, the screw should enter the threaded hole of the handle to a depth equal to 1.5-2 times the screw diameter, without coming out the other side of the front panel.
Third mistake: overtightening fasteners
The desire to 'tighten it really tight' often leads to damage. An overtightened screw can compress the front panel material, creating a dent around itself. In wooden handles, excessive force causes deformation or even splitting. In MDF and particleboard, stripped threads mean the fastener will no longer hold. Tighten screws until the handle is firmly pressed against the front panel, and add another quarter turn — that's enough.
Fourth mistake: ignoring the base material
Attempting to install a heavy metal support on thin fiberboard or attaching a massive wooden handle to a fragile glass front panel is a direct path to destruction. Always assess the compatibility of the hardware's weight and type with the material and construction of the base. For thin and fragile materials, use distribution plates that increase the contact area and reduce local load.
Fifth mistake: not maintaining perpendicularity when drilling
A drill bit entering at an angle creates an oval hole, causing the screw to enter at a tilt. This creates stress in the structure and weakens the fastening. Always maintain perpendicular alignment of the drill bit to the surface. If you doubt your ability to hold the drill steady, use a drill press or guide.
Hardware care: how to extend the life of handles and supports
Proper installation is only half the battle. Longevityfurniture hardwarealso depends on proper care.
Regular inspection and tightening of fasteners
Under constant loads, fasteners can loosen over time. It is recommended to check the tightness of all handles every six months and tighten the screws if necessary. This is especially relevant for frequently used doors and drawers — kitchen fronts, wardrobe doors, dressers with linens.
For supports, inspection is even more important. A loose leg can lead to misalignment of the entire piece of furniture, deformation of the body, and sticking doors and drawers. If play is detected in the connection between the leg and the threaded insert, unscrew the leg, check the condition of the threads, and replace the insert or use a locking compound (anaerobic thread sealant) if necessary.
Cleaning and protection of wooden elements
Wooden handles require delicate care. Avoid aggressive cleaning agents, abrasive sponges, and excessive moisture. For cleaning, use a slightly damp soft cloth, and if necessary, a mild soap solution. After wet cleaning, immediately wipe the handle dry.
Periodically (once a year or two), renew the protective coating. If the handles are oiled, apply a fresh coat of wood oil. If varnished, lightly sand with fine sandpaper when wear appears and apply a new coat of varnish. This will not only restore the appearance but also protect the wood from moisture and dirt.
Protection from mechanical damage
Handles and supports, despite their apparent strength, can be damaged by careless handling. Do not use handles as supports for standing or hanging — they are not designed for such loads. Do not place excessively heavy items exceeding the rated load on furniture supports. Do not drag furniture, especially on legs without protective pads — this will damage both the legs themselves and the flooring.
Creative solutions: non-standard approaches to hardware installation
Standard methods are reliable and time-tested, but sometimes a task requires a creative approach.
Concealed handle mounting
For minimalist interiors where clean lines are important, concealed handles are used — milled grooves in the edges of front panels that allow doors and drawers to be opened without protruding hardware. Such solutions require precise milling and careful fitting, but the result is impressive — the fronts look like monolithic panels.
Another concealed opening option is push-to-open systems, where the door opens with a light press. For such systems, handles are not needed at all, but special hinge or slide hardware with an auto-opening function is required.
Asymmetric placement
Who said the handle must be in the center? In modern design, intentionally asymmetric placement is popular — a handle in the corner of the front panel, closer to the edge, vertically on a horizontal front. Such solutions require boldness and a sense of proportion, but when executed correctly, they create a unique visual image.
Combining materials
A wooden handle with metal inserts, a combination of wood and leather, the use of contrasting wood species — the possibilities for combination are limited only by imagination. The main thing is to observe the technological compatibility of materials and consider their different reactions to temperature and humidity.
Frequently asked questions: expert answers
At what distance from the edge of the front panel should the handle be installed?
The standard recommendation is 30-50 millimeters from the edge of the front panel to the center of the handle. However, this can vary depending on the size of the front panel and the type of handle. For large front panels (over 600 millimeters in height), the distance can be increased to 70-100 millimeters for better ergonomics.
Can a wooden handle be installed on a glass facade?
Yes, but with limitations. Special fasteners with silicone or rubber gaskets that distribute the load are used for glass. Holes in the glass must be drilled at the factory using special drills; self-drilling of tempered glass is impossible. An alternative is overlay handles with adhesive mounting, but they withstand less load.
How to determine the required number of supports for a long dresser?
The basic rule is four supports at the corners plus one additional support for every 800-1000 millimeters of body length. For a dresser 1200 millimeters long, four corner supports are sufficient. For a dresser 1800 millimeters long, six supports are recommended — four at the corners and two intermediate ones. Also consider the weight of the contents — if very heavy items are to be stored, increase the number of supports.
What to do if you drilled a hole in the wrong place?
For small holes (up to 5 millimeters), you can use furniture putty or a wax corrector in the color of the facade. Fill the hole with putty, let it dry, and sand it flush. For larger holes, you can use a wooden dowel coated with glue — drive it into the hole, cut off the protruding part, and sand it. On dark facades, small holes can be painted over with a marker of a suitable color.
Is it necessary to use any locking compounds for threaded connections?
For furniture legs screwed into threaded inserts, locking compounds are usually not required — the threaded connection itself is sufficiently reliable. However, under conditions of increased vibration (e.g., furniture installed on upper floors of buildings with noticeable oscillations), a medium-strength anaerobic thread locker can be used. Locking compounds are not used for handle mounting screws — this would complicate disassembly if hardware replacement is needed.
How often should the protective coating on wooden handles be renewed?
The frequency depends on the intensity of use and operating conditions. On average, it is recommended to inspect the coating once a year and renew it if wear, dullness, or local damage is detected. In the kitchen, where handles are exposed to moisture, grease, and frequent touching, renewal may be required more often — every 6-12 months. In the bedroom or living room — every 2-3 years.
Can the same furniture supports be used in the kitchen and living room?
Technically — yes, if the supports match in load-bearing capacity and mounting type. However, operating conditions should be considered. In the kitchen, there is higher humidity, and water may get on the floor and, consequently, on the supports. If supports with basic protective coating are suitable for the living room, then for the kitchen it is better to choose supports with enhanced moisture protection — coated with varnish, enamel, or impregnated with moisture-resistant compounds.
What is better — to buy handles with a ready-made coating or to paint them yourself?
This depends on your skills and quality requirements. Factory coating is usually applied under conditions that ensure uniformity, durability, and resistance to external influences. Self-painting offers freedom in choosing colors and effects but requires certain skills and quality materials to achieve a professional result.furniture handles with coatingThey save your time and guarantee consistent quality.
How to choose the height of furniture legs?
Leg height is determined by several factors: the functional purpose of the furniture, stylistic preferences, and the need to ensure ventilation and access for cleaning. For most dressers and cabinets, the optimal leg height is 100-150 millimeters. This provides visual lightness, convenience for cleaning under the furniture, and sufficient ventilation. For sofas and armchairs, the support height is usually 50-100 millimeters. For tables — 700-730 millimeters from the floor to the tabletop, which, with a tabletop thickness of 20-40 millimeters, gives a leg height of 660-710 millimeters.
Is it mandatory to use threaded inserts, or can legs be screwed directly into the body?
Using threaded inserts is strongly recommended for several reasons. First, an insert creates a metal thread, which is significantly stronger than a thread cut directly into wood or particleboard. Second, an insert allows the leg to be unscrewed and screwed in multiple times without thread wear — relevant during transportation or moving. Third, an insert provides reliable fastening even in loose materials. Screwing legs directly is permissible only into solid hardwood, provided the leg will not be unscrewed and screwed in again.
Conclusion: The Philosophy of Quality Installation
Installing furniture handles and supports is not just a technological operation. It is the moment when a lifeless body turns into living furniture, ready to serve its owner for decades. It is the point where functionality and aesthetics, technology and art meet.
Every correctly installed handle is thousands of comfortable touches, tens of thousands of smooth openings and closings. Every properly installed support is years of stability, absence of squeaks, confidence in reliability. And conversely — a carelessly tightened screw, a crooked leg, a misaligned hole — is constant irritation, premature wear, disappointment in the furniture.
By choosing quality hardware and paying due attention to its installation, you are not just investing in furnishings. You are creating an environment in which you will live, work, and relax. An environment that will daily remind you of the right choice made. An environment that will serve for decades, preserving functionality and attractiveness.
For over twenty years, STAVROS has been creating wooden products for those who value quality, naturalness, and impeccable execution.furniture legsHandles, decorative elements made from selected oak and beech solid wood — each product undergoes strict quality control and meets the highest standards. Choosing STAVROS means choosing craftsmanship tested by time, technologies honed by years of practice, and materials worthy of your home. Let every detail of your furniture become a model of perfection, and the installation of hardware — an act of creating beauty and reliability.


