


Article Contents:
- Lath Balusters
- Handrail Profiles
- Connection Nodes
- Wear and Maintenance
- Lighting Scenarios
- Conclusion: Architecture of Movement
- Frequently Asked Questions

The staircase in a traditional Russian house was not merely a functional element connecting floors. It was an architectural statement, a demonstration of carpentry craftsmanship, a place where the beauty of wooden construction was revealed. Wide steps made of solid boards, finely turned balusters, carved nosings, a massive handrail — all of this created a sense of solidity, reliability, and connection across generations.
A modern staircase in a house or two-story apartment inherits these functions but adds new requirements. It must be a safe structure (complying with building codes), ergonomic (comfortable step proportions, railing height), durable (withstanding daily use), and aesthetically pleasing (decorating the interior, not merely serving it).
Staircase with Wooden LathIn railing — this is a modern interpretation of tradition. Instead of classical turned balusters, vertical laths are used, creating a light, airy rhythm. This preserves the spirit of wooden staircases but makes them more modern, minimalist, suitable for urban interiors. At the same time, all safety, comfort, and durability requirements are met.
In this article, we will examine how to create a staircase and handrail railings in Russian style using lath balusters. You will learn which handrail profiles are optimal, how to properly install railing elements, how to maintain the staircase under intensive use, and which lighting scenarios will highlight the beauty of the structure.


Lath Balusters
Balusters — vertical elements of staircase railing that fill the space between steps and handrail, preventing falls. Traditionally, balusters were turned on a lathe, creating complex shapes — spheres, vases, spindles. Lath balusters — a modern alternative: simple vertical planks with rectangular cross-section, creating a clear, strict rhythm.
Lath baluster cross-section. For a staircase railing 90–100 cm high (standard height according to building codes), the optimal lath cross-section is 40×60 mm or 50×80 mm. A smaller cross-section (30×40 mm) is acceptable for decorative staircases with low load (staircase to attic, loft, used rarely). But for the main staircase, used daily, where people lean on the handrail, sufficient stiffness is required.
Lath thickness (smaller dimension, 40–50 mm) determines bending stiffness. A 40 mm lath at 90 cm height, with mounting only from top and bottom, may slightly bend under lateral force (leaning, impact). A 50 mm lath is significantly stiffer. Lath width (larger dimension, 60–80 mm) determines visual expressiveness and density of filling.
Lath spacing and safety. According to building codes (SP 54.13330), the distance between vertical railing elements of a staircase should not exceed 10 cm in clear space (to prevent children from fitting their heads through). This is a critical safety parameter.
When using 50 mm laths, the spacing between lath axes is 150 mm (50 mm lath + 100 mm gap), giving a 100 mm clear space — this is at the upper limit of the norm, acceptable. If 40 mm laths are used, the spacing between axes is 140 mm (40 + 100), with a 100 mm gap — also acceptable.
A more sparse spacing (150 mm gap and more) is not allowed for main staircases. For staircases in areas where children have no access (adult zone, office), the spacing can be increased to 150 mm gap, but this becomes a matter of the owner’s responsibility.
Wood species for balusters. Balusters are subjected to mechanical loads (leaning, impacts from moving furniture), so they require strong wood. Oak is the ideal choice: hardness 3.7–3.9 on Brinell scale, does not dent, does not crack, lasts for decades. Oak color ranges from light gold to dark brown, with distinct grain.
Ash — a light alternative to oak, even harder (4.0–4.1), with clear, striped grain. Good for staircases in light interiors, where dark oak would be overly heavy.
Larch — more affordable than oak or ash, hardness 3.1, contains natural resins (protection against rot, insects). Color is reddish, grain is calm. Optimal for staircases in country houses, especially in areas with variable humidity (entrance, vestibule).
Spruce, birch — softwoods (hardness 1.6–2.6), unsuitable for balusters. They easily dent and wear out quickly. Spruce can be used for stringers, treads (load-bearing elements of the staircase hidden under steps), but not for visible railing elements.
Lath orientation: vertical or horizontal? Traditionally, balusters are vertical — safer (children cannot climb them like a ladder) and more aesthetically appropriate for Russian style (verticals associate with columns, trees, upward aspiration).
Horizontal laths in staircase railing — a more modern solution, characteristic of Scandinavian and minimalist styles. They visually expand space, creating a calm rhythm. However, they are easier to climb on (dangerous for children), and less authentic for Russian style.
A compromise is possible: combination of vertical and horizontal elements. Base — vertical laths (frequent spacing, safety), additionally 1–2 horizontal planks crossing (at heights 30–40 cm and 60–70 cm from steps), strengthening the structure and adding graphic accents.
Surface treatment of laths. Lath balusters must be carefully sanded (grit 150–180, then 220), free of burrs, roughness. Hands touch them (especially children’s), splinters are unacceptable. After sanding — final finish: oil with hard wax (preserves wood texture, tactile feel) or polyurethane varnish (more durable, but cold to the touch coating).
For staircases, oil is preferable — it leaves wood alive, warm, pleasant to the touch. Varnish creates a glassy surface that feels cold. Oil is applied in 2–3 layers, with intermediate drying (24 hours between layers), rubbed in, excess removed.
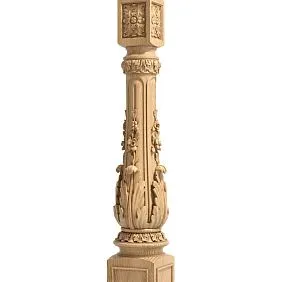
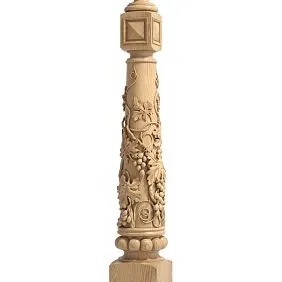
Carved elements on laths. Simple vertical laths can be decorated with carving — restrained, not excessive. For example, on the top end of the lath (under the handrail) — a small carved rosette 40–50 mm in diameter with traditional Russian motif (solar symbol, stylized flower, rhombus). Or a vertical groove (cannelure) along the entire length of the lath, creating additional play of light.
Excessive carving (laths fully covered with ornament) overloads, turning the staircase into a museum exhibit. For a residential home, restraint is better: most laths are smooth, a few (e.g., corner ones, at staircase turns) — with light carving, creating accents.


Handrail Profiles
Handrail (balustrade) — the upper element of the staircase railing, which is held by hand when ascending or descending. It is the most tactile element of the staircase, constantly touched. Therefore, the handrail profile must be ergonomic (easy to grip), smooth (without burrs), and pleasant to the touch.
Round handrail. The most ergonomic profile — a circle with a diameter of 40–50 mm. The hand grips it naturally, without strain. A round handrail is turned on a lathe from a 50×50 or 60×60 mm block, then sanded to perfect smoothness.
For Russian style, a round handrail is traditional — recall the finely turned balustrades of old estates, town schools, and hospitals. A 45 mm diameter is optimal for most people (adults and teenagers). For children (if the staircase is actively used by children aged 5–10), an additional handrail can be installed lower (at 60–70 cm from the treads) with a diameter of 35–40 mm.
Oval handrail. An oval cross-section (e.g., 50×35 mm) — a compromise between a circle and a rectangle. A flatter shape, but still comfortable to grip. An oval handrail is more elegant than a round one, appears more refined, but is more difficult to manufacture (requires milling to a complex profile or hand finishing).
Rectangular with rounded edges. Rectangular cross-section 60×40 mm or 80×50 mm (width × height) with rounded top edges (radius of rounding 8–12 mm). Less ergonomic than a circle, but more monumental and substantial. A wide rectangular handrail is associated with heavy, classical stair railings.
For Russian style, where solidity is important, a rectangular handrail with rounded edges is appropriate, especially for wide grand staircases (width of the stair run 120–150 cm). For narrow staircases (90–100 cm), a round or oval handrail appears lighter visually and does not overwhelm the space.
Composite handrail. An interesting solution — a handrail composed of several elements. For example, the base — a rectangular block 50×40 mm, topped with a separate circular overlay of 35 mm diameter (turned separately and glued on). This results in a comfortable circular profile mounted on a substantial base.
Or the base — two 40×20 mm planks glued in a T-shape, topped with a rounded overlay. A composite handrail is more complex to manufacture, but allows combining wood species (base — pine, overlay — oak), creating interesting visual effects.
Handrail material. The handrail must be made of hardwood, resistant to wear. Oak is the best choice: does not wear, does not darken from hands, develops a noble patina over time. Ash is a lighter alternative. Larch is suitable for budget projects or country houses.
Pine is unsuitable for handrails — too soft, wears quickly, darkens, absorbs grease from hands. After 5–7 years, a pine handrail looks worn and requires replacement or deep sanding with a fresh finish.
Handrail finish. Oil with hard wax — optimal. The handrail remains warm and pleasant to the touch, the wood grain is visible and felt. Oil penetrates into the wood, does not form a film, and the wood breathes. With wear (after 3–5 years of intensive use), the surface is sanded and a fresh layer of oil is applied — and the handrail looks as new.
Polyurethane lacquer — a more durable finish, withstands intensive wear without losing gloss. However, lacquer feels cold to the touch, especially in winter (wood under lacquer does not breathe, the handrail temperature is closer to air temperature than to hand temperature). For residential homes, where warmth and tactile comfort are important, oil is preferable.
Handrail height. According to construction norms, the handrail height is 90–100 cm from the front edge of the tread (not from the tread surface, but from its edge, known as the "line of travel"). For most adults, 90 cm is optimal. For tall individuals (height 180+ cm) — 95–100 cm.
If there are children in the house, a second handrail can be installed at 60–70 cm — child height. It is mounted parallel to the main handrail, attached to the same railing posts. Children hold onto their handrail, adults hold onto the upper one. This is safer and more convenient than forcing children to reach for the high handrail.
Handrail connection at turns. If the staircase has turns (L-shaped or U-shaped), the handrail must continuously follow the angle. The simplest method — connection at 45° (two straight handrail sections are cut at 45° angles, joined at the corner, the joint is reinforced with dowels or screws, spackled, and sanded).
A more complex and aesthetic method — a bent handrail element at the turn. A curved section is made from solid wood (bending with steaming or laminating thin veneer layers), which smoothly connects straight sections. A bent handrail has no corners, the hand glides over it continuously — the pinnacle of craftsmanship.
Our factory also produces:


Connection Nodes
The reliability of the staircase railing depends on the quality of the connection joints. The railing must withstand lateral loads of at least 100 kg (according to norms — test: an adult person leans their full weight on it, the railing must not wobble or deflect more than 5 mm). Let’s examine key joints.
Joint 1: Attaching balusters to treads. The lower end of the baluster (rail) is attached to the tread. Methods:
Method 1: Screw from below at an angle. A 45° angled hole is drilled from the underside of the tread (invisible side) into the baluster. A 5–6 mm diameter, 80–100 mm long screw is screwed in. The screw passes through the tread thickness (usually 40–50 mm) and enters the baluster 40–50 mm. The attachment is invisible from above, aesthetics are preserved.
Method 2: Dowel. Vertical holes of 8–10 mm diameter and 30–40 mm depth are drilled into the tread and the lower end of the baluster. A wooden dowel (cylindrical rod) is inserted on PVA glue. The baluster is mounted on the dowel protruding from the tread. The glue sets, creating a strong but disassemblable connection (the dowel can be removed if necessary, and the baluster removed).
Method 3: Metal anchor. A metal threaded anchor (rod 80–100 mm long, 8–10 mm diameter) is screwed into the tread. A vertical hole is drilled into the baluster, and the baluster is mounted on the anchor, secured from below with a nut (invisible from above). The strongest connection, withstands any load.
Joint 2: Attaching balusters to the handrail. The upper end of the baluster is attached to the handrail. Methods:
Method 1: Screw from above at an angle. A screw is screwed through the handrail at an angle into the baluster. The screw head is countersunk 2–3 mm, the hole is filled with a wooden plug (chopstick) matching the tone, sanded. The connection is strong, the chopstick is almost invisible (if precisely matched in tone and grain direction).
Method 2: Mortise in the handrail. A longitudinal groove 15–20 mm deep and equal in width to the baluster thickness (40–50 mm) is milled into the underside of the handrail. The upper ends of the balusters slide into the groove, secured with glue and thin nails (finishing nails, 1.5–2 mm diameter), driven through the handrail into the baluster ends. The groove covers the balusters from all sides, creating a very aesthetic connection.
Method 3: Overlay plank. Balusters are installed vertically, their upper ends rest against the underside of the handrail. A thin 20×40 mm plank is attached to the balusters (from the inner side of the railing, invisible from the staircase) to secure the balusters to the handrail. The plank is secured to the handrail and to each baluster with screws. Simple, reliable, but the plank is visible from the inner side.
Joint 3: Attaching the handrail to support posts. At turns, at the start and end of the stair run, support posts (more massive than balusters, 100×100 or 120×120 mm cross-section) are installed. The handrail is attached to them. Methods:
Method 1: Half-lap joint. A groove 20–30 mm deep is cut into the top end of the post, into which the handrail fits. The connection is secured with a long screw (120–150 mm), screwed from above through the handrail into the post. The screw head is countersunk and covered with a chopstick.
Method 2: Metal angle bracket. A metal angle bracket (stainless steel or galvanized) is attached to the post from the inside (invisible side). The handrail is laid on the bracket and secured with screws. The connection is invisible from the outside and very strong.
Method 3: Through bolt. The handrail is laid on the post, a through hole (10–12 mm diameter) is drilled through the handrail and post, a bolt is inserted, and a nut is tightened from below. The bolt head and nut are countersunk into the wood 10–15 mm, covered with wooden plugs. The strongest connection.
Joint 4: Attaching support posts to floor/treads. The support post is the main load-bearing element of the railing and must be rigidly fixed. Methods:
Method 1: Bolted mounting. A vertical hole of 12-16 mm diameter is drilled through the post from below. The post is installed in place, and a long bolt (150-200 mm) is screwed in from below (through the tread or floor), passing through the tread/floor and into the post. The bolt is tightened from below with a wide washer nut (invisible from above).
Method 2: Metal anchor. A metal anchor (threaded rod 100-150 mm long) is embedded or screwed into the floor/tread. A vertical hole is drilled into the post, the post is mounted onto the anchor, and secured from below (in a specially selected recess at the bottom end of the post, covered with a cap).
Method 3: Embedding into the tread. If the tread is thick (60-80 mm), a groove 40-50 mm deep is cut into it, into which the lower end of the post fits. Additionally, the post is secured with screws driven at an angle through the sides of the groove. This is a traditional method characteristic of old staircases.
Joint strength check. After installing the railing, a test is conducted: an adult person (weight 80-100 kg) leans on the handrail with maximum force, attempting to sway the railing. There should be no: play (swaying), creaking, deflection exceeding 5 mm. If present, the joints require reinforcement: additional fasteners, metal reinforcing elements, reworking of connections.
Get Consultation
Wear and Maintenance
Stairs are one of the most heavily loaded elements of interior design. People walk on them daily, many times a day. Hands grip the handrail. Balusters are subjected to accidental impacts when moving furniture or other items. Wear is inevitable, but proper care extends the life of the stairs and preserves their appearance.
Tread wear. Treads are worn in areas of most frequent use — in the center of the run (walk line). After 5-10 years of intensive use, noticeable wear marks appear on the treads: protective coating (oil, varnish) is worn away, wood is exposed and darkens (soiling penetrates).
Tread wear prevention: use hardwoods (oak, beech) — they wear 2-3 times slower than pine or birch; apply a quality protective finish (3-4 layers of parquet oil or 4-5 layers of polyurethane-based parquet varnish); install anti-slip pads on treads (in areas of greatest wear) — they take the wear themselves, protecting the wood, and are easily replaceable.
Renewing worn treads: remove all movable decorative elements from the stairs, protect walls and railings with plastic sheeting; sand treads (grit 60-80 to remove old finish, then 120, 180, 220 for leveling); remove dust (with industrial vacuum cleaner); apply fresh protective finish (2-3 layers of oil or 3-4 layers of varnish). The stairs look new. Renewal frequency: oil every 5-7 years, varnish every 10-15 years.
Handrail wear. The handrail is worn from constant contact with hands. This is especially noticeable in areas where hands are placed most often (start and end of the run, turns). Oil finish wears out in 3-5 years, exposing the wood, which darkens and absorbs grease from hands.
Handrail renewal: remove the handrail (if the structure is disassemblable) or protect adjacent elements with painter’s tape; sand (grit 180-220, light sanding to remove only the darkened layer); remove dust, degrease (with alcohol or acetone); apply 2-3 layers of hard wax oil. Frequency: every 3-5 years for heavily used stairs, every 5-7 years for lightly loaded stairs.
Baluster damage. Balusters may acquire scratches or dents from moving furniture or impacts. Minor damage is repaired on-site: dents are filled with wood-colored putty, sanded, and coated with oil/varnish. Deep scratches (broken pieces) — the damaged baluster is replaced with a new one.
Therefore, when constructing stairs, it is advisable to order 2-3 spare balusters of the same cross-section and made from the same wood, treated with the same finish. They are stored and, if after several years one baluster is severely damaged, it can be easily replaced with an identical one.
Stair squeaking. Over time, the stairs may begin to squeak — the sound arises from friction between elements (treads against stringers, balusters against handrail) under load deformation. Squeaking does not affect strength but is annoying.
Squeak elimination: identify the squeaking joint (walk the stairs to determine exactly where it squeaks); strengthen the connection (add an extra screw, apply glue, install a metal angle bracket); if the tread squeaks against the stringer — insert a wooden wedge between them, coated with glue; if balusters squeak — tighten fasteners, add felt washers at wood-to-wood contact points.
Wet cleaning of stairs. Stairs require regular cleaning — dust and dirt from shoes accumulate on treads. Cleaning: dry (with vacuum cleaner or brush) — daily or every other day; wet (with cloth slightly dampened with water and wood surface cleaner) — once a week.
Important: the cloth must be well wrung out, not wet but damp. Excess water is harmful to wood, especially at joints and ends. After wet cleaning, treads and handrail are wiped dry with a clean cloth to avoid leaving moisture.
Scratch protection. Heavy sharp objects (metal boxes, buckets) should not be placed on treads; walking in shoes with metal studs or heels should be avoided. It is preferable to use soft indoor footwear (slippers, socks). When moving furniture up the stairs — wrap the furniture’s corners with soft fabric or cardboard to avoid hitting balusters.
Lighting Scenarios
Staircase lighting — this is not only functionality (safety during movement in darkness), but also aesthetics. Proper lighting highlights the beauty of the wooden structure, creates an atmosphere, and makes the staircase an architectural accent of the home.
General overhead lighting. Basic level — chandelier or ceiling fixture above the stairwell. Power is chosen so that illumination on treads is at least 150 lux (standard for stairs). For a stairwell 3 m high and 10 m² in area, this is approximately 800-1000 lumens (10-12 W LED bulb).
Suitable for Russian style: chandelier in traditional design — wooden frame, wrought iron elements, diffusers made of frosted glass or fabric. Or ceiling fixture with wooden frame, styled asWooden Picture Frame.
Under-tread lighting. Modern and effective solution — LED strip, installed under the front edge of each tread (in the nosing or in a special groove on the underside of the tread). Light is directed downward and forward, creating soft under-lighting for each step.
LED strip is mounted in an aluminum profile (for protection and even light distribution), the profile is recessed into the groove so that the strip is invisible, only the light is visible. Light color — warm white (2700-3000K, creates coziness) or neutral white (4000K, more functional). Power — 5-7 W per meter (sufficient for under-lighting, does not cause glare).
Tread lighting turns on automatically when darkness is detected (light sensor) or when approaching the stairs (motion sensor). This is convenient and economical — light is on only when needed.
Baluster lighting from within. Exclusive solution — LED strip laid behind balusters (between balusters and wall, if the staircase is wall-mounted, or in the space between two rows of balusters, if the staircase is freestanding). Light passes between balusters, creating rhythmic light stripes, emphasizing verticals.
For this, balusters are mounted at a small distance (30-50 mm) from the wall or on a frame creating a gap. LED strip is laid vertically or horizontally behind balusters, mounted to the wall or frame. Light is diffused and soft, creating an intimate atmosphere.
Accent lighting of handrail. Spotlights (spotlights) can be directed onto the handrail, mounted on the ceiling or wall near the staircase. Narrow beam of light glides along the handrail, highlighting its shape, wood texture, and creating expressive highlights.
Or a thin LED strip is embedded into the handrail (in a specially milled groove on the top side of the handrail, covered with a transparent acrylic diffuser). The handrail glows from within — dramatic, futuristic, but requires a complex handrail structure.
Decorative lighting of support posts. Support posts at stair turns, at the start and end of the run can be lit from below (light fixture in the floor, directed upward along the post) or from above (light fixture in the ceiling, directed downward). Light glides along the post, emphasizing its verticality, creating a dramatic effect.
If the posts are carved (with traditional Russian motifs —Carved wooden window casingsthe lighting highlights the relief of the carving, creates a play of light and shadow, transforming the post into a sculptural object.
Lighting scenarios. Modern lighting control systems allow creating different scenarios for different times of day and moods:
Daytime scenario: upper general lighting is off (sufficient natural light from windows), decorative lighting is off. Energy saving.
Evening scenario: upper lighting is on at 50-70% (comfortable level for movement), step lighting is on at 30% (soft guide), accent lighting on posts and handrails is on at 50% (creates atmosphere).
Night scenario: upper lighting is off, step lighting at 10-20% (minimal but sufficient for safe descent/ascent in darkness), all other lighting is off. Does not disturb sleepers, but ensures orientation.
Festive scenario: all lighting at maximum, possibly adding colored RGB lighting (for special occasions). The staircase becomes the center of attention, a work of art.
Lighting control. Staircase lighting is controlled by: switches (standard, at the start and end of the run — through switches allowing to turn the light on/off from both ends of the staircase); dimmers (brightness adjustment — convenient for creating scenarios); motion sensors (automatic activation upon approaching the staircase — energy saving, convenient); smart system (control via smartphone, voice, or schedule — maximum comfort, but more expensive).
For a residential home, the optimal combination is: main lighting controlled by through switches with dimmer, decorative lighting — by a separate switch or smart system, step lighting — by motion sensor (activates automatically upon approaching).
Conclusion: architecture of movement
The staircase is not just a way to get from floor to floor. It is an architectural element organizing the space of the house, creating vertical connection, a place where the beauty of construction and material is revealed. A staircase in Russian style is a tribute to the tradition of wooden architecture, where every element had meaning, function, and beauty.
decor in Russian styleOn the staircase — it is not excessive carving and gilding, but honesty of construction, correct proportions, quality of execution. Simple-profiled balusters, a massive handrail, comfortable for the hand, solid oak steps that will serve generations — this is what makes a staircase Russian in spirit.
A properly designed and built staircase serves 50-100 years. Oak steps, worn by the feet of several generations, acquire a noble patina. A handrail polished by thousands of touches becomes smooth as silk. Balusters, having survived moves, renovations, furniture rearrangements, stand firmly as on the day of installation. This is an investment in long-term quality of life.
for stairway railings.Wooden skirting boardsfor finishing stair treads.
We offer ready-made kits of elements for standard staircases (straight, L-shaped, U-shaped) and manufacture according to individual projects. We consult on connection node construction, safety, ergonomics. We help calculate material quantities based on staircase drawings.
We manufacture non-standard elements: handrails with individual profiles (per your sketch or sample), carved support posts with traditional Russian motifs, curved handrails for turns. All made from kiln-dried solid wood, precise dimensions, ready for installation.
We offer finishing services: sanding (up to 220 grit), oiling (in 2-3 coats) or varnishing (in 3-4 coats) at the factory. Elements arrive fully ready, only installation remains. This saves time and guarantees even coating.
Delivery across Russia. For large orders (full staircase kit) — free consultation with a designer, assistance in designing connection nodes. 23 years on the market, hundreds of staircases with our elements in homes across the country.
By choosing STAVROS, you receive quality that withstands decades of intensive use, materials from hardwoods, traditional solutions adapted to modern safety and ergonomic requirements, and a partner who understands that a staircase is for life.
Frequently asked questions
What is the optimal profile for stair railings?
For railings 90-100 cm high — 40×60 mm or 50×80 mm rails. Smaller section (30×40 mm) is insufficiently rigid and may bend. Larger (60×100 mm) is unnecessarily bulky and visually heavy. Rail spacing — no more than 100 mm (clearance) (safety requirement to prevent a child from pushing their head through).
Can pine be used for balusters and handrails?
For balusters — not recommended (too soft, wears out quickly), better to use oak, ash, larch. For handrails — absolutely not (pine wears out and darkens within 3-5 years, loses appearance). Pine can be used for load-bearing staircase elements (stringers, treads), hidden under steps.
How often should staircase coating be renewed?
Steps (oiled) — every 5-7 years, varnished — every 10-15 years. Handrail (oiled) — every 3-5 years. Balusters (if not subjected to direct wear) — every 10-15 years. Signs of need for renewal: dullness, scratches, water absorption (drop does not roll off).
How much does it cost to manufacture a railing for a 14-step staircase?
14 steps, railing height 90 cm, baluster rails 50×80 mm oak with 15 cm spacing (approximately 10 rails per step): 140 rails × 200 rub = 28,000 rub. Round oak handrail, 45 mm diameter, 5 m length — 8,000 rub. Support posts 100×100 mm, 3 pcs — 9,000 rub. Fasteners — 3,000 rub. Labor (installation) — 35,000-45,000 rub. Total: 80,000-95,000 rub.
Is it necessary to install a second handrail for children?
Recommended if there are children aged 5-10 years in the house and the staircase is actively used by them. The child’s handrail is installed at 60-70 cm from the steps, 35-40 mm diameter (smaller than adult). It is more convenient and safer for a child to hold onto a handrail at their own height than to reach for a higher one.
How to fix a squeaky staircase?
Identify the squeaky joint (walk the stairs to locate the exact spot). Strengthen the connection: drive an additional screw at an angle, add adhesive to the joint, install a metal angle bracket. If the tread squeaks against the stringer — insert a wooden wedge with adhesive between them. If balusters — tighten fasteners, add felt washers.
What lighting is optimal for a staircase?
Combination: general overhead lighting (chandelier or pendant, 150+ lux on treads); under-tread lighting (LED strip under each step, warm white light, automatic activation via motion sensor); accent lighting (support columns, handrail — for aesthetics). Control: main light — pass-through switches with dimmer; under-tread lighting — motion sensor.
Can a staircase railing be made of MDF?
Balusters — no (MDF is not strong enough for elements subjected to lateral loads and may split). Handrail — no (it is constantly touched, MDF wears out quickly). Decorative overlays and fillers between balusters — yes (if painted and not subjected to load). Solid wood is required for load-bearing railing elements.
How to protect steps from rapid wear?
Use hardwoods (oak, beech). Apply a quality protective finish (3-4 layers of parquet oil or 4-5 layers of parquet varnish). Install anti-slip overlays on treads (in the walking line zone) — they absorb wear and are easy to replace. Use soft indoor footwear and avoid footwear with metal parts.
Is it necessary to coordinate the staircase design?
The staircase is a responsible structure whose safety depends on it. Its design must comply with SP 54.13330 (staircases). If the staircase is in a private house — usually no approval from supervisory authorities is required (owner’s responsibility). If in a multi-apartment building (renovation with adding a staircase between apartments) — project approval from the housing inspection is required. It is better to entrust the construction to professionals.


