Article Contents:
- History Frozen in Gypsum
- From Palaces to Homes
- Anatomy of Plaster Ceiling
- Ceiling Rosettes: The Heart of Composition
- Cornices: The Line of Connection
- Moldings and Cores: Division of Plane
- Corner Elements and Inserts
- Materials: From Gypsum to Polymers
- Polystyrene: Budget Solution
- Polyurethane: Modern Solution
- Polystyrene: Budget Option
- Styles and Their Language
- Classicism: harmony of proportions
- Baroque: Celebration of Form
- Empire Style: Imperial Grandeur
- Modern: Natural Motifs
- Modern Classicism: Minimalism with Traditions
- Practical Aspects of Creation
- Design: Seeing the Future
- Installation: Precision and Care
- Painting: Final Touch
- Mistakes and How to Avoid Them
- Proportional Errors
- Stylistic Eclecticism
- Poor Installation
- Incorrect Painting
- Conclusion: Ceiling as a Work of Art

Looking upward, one does not see a blank, indifferent white surface, but a whole world. Elegant scrolls, refined rosettes, strict cornices — plaster ceiling transforms space, turning an ordinary room into a work of architectural art. This is not mere decoration, but a language spoken by classical architecture, capable of creating an atmosphere impossible to achieve by any other means.
For centuries, ceiling plasterwork was a privilege of palaces and mansions, a symbol of wealth and refined taste. Master plasterers spent months creating complex compositions, each unique. Today, technology has made this beauty accessible, but the essence remains unchanged —Plaster ceilingit continues to embody elegance, a sign that the homeowner values true beauty and is willing to invest in details.
Entering a room with a plaster ceiling, one instantly feels the difference. The space gains depth, height, character. The ceiling ceases to be a boundary, becoming a fifth wall participating in interior creation. The play of light and shadow on the relief, the rhythm of repeating elements, the central accent of the rosette — all this contributes to creating a harmonious, thoughtfully designed space.


History Frozen in Gypsum
Stucco originated in ancient times, when humans learned to work with clay and lime. Ancient Egypt adorned temples with reliefs, while Ancient Greece perfected the art of decorative stucco. But it was ceiling stucco that truly flourished during the Renaissance, when Italian masters rediscovered the principles of classical beauty.


From Palaces to Homes
The 17th-18th centuries became the golden age for ceiling stucco. Baroque and Rococo created unprecedented opulence in decoration. Palace ceilings were covered with complex compositions — rosettes, cartouches, garlands, putti. Every centimeter was meticulously crafted, and each detail carried symbolic meaning.
Neoclassicism tempered Baroque excesses, returning stucco to strictness and clarity of form. Symmetrical compositions, repeating motifs, restrained decoration — this is the language of classical ceiling stucco. It is precisely this style that became the foundation for most modern solutions, where noble restraint is valued.
The 19th century democratized stucco. Technological advancements allowed the creation of molds for mass production of elements. What was once accessible only to the aristocracy became available to middle-class homes. Ceiling stucco became a sign of good taste, not merely wealth.
The 20th century brought new materials. Gypsum was supplemented by polystyrene, and then polyurethane — a material that combined the lightness of plastic with the strength of traditional stucco. Todaypolyurethane moldingsit allows recreating any historical styles with minimal time and cost.
Our factory also produces:


Anatomy of a Stucco Ceiling
A stucco ceiling is not a chaotic accumulation of elements, but a thought-out system where each detail plays its role. Understanding this system is critical for achieving a harmonious result.
Get Consultation
Ceiling Rosettes: The Heart of the Composition
A rosette is the central element around which the entire composition is built. It is placed at the geometric center of the ceiling or above the dining table, in an area requiring emphasis. The classical function of a rosette is to frame a chandelier, but modern design uses them as independent decorative elements.
The size of the rosette is determined by the proportions of the room. The formula is simple: the diameter should not exceed one-seventh of the sum of the room's length and width. For a 5x6 meter living room, a 60-80 cm rosette is optimal. A too large rosette will overwhelm the space, while a too small one will disappear.
The shape of the rosette can be round, oval, square, or polygonal. A circle is classic, symbolizing perfection and harmony. An oval is good for elongated rooms, visually correcting proportions. Square and polygonal rosettes are characteristic of Empire and Neoclassicism, where geometric clarity is valued.
The ornament of the rosette reflects the interior's stylistic theme. Acanthus leaves, volutes, floral garlands — the language of classicism. Geometric patterns, strict lines — Neoclassicism. Luxurious scrolls, asymmetry — Baroque and Rococo. The choice of ornament must align with the overall concept, not contradict it.
Cornices: The Line of Connection
A ceiling cornice is not merely a decorative strip, but an architectural element creating the transition between wall and ceiling. It visually raises or lowers the ceiling, altering the perception of the room's proportions.
The width of the cornice is calculated as one-twentieth of the wall height. For a standard height of 2.7 meters, a 12-15 cm cornice is optimal. In rooms with high ceilings — from 3.5 meters — wide cornices of 20-30 cm can be used, creating a monumental effect.
The cornice profile determines the character of the interior. A simple smooth profile — for minimalism and modern classicism. A complex multi-level profile with grooves and protrusions — for historical styles. A profile with fluting — for Neoclassicism. Ornate, with scrolls and petals — for Baroque.
Cornices can be smooth or ornamented. The ornament is placed on the vertical part facing the wall, or on the horizontal part visible from below. Popular motifs — meander, egg with dart, palmettes, modillions. Each has historical associations and carries specific stylistic weight.
Moldings and Coffered Ceilings: Division of the Plane
Moldings — narrow decorative strips — are used to divide the ceiling plane, create frames, and accentuate zones. They transform a flat ceiling into a structured surface, adding rhythm and visual interest.
The classical use of moldings is to create rectangular or square frames on the ceiling. These frames can frame zones (dining area, lounge), highlight chandeliers, or create the illusion of a coffered ceiling. The size of the frames should be proportional to the room — not too small to avoid clutter, and not too large to avoid appearing empty.
Coffers — recessed cells on the ceiling — are a classic technique of ancient and Renaissance architecture. True coffers are complex engineering structures, but stucco allows imitating them without construction work. Moldings create the illusion of depth, especially if the inner surface of the 'coffer' is painted in a contrasting color.
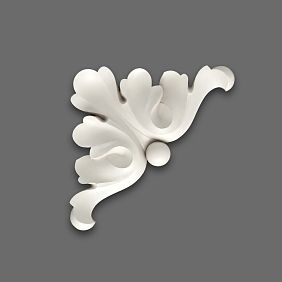
Corner Elements and Inserts
Corners — problematic zones of any ceiling. Here, cornices meet, and voids often form, requiring filling. Corner elements — special decorative inserts — solve this problem, turning a technical necessity into decoration.
Corner inserts can be simple — smoothly connecting two cornices — or complex — with additional ornament, rosettes, scrolls. In classical interiors, corners are often adorned with palmettes, acanthus leaves, smaller rosettes. This creates rhythm and unifies the composition.
Friezes — wide horizontal bands with ornament — are placed between the cornice and the main wall plane. This is an intermediate element, enhancing the transition and adding decorative detail. Friezes are characteristic of Empire and Neoclassicism, where layered richness and ornate decoration are valued.
Materials: From Gypsum to Polymers
The choice of material determines not only the appearance of the stucco, but also its service life, installation complexity, and project cost.
Gypsum: Genre Classic
Gypsum moldings — a tradition dating back to ancient times. Gypsum is pliable, allowing the creation of complex forms and retaining fine detail exceptionally well. Its surface is matte and noble, without artificial sheen.
The main advantage of gypsum is the possibility of individual manufacturing. The artisan creates unique elements that no longer exist anywhere else. This is the path to an exclusive interior, where every detail bears the mark of original craftsmanship. Gypsum can be restored, refreshed, and restored to its original appearance multiple times.
The drawbacks of gypsum are obvious — heavy weight, brittleness, and complex installation. A gypsum rosette with a one-meter diameter weighs 15–20 kilograms and requires secure mounting, often mechanical fastening with self-tapping screws or anchors. Installing gypsum moldings is a job for professionals; self-installation involves risks.
Gypsum is hygroscopic — it absorbs moisture from the air. In humid rooms, this may lead to mold growth and material degradation. Gypsum moldings require quality ventilation and stable humidity levels. This limits their use in bathrooms, kitchens, and basements.
Polyurethane: modern solution
Polyurethane moldings combine the beauty of gypsum with the practicality of modern materials. Lightweight, strong, and moisture-resistant — they lack most of the drawbacks of traditional moldings while preserving all their aesthetic merits.
Polyurethane weighs 10 times less than gypsum at the same strength. A rosette with a one-meter diameter weighs 1.5–2 kilograms, allowing it to be mounted using adhesive without additional mechanical fasteners. This simplifies installation and makes it accessible even for non-professionals.
Polyurethane moldings are not afraid of moisture — they do not absorb it, swell, or deform. Polyurethane moldings work excellently in bathrooms, kitchens, and high-humidity areas. They require no special care — simply wipe them periodically with a damp cloth.
The cost of polyurethane moldings is significantly lower than gypsum moldings. Mass production reduces the price, making beauty accessible. At the same time, the quality of execution remains high — reputable manufacturers use quality raw materials, precise equipment, and multi-stage quality control.
The cost of polyurethane molding is significantly lower than that of gypsum. Mass production reduces the price, making beauty accessible. At the same time, the quality of execution remains high — proven manufacturers use quality raw materials, precise equipment, and multi-stage control.
Polystyrene: Budget Option
Polystyrene moldings — the most affordable option for those who want to achieve a molded ceiling at minimal cost. Lightweight, inexpensive, and easy to install — they deserve to exist, but with reservations.
The main drawback of polystyrene is low detail. The material is coarse-grained and cannot hold fine elements, resulting in rough carving. Polystyrene moldings are suitable for simple profiles, but complex ornaments on them appear simplified.
Polystyrene has low strength — it breaks easily and crumbles under mechanical stress. Its service life is limited — after 5–10 years, the material yellows, becomes brittle, and requires replacement. This is a temporary solution, not designed for decades.
Polystyrene is flammable and releases toxic gases when burned. Its use is undesirable in spaces with heightened fire safety requirements. There are self-extinguishing grades, but even they are not entirely safe.
Styles and Their Language
A molded ceiling speaks the language of architectural styles. Each era developed its own visual code, and understanding this code is critical for creating an authentic interior.
Neoclassicism: harmony of proportions
Classic molded ceilings — symmetry, clarity of forms, restrained decoration. A central rosette with a strict circular shape, adorned with acanthus leaves or laurel wreaths. A straight cornice with a clear profile, without excesses. Moldings create geometrically correct frames.
The color palette of classicism — white, cream, light gray. Monochromaticity emphasizes form, not distracting with color. Gold is used minimally — only on accents, highlighting key elements of the ornament. This is noble restraint, elegance without ostentatious luxury.
Proportions are mathematically precise. The size of the rosette, the width of the cornice, the spacing of moldings — all are calculated using formulas developed by architects of the past. The result — harmony, intuitively perceived, creating a sense of calm and order.
Baroque: Celebration of Form
A Baroque ceiling — an explosion of ornamentation, where moldings cover almost the entire surface. Rosettes are complex, multi-level, with abundant scrolls, putti, garlands. Cornices are wide, protruding, with rich ornamentation. Corners are filled with decorative inserts.
Asymmetry — a characteristic feature of Baroque. Elements may be placed not strictly at the center, and the composition may be dynamic, creating a sense of movement. This is a departure from classical staticness toward liveliness and expressiveness.
Color plays an active role in Baroque. Gold is abundant, covering significant surfaces. Polychromy — coloring different elements in different colors, creating color accents — is possible. White with gold — a classic combination, but Baroque allows bolder solutions.
Empire: Imperial Grandeur
An Empire ceiling is monumental. Large rosettes, wide cornices, massive elements create a sense of power. The ornament is militaristic — eagles, laurel wreaths, swords, shields. Everything speaks of strength, victory, grandeur.
Symmetry in Empire is absolute. The composition is built around a central axis, elements are mirrored. This is order, discipline, clarity — qualities that were valued during the Napoleonic era and remain relevant for grand interiors.
Empire materials imitate luxury. Gold should look like real gold, white — like marble. The color palette is limited — white, gold, sometimes black for contrast. No half-tones, everything is clear and defined.
Modern: Natural Motifs
Modernist molded ceilings reject classical forms in favor of natural lines. Asymmetrical compositions, floral ornaments, flowing forms — this is the language of modernism. Rosettes may be oval, curved, or irregularly shaped, not necessarily circular.
Modernist ornament — stylized flowers, leaves, climbing stems. Irises, lilies, water lilies — flora becomes a source of inspiration. Lines are smooth, flowing into one another, without sharp edges. This is organic against the geometry of classicism.
Water lilies — flora becomes a source of inspiration. Lines are smooth, flowing into one another, without sharp edges. This is organic against the geometry of classicism.
In modern style, color can be unexpected. Pastel shades, muted tones, sometimes contrasting combinations. Moldings can be painted not white, but in the color of the walls, becoming a unified whole with the surface. Or, conversely, contrast to create an accent.
Modern classicism: minimalism with traditions
The modern approach to molded ceilings simplifies historical forms while preserving their essence. Rosettes are small, concise, without excessive decoration. Cornices have simple profiles, often smooth, without ornamentation. Moldings are used minimally, only to create the main structure.
The color palette is restrained — white, gray, sometimes black for contrast. Gold leaf is absent or minimal. This is purity of form, where beauty lies in proportions and lines, not in abundance of decoration. An approach aligned with modern aesthetics, valuing functionality.
Combining with modern materials and technologies is a characteristic feature. Moldings can be integrated with suspended ceilings, LED lighting, climate control systems. Classical forms acquire modern content, creating a unique synthesis of traditions and innovations.
Practical aspects of creation
Theory without practice is dead. Understanding how a molded ceiling is implemented helps make correct decisions at every stage.
Designing: seeing the future
Creating a molded ceiling begins with a project. The room is measured, its proportions, height, and features are determined. Windows, doors, furniture — everything affecting the perception of the ceiling — are marked on the plan.
A composition concept is developed. Where will the central rosette be, what size, what ornament. What cornice — smooth or decorated, wide or narrow. Are moldings, coffered panels, additional elements needed? All this is sketched on the plan and visually evaluated.
Modern 3D modeling programs allow you to see the result before starting work. A virtual model shows how the ceiling will look from different angles and under various lighting conditions. This enables experimenting, trying out options, finding the optimal solution without physical costs.
Material calculations are performed based on the project. The perimeter is measured for cornices, area for moldings, number of corner elements. An additional 10-15% allowance is added for fitting, possible defects, and future repairs. It is better to buy with excess rather than later searching for elements from the same batch.
Installation: precision and neatness
Surface preparation is critical. The ceiling must be flat, clean, dry, and strong. Irregularities exceeding 2 millimeters per meter require leveling. Old paint, wallpaper, and whitewash are removed until a solid base is reached. Cracks are chiseled and filled.
Priming improves adhesion, binds residual dust, strengthens the surface. A deep-penetration primer is used, applied with a roller or brush. Drying time is 4-6 hours, but it is better to wait a full day for complete polymerization.
Marking is done with a laser level or string. The center of the ceiling is located, and the position for the rosette is marked. Lines for cornices and moldings are marked. The accuracy of marking determines the accuracy of the result — an error of 1 millimeter at the initial stage becomes centimeters on the opposite wall.
Special adhesive is chosen — for polyurethane moldings. Ordinary construction adhesive is not suitable — it may not provide reliable adhesion. Adhesive is applied with a notched trowel in a thin, even layer to the back of the element. For large elements, additional adhesive is applied along the perimeter.
Installation begins with central elements. The rosette is pressed against the ceiling, aligned with the marking, held for several minutes until the adhesive sets. Excess adhesive is immediately wiped away with a damp sponge. Then cornices are installed, starting with corners, then straight sections.
Joining elements requires precision. Edges must be perfectly flat, cut at the required angle. For internal corners — 45 degrees, for straight joints — 90 degrees. A miter box or a miter saw is used. The gap at the joint should not exceed 0.5 millimeters.
Final finishing includes filling joints with acrylic putty. It fills small gaps and levels the surface. After drying, joints are sanded with fine-grit sandpaper until smooth. Then the entire molding is primed for painting.
Painting: the finishing touch
Water-based paint for interior use is selected. Matte for classic interiors, satin or semi-gloss for modern ones. Glossy paint is unsuitable for moldings — gloss looks cheap and emphasizes minor imperfections.
The first layer is applied with a brush, carefully painting all ornament recesses. Movements should be across the relief to ensure paint penetrates all details. The second layer is applied with a roller or brush along main lines, creating an even coating.
Patina creates an aged effect. Dark paint — gray, brown, black — is applied into ornament recesses. Excess is partially wiped away with a damp sponge, leaving darkening only in the recesses. This emphasizes relief and adds depth.
Gold leaf is applied using special metallic paints or gold leaf — imitation of gold leaf. Brush strokes are applied to raised parts of the ornament. It is important not to overdo it — gold should be used sparingly, only on accents.
Mistakes and how to avoid them
Even high-quality materials do not guarantee a good result if design or installation errors are made.
Proportional errors
An overly large rosette in a small room overwhelms, creating a sense of confinement. An overly small rosette in a spacious room disappears, appearing insignificant. The one-seventh rule must be strictly followed.
An overly wide cornice visually lowers the ceiling. In a room with a height of 2.7 meters, a cornice wider than 15 centimeters is undesirable. An overly narrow cornice in a high room looks short and fails to fulfill its architectural role.
Stylistic eclecticism
Mixing elements of different styles without understanding their compatibility leads to chaos. A baroque ornate rosette with a minimalist smooth cornice — a conflict. Classical moldings with modernist asymmetrical decoration — dissonance. The style must be unified or thoughtfully eclectic.
Poor installation
Poorly prepared surface leads to plaster detachment. Insufficient adhesive quantity results in voids, reducing strength. Careless jointing causes visible gaps, spoiling the impression. Installation requires care, patience, and adherence to technology.
Incorrect painting
Thick paint layer clogs ornament details, simplifies relief. Paint must be applied in thin layers, avoiding accumulation in recesses. Using oil-based paint on polyurethane may cause reactions, material degradation. Only water-emulsion or acrylic paints.
Conclusion: ceiling as a work of art
Plaster ceiling is not just decoration, but a way to transform an ordinary room into a space with character, history, soul. It is an investment in beauty, repaid by daily aesthetic pleasure. Entering a room with a plaster ceiling, one feels the difference — here, taste, understanding of harmony, respect for traditions live.
Modern technologies have made this beauty accessible. No longer do you need to wait months for plasterers to work, pay exorbitant sums. Quality polyurethane plaster allows creating a classic interior at reasonable prices and in short time. The key is understanding principles, observing proportions, not cutting corners on material quality.
Plaster ceilingSTAVROS — is a combination of craftsmanship traditions and modern technologies. The company has specialized for over twenty years in producing and supplying decorative interior elements. Own production guarantees stable quality, wide assortment, affordable prices.
STAVROS catalog includes hundreds of elements for creating plaster ceilings. Rosettes from simple classical to complex baroque, diameter from 30 centimeters to 1.5 meters. Cornices of various profiles and widths — from minimalist smooth to richly ornamented. Moldings, corner elements, decorative inserts — everything for realizing any design ideas.
Material quality has been tested by time. Dense polyurethane with ideal ornament detail, smooth surface, precise geometric dimensions. Elements do not deform, do not yellow, retain original appearance for decades. This durability is reliable.
STAVROS consultants will help select elements for a specific project. They will calculate required quantity, advise optimal sizes, and provide installation tips. Technical specialists will answer any questions and share professional secrets. This is support at all stages — from selection to installation.
Delivery is organized to all regions of Russia. Elements are securely packaged and protected from damage during transport. Delivery times are minimal — ready products are promptly shipped from the warehouse in Saint Petersburg. This is convenience, time-saving, and confidence in product safety.
Showrooms in Moscow and Saint Petersburg are open for visits. Here you can see plaster samples, evaluate detail quality, touch the material, compare different options. The exhibition shows how elements look in interiors, helping make the right decision.
Plaster ceiling is a choice for those who appreciate classical beauty, understand the power of details, are ready to invest in creating a harmonious space. It is not a fashion trend, but a conscious decision in favor of timeless values. A ceiling adorned with quality plaster will delight for decades, remaining relevant, becoming part of the home’s history.
Choosing STAVROS means choosing proven quality, professional service, wide creative possibilities. The company helps realize the dream of a classic interior, providing everything necessary — materials, knowledge, support. Plaster ceiling from STAVROS — is art accessible to anyone who values beauty and is ready to create a dream space.