


Article Contents:
- Why polyurethane: material of the new generation
- Weight: lightness without compromise
- Strength: durability over time
- Detailing: precision of industrial technologies
- Painting: unlimited color solutions
- Moisture Resistance: Decor for Any Room
- Element categories: decorator's arsenal
- Moldings: universal decorative profiles
- Crown moldings: elements for ceiling-wall transitions
- Rosettes: central ceiling accents
- Appliances: furniture and architectural decoration
- Corners: ready-made solutions for joints
- Flexible elements: decoration for curved surfaces
- Ceiling scenarios: the art of decorating the fifth wall
- Rosette for chandelier: classic accent
- Beads: perimeter framing
- Coffers: volumetric division of the plane
- Transition to walls: space zoning
- Wall panels: relief compositions
- Classic panels: geometry and symmetry
- Vertical accents: pilasters and cornices
- Horizontal divisions: friezes and dado
- Opening framing: doors and windows
- Flexible molding on radii: smooth lines
- Combinations with wood: material synthesis
- Wooden panels and polyurethane moldings
- Boiserie with polyurethane decoration
- Rails and appliques: modern aesthetics
- Beams and rosettes: ceiling accents
- Installation: flawless result technology
- Surface preparation: foundation of reliability
- Marking: precision — the courtesy of kings
- Adhesive: correct choice and application
- Molding and trimming: precision of joints
- Joint spackling: invisible seams
- Painting: final touch
- Budget and logistics: project planning
- Price per meter: forming a cost estimate
- Consumables: hidden items
- Transportation: preservation during delivery
- Professional installation: to save or hire?
- Typical mistakes and how to avoid them
- First mistake: installation on unprepared surface
- Second mistake: incorrect adhesive choice
- Third mistake: rushing during jointing
- Fourth mistake: insufficient fixation of large elements
- Fifth mistake: painting before sealing joints
- Sixth mistake: ignoring acclimatization
- Seventh mistake: non-compliance with proportions
- Eighth mistake: lack of symmetry
- Ninth mistake: neglecting finishing work
- Tenth mistake: installation on stretch ceiling without preparation
- Popular Questions and Answers
- Can polyurethane molding be used in a bathroom?
- How long does it take to install a ceiling cornice in a room?
- How does flexible molding differ from regular molding?
- Can polyurethane molding be painted with acrylic paint?
- How to calculate the amount of molding needed for a room?
- Is it necessary to prime polyurethane molding before painting?
- Will a polyurethane rose hold a heavy chandelier?
- How to care for polyurethane molding?
- Can molding be mounted on wallpaper?
- What is the service life of polyurethane molding?
- Does polyurethane molding differ visually from gypsum molding?
- Can polyurethane molding be used on facades?
- Conclusion
Creating an elegant interior no longer requires months of work with fragile gypsum and armies of plasterers. ModernPolyurethane moldingstransforms the most complex decoration task into an engaging process accessible even to non-professionals. Lightweight, durable elements with intricate detailing are installed in hours, serve for decades, and open up limitless possibilities for realizing the boldest design concepts—from noble classicism to daring minimalism.


Why polyurethane: material of the new generation
Polyurethane molding represents a revolutionary solution in the world of decorative materials, combining the aesthetics of classical molding with the advantages of modern technologies. High-density polyurethane foam, from whichMoldings made of polyurethaneand other elements are manufactured, demonstrates characteristics unattainable with traditional materials.


Weight: lightness without compromise
The first and most obvious advantage of polyurethane decoration is its remarkable lightness. Elements weigh 8-10 times less than gypsum equivalents of similar size, which dramatically simplifies working with them. One can easily lift a three-meter cornice with one hand, install a heavy rosette on a suspended ceiling without risking structural collapse, or create a complex multi-tiered composition on gypsum board walls.
The lightness of the material opens up possibilities unimaginable for traditional molding.polyurethane wall moldingscan be mounted on any base—from concrete to thin partitions. The load on load-bearing structures is minimal, no special reinforcements are required. This is especially critical when working with suspended and tensioned ceilings, where each additional kilogram creates problems.
Our factory also produces:


Strength: resistance to the test of time
Despite their minimal weight, polyurethane elements demonstrate remarkable strength and resistance to mechanical impacts. The material does not crack during transportation, does not crumble during processing, and retains its geometry during installation. A random impact that would destroy a gypsum detail will leave only a small dent or no damage at all on polyurethane.
The durability of polyurethane has been proven over decades of use. Elements do not deform over time, do not sag under their own weight, and retain the clarity of relief and lines.Relief DecorationAfter 20-30 years, it still looks flawless, as on the day of installation. The material is inert to most aggressive environmental factors, does not react with paints and adhesives, does not oxidize or corrode.
Get Consultation
Detailing: precision of industrial technologies
Modern production of polyurethane molding is carried out by casting into high-precision molds, ensuring perfect repeatability of relief and finest details. Each swirl, each groove, each ornament element is reproduced with jewel-like precision. The surface obtained is perfectly smooth, without bubbles, blisters, or defects typical of hand casting.
The richness of forms and ornaments is breathtaking. Catalogs feature hundreds of options—from strict classical profiles to elaborate baroque compositions with botanical motifs, from minimalist modern lines to complex multi-tiered cornices.Ceiling molding made of polyurethanecan imitate wood carving, gypsum molding, stone masonry—all with equal conviction.
Painting: limitless color solutions
Polyurethane excellently accepts any paints based on water or oil, making it a universal material for implementing any design concepts. The primed surface of elements ensures excellent adhesion, paint lays evenly without runs or spots. One can create classic white molding, paint decoration to match wall tones for creating relief panels, or use contrasting colors to accentuate architectural elements.
The painting technology is simple and accessible even to beginners. It is enough to degrease the surface, apply paint with a roller or brush in one or two layers. One can experiment with effects—patina, gilding, silvering, creating imitation of various materials. Painted molding easily withstands wet cleaning, is resistant to fading, and retains color saturation for years.
Water resistance: decoration for any room
Unlike gypsum, which deteriorates upon contact with water, polyurethane is completely indifferent to moisture. This opens up the possibility of using decorative elements in bathrooms, toilets, kitchens, pools—everywhere where gypsum molding is unthinkable.Trendy ceilings with moldingin rooms with high humidity are now reality, not just designer fantasy.
Polyurethane elements do not absorb water, do not swell, do not lose shape with changes in humidity. The material does not create a favorable environment for mold and fungi growth, easily cleanses dirt with ordinary cleaning agents. Facade decoration made of polyurethane withstands rain, snow, fog without any signs of degradation, making it an ideal solution for exterior building decoration.
Element categories: decorator's arsenal
The assortment of polyurethane decorative elements is so extensive that it can solve any interior design task. Each category of products has a specific purpose and opens up certain design possibilities. Understanding the functions of different elements is key to creating harmonious compositions.
Moldings: universal decorative profiles
Moldings are long, surface-mounted strips with various profile cross-sections — from simple smooth rails to complex relief elements with ornamentation. This is the most universal category of decor, used to solve a multitude of tasks. Moldings create horizontal and vertical divisions on walls, frame panels, frame door and window openings, and serve as transition elements between different finishing materials.
The variety of profiles allows selecting moldings for any interior style. Classical profiles with fluting and Ionic motifs, baroque variants with plant scrolls, strict geometric strips for modern interiors, wood imitation rails — the choice is limited only by the designer's imagination.polyurethane moldings buyAvailable in standard lengths of 2–2.4 meters, which simplifies transportation and installation.
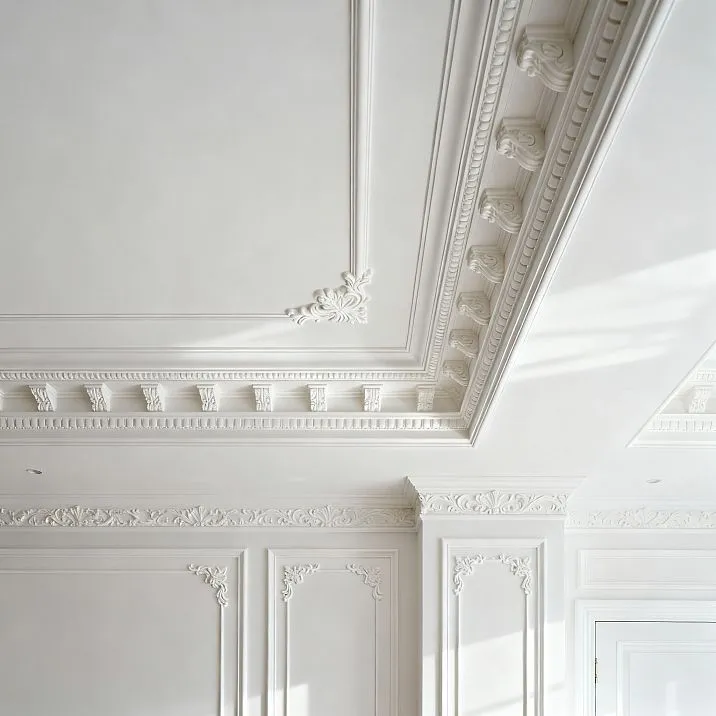
Crown moldings: elements for transitioning between ceiling and wall
Crown moldings are specialized moldings designed for decorating the junction between wall and ceiling. Their profile is designed to create a smooth visual transition between horizontal and vertical planes. Crown moldings can be minimalist, practically invisible elements or luxurious multi-tiered structures defining the character of the entire room.
Wide crown moldings with rich relief create the impression of grand palace halls even in rooms with standard ceiling heights. Crown moldings with hidden lighting become sources of soft, diffused light, visually lifting the ceiling. Simple cornices delicately mask technological gaps between finishing materials, drawing no attention and allowing other interior elements to take center stage.
Rosettes: central ceiling accents
Ceiling rosettes are round, oval, or polygonal surface-mounted elements traditionally placed in the center of the ceiling under a chandelier or other pendant lighting.Rosette under chandelierServes as a visual anchor for the composition, draws the eye, and creates a sense of completion for the ceiling surface.
Rosette designs vary from strict concentric circles to lavish baroque compositions with cherubs, floral garlands, and acanthus leaves. Sizes also vary — from compact 30-centimeter versions for small rooms to monumental meter-sized rosettes for grand halls. Modern interiors often use rosettes not for their intended purpose — as wall decor, mirror framing, or as bases for clock mechanisms.
Appliques: furniture and architectural decor
Surface-mounted elements are diverse ornamental details without a strictly defined purpose. These can be cartouches, medallions, corners, rosettes, plant and geometric motifs, shaped elements. Appliques are used to decorate door panels, furniture facades, fireplace surrounds, wall panels — anywhere a volumetric accent is needed.
It is precisely appliques that allow personalizing mass-produced furniture and adding uniqueness to standard interior solutions. A few symmetrically placed ornamental elements transform a plain door into a work of decorative art. Appliques on the corners of furniture facades create the effect of handcrafted carved furniture. The ability to paint in any color allows integrating appliques into existing color palettes or creating contrasting accents.
Corners: ready-made solutions for junctions
Polyurethane corner moldingsare special elements designed for decorating internal and external corners when using moldings and crown moldings. Using ready-made corner elements greatly simplifies installation, eliminates the need for precise 45-degree trimming, and guarantees perfect joints in the most critical areas.
Corner elements often have more elaborate decoration compared to linear molding parts, turning technical junctions into decorative accents. Rosettes on corners, interwoven ornaments, three-dimensional compositions — corners become the highlight of the design, not a problematic zone. For complex multi-profile crown moldings, ready-made corner blocks are the only way to ensure correct joints without hours of fitting.
Flexible elements: decor for curved surfaces
A special category of polyurethane molding —flexible polyurethane moldingmade from a more elastic material. Such elements can be bent along a radius, allowing decoration of arches, bay windows, curved walls, round columns. Flexibility is achieved by using a special low-density polyurethane composition that retains all the basic properties of the material.
Flexible moldings open up possibilities for creating smooth, flowing compositions impossible with rigid elements. Framing round niches, decorating wavy ceilings, decorating radius staircases — all these tasks are solved without complex trimming and joining multiple short fragments. Installing flexible elements requires certain skills, but the result justifies the effort with flawless line smoothness.
Ceiling scenarios: the art of decorating the fifth wall
The ceiling is the most underestimated surface in interior design, although proper ceiling zone decoration can dramatically change the perception of space. Polyurethane molding transforms the ceiling from a technical element into a full-fledged participant in the designer's composition, creating volume, rhythm, and accents.
Rosette under chandelier: classic accent
Installing a ceiling rosette under a central light fixture is the simplest and most effective way to decorate the ceiling. The rosette visually enlarges the scale of the chandelier, creates a complete composition, and draws the eye to the center of the room. Even a modest chandelier framed by an expressive rosette becomes a dominant feature of the interior.
Choosing the rosette size is critically important for composition balance. In compact rooms, rosettes with a diameter of 30–50 centimeters are appropriate; in spacious living rooms, monumental versions up to one meter or more can be used. General rule: the rosette diameter should be approximately one-third the diameter of the chandelier or pendant fixture. A too large rosette overwhelms the light fixture, while a too small one disappears and looks out of place.
Socket installation requires precise centering. Before installation, determine the geometric center of the ceiling, mark the socket position, and verify alignment of the central hole with the electrical wiring outlet. Adhesive is applied to the entire back surface of the socket, the element is pressed firmly against the ceiling and secured until the adhesive sets. After drying, the socket can be painted to match the ceiling or used as a contrasting accent.
Coving: perimeter trim
Ceiling coving - moldings running along the perimeter of the room at the junction of walls and ceiling. This technique creates a clear frame for the ceiling plane, visually structures the space, and conceals technological gaps between different finishing materials. Even a simple smooth coving transforms the room, making it complete and thoughtfully designed.
The width of the coving determines the degree of its influence on the perception of room height. Narrow coving (5-7 cm) is almost invisible, delicately performing its function without drawing attention. Medium coving (10-15 cm) creates a noticeable frame, participating in interior style formation. Wide coving (20-30 cm and more) becomes a standalone architectural element, defining the character of the room.
Coving with hidden backlighting is especially effective. To achieve this effect, special coving with a shelf is used, behind which LED strips are concealed. The light reflected from the ceiling creates a soft glow along the perimeter, visually lifting the ceiling and making the room appear airy and spacious. This solution is particularly valuable in rooms with low ceilings, where every centimeter of visual height matters.
Coffers: volumetric division of the plane
Coffer ceilings - complex compositions of intersecting beams or moldings, creating a system of rectangular or square cells. Such decoration gives the ceiling volume, rhythm, and architectural expressiveness. Coasters are associated with classical palace interiors, but with the right approach, they fit organically into modern spaces.
Creating coffer ceilings using polyurethane moldings is accessible even to non-professionals. The process begins with careful marking of the ceiling - determining the size and number of cells, calculating beam width, checking symmetry. Then, moldings are installed according to the marking, forming the composition's frame. Corners are beveled at 45 degrees for perfect joints or finished with special corner elements.
The interior of coffer ceilings can be left in the base ceiling color, painted in a contrasting tone, covered with patterned wallpaper, or decorated with painting. Small sockets in the center of each coffer create an additional volume effect. Built-in lights in the coffer ceilings provide even illumination and emphasize the composition's relief.
Transition to walls: space zoning
Moldings on the ceiling can be used not only along the perimeter but also to create zonal accents. For example, a molding frame above the dining area distinguishes it from the overall kitchen-living space. A circular or oval molding on the bedroom ceiling marks the bed zone. A rectangular frame in an office accentuates the work area.
Such zoning is especially effective when combined with different finishes inside and outside the molding frame. Contrasting colors, different textures, and varying lighting fixtures - the molding becomes the boundary between different functional zones. It is a subtle tool for organizing space, requiring no construction of partitions or radical re-planning.
Multi-level gypsum board ceilings combine beautifully with polyurethane molding. Moldings along the contours of levels emphasize the geometry of the structure and complete the forms. Coving with backlighting at the level boundaries enhances the effect of volume, transforming technical height differences into expressive architectural elements.
Wall moldings: relief compositions
Walls provide a vast canvas for creativity with polyurethane molding. Moldings allow creating complex decorative panels, imitating expensive wall panels, structuring large surfaces, and forming accent zones. Proper use of molding decoration on walls can completely transform a room, giving it individuality and style.
Classic panels: geometry and symmetry
Traditional use of moldings on walls - creating rectangular frames imitating classic wainscoting. The wall is divided into symmetrical sections, each framed by molding. The interior of the frames can be painted in a contrasting color, covered with patterned wallpaper, or decorated with fabric. This achieves the effect of expensive wooden panels at minimal cost.
Panel proportions are critically important for a harmonious result. The classic variant implies vertical orientation - the frame height is approximately 1.5-2 times the width. The number of panels on the wall depends on its length, but must always be odd to ensure a central axis of symmetry. Distances between panels and from panels to room corners must be equal.
installing polyurethane moldingTo create wall panels, start with careful marking. First, determine the size and position of panels, then draw lines on the wall where moldings will be adhered. Frame corners are beveled at 45 degrees using a miter box, elements are adhered with special adhesive. After drying, joints are spackled, and moldings are painted.
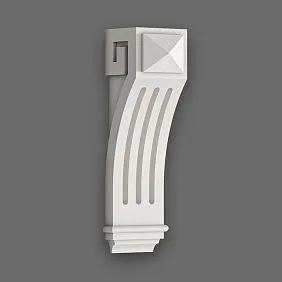
Vertical accents: pilasters and flutes
Vertical moldings imitating pilasters or flutes visually increase room height, create rhythm, and structure long walls. Such elements are especially suitable for rooms with low ceilings, where every technique to increase visual height is valuable. Vertical moldings can run from floor to ceiling or occupy the upper third of the wall.
To create convincing pilaster imitation, use moldings with classic profiles - flutes, ovals, astragals. The base and capital are formed from horizontal moldings or special overlay elements. The distance between pilasters should correspond to classical proportions - approximately three to five times the width of a pilaster. Symmetrical placement relative to the center of the wall is mandatory.
Modern interiors use vertical moldings more freely, without strict adherence to classical canons. Simple smooth strips placed at equal intervals along the entire wall create the effect of slatted panels. Contrasting coloring of moldings and background enhances the graphic quality of the composition. Asymmetric placement of vertical elements adds dynamism.
Horizontal divisions: friezes and dado
Horizontal moldings divide the wall vertically, creating the classic three-part division - baseboard, main field, frieze. The lower molding is usually placed at a height of 70-90 cm from the floor, separating the dark baseboard section from the main wall field. The upper molding runs just below the ceiling, creating the frieze zone. Such division has not only decorative but also practical value - the baseboard zone is more resistant to dirt.
The width and profile of moldings for horizontal division should correspond to the scale of the room. In compact rooms, subtle thin strips are appropriate; in spacious halls, expressive relief moldings are suitable. The color of moldings can match the baseboard and window trim for a unified framing system or contrast with them for a more complex color scheme.
Compositions with multiple horizontal moldings at different levels are especially interesting. Three to four parallel strips create rhythmic division of the wall, visually expanding the room. Combining horizontal and vertical moldings forms a grid, within whose cells various decorative effects can be created - alternating colors, textures, and patterns.
Opening framing: doors and windows
installation of polyurethane moldingFraming around door and window openings adds architectural expressiveness, transforming utilitarian elements into decorative accents. Framing can be minimalist - a simple frame of smooth molding - or luxurious, with capitals, pediments, and side pilasters.
The width of framing should be proportional to the size of the opening. For a standard door 80-90 cm wide, an optimal molding width is 8-12 cm. For panoramic windows or wide openings, larger elements can be used. Framing should be set back from the edge of the opening by 5-10 cm, creating a frame around the trim.
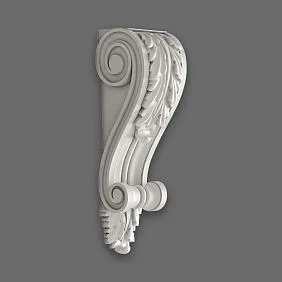
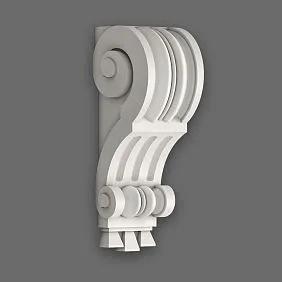
The upper part of the molding is the most expressive element of the composition. A straight horizontal finish creates a strict classical look. A triangular or arched pediment adds grandeur. A broken pediment with a decorative cartouche in the center is a sign of baroque luxury. Console brackets or supports under the horizontal element enhance the illusion of a load-bearing structure.
Flexible molding on radii: smooth lines
Arched openings, bay windows, curved walls require a special approach. Rigid moldings cannot be bent without breaking, and joining multiple short straight fragments results in an uneven broken line. The solution is to use special flexible moldings capable of taking any curvature.
Installing flexible moldings requires pre-soaking the element in warm water to increase its elasticity. Then, the molding is gradually bent to match the curved surface, fixed with adhesive, and additionally secured with painter’s tape until fully set. After drying, the material hardens, retaining the given shape.
The bending radius is limited by the material properties — too sharp a turn may result in creases or cracks. For small-diameter circles, it is sometimes necessary to use several short flexible fragments, carefully matching the joints. An alternative is to order radius-specific elements, custom-made for a specific project with a given curvature radius.
Combinations with wood: material synthesis
One of the most interesting trends in modern design is combining polyurethane molding with wooden elements. The contrast of textures, the interplay of natural and synthetic materials, and the combination of different reliefs create rich, multi-layered compositions unattainable with only one type of decoration.
Wooden panels and polyurethane moldings
Wall panels made of solid wood, MDF, or veneered materials are beautifully framed by polyurethane moldings. The wooden surface becomes the filling of the frame, the molding forms a clear boundary, creating volume. Such a combination allows using more affordable wooden panels without milling, compensating for the material’s simplicity with the expressiveness of the framing.
Color solutions can vary. The classic option is white moldings and natural wood, creating a contrast between light and dark, smooth and textured. Moldings painted to match the wood tone create a monolithic composition, where the focus is on relief rather than color. Contrasting combinations — dark moldings on light panels or vice versa — add graphic impact.
Especially effective are combinations of vertical wooden slats and horizontal polyurethane moldings. Slats create a pronounced vertical texture, moldings form horizontal divisions, and the intersection of rhythms creates a complex visual play. Such compositions suit modern interiors, where the combination of natural materials and clear geometry is valued.
Boiserie with polyurethane decoration
Classic wooden boiserie — wall panels with panels, cornices, pilasters — are extremely expensive due to the complexity of manufacturing and installation. A compromise solution is using flat wooden panels combined with polyurethane decoration, imitating the volumetric elements of real boiserie.
Simple wooden boards or MDF panels are mounted on the wall, creating a smooth base surface. Then, polyurethane moldings are glued over the panels, forming frames for panels, vertical posts, and horizontal rails. Applied ornamental elements — rosettes, cartouches, corners — add details. After painting in a single color, a convincing imitation of carved panels is achieved.
This approach significantly reduces cost and complexity of work while achieving visually comparable results. The wooden base provides the nobility of natural material, warmth of texture. Polyurethane decoration provides volume, detail, architectural complexity. The ability to paint allows creating both traditional wooden tones and modern color solutions.
Slats and appliqués: modern aesthetics
Modern interiors often use wooden slats — parallel boards mounted on walls with equal spacing. Such finishing creates an expressive rhythmic surface, playing with light and shadow. Adding polyurethane appliqués to slat compositions adds accents without disrupting the overall minimalism.
Appliqués can be placed at intersections of slats, centers of formed cells, or around the perimeter of the slat field. Simple geometric shapes — circles, squares, rhombuses — support modern aesthetics. Painting appliqués in contrasting colors enhances the graphic quality of the composition. Metallic finishes — gold, silver, bronze — add glamour.
Combining horizontal wooden slats on the lower part of the wall with polyurethane moldings on the upper part creates an interesting two-level solution. The transition between zones is marked by a wide molding that simultaneously serves as the finish of the slat panel and the base for the upper part. Different materials emphasize the functional division of the wall.
Beams and rosettes: ceiling accents
Wooden or wood-imitating beams on the ceiling — a popular technique for creating coziness and visually reducing height in spacious rooms. Combining beams with polyurethane rosettes and cornices forms a rich ceiling composition. Rosettes are placed at the centers of cells formed by beam intersections, cornices run along the perimeter.
It is important to maintain a balance of scales — massive beams require proportionally large rosettes and wide cornices. Thin decorative beams pair with elegant molding elements. Color solutions can be contrasting — dark beams and white molding — or harmonious, in similar shades. Patination and artificial aging of molding allows integrating it into vintage beam interiors.
Polyurethane beams, imitating wood, can be combined with polyurethane molding, creating a lightweight unified ceiling decoration system. This solution is easier to install, cheaper, and does not create load on the ceiling structure. With proper painting and patination, polyurethane beams are virtually indistinguishable from wooden ones at ceiling height.
Installation: Technology for Flawless Results
The ease of installing polyurethane molding is one of the key advantages of the material, but this does not mean the process does not require attention and care. Knowledge of the technology, proper material selection, and correct sequence of operations determine the longevity and aesthetic quality of the result. Let’s examine all stages from preparation to final finishing.
Surface preparation: the foundation of reliability
The quality of installation directly depends on the condition of the surface on which the molding is mounted. The base must be clean, dry, strong, free of peeling coatings and dust. Old wallpaper, whitewash, and weak paint are completely removed. The surface is degreased, unevenness is sanded, and after drying, it is sanded again.
Special attention should be paid to room corners. Dust accumulates here most often, plaster peels off, and cracks form. Corners are thoroughly cleaned, reinforced with mesh tape and putty if necessary. The verticality and horizontality of surfaces are checked — significant deviations will require leveling, otherwise the molding will reveal all defects.
Priming the surface improves adhesive bond, reduces absorption in porous substrates, and strengthens the surface layer. A penetrating primer is used, applied with a roller or brush in one to two coats with intermediate drying. After the primer is fully dry, installation can begin.
Marking: precision — the courtesy of kings
Careful marking is the guarantee of symmetrical, even compositions. For ceiling cornices, a horizontal line is drawn around the room at a distance equal to the cornice width from the ceiling using a laser level or plumb line. For wall panels, all frames are marked with checks for symmetry and equal dimensions.
Central elements - outlets, inserts - require determining the center of the surface. For rectangular ceilings or walls, diagonals are drawn, and the point of intersection is the geometric center. For complex shapes, the center is visually determined, taking into account the placement of furniture, lighting fixtures, and architectural features. Markings are made with a thin pencil, visible but not leaving rough marks.
When creating complex compositions with multiple elements, it makes sense to make a template from cardboard or thin plastic. The template allows precisely determining the position of each element, checking the composition before starting installation, and correcting errors on paper rather than on the wall. This is especially important for ornamental compositions, where symmetry is critical.
Adhesive: correct selection and application
For installing polyurethane molding, special mounting adhesives based on synthetic resins or liquid nails are used. Universal compositions like "Moment Mounting" provide rapid setting and secure fixation. Specialized polyurethane adhesives offer a longer positioning time, which is important when working with large elements.
Adhesive is applied to the back of the element in a zigzag or dot pattern depending on the size of the detail. Small moldings require a thin continuous line of adhesive down the center of the back. Large outlets and wide cornices require adhesive to be applied over the entire contact surface with intervals of 10-15 centimeters. For particularly heavy elements, adhesive is also applied to the wall or ceiling surface.
After applying adhesive, the element is firmly pressed against the surface and held for 30-60 seconds for initial setting. Excess adhesive is immediately wiped off with a damp sponge — after drying, this will be more difficult. Heavy elements are additionally secured with painter’s tape or thin nails, which are removed after the adhesive has fully dried.
Molding joints and trimming: precision of connections
Most molding joints require 45-degree beveling. For precise beveling, a miter box is used — a device that holds the stock and guides the saw at the desired angle. Professional miter boxes allow setting any angle, while simple ones have fixed slots for 45 and 90 degrees.
To cut polyurethane, use a fine-tooth hacksaw — metal or plastic-specific. A coarse tooth leaves a ragged edge requiring additional finishing. Cut smoothly without pressure — polyurethane cuts easily, rushing leads to chipping. Cutting is done from the front side to prevent the edge from catching.
Internal and external angles are cut in mirrored fashion. For internal angles, the bottom part of the molding is longer than the top; for external angles, it’s the opposite. Before beveling, it’s recommended to practice on scraps, mastering the correct position of the stock in the miter box. An error in cutting direction is the most common cause of material waste.
Joint filling: invisible seams
Even with perfect beveling, molding joints have minimal gaps requiring filling. Acrylic joint filler, matched to the elements’ tone or universal white for painting, is used. Filler is applied with a rubber spatula, excess is immediately removed. The joint is filled level with the molding surface without bumps or hollows.
The heads of nails used for temporary fixation are also filled. Before filling, nails are driven 1-2 millimeters below the surface using a nail set. The resulting depression is filled with filler, then sanded smooth with fine sandpaper after drying. With careful work, fastener marks become completely invisible.
After the first layer of filler dries, shrinkage cracks often appear in areas of thickest application. A second thin layer of filler is required, followed by sanding. Only after achieving perfectly smooth joints can finishing work begin. Rushing at this stage will result in visible defects after painting.
Painting: final touch
Most polyurethane elements come with a white primer coat ready for painting. Water-based paints — acrylic or latex — are used, providing durable matte or semi-gloss finishes. Glossy paints highlight all surface defects, while matte finishes conceal minor imperfections.
Painting is done with a brush or roller in two to three thin layers with intermediate drying. The first layer is applied along the molding direction, the second across, and the third along again. This technique ensures even coverage without gaps. Raised areas are painted with a brush, smooth areas with a roller for faster work.
Decorative techniques are used to create effects. Patination — applying dark paint into relief grooves — emphasizes volume and creates an effect of noble antiquity. Gold or silvering with special paints adds luxury. Dry brush technique — rubbing a small amount of contrasting paint — creates complex color play. Possibilities are limited only by imagination.
Budget and logistics: project planning
The attractiveness of polyurethane molding largely depends on its accessible cost despite high decorative quality. However, for accurate budget planning, numerous factors must be considered — from the price per meter of molding to the cost of consumables and potential losses during beveling.
Price per meter: forming the estimate
The cost of polyurethane molding varies widely depending on the manufacturer, profile complexity, and element width. Simple smooth moldings start at 200-300 rubles per linear meter. Medium-complexity elements with classic ornamentation cost 500-800 rubles. Complex wide cornices with detailed ornamentation reach 1500-2500 rubles per meter.
Outlets, corner elements, and inserts are sold individually. A simple outlet with a 30-40 cm diameter costs 800-1500 rubles, a large complex outlet 70-100 cm in diameter — 3000-8000 rubles. Ready-made corner elements for moldings are priced at 300-1000 rubles per piece depending on size. Decorative inserts vary from 150 to 2000 rubles.
To calculate the required linear meters, measure the room’s perimeter (for ceiling cornices) or the total length of all planned moldings (for wall compositions). Add 10-15% extra for beveling and possible errors. The number of outlets and corner elements is determined directly by the project, and no extra allowance is typically needed.
Consumables: hidden items
In addition to the molding elements themselves, the estimate must include the cost of consumables. Mounting adhesive is used at approximately one can (310 ml) per 4-5 linear meters of medium-width molding. The price of a can ranges from 150-300 rubles depending on the manufacturer. For a 20 sq. m room with a ceiling cornice around the perimeter, 4-5 cans of adhesive will be needed.
Joint filler for sealing joints is used sparingly — one kilogram of filler is sufficient for 30-40 linear meters of molding. The cost of acrylic filler is 200-400 rubles per kilogram. Finishing paint is calculated based on the area to be painted. One liter of quality acrylic paint (500-800 rubles) covers 25-30 linear meters of 10 cm wide molding in two coats.
Auxiliary materials — primer, sandpaper, painter’s tape, solvent — add another 500-1000 rubles to the estimate depending on the scope of work. Tools, if not already available — miter box, hacksaw, spatulas, brushes, rollers — will cost 2000-4000 rubles, but these are one-time expenses that pay off when doing the work yourself.
Transportation: preservation during delivery
Polyurethane elements are delivered in protective packaging but require careful handling during transport. Standard molding lengths are 2 or 2.4 meters, allowing transport in a regular passenger car with a fold-down rear seat or a station wagon. Longer elements, if ordered, require a truck.
Moldings are laid horizontally, no more than 10-15 pieces per stack to avoid deformation of lower elements. Cardboard or packaging film is placed between layers. Sudden braking, impacts during loading-unloading may damage delicate relief details, so caution is required. Outlets and large inserts are transported separately, preferably in original packaging.
Upon receipt of goods at the warehouse or store, each item must be carefully inspected for chips, cracks, or deformations. Defective items should be replaced immediately — claims after delivery to the site become significantly more complicated. Storage until installation is performed horizontally in a dry room at room temperature for at least 24 hours to acclimate the material.
Professional installation: save money or hire?
Many homeowners install polyurethane molding themselves, saving on specialist services. For simple projects — a ceiling cornice around the perimeter, a few outlets — this is a reasonable solution if basic skills and care are present. Video instructions and step-by-step guides make the process understandable even for beginners.
Complex compositions with multiple joints, corner elements, and combinations of different profiles are better entrusted to professionals. An experienced craftsman will complete the work faster, better, with a guarantee of results. Installation cost is usually comparable to the cost of materials — from 300 to 1000 rubles per linear meter depending on complexity. For a 20-square-meter room, the work will cost 10,000–20,000 rubles.
When choosing an installer, it is important to evaluate the portfolio of completed projects, read client reviews, and obtain a detailed estimate broken down by type of work. Low-cost services often result in poor quality — crooked joints, visible seams, uneven painting. A reasonable price with a quality guarantee is preferable to the lowest cost with unpredictable results.
Typical mistakes and how to avoid them
Even with the apparent simplicity of installing polyurethane molding, there are several typical mistakes that can ruin the final result. Knowing these pitfalls allows you to avoid disappointments and redoing work, saving time, materials, and nerves. Let’s examine the most common mistakes and correct approaches.
Error #1: Installing on an unprepared surface
The most common mistake — attempting to glue molding onto a dusty, greasy, peeling surface. The result is predictable — elements will detach within days or weeks. The adhesive sticks to dust or old paint layers, which do not have sufficient adhesion to the base surface.
The correct approach — thorough preparation. Remove all loose coatings, degrease, and prime. Yes, this takes time, but only this ensures long-term durability. Pay special attention to corners and areas of old leaks, where plaster is often weakened. Simple rule: if the coating peels off with a fingernail, it must be removed.
Error #2: Incorrect adhesive selection
Using an inappropriate adhesive — a common cause of problems. PVA, wallpaper adhesive, or cement-based compounds do not provide reliable fixation for polyurethane. PVA loses its properties in humid environments, wallpaper adhesive cannot hold the weight of elements, and cement-based compounds lack sufficient adhesion to smooth polyurethane.
Specialized adhesives for polyurethane molding or universal construction adhesives like "liquid nails" based on synthetic materials must be used. These compounds provide rapid setting, high strength, and resistance to moisture and temperature fluctuations. Saving on adhesive often results in the need to redo the entire job.
Error #3: Rushing during jointing
Attempting to install moldings as quickly as possible without careful joint fitting leads to visible gaps, steps at connections, and misalignments. Precision is especially critical at internal angles — even a millimeter error in trimming results in a noticeable gap.
The correct technique — dry fitting each element before applying adhesive. Check the accuracy of trimming, and make adjustments if necessary. Use a miter saw to ensure precise cutting angles. For complex joints — create cardboard templates. Only after ensuring perfect fitment is the adhesive applied and final installation performed.
Error #4: Insufficient fixation of large elements
Wide cornices, heavy outlets, long moldings have significant weight, creating peeling forces until the adhesive fully dries. Relying solely on adhesive often leads to elements detaching under their own weight.
Additional temporary fixation is required — painter’s tape, thin nails, or self-tapping screws. Tape is applied across the molding, holding it pressed against the surface. Nails are driven into inconspicuous areas — under screw threads, into ornament recesses. After the adhesive fully dries (24–48 hours), fasteners are removed, and holes are filled with putty. Extra minutes spent on fixation save hours of redoing work.
Error #5: Painting before sealing joints
Painting molding before sealing joints — a classic beginner’s mistake. After painting, joints remain visible as dark lines, spoiling the appearance. Sealing over paint creates adhesion problems — putty peels off or shows a different shade.
The correct sequence — installation, full sealing and sanding of all joints and holes, priming, painting. Only after achieving a perfectly smooth surface with no visible seams is the final finish applied. If painting was done prematurely for any reason, the joint areas must be sanded down to the base material before applying putty.
Error #6: Ignoring acclimatization
Installing molding immediately after delivery from a cold warehouse into a warm room leads to problems. As the material heats up, it expands, potentially causing warping, joint separation, or peeling. Condensation on cold elements reduces adhesive adhesion.
Polyurethane molding must remain in the installation room for at least 24 hours to equalize temperature and humidity with the surrounding environment. Only after acclimatization does the material achieve stable dimensions and become ready for installation. This is especially critical in winter when there are large temperature differences between the warehouse and the site.
Error #7: Not following proportions
Using elements that are too large or too small relative to the room’s scale creates imbalance. A massive, wide cornice in a compact room visually lowers the ceiling, making the space feel cramped. A miniature outlet under a large chandelier in a spacious hall becomes lost and looks ridiculous.
The correct approach — matching element sizes to room dimensions and other interior details. For rooms 2.5–2.7 meters high, cornices 8–12 cm wide are optimal. In halls 3–4 meters high, cornices 15–25 cm wide are appropriate. Outlets should correspond to chandelier size — approximately one-third of its diameter. Wall moldings are chosen proportionally to the size of the frames they create.
Error 8: Lack of symmetry
Asymmetric placement of decorative elements, unequal gaps between panels, and outlets offset from the center create an impression of carelessness and incompleteness. The human eye is sensitive to symmetry violations, even minor deviations are noticeable.
Careful marking with symmetry check relative to the room's central axes is required. When installing multiple panels on a wall, first determine the central panel, then symmetrically add side panels. The distances from the outermost panels to the corners must be equal. Verification is done not only with a tape measure but also visually — stepping back several meters and assessing the overall picture.
Error number nine: neglecting finishing work
Leaving moldings in basic white without considering the overall interior color scheme, visible seams, uncolored ends at cutouts — signs of incomplete work. Polyurethane molding only reveals its potential after proper finishing work.
Painting must be done in a style consistent with the entire interior. White molding on a white ceiling can be subtly toned down by half a shade. Contrasting combinations require careful color selection. All edges, visible surfaces, and recesses must be painted. Raised areas often require additional work with a fine brush for even coverage.
Error number ten: mounting on a stretch ceiling without preparation
Attempting to glue molding directly to the stretch ceiling fabric is doomed to failure — the film cannot support the weight of the elements, sags, and deforms. Meanwhile, ceiling cornices with lighting are one of the most popular solutions specifically for stretch ceilings.
The correct technology is mounting molding to the wall, not the ceiling. The cornice is glued only with its lower part to the upper zone of the wall, while the upper part remains free and does not touch the stretch fabric. A 2-3 mm gap compensates for possible film movement. If lighting is planned, the LED strip is mounted to the wall behind the molding before its installation.
Popular questions and answers
Can polyurethane molding be used in a bathroom?
Polyurethane is completely moisture-resistant and ideal for rooms with high humidity.Polyurethane moldingsIt does not absorb water, does not deform upon contact with steam, does not create a favorable environment for mold growth. In a bathroom, polyurethane molding lasts as long as in dry rooms. The only requirement — use of moisture-resistant glue and paint resistant to condensation.
How long does it take to install a ceiling cornice in a room?
In a room of standard size 15-20 square meters, an experienced craftsman installs a ceiling cornice around the perimeter in 3-4 hours, including surface preparation and corner cutting. A novice may require 6-8 hours. The glue drying time is 24 hours, after which you can proceed to joint spackling. The full cycle from start to finish painting takes 2-3 days, including technological breaks for drying.
How does flexible molding differ from regular molding?
flexible polyurethane moldingIt is made from a more elastic compound, allowing the element to be bent along a radius without breaking. Regular rigid moldings break when attempted to be bent. Flexible variants are used for decorating arches, bay windows, columns, and curved walls. Visually and in terms of installation, there are no differences, but flexible moldings usually cost 30-50% more than rigid counterparts.
Can polyurethane molding be painted with acrylic paint?
Acrylic paint is the optimal choice for painting polyurethane. It provides good adhesion, dries quickly, has no strong odor, and creates a durable coating. Both matte and semi-gloss finishes are suitable. Glossy paints are not recommended — they highlight even minor surface defects. Oil-based paints can also be used, but they take longer to dry and have a strong odor. Latex paints also work excellently for polyurethane.
How to calculate the amount of molding needed for a room?
For a ceiling cornice, measure the room's perimeter — the sum of all wall lengths. For a 4x5 meter room, the perimeter is 18 meters. Add 10-15% for cutting — total 20 meters. With a standard molding length of 2.4 meters, you will need 9 pieces. For wall compositions, sum the lengths of all planned moldings according to the project and also add a reserve. Corner elements are counted individually — by the number of corners in the room.
Is it necessary to prime polyurethane molding before painting?
Most manufacturers supply elements with factory-applied white primer, ready for painting without additional treatment. If the surface is smooth and free of defects, you can paint immediately. After spackling joints, it is recommended to locally prime the spackled areas to equalize absorption. Full priming of the entire surface is necessary if a complete color change or dark shades are planned.
Will a polyurethane outlet withstand a heavy chandelier?
Rosette under chandelierIt is a decorative element not intended to bear load. The chandelier is mounted to the ceiling structure independently of the outlet. The outlet merely frames the mounting point and visually enhances the light fixture. During installation, first install the hook or bar for the chandelier, then glue the outlet to the ceiling with a central hole through which the chandelier's suspension passes. The chandelier's weight is borne by the ceiling structure, and the outlet remains unloaded.
How to care for polyurethane molding?
Painted polyurethane molding is low-maintenance. To remove dust, simply wipe with a dry soft cloth or use a vacuum cleaner with a soft attachment. Stains are removed with a damp sponge and mild detergent, then the surface is wiped dry. Abrasive cleaners, stiff brushes, and solvents must not be used — they may damage the paint. Raised areas are cleaned with a soft brush. Frequency of wet cleaning — as needed, usually once every few months.
Can molding be mounted on wallpaper?
Technically possible, but strongly discouraged. The glue adheres to wallpaper, and wallpaper adheres to the wall. The strength of the connection is determined by the weakest link — the adhesion of wallpaper to the base. Heavy elements may rip off the wallpaper along with the molding. The correct technology is installing molding on a prepared base surface before wallpapering. If wallpaper is already installed, cut out sections for molding installation, exposing the base. After installing the molding, wallpaper is trimmed to its edges.
What is the service life of polyurethane molding?
With proper installation and maintenance, polyurethane molding lasts 30-50 years without losing decorative qualities. The material does not age, yellow, or lose strength. The only thing that may be needed — repainting every 10-15 years to refresh the color. The service life is comparable to the interval between major renovations, making polyurethane molding a long-term investment in interior beauty.
Does polyurethane molding differ visually from gypsum molding?
After proper installation and painting, it is virtually impossible to visually distinguish polyurethane from gypsum molding. Both materials are white, paint similarly, and have comparable relief detail. Differences become apparent upon close inspection — polyurethane has a smoother surface, while gypsum has a slightly porous texture. At distances over one meter — the typical viewing distance for ceiling decor — the materials are indistinguishable. Polyurethane's advantages — lightness, moisture resistance, ease of installation — are not visible to the eye but are noticeable during use.
Can polyurethane molding be used on facades?
Polyurethane molding specifically designed for facade use successfully operates on exterior building walls. It is resistant to moisture, frost, ultraviolet radiation, and temperature fluctuations. Facade elements have increased density and are treated with special protective compounds. Standard interior molding is not suitable for exterior use — it is not designed for aggressive climatic conditions. When selecting, it is necessary to confirm with the manufacturer the intended use of specific products.
Conclusion
Polyurethane molding opens up limitless possibilities for creating expressive, refined interiors without the enormous time and cost required when working with traditional materials. The ease of installation makes decorating accessible not only to professionals but also to enthusiastic homeowners willing to invest a little time in transforming their living space. The variety of shapes, profiles, and ornaments allows you to realize any design concept — from grand classicism to minimalist modernism.
Moldings made of polyurethaneThey structure space, create rhythm, and form accents. Rosettes add expressiveness to ceilings, turning them into a full-fledged compositional element. Crown moldings with hidden lighting visually increase room height, filling them with air and light. Wall panels made of moldings imitate expensive classical finishes at an affordable budget. Combinations with wooden elements produce rich, multi-layered compositions that blend naturalness with technology.
The key to successfully using polyurethane decor is attention to detail at every stage of work. Careful surface preparation ensures reliable installation. Precise marking guarantees symmetry and balance of the composition. Careful trimming creates invisible joints. Quality spackling and painting give a finished look. Adhering to proportions, considering room scale, and thoughtful color selection transform a set of decorative elements into a harmonious ensemble.
STAVROS offers a wide range of polyurethane molding to suit any taste and budget. The catalog features hundreds of optionspolyurethane wall moldings, ceiling moldings, rosettes, corner elements, and overlays. Classic profiles coexist with modern minimalist forms, simple smooth strips with complex ornamental compositions. The company’s specialists will help select elements for any project, calculate the required amount of materials, and advise on installation and finishing.
STAVROS product quality is proven by years of successful operation and thousands of completed projects. Elements are made from high-density polyurethane, ensuring durability and resistance to deformation. Precision casting in precision molds guarantees clear relief and repeatability of details. Factory primer coating creates an ideal base for painting. Convenient logistics, flexible pricing policy, and professional support make working with STAVROS comfortable and effective.
Transform your interior withmoldings from polyurethane— invite elegance of classical forms, nobility of architectural details, sophistication of thoughtful decor into your home. Create a space where every element contributes to overall harmony, every line is intentional, every accent is precise. Polyurethane molding — an accessible luxury that turns an ordinary dwelling into a work of decorative art, pleasing to the eye and inspiring new creative achievements.


