Article Contents:
- Appliqués: accents and detailing
- Rosettes: ceiling composition center
- Wall compositions: system of elements
- Lightweight: technological advantage
- Quick installation: time advantage
- Adhesive compositions: basis for strong mounting
- Painting: adaptation to interior style
- Conclusion

An interior without decoration is a space without character. Walls and ceilings perform a function, but do not create an atmosphere. Furniture ensures comfort, but does not form a style. Moldings transform a room into a work of architectural art, where each element carries meaning, creates hierarchy, and forms composition.
Traditional plaster moldings are associated with the luxury of palace interiors, but are accessible to few. They are heavy, fragile, expensive to manufacture and install, and require the work of professional plasterers. Wood is noble, but capricious to humidity and temperature. Foam plastic is cheap, but looks cheap, does not hold sharp geometry, and is easily damaged.
molded decoration made of polyurethaneRevolutionized the world of interior design, making classic aesthetics accessible to a broad audience. Polyurethane combines the visual perfection of plaster with the practicality of modern materials. Lightweight weight allows mounting elements independently without helpers, without stressing the structure. Quick installation on adhesive compositions takes hours, not days. The possibility of multiple painting adapts the decoration to any interior color scheme.
Appliqués, rosettes, wall compositions — three categories of molding decoration, each with its own function and aesthetics. Appliqués create local accents, decorate furniture, doors, walls with fragmentary ornamental elements. Rosettes organize the ceiling composition center, frame chandeliers, gather the gaze into a focal point. Compositions of moldings and panels structure walls, divide the surface into proportional parts, create rhythm and hierarchy.
Understanding the specifics of each category, rules for their application, mounting and finishing techniques — the foundation for creating a harmonious interior. Chaotic placement of decorative elements without compositional logic creates visual noise. A properly designed molding decoration system transforms an ordinary space into one with character.
In this article, we will thoroughly examine the three categories of polyurethane molding decoration, their application, mounting, and finishing. You will learn how the lightweight nature of elements simplifies work, how quick installation on adhesive compositions turns interior transformation into a weekend project, and how painting adapts white decoration to any style.


Appliqués: accents and detailing
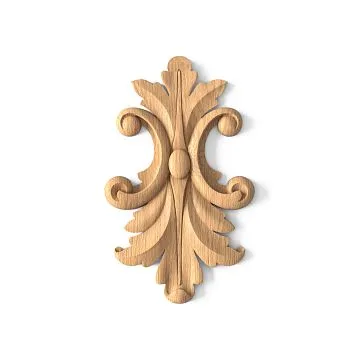
Appliqués — compact decorative elements with relief ornament, size from 5×5 cm to 40×60 cm. They do not form continuous lines like moldings, but create local accents — points of visual interest on furniture, doors, walls, ceilings.
Appliqué types are diverse. Rosettes — round or oval appliqués with a diameter of 8–20 cm with plant ornament (leaves, flowers, scrolls), used for decorating furniture facades, frame corners, panel centers. Cartouches — appliqués in the shape of a heraldic shield with ornament around the perimeter and a smooth central part, where you can add a monogram, inscription, or symbol. Corner appliqués — elements for decorating straight frame corners, doorways, furniture, with L-shaped or radial forms with ornament radiating from the corner.
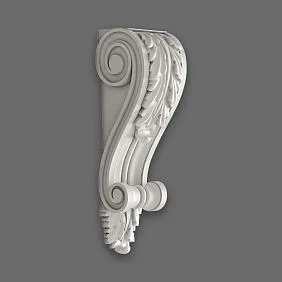
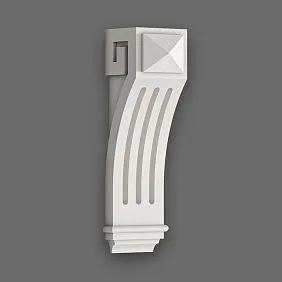
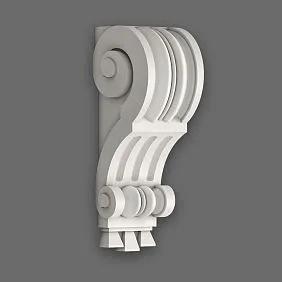
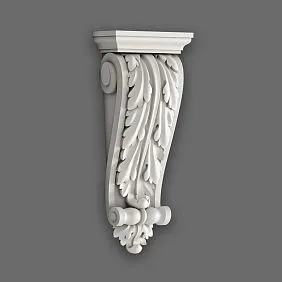
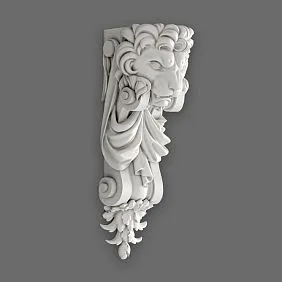
Consoles — shaped appliqués imitating architectural consoles (projecting support elements), used for decorating walls under shelves, pictures, mirrors, creating the impression that the object rests on a decorative console. Console height 15–40 cm, projection from the wall 5–15 cm.
Central appliqués — large elements 30×40 cm or 40×60 cm with rich ornament, placed in the center of wall panels, on door panels, above fireplaces. They create a compositional center, focal point, attracting attention.
Appliqué functions are varied. Furniture decoration — applying appliqués to cabinet, chest, or table facades transforms simple carcass furniture into an item with character. Rosettes at the corners of the facade, a central appliqué in the middle of the door create a symmetrical composition. Appliqués are painted in the color of the furniture or contrastively (gold on white furniture, white on dark furniture).
Door decoration — appliqués are placed on the door panel, creating frames, central accents. Four corner appliqués at the corners of the door form the perimeter, a central appliqué in the upper third — compositional center. Such decoration transforms a standard smooth door into a paneled, visually rich one.
Wall decoration — appliqués on uniformly painted walls create rhythm, pattern. A row of identical rosettes spaced 40–60 cm apart at a height of 140–160 cm from the floor along a long wall forms a horizontal rhythm. A vertical row of appliqués from baseboard to cornice with an interval of 50–80 cm creates vertical organization.
Frame decoration for mirrors and pictures — appliqués at the corners of the mirror or picture frame enhance decoration. Four corner appliqués transform a simple frame into a baroque, luxurious one. Central appliqués above and below the mirror create a vertical compositional axis.
Lightweight appliqués — their main technological advantage. An appliqué of size 20×30 cm weighs 50–150 grams depending on the relief thickness. A plaster appliqué of the same size — 500–800 grams, 5–10 times heavier. This allows attaching polyurethane appliqués to any surface, including MDF doors, particleboard facades, gypsum board walls — the load-bearing capacity of these materials is limited, a heavy plaster appliqué may fall off, while a lightweight polyurethane one will hold for decades.
Mounting appliqués on adhesive compositions takes minutes. Specialized polyurethane adhesive (Orac Decofix, Decomaster) is applied in dots to the back of the appliqué — 4–6 dots of 1 cm diameter. The appliqué is pressed onto the surface, held for 10–15 seconds, and secured with two strips of painter’s tape for 2–4 hours until the adhesive sets. That’s it. No screws, anchors, or complex fasteners.
Painting appliqués is done after mounting. Acrylic paint from a spray can — quick method: hold the can 25–30 cm away, apply a thin even layer, painting the recesses of the ornament. Drying time 2–3 hours, second layer for coverage. Alternative — 20–30 mm brush, acrylic paint from a can, careful painting of all relief details. Longer time, but higher control.
Gilding appliqués creates a luxurious effect. Acrylic paint with metallic pigment (gold, silver, bronze) is applied with a brush to the raised parts of the relief, recesses remain white or base color. This creates volume and emphasizes detailing. Alternative — gold leaf (imitation of gold leaf), applied to raised parts of the relief with special adhesive. The effect is closest to real gold.


Ceiling Rosettes — round or oval elements with relief ornamentation, placed at the center of the ceiling to frame a chandelier. Traditional function of a rosette — concealing the electrical wiring outlet, visually framing the light fixture, creating a compositional center on the ceiling.
Specific figures are impressive. A 60 mm wide, 2-meter long polyurethane molding with a density of 200 kg/m³ weighs 400-500 grams. A similar gypsum one — 4-5 kg, 10 times heavier. A 20×30 cm thick 15 mm polyurethane overlay — 100-150 grams, gypsum — 1-1.5 kg, 10 times heavier. An 80 cm diameter polyurethane rosette — 800-1200 grams, gypsum — 10-15 kg, 12-15 times heavier.
The size range of rosettes is wide — from compact 20-30 cm diameter for small rooms to monumental 100-150 cm for halls and large rooms. The rule for selecting diameter: for rooms 10-15 m² — rosette 30-40 cm, for 15-25 m² — 40-60 cm, for 25-40 m² — 60-80 cm, for over 40 m² — 80-120 cm and larger.
Rosette ornament styles are determined by era and direction. Classical rosettes feature vegetal ornament — acanthus leaves, laurel wreaths, floral garlands arranged in concentric circles from center to edge. Relief depth of 10-30 mm creates expressive play of light and shadow.
Baroque rosettes are highly ornamented — lush scrolls, cherubs, fruit garlands, asymmetrical elements. Such rosettes require high ceilings 3.5-4 meters and a corresponding rich interior — they overwhelm modest spaces.
Empire rosettes are geometric — concentric circles, rays radiating from center, wreaths, medallions. The ornament is symmetrical and orderly, creating a majestic effect. Typical for formal rooms, dining rooms, offices.
Modern rosettes are minimalist — simple geometry, concentric rings without vegetal ornament, relief depth 5-10 mm. Suitable for Scandinavian, minimalist, and high-tech styles, where classical ornament is inappropriate, but ceiling structure requires definition.
Rosette placement is determined not by the geometric center of the ceiling, but by the functional center of the room. In the living room, the functional center is the sofa and armchair zone where the family gathers. The chandelier hangs over this zone, and the rosette frames the chandelier. If the sofa is against the wall (typical in small apartments), the geometric and functional centers do not coincide — the rosette shifts toward the wall with the sofa.
In the dining room, the functional center is the dining table. The chandelier hangs over the table, and the rosette frames the chandelier. The table may not be centered in the room (if kitchen-dining area is elongated), and the rosette follows the table.
In the bedroom, the functional center is the bed. However, a chandelier over the bed is inconvenient (obstructs), so the rosette is placed over the geometric center of the room or not used at all if lighting is provided by wall sconces and floor lamps.
Lightweight rosettes are critical for ceiling mounting. A 60 cm diameter rosette weighs 400-800 grams. A gypsum rosette of the same diameter — 6-10 kg, 10-15 times heavier. Mounting heavy gypsum rosettes requires mechanical fastening with screws through the rosette into the ceiling, with fastener points masked by putty. Polyurethane rosettes are glued with adhesive without mechanical fasteners — their weight is fully supported by adhesive bond.
Quick rosette installation takes 15-30 minutes. Mark the center of the rosette on the ceiling (intersection of room diagonals or functional center). Apply adhesive to the back of the rosette — a full layer with a 4-6 mm notched trowel or radial stripes from center to edge. Position the rosette on the ceiling, aligning its center with the mark. Press evenly across the entire surface, pressing down in a circular motion from center to edges. Remove excess adhesive squeezed out around the perimeter with a damp sponge.
Rosette fixation until adhesive sets (4-6 hours) is done with temporary supports — a wooden plank from floor to rosette center on a ladder, or a T-shaped support. For rosettes up to 60 cm diameter, a support is not necessary — the weight is light and adhesive holds immediately. For rosettes 80 cm and larger, a support is mandatory.
Electrical wiring integration is planned in advance. The rosette center has a 5-10 cm diameter hole for chandelier wire exit. If the hole is absent or insufficiently sized, enlarge it with a sharp knife before mounting. The wire exits through the hole, the rosette is glued around it, and after mounting, the wire is connected to the chandelier, which is installed by standard method.
Rosette painting is done after installation and adhesive drying. Primer with 50-60 mm brush — thin layer, thorough painting of all ornament recesses. Dries in 3-4 hours. First paint layer — diluted 10% with water for better penetration into relief. Second layer — undiluted, opaque. 4-6 hours between layers. Do not sand between layers unless there are drips.
Decorative techniques for rosettes: patination — dark paint is applied to ornament recesses, creating an aged effect. Gilding — raised ornament elements are coated with gold paint or gold leaf, recesses remain white. Contrast coloring — rosette one color, ceiling another, rosette stands out as a medallion.
Our factory also produces:


Wall compositions: system of elements
Composition of wall molding decoration — not a random set of appliqués and moldings, but a system organized according to principles of harmony. Composition elements interact, creating hierarchy, rhythm, scale, structure.
Basic composition — molding panels. Rectangular frames outlined by 30-60 mm wide moldings divide the wall into sections. Typical scheme for 4-meter wall — three panels, each 80 cm wide, 100 cm high, bottom edge 80 cm from floor, 15 cm intervals between panels, 27.5 cm setbacks from wall corners. Inside panels — contrasting wallpaper, decorative plaster, or different shade paint.
Complex composition adds appliqués. Corner appliqués 8-12 cm wide are glued at each panel corner, decorating molding junctions. Center appliqués 15×20 cm are placed in center of each panel, creating a focal point. Composition gains detail, richness, and stops being merely frames.
Vertical composition uses tall narrow panels extending from baseboard to cornice. Panel proportions 1:2.5 or 1:3 (width to height). For 3.5-meter wall — four panels, 50 cm wide, 140 cm high, 10 cm intervals, 30 cm setbacks from corners. Bottom edge of panels 60 cm from floor (chair back level in dining room), top edge 200 cm (50 cm below 2.5 m ceiling). Vertical composition visually raises ceiling, suitable for rooms 2.5-2.7 meters high.
Horizontal composition divides wall into two tiers — lower and upper. Lower tier — panels 90-120 cm high from floor, filled with vertical frames or solid cladding. Tier boundary emphasized by wide horizontal molding 60-80 mm. Upper tier — smooth painted wall or wallpaper. Such composition is typical for English interiors, offices, libraries, dining rooms.
Symmetrical composition requires mirror reflection of elements relative to central vertical wall axis. Three panels — central on axis, two side panels mirror-symmetrical. Five panels — central on axis, two pairs of side panels. Appliqués within panels are placed identically — if an appliqué is in upper right corner of left panel, then an appliqué is in upper left corner of right panel (mirror reflection).
Asymmetrical composition breaks symmetry but maintains visual balance. Large panel on left is balanced by two small panels on right. Three panels in upper wall section are balanced by two in lower section. Asymmetry creates dynamism, modernity, but requires developed compositional sense.
Modular composition is built from repeating basic module. Module — 60×80 cm panel with appliqué centered. Modules assemble various configurations: 2×3 grid of six modules, vertical row of three modules, L-shaped composition of five modules. Modularity simplifies design, ensures rhythm repetition.
Lightweight composition elements allow creating complex multi-layered solutions. Base layer — molding panels, weighing 200-400 grams per meter of 40-60 mm wide molding. 3-meter perimeter panel (80×100 cm) — 600-1200 grams molding. Second layer — corner and center appliqués, 4 corner appliqués at 80 grams each + central 150 grams = 470 grams. Total weight of one-panel composition — 1-1.7 kg. Gypsum equivalent composition — 8-12 kg, 5-7 times heavier.
Quick composition installation: one person creates a three-panel composition on wall in 4-6 hours of pure time. Marking — 30 minutes. Molding installation — 2-3 hours (trimming, gluing, taping). Appliqué installation — 30-60 minutes. Joint spackling and sanding — 1-2 hours (next day after adhesive sets). Priming and painting — 1-2 hours (another day after spackling).
Adhesive compositions for compositions: mounting polyurethane adhesive for moldings and appliqués (consumption 1 tube 310 ml for 10-15 linear meters of molding or 15-20 medium-sized appliqués), joint adhesive for sealing molding joints in frame corners (consumption 1 tube 80 ml for entire composition). Both adhesives are mandatory — mounting adhesive holds elements on wall, joint adhesive creates invisible seams.
Composition painting is done after full installation and joint finishing. Priming moldings and appliqués — acrylic primer with brush. Two-layer painting — acrylic paint in wall color (moldings blend with wall, visible only in relief) or contrasting (white moldings on gray wall, dark on light). Paint consumption for three-panel composition — 150-250 ml in two layers.
Get Consultation
Lightweight: technical advantage
Decorative element weight determines installation complexity, load-bearing requirements of base, operational safety. Polyurethane — one of the lightest materials for molding decoration while maintaining strength and relief clarity.
Polyurethane density for molding — 150-350 kg/m³ depending on manufacturer and series. Budget series (Decomaster) — 180-200 kg/m³, premium (Orac Decor Duropolymer) — 300-350 kg/m³. For comparison: gypsum density 1200-1500 kg/m³ (6-8 times higher), wood 400-800 kg/m³ (2-4 times higher), polystyrene 25-35 kg/m³ (6-10 times lower, but polystyrene is not strong).
Advantages of light weight are numerous. Installation by one person without assistants — the element is held by one hand, the other adjusts position and presses against the surface. Gypsum elements require two people — one holds, the other adjusts and secures.
Absence of mechanical fasteners — a lightweight element is fully held by adhesive, screws and anchors are not needed. Gypsum elements, especially ceiling ones, require additional mechanical fastening — screws through the element into the base, joints are spackled. This complicates installation and leaves a risk of visible fastening points.
Installation on weak bases — gypsum board partitions, furniture facades made of MDF, MDF doors withstand limited load. Gypsum board supports up to 15 kg per linear meter without reinforcing the frame. A 100 mm wide polyurethane cornice weighs 300-400 grams per meter, gypsum board easily handles it. A 3-4 kg per meter gypsum cornice requires reinforcing the frame with embedded supports.
Operational safety increases. In case of element detachment (due to improper installation or base deformation), a lightweight polyurethane cornice falling does not create a hazardous situation. A heavy gypsum element falling may cause serious injuries. This is critical for children’s rooms, bedrooms, public spaces.
Transportation and storage are simplified. A box with 10 2-meter moldings (20 linear meters, standard room kit) made of polyurethane weighs 5-7 kg, easily carried by one person. A similar quantity of gypsum moldings — 50-70 kg, requires two loaders, risk of damage during loading/unloading is multiple times higher.
Delivery cost depends on weight. Delivery of 20 linear meters of polyurethane moldings by courier within the city — 300-500 rubles (light package). Delivery of gypsum moldings — 1000-1500 rubles (heavy load) or need for personal transport.
Load on load-bearing structures is minimal. Decorating all walls and ceiling of a 20 m² room with polyurethane molding adds 10-15 kg to the total structure weight. Gypsum — 80-120 kg. For load-bearing walls, it is insignificant, for gypsum board partitions, it is critical.
The load on load-bearing structures is minimal. Decorating all walls and ceiling of a 20 m² room with polyurethane moldings adds 10-15 kg to the total weight of the structure. Gypsum-based — 80-120 kg. This is insignificant for load-bearing walls, but critical for gypsum board partitions.
Fast installation: advantage of time
Factors of polyurethane installation speed: pre-fabricated elements with precise geometry do not require fitting. Factory production ensures dimensional accuracy of ±1-2 mm on a 2-meter plank. Elements fit tightly without gaps or steps. Gypsum elements, especially handmade ones, have deviations of ±5-10 mm, requiring individual fitting of each joint.
Factors of polyurethane installation speed: pre-fabricated elements with precise geometry require no fitting. Factory production ensures dimensional accuracy of ±1-2 mm per 2-meter plank. Elements fit tightly without gaps or steps. Gypsum elements, especially hand-made ones, have deviations of ±5-10 mm and require individual fitting for each joint.
Ease of processing — polyurethane can be cut with a fine-toothed metal hacksaw or a circular saw. Cut is clean, precise, without chips. Time to cut molding at 45° — 30-60 seconds. Gypsum is difficult to cut (material is hard, crumbles), professionally — with a diamond disc grinder (dust, noise, protective gear). Time to cut — 2-3 minutes.
Installation with adhesive is faster than mechanical fasteners. Applying adhesive to the element — 30-60 seconds. Pressing against the surface and adjusting position — 30-60 seconds. Fixing with painter’s tape — 30 seconds. Total for a 2-meter long element — 2-3 minutes. Mechanical fastening (marking points, drilling, installing anchors, screwing) — 10-15 minutes per element.
Specific installation time figures: a 20×30 cm overlay — 3-5 minutes per element (applying adhesive, positioning, pressing, taping). A 60 cm diameter rosette — 15-20 minutes (applying adhesive, positioning according to marking, pressing, supporting fixation). A 2-meter long molding — 5-7 minutes (applying adhesive, pressing, taping every 50 cm).
Composition of three panels on a wall (12 linear meters of molding, 12 overlays) is installed in 4-6 hours of pure time by one person. Marking — 30 minutes (laser level projects lines, outlines of panels are marked with pencil). Cutting moldings — 1 hour (12 elements of 1 meter each, each cut twice at 45° at corners, 24 cuts at 2-3 minutes each). Installing moldings — 1.5-2 hours (12 elements at 5-7 minutes each, plus waiting time between elements). Installing overlays — 40-60 minutes (12 overlays at 3-5 minutes each). Total 3.5-4.5 hours of active work plus 30-60 minutes for breaks, level checking, adjustments.
Installation of a three-panel composition on the wall (12 linear meters of molding, 12 appliqués) takes 4-6 hours of pure time for one person. Marking — 30 minutes (laser level projects lines, outlines of panels are marked with pencil). Cutting moldings — 1 hour (12 elements, each 1 meter, cut twice at 45° at corners, 24 cuts at 2-3 minutes each). Installing moldings — 1.5-2 hours (12 elements, 5-7 minutes each, plus waiting time between elements). Installing appliqués — 40-60 minutes (12 appliqués, 3-5 minutes each). Total: 3.5-4.5 hours of active work plus 30-60 minutes for breaks, level checking, and adjustments.
Comparison with gypsum: a similar gypsum composition is installed in 12-18 hours of work by a two-person crew (two working days). Cutting gypsum takes longer and is more complex, installing heavy elements requires two people, mechanical fasteners on each element, finishing joint work is more labor-intensive. Polyurethane speeds up installation by 3-4 times.
Gypsum molding cannot be installed by a homeowner without professional training — heavy elements, complex technology, high risk of errors. Requires a team of professionals, labor cost 100-200% of material cost, work time 3-7 days depending on volume. Polyurethane saves not only time, but also money on installation.
A homeowner without professional training cannot install gypsum moldings — heavy elements, complex technology, high risk of errors. Requires a team of professionals, labor cost 100-200% of material cost, work time 3-7 days depending on volume. Polyurethane saves not only time, but also money on installation.
Adhesive compositions: basis of strong bonding
Adhesive for polyurethane molding — specialized composition ensuring strong adhesion of polyurethane to various bases (concrete, plaster, gypsum board, wood, MDF, particleboard, painted surfaces) and durability of the joint for 30-40 years. Universal construction adhesives are less suitable — slower setting, weaker holding, may contain solvents that deform polyurethane.
Types of adhesive compositions for polyurethane: mounting polyurethane adhesive — thick white composition in a 280-310 ml tube for mounting gun. Base — polyurethane resins, no solvents, safe for polyurethane. Open time (period when element position can be adjusted) — 10-20 minutes. Setting time (when element holds without fixation) — 4-6 hours. Full strength — 24 hours. Tensile strength — 1.5-2.0 MPa.
Recommended brands: Orac Decofix FDP500 (premium, Belgium, price 600-800 rubles per 310 ml tube), Decomaster DM-0801 (good quality, Russia, price 350-450 rubles), Moment Kristall for molding (budget, Russia, price 250-350 rubles). All three ensure reliable bonding, differences in setting speed and ease of use.
Joint polyurethane adhesive — liquid transparent or white composition in an 80-100 ml tube with a narrow nozzle. Designed for bonding ends of elements at joints — applied in a thin layer of 1-2 mm on both ends, elements pressed together. Creates a strong monolithic joint, joint after polymerization is stronger than the material itself. Polymerization time 2-4 hours, full strength 24 hours.
Acrylic mounting adhesives — alternative to polyurethane, water-based. Thick white paste in a 280-310 ml tube. Advantages: no odor (polyurethane has a slight specific odor until polymerization), tools washed with water, 20-30% cheaper. Disadvantages: slower setting (6-8 hours), lower strength (1.0-1.5 MPa), not suitable for humid rooms (acrylic absorbs moisture). Suitable for dry rooms, not critical for installation time.
Mounting adhesive application technique depends on element size. For narrow moldings and small overlays (width up to 50 mm) — one adhesive strip applied in a zigzag pattern along the center of the back side. For medium elements (width 50-100 mm) — two strips along the edges parallel to each other. For wide elements (width over 100 mm) and rosettes — continuous application with a 4-6 mm notched trowel.
Mounting adhesive consumption: a 310 ml tube provides 10-15 linear meters of medium-width (50-70 mm) molding or 15-20 overlays of 15×20 cm or 4-6 rosettes of 50-70 cm diameter. For a room with a 18-meter perimeter and cornice around the perimeter, 2 tubes of adhesive are required (18 meters / 12.5 average consumption = 1.44 tubes, rounded up to 2 with reserve).
Installation adhesive consumption: a 310 ml tube provides 10-15 linear meters of molding of average width 50-70 mm or 15-20 appliqués of size 15×20 cm or 4-6 rose fixtures of diameter 50-70 cm. For a room with a 18-meter perimeter and cornice around, 2 tubes of adhesive are required (18 meters / 12.5 average consumption = 1.44 tubes, rounded up to 2 with reserve).
Surface preparation for adhesive is critical for adhesion. The surface must be strong, clean, dry, and degreased. Flaking plaster, old paint, and whitewash are sanded down to a solid base. Dust is removed with a vacuum or a damp cloth. Grease stains (e.g., from kitchens) are cleaned with isopropyl alcohol or acetone.
Priming the substrate improves adhesion by 30-50%. Deep-penetration acrylic primer is applied with a brush or roller in the contact zone of the element (a 10-15 cm wide strip). Drying time is 4-6 hours, preferably 12-24 hours. Primer strengthens the surface, equalizes absorption, and creates a micro-texture for the adhesive.
Installation temperature affects adhesive polymerization. Optimal temperature is +15-25°C. Below +10°C, adhesive bonds poorly and polymerization slows to 12-24 hours. Above +30°C, adhesive sets too quickly, leaving little time for adjustments. Optimal humidity is 40-70%; above 80% it slows polymerization.
Adhesive application errors: applying to dusty or greasy surfaces reduces adhesion by 50-70%, causing elements to delaminate over months. Insufficient adhesive quantity results in weak holding and detachment under pressure. Excessive adhesive causes squeeze-out around the element, forming blobs that require immediate removal. Using solvent-based adhesives (organic-based liquid nails) may deform cheap polyurethane; quality-grade can withstand it, but risk remains.
Adhesive storage: temperature +5-25°C, shelf life 12-18 months from production date. Check the date when purchasing. Old adhesive loses adhesion and may not cure.
Painting: adaptation to interior style
Polyurethane molded decor is supplied white and ready for painting. White is universal — suitable for most interiors and pairs with any wall or ceiling colors. However, painting opens additional possibilities: adapting decor to interior color schemes, creating contrast, decorative techniques (gilding, patination, metalization).
Types of paint for polyurethane: acrylic water-emulsion paints — primary choice. Water-based, solvent-free, safe for polyurethane, quick-drying (3-4 hours between coats), odorless, tools wash with water. Sheen levels: matte (absorbs light, hides minor defects, elegant), satin (light silk-like sheen, easier to clean, versatile), glossy (vibrant sheen, visually increases volume, but reveals defects).
Alkyd enamels — alternative to acrylics. Solvent-based, form a harder, more durable film, deep gloss. Drawbacks: strong odor, long drying time (8-12 hours), toxic until dry, tools washed with solvent. Suitable for polyurethane, but quality polyurethane is not affected by solvents; cheap polyurethane may soften. Acrylics are preferable.
Aerosol acrylic paints in cans — quick way to paint small elements (appliques, small moldings). Advantages: even layer, fills ornament recesses, speed (one applique painted in 30-60 seconds), wide color range. Disadvantages: higher consumption (400 ml can covers 2-3 m² vs 4-5 m² from 1-liter can), difficulty controlling layer thickness (easy to create drips). Suitable for small volumes.
Priming before painting is mandatory for even color. Polyurethane has a dense surface, poorly absorbs paint. Spackling on joints (if elements were spackled) is porous and absorbs actively. Without primer, paint lays unevenly — saturated on polyurethane, darker on spackling. Primer equalizes absorption, paint lays evenly.
Primer type: acrylic primer for interior use, universal or for low-absorption substrates. Apply with brush in thin layer. Consumption: 50-80 ml per linear meter of 50-70 mm molding, 30-50 ml per 20×30 cm applique, 150-250 ml per 60-80 cm rose. Drying time: 3-4 hours.
Brush painting technique: flat 40-60 mm synthetic-bristle brush for acrylics. First coat — primer, thin, fills all ornament recesses, creates base. Brush strokes along element, careful detailing. Dries in 3-4 hours. Second coat — covering, creates uniform saturated color. Applied in same direction. Dries in 3-4 hours. Do not sand between coats unless drips are present.
Roller painting technique: 100-150 mm foam roller for acrylics. Suitable for flat moldings without ornament and large areas. Ornamented elements cannot be painted with roller — recesses remain unpainted, require brush. Advantage of roller — speed on large flat cornices and moldings.
Spray painting technique: hold can 25-30 cm from element, apply paint with smooth left-to-right, then right-to-left strokes, overlapping bands by 50%. First coat — thin primer, visible gaps. Dries in 15-30 minutes. Second coat — covering, hides gaps. Dries in 30-60 minutes. Avoid drips — do not linger on one spot, keep can moving.
Color solutions: matching wall/ceiling color — decor blends into surface, visible only by relief, creates shadow pattern. Delicate modern solution. Contrasting color — white decor on colored walls or colored on white. Graphic solution, emphasizes architecture. Metallic — gold, silver, bronze, copper. Luxurious classic solution, requires patination (gold on protrusions, white in recesses) for volume.
Decorative techniques: patination — dark paint (gray, brown, black) applied with brush into ornament recesses, partially removed from protrusions with damp sponge. Creates aged, noble wear effect. Gilding — acrylic paint with gold pigment or gold leaf (imitation of gold leaf) applied to ornament protrusions. Recesses remain white or base color. Emphasizes volume, luxury.
Paint consumption: acrylic paint in two coats — 80-120 ml per linear meter of 50-70 mm molding, 50-80 ml per 20×30 cm applique, 200-300 ml per 60-80 cm rose. For composition of three panels (12 linear meters of molding, 12 appliques) — 1.5-2.0 liters with reserve.
Total painting time for composition: priming — 1-1.5 hours work + 3-4 hours drying. First paint coat — 1-1.5 hours work + 3-4 hours drying. Second paint coat — 1-1.5 hours work + 3-4 hours drying. Total: 3-4.5 hours pure work time plus 9-12 hours technical drying breaks. In practice, painting takes two days: first day — priming and first coat, second day — second coat.
Conclusion
molded decoration made of polyurethaneModern solution for creating interiors with character, where classic aesthetics combine with material technology. Appliques create local accents, decorate furniture and walls with fragmented ornamentation. Roses organize ceiling composition centers, frame chandeliers. Molding and panel compositions structure walls, create rhythm and hierarchy.
Lightweight polyurethane (8-10 times lighter than plaster) simplifies installation to a level accessible to a home handyman. Elements can be mounted by one person without helpers, do not require structural reinforcement, safe during use. An applique weighing 100-150 grams adheres to furniture fronts; a rose weighing 800 grams mounts to ceiling without mechanical fasteners.
Quick installation turns interior transformation into a weekend project. A composition of three wall panels installs in 4-6 hours by one person. A rose on ceiling — in 15-20 minutes. A row of appliques on furniture fronts — in one hour. Plaster molding requires days of professional crew work.
Adhesive compositions provide strong bonding for 30-40 years. Specialized polyurethane adhesives create adhesion of 1.5-2.0 MPa, sufficient to hold elements of any size. Installation adhesive holds elements on walls; joint adhesive creates seamless, invisible seams. Application technique is simple and accessible to beginners.
Polyurethane molded decor
Company STAVROS offers a full range ofpolyurethane molding decoration — appliquefrom 5×5 cm to 40×60 cm in various styles,Outletswith diameter from 20 to 150 cm,Moldingsfor creating compositions. Material density 180-350 kg/m³ depending on series, clear relief, precise geometry.
Professional consultants STAVROS will help select elements to match your interior style, calculate quantities, and design composition layouts. Adhesive, primer, and paint for quality installation and finishing — all in one place. Delivery across Russia, full technical support.
Create an interior where every detail matters. An interior where appliques create accents, roses organize centers, compositions structure space. An interior assembled over weekends, serving for decades, adaptable to any style through repainting.
From concept to realization. From white element to color-matched interior. From the idea of decorating a wall to the reality of a composition that creates character.molded decoration made of polyurethanefrom STAVROS — the tool for creating such interiors.