Article Contents:
- Philosophy of ceiling decor: why molding is needed in the 21st century?
- Psychology of perception: how the ceiling affects mood
- Historical continuity: from antiquity to modernity
- Anatomy of ceiling composition: main elements and their interaction
- Ceiling cornice: frame for the fifth wall
- Ceiling rosette: crown for the chandelier
- Moldings and friezes: additional accents
- Stylistic unity: principles of harmonious selection
- Signs of stylistic kinship
- Manufacturing collections: ready-made solutions
- Style classification: from strict classic to bold modern
- Classicism: harmony and proportion
- Baroque: Opulence and Dynamism
- Rococo: elegance and lightness
- Empire: severity and grandeur
- Modern: Nature and Asymmetry
- Art Deco: Geometry and Luxury
- Modern Minimalism: Purity of Lines
- Practical aspects of selection: dimensions, proportions, scale
- Ceiling height and cornice width
- Room area and rosette diameter
- Ratio of cornice and rosette
- Color and finish: from monochrome to multicolor
- Monochrome painting: elegance of simplicity
- Contrast painting: accent on decor
- Gilding and patination: palace luxury
- Color painting: creative approach
- Molding installation: professional approach or DIY?
- Surface Preparation
- Adhesive and Application Technique
- Element joints
- Rosette installation
- Lighting and molding: mutual enhancement
- Central lighting: chandelier as the main character
- Hidden cornice lighting: floating ceiling effect
- Accent lighting: spotlights on molding
- Maintenance and Operation: Preserving Beauty for Years
- Regular dust cleaning
- Wet Cleaning
- Restoration and renewal
- Mistakes to avoid
- Mismatch with interior style
- Incorrect scale
- Stylistic incompatibility of elements
- Poor Installation
- Inappropriate lighting
- Polyurethane or polystyrene: material choice
- Advantages of Polyurethane
- Advantages of polystyrene
- When to choose polyurethane
- When polystyrene is sufficient
- Frequently asked questions about ceiling molding
- Can polyurethane molding be installed on a stretch ceiling?
- How Long Does Installation Take?
- Does molding need to be painted after installation?
- Can molding be installed independently?
- How does molding affect room acoustics?
- Is polyurethane molding safe for health?
- Can molding be used in bathrooms or kitchens?
- How long does polyurethane stucco last?
- Why STAVROS is your choice for the perfect ceiling
- Unmatched product quality
- Widest range of styles and sizes
- Collections in a unified style
- Professional consultations
- Installation and finishing services
- Long-term warranty and support
The ceiling often remains an undeservedly forgotten element of interior design. Meanwhile, it occupies a significant area in the field of view, shapes the overall impression of the room, and sets the tone for the entire space. Polyurethane ceiling molding can radically transform even the most ordinary room, turning it into an elegant space with character and history. The correct selection of a ceiling rosette for a chandelier in combination with a cornice plays a particularly important role—when these elements harmonize with each other, a cohesive architectural composition is created that pleases the eye and elevates the status of the interior.
Why has polyurethane become the material of choice for modern ceiling molding? The answer lies in the unique combination of practical and aesthetic qualities of this material. Polyurethane ceiling molding for a chandelier combines the beauty of classic plaster molding with the technological advantages of a modern polymer. It is lightweight, durable, resistant to moisture and temperature fluctuations, while reproducing the finest nuances of relief with museum-like precision.


The philosophy of ceiling decor: why is molding needed in the 21st century?
It may seem that ceiling decorations are a relic of the past, an attribute of palace interiors, inappropriate in modern apartments. However, practice proves otherwise. Well-chosen polyurethane ceiling molding works as an architectural tool that solves numerous tasks—from visually correcting room proportions to creating focal points and zoning space.


Psychology of perception: how the ceiling affects mood
Human perception of space is such that an empty white ceiling is perceived as a neutral background that the brain automatically ignores. Adding architectural details—cornices, rosettes, moldings—activates the attention mechanism. The room ceases to be faceless and gains individuality. Properly executed ceiling decorations create a sense of completeness, thoughtfulness, and status.
A polyurethane chandelier rosette serves as a visual anchor that attracts the eye. The chandelier ceases to be just a light fixture hanging from the ceiling—it becomes the center of the composition, around which the entire architectural logic of the room is built. The cornice frames the perimeter, creating a frame that psychologically 'raises' the ceiling, making it more structured.
Our factory also produces:


Historical continuity: from antiquity to modernity
Ceiling molding decorations have a history spanning thousands of years. Ancient Roman patrician houses were adorned with coffered ceilings with delicate paintings and relief decor. Gothic cathedrals amazed with complex vaulted structures and carved stone details. The Renaissance and Baroque eras elevated the art of ceiling molding to incredible heights—just recall the ceilings of the Sistine Chapel or the Palace of Versailles.
Modern polyurethane ceiling molding for chandeliers continues this tradition, adapting classical forms to today's requirements. The technology has changed—instead of handcrafted plaster, high-precision polymer casting is used—but the aesthetic principles remain the same: harmony of proportions, clarity of relief, and unity of style.
Get Consultation
Anatomy of a ceiling composition: key elements and their interaction
Before discussing the selection of elements in a unified style, it's necessary to understand which specific details formthe ceiling compositionand how they interact with each other.
Ceiling cornice: the frame for the fifth wall
A cornice is a transitional element between the vertical wall and the horizontal ceiling. It serves several functions simultaneously. Visually, the cornice completes the wall from above, creating a clear boundary. It frames the ceiling, turning it into an independent architectural plane. The cornice conceals technical joints between the wall and ceiling, masks irregularities and defects that are inevitable in any construction.
From a compositional perspective, polyurethane ceiling molding in the form of a cornice sets the scale for all decor. A wide, massive cornice creates a solemn, palatial effect, visually 'lowers' the ceiling, making the room cozier and more intimate. A narrow, elegant cornice, on the contrary, emphasizes height, creating a sense of lightness and airiness.
The cornice profile can be simple—one or two smooth curves—or complex, with many relief elements: flutes, beads, acanthus leaves, meanders. The richer the profile, the more classical and traditional the interior appears. Laconic profiles are characteristic of modern interiors, where minimalism of forms is valued.
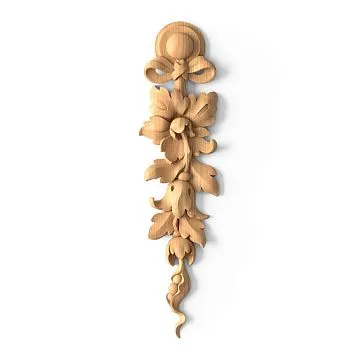
Ceiling rosette: the crown for the chandelier
Ceiling rosette—is a decorative round or polygonal element installed at the chandelier mounting point. Historically, rosettes appeared as a way to conceal the outlet for gas pipes for lighting, and later electrical cables. But their function has long transcended purely utilitarian purposes.
Polyurethane ceiling molding under the chandelier in the form of a rosette creates a visual center for the room. It increases the perceived size of the chandelier, making it more significant. The rosette's relief creates a play of light and shadow, which is especially noticeable when the lighting is on—the chandelier seems to 'grow' from the decorative base, becoming part of the architecture.
The rosette diameter is selected based on the size of the room and chandelier. A general rule: the rosette diameter should be from half to three-quarters of the chandelier's diameter. A too-small rosette gets lost, while a too-large one overwhelms the light fixture and looks disproportionate.
The rosette ornament can be concentric—circles, rings, waves radiating from the center—or radial—rays, petals, leaves directed from the center to the edges. Classical rosettes often imitate natural motifs: a blooming flower, a sun with rays, a geometric mandala.
Moldings and friezes: additional accents
In addition to the cornice and rosette, the ceiling composition can include additional elements. Moldings—narrow decorative strips—are used to create frames, divide surfaces into zones, and form coffers. Friezes—wide decorative bands with ornamentation—are placed under the cornice or in the central part of the ceiling, creating an additional level of decor.
corner elementssimplify the installation of cornices in room corners, ensuring perfect joining without the need for precise 45-degree cuts. They can be simple—repeating the cornice profile—or decorative, with enhanced relief, emphasizing corners as independent compositional points.
Stylistic unity: principles of harmonious selection
The most common mistake in ceiling design is choosing a rosette and cornice from different stylistic systems. A Baroque rosette with lush swirls combined with a minimalist smooth cornice, or conversely, a classical profiled cornice with a modernist geometric rosette—such combinations create visual dissonance and disrupt the integrity of the interior.
Signs of stylistic kinship
How to determine if a cornice and rosette belong to the same style? There are several key signs:
Commonality of ornamental motifs. If the cornice features acanthus leaves, the rosette should also have plant elements of a similar nature. If the cornice is adorned with a geometric meander, the rosette should have a geometric structure.
Similarity in detail scale. A large, massive cornice requires a correspondingly scaled rosette with enlarged relief elements. A thin, elegant cornice harmonizes with a rosette having fine, detailed ornamentation.
Unity of plastic language. Smooth, flowing Baroque forms are incompatible with the angular geometry of Art Deco. The strict symmetry of Classicism contrasts with the asymmetrical swirls of Art Nouveau. When selecting elements, ensure their plasticity speaks the same language.
Correspondence of relief depth. A cornice with deep, expressive profiling requires a rosette with high relief. A flat, almost graphic cornice pairs with a rosette of shallow depth.
Manufacturer collections: ready-made solutions
Most molding manufacturers, including the company STAVROS, produce collections where all elements are already selected in a unified style. This significantly simplifies the task: you choose a collection that matches your interior and select from it a cornice of the required width and a rosette of suitable diameter. It is guaranteed that they will harmonize with each other.
Collections usually have names indicating stylistic affiliation: 'Classic', 'Baroque', 'Art Nouveau', 'Empire', 'Contemporary'. Each collection includes elements of various sizes and complexity levels, allowing for compositions suitable for both small rooms and spacious halls.
Style classification: from strict classicism to bold modernism
To correctly select polyurethane ceiling molding, it's necessary to understand the characteristic features of major historical styles and their adaptation in contemporary interiors.
Classicism: harmony and proportion
The classical style is based on ancient models, values symmetry, clarity of forms, and moderation in decor. Classical style cornices have a clear profile with several levels: typically a combination of straight and concave sections forming a logical sequence. The ornamentation is restrained: a row of beads (pearls), egg-and-dart motifs, dentils, meanders.
Classical-style rosettes feature a strict concentric structure. The center is a smooth circle or a small rosette. Circular bands with regular ornamentation radiate from the center: acanthus leaves, laurel wreaths, rosettes. The composition is symmetrical relative to the center and all radial axes.
Polyurethane ceiling molding for a chandelier in a classical style is predominantly painted white or light ivory shades. Light gilding of protruding elements is permissible, but it should be delicate, not turning into garish ornamentation.
Baroque: opulence and dynamism
Baroque is a style of luxury, excess, and theatricality. Ceiling decorations in this style are striking in their abundance of decor, complexity of forms, and dynamic composition. Cornices are wide, multi-level, with deep relief. Scrolls (volutes), cartouches, garlands of flowers and fruits, putti (little angels), and masks are present.
Baroque rosettes are true sculptural compositions. They can be asymmetrical, with elements extending beyond the contour. Often, a complex rosette or even a sculptural group is placed in the center. Lush scrolls, leaves, and flowers radiate from the center, creating a sense of movement and swirling.
Color solutions for Baroque polyurethane ceiling molding are bolder: gilding is widely used, not only on protruding parts but also in recesses, creating a jewel-like effect. Combinations of white with gold, colored patinas (green, blue) imitating noble oxides are possible.
Rococo: Elegance and Lightness
Rococo evolved from Baroque but became lighter, more graceful, and more asymmetrical. It is the style of boudoirs and salons, intimate spaces where refinement is valued more than monumentality. Rococo cornices are thinner than Baroque ones but no less decorative. Ornaments are intricate, whimsical: rocaille scrolls (shells), floral garlands, ribbons, birds.
Rococo rosettes are often asymmetrical or have a complex, whimsical shape. Instead of a strict circle, there is an oval, a multi-lobed shape, an irregular contour. The relief is light, airy, creating a lace-like effect. Polyurethane ceiling molding for a chandelier in the Rococo style can be painted in pastel tones—soft blue, pink, lilac—with gold or silver accents.
Empire: Strictness and Grandeur
Empire—the style of the Napoleonic Empire—combines classical strictness with military symbolism and Egyptian motifs. Empire cornices are large, massive, with a clear profile. Ornaments: laurel wreaths, swords and shields, eagles, sphinxes, palmettes, geometric meanders.
Empire rosettes are distinguished by graphic clarity. The motif of a sun with straight rays, stars, or a geometric flower is often used. The relief is deep, contrasting, creating sharp shadows. Empire ceiling decorations are painted in rich colors—white with gold, or even dark backgrounds (blue, green, burgundy) with gold details, creating a solemn, imperial effect.
Modern: nature and asymmetry
Art Nouveau (Art Nouveau) of the late 19th to early 20th centuries rejected classical canons in favor of natural forms and asymmetry. Art Nouveau cornices have smooth, flowing lines reminiscent of plant stems or waves. Ornaments: stylized flowers (irises, lilies, poppies), winding stems, female faces with flowing hair, dragonflies, butterflies.
Art Nouveau rosettes are often asymmetrical, shaped like a flower or a fantastic plant. Petals are elongated, curving, creating a dynamic composition. Polyurethane ceiling molding in the Art Nouveau style can be painted in colors characteristic of the era: muted greens, browns, purples, using patina and multi-layer coatings to create the effect of antique bronze or oxidized copper.
Art Deco: geometry and luxury
Art Deco of the 1920s-30s is a synthesis of classical strictness and jazz dynamics. Art Deco cornices are distinguished by geometric forms: stepped profiles, zigzags, chevrons, concentric rectangles. Ornaments: stylized suns, lightning bolts, geometric plants, abstract patterns.
Art Deco rosettes can be round but with a geometric pattern: alternating triangles, concentric polygons, radial rays forming a star. Color solutions are bold: black with gold, silver with emerald, bronze with burgundy. Polyurethane ceiling molding for a chandelier in the Art Deco style is often combined with mirror or metal inserts, creating an effect of luxurious chic.
Modern Minimalism: Clean Lines
Modern interiors often lean towards minimalism, where decor is minimized. But even here, there is a place for ceiling decorations; they simply take a different form. Cornices become simple, smooth, without ornamentation—just a smooth curve or a step. Rosettes are simplified to concentric rings or even a smooth disk.
Such polyurethane ceiling molding works not through decorativeness but through the purity of lines and the play of light on smooth surfaces. The coloring is strictly monochromatic, often matching the ceiling color, so the elements are perceived as architectural details rather than applied decor.
Practical Aspects of Selection: Dimensions, Proportions, Scale
Theory of styles is important, but the practical decision depends on the specific parameters of the room. How to choosethe correct size of the cornice and rosette?
Ceiling Height and Cornice Width
There is an empirical rule for the ratio of room height to cornice width:
-
For ceilings 2.5-2.7 m, the optimal cornice width is 5-8 cm. A wider cornice will visually 'lower' the ceiling, making the room squat.
-
For ceilings 2.8-3.0 m, a cornice width of 8-12 cm is suitable. This is the most common range for improved-layout standard apartments.
-
For ceilings 3.0-3.5 m, cornices of 12-18 cm can be used. Such width creates an expressive frame without overwhelming the space.
-
For ceilings above 3.5 m (especially in country houses, townhouses), cornices 18-25 cm wide or more are appropriate. A massive cornice in a high room looks proportional and creates a solemn effect.
It is important to understand that the cornice width is measured not by the length of the profile but by its projection from the wall. Visually, it is this dimension that is perceived, and it is this that affects the proportions of the room.
Room Area and Rosette Diameter
The diameter of the ceiling rosette is chosen depending on the room area and the size of the chandelier:
-
For rooms with an area of 12-16 m², rosettes with a diameter of 30-40 cm are suitable. These are small bedrooms, studies, children's rooms.
-
For rooms of 16-25 m², rosettes with a diameter of 40-60 cm are optimal. These include medium-sized living rooms, large bedrooms.
-
For rooms of 25-40 m², rosettes with a diameter of 60-80 cm are used. They create a noticeable accent without overwhelming the space.
-
For spacious living rooms and halls with an area of more than 40 m², rosettes with a diameter of 80-120 cm or more are suitable. A large rosette in a large room looks proportional and grand.
There is another rule: the diameter of the rosette should be approximately 1/3 to 1/2 of the chandelier's diameter. If the chandelier has a diameter of 80 cm, the rosette can be 40-60 cm. A rosette that is too small under a large chandelier gets lost, while one that is too large overwhelms the light fixture.
The relationship between cornice and rosette
The cornice and rosette should relate to each other not only stylistically but also in scale. The general principle: the wider the cornice, the larger the rosette can be. A narrow cornice combined with a massive rosette creates imbalance — the rosette looks like a foreign element, unconnected to the ceiling framing.
For a harmonious combination, it is recommended that the height of the cornice relief and the depth of the rosette relief be comparable. If the cornice has a deep, expressive profile with protrusions of 3-5 cm, the rosette should have a corresponding relief. A flat cornice pairs with a flat or medium-relief rosette.
Color and finish: from monochrome to multicolor
Polyurethane ceiling molding in its basic form is white or light beige. But the final finish opens up huge creative possibilities.
Monochrome painting: the elegance of simplicity
The most common approach is painting all the molding in one color, usually matching the ceiling color. White molding on a white ceiling creates a classic, refined look. The relief is perceived through the play of light and shadow, especially with proper lighting.
Monochrome painting suits most styles — from strict classicism to modern minimalism. It is universal, does not overload the space, and visually expands the room. For living rooms, this is the safest and most fail-proof option.
Polyurethane molding on the ceiling under a chandelier can also be painted a color different from the ceiling but harmonizing with the overall interior palette. For example, if the walls have a warm beige hue, the molding can be slightly creamy, creating a soft, cozy effect.
Contrast painting: accent on decor
A bolder solution is contrast painting, where the molding stands out against the ceiling. A classic combination: white molding on a colored ceiling or vice versa — colored molding on a white ceiling. Contrast emphasizes the relief, making the decor more noticeable and expressive.
This approach requires caution. Too strong a contrast can look intrusive, especially in small rooms. It is recommended to use close but distinct shades: for example, a light gray ceiling and white molding, or a cream ceiling and a darker beige molding.
Contrast painting is especially effective incoffered ceilings, where moldings form frames, inside which the ceiling is painted a different color. This creates a structured, multi-layered composition.
Gilding and patination: palatial luxury
For interiors in classic, Baroque, or Empire styles, the use of gilding is characteristic. The protruding elements of the relief are covered with gold paint or imitation gold leaf (imitation of gold leaf), creating an effect of preciousness and luxury.
Gilding can be full — when all the molding is gold — or partial, when only the most protruding details are highlighted in gold, while the base remains white or colored. Partial gilding looks more refined and less 'heavy,' especially in residential interiors.
Patination is a technique that imitates noble antiquity. Patina (dark paint) is applied to the painted molding, filling the recesses of the relief, and then partially wiped off the protruding parts. This creates an effect of years of use, giving the decor a sense of history and depth.
Ceiling decorations with patination are especially appropriate in interiors with antique or aged furniture, where new, perfectly white molding would look out of place.
Color painting: a creative approach
Modern design solutions are not limited to traditional white and gold. Polyurethane ceiling molding can be painted any color that fits the interior concept. Dark blue molding in a nautical interior, green in an eco-style, black in a loft — the possibilities are endless.
It is important to maintain balance. Colored molding should harmonize with the overall color scheme and be supported by other interior elements. If the molding is emerald green, green accents — textiles, decor, furniture — should be present in the room.
Molding installation: professional approach or DIY?
Installation quality is critical for the final result. Even the most beautiful polyurethane ceiling molding under a chandelier will look sloppy if the installation is done carelessly: gaps in joints, misalignments, visible traces of adhesive.
Surface preparation
The ceiling must be dry, clean, and relatively level. Serious unevenness (more than 5 mm per meter) should ideally be corrected with filler. If the ceiling is painted with oil-based paint or coated with a glossy compound, treatment with a primer is necessary to improve adhesion.
Before installation, it is recommended to mark the position of the elements. For the cornice, a line is marked around the perimeter of the room at the desired distance from the ceiling (usually the cornice is glued not flush with the wall-ceiling joint but slightly lower, which facilitates installation). For the rosette, the center is determined — usually the point where the chandelier's electrical cable exits.
Adhesive and application technique
Polyurethane molding is attached using a special adhesive — polymer-based or solvent-based. Universal adhesives like 'liquid nails' are also suitable, but specialized compounds provide better adhesion and faster setting.
Adhesive is applied to the back of the element in a zigzag pattern or dots spaced 5-10 cm apart. It is important not to apply too much adhesive, otherwise it will squeeze out when pressed and stain the ceiling. After applying the adhesive, the element is placed against the ceiling, pressed with even pressure, and held for 30-60 seconds until setting begins.
Heavy elements (wide cornices, large rosettes) may require additional fixation with screws or temporary supports until the adhesive is completely dry. Screws are inserted in inconspicuous places and removed after the adhesive dries, with the holes filled with putty.
Element Joints
Cornices are supplied in 2-2.4 meter lengths, so joints are inevitable in large rooms. Proper joining is key to making connections invisible. Ends must be perfectly even, cut at a right angle (for straight sections) or at 45 degrees (for corners).
After gluing adjacent elements, the joint may have a small gap (up to 1 mm). It is filled with acrylic sealant matching the color of the molding, and excess is immediately removed with a damp cloth. After drying, the joint is practically invisible.
Corner connections are the most complex. Ready-madecorner elementscan be used, which significantly simplifies the work. If cutting cornices at 45 degrees, a miter saw or a high-quality miter box ensuring an accurate cutting angle is necessary.
Installing a rosette
The rosette is usually installed after mounting the cornice. The center of the rosette is aligned with the electrical cable exit point. The rosette has a hole in the center for the wire; if it is too small, it can be carefully enlarged.
Adhesive is applied evenly across the entire back of the rosette. The rosette is pressed against the ceiling, and its position is checked relative to the walls (the rosette should be exactly centered in the room or at the planned point). Large rosettes may require several people for installation and temporary fixation until the adhesive dries.
Lighting and molding: mutual enhancement
Proper lighting transforms ceiling decorations from merely decorative elements into true architectural focal points.
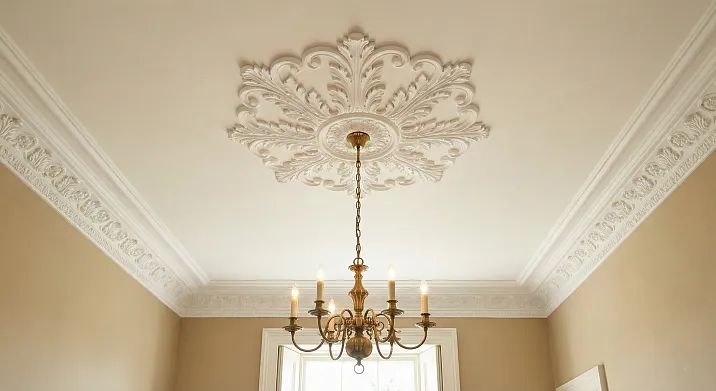
Central lighting: the chandelier as the main feature
The traditional scheme is a central chandelier combined with a ceiling rosette. The rosette serves as a visual base for the chandelier, increasing its perceived size and significance. When the chandelier is turned on, light reflecting off the rosette's relief creates a play of highlights and shadows, bringing the decor to life.
It is important that the chandelier and rosette are proportional. A massive multi-arm chandelier requires a large, expressive rosette. A delicate small chandelier harmonizes with a medium-sized rosette with fine relief.
Hidden cornice lighting: the floating ceiling effect
A modern technique is installing LED strips in special cornices with a niche for lighting. The light is directed upward onto the ceiling, creating a 'floating' surface effect. The ceiling appears separated from the walls, visually increasing the room's height.
For hidden lighting,special cornice profilesare used, featuring a niche or shelf for placing LED strips. The light can be white (warm or cool) or colored (RGB strips allow changing colors and creating various lighting scenarios).
Hidden lighting is especially effective in modern interiors, where technological sophistication and visual lightness are valued. It also suits classical interiors, creating a modern interpretation of traditional forms.
Accent lighting: spotlights on molding
Additional light fixtures — spotlights directed at the cornice or rosette — emphasize the relief, creating dramatic shadows. This solution is for interiors where molding should be the visual center, a work of art.
Accent lighting requires careful planning. Light should fall at an angle, revealing the volume of the relief. Too bright or incorrectly directed light can distort perception and create awkward shadows.
Care and maintenance: preserving beauty for years
Polyurethane molding on the ceiling under a chandelier is low-maintenance, but certain care is necessary to preserve its flawless appearance.
Regular dust cleaning
The main issue with ceiling decor is the accumulation of dust in the recesses of the relief. For regular cleaning, use a soft brush, dry cloth, or vacuum with a soft attachment. Cleaning is performed every 1-3 months depending on the room's dustiness.
It is important not to use abrasive brushes or rough fabrics that could scratch the painted surface. Polyurethane is durable, but the finish (paint) can be damaged by rough mechanical action.
Wet cleaning
If necessary (for example, in the kitchen where grease particles may settle), the molding can be wiped with a damp cloth. Use clean water or a weak solution of neutral detergent. The cloth should be well wrung out to avoid water dripping.
After wet cleaning, it is recommended to wipe the molding with a dry cloth to remove any remaining moisture. This prevents possible streaks and maintains uniform coloring.
Restoration and renewal
If the coloring fades over time or mechanical damage (chips, scratches) appears, polyurethane ceiling molding is easily restored. The damaged area is sanded with fine sandpaper, primed, and painted to match the main coating.
A complete update can be achieved by repainting all the molding. Old paint does not need to be completely removed—light sanding to create roughness for better adhesion of the new layer is sufficient. Then primer and finish paint are applied.
First mistake - unstructured mixing. A classic chair, loft table, Scandinavian chest, and minimalist cabinet in one room is not eclecticism, but visual chaos. Each item draws attention to itself, not creating cohesion. A system, logic, unifying idea is needed. Choose one dominant style, add a second as an addition, and possibly a third as an accent. But no more than three, and all should have something in common - color, material, era, or functionality.
Even high-quality molding can look unsuccessful if typical planning and installation mistakes are made.
Mismatch with interior style
The most common mistake is choosing molding that does not match the style of the room. An ornate Baroque rosette in a minimalist interior or a strict classical cornice in a bohemian loft creates stylistic dissonance. Molding should organically fit into the overall concept, not be a foreign element.
Incorrect scale
Oversized molding in a small room with low ceilings feels 'oppressive' and visually reduces space. Too small molding in a spacious hall gets lost and looks insignificant. Maintaining proportions is critical for a harmonious result.
Stylistic incompatibility of elements
Combining cornices and rosettes from different stylistic systems is a common mistake. Elements should speak the same decorative language, share common ornamental motifs, and have a similar scale of details.
Poor installation
Visible gaps in joints, misalignments, glue marks, unevenness—all of this ruins the impression of even the most beautiful molding. Installation requires care, precision, and attention to detail. If you are not confident in your own skills, it is better to turn to professionals.
Unsuitable lighting
Molding comes alive through the play of light and shadow. Flat, uniform lighting 'kills' the relief, making the decor flat and unexpressive. It is necessary to plan lighting so that it reveals volume and creates dynamism.
Polyurethane or polystyrene: material choice
In addition to polyurethane, polystyrene (expanded polystyrene) is used for ceiling molding. Both materials have their advantages and limitations.
Advantages of polyurethane
Polyurethane is stronger, denser, and reproduces finer relief details. It is resistant to mechanical impact, does not crumble, and does not break during installation. Polyurethane molding can have deep, complex relief that accurately reproduces historical samples.
Polyurethane is chemically inert, does not emit harmful substances, and is compatible with any paints and varnishes. It does not yellow over time (unlike some types of polystyrene) and retains its whiteness for decades.
Advantages of polystyrene
PolystyreneLighter and cheaper than polyurethane. For simple profiles without complex relief, it is quite suitable. Polystyrene cornice is easily cut with a regular knife, simplifying fitting.
Modern high-density extruded polystyrene (like %s)impact-resistant ceiling polystyrene skirting boardin strength approaches polyurethane, although it does not reach its characteristics. For budget projects, polystyrene is a reasonable choice.
When to choose polyurethane
For classical interiors with rich decor, where relief detailing is important, polyurethane is preferable. For large elements—wide cornices, large rosettes—the strength of polyurethane ensures durability. For rooms with high quality and status requirements, polyurethane is the only choice.
When polystyrene is sufficient
For modern minimalist interiors, where simple smooth profiles without ornament are used, polystyrene is quite suitable. For temporary or budget solutions, polystyrene allows achieving an acceptable result at lower costs.
Frequently asked questions about ceiling molding
Can polyurethane molding be installed on a stretch ceiling?
Yes, but with certain limitations. The cornice is attached not to the stretch fabric itself, but to the wall, with a small gap left between the cornice and the ceiling, which is visually unnoticeable. A rosette on a stretch ceiling requires special preparation: a platform is attached to the base ceiling at the installation site, then a hole is cut in the stretch fabric and reinforced with a thermal ring, and only after that the rosette is mounted.
How long does installation take?
For a standard room (perimeter 16-20 meters, one rosette), installation takes 4-6 hours for an experienced craftsman. This includes marking, cutting, gluing, and sealing joints. Complex compositions with coffers, friezes, and multiple elements may require several days of work.
Does molding need to be painted after installation?
Polyurethane molding is supplied in white and can be used without additional painting if white fits the interior. However, painting is recommended: it creates a final protective coating, hides joint sealing areas, and allows precise color matching to the room's overall palette.
Can molding be installed independently?
Yes, installing molding does not require special skills, although certain care and precision are necessary. Straight sections of cornice and medium-sized rosettes are quite accessible for DIY installation. Difficulties arise with corner joints and large elements—here a professional's experience significantly speeds up the work and improves the result.
How does stucco affect room acoustics?
The relief surface of molding scatters sound waves, reducing echo and reverberation. The effect is small but noticeable in spacious rooms with high ceilings. Polyurethane ceiling molding makes acoustics more comfortable, especially when combined with textile elements (curtains, soft furniture).
Is polyurethane molding safe for health?
High-quality polyurethane is absolutely safe. It does not emit volatile substances, does not cause allergies, and is approved for use in residential premises, children's rooms, and medical institutions. It is important to choose products from trusted manufacturers with quality certificates.
Can molding be used in the bathroom or kitchen?
Polyurethane is resistant to moisture and temperature fluctuations, making it suitable for damp rooms. In the bathroom, molding should be coated with moisture-resistant paint. In the kitchen, grease particles may settle, so it is recommended to periodically wipe the molding with a damp cloth.
How long does polyurethane molding last?
With proper installation and care, polyurethane molding lasts for decades without losing its appearance. The material does not age, yellow, or crack. The only thing that may be needed over time is repainting if the paint fades or becomes mechanically damaged.
Why STAVROS is your choice for the perfect ceiling
Creating a harmonious interior is an art that requires not only taste but also quality materials, professional execution, and attention to detail. When it comes toceiling molding, the company STAVROS holds a special place among manufacturers and suppliers of decorative elements.
Unmatched product quality
STAVROS uses exclusively high-quality European raw materials for the production of polyurethane molding. Each product undergoes multi-stage quality control, ensuring sharp relief, precise geometry, and absence of defects. STAVROS molding is the benchmark against which other manufacturers' products are compared.
Widest range of styles and sizes
The STAVROS catalog features hundreds of models ofceiling cornices, rosettes, moldings, friezes — from strict classics to bold modern, from miniature elements for small rooms to monumental details for spacious halls. Such variety allows you to find the perfect solution for any interior, any style, any budget.
Collections in a unified style
STAVROS offers ready-made collections where all elements — cornices, rosettes, moldings, corner pieces — are executed in a unified stylistic key. This eliminates the tedious task of matching compatible elements: you choose a collection, and harmony is guaranteed.
Professional consultations
STAVROS specialists are ready to assist at all stages — from selecting suitable elements to planning the composition and calculating the required amount of material. Professional consultation saves time, money, and nerves, ensuring the right solution.
Installation and finishing services
STAVROS offers not only materials but also comprehensive services: professional installation, painting, patination, gilding. Experienced craftsmen will bring any designer's idea to life, ensuring impeccable execution quality.
Long-term warranty and support
STAVROS provides a warranty on its products and completed work. If questions or issues arise, the support service is always ready to help. This is not just a sale of materials — it is a partnership based on trust and mutual respect.
Choosing STAVROS means choosing quality tested by time, professionalism recognized by thousands of satisfied customers, and confidence that your ceiling will become a true interior decoration — elegant, harmonious, perfect.