


Article Contents:
- Types of profiles: from simplicity to decoration
- Casing width: proportions and functionality
- Corner elements and jointing methods
- Fastening: reliability and aesthetics
- Installation on facade: protection and longevity
- Casing in interior: style and function
- Joint sealing: protection against moisture and drafts
- Wood species and their properties
- Care and renewal of casings
- Cost and supplier selection
- Conclusion: framing as a finishing touch

Casing is not just a decorative strip framing a window or door opening. It is an architectural element that creates a visual boundary between the wall surface and the depth of the opening, conceals the mounting foam gap, protects the joint from moisture and drafts. In a wooden house, casings become part of a unified language spoken by the facade — together withhouse carving, cornices, gable decorations, they create a unique appearance of the building. In the interior, casings work differently — they structure space, link separate openings into a unified system, add rhythm and completeness.
Choosing a casing requires understanding its functions, knowledge of profile types, and awareness of mounting methods. A wide casing of ninety millimeters creates a solid frame, suitable for spacious rooms with high ceilings. A narrow forty-millimeter casing is delicate and inconspicuous, ideal where only a subtle boundary line is needed. A straight profile is universal, a rounded one adds softness, and a decorative profile turns the casing into a decorative element. Fastening determines reliability — nails without heads provide hidden connections, self-tapping screws ensure strength, and glue works best on perfectly flat surfaces.


Types of profiles: from simplicity to decoration
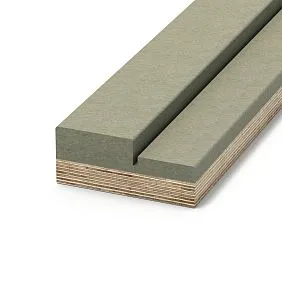
A straight flat casing is a planed rectangular-section strip with slight rounding or beveling on the front edge. It is the most universal and popular type, suitable for both modern minimalist interiors and facades in contemporary style. Width varies from forty to one hundred fifty millimeters, thickness is usually ten to twenty millimeters. A straight casing is easy to install — corners join at forty-five or ninety degrees, if the construction includes a wider horizontal top strip.
A rounded casing has a curved front surface — from a slight convexity to a pronounced semi-circular profile. This shape softens the geometry of the opening, creates play of light and shadow, adds volume. Rounded casings are ideal for classic interiors where smooth lines and absence of sharp edges are valued. On the facade, a rounded profile works effectively — light glides over the surface, emphasizing the shape. Corner joints require precise trimming at forty-five degrees, so semi-circular profiles form a smooth transition.
A decorative casing combines various complex profile variants — with grooves, protrusions, combinations of flat and rounded sections. It is a transitional form between a simple casing and carved ornamentation. A decorative profile is created on a milling machine, may include multiple levels of depth, creating an expressive relief. Such casings suit classic, rustic, and Provencal interiors where decorative appeal is needed without excessive carving. On the facade, a decorative casing combines well with simple formshouse carving, adding detail without overloading.
A carved casing is the pinnacle of decoration. Openwork or solid carving transforms a functional element into a work of art. Traditional Russian motifs — sun, plant ornaments, geometric patterns — create a recognizable image of a wooden house. Carved casings are handmade or produced on CNC machines based on historical samples. They are heavier than simple casings, require more reliable fastening, and need careful protection from moisture. Inside, carved casings are appropriate for interiors styled as Russian peasant houses, palaces, or manors.
A telescopic casing has a special shape with a groove into which a filler or door frame is inserted. This is a technical solution for situations where the wall thickness exceeds the door frame width. A telescopic casing creates a hidden connection without visible fasteners, easily adjustable to the opening width. It is primarily used for interior doors, where neatness and the ability to remove without damage are important.
A capital is a special type of top casing with increased width and height, often with decorative elements. A capital crowns side casings, adds grandeur, and emphasizes the importance of the opening. It is used for entrance doors, arches, and openings in formal rooms. A classical capital may include carved elements,decorative rose outlets, volutes, transforming the door opening into an architectural composition.


Casing width: proportions and functionality
Narrow casings, forty to fifty millimeters wide — a choice for modern interiors where restraint is valued. They mark the opening boundary with a thin line, avoiding excessive attention. This width suits small rooms where wide casings would visually consume space. A narrow casing covers the minimal mounting gap of five to ten millimeters, requires careful installation of the frame, as it does not tolerate large deviations. On the facade, narrow casings are suitable for small windows, decorative openings, where pronounced framing is not required.
Medium casings, sixty to seventy millimeters wide — a universal solution for most situations. This width is sufficient to cover the standard mounting gap of fifteen to twenty millimeters with a margin, while the casing does not appear bulky. Seventy millimeters is the most popular size for interior doors in standard apartments and private homes. Such a casing combines well withwooden skirting boardsstandard height, creating harmonious proportions.
Wide casings, eighty to ninety millimeters wide create an expressive frame, suitable for spacious rooms with high ceilings. They visually emphasize the opening, making it a significant interior element. A wide casing covers large wall irregularities around the frame, conceals mounting technical flaws. On the facade, wide casings are traditional for wooden architecture — they protect joints from weather, creating an expressive window outline.Wooden skirting board purchaseWide-profile casings are suitable for grand entrance doors, large windows, openings in living rooms and halls.
Overwide casings from 120 to 150 millimeters and more are used in special cases — for creating monumental framing, masking very wide gaps, in interiors with large architectural forms. Such width requires appropriate room scale. In a standard apartment, a 150-millimeter casing will look disproportionate, but in a two-story country house living room — harmoniously. On facades, overwide casings are characteristic of old merchant houses, where window framing became a demonstration of wealth and status.
Combined width — using different widths for side and top casings. Classic approach — side casings 60-70 millimeters, top casing 100-120 millimeters, possibly with decorative capitals. This creates visual completeness, emphasizes the verticals and horizontals of the opening. This solution originated in classical architecture, where the top element — the antabлемент — is always heavier than the side columns or pilasters.
Matching the opening width — an important rule of proportionality. For a narrow door 700 millimeters wide, a 90-millimeter casing will look excessive. For a wide double-door opening 1500 millimeters wide, a narrow 50-millimeter casing will disappear. Guideline: the casing width should be 5 to 10 percent of the opening width for harmonious proportions.
Our factory also produces:


Corner elements and joining methods
45-degree joint — classic method of joining casings at corners. Provides a neat joint where profiles smoothly transition into one another, creating a continuous frame around the opening. Such jointing is mandatory for radius and decorative profiles, desirable for straight profiles. Requires precise cutting — even a half-degree deviation creates a noticeable gap. Professionals use a miter saw with a rotating table, ensuring accuracy to tenths of a degree. After trimming, ends are sanded with fine-grit sandpaper, burrs are removed, and the joint is glued with carpentry glue for reinforcement.
90-degree joint — simplified method, where side casings are cut straight and the top casing is laid horizontally on them. Such jointing is permissible for straight flat profiles, especially if the top casing is wider than the side ones. Advantage — simple cutting, no need for high-precision tools. Disadvantage — ends of side casings are visible if they are a different color or uncolored. 90-degree joint is characteristic of rustic, country-style interiors, where deliberate simplicity of connections is part of the aesthetic.
Corner decorative elements — special inserts covering the joint between casings at the corner. These may be square or rectangular blocks with grooves,Outlets, or decorative inserts with ornamentation. Corner elements eliminate the need for precise trimming — casings fit to them with straight ends, and the decorative insert masks the joint. Such a solution is typical for classical and Victorian interiors, where every connection node becomes a decorative accent. On facades, corner elements protect the joint from water seepage and reinforce the corners.
Overlapping joint is used rarely, mainly for facade work, where protection against moisture is more important than aesthetics. The top casing is laid over the side casings with an overlap of 10-15 millimeters, creating a drip edge from which water runs off. The joint is additionally sealed to prevent moisture from entering under the casing. In interiors, overlapping joint looks rough and is used in utility rooms or for styling as a barn aesthetic.
Shank or tongue-and-groove joint — carpentry method providing the strongest joint. A groove is cut into one casing end, a tongue into the other, and the parts are joined with glue. Such a joint is invisible, strong, but requires precise manufacturing and special equipment. Used in factory production of casings for creating pre-assembled frames that are installed as a whole. Such a joint is difficult to implement on-site.
Metal connectors — hidden plates or angles clamping casings at corners. Installed on the reverse side, not visible from outside. Used for heavy, wide casings where glue joints are insufficient, and visible fasteners are undesirable. Metal must be galvanized or painted to prevent rusting from condensation.
Get Consultation
Fastening: reliability and aesthetics
Finish nails without heads — traditional and aesthetic method of fastening casings. A nail with a diameter of 1-1.5 millimeters and length of 40-50 millimeters is driven in with a nail set, the head is pressed 2-3 millimeters into the wood. The hole is spackled to match the casing color or covered with wax pencil. The fastening mark is almost invisible. Finish nails provide strong connection, easily removable if disassembly is needed. Disadvantage — during driving, narrow casings can split or decorative profiles can be damaged, requiring experience and care.
Countersunk screws provide more reliable fastening than nails. Screw length 50-70 millimeters, diameter 3-4 millimeters. A 2-millimeter hole is drilled first, then countersunk for the screw head. The screw is screwed in, the head is pressed down, and the hole is spackled. Advantage of screws — they do not loosen over time, do not pop out during wood shrinkage, withstand heavy loads. Used for heavy, wide casings, fastening to hard surfaces — oak, beech, hard boxwood.
Liquid nails and mounting glue are used on smooth plastered walls where the casing has good contact along its entire length. Glue is applied in a zigzag or dot pattern on the back of the casing, the element is pressed against the wall, and fixed with painter’s tape or supports until the glue sets. Glue fastening provides a clean front surface without fastener marks, but requires perfect wall geometry. Disadvantage — difficulty removing the casing without damaging the casing or plaster. Combined fastening — glue plus nails — gives the best result — glue ensures contact, nails provide fixation until the glue sets and additional strength.
Clamps — special metal clips allowing hidden casing fastening. The clamp is mounted on the wall, and the casing clicks into it with a groove on the reverse side. Such fastening requires a special casing profile with a groove for the clamp. Advantage — completely clean front surface, easy disassembly and reinstallation. Used in systems where casing replacement is possible without damaging walls — for example, in office buildings, museums, public spaces.
Decorative-headed screws — intentionally visible fasteners becoming design elements. Brass, bronze, or blackened screws with large decorative heads are placed at equal intervals, creating rhythm. Such fastening is characteristic of rustic, industrial, and loft styles, where deliberate functionality and visibility of structures are part of the aesthetic.Furniture legsand hardware in such interiors are also deliberately functional and decorative at the same time.
Fastening frequency is determined by the width and weight of the casing. A narrow 50-millimeter casing is fastened every 300-400 millimeters. A wide 90-millimeter casing — every 250-300 millimeters. Heavy carved casings require more frequent fastening — every 200 millimeters. Fastening points are placed 20-30 millimeters from the ends to avoid splitting during shrinkage.
Installation on facade: protection and longevity
Base preparation — critical stage of facade installation. The surface around the opening must be flat, clean of dust, and dry. Excess mounting foam protruding from the gap between the frame and wall is trimmed flush with the wall surface using a sharp knife. Irregularities over 5 millimeters are leveled with plaster; otherwise, the casing won’t lie flat, leaving voids underneath where water will collect. Wooden walls are treated with antiseptic in the contact zone — this prevents rotting in enclosed areas.
Joint waterproofing — mandatory condition for the longevity of facade casings. Before installation on the wall, a layer of sealing tape or mastic is applied at the point of casing contact. This creates a waterproof barrier between wood and wall. After installing the casing, the joint is additionally sealed with weather-resistant acrylic or silicone sealant. The sealant is matched to the casing color or made inconspicuous. Special attention — top joint, where water accumulates. Here, sealant is applied with a slight slope to allow water to run off without pooling.
Facade casings must have weather-resistant protective coating. Simple oil or interior varnish won’t withstand UV radiation, temperature fluctuations, or precipitation. Special facade varnishes, lacquers, impregnations with UV filters and fungicides are used. Coating is applied in two to three layers before installation; after installation, ends and fastening points are touched up. Coating renewal frequency — every 3-5 years depending on climate and facade orientation. South-facing facades, exposed to direct sunlight, require more frequent renewal.
Facade fasteners must be corrosion-resistant. Ordinary nails and screws rust, leave stains, and lose strength. Galvanized or stainless steel nails and screws with anti-corrosion coating are used. This is more expensive, but guarantees that after a year, no rusty streaks will appear on the casing. Fastener length is chosen based on casing thickness and the need to penetrate the wall base by at least 30 millimeters.
Sills and drip edges above the top casing additionally protect the joint from water. A metal or plastic sill is mounted above the window with an overhang onto the top casing. Water runs off the sill, not onto the wood. For door openings, a drip edge — wooden, metal, or other materials — is installed above the casing. The drip edge not only protects but also completes the architectural composition of the entrance group.
Ventilation gap between casing and wall of 2-3 millimeters ensures air circulation, preventing condensation buildup. Such a gap is created using thin washers installed at fastening points. The bottom part of the casing should not rest on the foundation or soil — a 5-10 millimeter gap is left to prevent wood from drawing moisture from below. This gap is covered with a drip edge or sealed with elastic compound.
Seasonality of installation affects longevity. Casings are installed in dry weather at temperatures above plus 5 degrees Celsius. Wet wood installed in rain will dry later, causing fasteners to loosen and gaps to appear. Cold weather prevents glue and sealant from setting properly. Optimal time — late spring or early autumn, when it is warm but not hot, and humidity is moderate.
Casings in interiors: style and function
Interior doors are typically framed with casings 60-70 millimeters wide, rarely 80-90 for spacious rooms. Color and texture of casings should match the door panel or contrast intentionally. White doors with white casings create unity, blending the opening into the wall. Dark doors with light casings accentuate the opening, making it a noticeable interior element.Wooden baseboardand casings from the same wood species and with identical finish create spatial continuity.
Window casings in interior design serve more of a decorative than functional role. They frame the window, linking it to the overall style of the room. In modern interiors, window casings are often absent — the jambs are neatly plastered or covered with plastic. However, in classical, rustic, or Scandinavian interiors, wooden window casings on windows create coziness and completeness. The width is usually matched to door casings for stylistic unity.
Arched openings require special curved casings or assembly of an arch from short straight segments. A curved casing is made from thin laminates glued along the radius of the arch. This is a complex and expensive item, custom-made. An alternative is a modular arch composed of segments ten to fifteen centimeters long, joined at small angles. With sufficient number of segments, a smooth curve is achieved, visually indistinguishable from a curved element.
Hidden doors without casings — a modern trend, where the door panel becomes part of the wall, not highlighted by framing. The frame is concealed within the wall, the door opens by pressing, and there are no casings or only minimal ones flush with the wall. Such a solution requires precise installation and special door systems, but it provides the cleanest architectural space.Moldings for wallsSuch interiors also use restrained styles.
Two-tone casings — a technique adding depth. The main field of the casing is one color, the bevel or edge — another. Or the front side is dark, the ends are light. This creates graphic contrast, emphasizing shape. Two-toned effect is achieved by combining wood species, staining, or using contrasting stains. Requires careful execution to ensure a clear color boundary.
Combination with other finishing elements determines interior harmony. If there isWooden cornices, Moldings, decorative elementsin the room, casings must match them in color, profile, and scale. Too different elements create chaos, harmonious ones reinforce each other, creating a unified space.
Joint sealing: protection against moisture and drafts
Installation foam fills the gap between the door or window frame and the wall, providing insulation and securing the frame. But foam is afraid of ultraviolet light — it degrades, darkens, loses its properties. The casing protects the foam, shielding it from light and moisture. It is important that the foam cut is level with the frame surface, without protrusions that would prevent tight casing fit. Before installing the casing, it is advisable to treat the foam with a special compound or paint, which provides additional protection.
Sealing the joint between the casing and frame is done with a thin strip of transparent or colored acrylic sealant. The sealant is applied with a caulking gun in a thin bead around the perimeter, immediately smoothed with a wet finger or special putty knife. This creates an elastic joint that compensates for micro-movements of wood due to humidity changes, does not allow dust or moisture to pass. Sealing is mandatory on the facade, desirable in humid interiors.
The sealing tape between the casing and the wall is used to compensate for minor irregularities and create a resilient layer that dampens vibrations. The self-adhesive tape, 1-2 mm thick, is applied to the back of the casing before installation. When pressed against the wall, the tape compresses, filling microscopic irregularities and ensuring a tight fit. This is especially important for casings on walls that are not perfectly flat.
Silicone sealant is used for exterior work and humid areas due to its high elasticity and water resistance. Silicone is more expensive than acrylic but longer-lasting, does not crack with temperature changes, does not yellow in sunlight. For facade casings, silicone with fungicidal additives is used to prevent mold growth at joints. It is important to choose neutral silicone; acidic types may cause corrosion of fasteners.
Mastics and bituminous compounds are used for particularly humid conditions — sills, basements, ground floors of wooden houses. Mastics are applied with a trowel, creating a thick waterproof layer. Aesthetics are not the best, but protection is maximum. After installing the casing on mastics, excess material is removed, visible areas are covered with decorative overlays.
Periodic inspection of sealing is performed once a year. Inspection of joints, checking for sealant peeling, cracks. Damaged areas are removed, fresh sealant is applied. This is a simple operation that extends the life of casings for years, preventing wood rot and winter freezing at joints.
Wood species and their properties
Spruce is the most accessible and popular wood species for casings. Light, soft, easy to process, holds fasteners well. Light-colored wood with pronounced texture is easily stained, tinted, or lacquered. The drawback of spruce is resinous nature, causing resin pockets to appear on the surface, especially when heated. Spruce casings are suitable for interiors, but for facades in sunny areas, another species is preferable. Spruce casings require quality protective treatment against moisture and UV radiation.
Pine is similar to spruce in properties but less resinous, has a lighter shade and less pronounced texture. Pine casings are good for light tones, as the wood is more uniform. Pine is slightly softer than spruce, absorbs moisture more readily, thus requiring more careful protection. Used mainly for interior work.
Larch is an elite species among conifers. Dense, hard, with high natural resin content, making it resistant to rot and moisture. Larch is ideal for facade casings — not afraid of rain, snow, or temperature fluctuations. Over time, it darkens, acquiring a noble gray-brown hue. The drawback is difficulty in processing due to hardness and high cost. However, larch's longevity compensates for the investment — casings last decades without losing properties.
Oak is classic for interior casings. Hard, dense, with beautiful pronounced texture. Oak casings look solid and substantial, suitable for classical, English, and country interiors. Color ranges from light gold to dark brown, possible staining or tinting. Oak holds its shape well, does not warp, fasteners hold firmly. Price is high, but status and longevity justify it. Oak is also good for facades, but requires protective coating.
Beech is comparable in hardness to oak, but has a more uniform light-colored wood with a pinkish hue. Beech casings are easily stained, well-suited for complex profiles. The drawback of beech is hygroscopic nature — it actively absorbs moisture during humidity changes. Beech is excellent for interiors, but for facades, it requires especially high-quality protection and is not recommended for humid regions.
Ash is a light hardwood with beautiful striped texture. Ash casings are strong, elastic, look good with transparent finish highlighting the texture. Color ranges from cream to light brown. Ash is lighter than oak, but almost as strong, and cheaper. Suitable for modern light interiors and Scandinavian style, where natural wood is valued.
Exotic species — meranti, mahogany, teak — are used for exclusive projects. They have unique shades from reddish-brown to nearly black, high density, natural resistance to moisture and insects. Exotic casings are a sign of luxury, but require special knowledge for processing and installation.Classic FurnitureOften made from such species, and casings are matched to the tone.
Care and renewal of casings
Regular cleaning with a soft cloth or brush maintains appearance. For lacquered casings, slightly damp cloth is used; for oil-finished, dry or with a small amount of special oil. Do not use aggressive cleaning agents, abrasives, or solvents — they damage the finish. Facade casings are washed once a year with medium-pressure water, removing dust, cobwebs, and insect traces.
Renewal of finish is performed when gloss is lost, matte areas appear, or micro-cracks form in the lacquer. Surface is lightly sanded with fine grit 240-320, dust is removed, and fresh lacquer or oil is applied. Oil finish is easier to renew — simply wipe with special cleaner, apply new oil layer with cloth. For facade casings, renewal every three to five years is critically important for wood protection.
Repair of chips and damage is done with matching furniture wax pencils or wood putty. The damaged area is cleaned, filled with putty, sanded after drying, stained or painted, and sealed with lacquer. Deep damage may require replacing the casing section — the damaged part is cut out, a new piece is inserted, joints are carefully fitted and glued.
Pest control — relevant for wooden elements on facades. Wood-boring beetles and bark beetles can damage unprotected wood. Signs — small holes, wood dust emerging from them. Upon detection, affected areas are treated with insecticides injected into holes with a syringe. Severely damaged elements are replaced. Prevention — quality antiseptic treatment before installation and regular renewal of protective coating.
Repainting casings refreshes the interior without replacing elements. Old finish is removed by sanding or chemical strippers, surface is primed, and repainted in a new color. Style can be changed — from natural wood to painted casings, from dark to light. Proper surface preparation is essential, otherwise new paint will quickly peel off.
Cost and supplier selection
Price range for casings is wide — from 100 to 1,000 rubles per linear meter depending on species, profile, and processing quality. Spruce straight casing 70 mm wide costs 150–200 rubles per meter. Oak decorative 90 mm — 500–700 rubles. Hand-carved casings — from 1,500 rubles per meter. When calculating required quantity, height and width of opening plus 10–15% allowance for trimming and possible defects are considered.
The quality of wood determines durability and appearance. Grade A trimmer boards have no knots, cracks, or resin pockets. Grade B allows small, healthy knots that do not affect strength. Grade C contains visible defects and is suitable for covering with opaque paints. For transparent finishing that highlights texture, Grade A or B is required. Grade C is suitable for enamel coating and is significantly cheaper.
Wood moisture is critical. Trimmer boards must be dried to 8-12% moisture for use in heated rooms. Wet trimmer boards will dry after installation, causing fasteners to loosen and gaps to appear at corners. Quality manufacturers indicate moisture content and have certifications. When purchasing, you can request a moisture meter reading — it takes a minute but provides confidence.
Geometry — flatness, absence of twist, dimensional accuracy. The trimmer must lie flat on a surface along its entire length without warping or twisting. Thickness and width must match specifications throughout the length. Checked with a caliper at multiple points. The profile must be clear and uniform along the entire length. Blurred profile, uneven groove depths — signs of worn equipment or low production standards.
The reputation of the supplier is important. The company STAVROS specializes in the production and sale of qualitywooden architravesfrom various species — pine, oak, beech, ash. Wide range of profiles from simple straight to complex carved and decorative shapes. Kiln-dried wood, precise processing on modern equipment, quality control at all stages. Custom-sized and profiled trimmer boards can be manufactured to individual orders.
STAVROS specialists' consultations will help select the optimal species, profile, and width for a specific project. They will calculate the required quantity based on room characteristics. They will advise on mounting methods and recommend protective coatings.staircase components, Moldings, Baseboards, decorative elements— all from one source, with guaranteed color and style compatibility.
Conclusion: trimmer as a finishing touch
Trimmer — the final touch, transforming a technological opening into an architectural element. The right profile emphasizes style, the correct width creates proportions, neat corner joints demonstrate work quality.Buy wooden trimmer— means investing in the completeness of space, in details that create an impression.
On the facade, trimmer boards protect joints from moisture, add expressiveness to windows and doors, and link separate openings into a unified composition. Installation on the facade requires attention to sealing, selection of durable coatings, and reliable fasteners. Corner elements solve the jointing problem and add decorative value. House carving on trimmer boards turns the facade into a work of wooden architecture.
In the interior, trimmer boards create frames, structure walls, and link doors and windows to the overall style. They work together withbaseboards, cornices, moldings, creating a cohesive decorative system. Choosing species, profile, width, and mounting method — all this is not technical detail, but decisions that affect the atmosphere of the space.
Quality wooden trimmer boards serve for decades without losing appearance or strength. They age gracefully, acquiring the patina of time. They can be renewed, repainted, and adapted to changing interiors. Saving on trimmer boards is saving on completeness, on quality that is felt every day. Investing in good trimmer boards pays off in comfort, aesthetics, and longevity — things for which we build homes.


